Quiet OC’ed Pentium D 830 System
Chris Thomson built a system around a hot, overclocked Pentium D 830 dual-core processor with a total system power draw of 327W AC and managed to quiet it down to true whisper levels by applying ingenuity and drawing judiciously on the infobanks of SPCR. The great attention to detail makes this one of the best documented DIY articles we’ve posted.
March 26, 2006 by Chris Thomson
(cmthomson at comcast dot net)
|
Chris has been a computer system architect at Myrias Research, Amdahl, 3Com, Nokia and others for the last 20+ years. An ex-pat What Chris describes in the following article is the construction of a system based around an Intel Pentium D 830 dual core processor, overclocking the CPU, and finally, making it run as quietly as possible despite the extreme >130W heat. – Mike Chin, Editor of SPCR |
THE ORIGINAL IDEA
I do a lot of transcoding of audio and video on my home
computer, and got tired of the system being unusably slow for hours at
a stretch during transcoding or other activities such as virus scans.
This was not a particularly slow system (a 2.53 GHz, 1 GB-RAM Pentium 4 HP 754n),
but it sure ground to a halt when busy. I knew
that the solution to this would be a dual-core CPU. When the Intel
Pentium D came out, a guy at work convinced me it would be
“tons of fun” to build a system around one of these chips.
I can safely say that I’ve met the original goal, but it’s
been quite an adventure. Along the way, I discovered the joys of
designing, assembling, overclocking, cooling, quieting and
measuring such a system. As my first-ever do-it-yourself PC, it was a remarkable learning
experience. I started the research in August 2005, and quit tinkering
in November. Then of course as I was finishing this article, I made more changes.
SELECTING A CPU
All I knew at the start of this was that I wanted a dual-core CPU, and had a preference for a Pentium (it’s a long story). Intel had just
introduced a four-member family, the 820 D, 830 D, 840 D and 840 Extreme Edition. All of these are bin selections and bond-outs of the
Smithfield chip, which is basically two Prescotts on a single die, each with a 1MB L2 cache. All variants support 64-bit mode.
I immediately ruled out the 840 EE as a useless marketing gimmick. Four threads instead of two would provide no practical speedup, and the $1000 price tag was just silly.
Scanning the Pentium D reviews on Newegg,
I encountered some scathing comments about the 820 being a different
architecture from the others, and not being well-supported by graphics
processors.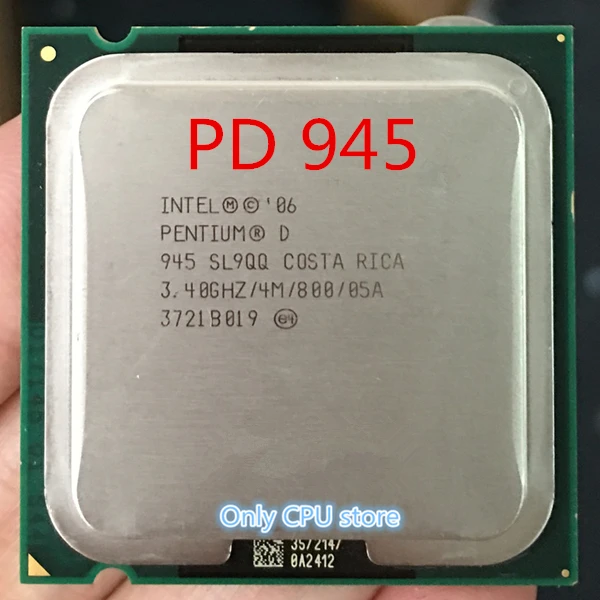 Sure enough, perusing Intel’s data
sheet revealed the existence of the PRB (platform requirement bit), which is zero for
the 820 and one for the others. The main difference the PRB makes is in power consumption. The 820 has a TDP (thermal design power) of 95W, whereas the others have a TDP of 130W.
That’s a huge difference, and implies that setting PRB=0 cripples some pretty important performance features. Accordingly, I
chose the 830 D, largely because it is a lot cheaper than the 840D, which has the same chip inside.
NB: If you’re building a system now (in early 2006), you should choose a member of the 65-nm Pentium D 900 Presler family, which has
caches twice as large as the 90-nm Smithfield, and uses less power. You might also consider using a Yonah or Sossaman instead; these are 32-bit-only CPUs
and much more expensive, but they have similar performance while consuming a third as much power.
SELECTING A HEATSINK
Virtually every review of the Pentium D pointed out that it is One Hot Mama.
Most of the reviews complain about the stock Intel cooler being noisy and not particularly effective. I came across many
references to the Scythe Ninja cooler, and a quick Google took me to its SPCR
review. I was hooked: this was the heatsink for me. Unfortunately it was out of stock, so I did the initial system build with the Intel cooler. No
doubt about it, that fan is loud. Also, the temperature was quite high, even with Arctic Silver
5 in place of the obviously compromised stock thermal tape.
Ninja heatsink w/120mm fan, from the SPCR review.
I ordered a 120mm DustProof
AcoustiFan to attach to the Ninja, since I was dubious about dissipating >130W passively, even with the two case fans close by. This turned out to be
a very valid concern. When the Ninja arrived I swapped coolers and was much happier.
SELECTING A MOTHERBOARD
Since this system would be used for general computing and not gaming,
I had no interest in SLI
(the last game I spent much time playing was Adventure;
gosh I’m old!). However, I did want dual-channel memory, which is the PC-world name for interleaving. I also wanted an abundant set of SATA and IDE connectors, DDR2 memory, and PCI-Express support.
The ASUS
P5LD2 met my requirements. All of its components are passively cooled, except of course for the
CPU. Although it wasn’t a consideration at the time, it also has the advantage of using a 4-pin 12V connector. More on this later. This motherboard has
all the overclocking features you’d want: independent FSB, memory and PCI clocks, independently adjustable core, MCH [Editor’s Note: Memory Controller Hub, more commonly referred to as the Northbridge chip] and DRAM voltages, etc.
There are lots of other fine motherboards out there, but this one has worked well for me. The only issues I encountered were excessive motherboard heat buildup and Vcore droop under full load. More on this later.
SELECTING THE MEMORY
As mentioned above, I wanted to use DDR2 memory. With two cores running independent programs, the higher the
memory bandwidth, the better. Also, my old 1GB system swapped more than
I like, so I wanted 2 GB.
DDR2 memories run at very high clock rates, but typically have
high CAS
latency.
Higher latency translates directly into lower system performance, since
the CPU is unable to do anything useful while it’s waiting on the
memory. The main consideration in choosing the memory DIMMs for my
system was a tradeoff between CAS latency and price. Since I
planned to
overclock by boosting the FSB frequency, I also wanted memory that
would run faster than the standard 533 MHz.
There are lots of DDR2 DIMMs that are rated at PC2 5300 (667
MHz) or
PC2 5400 (675 MHz). Most have latencies of 5. For a little more money,
you get a latency of 4. For a lot
more money, you get a latency of 3.
In the end, I chose 2 GB of Corsair
XMS2 TWIN2X1024-5400C4.
These are matched pairs of 512MB DIMMs, rated at 675 MHz with 4-4-4-12
timing at 1. 8V. At the time, they cost a little over $200 for the set.
SELECTING THE DISKS
I wanted to have SATA II (3.0 Gb/s) disks, not only for their
high transfer rate, but also for NCQ (Native Command Queueing).
This feature allows the disk to complete requests out of order. This
allows the controller inside the disk to optimize for performance, and
cuts down on random seeks in opposing directions. Because I was
optimizing the system for multiprogram performance, I considered the
NCQ configuration to be better than the more popular bandwidth-optimizing RAID configuration, which disables NCQ. The
biggest beneficiary of this choice is the Windows login function, when a lot of processes are
performing unrelated disk operations.
Second, I wanted nearly silent disks. The reviews of
the SpinPoint family all remarked on how quiet they are.
Finally, when I looked at pricing, the 200GB Samsung
SP2004C leapt out. For some reason, it was cheaper than its competitors, and even its smaller brethren. I bought two of these for less than $100 each.
SELECTING A CASE AND POWER SUPPLY
The last page of the SPCR Ninja review showed it in an Antec
P180 case. After reading the SPCR review
of the P180, I decided that this was the case I wanted to use. It would have the best chance of handling the enormous power consumption of the
Pentium D 830 while remaining quiet.
Size and weight were not a concern. I have a fairly large home office, and the system was going to be on the floor on the other side
of the desk, out of sight and out of the way. I was a bit concerned about cable management, as cautioned by several reviews, but everything
worked out fine.
Scanning the reviews on SPCR for ideas on power supplies, I came across the review
of the Antec Phantom 350 fanless power supply. However, when I went to buy one, all I could find was the newer Phantom 500. The SPCR
review of this supply was also quite upbeat, and I did like the idea of a “backup fan”. It is a snug fit in the P180 case, but with some shoving, everything fits. In
the finished system, the fan never operates, so the supply is silent.
One thing I wanted to be sure of was that the 12V AUX cable would be long enough. It turns out that the 12V cable for this supply has an
8-pin connector daisy-chained to a 4-pin connector. The length to the 4-pin connector is 24″, enough to reach the top corner of the P5LD2
motherboard with comfortable routing. This cable is third from the bottom in this photo.
Phantom 500 cables. The 12V AUX
is 3rd from the bottom, and 24″ to the 4-pin connector.
SELECTING A GRAPHICS CARD
All of my previous PCs had integrated graphics, so I had never
thought about graphics cards. The P5LD2 uses the Intel 945P
MCH north bridge, which does not have an integrated graphics function, so I had
to shop for a card.
A quick survey on Newegg turned up the ASUS
Extreme AX300SE-X/TD,
a PCI-Express x16 card described in the reviews as a “good all-round
graphics card”. After all, something with that many X’s in its name
must be good, right? However, my friend at work was derisive. When I
ran PCMark04 benchmarks, I understood why: it scored about 1300 in a system
that was otherwise well above 5000.
So, back to the search. A little digging turned up the Gigabyte
GV-RX80L256V X800 XL.
Even though it has only one more X in its name, it has much higher
performance, and is passively cooled. Of course, it is also more
expensive.
ASSEMBLING THE SYSTEM
I’ll skip over some of the initial false starts, and describe
the system that I ended up with in October 2005.
I installed the Ninja LGA 775 adapter with the rails vertical;
this is the orientation expected by most LGA775-compatible heatsinks. In my initial build, I
tried to fully seat the fan mounting wires into the heatsink, which
caused them to bump into the heatsink clips, as shown in this photo
(the fins in the lower part of the highlight are part of the north bridge
passive heatsink; the fan was sitting about ½” above it).
As a result, the fan stuck up above the Ninja and some air flow which
could have helped cool the voltage regulators and bridge chips was wasted. More on this later.
Heatsink and fan mount mechanical interference.
Initially, I planned to have the CPU heatsink air
flow towards the back of the case, with a fan mounted on
the front side of the heatsink, blowing through it
towards the back. This worked quite well with the 300SE
graphics card, but when I installed the X800 card, this proved to be a
poor choice, since the CPU was well cooled, but the graphics card
overheated. After some experimentation, I concluded that putting a fan
between the GPU and the CPU heatsinks cooled both quite well. This
works because almost all of the cooling in the X800 is from the
heat-pipe (upper/solder) side of the card, and even minor airflow
provides good cooling. The radiator on the component side of the card provides
at best nominal cooling, since it is poorly coupled to the GPU chip.
This photo shows the same fan as above, from a different
angle, to highlight the positioning between the CPU heat pipes and the GPU heat
pipes. The CPU cooler is the aluminum above; the GPU cooler is the
yellow metal below.
120mm fan between the Ninja (above) and the X800 fanless cooler
(below).
The P180 case GPU cooling duct ended up being a complete dud.
First, the fan housing collided with the heat pipes on the X800 card. Second,
the vent on the back of the case short-circuited the airflow across the
motherboard, and caused it to overheat. In the end, I removed the
entire GPU duct, and blocked the vent with foam.
I also replaced the stock thermal tape on the X800 with Arctic
Silver. This significantly reduced the airflow needed to keep the GPU
cool. This replacement is a bit tricky; the heatsink is actually in
two parts that sandwich around the board. To disassemble, you need to
remove the retaining screws, then pry apart the two-sided tape on the
sides of the base plate that makes contact with the GPU chip. The pry
points are highlighted in this photo.
Where to pry the two
parts of the X800 cooler apart to replace the thermal compound.
Cable management in the P180 case was fairly simple. The only
issues were the some of the power cables. The Phantom 500 has
a standard size main body with a fan assembly added to the back. The cable bundle sticks out
through the fan assembly and needs about another half-inch or so to
splay to various parts of the system. This would not be a problem if
the center fan of the P180 were removed (not a good idea since the
disks in the lower bay would get no air flow), or if the power supply
fan were removed (turning the 500 into a 350 and voiding the warranty), or
the center fan were thinner (which can be done by swapping fans with
the upper bay, or by replacing the stock fan). I went with a thinner
fan. I routed the 12V AUX cable over top of the back fan and had some slack left over.
Attaching the disk drives to the P5LD2 is
straightforward if you read the manual carefully. To support two HDDs with NCQ,
I needed to connect them to the SATA1 and SATA3 connectors. The DVD/CD drive
must be attached to the blue IDE connector, not the red ones. I needed to create a floppy with the ICH7/NCQ drivers from the
motherboard CD in order to install Windows.
One decision during assembly is what to do with the extra
power supply cables. Since they exit the supply at the top, the natural impulse is
to shove them into the gap above the supply. However, this blocks the
airflow across the radiative top heatsink of the supply. It is best to tuck the unused cables either under the supply or
on the sides, where airflow is not important. This photo shows what I
ended up with.
Put unused cables under the Phantom 500 to maximize airflow over its
top heatsink.
There were a few issues with the case that arose during
assembly. The motherboard rear I/O panel is especially cheesy and it buzzed like crazy;
it took some serious bending of the EMI tabs to provide enough
pressure to stop this. The PCI blank panels are tinny and don’t seat
well, and they rattled. This was easily overcome with a bit of tape.
The front plastic panels for the 5 1/2 inch bays buzzed, which was
fixed with a bit of tape. The stock fan for the power supply bay was
too thick. All the P180 stock fans were too loud for my taste even on
the low setting, and in the end I used only AcoustiFan DustProof fans, which produced a much
quieter system. The fat P180 lower bay fan was particularly loud and obnoxious.
Having spent a lot on the fans, I decided to splurge a few dollars more for the AcoustiFan
silicone fan gasket kits. These were easy to install for all but the top fan. A minor case mod,
followed by some shoving and cursing resolved this. The mod consists of bending the mounting tabs slightly, as shown in this photo.
The top case fan mounts with only two screws; bend the fingers to make room for the silicone gasket.
Toward the end of the assembly process, I decided to line most of the box with AcoustiPack
foam, in the hopes of sucking up a few decibels. I couldn’t really tell any difference in the sound, but it looked better. ?
OVERCLOCKING THE SYSTEM
With the system assembled, it was now time to see how much performance I could squeeze out of it. I started with fast fan settings
to reduce the number of variables I had to deal with.
The 830 D CPU clock multiplier is locked to 15, so the only
effective way to overclock it is to increase the FSB frequency from its factory setting
of 200 MHz. Most marketing literature quotes this speed as 800 MHz
because the bus is quad-pumped. The memory bus speed is similarly
confusing: the factory setting is 266 MHz, but it is
usually quoted as 533 MHz since it is double-pumped. Here I’ll use the
values reported by the BIOS, even though they are
inconsistent: 200 and 533 for the standard settings.
The P5LD2 allows independent setting of the FSB and PCI bus
clocks so you can overclock the CPU without messing up the peripherals. It
also allows the FSB-to-memory clock ratio to be changed. This leads to
three reasonable alternatives to overclocking: speed up the CPU more
than the memory, speed up the memory more than the CPU, or speed up
both by the same amount. The first two approaches are appropriate when
there is a large discrepancy in how much the memory or CPU can be
overclocked, such as when the memory is cheap, or the CPU can’t be
cooled. Because I had memory rated at 675 and a Ninja cooler, the
linear speedup approach seemed best.
The first step was to find the clock and voltage settings that would get the most out of the memory. As shipped, the memory is rated at 675 MHz with latency settings of
4-4-4-12-4, at 1.8V; Corsair has since boosted this to 1.9V. The factory BIOS and SPD settings are much more conservative: 533 and 4-5-5-15-4. Using a bootable copy of memtest86+,
I adjusted the BIOS settings to find the highest reliable memory performance in my configuration. I got a lot of single-bit errors running the memory at its rated parameters, but after a bunch of experiments adjusting some voltages, I got memtest86+ to pass at 667 MHz and 4-4-4-12-4 latency. In addition to increasing
the DRAM voltage, I needed to boost the MCH to 1.55V.
Having established that the memory had plenty of headroom, I next started to experiment with overclocking the FSB while keeping the
memory at a 4:3 clock ratio. My main tools in this process were PCMark04, Prime95,
and CPUBurn,
which runs a bit hotter than CPU
Burn-in. I monitored the system with SpeedFan, CPU-Z and ThrottleWatch,
as well as the Probe2 program from the motherboard CD.
Running two copies of CPUBurn (with their CPU affinity set using the Task Manager) produces the highest CPU temperature and lowest Vcore
voltage. The 830 D requires at least 1.2V to operate correctly: with this motherboard, I had to set the nominal Vcore to 1.30V to
consistently keep the voltage reported by CPU-Z at least 1.208V. It fluctuates a lot, since the regulator is apparently controlled on the input side,
not the output side. Note that higher voltages would work, but since CPU power consumption increases with the square of the voltage, there is considerable
incentive to find the lowest reliable voltage.
With the DRAM/CPU/MCH voltages set to 1.95/1.30/1.55, I
was able to turn the FSB up to 240 MHz (3.600 GHz CPU and 640 MHz DRAM)
with reasonable reliability. These settings worked well enough to run
memtest86+, PCMark04, and a few hours of Prime95. However, the ambient
temperature inside the case rose to the point that motherboard
components such as the mouse controller or the USB would fail. Usually
it took several hours or even days for this to happen.
I also overclocked the graphics card. The factory settings for
this card are 400 MHz for the GPU and 988 MHz for the GRAM. Using PCMark04
and 3DMark05
as my tests, I was able to turn these up to 420 and 1098 with the
quality setting at maximum, without any apparent problems. Any higher
settings caused 3DMark05 runs to freeze.
After many experiments, I found that the system would run
indefinitely (48 hours of CPUBurn and Prime95 together, and
weeks on end of World
Community Grid protein folding), with the FSB/DRAM set to 230/613, the DRAM/CPU/MCH voltages set to
2. 10/1.30/1.55, and the memory latencies set to 4-4-4-12-4. For the
four months prior to February 2006, I ran with these settings, which clock the CPU at 3.456 GHz.
QUIETLY COOLING THE SYSTEM
|
SIDEBAR: CPU TEMPERATURES The maximum rating consumption and the junction-to-case thermal resistance. To sanity check of all this, I measured the temperature of As a safety feature, the 830 D implements a second All of these temperatures are way |

 I suspect the
As described in the assembly section, the Ninja CPU cooler had
three 120mm fans
around it: the top and rear case fans, plus a fan blowing up through
the heatsink. The power supply and disks shared a single 120mm fan. My
next task was to find the best speeds for
these fans to provide good cooling at the lowest noise levels.
Cooling the CPU was the most obvious concern, since it uses
most of
the
power in the system. How much power does this CPU draw? Well, that
appears to be a State Secret. The “thermal design power” is 130W, which
implies that the maximum power is higher than that. Using a PowerAngel,
I measured the total system AC consumption at 262W running two copies of CPUBurn. A review
of the 840 EE states that at 3208 MHz and 1. 408V it consumes 178.8W. CPU-Z measured my CPU at 1.22V average, and 3456 MHz. Plugging these values into the “V squared x f ” formula gives 145W. Directly measuring the 12V AUX wires with
a current clamp meter shows 149W with two copies of CPUBurn.
In the most demanding situation, the CPU, graphics card, memory, and voltage converters consume about 200W. That’s a lot of hot air to
try to push quietly through two 4-inch holes. As testing would show, the main challenge would be cooling the motherboard.
Okay, enough theory. Time to talk about fan speeds.
The 120mm AcoustiFans come with a three-speed wiring set that
runs the fan at 12V (black connector, rated at 1500 RPM, 56 CFM and 25 dB),
5V (white connector, rated at 675 RPM, 25 CFM and 10 dB), or an
intermediate voltage connected to 12V through a series resistor (blue
connector). As shipped, the resistor is 56 ohms and the
fan is 92 ohms, so the blue connector provides 7.5V and is rated
at 1050 RPM, 42 CFM and 16 dB. Replacing the inline resistor allows customization of
the fan speed, which varies fairly linearly with the voltage.
I tried a bunch of different configurations and speeds,
including no rear fan, rear fan blowing in instead of out, fast CPU
fan, fast top fan, fast HDD/PS fan, etc, etc. In general, the only
configurations that kept the motherboard from overheating had the rear
fan blowing out, and the top and power supply fans running fastest.
By far the noisiest fan in the system is the hard disk/power supply fan in the lower chamber. This is because the chamber resonates. The typical sound is a
low growl accompanied by a 400-500 Hz tone, depending on the fan speed. Foam doesn’t help. The only time this
fan could be considered quiet is when it is run at 5V (675 RPM). At
this speed, it makes a faint hissing sound, and is quieter than the
disks. Unfortunately, when running that slow, a lot of the heat from the power supply eventually transfers
to the upper chamber, causing the motherboard to overheat and become
unreliable. After many experiments trading off noise levels against fan
speed, I settled on a 78 ohm resistor, which runs the fan at 1090 RPM.
The top fan is the second loudest. When I mounted it with the
silicone gasket, I was surprised that the overall sound increased.
This was because the whole center of the fan started to vibrate, creating a
nearly pure 466-Hz tone at 1015 RPM (obtained with a 103 ohms
resistor). I thought I could damp this by wedging some foam between the hub of the fan and the
center of the case opening. This was only partially effective. Quite by
accident, I discovered that touching the center of the case opening
with something metallic (like a screwdriver) got rid of the ringing.
[Those of you who have ever done EMI testing will recognize the
tape-and-tinfoil nature of this process.] So I built a stack of
quarters held together by paper glue to sit on the top of the case and
damp out the ringing. I am not making this up! Here is a recording
where I alternately add and remove the stack of coins, and here is a photo of the setup.
Top fan damped with silicone gasket, foam, and a stack of coins.
With the case closed, the sound from the fan attached to the CPU heatsink is very well damped. I could run it at up to 1100 RPM without adding a
significant amount of overall noise. These higher speeds resulted in CPU temperatures 2-5°C cooler, but had the counterintuitive effect of raising the motherboard temperature. A series of experiments revealed that running the top case fan faster than the CPU heatsink fan worked best
for overall system cooling.
A side note on the power supply internal fan: when the
Phantom 500 was first
reviewed by SPCR, there was some confusion about when this
fan would activate. My experiments showed that it starts to cycle on
and off when the top heatsink of the power supply reaches
51°C, and to spin continuously when the heatsink reaches
52°C. The only way I could get the power supply that hot was by
turning off the center 120mm fan; running that fan at even the 5V
setting keeps the power supply heatsink below 45°C,
so the internal fan never turns on. This is good, because it is rather
loud, and makes a grating ratcheting kind of racket.
At the conclusion of all these experiments, I had set the
lower chamber fan to 1090 RPM (78 ohms), the top case fan to
1010 RPM (103 ohms), the back case fan to 660 RPM (5V), and
the CPU heatsink fan to 690 RPM (5V). Reported CPU temperatures varied
from 61°C idle to 88°C running two copies of CPUBurn.
The system was highly reliable and very quiet. The only
annoyance was a faint 495-Hz tone that had various nodes and antinodes
in the room; by moving the system around a bit, I was able to position
a node where I normally sit at the desk. Aside from that tone, the sound was a low growl, easily ignored.
MEASURING THE SOUND LEVEL
During the quieting process, I became interested in measuring
and recording the various sounds. One nifty tool I found was this
web site, which makes it easy to tell the frequency of a sound you’re hearing.
To properly record or measure a system this quiet, you really
should have some professional gear, such as that found in MikeC’s
sound lab at SPCR. I wasn’t about to spend the several thousand dollars this
would take, but I thought I’d give it a go with some decent amateur
equipment. For $200, I bought a Radio Shack dynamic microphone
and stand, an M-Audio Audio Buddy preamplifier,
cables, and a CEM DT-805 30-dB sound
meter. This collection was almost, but not quite, up to the task at hand.
My $200 “sound lab”.
The sound meter shows
readings as low as 23 dB, but these are neither repeatable nor
believable. Taking measurements closer to the fans so that readings
were well above 30 dB was really the best I could do, but to get
readings that high I had to be only a few inches away from one of the
fans. Oh well, another tool for the shed. ?
AcoustiFan specs the 120mm
fan at 16 and 25 dBA at 1050 and 1500 RPM. The lower chamber fan was running between
these speeds, but also resonated. The overall audible system noise was
less than that of a single fan at 12V/1500RPM, which leads me to guess that
the overall sound level was about 22-24 dBA. Certainly
it couldn’t be heard if there was any noise in the house (furnace
running, TV on, wife at home, cat running around, etc). It was much quieter than the
keyboard, or even mouse clicks.
Here is a recording
made from the desktop, about 4 feet from the system. I clicked the
mouse a few times for purposes of comparison. Note that the microphone
is only rated at -70 dB, and the high-frequency hiss you hear is an
artifact of the microphone/preamplifier/computer; the gain was set to
maximum on both the preamplifier and the computer microphone input. The
low growl/hum component is what I actually heard.
COOLING AND QUIETING, REVISITED
I ran with this setup for about four months, and was fairly
happy with it. However, when I opened up the system to do some
maintenance, I noticed that the CPU and motherboard
temperatures dropped 12°C and 3°C respectively with the side cover off. This
caused me to rethink my approach.
As had long been evident, the hardest thing to do in
this system is cool the motherboard quietly. When I took a closer look
at the board with this in mind, it was clear that the motherboard
heatsinks are designed to catch the downwash from the stock CPU cooler.
This is especially true of the VRM and the MCH, highlighted in this
photo from Newegg:
Hot spots on the P5LD2 motherboard that need airflow: Vcore and MCH heatsinks.
This caused me to question the choice of the Ninja, which has
all its airflow parallel to and well above the motherboard. I reread the
recently updated SPCR
heatsink summary (which coincidentally warns about
overheated VRMs), and saw that the Thermalright
XP-120 rated nearly as high as the Ninja, so I tried one. I was surprised when I
unpacked it by how much smaller the fins are than the Ninja. This
turned out to be significant, because when I mounted its fan blowing
down, the air leaving the fins was so hot it actually increased
the motherboard temperature. I also tried blowing up through the fins,
hoping this would suck air through the motherboard heatsinks, but that
only worked when the fan was run at an unacceptably loud speed. Oh
well, back to the Ninja.
While remounting the Ninja on the motherboard, I noticed that
the fan could be mounted closer to the motherboard and provide some
turbulence around the VRM and northbridge heatsinks if the retaining wires are
stretched around the Ninja mounting clips, like this:
The fan can sit right on top of the northbridge heatsink if the retainers are bent around the clips.
It occurred to me that the temperatures were so much lower
with the side cover off that I might be able to slow down the fans
enough to make the overall system both cooler and quieter.
This turned out to be the case. When I set all four fans to 5V, the
system was cooler and significantly quieter than my prior setup, and was by now much too quiet to measure with the tools at hand. I did have to seal
the gap in the lower chamber between the disk cage and the fan bulkhead so that the HDDs would get some air
flow. A bit of packing tape did the job duct tape would not be removable.
At this point, the back fan was the loudest thing in the case. Its sound was a low thrumming combined with a 400-Hz tone. The
center of the fan was resonating just like the top fan had earlier. I removed the silicone gasket, and it was quieter, but still
resonated. Then I tried cramming some folded tinfoil between the fan hub and the case grill to damp the ringing, but this was only partly effective.
This all-5V setup ran quite well, but over time the motherboard
would overheat, causing erroneous fan sensor readings or other errors. In an attempt to increase the turbulance around the
motherboard heatsinks, I turned up the CPU fan to 985 RPM, but that didn’t help. What worked better was increasing the top case fan to 1010 RPM
while leaving the other three fans at 5V. I ran the system this way for a week or so.
While revisiting how much I could overclock (discussed
below), I continued to encounter motherboard heat issues. Clearly it
was time to take direct action, and mount an additional fan blowing
directly at the motherboard heatsinks. By happy coincidence an
AcoustiFan can be nestled snugly on top of the front pair of DIMMs, which is
where I mounted it. I also moved the CPU fan to the front of the Ninja
so these two fans would blow back across the various heatsinks. I put
a bit of foam on the motherboard fan hub where it bumps against the
graphics card, and secured the fan with a couple of cable ties and some
elastic, as shown in this photo.
Directly cooling the motherboard
with a fan set on top of the DIMMs.
This arrangement not only cooled the motherboard heatsinks, it significantly improved the graphics and PCI card cooling, and let me increase the graphics overclocking. However, it doesn’t cool the northbridge chip optimally because its heatsink fins are perpendicular to the air flow. The geometry of the mounting clips
doesn’t allow for rotation of the heatsink. Rather than do radical surgery, I decided to insert a simple air deflector. This dropped the MCH heatsink temperature a couple of degrees. Here’s a photo:
An old business card used as an air deflector for the MCH heatsink.
The back case fan remained the loudest part of the system even at 5V, and it still had that annoying ringing. So I tried turning it off altogether to see if it was really needed. It wasn’t: the temperatures barely budged with it off. This
resulted in my next configuration: case open, top case fan 5V (695 RPM), CPU fan 5V (685 RPM), power supply/hard disk fan 5V (675 RPM), motherboard fan at 995 RPM, and rear panel case fan off.
TIME TO RESORT TO DUCTING
I continued to be bothered by the lack of cooling for the MCH. The
heatsink was too hot to hold a finger on, which is not a good thing. I
I
decided to search SPCR for ducting ideas, and came across Edwood’s article about his HTPC. In addition to some fascinating pictures of custom ducts, it also pointed to this tutorial on styrene cutting and cementing.
Since the P5LD2 MCH heatsink has a pair of slots cut horizontally, I figured
I could make a duct that would slide into those slots and divert airflow
from the motherboard fan directly onto the heatsink. The idea was to
have the duct friction-fit into the heatsink and bump against the back DIMMs,
just downwind from the motherboard fan. I actually got it right on the first
try, although it’s a bit ragged. Here’s what the duct looks like from the bottom (the heatsink
side):
The MCH heatsink duct, outside the system (bottom view).
To make room for the duct, I had to shove the CPU fan upward, which
was a good thing since that increased the air flow across the Vcore
VRM. Here’s what the MCH duct looked like in the system, before the
motherboard fan was mounted:
The MCH heatsink duct, inside the system (front view).
This had excellent results. Whereas previously the north bridge heatsink was very hot to the touch, now it was barely warm. The reported
motherboard temperatures also dropped a degree or so.
Encouraged by this success, I started to think about how to vent the
CPU heat directly from the case, separating it from the motherboard
heat. I figured if I could encapsulate most of the Ninja and direct the
hot air out the back, the motherboard cooling would improve. First I
removed the back case fan, which I was no longer running anyway. Next I
built a square duct with flaps to cover the top and bottom of the Ninja
and route the air flow to the back vent. I lined the back portion with
foam, thinking that ought to reduce the CPU fan noise. Here’s what it
looked like before being put in the system:
Ninja duct and its foam lining outside the system (back view).
After installation, I put some foam strips on the case wall
by the back of the Ninja duct to keep it in place and seal off the air
flow. Here’s what the two ducts and fans look like inside the system:
Both ducts and fans installed in the system.
Although in the picture above it looks like the Ninja duct goes all
the way down to the motherboard, it is actually an inch above it,
allowing airflow all around the base of the CPU tower. Also, the
downwash from the MCH duct flows across the motherboard surface.
While designing the Ninja duct, I was hoping I could augment
the airflow through the VRM heatsink with some kind of baffle on the
bottom, but unfortunately the VRM heatsink is so
close to the CPU that there is no room for any kind of deflector. Pity.
With these two ducts in place, I tried running the system with all
the fans at 5V. Unfortunately this didn’t adequately cool the
motherboard at the new clock settings described below; I needed to
return the motherboard fan to 995 RPM (103 ohms).
During these tests I noticed that the entire top of the case was
vibrating and contributing a lot of noise. This seemed to be caused by
the “semi-hard” mounting of the top case fan. I decided to soft-mount
it properly with AcoustiFan gaskets and screws. This required drilling
two holes for the front screws, and bending the inside case tabs
completely out of the way. The fan hub vibrated almost as much as
initially, so I added the foam-and-coin damping described above with
good results. Here is what the soft-mounted fan looks like. The P180
slip-on cover fits over the screws with minimal distortion.
Top case fan soft-mounted with AcoustiFan gasket and screws, damped with foam and coins.
The last step before photographing the finished system was to tidy
up the cables. The AcoustiFan three-speed cable assemblies are quite
unsightly, so I tucked them into an unused disk bay, along with the
PATA cable and power splitters and connectors. I routed the 12V AUX
cable around the top of the Ninja duct. This is what the finished system looks like:
The finished system, with cables tucked mostly out of sight.
This setup is almost silent. When I try to record its sound, all I
get is microphone/amplifier hiss. With the system positioned back
behind the desk, I can hear it only if the house and neighborhood are
totally quiet. It makes a faint low-pitched whirring sound that I
guess might be 20-22 dBA; I have no way to measure it. The reported CPU
temperature varies from 50°C when idle, to 75°C running two copies of CPUBurn.
As mentioned before, the temperatures are way
higher than numbers I see in other people’s reviews. I suspect the
thermal diode circuit in my system is out of whack.
OVERCLOCKING REVISITED
Since the fan rearrangements and ducting improved cooling so much, I decided to see if the clocks could be turned up even higher.
As before, I started with the memory. I was able to run memtest86+
at 683 MHz with the DRAM/CPU/MCH
voltages set to 2.0/1.30/1.60 and the latencies set to 4-4-4-12-4. Note
that I increased the MCH voltage and lowered the DRAM voltage from
before; this eliminated occasional Prime95 failures.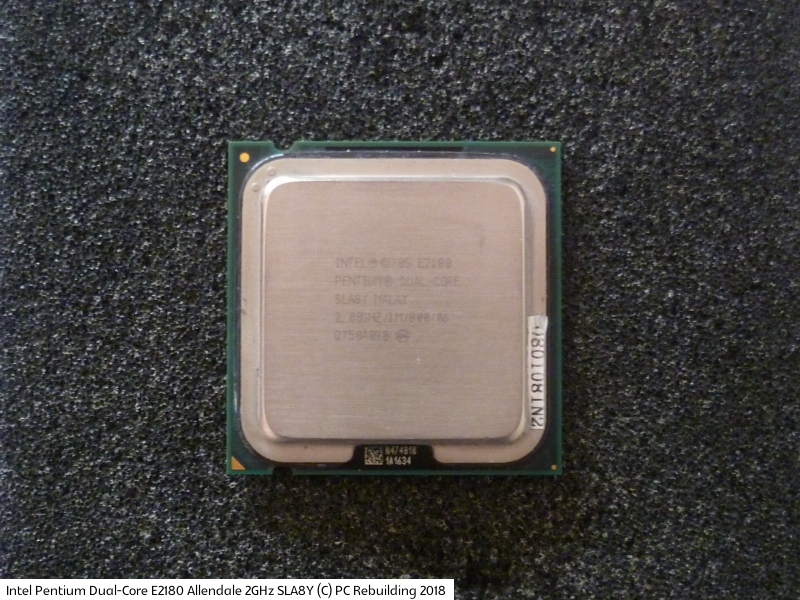 Next, I tried
cranking up the FSB. This required increasing the CPU voltage another
notch to 1.325V, to keep the measured Vcore above
1.2V running CPUBurn. With this voltage, the CPU was stable
with the FSB running at 240 MHz. Last, I sped up the graphics card
another 2%.
I ended up with the FSB/DRAM set to 240/640 MHz,
and the GPU/GRAM set to 427/1110 MHz, with no failures or instabilities.
CPU-Z reports the CPU clock as 3.607 GHz.
PERFORMANCE MEASUREMENTS
Here is a table of system parameters, memtest86+, 3DMark05, and PCMark04 benchmark results for the stock system, the
October configuration, and the final configuration.
| Parameter | Factory Settings | October 2005 | March 2006 |
| FSB, DRAM, CPU clocks | 200, 533, 3. 00 00 |
230, 613, 3.45 | 240, 640, 3.60 |
| Graphics GPU, GRAM clocks | 400, 988 | 420, 1098 | 427, 1110 |
| DRAM, CPU, MCH voltages | 1.80, 1.35, 1.50 | 2.10, 1.30, 1.55 | 2.00, 1.325, 1.60 |
| DRAM latencies | 4-5-5-15-4 | 4-4-4-12-4 | 4-4-4-12-4 |
| Memtest86+ L1, L2, memory MB/s | 21054, 18470, 3016 | 24174, 21208, 3463 | 25224, 22129, 3614 |
| 3DMark05 | 4903 | 5292 | 5379 |
| PCMark04 CPU, memory, graphics, disk | 5931, 4752, 6184, 4262 | 6859, 5445, 6690, 4302 | 7139, 5693, 6795, 4441 |
| PCMark04 System | 6060 | 6966 | 7261 |
CONCLUSION
This was quite the project/hobby/obsession. I learned a lot, and exceeded my goals. The resulting system is very fast, almost totally silent, and
finally done (yeah, right!). I look forward to actually using it rather than working
on it. That should be “tons of fun”.
* * *
Editor’s Note: Much thanks to Chris Thomson for sharing his experience with us.
Chris Thomson’s moniker in the SPCR forum is cmthomson, and he may be reached by email at cmthomson at comcast dot net.
* * *
Other Interesting DIY Articles at SPCR:
Doug’s Quiet Wooden Case PC
Quiet A64 X2-3800+ PC for Torrid Thailand
Ducted Zalman 7000CU on A64-3000 w/Countercurrent Flow Cooling
Fanless Heatpipe CPU PC System by FMAH
* * *
Discuss this article in the SPCR Forums.
Intel’s Pentium D Price Half That Of AMD’s X2
- By Mark Hachman on May 26, 2005 at 12:41 pm
This site may earn affiliate commissions from the links on this page.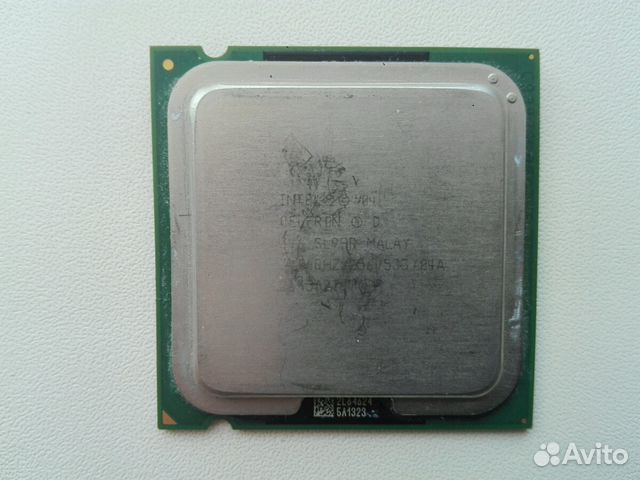 Terms of use.
LONDON — The “D” in “Pentium D” apparently stands for “discount”.
Intel Corp. lowballed its way into the mainstream dual-core market on Thursday, launching the Pentium D at a price that’s less than half of AMD’s own dual-core chip.
As expected, Intel introduced three models of the Pentium D on Thursday: the 2.8-GHz Pentium D 820, the 3.0-GHz Pentium D 830, and the 3.2-GHz Pentium D 840. The three chips are priced at $241, $316, and $530, in lots of 1,000 units.
Intel also introduced the Pentium 4 670, a 3.8-GHz 64-bit chip that will round out the top end of its single-core platform, at $851.
Compared to the AMD Athlon X2, however, Intel’s new Pentium D offers a dramatic discount. AMD’s slowest 2.2-GHz 4200+ Athlon X2 is priced at $537, while the slowest Intel Pentium D, the 2.8-GHz 820, is priced at $241. Intel also offers a premium dual-core part, the Pentium 4 Extreme Edition, priced at $999. AMD has yet to update its microprocessor pricing page with the price of the X2, although executives have quoted those prices in briefings.
The discrepancy casts the differences between AMD and Intel into sharp focus. All of Intel’s production fabs are producing wafers using 90-nm wafers; AMD has but a single fab, although it is close to ramping a second facility next door in Dresden, Germany.
As AMD and Intel segment their product lines to meet the needs of divergent markets, AMD’s fab capacity may be stretched thinner. One analyst had already suspected that the X2 would be a premium part, given that AMD is restricted to a single fab.
“AMD is not in a position to move its product line to dual-core until it brings on an additional fab–either it’s own Fab 36 or a foundry,” Kevin Krewell, an analyst for In-Stat and editor of the Microprocessor Report, said Thursday. “Dual core equals two regular CPU dice, so it’s not cost effective for AMD to ship
dual-core [chips] for the same price as single-core. AMD needs to keep dollars per wafer growing, and aggressive pricing of dual-core would reduce it. ”
”
AMD, meanwhile, views the X2 as a boutique chip.
“Our desktop dual-core AMD Athlon 64 X2 products are priced based on performance,” said Cathy Abbinanti, an AMD spokeswoman, when asked for comment on the pricing discrepancy. “Based on the performance benchmark information in recent third-party reviews of the competition’s dual-core desktop product, we believe our lowest performing AMD Athlon 64 X2 dual-core processor will outperform Intel’s highest performing dual-core part.”
That’s true, according to ExtremeTech tests. However, it may end up being a moot point.
“So while Intel is losing in the performance game, it may very well win in the perceived value side of the equation,” analyst Loyd Case wrote in his review. “We’re likely to see a host of relatively low-cost dual-core systems shipping in the near future. We’ll have to see what AMD’s response will be.”
Intel’s focus: platforms
Interestingly, Intel chose to overlook the pricing differential in launching its chip, focusing more on the “new features” the company released for home and business PCs. Those new features are technologies contained within the Intel 945 and Intel 945G chipsets, which will be prominently featured in Intel’s new home and business “platforms”, the name which Intel uses to describe the package of processor, chipset, and peripheral I/O that it is attempting to sell as a bundle to PC customers. Intel disclosed some details of its Professional Business Platform before the Pentium D’s launch.
PC OEMs at the launch said they plan to release boxes built around the chip in mid-June, apparently held back by a shortage of motherboards.
“Is the PC dead?” said Gordon Grayliss, Intel’s director of marketing for the EMEA region. Noting that Intel also sells a significant number of notebooks that have replaced desktops, Grayliss added: “If you ask about the boring beige box, then the answer is yes.”
Grayliss also oversaw a pair of demos that attempted to prove the merits of the dual-core architecture, first connecting a personal video player to a dual-core PC and contrasting it with the performance of a single-core box. When synchronizing video between the two devices, the additional horsepower the second core provides could cut the synch time by an hour on a large video file, he said.
Grayliss also introduced Colin Morrow, a developer with Lead Pursuit, whose Falcon 4.0 game will ship in June. One of the advantages of a dual-core architecture is that games can use the second core for artificial-intelligence processing, Morrow said. Future games will also break out these functions into separate threads to route to Intel’s physical and virtual, or hyperthreaded, cores, he added.
The new 945 chipsets also include Intel’s Active Management technology, useful for monitoring and controlling PCs in an enterprise environment, Grayliss said. The 945G chipset also includes the Intel Graphics Media Accelerator 950, which offers nearly double the performance of the previous generation. Hard drives can be combined into a RAID array using Intel’s Active Matrix technology.
In addition to providing improved graphics, the 950 can accommodate up to 1080i video formats and provides a slot for a Media Expansion Card, essentially a second video tuner card. Finally, the new chipsets have earned the Dolby Digital seal of approval, and PCs using the new chipset will be fitted with logos touting Intel’s new High Definition Audio.
Most OEMs are beginning to offer the option of adding Microsoft’s Media Center Edition software onto the basic Windows XP OS, adding video management features to the box; the dual-core chips will also provide a buffer for those wanting to interact with their TV and their PC at the same time, Grayliss said.
“I can’t imagine telling my wife ‘Don’t turn on Media Extender when I’m playing a game,” Grayliss said.
PC OEMs interviewed at the launch said that they have had no problems obtaining supplies of the chip, although there is a shortage of third-party motherboards that have affected production. Medion Electronics, which builds PCs for traditional retailers, showed off a prototype of a product the company hopes to launch in June using a reference motherboard. So far, the only third-party supplier to begin shipping 945-based boards is MSI, which delivered one its first to Medion on Thursday, according to Rick Munday, director of marketing and business development.
Fujitsu Siemens also plans to launch its Esprimo line of “green PCs” around the Intel 945 dual-core platforms beginning in June, with prices beginning at 486 pounds ($884), excluding VAT.
The Esprimo PCs contain just one gram of lead within the motherboard, and the power supply, PCBs, and riser cards are all free of halogens. The new Esprimo line will be compliant with the European Union’s ROHS/WEEE regulation, which places restrictions on the amount of toxic susbstances that can be found within electronic devices. It is expected to be enfoced beginning in July 2006.
Editor’s Note: This story was updated at 9:47 AM PDT on May 26, 2005 with comments from AMD’s Abbinanti and In-Stat’s Krewell.
This site may earn affiliate commissions from the links on this page. Terms of use.
ExtremeTech Newsletter
Subscribe Today to get the latest ExtremeTech news delivered right to your inbox.
This newsletter may contain advertising, deals, or affiliate links. Subscribing to a newsletter indicates your consent to our
Terms of Use and
Privacy Policy. You may unsubscribe from the newsletter at any time.
More articles
Intel Pentium D Processor 820, Pentium 4 Processor 670 and 945 Express Chipsets
This article includes a brief overview and some benchmarks for Intel’s latest desktop offerings – the 945G Express chipset, Pentium 4 Processor 670 (3.8GHz, 2MB L2), and dual-core Pentium D Processor 820. Check it out!
INTRODUCTION
Focusing on the enthusiast and high-end workstation markets, Intel started its multi-core desktop campaign last month by introducing the 955X Express chipset and Pentium Processor Extreme Edition dual-core CPU. Today’s release is aimed at the mainstream market, though. The new mainstream chipsets are the 945G Express Chipset and 945P Express Chipset (the ‘G’ variant providing onboard graphics), and the three new mainstream dual-core processors are the Pentium D Processor 820, 830 and 840, which run at 2. 8GHz, 3.0GHz and 3.2GHz, respectively. One of the big differences between the Pentium D line and the Pentium Extreme Edition dual-core CPU is that the Pentium D processors do not support Hyper-Threading.
The single core Pentium 4 Processor line is also getting attention today with the release of the Pentium 4 Processor 670, the fastest (at 3.8GHz) and latest in the 600 sequence of processors. This is an 800MHz FSB processor with 2MB L2 cache and Hyper-Threading support.
“Why do we have these two new platforms (945 and 955X)?” you ask. Well, even though Intel’s first generation dual-core processors are designed for the current LGA775 socket, they are not compatible with the current LGA775 Intel chipsets — 915 and 925. Therefore, they are necessary. It is also worth noting that the 945 Express chipsets do not support the aforementioned dual-core Pentium Processor Extreme Edition.
Those of you who are skeptical about the need or usefulness of multiple cores on one processor should know that Intel is working hard to get more application programmers to write or update code so that software will fully take advantage of multi-core CPUs. In this article, I will not spend a lot of time on the multi-threaded type of benchmarks/applications that multi-core processors really like. Instead, I’m going to run through the usual set of benchmarks I use to see what kind of performance we can expect from the 2.8GHz Pentium D 820 and 3.8GHz Pentium 4 670 on the 945G platform.
|
$$ FIND THE BEST PRICES FOR THE Intel Pentium Extreme Edition 840 @ PRICEGRABBER $$ |
FEATURES & SPECIFICATIONS – 945G EXPRESS
Intel® D945GTPLR Motherboard – 945G Express Chipset with ICH7R
- I/O Controller Hub 7 (ICH7R)
- Intel LGA775 socket processors, including the new Pentium® D processors (Intel® 945G Express chipset does not support the dual-core Pentium® processor Extreme Edition)
- 1066, 800, and 533 MHz Front Side Bus speeds
- DDR2-667 / -533 / -400 main memory
Delivers up to 10. 7 GB/s of bandwidth and 4 GB memory addressability for faster system responsiveness and support of 64-bit computing.
 - Intel® Flex Memory Technology
Facilitates easier upgrades by allowing different memory sizes to be populated and remain in dual-channel mode. - PCI Express* x16 graphics connection
- 4 GB total dual channel main memory
- Serial ATA ports (3 Gbps)
High-speed storage interface supports faster transfer rate for improved data access. - Intel® Matrix Storage Technology supporting Advanced Host Controller Interface (AHCI)
Provides quicker access to digital photo, video and business files with RAID 0, 5, and 10, and protection against data loss from a hard disk drive failure with RAID 1, 5, and 10. - PCI Express x1 connection
- PCI connections
- Intel® Pro/1000 PM Network Connection
- Intel® Graphics Media Acclerator 950
Delivers richer visual color and picture clarity without the need for additional discrete graphics cards.
- Intel® High Definition Audio
Integrated audio support enables premium home theater sound and delivers advanced features such as multiple audio streams and jack re-tasking. The Dolby* PC Entertainment Experience6 is available exclusively on systems with Intel® High Definition Audio. - Intel® Active Management Technology
Enables remote, down-the-wire management of out-of-band networked systems regardless of system state. Helps improve IT efficiency, asset management and system security and availability.
With DDR2-667 and second generation SATA support, the 945 chipsets are definitely built with the future in mind. The 945G Express Chipset features the improved Graphics Media Accelerator 950, which very well could make this chipset a home theater PC favorite with its improved DirectX 9.0 3D performance and support for high-definition video playback and output to either 720p or 1080i resolutions. The argument for a good media platform is strengthened by the Intel High Definition Audio offered on this platform. Intel’s HD Audio promises to deliver top-notch home theater sound with advanced features like multiple audio streams and jack re-tasking.
Other features of note include the gigabit Intel Pro onboard network connection, Intel Matrix Storage Technology and Intel Flex Memory Technology. Fortunately, Matrix Storage now supports RAID 5, which requires three hard drives and provides redundancy and excellent performance. Gone are the days that you had to use same-size memory modules for dual-channel operation thanks to Intel’s Flex Memory Technology, which allows different sized DIMMs to be populated and still remain in dual-channel mode.
In case, you are wondering how the enthusiast-oriented 955X Express Chipset compares to the new, mainstream-targeted 945G Express and 945P Express Chipsets, I prepared a table that show you. I highlighted the key differences with red boxes.
You can see that the only way the 945G differs from the 945P is the inclusion of onboard graphics in the form of Intel GMA 950. Based on that fact, you can assume that the two chipsets will perform relatively the same.
|
$$ FIND THE BEST PRICES FOR THE Intel Pentium Extreme Edition 840 @ PRICEGRABBER $$ |
FEATURES & SPECIFICATIONS – PENTIUM D 820 & PENTIUM 4 670
Intel® Pentium® D Processor 820
The Pentium D Processor 820 a 2.80GHz dual execution core processor that supports an 800 MHz FSB and features two 1MB L2 caches – one per core. You probably noted in the introduction that this is the slowest processor in the Pentium D line. The 830 and 840 are clocked at 3.0GHz and 3.2GHz, respectively. Here’s a little blurb from Intel about the Pentium D line of CPUs.
Intel’s new digital home platform couples the Intel® Pentium® D processor with the Intel® 945G Express Chipset to enhance the digital experience in the home and make the most of consumers’ digital lifestyles.
The Intel Pentium D Processor 840, 830, and 820 are Intel’s first mainstream dual core processors for desktop PC market segments and bring new capabilities allowing consumers the flexibility and performance to run multiple demanding applications simultaneously. Intel Pentium D processors with two processing cores also bring new computing capabilities to the desktop by allowing multiple users to enjoy a simultaneous computing experience, even from different rooms in the house.
Intel continues to work with the software industry to expand the number of applications that are multi-threaded or work well in multitasking environments.
Here is a quick look at the specs of the Pentium D line of processors.
|
|||||||||||||||||||||||||
 80 GHz
Intel® Pentium® 4 Processor 670
The Pentium 4 670 is the new king of the P4 lineup with its 3.80GHz single execution core processor that features Hyper-Threading Technology, an 800 MHz FSB, and a 2MB L2 cache. Clawing at the 4.0GHz mark, the 670 will initially have a very large price tag since it will be the new top P4 chip. Several noteworthy features of the 6xx processors are 2MB L2 cache, Intel® Extended Memory 64 Technology (EM64T) (64-bit computing support), and Enhanced Intel SpeedStep® technology (EIST). Here’s a little info from Intel regardin the Pentium 4 670.
The Intel Pentium 4 Processor 670 is the newest processor in the 600 sequence, bringing the highest frequency with a robust 2MB of L2 cache memory for the mainstream user. The 2MB of L2 cache provides the performance and responsiveness for users’ demanding creation needs. The Intel 945 Express Chipset family delivers new levels of performance and advanced features for mainstream desktop market segments. Also, the 64-bit computing gives headroom for the future.
Enhanced Intel SpeedStep® technology (EIST) is not supported in the Intel Pentium D processor 820 but is supported for the Intel Pentium 4 processor 670. (Note: The Pentium D 830 and 840 do support EIST.)
|
|||||||||||||||
 80 GHz
The Enhanced Intel SpeedStep® technology (EIST) was first introduced in Intel’s mobile and server platforms. The purpose of EIST to reduce power consumption and decrease heat production, and this is accomplished by allowing the system to dynamically adjust processor voltage and frequency. The Pentium 4 6xx series are the first desktop processors to feature EIST. You can read more about it here
Comparison – Features
With both of these lines of processors you will see two CPU graphs if you go into Windows Task Manager and look at the Performance tab. The Pentium D shows up as two because of its two cores while the Pentium 4 with HT Technology shows up as two because of HyperThreading, which basically adds a “virtual processor.”
|
$$ FIND THE BEST PRICES FOR THE Intel Pentium Extreme Edition 840 @ PRICEGRABBER $$ |
TEST SYSTEMS & BENCHMARKS
For article, I decided to add my 945G, P4 670 and PD 820 results to the results I recently obtained for our NVIDIA nForce4 SLI Intel Edition article. It is important to note that all of the Intel products (the D945GTPLR 945G Express motherboard, P4 670 CPU and PD 820 CPU) tested are pre-production samples, which means the actual retail performance may vary slightly.
You can see all of the test systems below. I think you’ll see that the comparison between the four main setups (945G + P4 670, 945G + PD 820, NF4 SLI Intel + P4 560, and 925X + P4 560) proves to be an interesting one.
Test Systems
|
Intel 945G Express (D945GTPLR) Reference Configuration
|
|
|
nForce4 SLI Intel Edition Reference Configuration
|
ABIT AA8 DuraMAX 925X Configuration
|
 6GHz)
6GHz) Benchmarks
- FutureMark PCMark2004 v130
- SiSoftware Sandra 2005 SR1
- CPU Arithmetic
- CPU Multi-Media
- Memory Bandwidth
- File System
- Super PI
- POV-Ray 3.
 6
6 - HD Tach 3
- ABBYY FineReader 7.0 Professional
- FutureMark 3DMark03 v360
- FutureMark 3DMark05 v120
- AquaMark3
|
$$ FIND THE BEST PRICES FOR THE Intel Pentium Extreme Edition 840 @ PRICEGRABBER $$ |
BENCHMARKS – PCMARK04, SANDRA 2005
|
$$ FIND THE BEST PRICES FOR THE Intel Pentium Extreme Edition 840 @ PRICEGRABBER $$ |
BENCHMARKS – SUPER PI, POV-RAY, ABBYY FINEREADER, FILE SYSTEM
Super PI and POV-Ray
The Super PI benchmark calculates the number pi out to a specified number of digits. I selected the highest option, 32 million. This benchmark really tests the CPU more than anything, but it doesn’t seem to take advantage of the second core on the Pentium D 820. Lower time is better.
|
Super PI – 32M |
||||||
| Mobo – CPU | Result | |||||
|
Intel 945G – PD 820 |
37 min 56 sec |
|||||
|
Intel 945G – P4 670 |
29 min 47 sec |
|||||
|
nF4 SLI Intel – P4 560 |
30 min 13 sec |
|||||
|
AA8 DuraMAX – P4 560 |
30 min 14 sec |
|||||
Another CPU-intensive benchmark that I ran is POV-Ray 3. 6 (Persistence of Vision Ray-Tracer). POV-Ray is a freely available tool that can be used for ray-tracing, and it has a built-in benchmark capability, which is what I used for this comparison. You can see from the results that it isn’t designed to take advantage of a dual-core CPU. Higher score is better.
|
POV-Ray 3.6 |
||||||
| Mobo – CPU | Result | |||||
|
Intel 945G – PD 820 |
69.66 PPS |
|||||
|
Intel 945G – P4 670 |
92.39 PPS |
|||||
|
nF4 SLI Intel – P4 560 |
102. |
|||||
|
AA8 DuraMAX – P4 560 |
94.80 PPS |
|||||
 79 PPS
ABBYY FineReader 7.0
The tests with ABBYY FineReader 7.0 were performed to see the benefits of multi-core processors versus single core silicon. In a software evaluation guide, Intel describes FineReader as such:
“ABBYY FineReader 7.0 software is an industry leading application used for document recognition and conversion. This optical character recogntion (OCR) product delivers the capability to convert static documents and images into editable and searchable electronic files. As a demanding processor intensive program, FineReader 7.0 achieves an exceptional level of performance and responsiveness when run on a multiple core processor. This heightened level of productivity is ideal for people needing to repurpose, convert, and edit a variety of paper and electronic files – including magazines, newsprint, faxes, copies, and any document with textured backgrounds, complex layouts, or degraded quality.
The FineReader 7.0 application powered by a multiple core processor delivers blazing productivity for all your document recognition needs.”
A typical use of FineReader is to scan a PDF document and convert it into a fully editable and searchable document. I used two different PDFs in my testing and manually timed how long it took for FineReader to read each page of the document. Test 1 was a 22-page 700KB technical brief while Test 2 consisted of a 54-page 1.2MB technical article. Here are the results in seconds (lower is of course better).
|
ABBYY FineReader 7.0 |
||||||
| Mobo – CPU | Test 1 | Test 2 | ||||
|
Intel 945G – PD 820 |
26. |
120.25 sec |
||||
|
Intel 945G – P4 670 |
40.84 sec |
139.49 sec |
||||
 04 sec
Here you can see that the dual-core design of the Pentium D 820 more than makes up for its lower 2.8GHz frequency compared to the 3.8GHz of the Pentium 4 670.
File System – Sandra 2005 and HD Tach
Because the systems are using totally different hard drives, I’m only including the Intel 945G results here since the comparison isn’t relevant or appropriate. Recall that with setup I only used a single SATA drive.
|
Sandra 2005 File System |
||||||
|
Result |
44 MB/s |
|||||
|
HD Tach 3 |
||||||
|
Average Read |
48. |
|||||
|
Burst Speed |
120.1 MB/s |
|||||
|
Access Time |
14.6 ms |
|||||
 7 MB/s
|
$$ FIND THE BEST PRICES FOR THE Intel Pentium Extreme Edition 840 @ PRICEGRABBER $$ |
BENCHMARKS – 3DMARK03, 3DMARK05, AQUAMARK3
|
$$ FIND THE BEST PRICES FOR THE Intel Pentium Extreme Edition 840 @ PRICEGRABBER $$ |
PRICING
Here are the initial pricing numbers. These are from Intel so you can trust them.
|
Pricing (per chip in 1000-unit quantities) |
|
|
Pentium D Processor 840 |
$530 |
|
Pentium D Processor 830 |
$316 |
|
Pentium D Processor 820 |
$241 |
|
Pentium 4 Processor 670 |
$851 |
|
945G Express Chipset |
$42 |
|
945P Express Chipset |
$38 |
Considering the 200MHz difference between the 840 and 830, many people will be scratching their heads at the huge price gap in between these two CPUs. This is always the case though – the top processor in a sequence is always considerably higher than the next processor down. It’s the same with the P4 670, which will cost much more than the 660.
CONCLUSION
With great features like Matrix Storage Technology with support for RAID 5, Flex Memory Technology, High Definition Audio and Graphics Media Acclerator 950 in the case of the 945G, the 945 Express chipsets have a lot of potential. It’s quite easy to see how a 945G Express board could become the foundation of a media PC build, and with support for dual-core processors, it’s exciting to think about the ability to support a multi-room media PC environment. I think the system builders are going to love this all-in-one high quality solution.
More benchmarks are in order to really see how well these new processors perform, but from the tests I ran, I was surprised by the Pentium D 820. I thought that it would fall behind in many of the benchmarks because of its lower frequency, but it held pretty solid ground and put up some impressive numbers more than a couple times. It was especially interesting for me to see just how much better the Pentium D 820 performed than the Pentium 4 670 in the ABBYY FineReader 7.0 tests. To some, 15-20 seconds might not seem like a lot, but if you used applications like that day-in and day-out, then I’m sure you could really appreciate the increase in productivity and efficiency offered by the dual-core processors. Thankfully, the 820 comes in at an affordable price level.
In the week and a half that I’ve been testing the 945G platform and these two processors, I’ve grown very intrigued by the performance differences and the situations where dual-core is a better choice than a single-core processor. Like many of you, I am also quite curious about the gaming performance of the dual-core chips. I am still surprised that the 820 performed so well compared to the 670. With that said, you can bet I’ll be doing some more testing, and when I get it done, you can read about it right here.
|
$$ FIND THE BEST PRICES FOR THE Intel Pentium Extreme Edition 840 @ PRICEGRABBER $$ |
Dual-core processors / Processors and memory
Intel dual-core processors
Intel’s first dual-core processors were based on the Smithfield core, which
is nothing more than two E0 stepping Prescott cores combined on a single chip.
The cores interact with each other through the system bus using a special arbiter.
Accordingly, the crystal size reached 206 square meters. mm., and the number of transistors increased to 230 million.
It is interesting to consider how the HyperThreading technology is implemented in dual-core processors based on the Smithfield core.
For example, Pentium D processors do not support this technology at all. Intel marketers considered
that two «real» cores is enough for most users. But in the Pentium Extreme Edition 840 processor
it is enabled, and thanks to this, the processor can execute 4 instruction streams simultaneously.
By the way, HyperThreading support is the only difference between the Pentium Extreme Edition processor and the Pentium D.
All other functions and technologies are completely the same. Among them are support for the EM64T command set,
energy saving technologies EIST, C1E and TM2, as well as the NX-bit information security function.
As a result, the difference between Pentium D and Pentium EE processors is completely artificial.
Let’s list the models of processors based on the Smithfield core. This is a Pentium D with indexes 820, 830 and 840 and
also Pentium Extreme Edition 840. All of them operate at a system bus frequency of 200 MHz (800QPB),
produced according to the 90nm process technology, have a standard supply voltage (Vcore) of 1.25-1.388 V,
maximum heat dissipation ~130 W (although according to some estimates, the heat dissipation of the EE 840 is at the level of 180 W).
To be honest, I didn’t find any positive aspects of processors based on the Smithfield core.
The main complaint is the level of performance, when in many applications (which are not optimized for multithreading) dual-core Smithfield processors lose out to single-core Prescotts running on the same
clock frequency. At the same time, AMD processors do not have such a situation.
Obviously, the problem lies in the interaction of the cores through the processor bus (during the development of the Prescott core
there was no provision for performance scaling by increasing the number of cores).
Perhaps for this reason, Intel decided to compensate for the shortcomings with a lower price.
In particular, the price tag for the junior model Pentium D 820 was set at ~$260 (the cheapest Athlon X2 costs $340).
By the way, the Pentium D 820 model is incompatible with all motherboards based on the nForce4 SLI Intel Edition chipset
(the operating system does not see the second core).
The problem lies in the chipset itself and nVidia officially acknowledged this fact. In addition, we met on the Internet
messages about the incompatibility of older models (but these were isolated cases with separate configurations).
We should also note that the new nForce4 SLI X16 Intel Edition chipset is free from this problem.
The overclocking potential of the processor based on the Smithfield core turned out to be not very high. Stable system operation
remained only at a clock frequency not exceeding 3.25 GHz.
In fairness, we note that this processor was launched at a frequency of 3.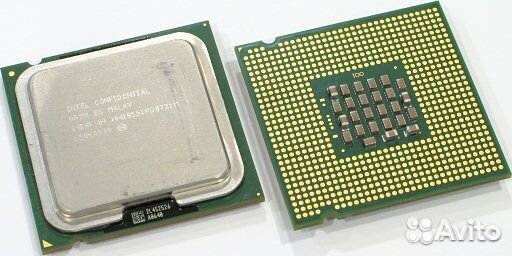 8 GHz, and at
using a more efficient cooling system could achieve stable operation.
Looking ahead, we note that these are all “flowers” compared to overclocking potential
65nm processors.
As far as compatibility is concerned, processors based on the Smithfield core can potentially be installed in any
LGA775 motherboard. However, these processors have increased requirements for the power supply module of the board.
Summing up, we can say that processors based on the Smithfield core are an unsuccessful product. However,
We are not finishing the conversation about Intel dual-core processors, because at the end of 2005 the company
successfully switched to the latest 65nm process technology, and in early 2006, the first processors based on the Presler and Cedar Mill cores appeared on store shelves (traditionally, this happened for the first time in Japan).
What does the new, more «thin» technical process give? If you do not radically change the architecture of the kernel,
but the new technical process allows to reduce the core area (i. e. increase the number of processors on one
plate, and thereby reduce the cost), reduce power consumption (respectively — heat dissipation)
and increase clock speeds. However, the last two parameters are interrelated: if we do not increase the frequency, we get a processor with less heat dissipation. If we do not change the power consumption,
then we get processors with higher frequencies.
Intel engineers chose the second way — the official heat dissipation remained at
level of 130 W, which made it possible to increase clock frequencies to 3.4 GHz and 3.46 GHz. And
as our experiments with overclocking showed, the potential of the 65 nm process technology is very high, and as the process technology is improved and optimized, the increase in clock frequencies will continue (up to
transition to a completely new processor architecture).
As for the Presler processor core, we emphasize those technical points
which distinguish them from the Smithfield core. The most important fact — on one Presler core
hosted two Cedar Mill cores, which is nothing more than a Prescott 2M core
manufactured according to the 65nm process technology (the Smithfield core has two «regular» Prescott cores). Thus, Intel engineers
took advantage of the 65 nm process technology, which allows either to reduce the area
crystal or increase the number of transistors.
However, this description of the Presler core is not entirely correct. The point is that under
heat spreader cover reveals two separate processor cores,
whereas Smithfield was a single core (although internally there was a division between the cores).
In this way, production efficiency is significantly improved: it becomes possible to
to produce one 2-core processor, use cores from different parts of the plate (or even from different
plates). In addition, due to the modular architecture, the yield of suitable crystals is increased.
(and conditionally «unusable» can be marked as Pentium D processors :).
The CPU-Z utility provides us with the following information about the processor:
The appearance of the processor from the front side is no different from other LGA775 processors.
And on the reverse side there are differences in the arrangement of elements:
From left to right: Prescott 2M, Smithfield, Presler
Presler close up:
So, the new dual-core processors based on the Presler core are called Pentium D with indices 920 — 950.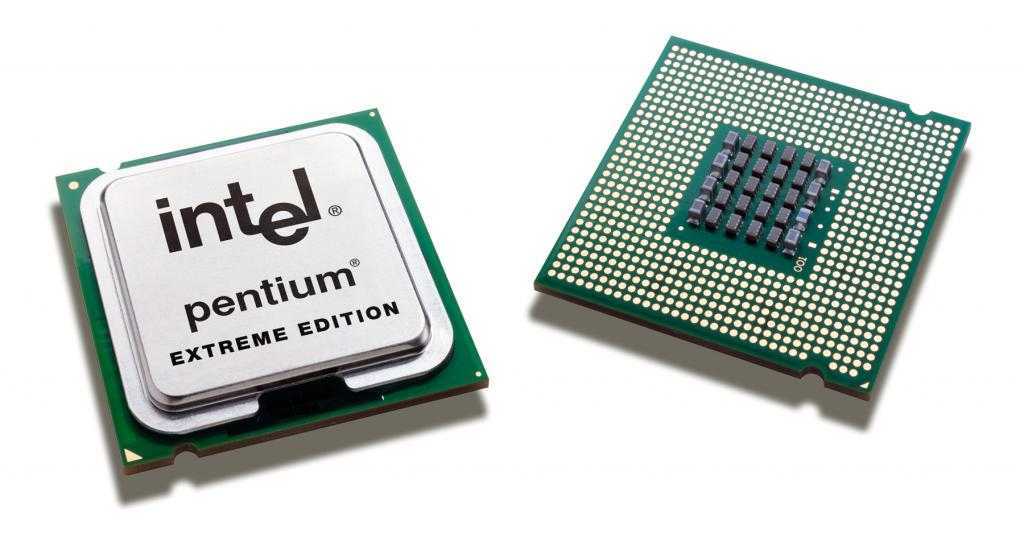
In addition, the Pentium Extreme Edition 955 processor was released with HyperThreading enabled and
operating at system bus frequency = 266 MHz (1066QPB). So that the reader does not get confused in all
presented processors, we will summarize their characteristics in a single table:
| Designation | Core stepping | Clock frequency | Bus frequency (FSB) | L2 cache size | HyperThreading | Virtualization support |
| Pentium D 820 | Smithfield | 2800MHz | 800MHz | 2 x 1Mb | No | No |
| Pentium D 830 | Smithfield | 3000MHz | 800MHz | 2 x 1Mb | No | No |
| Pentium D 840 | Smithfield | 3200MHz | 800MHz | 2 x 1Mb | No | No |
| Pentium Extreme Edition 840 | Smithfield | 3200MHz | 800MHz | 2 x 1Mb | Yes | No |
| Pentium D 920 | Presler | 2800MHz | 800MHz | 2 x 2Mb | No | Yes |
| Pentium D 930 | Presler | 3000MHz | 800MHz | 2 x 2Mb | No | Yes |
| Pentium D 940 | Presler | 3200MHz | 800MHz | 2 x 2Mb | No | Yes |
| Pentium D 950 | Presler | 3400MHz | 800MHz | 2 x 2Mb | No | Yes |
| Pentium Extreme Edition 955 | Presler | 3466MHz | 1066MHz | 2 x 2Mb | Yes | Yes |
A few words about the compatibility of new processors with motherboards.
Officially, new processors based on the Presler core with a bus frequency of 1066 MHz are only compatible with motherboards based on
the latest i975X chipset. However, there are no fundamental restrictions on working with boards based on other chipsets.
with support for such a bus (i945P, i955X and nForce4 SLI (x16) Intel Edition) no. The main thing is that the power module
The board was designed for the corresponding loads, and the BIOS version correctly recognized the new processor.
In particular, we ran the Pentium Extreme Edition 955 processor on an Asus P5WD2 Premium motherboard without any problems,
which is based on the i955X chipset.
As for processors with 800 MHz bus frequency (Presler and CedarMill cores), in most cases
they will work on all motherboards that support this bus.
Now let’s talk about overclocking. Just like AMD processors, Intel processors
the multiplier is locked upwards. But on the test processor Pentium Extreme Edition 955
it turned out to be completely unlocked (from 12 to 60) which gave us the opportunity to assess the potential
65nm core without the influence of other system components (primarily the chipset and memory, which worked in normal modes).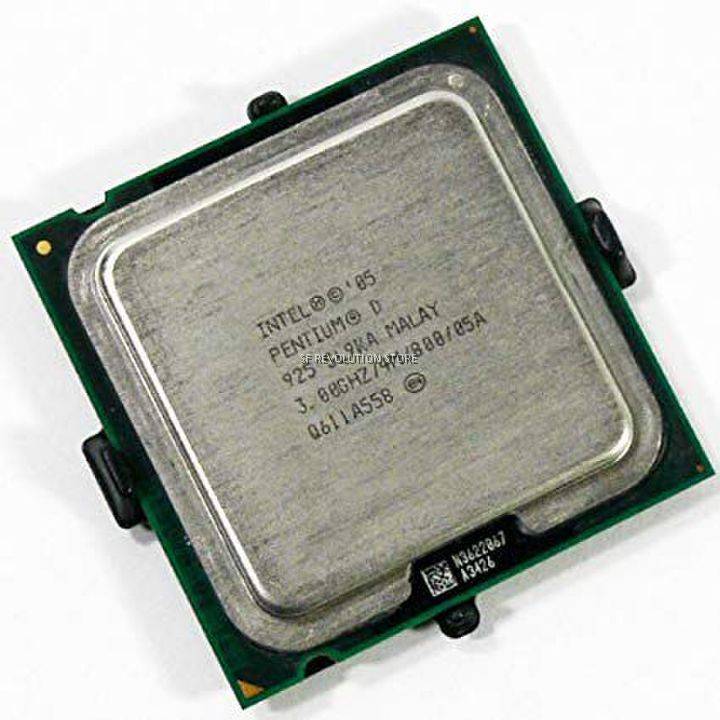
So, without increasing the core voltage, the processor easily took the frequency of 4.0 GHz, and with a slight
By increasing the Vcore, the processor worked absolutely stably at a frequency of 4.26 GHz.
And with an increase in voltage to 1.4125V, the processor obeyed the frequency of 4.55GHz.
But in this case it was impossible to speak
about complete stability: some tests passed perfectly (their results are shown on the next page),
and others produced completely wrong results (because of a system timer failure).
At the same time, we could no longer increase the voltage on the processor (we used the Gigabyte G-power air cooler),
because it led to throttling. So, we estimate the overclocking potential as excellent,
and owners of water cooling systems will be able to reach 4.5 GHz (according to reports on the Internet, owners
cryogenic systems have already reached 5.5 GHz!).
So, a preliminary conclusion about processors based on the Presler core. Thanks to the new 65 nm process technology,
Intel was able to release a new generation of dual-core processors that are better in all technical characteristics (functionality, speed, heat dissipation) than processors based on the Smithfield core. And it is the processors based on the Presler core that will be able to give a worthy rebuff to the competitors represented by the Athlon X2 line. But how much the balance of power has changed, we will see on the next page, which is dedicated to performance.
Dual-core Intel Pentium D
Microprocessors Circa 2000 was published in the October issue of IEEE Spectrum in 1989. In this work, four employees of Intel Corporation (including Vice President Patrick Gelsinger), based on Moore’s law , suggested that multi-core processors would appear at the beginning of the new century. And now, sixteen years later, their predictions have become a reality.
Help
For quite a long time, multiprocessor systems were the property of the server segment, but in May 2005, Intel presented its first dual-core processor for desktop PCs to the public. The new technology has become one of the components of the Digital Home concept, within which the corporation promotes various innovations.
The family of dual-core processors is represented by four models: Pentium D 820, 830, 840 and Pentium Extreme Edition 840. Their clock speeds are lower than those of the Pentium 4 line, from 2.80 GHz in the younger model 820 to 3.20 GHz for the older Pentium D 840 and Extreme Edition. All CPUs of the series have 1 MB of L2 cache per core (1×2 MB). Power consumption (TDP — Thermal Design Power) has increased slightly — from 95 to 130 watts. This is higher than that of the previous line based on Prescott and Prescott2M cores, which have earned a reputation as «hot guys» (for example, the TDP of the 600th and 500th series ranged from 84-115 W), so you need to be especially attentive to the cooling system and case ventilation when collecting a computer.
Products of the new family use all modern technologies: SpeedStep — lowering the voltage and clock frequency of the processor at times when maximum performance is not required (not available in the younger 820th model and in the 840 Extreme Edition), EM64T — 64-bit instruction execution and addressing large amounts of RAM, Execute Disable Bit — hardware protection against certain types of viruses.
The gap between Extreme Edition processors and «regular» products is gradually closing. Previously, extreme CPUs were distinguished by a high FSB (1066 MHz) and a 2 MB L2 cache, but with the release of the 600 series (2 MB L2), there was only one plus — a higher system bus frequency. With a good motherboard and successful overclocking, this result is achievable on conventional processors. With the release of the 800th line, the bus frequency in the Extreme Edition model was lowered to 800 MHz; Now the only advantage of «extreme» is the Hyper-Threading technology, which allows increasing the number of logical CPUs up to four.
In terms of microprocessor architecture, we do not see anything fundamentally new in the Pentium D — it’s just two Prescott cores in one package. But not all motherboards are suitable for building a system based on the 800 series, but only those based on the Intel 945 chipset or newer. When choosing a system logic set from a third-party manufacturer, you should pay attention to compatibility with processors, for example, NVidia nForce 4 SLI Intel Edition does not fully support dual-core CPUs — when installing a Pentium D 820, only one core will work.
The home segment is acquiring more and more specific features that were previously characteristic of the server segment. So, with the release of dual-core Pentiums, due to their high “voracity”, an 8-pin connector appeared on motherboards, so when buying a new processor, you should also purchase an ATX 2.2 power supply.
Our goal was to compare the performance of dual-core and single-core processors on the example of Intel Pentium D 840 (3. 20 GHz, 2×1 MB L2) and Intel Pentium 640 (3.20 GHz, 2 MB L2). The first part of testing is the PCMark05 package. We talked about it in detail in the previous issue, now we will just present the results. The dual-core CPU shows a performance increase of about 17% compared to its «little brother». Then we used the WinlauncherXP utility, which allows you to manage the allocation of processor resources for running applications, and specify the number of processors / cores involved in multiprocessor / multi-core systems, as well as in systems with Hyper-Threading support.
To determine performance in real applications, a DVD9 to DVD5 movie was converted using Clone DVD 2. In this rather typical case, the difference in performance was minimal, but this fact only indicates that the product is not adapted to work with dual-core processors. To make things more difficult, we ran Need For Speed: Most Wanted (at 800×600, no AF, no AA) at the same time as we were encoding the DVD. We then set both applications to prioritize their CPU usage with WinLauncherXP and assigned them to different logical processors. As a result, under the condition of multi-threaded work, the performance of the Pentium D turned out to be 22% higher. Modern PCs almost always work in multitasking mode (for example, office programs run simultaneously with mail and communication clients, as well as with antiviruses), so such an increase in performance, which can significantly reduce system response time, will not be superfluous at all. In addition, games that use multithreading are already appearing today, so the future of personal computing is undoubtedly with dual-core processors.
project 857 — Articles — Overclocking a dual-core Pentium D 820.
The history of the development of processors from Intel in recent times does not shine with originality. In pursuit of AMD, Intel, just like Michurin, first instilled support for 64-bit instructions in its processors, and then crossed two Prescott cores and got a dual-core processor. Today we will try to overclock just such an instance.
And so, the Pentium D 820 is listed under the following name:
[BOX] Socket 775 2x1024k FSB 800 Intel(TM) Pentium(TM) D Processor 2.8 Ghz (Processor 820) — 279.4$
In this case, the pricing policy from Intel cannot but rejoice, because AMD’s competitor Athlon 64 X2 3800+ costs more than $350! Although today AMD has come to its senses and lowered the wholesale price to $284, the processor will still reach the end user with a price of at least $300. It turns out an interesting situation: at the moment, Intel is releasing the cheapest two-core processors. Lived up! 🙂
This processor is based on the Smithfield core, runs at 2.8 Hz and has 1 MB of L2 cache per core. But there is also a significant drawback: both cores sit on the same bus, as a result, they have to “fight” for it.
Pentium D820
Intel Processor Spec Finder provides the following information:
It should be noted that this is a very progressive processor. It supports all modern «features» from Intel. Here you have 64-bit instructions, and NX-bit, and Speed Step technology (power-saving mode). Here with Speed Step there is a small incident. All the older brothers of this processor are capable of lowering the multiplier to 14 (to save electricity :), and they eat “immeasurably”, two Prescotts, after all), but our processor already has it! And there is simply nowhere to lower it! It turns out that this technology is supported purely hypothetically. It’s funny…
Well, we got acquainted with the processor, let’s move on to overclocking.
Test system.
CPU — Pentium D 820 (14×200 = 2800 MHz)
MB — MSI 945P Platinum (MS-7176) (i945P)
Ram — 2x512Mb DDR2-533 (266MHz) Samsung
SVGA — MSI Radeon X800 (which we will write about in more detail next week)
The overclocking history of the described processor is complicated and thorny.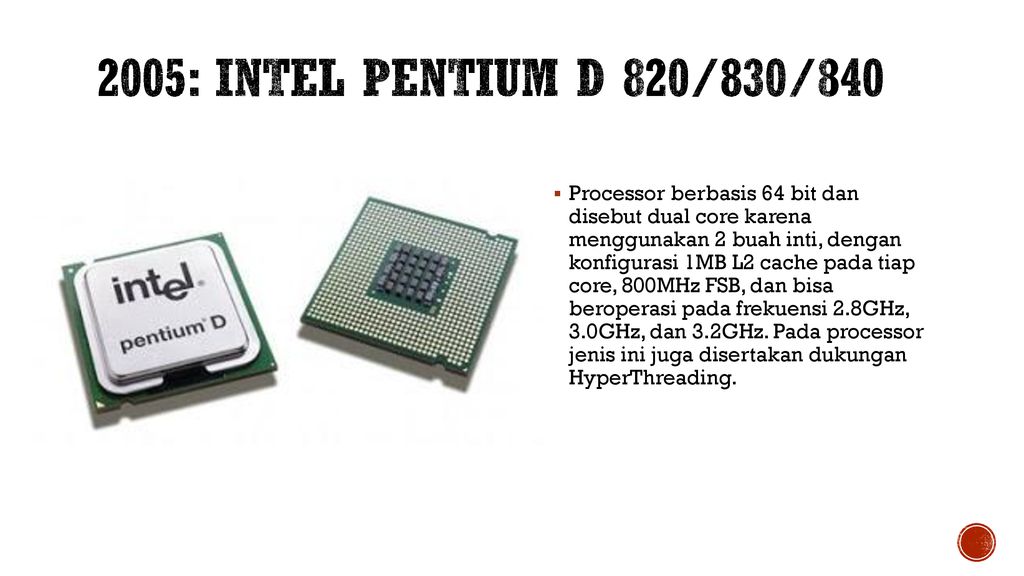 She started a week ago. And, it would seem, almost then it did not end. It turns out that the board from MSI does not support DDR2 400 memory! But we didn’t know that. They stuck the memory — but the mother does not start. Well, at least there is D-led, diodes displaying errors. According to them, we realized that memory is to blame. We got into the instructions and … ofigeli! In the manual, in black and white, the following was written: i9 chipset45 supports DDR2 400 memory, but the motherboard does NOT!
For those who want to see this miracle «live» here is a link.
Well, how do you feel about this? I don’t know in what drunken stupor MSI engineers planed this board, but apparently they decided that synchronous memory operation is harmful, and excluded the necessary divider from use! As a result, the memory always works asynchronously with a 3:4 boost divider. MSI has gone wild!
Okay, nothing to do, I had to look for another memory. This took a week. As a result, we found DDR2 memory — 533.
After such a «hard start», we finally got the system up and running.
But first, we took an unconventional path. Included with the motherboard on the disk was a special utility for overclocking the processor from under Windows. It’s called CoreCenter. We launch the utility, press the “+” a couple of times (in order to raise the bus frequency), and … we freeze in amazement.
5.6Hz! Can’t be! For several minutes we “scratch pumpkins” looking at each other. When the shock passed, we figured out what the problem was. It turns out that the engineers from MSI (you remember :), who are «in a drunken stupor»), forgot to tell the utility that the nucleolus is TWO. As a result, the utility simply ADDED the frequencies of both cores! Oh, I did not expect so many shortcomings from MSI. A decent office … was … once.
Okay, now that the super-overclocking issue is over, we’ve moved on to more traditional methods.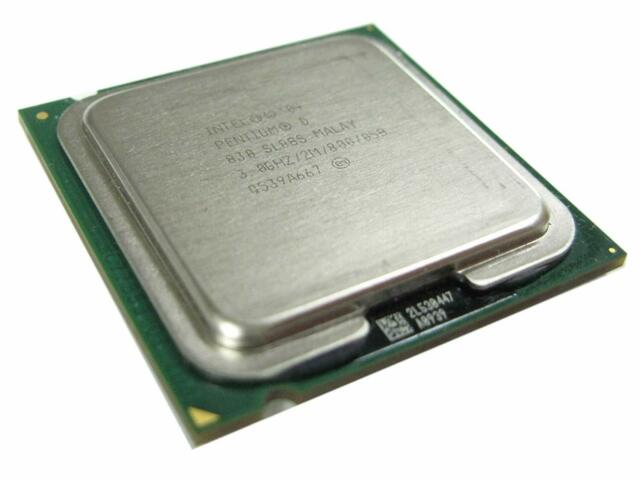 Got into the BIOS.
We set the bus frequency for a start — 210 Mhz, and … the mother does not start! Thoughts about a big, weighty sledgehammer came into my head … 🙂 But this problem was solved simply. It turns out that the PCI-E bus does not initially lock on the mother in question (ie, it works synchronously with the system one). We pull the Clear CMOS jumper, climb into the BIOS and set the PCI-E frequency, say 102MHz. We are overloaded, and … the mother joyfully starts. Hurray, fir-tree sticks, at least some movement forward. So, we go further, we put the 215MHz bus — the mother starts, we set 220 — it starts. We put the bus 225MHz — the mother does not start. We reset the BIOS again and raise the frequency more smoothly, by 1MHz. As a result, the maximum bus on which it was possible to boot was 221MHz.
The memory worked at 294Mhz almost like DDR2 600!
It is quite clear that we hit the limit of memory.