Please Enter Setup to Recover BIOS Setting – Top 8 Fixes!
If your PC shows the message «Please enter setup to recover BIOS setting. Press F1 to Run SETUP» on your startup screen, you don’t need to worry. This post from MiniTool Partition Wizard provides some useful solutions for you to fix this error.
Causes of the Please Enter Setup to Recover BIOS Setting Error
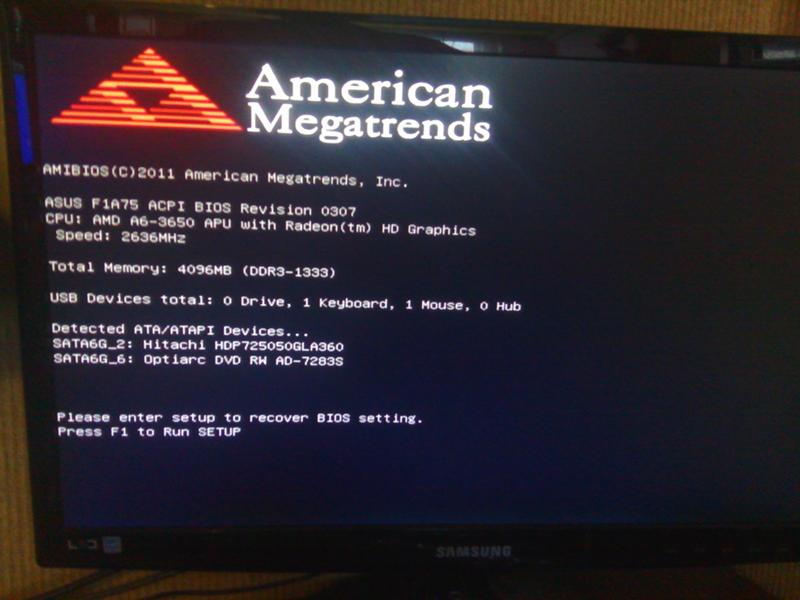
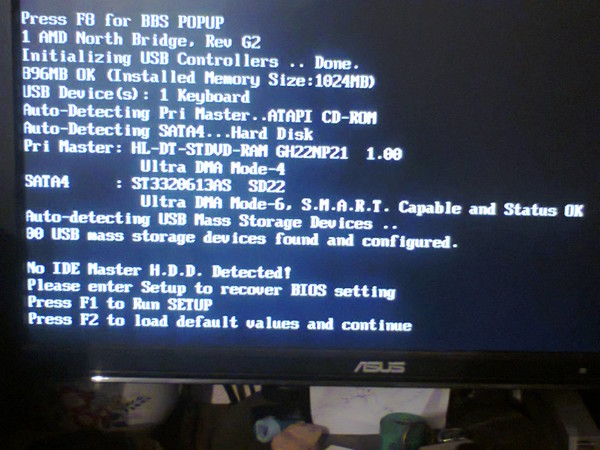
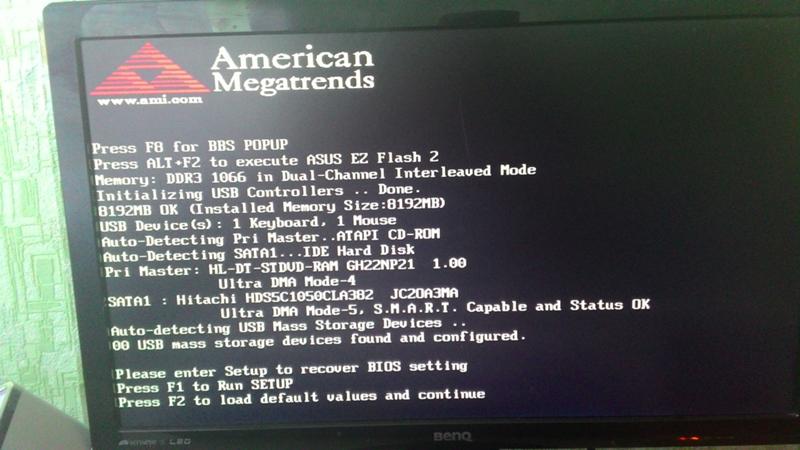
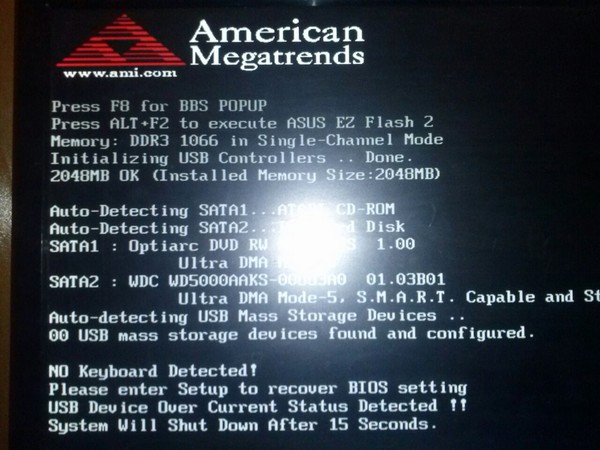
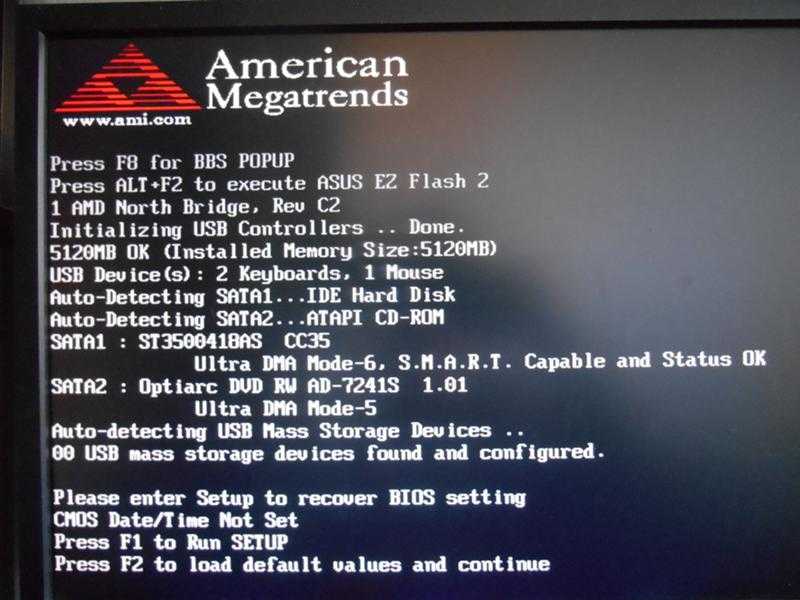
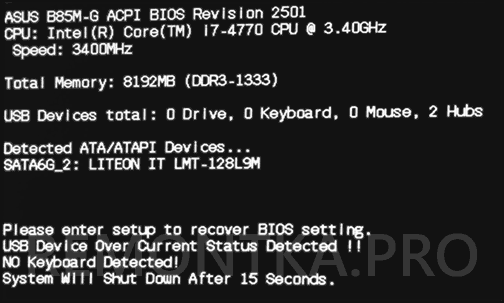
Some people report that they receive the message «Please enter setup to recover BIOS setting. Press F1 to Run SETUP» on their screen each time they do a cold boot, as shown in the picture below.
What causes this “Please enter setup to recover BIOS setting” error? After investigating this particular issue, we find it can be caused by these possible reasons:
- The CMOS battery is dead.
- The BIOS on your PC is outdated.
- There are some system file corruptions on your PC.
- The settings in the BIOS do not match the real hardware data.
Below are some useful solutions that you can try to fix this “Please enter setup to recover BIOS setting” error.
Fix 1. Restart Your PC
Restarting can wipe away the current state of the software. Any code that’s stuck in a misbehaving state will be swept away, too. So, the first thing you can try is to start your computer. If it doesn’t work for you, just try the other fixes below.
Fix 2. Change the Boot Order
You may also get the message «Please enter setup to recover BIOS setting. Press F1 to Run SETUP» if the BIOS was previously set to contain two hard drives but you neglected to change it back after you removed one of them.
In this case, you can try changing the boot order to the system disk as the first boot. Here’s the guide:
Step 1. Restart your computer and press the BIOS key to enter the BIOS menu on Windows 10.
Step 2. Navigate to the Boot tab in BIOS.
Step 3.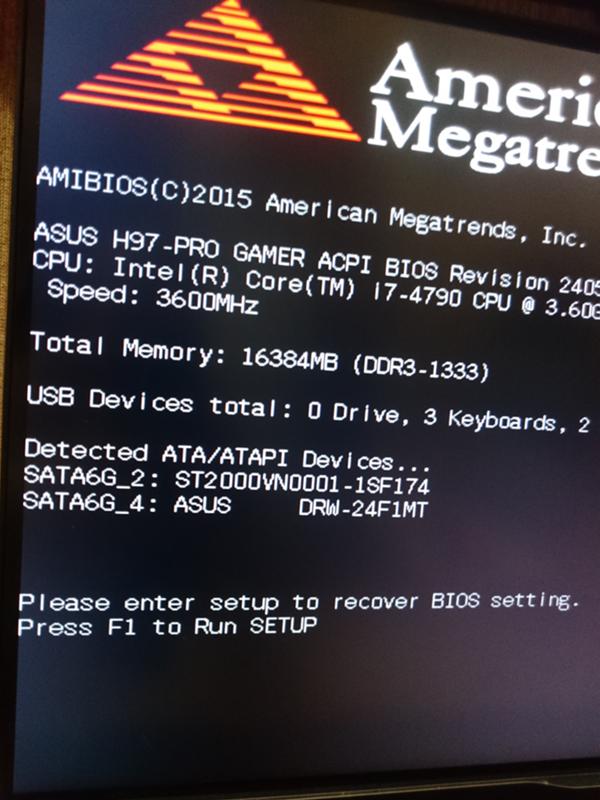 Use the function keys to change the boot order.
- Left, Right, Up, and Down directional arrows: Switch between tabs or highlight items.
- Enter: Select highlighted items.
- Plus (+) or Page Up: Move highlighted items up a list.
- Minus (–) or Page Down: Move highlighted items down a list.
Step 4. Press the F10 key and Enter key to save the changes and exit.
Fix 3. Update BIOS to the Latest Version
Outdated BIOS can also cause this «Please enter setup to recover BIOS setting» error. You can check and update your BIOS version by reading this post: How to Update BIOS Windows 10 | How to Check BIOS Version.
However, it’s a little dangerous to update your BIOS because it may brick your system, so you’d better make a backup of your system.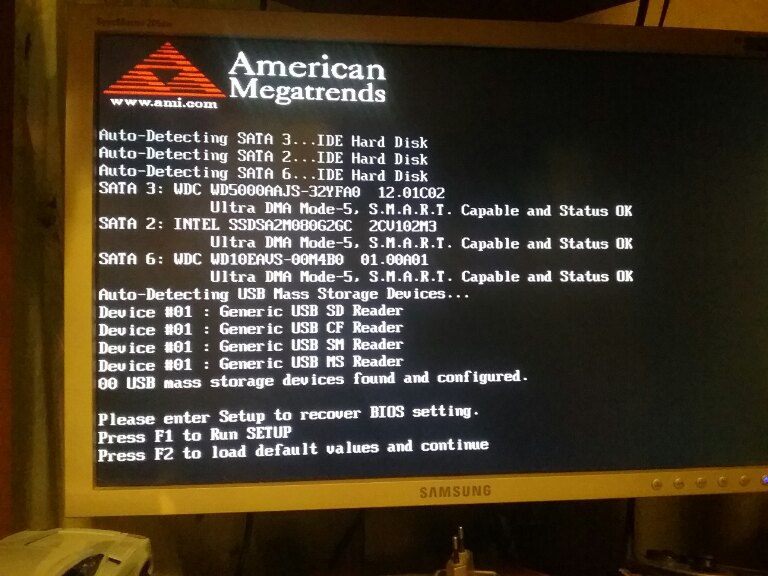 To do that, you can use MiniTool Partition Wizard’s Copy Partition Wizard or Copy Disk Wizard features. Here’s the tutorial:
Step 1. Download and install MiniTool Partition Wizard on your PC.
Free Download
Step 2. Connect the external storage device to your computer and then launch MiniTool Partition Wizard.
Step 3. Select the Copy Disk Wizard option from the left sidebar.
Step 4. Select the disk that you want to copy (Disk 1), and then click Next.
Step 5. Next, select the destination disk (Disk 2) and click the Next button. In the prompted window, click Yes if there’s no important data on it.
Step 6. Select copy options based on your needs and click Next. Click the Finish button on the next window.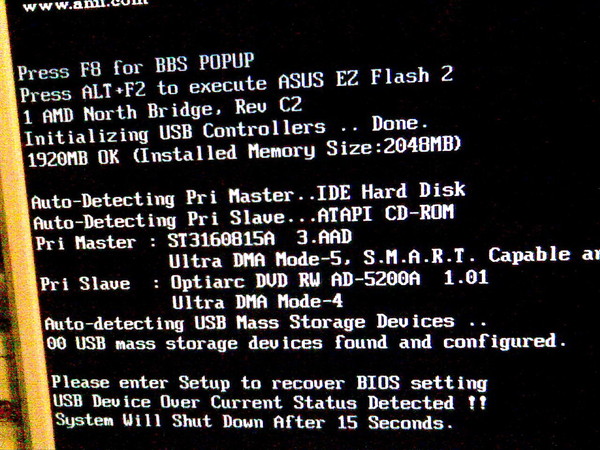
Step 7. Click Apply and Yes to execute your changes.
Fix 4. Clear CMOS by Using the Jumper Method
The complementary metal-oxide-semiconductor (CMOS) is a small amount of memory on a computer motherboard that stores the Basic Input/Output System (BIOS) settings. Sometimes, clearing CMOS by using the jumper method can help you recover the boards and fix errors like the «Please enter setup to recover BIOS setting» error. Here’s the guide:
- Power off your computer and disconnect it from the wall outlet.
- Press the Power button multiple times to clear any capacitors.
- Open your computer’s case so you can see the motherboard.
- Locate the CMOS jumper by referring to the motherboard manual and clear the CMOS. In general, the CMOS jumper consists of three pins located near the battery.
- In general, the CMOS jumper has positions 1-2 and 2- Move the jumper from the default positions 1-2 to positions 2-3 to clear CMOS.
 Wait 1-5 minutes, then move it back to the default position.
 - Close the computer’s case, and then power on the system.
Fix 5. Replace the CMOS Battery and Change the F1 Settings
If your CMOS battery is out of power, you can also receive the message «Please enter setup to recover BIOS setting. Press F1 to Run SETUP» when you do a clean boot. To fix this, you can try replacing the CMOS battery and changing the F1 settings. Here’s how to do it:
- Enter the BIOS menu.
- Then press the F7 key to enter the Advanced Mode. (Different computers may need a different key to enter the Advanced Mode.)
- Go to the Boot tab and disable the Wait For “F1” If Error option.
- Next, press the Power button until the computer is turned off completely.
- Remove all the power sources and batteries.
- Make sure to release all the static electricity to avoid damaging your computer.
- Remove the bottom panel of the laptop.
- Take out the CMOS battery. It looks like a coin.
- Press the Power button on the laptop for 10-15 seconds to release the remaining power. This will reset the CMOS memory and your BIOS.
- Replace the CMOS battery, reassemble your laptop, plug the power source back, and boot up your laptop.
- Enter the BIOS again and reset the Time and Date. Next, press F10 and Enter to save the changes.
- Once done, check if the error is fixed.
Fix 6. Enable CSM
CSM is a component of your UEFI firmware, which stands for compatibility support module. It appears in the UEFI setup menu. Some people report that enabling CSM can fix this «Please enter setup to recover BIOS setting» error. You can also have a try.
If you want to know more about CSM, you can read this post: What Is CSM Support & Should I Enable It in BIOS? [Answered]. If you decide to enable the CSM, you can do as follows:
- Enter the BIOS menu on your PC.
- Navigate to Security Options and set Secure Boot to Disabled.
- Save the changes and restart your PC.
- Enter the BIOS again and go to the Boot tab.
- Set the Fast Boot to Disabled.
- Next, scroll down to the Launch CSM option and set it to Enabled.
- Save all the changes and restart your PC.
- Perform a cold boot of your PC and check if the error has been resolved. If you still see the error, please enter setup to recover BIOS settings and press F1 to run setup.
Fix 7. Change SATA Mode to AHCI
AHCI is an abbreviation for Advanced Host Controller Interface, which is defined by Intel. It is an operating mode in the BIOS settings of newer PCs that provides some advanced features to the Serial ATA standard.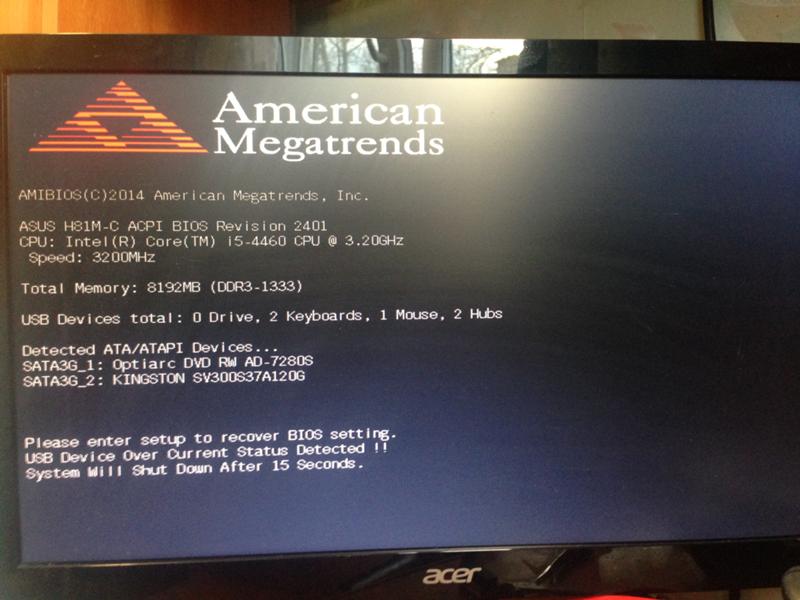
AHCI can be used to access the native functions of the SATA interface, such as NCQ (Native Command Queuing) and hot plugging, which are beneficial to improving the compatibility and performance of your devices.
Some people report that changing SATA mode to AHCI works for the «Please enter setup to recover BIOS setting» error on their computer. Maybe it also works on your PC, so you can have a try. Here are the steps:
- Use the shortcut keys (F10, F2, F12, F1, DEL) to enter the BIOS menu.
- Navigate to the Boot tab, and then set the Launch CSM to Enabled.
- Next, go to the SATA Mode Selection section and change it to AHCI.
- Once done, reboot your PC and check if the «Please enter setup to recover BIOS setting» error is fixed.
Fix 8. Ignore CPU Core Voltage
Ignoring CPU core voltage is a good choice to try fixing the «Please enter setup to recover BIOS setting» error, and you can also have a try.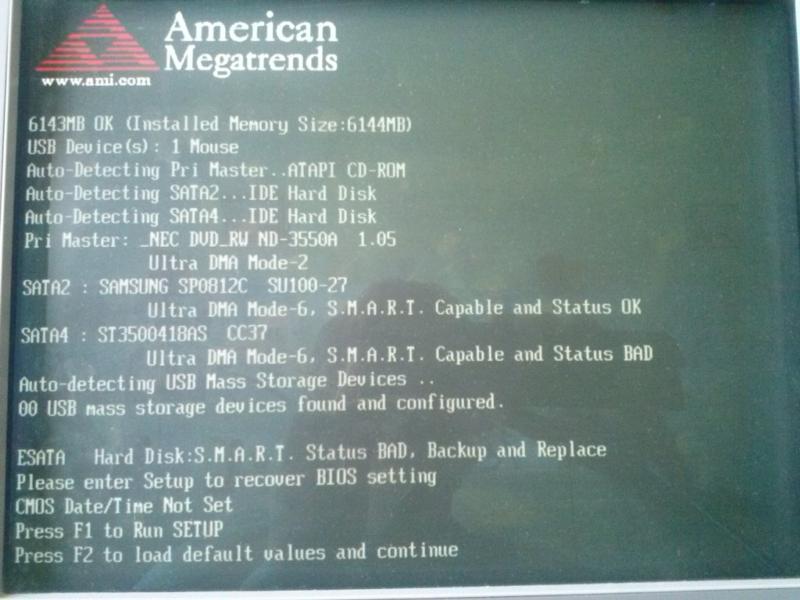 Here’s the way:
- Press the BIOS key to enter the BIOS menu.
- Then press F7 or another designated key to enter the Advanced Mode.
- Next, go to the Monitor tab and select the CPU Core Voltage option.
- Set it to Monitor.
- Save the changes and exit.
- Restart your PC and then check if you receive the message «Please enter setup to recover BIOS setting. Press F1 to Run SETUP» again.
I have received the message «Please enter setup to recover BIOS setting. Press F1 to Run SETUP» on my screen when I do a cold boot every time. It bothers me a lot. Luckily, I fixed this error by following the methods in this post! I want to share it with you.Click to Tweet
This post provides eight fixes to help you fix the «Please enter setup to recover BIOS setting» error. You can try these fixes to solve this error on your computer.
Do you know other methods to solve this error? Please share your ideas or experience with us in the following comment zone. In addition, if you encounter problems while using MiniTool Partition Wizard, please contact us via [email protected]. We will get back to you as soon as possible.
Please Enter Setup to Recover BIOS Settings: How to Fix It
A dead motherboard battery most likely triggers BIOS settings errors
by Madhuparna Roy
Madhuparna Roy
A diploma holder in computers and with a keen interest in technology, Madhuparna is passionate about writing How-to guides and helping people solve the most intricate Windows issues…. read more
Published on
Reviewed by
Alex Serban
Alex Serban
Windows Server & Networking Expert
After moving away from the corporate work-style, Alex has found rewards in a lifestyle of constant analysis, team coordination and pestering his colleagues.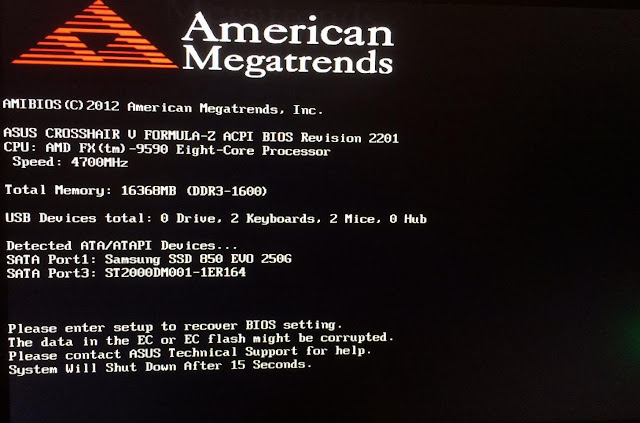 Holding an MCSA Windows Server… read more
Affiliate Disclosure
- Sometimes, when trying to restart your PC using the cold boot, you may come across an unexpected BIOS error that says, Please enter setup to recover BIOS settings.
- Many users who face this issue have been found to have an old motherboard with an outdated or dead CMOS battery.
- However, the BIOS error message may also show up due to incorrect BIOS settings, corrupted system files, or, outdated BIOS version.
XINSTALL BY CLICKING THE DOWNLOAD FILE
To fix various PC problems, we recommend Restoro PC Repair Tool:
This software will repair common computer errors, protect you from file loss, malware, hardware failure and optimize your PC for maximum performance. Fix PC issues and remove viruses now in 3 easy steps:
- Download Restoro PC Repair Tool that comes with Patented Technologies (patent available here).
-
Click Start Scan to find Windows issues that could be causing PC problems.

- Click Repair All to fix issues affecting your computer’s security and performance
- Restoro has been downloaded by 0 readers this month.
When trying to do a cold boot, you may bump into the error message, Please enter setup to recover BIOS settings as your PC is starting up.
You may not encounter this issue when doing a normal restart, but only during a cold boot. Besides, it also wipes off all the saved BIOS changes. To know more about what is BIOS and how to use it, you can follow our detailed guide.
What causes the please enter setup recovery BIOS settings error?
Some of the primary reasons why you may see the BNIOS settings error are as below:
- The CMOS battery is dead – When the motherboard model and the coin-cell battery are old.
- BIOS version is outdated – Sometimes, the BIOS needs to be updated to the latest version for proper functioning.
- System files – Chances are, that you see the error due to corrupted Windows files.
However, it’s not as frightening as it looks. Below are a few solutions that can help you fix the Please enter setup to recover BIOS settings error.
How do I fix the please enter setup recovery BIOS settings error?
Before you proceed with the main troubleshooting methods, you may want to apply the steps below:
- Restart your PC.
- Update the BIOS to the latest version.
- Enter the BIOS, hit Save all changes, and restart.
- Change the boot order in Windows 11.
- Ignore this error message completely if you don’t need any non-default settings.
But, if you still keep receiving the same error, Please enter setup to recover BIOS settings and press F1 to run the setup, you can follow the below workarounds.
1. Replace the CMOS battery and change the F1 settings
- Enter BIOS, and press F7 to enter the Advanced Mode.
- Here, go to the Boot tab and disable the Wait For ‘F1’ If Error option.
- Now, press and hold the power button until the computer shuts down completely. Remove any power sources from the laptop, and the battery to proceed.
- Before you dismantle your laptop, make sure to discharge any static electricity to avoid any damage.
- You can now remove the bottom panel of the laptop, or dismantle it to access the CMOS battery, which looks like a coin.
- It is typically located near your PCI slots but could also be found in other locations based on the motherboard manufacturer. Now, remove the battery.
- Next, hold the power button on your laptop for about 10-15 seconds to discharge any remaining power. This will reset the CMOS memory and your BIOS.
- Now, place the CMOS battery back in its location, reassemble your laptop, plug the power source back, and boot up your laptop.
- Enter BIOS again, reset the time and date, and press F10 to save the settings and exit.
Now, shut down your PC, wait for a while and as you turn on your PC, you should not see the error anymore. You can also refer to our detailed guide on how to fix corrupt CMOS for more solutions.
2. Change BIOS settings
2.1 Enable CSM
- Enter BIOS on your PC based on the model, navigate to Security Options and turn off Secure Boot. Save the changes and restart your PC.
- Next, enter BIOS again, go to the Boot section, and disable Fastboot.
- Now, enable CSM (Compatibility Support Module), save the changes, and restart your PC.
Expert tip:
SPONSORED
Some PC issues are hard to tackle, especially when it comes to corrupted repositories or missing Windows files. If you are having troubles fixing an error, your system may be partially broken.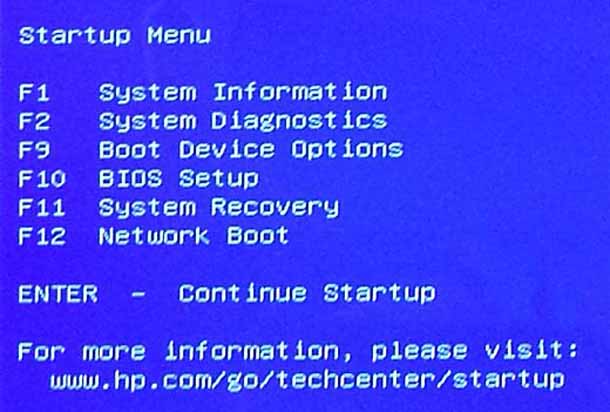
We recommend installing Restoro, a tool that will scan your machine and identify what the fault is.
Click here to download and start repairing.
You can now cold boot your PC and check if the issue is fixed or, if you still see the error, please enter setup to recover BIOS settings and press F1 to run setup.
This method can also help you with an issue such as when the PC won’t exit BIOS and we have some more solutions for the same.
2.2 Change SATA Mode to AHCI
- On your PC, enter BIOS by using the designated shortcut key (F10/F2/F12/F1/DEL) based on the PC model.
- Navigate to the Boot section, and enable the CSM option.
- Next, go to SATA mode and change it to AHCI.
Now, reboot your PC, and check if setting the SATA mode to AHCI helped fix the BIOS settings issue.
3. Ignore CPU Core Voltage
- Press the designated key based on your laptop manufacturer to enter BIOS and press F7 to switch to Advanced Mode.
- Here, go to the Monitor tab. Now, go to the CPU Core Voltage field and set it to Monitor.
- Save the changes and exit.
Now, restart your PC and you should not encounter the BIOS error message anymore, Please enter setup recovery BIOS settings.
How do I restore my BIOS?
- Restart your PC, wait for the computer’s first startup screen to appear, and repeatedly hit Del/F2/F8/F10/Esc/Tab key to enter setup.
- Once the BIOS loads and you reach the settings menu, select Reset to Default, Factory Default, or Setup Defaults.
- In the confirmation prompt, press Yes to save the changes, and your PC will automatically reboot.
Once the BIOS reset is complete, reboot your PC and you can now enter BIOS again to change any settings.
Alternatively, you can press the CTRL + ESC shortcut keys together to initiate BIOS recovery on your PC with an external keyboard as a primary input.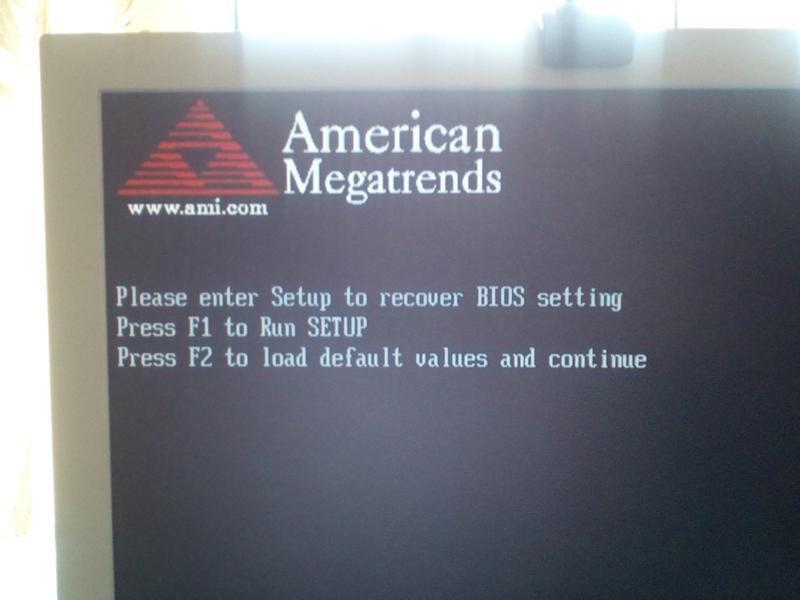
But if none of the above methods help, you can follow either of the two easy methods to flash the BIOS.
For any other queries on BIOS errors or if the computer won’t boot, do let us know in the comments box below.
Still having issues? Fix them with this tool:
SPONSORED
If the advices above haven’t solved your issue, your PC may experience deeper Windows problems. We recommend downloading this PC Repair tool (rated Great on TrustPilot.com) to easily address them. After installation, simply click the Start Scan button and then press on Repair All.
Was this page helpful?
Start a conversation
Share
Copy link
Newsletter
Software deals
Friday round-up
I agree with the Privacy Policy regarding my personal data
How to reset BIOS (UEFI) to default settings
Home » BIOS
Artyom Sinyavin
This article shows different ways to reset BIOS (UEFI) to default settings.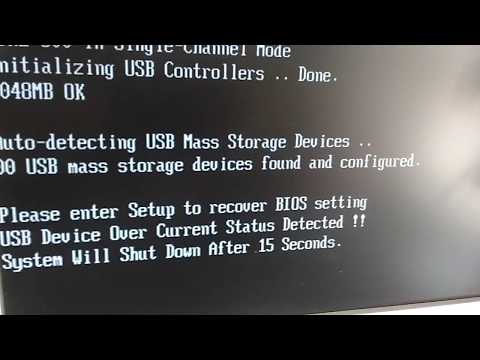
In case of incorrect hardware settings or incorrect values of critical system parameters when trying to overclock the computer, hardware failure, and if you need to reset the password on the BIOS, it is possible to reset the BIOS (UEFI) to default settings.
You can reset BIOS (UEFI) settings to default settings in software or hardware.
How to reset the BIOS UEFI to default settings in the BIOS settings menu
manufacturer, find and select Load Setup Defaults or Load Fail-Safe Defaults, Load Defaults BIOS, Load BIOS Setup Defaults
Also, depending on the specific motherboard, you can reset the BIOS to default settings by pressing a certain key on the keyboard, for example F5.
Information on the purpose of the BIOS menu items and resetting the settings to their original state (to default settings) is indicated in the instructions for the motherboard (system) boards. Instructions are supplied with motherboards or can be downloaded from the motherboard manufacturer’s website.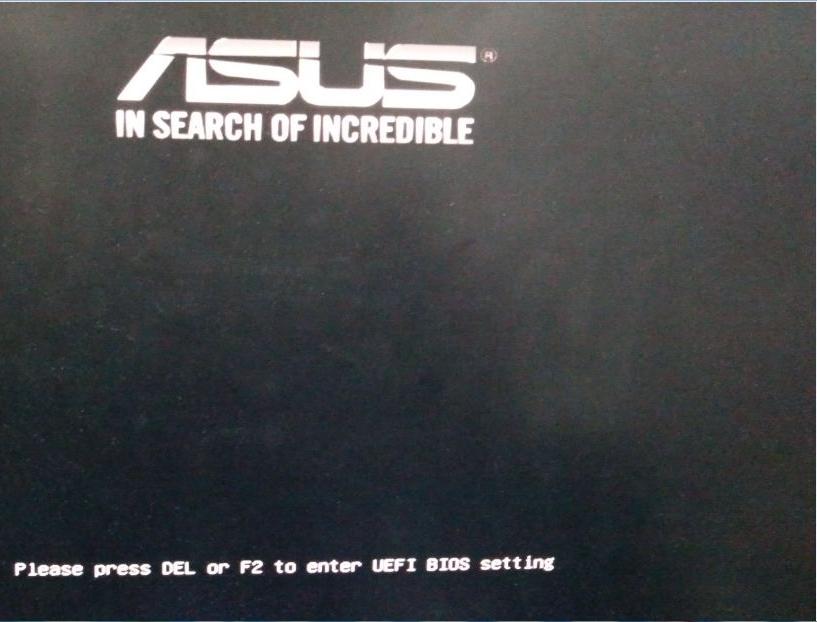
How to reset the UEFI BIOS to default settings by hardware
If the computer does not start and it is not possible to enter the BIOS, you must reset the BIOS by hardware.
Most motherboards are equipped with a special jumper (jumper-jumper, pins-pins) with which you can reset the CMOS memory in which the BIOS settings are stored.
To reset the BIOS (UEFI) to default settings, turn off the computer, unplug the power cable, open the case of the system unit and find the jumper on the motherboard named CLRTC, CLR_CMOS, CLEAR_CMOS, CLRRTC.
Move jumper from position 1-2 to position 2-3 for about 5-10 seconds, then return jumper to position 1-2 .
Some motherboards have a special CLR_CMOS button for resetting BIOS settings. Before resetting the BIOS settings using the button, turn off the computer and unplug the power cable.
You can also reset the BIOS to default settings by removing the battery. Turn off the computer and unplug the power cable, remove the system unit cover and find the battery on the motherboard that powers the CMOS memory.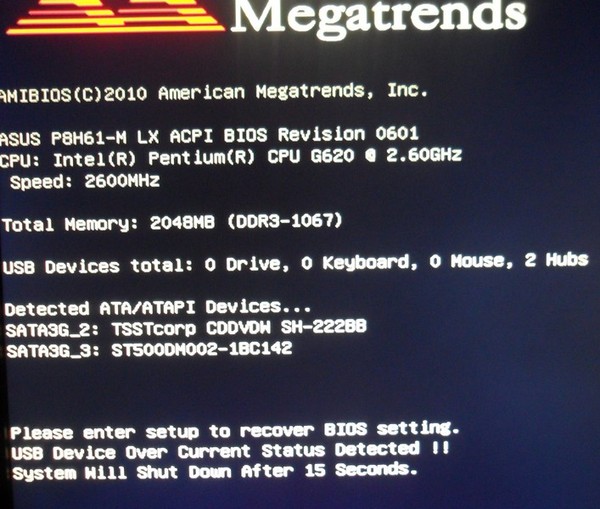 Carefully remove the battery and after a while (10-15 minutes) install it back.
The presented methods for resetting BIOS UEFI settings to default settings will help you solve problems that have arisen, for example, when overclocking the computer is unsuccessful, or if you need to reset the password on the BIOS.
How to reset CMOS — and restore default BIOS settings
When everything is working, most people don’t even open BIOS settings . Only overclockers «live in the BIOS» and when their device fails to boot, they often reset CMOS to restore the default BIOS settings.
For the average user, knowing how to reset CMOS is not necessary, but may be useful if their computer does not boot. There are different ways to do this, but first, it’s important to understand what is CMOS and why resetting it is one of the most effective solutions for computer boot failures.
CMOS — small memory circuit
CMOS means additional metal oxide semiconductor , which is the description of the manufacturing process of MOSFET . They are often used in integrated circuits, mainly due to their extremely low power consumption. In a PC, they are powered by a 3V battery, with a lifespan of 5 to 10 years, depending on usage and environment.
CMOS is used to store the Basic I/O System or BIOS , which stores the data the computer needs to recognize and communicate with components. It runs on battery power to store BIOS settings when the computer is powered off.
Why reset CMOS
Resetting CMOS may be required in many situations. The most common is a technical problem during download . If the computer «does not reach» the operating system, it is recommended to reset the BIOS settings to the default values.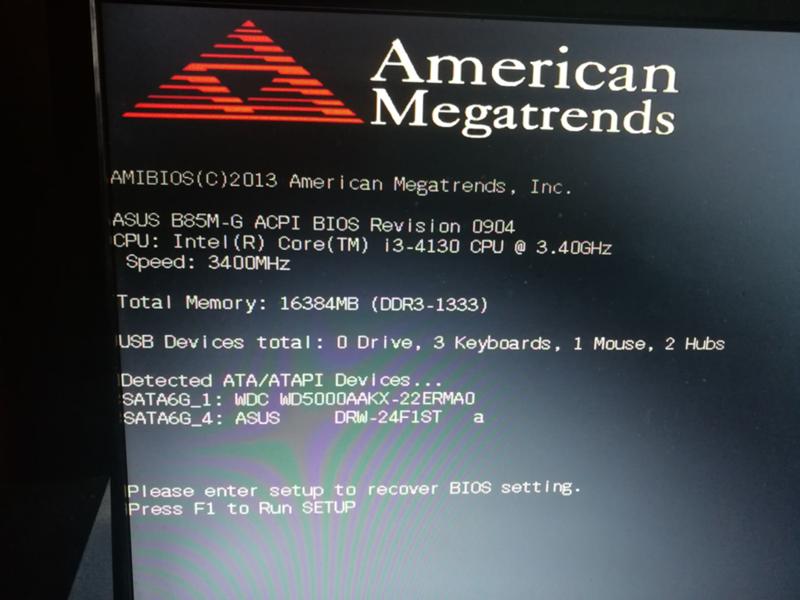 This can clear all the settings that have a rather negative impact on the computer’s boot.
An example would be a gaming motherboard with overclocked memory and a processor, but unable to support the required voltage due to overheating of the voltage regulator module or VRM .
There are many other problems that can be solved with a very simple CMOS hard reset.
How to reset CMOS — the easiest ways
There are several ways to reset CMOS, the most common and recommended is jumper method . Other methods for resetting CMOS are battery removal and a dedicated CMOS reset button, as well as software reset via BIOS.
Note . All motherboards have a software way to reset CMOS — in the BIOS settings. It is labeled Reset BIOS or Reset CMOS or Load Defaults .
If BIOS entry is not available, consider the following hardware methods.
How to reset CMOS using jumper
This is the standard CMOS reset method and works in most cases. The jumper method involves locating the 3-pin header labeled CMOS or CLR C or whatever, according to the lines that should be in the motherboard manual.
Its location is often very close to the CMOS battery, which is a button cell. It can be easily detected if it is not blocked by other components such as a large graphics card.
The 3-pin connector often has a jumper that covers pins 1 and 2, leaving pin 3 visible. Before the next step, the computer must be turned off. Remove the jumper and place it on pins 2 and 3 of to clear CMOS . It is recommended to wait 1 to 5 minutes before resetting the jumper.
It’s worth noting that some motherboards don’t have the jumper but still have the CMOS pins. Some motherboards have a 2-pin CMOS reset, but no jumper. In this case, it is recommended to use another conductive metal.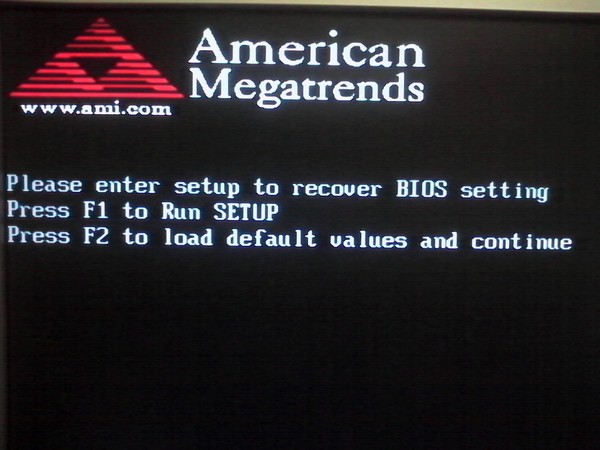
If this is not available, there are other methods to reset the CMOS.
Removing the CMOS Battery — Classic Off-On
Removing the battery is one of the easiest ways to reset your device. Likewise, removing the CMOS battery resets the BIOS settings. Some batteries are fixed, so removing them may require some skill. However, before removing the battery , the device must be turned off and the power cord disconnected .
Again, it is recommended to wait 1 to 5 minutes to discharge the capacitors and completely discharge the memory. Alternatively, pressing the power button can drain the battery in seconds with the power cord unplugged.
Reset CMOS using a dedicated button
Some motherboards, often more expensive, whether they are gaming motherboards, high-end ITX motherboards, or professional motherboards, have special CMOS buttons . Depending on the board, its format and manufacturer, the button can either be located on the board itself, or on the top or bottom, or on the outside of , with the rest of the I/O .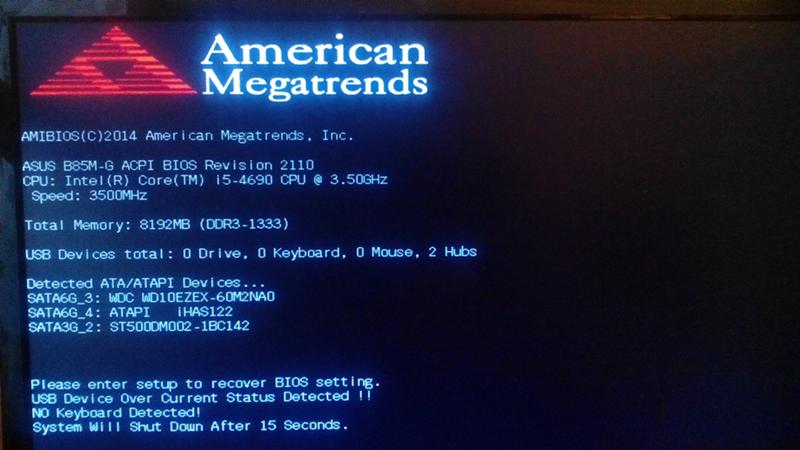
Pressing this button clears the CMOS, which is actually the easiest way to do this if the button is available.
-
How to reset CMOS ASUS
ASUS motherboards can be reset by placing a jumper on the required pins 2 and 3, or only 2 if the motherboard does not have a 3-pin connector. If there is no jumper, any conductive metal will do, such as a screwdriver.
The higher quality ROG boards have dedicated buttons. The battery method should work on all boards.
-
How to reset CMOS MSI
MSI motherboards can also be reset with a jumper, be it a jumper or any other conductive material. Removing the battery works with MSI boards just like any other board.
Higher end boards, such as the MEG series, must have a CMOS reset button, usually just below the motherboard’s chipset.
-
How to reset CMOS ASRock
Most new ASRock motherboards have a 2-pin connector that needs to be shorted.