Playstation 3 Media Server Setup
This guide has been updated since its original publication to reflect hardware and software updates. Multiple members of the Digital Trends staff contributed to this guide.
Like many people living in the digital age, my digital media was scattered among various drives, computers, and discs. I wanted seamless central control over all of it, so I decided to use my Sony PlayStation 3 as a media hub, with my 40-inch Samsung HDTV as a monitor. Now I can view or listen to all my photos, videos, and music via my TV screen, no matter where they are. Here’s a guide to building a digital media command center in your living room.
LEVEL 1: Connect to your home network
In the PS3’s main menu, navigate to Settings – Network Settings – Internet Connection, press X on your SixAxis controller and make sure it’s toggled to Enabled. Then go to Internet Connection Settings (also under Network Settings), and select your network name (SSID). Enter the network password if you have one.
If you have the original WiFi-less PS3 20GB, you can still connect it to your network by plugging the console into your router or extender (like an Apple Airport Express) via Ethernet cable.
Bonus Points: A Logitech diNovo mini Bluetooth keyboard comes in very handy for entering network passwords and any other text. There’s a complete guide to pairing and using it with a PS3 here.The pairing process is very similar to setting up a Bluetooth headset on a cell phone. You can check out our full Logitech diNovo mini review.
Extra Life: If your network consists exclusively of 802.11n-compatible hardware, bypass the PS3’s slower (802.11b/g) wireless connection by plugging it directly into your router or an extender (we used an Airport Express) via Ethernet cable. Adjust your router’s wireless settings to operate in 802.11n mode only. And if all your hardware supports it, switch to the 5GHz frequency band for a 60-100 percent speed bump and less interference. This can be a lifesaver when you’re copying lots of files to your PS3 over a network.
LEVEL 2: Connect to your computers
Go into the PS3’s Settings menu and navigate to Network Settings – Media Server Connection, and select Enabled. This allows the PS3 to detect networked computers running Universal Plug and Play (UPnP) server software.
Playstation Media Server Connection
WINDOWS 7/Vista: Windows users have a number of useful options when it comes to serving media files from their PCs. The latest version of Windows Media Player is generally the easiest option because it comes preinstalled with Windows, but a number of third-party applications also exist that offer better file compatibility and more advanced features. Plex and PS3 Media Server are two extremely popular packages that transcode file formats the PS3 doesn’t natively support. For instance, the PlayStation 3 doesn’t natively support playback of lossless FLAC files, but Plex will transcode them into other compatible formats on the fly.
For this particular tutorial, we used Plex. If you have media on either a Mac or a Windows computer (or both), we recommend Plex for its cross-platform compatibility, its clean and easily navigable interface and all the advanced connectivity features you can get. Oh, and did we mention it’s free?
First, you’ll need to download Plex. You can do that here for OSX and here for Windows. The important one is the Plex Media Server. The Plex Media Center is optional, but if you’re in the market for a new media center, it’s definitely worth a look.
After you’ve downloaded the Plex Media Server, click through all the necessary setup windows to install it. Following installation you’ll need to add media to your library. This process differs a bit for Windows and Mac.
MAC: After you’ve successfully installed the Plex Media Server, an icon in the shape of a black chevron should appear in your menu bar. Click on it to access a drop down menu and then choose Plex Media Manager.
A window will appear. At the bottom left you should see + and – buttons. Click on the plus button to add media. From here, you’ll need to tell Plex where your media is located. You can either drag folders into the list or click the + button to browse your folders in Finder. Find the right folders for your media and click Open to add them to Plex.
WINDOWS: After a successful install, a Plex icon will appear in your taskbar in the lower left. Select it and then click Plex Media Manager in the popup menu.
This will open up a new window in your default browser. From this point onward it’s simple. Just click on the sections for which you’d like to add media (movies, music, tv shows, etc.) and a drop-down window will appear. Click the Add button to add media. Another window will appear and you’ll be prompted to select the path to the folder where your media is. This can be done manually or by browsing your files.
Achievement: Use Plex’s list of metadata agents to find album art for your music, and posters pics for your movies. The added aesthetic makes everything look even more gorgeous.
LEVEL 3: Connect to extra storage
This part is simple — just plug in your thumb drive or USB hard drive to any of the PS3’s USB ports. My 300GB Maxtor USB hard drive showed up as “USB Disk (One Touch II)” in the PS3’s video, photo, and music menus. When navigating a USB drive’s folders, use the PS3 menu corresponding to the type of media you’re looking for on the drive, or the files won’t show up.
USB Device Connected
External drives must be formatted with the FAT32 file system for the PS3 to read files on it. Formatting a drive erases all the data on it, so if your PS3 won’t read your drive, make sure to back up all data before you format.
Memory cards (Memory Stick, SD and its variants, or CompactFlash) go in the labeled slots under the door on the PS3’s front, and they don’t require specific formatting. ‘
Secret weapon: If you have a network-attached storage device (like an Apple Time Capsule with a 500GB hard drive in it), you can access it by mounting the drive on a networked computer.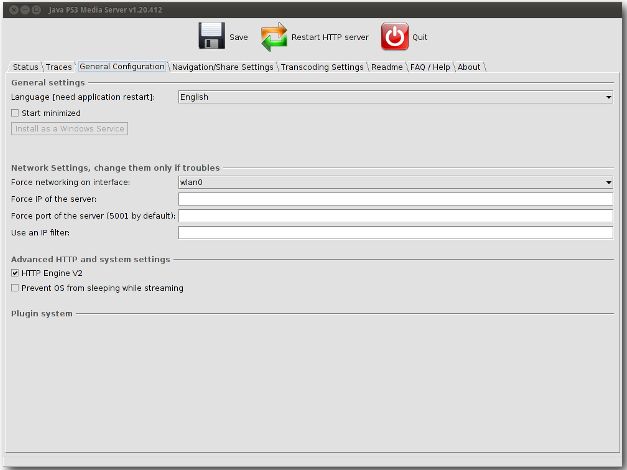 Then select your media server in the main PS3 window, and navigate to Folders – Volumes, and select the networked drive you want. Note that this doesn’t work with Windows Media Player’s UPnP server, but it works fine with Plex.
PS3 Accessing the Network Drive
LEVEL 4: Start watching and listening
Access your content by navigating to Photo, Video, or Music on the PS3’s home screen, and scroll until you see your computer or external drive. If you don’t see your computer’s media server listed, try selecting “Search for Media Servers” from any of the multimedia menus.
PS3 Codec Support
Video: MPG, MP4, AVI, DivX (except v3.11), AVCHD, WMV
Audio: WAV, MP3, AAC, ATRAC, WMA
Photo: JPEG, BMP, GIF, TIFF, PNG
Not supported: Protected content, lossless audio formats (Apple Lossless, FLAC, etc.), RAW image files, or VOB movie files.
Next page: How to copy frequently used files to your PS3 and other tips.
BONUS ROUND: Copy frequently used files to PS3
Even a super-fast 5GHz 802.11n network can’t match the speed of files that live on the PS3 itself. I put my favorite albums, photos, and movies on the PS3’s internal drive via ripping, network copying, and copying from memory cards and USB drives.
To copy files from an external drive, computer, or card to the PS3: Select the folder you want to copy, press Fn+OK on the diNovo or triangle on a SixAxis controller, and choose Copy. Unfortunately you can’t listen to music — or do anything else — during copying.
PS3 Copy Screenshot
The PS3’s 80GB internal hard drive gives you about 65GB for your own media — roomy enough for over 500 albums in 320Kbps MP3 format, or nearly 100 full-length movies in AVI format. If you need more room, the PS3’s hard drive is easily upgradable with any 2.5-inch SATA notebook drive and a screwdriver.
Ripping CDs is painless, though you can’t rip DVDs directly on a PS3.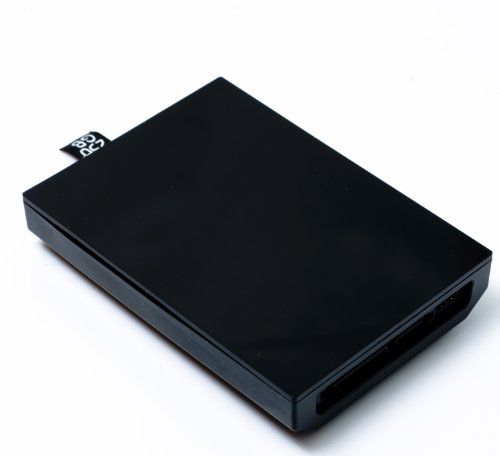 Insert the disc, navigate to it in the PS3 menu, and hit Fn+OK on the diNovo or the triangle button on a SixAxis controller. Select Options – Import. To change the default encoding format and bit rate, go to Settings – Music Settings – Audio CD Import and choose AAC, MP3, or ATRAC, up to 320Kbps. It takes 3-4 minutes to rip a CD to 320Kbps MP3.
PS3 Import Screenshot
The PS3 automatically grabs the artist/song info for CDs from the Internet, and it picks up ID3 tags from music files. When you copy items to the PS3’s internal hard drive, they show up in the PS3 menus as folders arranged alphabetically.
Extra Points: Organize your content on the PS3 by navigating to any folder and hitting Fn+OK (diNovo) or the triangle button (SixAxis controller) to access the Options menu. Scroll up, select Group Content, and choose an ID3 tag to group folders by. This helped me out because the music I copied to my PS3 was in a mishmash of Artist and Album folders; grouping them by Artist made it much easier to find items in a long list.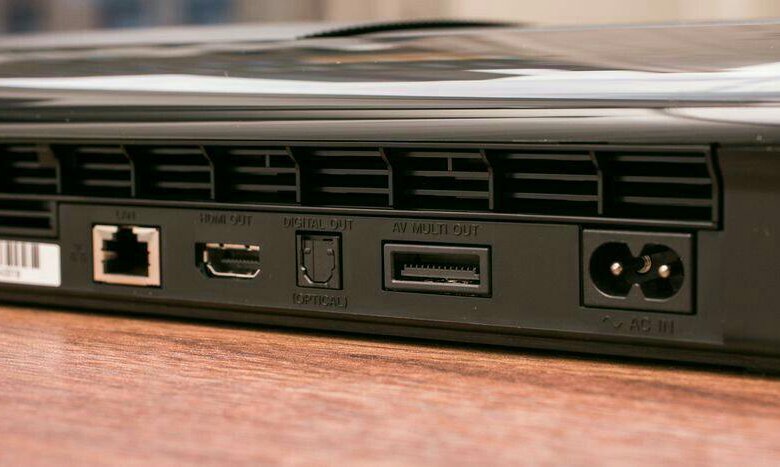 You can also sort folders from the Options menu.
PS3 Group Screenshot
Cheat Codes for Common Problems
If your Windows computer still can’t see your PS3, go to Control Panel – Administrative Tools – Services. Scroll down to Windows Media Player Network Sharing Service and double-click on it. If the service isn’t already started, click on the Start button. Then go to Control Panel – Windows Firewall, and click on Change Settings (Vista only), and click on the Exceptions tab (Vista/XP). Make sure the boxes next to “UPnP Framework” and “Windows Media Player Network Sharing Service” is checked.
On your PS3, you may see some DLNA protocol error notifications (we did). Sometimes this was because one of our computers had gone to sleep, and sometimes it remained a mystery. And operation can be quirky: For example, suddenly the PS3 might temporarily become unable to copy multiple items, or it won’t find all the subfolders in a folder. Odd problems like these usually disappear quickly. If they don’t, try restarting your media server software and PS3.
If you’ve run into any other problems using this guide, please let us know in the Comments section!
Play Online
Setting up your PlayStation 3 as a media server works great if you already own an entirely library of media on your Mac or PC, but with a wealth of streaming content from providers like CNN, Hulu and Comedy Central now hitting the Web, you don’t even have to rip or download shows to watch them online anymore.
But what about on the PS3?
When the PS3 was originally released, streaming media was still in its infancy. Users had limited options, and were forced to use the console’s built-in browser to access their favorite streaming services. Thanks to a steady stream of firmware updates, the PS3 can now stream stuff like Netflix, Hulu Plus, Vudu, Amazon, NHL, MLB.TV, and NFL Sunday Ticket just by downloading their respective apps.
All done? Time to sit back, relax, and veg out.
Editors’ Recommendations
-
PSVR vs. PSVR 2: The difference between the Sony VR headsets
-
The best video game consoles for 2023
-
Xbox Series X vs. Series S
-
The best game-streaming services for 2023
-
The best capture cards for 2023: Xbox, PlayStation, and PC
Playstation 3 Media Server Setup — AhelioTech
LEVEL 1: Connect to your home network (You already have done this)
In the PS3’s main menu, navigate to Settings – Network Settings – Internet Connection, press X on your SixAxis controller and select Enabled. Then go to Internet Connection Settings (also under Network Settings), and select your network name (SSID). Enter the network password if you have one.
(If you have the original WiFi-less PS3 20GB, you can still connect it to your network by plugging the console into your router or extender (like an Apple Airport Express) via Ethernet cable. )
LEVEL 1: Connect to your home network (You already have done this)
In the PS3’s main menu, navigate to Settings – Network Settings – Internet Connection, press X on your SixAxis controller and select Enabled. Then go to Internet Connection Settings (also under Network Settings), and select your network name (SSID). Enter the network password if you have one.
(If you have the original WiFi-less PS3 20GB, you can still connect it to your network by plugging the console into your router or extender (like an Apple Airport Express) via Ethernet cable.)
WINDOWS XP/Vista: Windows users have a number of useful options when it comes to serving media files from their PCs. Windows Media Player 11 still stands as the go-to option since it comes preinstalled with Windows, but a number of third-party applications also exist that offer better file compatibility and more advanced features.
We used Windows Media Player 11 for our guide due to the simplified setup and broad install base – you probably have it on your PC already.
Open Windows Media Player, right-click on Library, and select Media Sharing. Check the box next to “Share my media to:” and select eithe PlayStation 3 or Unknown Device (if the former doesn’t appear).
WMP 11 Library Menu.
LEVEL 4: Start watching and listening
Access your content by navigating to Photo, Video, or Music on the PS3’s home screen, and scroll until you see your computer or external drive. If you don’t see your computer’s media server listed, try selecting “Search for Media Servers” from any of the multimedia menus.
PS3 Codec Support
Video: MPG, MP4, AVI, DivX (except v3.11), AVCHD, WMV
Audio: WAV, MP3, AAC, ATRAC, WMA
Photo: JPEG, BMP, GIF, TIFF, PNG
Not supported: Protected content, lossless audio formats (Apple Lossless, FLAC, etc.), RAW image files, or VOB movie files.
BONUS ROUND: Copy frequently used files to PS3
Even a super-fast 5GHz 802.11n network can’t match the speed of files that live on the PS3 itself. I put my favorite albums, photos, and movies on the PS3’s internal drive via ripping, network copying, and copying from memory cards and USB drives.
To copy files from an external drive, computer, or card to the PS3: Select the folder you want to copy, press Fn+OK on the diNovo or triangle on a SixAxis controller, and choose Copy. Unfortunately you can’t listen to music — or do anything else — during copying.
PS3 Copy Screenshot
The PS3’s 80GB internal hard drive gives you about 65GB for your own media — roomy enough for over 500 albums in 320Kbps MP3 format, or nearly 100 full-length movies in AVI format. If you need more room, the PS3’s hard drive is easily upgradable with any 2.5-inch SATA notebook drive and a screwdriver.
Ripping CDs is painless, though you can’t rip DVDs directly on a PS3. Insert the disc, navigate to it in the PS3 menu, and hit Fn+OK on the diNovo or the triangle button on a SixAxis controller. Select Options – Import. To change the default encoding format and bit rate, go to Settings – Music Settings – Audio CD Import and choose AAC, MP3, or ATRAC, up to 320Kbps. It takes 3-4 minutes to rip a CD to 320Kbps MP3.
The PS3 automatically grabs the artist/song info for CDs from the Internet, and it picks up ID3 tags from music files. When you copy items to the PS3’s internal hard drive, they show up in the PS3 menus as folders arranged alphabetically.
Cheat Codes for Common Problems
If your Windows computer still can’t see your PS3, go to Control Panel – Administrative Tools – Services. Scroll down to Windows Media Player Network Sharing Service and double-click on it. If the service isn’t already started, click on the Start button. Then go to Control Panel – Windows Firewall, and click on Change Settings (Vista only), and click on the Exceptions tab (Vista/XP). Make sure the boxes next to “UPnP Framework” and “Windows Media Player Network Sharing Service” is checked.
On your PS3, you may see some DLNA protocol error notifications (we did). Sometimes this was because one of our computers had gone to sleep, and sometimes it remained a mystery. And operation can be quirky: For example, suddenly the PS3 might temporarily become unable to copy multiple items, or it won’t find all the subfolders in a folder. Odd problems like these usually disappear quickly. If they don’t, try restarting your media server software and PS3.
PS3™ | Video category
Video > Video category
The following icons appear under the (Video) category. The set of icons may vary depending on the conditions of use.
| BD Data Management Utility | Stores administrative data used by Blu-ray Disc™ (BD) discs. | |
|---|---|---|
| Search for media servers | Start searching for DLNA media servers connected on the same network. | |
| Media server | Connect to DLNA media servers and play video files stored on the servers. The displayed icon depends on the server type. | |
| Video editor and uploader | Edit video content stored on the PS3™ system’s system storage. |
|
| BD-ROM / BD-R / BD-RE | Blu-ray Disc (BD) playback. | |
| DVD-ROM / DVD-R / DVD+R / DVD-RW / DVD+RW | Playing a DVD or AVCHD disc. | |
| Data disc | Play video files stored on compatible disc media such as CD-R or DVD-R. | |
| Memory Stick™ | Play video files saved on Memory Stick™.* | |
| SD Memory Card | Play video files saved on SD Memory Card.* | |
| CompactFlash® | Playback of video files stored on CompactFlash®.* | |
| PSP™ (PlayStation®Portable) | Play video files saved on a Memory Stick™ media on a PSP™ system. | |
| PSP™ (PlayStation®Portable) | Play video files stored on the PSP™go system. | |
| Digital Camera | Plays video files stored on a digital camera compatible with the PS3™ system. |
|
| WALKMAN® / ATRAC Audio Device(WALKMAN®) | Plays back video files saved on the WALKMAN®/ATRAC Audio Device (WALKMAN®). | |
| ATRAC Audio Device | Playback of video files stored in ATRAC Audio Device. | |
| USB Device | Play video files saved on a USB mass storage device. | |
| Images from a digital video camera | Play video files saved in the DCIM folder of media. | |
| (folder) | This icon is displayed for folders that were created on media using a computer. | |
| (Files saved on system storage) | Play video files saved on the PS3™ system’s system storage. Thumbnail images are displayed. | |
| (Data downloaded to system storage) | This icon is displayed for video files downloaded to the system storage. |
| * |
When using media with some models, an appropriate USB adapter is required (not included). When used with a USB adapter, the media will be displayed as (USB Device). |
|---|
Hints
- Video content from PlayStation®Store for the PS3™ system has been discontinued.
- For details on the DLNA standard, see (Settings) > (Network settings) > [Media Server Connection] in this manual.
- To play Blu-ray Disc copy-protected content at 1080p resolution, use an HDMI cable to connect the system to an HDCP (High-bandwidth Digital Content Protection) compliant device.
- Thumbnails cannot be played for some video file types with copyright protection.
- When playing a BD containing content with parental control restrictions, playback will be restricted according to the parental control level set on the PS3™ system.
The parental control level of the BD can be set in (Settings) > (Security Settings).
- A password may be required to play a DVD containing content with parental control restrictions. You can set a password in (Settings) > (Security Settings).
- Content with parental restrictions is displayed as . The user can enable playback of such content by entering a 4-digit password. The password can be set or changed in (Settings) > (Security Settings).
- Locked BDs are marked with . To play content contained on such discs, enter the password set by the disc manufacturer.
- In rare cases, discs and other media may not work properly when played on the PS3™ system. This is mainly due to differences in the production process or in the encoding of the program.
- When a non-HDCP (High-bandwidth Digital Content Protection) device is connected to the system with an HDMI cable, the system cannot output video and/or audio.
Viewing 3D content
A 3D-compliant stereo 3D TV and High Speed HDMI cable are required to view stereoscopic 3D content.
Tips
- In some cases when playing Blu-ray 3D™ content, certain items such as menus and subtitles may appear differently on the PS3™ 3D system than on other playback devices.
- In some cases, certain BD-J features may not play in 3D or may not work properly on the PS3™ system.
- Dolby TrueHD audio output from Blu-ray 3D™ content is not supported. The Dolby Digital format is used.
Local Blu-ray Disc (BD)
If a message appears stating that there is not enough free space on the local drive when playing a BD disc, delete unnecessary files from the system drive.
Local storage is a data storage area defined by BD-ROM Profile 1.1 / 2.0. This data is stored on the PS3™ system’s system storage.
QNAP TS-659 Pro II Storage (6 Drives)
With exponential storage growth, today’s businesses need reliable, expandable storage centers with out-of-the-box security, sharing, resource redundancy, and high performance. To meet these challenges, QNAP offers the Turbo NAS TS-659 Pro II NAS.
Disk Space Management
Increase RAID capacity without stopping the drive
You can, if necessary, increase the storage capacity of the drive without turning it off — simply by sequentially replacing old hard drives with new larger ones.
Changing the RAID level without stopping the drive
With this feature, you can buy additional disks and create a RAID array without losing data or disconnecting the storage from the network.
Hard Drive Diagnostic Tools
S.M.A.R.T. allows you to monitor the status of your hard drive using the built-in self-diagnosis hardware. In addition, the drive can check hard drives and scan for errors using HHS technology.
NAS and iSCSI
The storage can be used as a resource sharing and iSCSI client/server at the same time. With the built-in Virtual Disk Drive feature, you can easily expand your storage storage capacity. Using the built-in iSCSI initiator, the QNAP NAS can connect to other iSCSI targets and turn them into virtual disks (up to 8 virtual disks) that become storage volumes. The drive then acts as an iSCSI master: all the user needs to do is simply connect once to this storage.
Virtualization Clusters and Platforms
QNAP Turbo NAS for Business has been certified by VMware to be compatible with the vSphere cloud virtualization platform. With features such as MC/S (multiple connections per session), MPIO (multipath I/O), and Thin-provisioning (thin disk allocation), the QNAP server is a turnkey storage solution for failover clusters or virtualization platforms. Turbo NAS can act as a data storage for both VMware and clusters and virtualization platforms in the Microsoft environment.
QNAP NAS supports the following iSCSI protocol features for flexible and secure deployment: file access and be part of cloud environments using iSCSI.
Flexible management of multiple LUNs
- NAS allows you to create a large number of LUNs (Logical Unit Numbers) and iSCSI targets.
Multiple LUNs can be flexibly connected, disconnected, and moved between different iSCSI targets.
Secure Deployment of an IP SAN Environment
- The Access Control List (ACL) feature allows you to restrict access by unauthorized initiators using CHAP authentication and LUN masking.
Use in cluster and virtual environments
- With support for VMware, Citrix, and Microsoft Windows Failover Clustering, QNAP NAS are affordable NAS for clustered environments and virtual environments.
Advantages of two Gigabit Ethernet interfaces
Several types of load balancing and port aggregation are supported: Balance-rr (Round-Robin), Active Backup, Balance XOR, Broadcast, IEEE 802.3ad, Balancetlb (Adaptive Transmit Load Balancing), and Balance -alb (Adaptive Load Balancing). Support for these modes provides flexibility when deploying the system in different networks.
Failover
In failover mode, the drive uses only one Ethernet port. When a connection is broken, traffic is automatically routed through the other connection.
Load Balancing
The drive will distribute traffic across two channels depending on the seven possible interface configurations. Some options require an Ethernet switch that supports 802.3ad.
Multi-IP Mode
Allows you to use the drive to share network resources on two different subnets.
Complete Backup Solution
NetBak Replicator Utility
- NetBak Replicator allows you to synchronize data and create a schedule for data backup.
Third party software support
- The device has been tested with a range of data backup software such as Veeam Backup & Replication, Acronis True Image, CA BrightStor ARCserve Backup, EMC Retrospect, Symantec Backup Exec, and LaCie Silverkeeper.
RSync drive resource replication
- Set up network backup to another QNAP drive or RSync server. Data protection can be applied to secure network transmission when copying drive resources.
Apple Time Machine backup management
- Apple Time Machine support for backing up important information from a Mac OS computer.
Cloud backup
- QNAP NAS supports Amazon S3, ElephantDrive, Symform and Google Drive internet services for data storage and backup. You can set up both scheduled and real-time backups. At the same time, you will always have access to your information via the Internet and, if necessary, will be able to restore data from cloud storage.
Real Time Replication (RTRR) or FTP servers. In real time, the NAS will monitor all file changes and synchronize to a remote backup server.
Copy from camera/USB drive
- Set the copy button on the front of the case to suit whether you want to copy from camera/USB drive to a storage device or vice versa. The USB device must be connected to the USB port located on the device under the copy button.
Server capabilities
Cross-platform file server
Users of any Windows, Mac OS, Linux and Unix operating systems can connect to the server to exchange information and store data. The system provides ample professional opportunities for creating and managing resources and users.
FTP Server
All-in-one tool to share drive files with friends or clients from the Internet. Data can be transmitted in SSL/TLS mode. Supports port range setting for passive FTP mode, FTP access mode “write-only” is provided
Download manager
Download via FTP, HTTP and BitTorrent without a computer. Support for queues, download configuration, bandwidth management.
Web server and MySQL server
Joomla!, PHP and MySQL/SQLite are supported for creating interactive websites.
Media Portal
Convenient web interface with customizable user rights for accessing media files over a local network or the Internet.
UPnP Media Server
Provides access to videos, music and photos from network media players, Sony PS3 and Microsoft Xbox360 game consoles using Twonky Media, PS3 Media Server or Serviio.
iTunes Server
The music collection stored on the drive is accessible by iTunes on any computer on the local network.
Print Server
Shares USB-connected printers and multifunction devices.
Working with ISO images
Network drives allow you to mount ISO images of CD/DVD/BD discs instead of first burning them to media of the same name. The contents of the ISO image can be accessed over the network.
User and resource management
The drive supports batch creation of users and network resources, which saves time when creating user accounts and resources on the storage. It is possible to hide a resource from the network environment.
QMobile app for Apple and Android mobile devices
The new QMobile app allows you to play music, photos and videos stored in QNAP storage on your portable digital devices, upload photos to a NAS and share them on the Internet — just connect your gadget to networks over Wi-Fi or 3G. In addition, there is the possibility of automatic synchronization every time you connect to the NAS.
Active Directory support
You can import user accounts from an AD domain to quickly create accounts. Users will be able to use the same logins and passwords.
* In QNAP lab testing, 200,000 domain users and groups were successfully imported.
QPKG Platform
Allows you to install QPKG software packages designed specifically for QNAP drives to expand the capabilities of the firmware. Installing the QPKG package takes place in two clicks: «Download» and «Install».
Management and system tools
User and resource management
Turbo NAS TS-659 Pro II supports batch creation of users and network resources, which saves time when creating user accounts and resources on storage. It is possible to hide a resource from the network environment.
Policy-based IP blocking
To prevent network attacks, you can create a set of rules that allow, deny, or block IP addresses, IP address ranges, or entire subnets from which the drive is accessed via SSH/Telnet protocols /HTTP(S)/FTP/SMB/AFP.
Device Scheduler
Allows you to flexibly set the schedule for the drive. You can set the days, hours and minutes for the system to automatically turn on, turn off or restart.
SNMP service
The built-in SNMP agent allows you to manage the device and send system messages via the SNMP protocol.
Sleep mode
If there is no access for a certain time (this parameter is configurable), the device enters sleep mode with reduced power consumption, hard drive speed and noise level.
Automatic system fan control
Fan speed automatically adjusts to drive temperature. It is possible to set temperatures by the user.
E-mail and SMS alerts
Configure the SMTP and SMSC settings to receive system error and warning messages by e-mail or SMS.
Secure connection over SSH and SSL (HTTPS)
Security certificate and RSA private key issued by a CA in X.509 formatPEM, will allow you to connect to the storage in secure mode via SSL.
Syslog
All system events as well as event and connection logs can be stored on the syslog server.
Syslog
To track file access over SMB, FTP, iSCSI, AFP, HTTP, HTTPS, Telnet, and SSH, and network services requested by users.
Detailed system information
For parameters such as processor, memory, packets sent and received, system uptime, temperature, hard drives, fan speed.
Expandable
Turbo NAS TS-659 Pro II is equipped with USB ports, allowing you to connect multiple external drives for data backup or storage capacity expansion.
Video Surveillance System
Surveillance server supporting leading IP cameras
- IP camera support for monitoring, video recording and playback. The list of tested and 100% compatible cameras includes AXIS, D-Link, IPUX, LevelOne, Linksys, Panasonic, Vivotek.
Audio and video monitoring, recording and playback via the Internet
- MPEG-4 and Motion JPEG video recording
- Real-time monitoring and recording up to 30 fps per channel
- Two-way audio support for monitoring and voice transmission
- Easy installation and management from any computer over a local network or the Internet
Power Management
Wake on LAN
Wake on LAN allows you to turn on the NAS remotely.