How to Boot Raspberry Pi from USB?
Raspberry Pi
5 months ago
by Aaliyan Javaid
On paper SD cards have a bandwidth of almost 50 MBps but they achieve 38 MBps which is quite low. On the other hand, the USBs have relatively higher bandwidth at least more than that of the SD cards, so they tend to be a better choice for Raspberry Pi, if you are absolute fanatic about the speed then go for an SSD storage for your Pi.
Booting Raspberry Pi from USB
The process of booting the Raspberry Pi using the USB drive is quite easy so just follow the steps below and you are good to go:
Step 1: For booting the Raspberry pi there are several software that one can use as an imager like Etcher, but it is recommended to use the Raspberry Pi iImager. So, first download the Raspberry Pi Imager for your computer by clicking on this link:
Step 2: Once you have installed the Raspberry Pi Imager, open it up and plug in the USB into your computer:
Step 3: Next choose the OS you want to install on your Raspberry Pi by clicking on the “Operating System”:
If you already have the image file of the operating system downloaded into your computer, then you can also load it into the Imager by clicking on the “Use Custom”:
Moreover, if you do not want to install the recommended one and want to go for a previous version then you can click on the “Raspberry Pi (other)” option:
And a list of operating system will tend to appear, you can choose which you want to install on Raspberry Pi:
Step 4: Next, select your USB that you have connected to your computer by clicking on the Storage tab and select your USB drive as the storage for Raspberry Pi:
Step 5: The next step is to write the selected operating system of Raspberry Pi to the USB drive and for that click on the Write button:
Next, click “YES” to continue:
Now, the Imager will start writing the USB drive, wait for it as it can take some time:
Once the Imager has written the USB it will start to verify the USB which might also take some time:
Once the process is completed, click on “Continue” and remove the USB from your computer:
Step 6: Once the USB is booted with the Raspberry Pi operating system plug it into the USB 2. 0 port of Raspberry Pi because not all the SATA to 3.0 of Raspberry Pi 4 is compatible.
Note: Connect bootable USB with 3.0 ports of Raspberry Pi.
Conclusion
Raspberry Pi OS can also be booted from USB if you don’t have an SD card. To boot Raspberry Pi using USB, one needs to have a Raspberry Pi Imager app on PC, from there select the OS you want, select the USB as storage device and write OS on it. Once the USB is ready, plug it into your Raspberry Pi and turn it on, you will see Raspberry Pi OS on your display.
About the author
Aaliyan Javaid
I am an electrical engineer and a technical blogger. My keen interest in embedded systems has led me to write and share my knowledge about them.
View all posts
How to Boot Raspberry Pi 4 / 400 From an SSD or Flash Drive
Skip to main content
When you purchase through links on our site, we may earn an affiliate commission.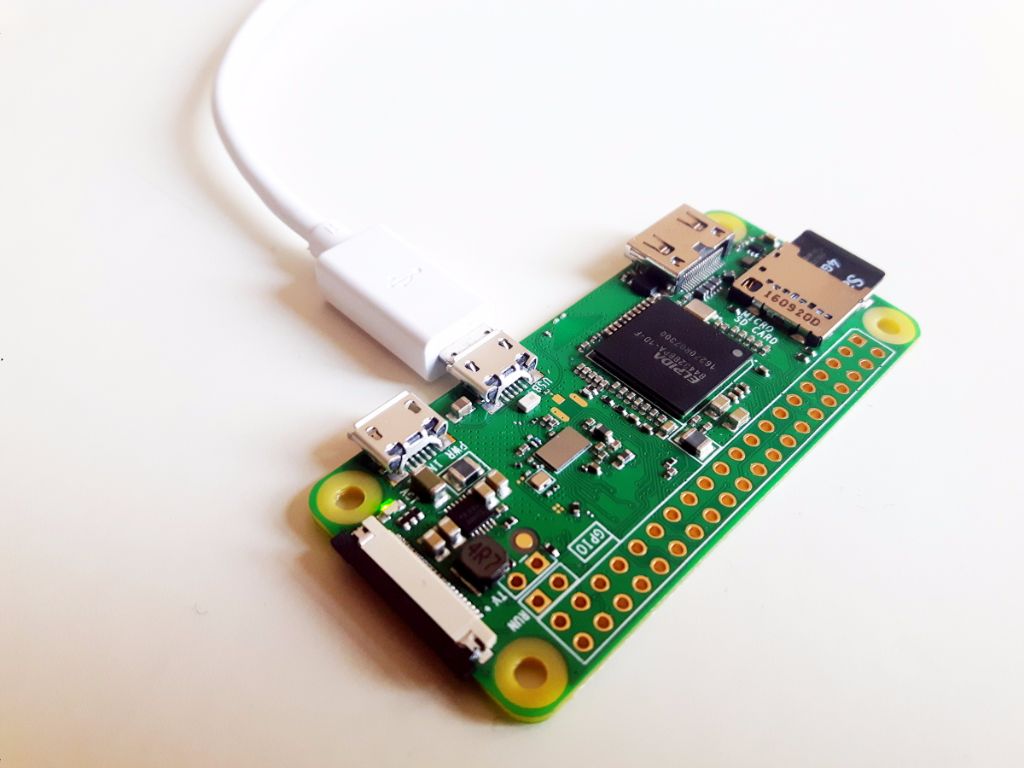 Here’s how it works.
(Image credit: Tom’s Hardware)
Editor’s Note (7/24/2021): We have updated this tutorial to include how you can boot your Raspberry Pi 400 from USB.
By default, Raspberry Pi boots up and stores all of its programs on a microSD memory card, which has a maximum theoretical bandwidth of 50 MBps on the Raspberry Pi 4 and just 25 MBps on prior models. In real-life, even the best microSD cards for Raspberry Pi get no faster than about 38 MBps in sequential writes. Using an external SSD as your main storage drive could speed things up significantly and, with a few commands and a simple firmware update, you can do just that.
In our real-life tests of a Raspberry Pi 4 with SSD last year we got impressive performance with sequential transfer rates as high as 140 MB / 208 MBps for reading and writing. You can also use a standard USB flash drive, though we found the performance worse than a microSD card on many tasks.
If you want to start with a fresh install of Raspberry Pi OS, simply follow the instructions in our tutorial on how to set up Raspberry Pi or how to do a Raspberry Pi headless install.
The latest versions of Raspberry Pi OS (as of April 29 2021 or later) have many of the necessary changes built-in. The Raspberry Pi Imager now has a much simpler means to prepare a Raspberry Pi 4 / 400 for USB boot. These instructions will set the Raspberry Pi 4 / 400 to look for a USB boot device, if none is found it will then boot from the micro SD card.
1. Download and install Raspberry Pi Imager from the Raspberry Pi website.
2. Insert a spare micro SD card into your computer. Note that this card will be erased.
3. Launch Raspberry Pi Imager and under Operating System scroll down to Misc Utility Images and left click to open the next menu.
(Image credit: Tom’s Hardware)
4. Select Bootloader and then Select USB Boot. This will return us to the main menu.
(Image credit: Tom’s Hardware)
5. Under Storage click on the button and select the micro SD card. Double check that you have the right drive before proceeding.
(Image credit: Tom’s Hardware)
6. Click on Write to download and write a configuration image to the micro SD card. When done remove the card from your computer.
(Image credit: Tom’s Hardware)
7. Insert the micro SD card into your Raspberry Pi 4 / 400 and power on. The green activity light will blink a steady pattern once the update has been completed. If you have an HDMI monitor attached, the screen will go green once the update is complete. Allow 10 seconds or more for the update to complete, do not remove the micro SD card until the update is complete.
8. Power off the Raspberry Pi and remove the micro SD card.
9. Into your Raspberry Pi, insert a micro SD card with Raspberry Pi OS and boot from micro SD to the desktop. This may take a little longer as the Raspberry Pi is looking for USB boot devices. If you do not have a Raspberry Pi OS micro SD card, follow our how to setup Raspberry Pi guide.
10. Launch SD Card Copier from the Accessories section of the start menu. Ensure that your SSD or Flash drive is connected to the Raspberry Pi using a USB 3 port.
(Image credit: Tom’s Hardware)
11. Select the Copy From Device (micro SD card), and the Copy To Device (the SSD). Double check that the correct drives are selected and click Start to copy the files across. The process should take around ten minutes to complete.
(Image credit: Tom’s Hardware)
12. Shut down the Raspberry Pi.
13. Remove the microSD card.
14. Power up the Raspberry Pi and it will boot from the USB SSD or Flash drive.
(Image credit: Tom’s Hardware)
Keep in mind that, if you are using an external drive that saps a lot of power from the bus, you may have issues (which you could probably solve by using a drive that has its own power source or by using a powered USB hub).
For example, we had problems using a bus-powered, external Kingston HyperX SSD, which booted but — perhaps because of how much power it was using — none of our peripherals would work. A SATA SSD in a externally powered dock worked fine as did a USB Flash drive.
Today’s best Raspberry Pi 4 deals
5 Amazon customer reviews
☆☆☆☆☆
No price information
Check Amazon
Get instant access to breaking news, in-depth reviews and helpful tips.
Contact me with news and offers from other Future brandsReceive email from us on behalf of our trusted partners or sponsors
Avram Piltch is Tom’s Hardware’s editor-in-chief. When he’s not playing with the latest gadgets at work or putting on VR helmets at trade shows, you’ll find him rooting his phone, taking apart his PC or coding plugins. With his technical knowledge and passion for testing, Avram developed many real-world benchmarks, including our laptop battery test.
Topics
Raspberry Pi
Tom’s Hardware is part of Future US Inc, an international media group and leading digital publisher. Visit our corporate site .
©
Future US, Inc. Full 7th Floor, 130 West 42nd Street,
New York,
NY 10036.
How to set up a Raspberry Pi — MAKE MORE 2023
01 of 07
Let’s get a Pi for projects
You may have recently read my «What is a Raspberry Pi» article and then my «Raspberry Pi Guide» to help guide you through your purchase.
You’ve placed your order online, your shiny new Pi has been delivered and now you need to set it up for the first time.
Setting up a Raspberry Pi is reasonably simple, just a few steps that might catch you if you haven’t done certain things before. nine0003
This guide will help you get up and running using a common Raspbian desktop system, including peripherals and a monitor.
This article is based on setting up a Raspberry Pi with a Windows PC.
02 of 07
What you need
hardware
Here are the physical «things» you’ll need to set up your Raspberry Pi for desktop use:
- PC/Laptop (I’m using a Windows 10 machine ) nine0030
- SD card reader (integrated or external / USB)
- Raspberry Pi (we use B+ model)
- HDMI monitor or TV
- HDMI cable
- SD card (Micro-SD if you are using model B+ or later. Go at least 8 GB)
- micro-USB power supply (official power supply is best used)
- Network cable
- USB keyboard
- USB mouse
Software
You will also need to download and install some software:
SD Formatter — so that your SD card is properly formatted
Win32DiskImager — write the Raspbian image to your formatted SD card
03 of 07
Load the operating system 9005
You won’t get anywhere without an operating system on an SD card, so let’s do that part first.
Raspbian
There are many different operating systems for the Raspberry Pi, but I always suggest that beginners start with Raspbian. nine0003
This is the Raspberry Pi Foundation’s officially supported operating system, so you’ll find most resources online using this in projects, examples, and tutorials.
Download Image
Head to the Raspberry Pi Foundation download page and grab the latest version of Raspbian. You will notice that there is a «Lite» version — ignore this time.
Your download will be a zip file. Extract («unzip») the contents to a folder of your choice using the normal context menu context menu. You should leave an «image» (.img file) to write to the SD card. nine0003
Writing «images» on SD cards may be a new concept for you, but we’ll cover it here.
04 of 07
Wipe the SD card
Software check
You will need the SD Formatter software to complete this step. If you follow the «What do you need» step, you should install this. If not, come back and do it now.
Wipe the card
I always wipe my SD cards before installing the operating system — even if they are new. This is a «just in case» step and a good habit. nine0003
Open the SD Formatter and check that the drive letter matches your SD card (especially if you have multiple devices installed on your computer).
The default settings work fine, so don’t touch them. For reference, these are «quick format» and «size adjustment».
After formatting the card, proceed to the next step.
05 of 07
Write Raspbian Image to SD Card
Software Check
You will need the Win32DiskImager software to complete this step. If you follow the «What do you need» step, you should install this. If not, come back and do it now.
Write image
Open Win32DiskImager. This program not only allows you to write images to SD cards, but can also backup (read) existing images.
With your SD card already on your PC from the previous step, open Win32DiskImager and you will be presented with a small window. Click on the blue folder icon and select the downloaded file of the extracted file. The full path to the image file should be displayed. nine0003
To the right of the window is the drive letter — this must match the drive letter of your SD card. Make sure it’s correct.
When you’re ready, select «Write» and wait for the process to complete. Once everything is ready, safely remove the SD card and place it in the Pi’s SD slot.
06 of 07
Connect the cables
This part is pretty self explanatory as you will see most of these connections on other devices in your home such as your TV. However, to clear any doubts, let’s review them:
- Your HDMI cable connects to the Pi and goes into your monitor/TV.
- Your ethernet cable runs from your Pi to your router
- Your keyboard and mouse connect to any of the USB ports
The only other cable to connect is micro USB power. Make sure it’s off on the wall before sticking it.
Your SD card must be installed from the last step.
07 of 07
First run
Power on
With everything connected, turn on the monitor and then turn on your Raspberry Pi on the plug.
When you turn on your Raspberry Pi for the first time, it may take a little longer to go (bootable) than usual. Watch the screen go through lines of text until it turns you into a Raspbian desktop environment.
Refresh
At this point you’re ready to go, but it’s always a good idea to run an upgrade. nine0003
Select the small monitor icon in the Raspbian taskbar to open a new terminal window. Type the following command (in lower case) and press enter. This will download the latest list of packages:
sudo apt-get update
Now use the following command in the same way by pressing Enter again. This will download all new packages and install them so you are up to date with all you are using:
sudo apt-get update
nine0003
We’ll cover updates soon in another post, including some additional commands that might come in handy.
Ready to go
That’s it: your Raspberry Pi is set up, running and ready for your first project!
UUGear RasPiKey User Manual — Manuals
RasPiKey is a 16/32GB eMMC module that can be inserted into Raspberry Pi’s micro SD card slot.
It works as a micro SD card with better read/write performance (especially for 4k read/write) and has a longer lifespan. The
RasPiKey comes pre-installed with Raspbian (Raspberry Pi OS) and allows you to set up SSH login and Wi-Fi connection before booting your Raspberry Pi. As a result, you can use your Raspberry Pi without a display, keyboard, and mouse, and access your Raspberry Pi via an SSH session on your PC. nine0003
RasPiKey is a plug and play accessory for most Raspberry Pi models. If you have a Raspberry Pi 4B from a fairly old batch that has fairly old firmware that cannot recognize the RasPiKey, you may need to update your Raspberry Pi 4B’s bootloader beforehand.
There are two varieties of RasPiKey, the 16 GB RasPiKey comes with a black lanyard and the 32 GB RasPiKey comes with a blue lanyard.
What’s in the bag?
Each RasPiKey pack contains:
4k read: ~11MB/s write
~4k0 s
4k read: ~15MB/s
4k write: ~15MB/s
before the loading of Raspikey Pi 4B and you have a display, keyboard and monitor connected to your Raspberry Pi, you can simply insert the RasPiKey into the micro SD card slot and directly use it like a normal SD card. The RasPiKey comes pre-installed with the OS so it can directly boot your Pi. nine0003
Update the bootloader (optional for Raspberry Pi 4B only)
If you are using a Raspberry Pi 4B, you may or may not need to update the bootloader to support the RasPiKey. It depends on the Raspberry Pi 4 you have: an earlier batch of Raspberry Pi 4 may have a rather old bootloader that the RasPiKey could not recognize. If your Raspberry Pi 4 was recently purchased, then most likely you do not need to update its bootloader, and it can be downloaded directly from the RasPiKey. nine0003
You can run this command to check the bootloader on your Pi 4: vcgencmd bootloader_version
If the printed bootloader release date is later than September 3, 2020, you do not need to update the bootloader for your Pi 4.
If you need to update the bootloader. You can find the official released bootloader here.
Here we offer a much easier way to update the bootloader:
- Download this update_bootloader.zip file, or you can find it in the RasPiKey boot section. nine0030
- Extract its contents to the micro SD card
- Insert the micro SD card into the Raspberry Pi and turn it on
- Wait one minute.

- Turn off and remove the micro SD card.
By following these steps, you have updated your Raspberry Pi 4B bootloader to work with the RasPiKey.
Enable SSH login and set up Wi-Fi connection
If you want to use Raspberry Pi without connecting a monitor, keyboard or mouse, you can enable SSH login and set up Wi-Fi connection before booting Raspberry Pi with RasPiKey. nine0187 You will need a computer with a micro SD card reader. If your computer does not have a Micro SD card reader, you can use a USB SD card reader.
After inserting the RasPiKey into a micro SD card reader, its «boot» partition will be recognized as a USB drive on your computer (commonly referred to as «boot»). There you can find these files:
- RasPiKey.exe
- RasPiKey_MAC
- RasPiKey_ARM
- RasPiKey_X86
- Prayer.zip
Depending on the computer and operating system used, you will use one of them to complete the setting:
| and operating system | ACTION | Run RasPiKey. exe exe |
| iMac, Mac Pro or MacBook + Mac OS X | Run RasPiKey_MAC | |
| Raspberry Pi + Raspbian | Run RasPiKey_ARM | |
| PC + Linux | Run RasPiKey_X86 | |
| Other | Unzip RasPiKey.zip and edit the files inside. |
When you run the file executable, it will ask you to enter some parameters to set up a Wi-Fi connection:
If you don’t have Wi-Fi or prefer to use a cable to connect your Raspberry Pi to the network, you can enter here fictitious data. The program will generate a «wpa_supplicant.conf» file and an empty «ssh» file in the same directory. The «wpa_supplicant.conf» file contains options for setting up a Wi-Fi connection, and an empty «ssh» file will allow you to login via SSH. nine0003
If for some reason you cannot run the appropriate executable file, you can unzip the RasPiKey.zip file and edit the «wpa_supplicant.conf» file. The «SSH» file does not need to be edited because it is empty.
Notes: The «wpa_supplicant.conf» and «ssh» files will be automatically deleted after booting your Raspberry Pi with the RasPiKey, however the configuration has been done and you don’t need to do it again (unless your Wi-Fi settings are changed). nine0003
Using the RasPiKey
You can use the RasPiKey like a normal micro SD card with OS installed. You insert it into the micro SD card slot on your Raspberry Pi and then turn it on.
With a display, keyboard, and mouse connected to your Raspberry Pi, you have nothing to worry about and will immediately enjoy using the Pi with the RasPiKey.
If your Pi doesn’t have a display, keyboard, or mouse, you can use it via an SSH session, which requires your Pi to be connected to your network. If you have set up a Wi-Fi connection beforehand, you just need to wait for the Raspberry Pi to finish downloading and connect to your Wi-Fi. Or you use a network cable to connect your Raspberry Pi to your local network. nine0003
Given an empty «ssh» file located in the RasPiKey’s boot partition, you can ensure that SSH login is enabled on your Raspberry Pi. During the first boot from the RasPiKey, your Raspberry Pi will adjust the template size and reboot, this will take a little longer until you can use SSH.
You can use this command to login via SSH session: SSH [email protected]
Sometimes he may complain about not knowing «Raspberry Pi» master. In most cases, this problem will disappear after a while. If the problem persists, you can use this command to list all the machines on your network: arp -a
This command exists on Windows, Mac OS X and Linux, what a handy tool!
If you run this command before and after booting up your Raspberry Pi, you can find out what IP address your Pi belongs to by comparing the output of this command. You can then login with: SSH [email protected]
DDR52 sync mode
eMMC DDR mode was introduced in the MMC 4. 4 standard. The DDR52 clock mode can support up to 52MHz and can nearly double the performance of an eMMC module (such as RasPiKey) on a Raspberry Pi.
Raspberry Pi firmware update may be required to support DDR52 mode. Although a patch to support DDR52 timing mode has been fixed, at the time of writing this chapter the patch has not yet been replicated to the official repository, once that happens you can update the firmware with the following commands:0204 sudo apt update, sudo apt full update
After updating and rebooting your Raspberry Pi, you can run this command to confirm if DDR52 mode is supported: sudo cat /sys/kernel/debug/mmc0/ios
It should print something like this:
clock: 52000000 Hz
actual clock: 50000000 Hz
vdd: 21 (3.3~3.4V)
bus mode: 2 (push-pull)
chip select: 0 (don’t care) nine0187 power mode: 2 (on)
bus width: 2 (4 bits)
timing specification: 8 (mmc DDR52)
signal loudness: 0 (3. 30V)
30V)
driver type: 0 (driver type B)
Above the result means DDR52 clock mode was supported and your RasPiKey has much better performance on Raspberry Pi 4.
However, if you see something different like:
clock: 52000000 Hz
actual clock: 50000000 Hz
vdd: 21 (3.3 ~ 3.4V)
bus mode: 2 (push-pull)
chip select: 0 (don’t care)
power mode: 2 (on)
bus width: 2 (4 bits)
time specification: 1 (mmk high-speed)
tone loudness: 0 (3.30V)
driver type: 0 (driver type B)
This means you need to update the firmware to support DDR52 clock mode.
You can run this command to upgrade: sudo apt full-upgrade
tests
We are following Jeff Gerling’s blog posts (thanks Jeff) to run tests for the RasPiKey. Jeff wrote this blog post about benchmarks on a Raspberry Pi 3B+. We run exactly the same tests with the RasPiKey and add the result to the diagram from Jeff’s blog post:
Jeff also wrote another blog post about testing on the Raspberry Pi 4B. We run the exact same tests again with the RasPiKey and add the result to the chart from Jeff’s blog post:0205
Tests on Raspberry Pi 4B (with DDR52 clock mode supported by firmware)
Please note that the above tests are taken on a Raspberry Pi 4B with updated firmware to support DDR52 clock mode. Please read the chapter «DDR52 Timing Mode» for more details.
Confirmation
We’d like to thank Tim Gover (Raspberry Pi Trading Ltd) and his team supporting the RasPiKey (and other eMMC modules) on the Raspberry Pi 4B, and their work in supporting the new DDR52 timing mode. nine0215
Raspberry Pi 4B.
Add test sheet for Raspberry Pi 4B Read more about bootloader update0177
| UUGear RasPiKey [pdf] RasPiKey Plug Play 16G, 32G eMMC User Manual for Raspberry Pi |
