How to Build a Raspberry Pi-Powered Multi-Room Audio System
Skip to main content
Tom’s Hardware is supported by its audience. When you purchase through links on our site, we may earn an affiliate commission. Here’s why you can trust us.
(Image credit: Tom’s Hardware)
Multi-room audio systems can cost a pretty penny, with Sono’s two-speaker system starting at $379. But who needs to buy an expensive set of wireless speakers when you can use some Raspberry Pis and any 3.5mm wired speakers you have handy to achieve the same effect?
In this tutorial, we will use our Raspberry Pi 4s and speakers / receivers (with 3.5mm audio inputs) to play music from our favorite streaming service perfectly in sync via Bluetooth from our phone, tablet, or computer. We’ll show you how to do this with a single speaker and Raspberry Pi and then explain how to replicate it in additional rooms.
Instead of Raspberry Pi OS, we will use BalenaSoundOS to make the bluetooth connection visible (to our other devices) and eliminate the need for a monitor, keyboard, and mouse for our Raspberry Pi.
What You’ll Need
- Raspberry Pi 4, or Raspberry Pi 400:one unit per room..
- 8 GB (or larger) microSD card, U3 cards recommended (see best Raspberry Pi microSD cards). One per room.
- 3.5 mm audio cables
- Speakers with 3.5mm audio input and/or receivers with 3.5mm audio input.
- Power Supplies for your Raspberry Pis
- Windows, Mac or Chromebook
- Optional: Smartphone or tablet
Notes
- During the writing of this article, we found the Raspberry Pi 4 with a 3.5 mm audio input to be the best hardware setup. The Pi 400 requires a USB speaker since it does not have an audio jack output.
- We tested with multiple Raspberry Pi 3B+ devices, but were unable to find the bluetooth signal during testing for this project.
- You do NOT need a monitor, mouse, or keyboard for your Raspberry Pi in this project.
- Timing: Please plan for an hour to complete this project.
- This is an excellent project for repurposing old receivers.
 If you have a non-bluetooth receiver with a 3.5mm jack input, you can connect your speakers to your receiver and your receiver to your Raspberry Pi.
Set Up Balena Sound
Instead of the standard Raspberry Pi OS, we will flash BalenaSoundOS to our microSD card. BalenaSound is pre-built with a lite client for music streaming via the Pi’s Bluetooth and eliminates the need for attaching a monitor, mouse, and keyboard to our Raspberry Pi.
1. Create a free BalenaCloud account here. If you already have a BalenaCloud account, login to BalenaCloud.
2. Deploy a balena-sound application. Note: You must already be logged into your Balena account for this to automatically direct you to creating a balena-sound application.
3. Click “Deploy to Application.”
(Image credit: Tom’s Hardware)
4. Select «Devices» from the left column menu in your Balena-Sound Dashboard, and click «Add device. «
«
5. Select your Device type, (Raspberry Pi 4, Raspberry Pi 400, or Raspberry Pi 3).
6. Select the radio button for Development.
7. If using Wifi, select the radio button for «Wifi + Ethernet» and enter your Wifi credentials.
(Image credit: Tom’s Hardware)
8. Click «Download balenaOS» and a zip file will start downloading.
9. Download, install, and open the Balena Etcher app to your desktop (if you don’t already have it installed). Raspberry Pi Imager also works, but Balena Etcher is preferred since we are flashing the BalenaOS.
10. Insert your microSD card into your computer.
11. Select your recently-downloaded BalenaOS image and flash it to your microSD card. Please note that all data will be erased from your microSD card.
(Image credit: Tom’s Hardware)
Connect the Hardware and Update BalenaOS
12. Remove the microSD card from your computer and insert into your Raspberry Pi.
(Image credit: Tom’s Hardware)
13. Connect the speaker to your Pi via 3.5 mm audio cable.
(Image credit: Tom’s Hardware)
14. Power up your Pi. Allow 15 minutes for your Pi to boot up and BalenaOS to update. Only the initial boot requires the long update. You can check the status of your Pi Balena Sound OS in your BalenaCloud dashboard.
(Image credit: Tom’s Hardware)
If you are using a Raspberry Pi 400, connect a USB speaker instead of the 3.5mm audio jack. (I did not have a USB speaker handy; instead I tested with USB headphones.)
(Image credit: Tom’s Hardware)
15. Wait for your Raspberry Pi BalenaOS update and confirm all systems are running.
(Image credit: Tom’s Hardware)
16. From your smartphone, tablet, or computer, navigate to your Bluetooth settings and look for BalenaOS XXXX and pair it to your device.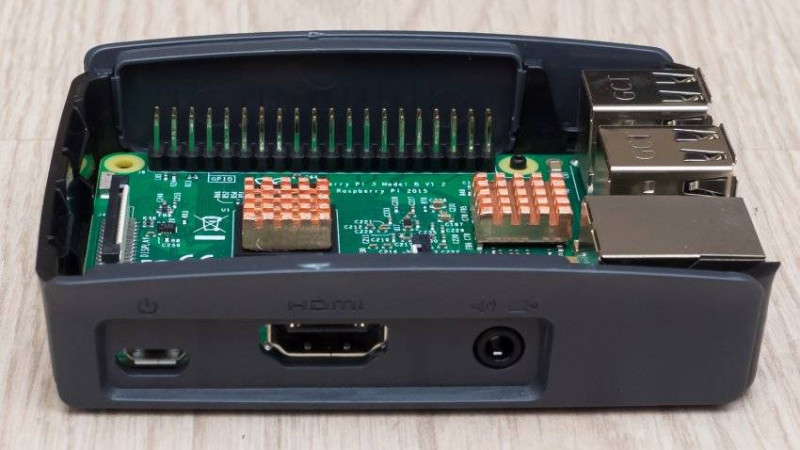
(Image credit: Tom’s Hardware)
17. Connect the device as the sound output for your smartphone, tablet or computer.
18. Go to your streaming service and play a song. The music should stream via Bluetooth to your Raspberry Pi and play from the attached speaker.
(Image credit: Tom’s Hardware)
We tested on Amazon Music and Spotify and all worked flawlessly.
Multi-Device / Multi-Room Sync
(Image credit: Tom’s Hardware)
19. For multi-device sync, repeat steps 4-15 to set up more Raspberry Pi devices with speakers (or your receiver). You can flash the same image from step 9 if you are using the same model Raspberry Pi. For example, if you set up a Pi 4, and you have a 2nd Pi 4, flash the same image. If you have a Pi 400, then repeat steps 4-8 to create a new device image.
20. With the same bluetooth device connected as in step 17, music can now stream to all Raspberry Pis and their connected speakers.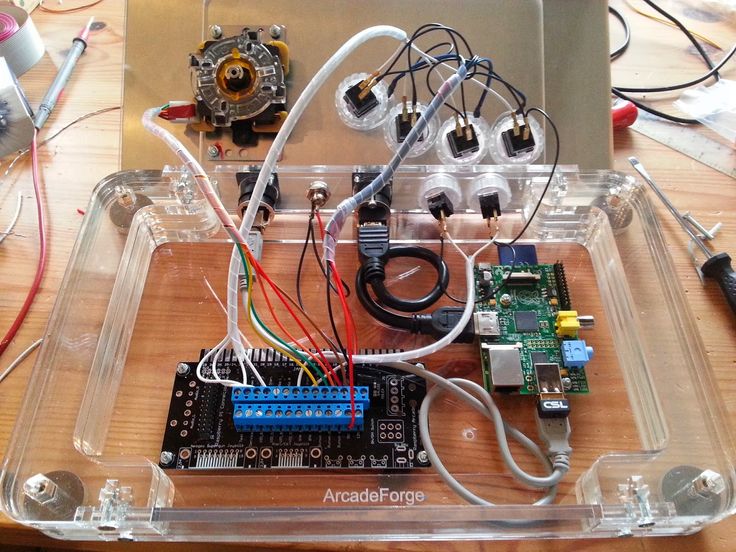 You will only need to connect one Raspberry Pi via bluetooth to your phone, tablet, or computer to stream to all Raspberry Pi Balena Sound speakers.
That’s it! You can now create multi-room / multi-device sound experiences in your home with your Raspberry Pi devices while DJing from your smartphone, tablet, or computer.
Topics
Raspberry Pi
Tom’s Hardware is part of Future US Inc, an international media group and leading digital publisher. Visit our corporate site .
©
Future US, Inc. Full 7th Floor, 130 West 42nd Street,
New York,
NY 10036.
Build your own multi-room audio system with Bluetooth, Airplay, and Spotify using Raspberry Pis
Last updated: 6th October 2020
Turn your spare Raspberry Pis and speakers into a fleet of synchronized multi-room audio players. You can start from scratch or upgrade an existing balenaSound device to add the multi-room functionality for free!
Before you start
Updates
We’re continually updating this post along with the project code, you can find a log of all our updates below.
- 6th October 2020: Updated instructions for balenaSound v3.0
- 7th July 2020: Added Deploy with balena method and links to official app site for docs, troubleshooting, and more.
Introduction
balenaSound already allowed you to stream audio from multiple sources with minimal effort. Now you can have a fleet of devices playing perfectly synchronised audio all over your place without paying a premium.
The latest version retains the previous functionality, but now, if you have more than one device, the audio will be seamlessly and automatically sent to all the other devices in your application.
If you have a couple Raspberry Pis and some spare speakers or an old stereo, you can build your own Sonos stand-in; read on and give it a go!
Your tunes are sent from your phone/laptop to all the devices in your app via WiFi.
Hardware required
For each room you will need the following:
- Server device: Raspberry Pi 3A+/3B/3B+/4B (device support table)
- Client devices: Raspberry Pi 3A+/3B/3B+/4B/Zero W
- SD Card (we recommend 8GB Sandisk Extreme Pro)
- Power supply
- 3.
 5mm audio cable to the input on your speakers/Hi-Fi (usually 3.5mm or RCA). Alternatively the HDMI port provides digital audio out.
 - Optional DAC (compatibility list)
Note: the Raspberry Pi Zero cannot be used on it’s own as it has no audio output. To use the Pi Zero you’ll need the optional DAC HAT to get the project working.
Software required
- A download of balenaSound from GitHub
- Software to flash an SD card (such as balenaEtcher)
- A free balenaCloud account to setup and manage the Pi
- (Optional) Download and install the balena CLI tools — to be installed on your computer, allowing us to install the project code on the Pi
Tutorial
Provision your devices
In this guide we will only cover adding additional devices to your existing balenaSound application. If you want a detailed step-by-step tutorial on how to start from scratch you can check the original balenaSound guide.
The quickest way to get started
You can also use Deploy with balena to deploy balenaSound to a application within your balenaCloud account. Once you’re logged in, use this button:
Otherwise, read on!
A multi-room audio streaming solution is no good if you only have one device in your fleet. For this project we are going to add several devices to our application, each device will stream audio to a different room. If you are asking yourself, “how many devices can I add?”, the answer is a simple one. balenaCloud is designed to handle fleets with thousands of devices, so you can add as many as you have (or until you run out of rooms in your house)! Remember that for each device you will need a speaker, headphones or a Hi-Fi system to hear the audio.
In order to provision your new devices you need to:
- Download the balenaOS disk image from your application page on the dashboard
- Flash it to an SD card
- Insert the SD card and boot your device
If you already have one or more devices running balenaSound, make sure to add the new ones to the same balena application, allowing them to download the same software automatically.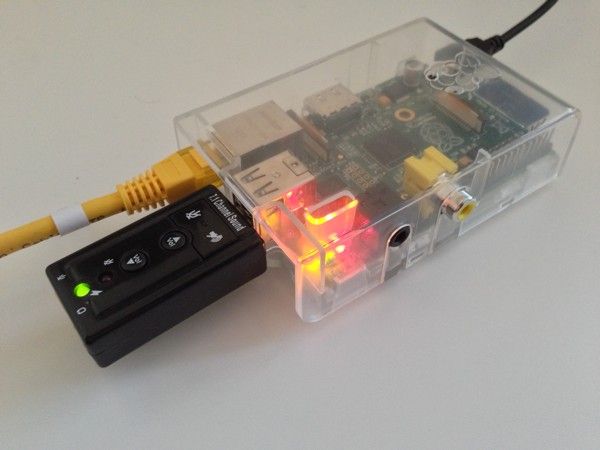 No need to flash the SD cards again, they can be upgraded to the new version simply by pushing the latest software over the air!
Note: You can mix device types as long as your application type supports it. A great way of maximizing device compatibility is to select Raspberry Pi 1/Zero as your application type. This enables you to add any board from the Pi family, and even the balenaFin. Read more about managing multiple device types in one application here.
When your newly provisioned devices boot, they will automatically register with balenaCloud. You should be able to see them on the dashboard:
Update balenaSound to the latest version
We now need to get the latest version of balenaSound pushed to our devices. It doesn’t matter if you’re updating your old balenaSound installation or working with a brand new one, the process is the same. To push the updated code we will leverage the power of balenaCloud to do so without even touching the devices.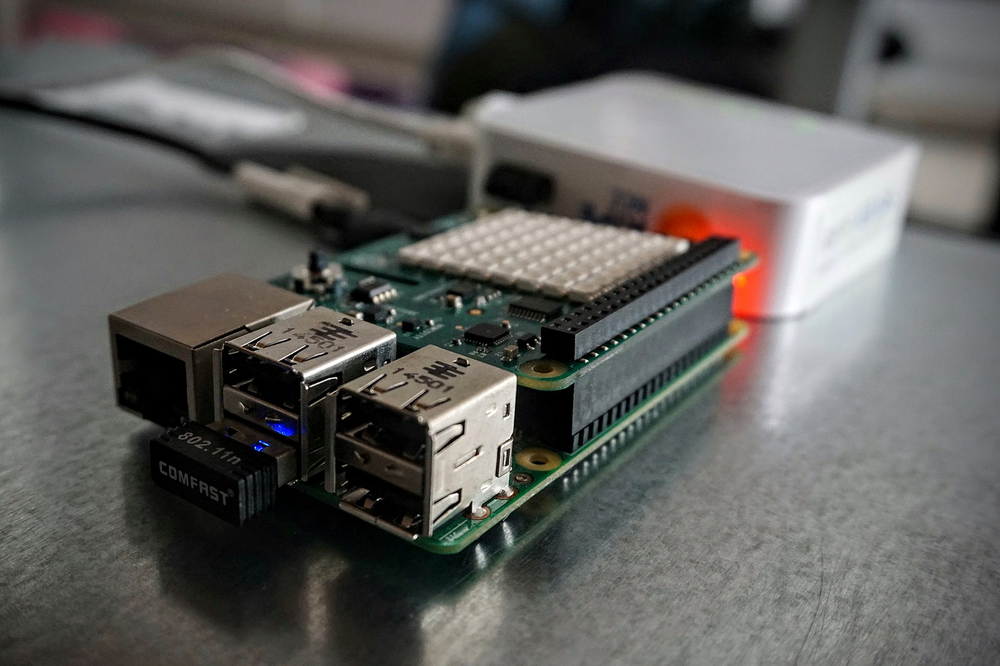
First, you need to get the new code. Either git pull the changes from your local project folder if you kept it, or grab the entire codebase via a zip file download.
With the new code in place you can now push the update to your balena application by using the balena CLI. For a more in depth deployment guide you can check the original balenaSound setup tutorial. The main thing to note is that you don’t need to flash the SD card on your existing device again — just push the new code and it will update automatically!
Once the code is deployed balenaCloud will ensure all devices are updated to the latest version that you pushed. If you inspect a device on the dashboard you should see a few new services: audio, sound-supervisor, multiroom-client and multiroom-server.
Using balenaSound multi-room
Give it a try
And that is it! You should be able to connect to any of your devices and start streaming using any of the supported methods (bluetooth, AirPlay and Spotify Connect) without configuring anything!
Here is how to connect to a device:
- If using Bluetooth: search for the device on your phone or laptop and pair.

- If using Airplay: select the balenaSound device from your audio output options.
- If using Spotify Connect: open Spotify and choose the balenaSound device as an alternate output.
When you start streaming to a device, it will configure itself as the server and will broadcast a message to all other devices to synchronize them and start playing the same audio. Note: it can take a few seconds for the system to autoconfigure the first time you start streaming from a new server.
Troubleshooting balenaSound
Did you know that balenaSound now has documentation, a troubleshooting guide, and an FAQ? Learn more about the project or find ways to contribute by visiting the official balenaSound app site.
What next?
While you can use any device type (except the Pi Zero) as the master, it’s recommended that you use a Pi 4 (read more about the reasoning on the project main read me file).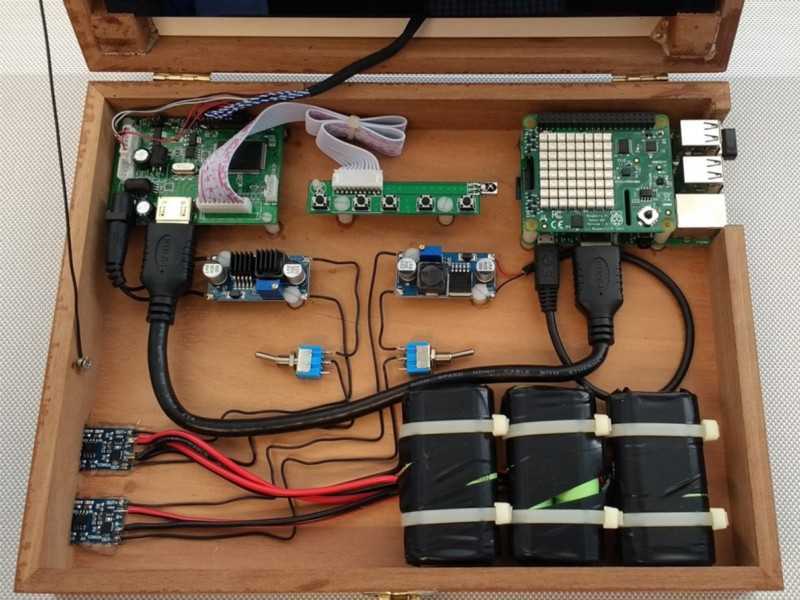 If you have multiple devices it can be hard to figure out which is which, so we are going to customize the device name of one of our Pi 4s so that we can easily identify it when trying to connect to it.
To do that we just need to add a device environment variable using the balenaCloud dashboard, set the variable SOUND_DEVICE_NAME to the name you desire:
Make sure you are only adding this variable to a particular device and not to the whole fleet (this is done from the device dashboard page rather than the application one).
One last quick tip, if you want to physically identify a device you can highlight it by blinking the onboard LED. This can be done by clicking the lightbulb icon on the dashboard:
Become a balena poweruser
Want to learn more about what makes balena work? Try one of our masterclasses. Each lesson is a self-contained, deep walkthrough on core skills to be successful with your next edge project.
Check them out at our docs.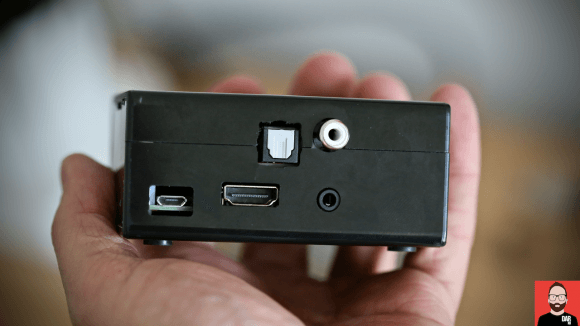 Also, reach out to us on the Forums if you need help.
Until next time…
Thanks for checking out this guide. We hope you were able to turn your place into a fully fledged audio streaming powerhouse!
If you had trouble getting the project running or have any other feedback we’d love to hear it; everything helps to improve our projects and tutorials for the next time.
If you would like to suggest new features or contribute more cool features to balenaSound feel free to drop by the GitHub repo.
You can always find us on our forums, on Twitter, on Instagram or on Facebook.
Budget multi-room and its integration into Home-assistant
Of course, I’m not a good writer, and I understand the subject rather superficially, but a keen desire to get what I want — I had to experiment a lot. And actually, I will now share these excrement with you (just kidding).
First, let’s define what a multiroom is. This, figuratively speaking, is music played from one source, on several speakers, and not interconnected by wires, and synchronized between them in sound. That is — in all rooms «seamlessly» plays the same thing, without any delays. Sound around in general.
Sonos is the most prominent representative of such devices.
Everyone will come up with application cases for themselves, but I will highlight 1 important point: Voice notifications (TTS) can sound at a minimum volume, and they will be clearly heard from any part of the apartment. In the end, with 1 sound source, to achieve the same effect is, among other things, to notify the neighbors that the humidity has dropped in the bedroom, or to drive 20 minutes longer to work.
And so, we need:
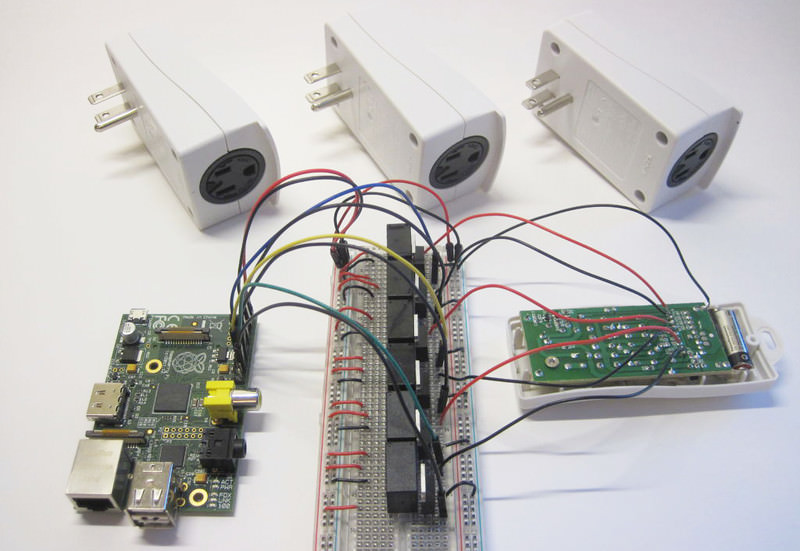
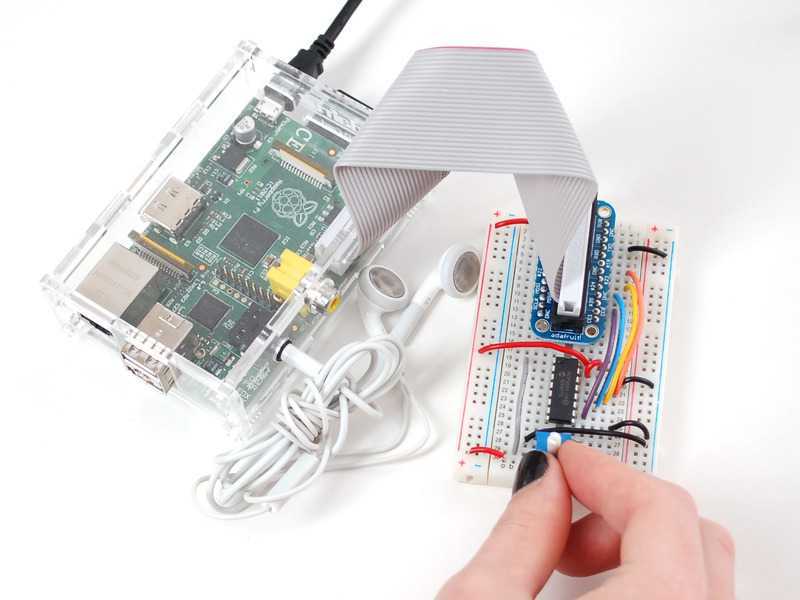
- Server device, Raspberry pi (orange and other fruits with audio output)
- Any device with Android on board. I have a tablet with a dashboard hanging on the wall in this role.
- And of course docker and docker-compose. Special thanks to tweaker3 for introducing me to the beautiful 🙂
Next, we need 3 components: Mopidy , snapserver , snapclient .
Mopidy — acts as a simple player (but oh, how not simple :)), but broadcasts not to speakers, but to snapserver, which in turn transmits sound to snapclient, synchronizing sound between all connected clients.
How to install docker was here
In the folder where docker-compose.yml is located, add a file with google music and spotify settings.
Attention , the path in the command below, yours may be different.
nano /home/pi/smarthome/logins.env
# Uncomment and fill in the login details below for your chosen services # Google Play Music #GMUSIC_USERNAME= #GMUSIC_PASSWORD= # Spotify #SPOTIFY_USERNAME= #SPOTIFY_PASSWORD=
Actually, I’m not using either GMUSIC or SPOTIFY yet, the lines are commented out and not active. This is for the future.
Add the following lines to docker-compose.yml
mopidy: container_name: mopidy env_file: logins.env image: «ivdata/mopidy» expose: — 6600 — 6680 ports: — «6680:6680» — «6600:6600» volumes: -. /fifo:/tmp/ -./music:/media network_mode: «host» snapserver: container_name: snapserver image: «ivdata/snapserver» ports: — «1704:1704» — «1705:1705» volumes: -./fifo:/tmp/ environment: — stream_name=Mopidy snapclient: container_name: snapclient image: nolte/rpi-snapcast-client:development volumes: -./alsa_sound-config/asound-hifibarry.conf:/etc/asound. conf links: — snapserver:snapserverhost depends_on: — snapserver devices: — «/dev/snd/:/dev/snd/» command: «-h snapserverhost»
Go to the folder and start the installation process. On raspberries, the server and client will configure themselves.
cd /home/pi/smarthome/ docker-compose up -d
After that, we only need to install clients on other devices. In our case, we pick up Android phones and tablets, and put SnapCast from Google play
I have bluetooth speakers, so the tablet remains in its place, and your point goes to the auditorium, the column goes to the kitchen.
To settings:
Go to settings and enter the address of the raspberry
You are amazing.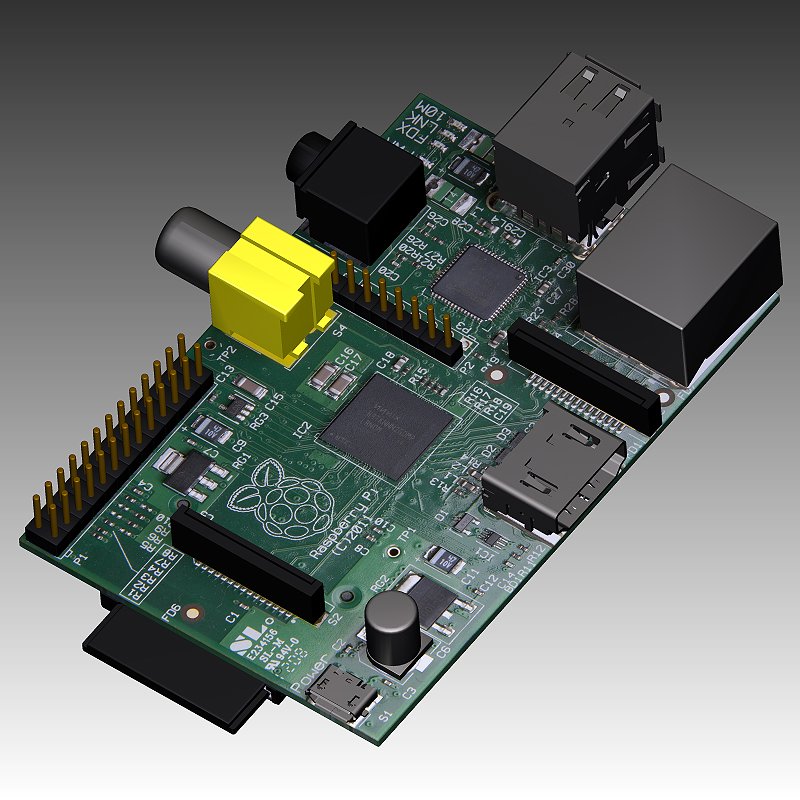
We go to http://AddressMalina:6680/ turn on the music (the Tuneln plugin is already there — through which it is extremely convenient to listen to the radio), turn on enjoy. But if you have more than one device, it is likely that the joy will not last long, and you will notice desynchronization between the speakers. The easiest way to fix it is through the same client for android.
And now the icing on the cake, forward it all to Home assistant .
In configuration.yaml paste this:
media_player: — platform: snapcast host: 127.0.0.1 — platform: mpd host: 127.0.0.1 location: Multi-Room Controller # password: name: Mopidy
I use lovelace ui — with custom component mini-media-player
resources: — type: module url: /local/custom_ui/mini-media-player.js?v=0.8.7 views: — cards: — cards: — entities: — entities: — artwork: cover entity: media_player.mpd group: true type: ‘custom:mini-media-player’ — entity: media_player.snapcast_client_1 group: true hide_power: true hide_controls: true name: Living room type: ‘custom:mini-media- player’ — entity: media_player.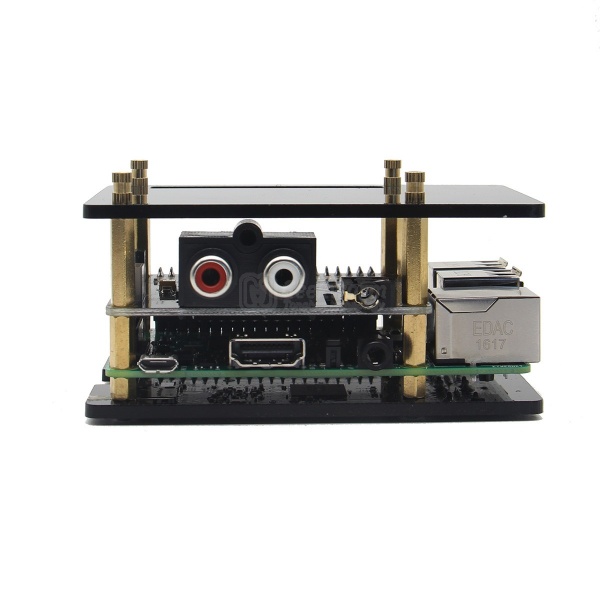 snapcast_client_2 group: true hide_controls: true hide_power: true name: Corridor type: ‘custom:mini-media-player’ — entity: media_player.snapcast_client_3 group: true hide_controls: true hide_power: true name: Bedroom type : ‘custom:mini-media-player’ — entity: media_player.snapcast_client_4 group: true hide_controls: true hide_pow er: true name: Kitchen type: ‘custom:mini-media-player’
And then we get the following situation
You are great! 🙂
* Why am I talking about raspberry, because in fact it can be run on any piece of hardware with docker? For example, the snapclient is definitely an arm architecture — which means fruit-family boards. If you want to use it on x86\64 systems, then most likely you should just find a container for this component for your architecture, while leaving the settings as they are.
And now a question for connoisseurs — there is such a thing as shairport sync — it allows you to stream music via AirPlay, which would be convenient if you play music from your favorite (not everyone!) apple music without waiting until airplay 2 appears, which claims to support several at once devices.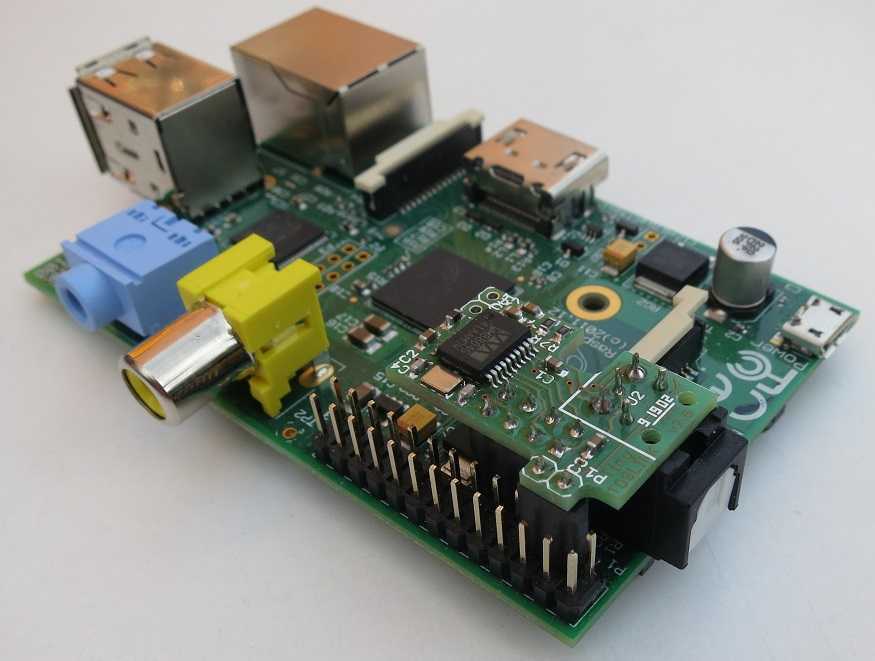 But alas, I have not yet managed to make shairport sync and snapcast server friends through docker. Ready to experiment?
Budget multi-room based on Snapcast
Creating multi-room audio systems allows you to achieve several goals at once.
- Reproduction of the same audio signal in multiple rooms (background music)
- Possibility for each room to play its own audio signal
- Possibility of distributed playback of notifications (for example, a doorbell rings not near the door at full volume, but at a low volume through all or through certain speakers).
In this article, I will share an example of building a multi-room system in my own apartment. The original idea was to create a musical background (the selected radio station) at a low volume in all rooms, instead of one point where the volume had to be done more.
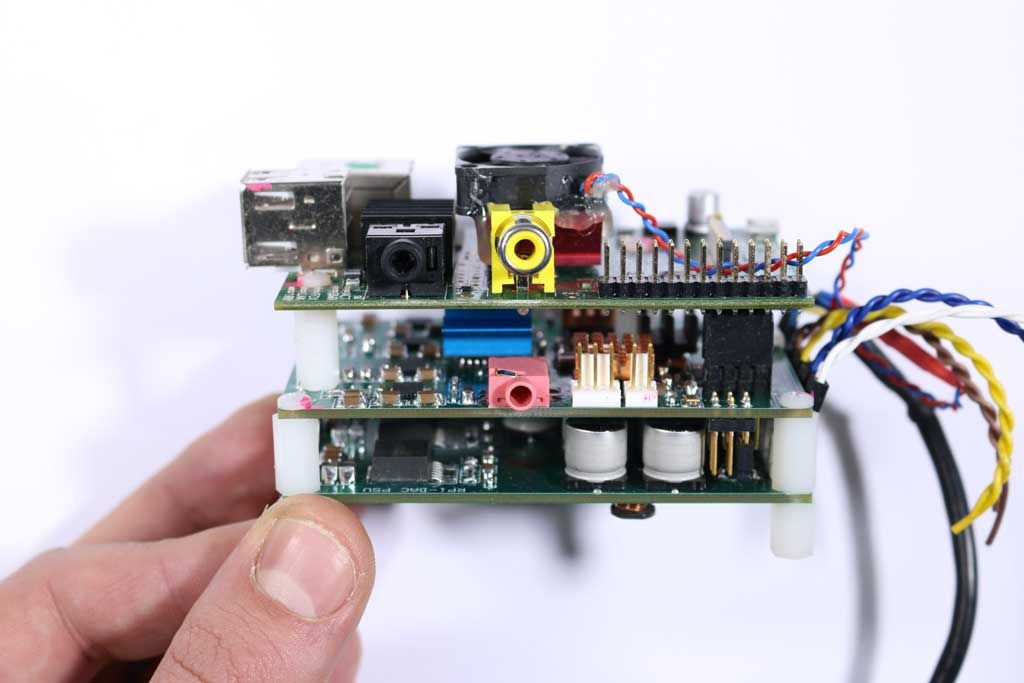
The basis for the multi-room system was the free solution Snapcast. The server part is running on a home server, either Orange PI zero minicomputers with active speakers connected to them, or more powerful Rasberry PI with an installed Kodi media player (Libreelec distribution) act as clients in the rooms.
Main features of the finished system
- Internet radio station background playback
- Ability to play music on multiroom (or on a separately selected client) using Airplay, UPnP or through the Plex player. Plans to add bluetooth support, although this is not particularly relevant to me
- Playing arbitrary content from a computer via the web interface
- Change the playing radio station manually or according to the schedule
- Set each client to any source
- Volume control individually for each audio device (it works like this: the audio system’s own control is set to maximum, the volume of each snapclient is adjusted from the server if necessary (usually also set to maximum), and the overall volume level is adjusted from the source from which the playback is being played — telephone, computer player or mpd)
On clients, it is now done without frills — there is armbian, on which shairport and snapclient are installed, and plans to deliver upmpdcli and plexamp, so that each client would act as a universal point that reproduces sound using any possible protocol. The main problem that prevents this so far is that Linux does not allow sharing one ALSA audio device between several programs, and here you have to either turn off others while playing sound through one service, or try to use Pulseaudio, which is impossible in the case of Snapclient (Snapcast works exclusively through ALSA, because this minimizes delays and thanks to this, the sound of all sources is absolutely synchronous (more details can be found in the Snapcast documentation).
The server part is designed as microservices in the form of several docker containers combined into a stack. Initially, there were plans to run containers in a Swarm cluster (yes, at my house two computers are combined into a Swarm cluster, which runs all the services that I need and not quite need at home), but this idea had to be abandoned, and the stack via docker-compose .yml file is run on one of the computers. Reliability is certainly lame, but enough for the house. The reason for the inability to start in a cluster is that the Snapcast server uses fifo to receive the audio stream (a typical chain works like this — the sound is played using mpd, the output device is fifo, from which the snapserver reads and transmits the stream to all clients). But due to the fact that the cluster cannot share the volume on which fifo is located between several nodes (using fifo on the host and forwarding it using a distributed file system also does not work. Although it may be possible through nfs, I have not tried it yet), and you can’t force a swarm cluster to run all containers on one node either, the only way to give all services access to fifo is to start everything on one node (you can of course make a virtual machine, or one giant container, where everything that is possible is launched through supervisor, but I decided not to do so).
Stack composition
1) Snapserver. Snapcast server container. It is available on ports 1704, 1705 and in the home network it is accessed through the dns name snapserver.local. It can announce itself through Avahi, but when working in the avahi docker, announcements go through a separate container (it is not part of this stack).
2) Snapcastr. Web service for managing snapserver.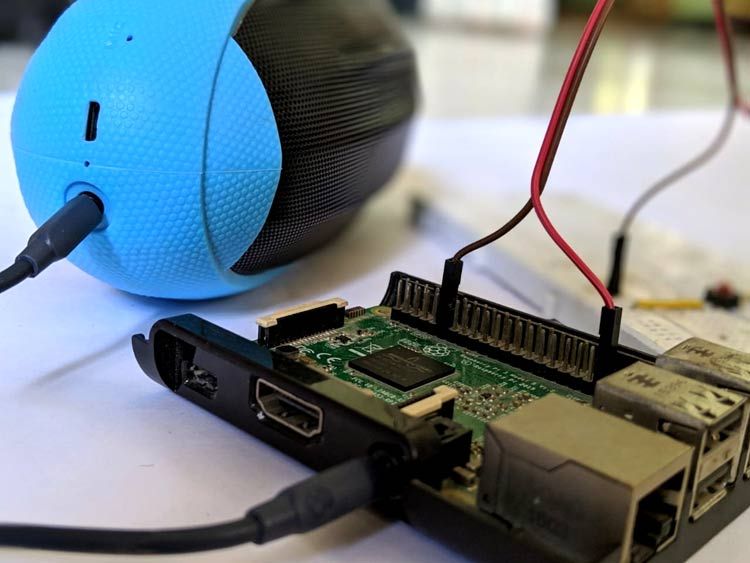 Available on port 5011 (available as snapcastr.local via local reverse proxy).
3) Snapchanger. Python script that parses audio sources and switches clients to the highest priority audio source that is currently active. For example, internet radio has the lowest priority and is always playing. When playing music from the phone via Airplay, it switches to this stream, and if at that moment there is a signal from the smart home, it will switch to it. When a thread stops, it switches back to the active threads with the highest priority. For each client, you can specify your own list of threads and priorities for them.
4) Snapcron. A container with cron, which can run scripts at a certain time, for example, change the volume on clients (turn off the music in the bedroom for the night completely).
5) mpd. an mpd instance for playing internet radio. Forwarded to home network on non-standard port 36602.
6) radio. pyhthon scripts that make sure that the radio is always playing (there are cases when the connection is interrupted, or the connection seems to be there, but the sound is not played) as well as switching radio stations and volume depending on the time of day.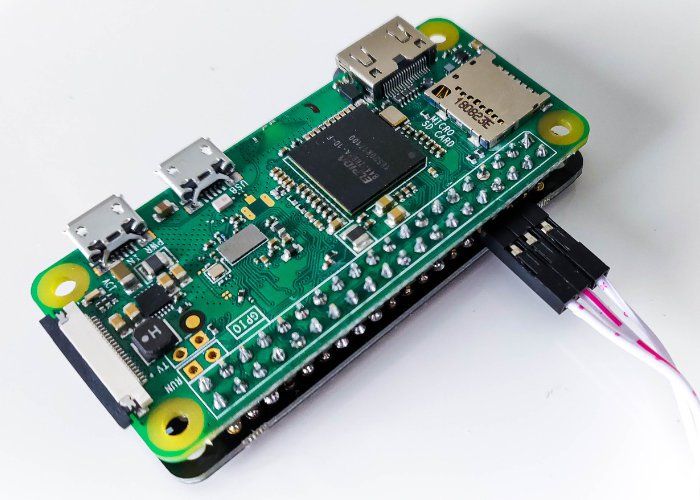
7-8) mpd.fm and pifi are web shells for playing a radio station. Two pieces of the same type for experiments.
9) mopidy. Another shell (aka a separate mpd server) for playing music. It acts as a separate mpd server and responds to the standard port for mpd — 6600. It can be used to listen to music. It uses its own stream and works independently of mpd for radios.
10-12) shairport-sync, upmpdcli, plexamp are containers with their respective clients. Each container uses its own mpd instance, writing to its own fifo. So each client has its own independent stream.
So the stack now supports:
- Multiple independent audio sources with a random choice between them — Default, uPnP, Mopidy, Plexamp, AirPlay and internet radio.
- Manage the Snapcast server itself with Snapcastr.
- A set of scripts to ensure reliable and uninterrupted background radio sound.
- Radio playback control using pi-fi or mpd.fm (additionally, I set up control of this mpd instance using Node-red used in my home automation).