Build a Raspberry Pi Security Camera Network
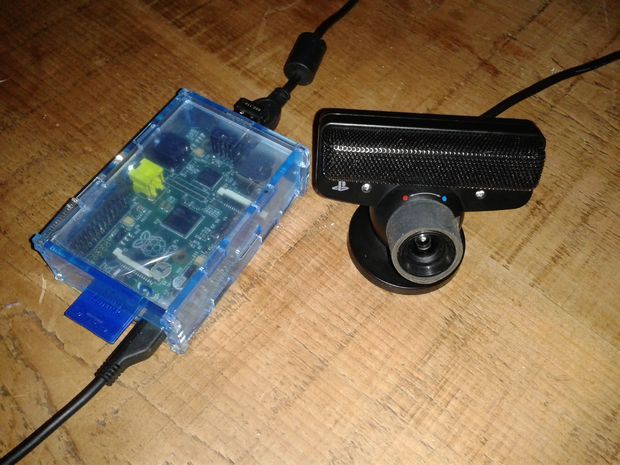
In this project, I am going to make a Raspberry Pi security camera simply using the standard Pi camera such as the one I used in the time-lapse tutorial.
This project is a cost-effective way of getting a security camera up and running that you can view over the network and also have it, so it is motion activated.
Remember the Raspberry Pi isn’t a powerhouse, so performance will degrade if you try to do too much by adding too many high definition cameras.
With that said, it’s still an excellent way of building your own affordable camera network. So let’s get to it.
Equipment
You will need the following equipment to complete this Raspberry Pi security camera project.
Recommended
Video
If you want to see how to set up the Raspberry Pi security camera visually, then check out the video I have prepared below.
As always, if you like what you see and want to stay up to date with all the latest and greatest projects, guides and much more, then please subscribe.
Adblock blocking the video? Support us by subscribing to our ad-free service.
Installing the Raspberry Pi Camera
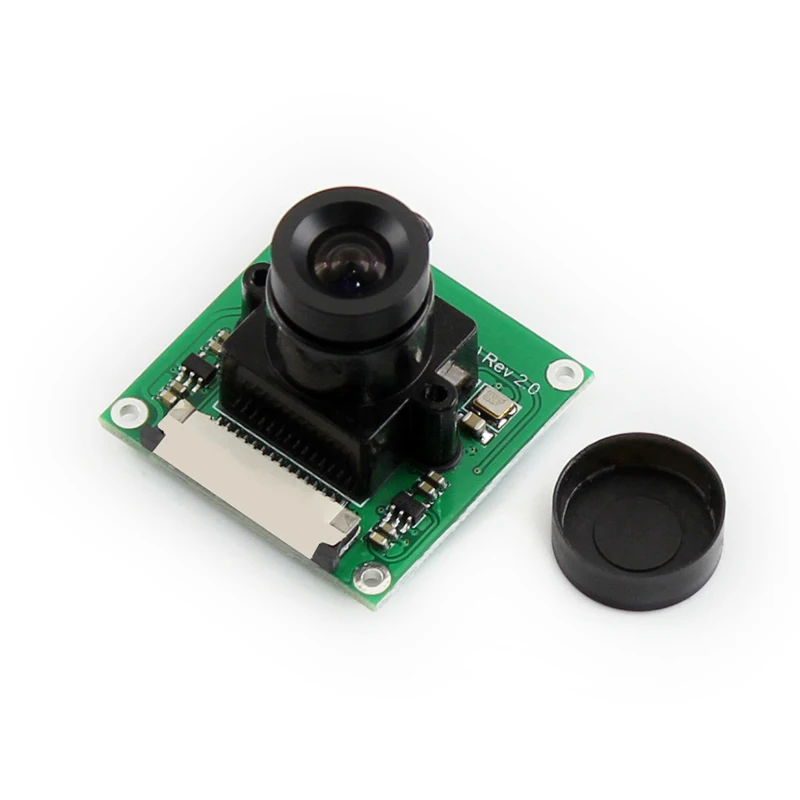
Firstly before we do anything, we need to have a Raspberry Pi camera. In this tutorial, I use the regular IR camera, and it works fine however if it gets dark it can’t see at all. (Which is probably not much good for a security camera). You can find the regular camera here or the non-IR camera here.
If you’re after for more information check out my Raspberry Pi camera guide for everything you need to know.
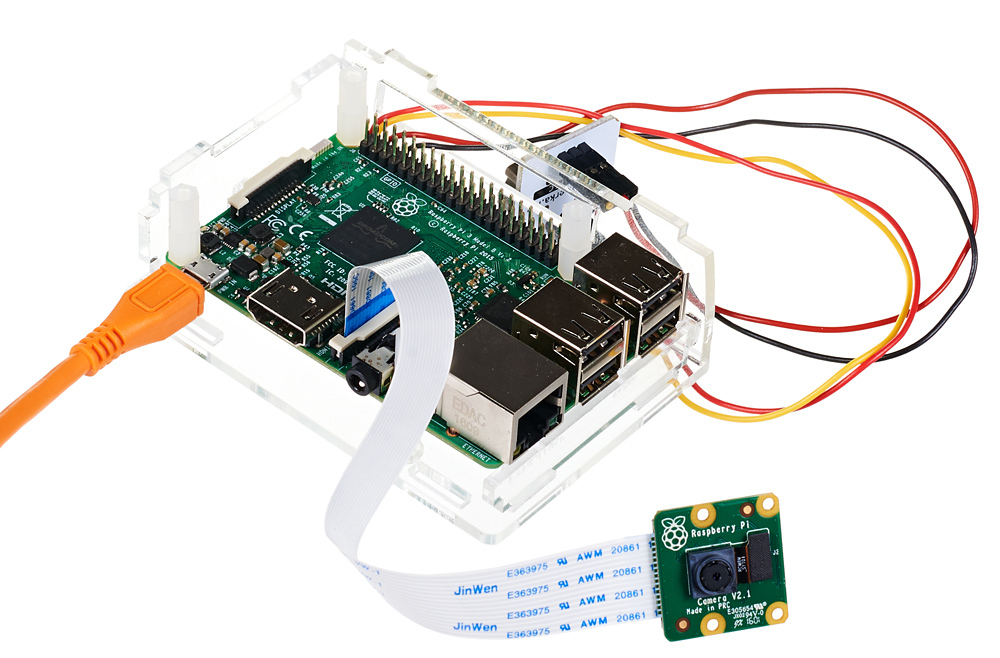
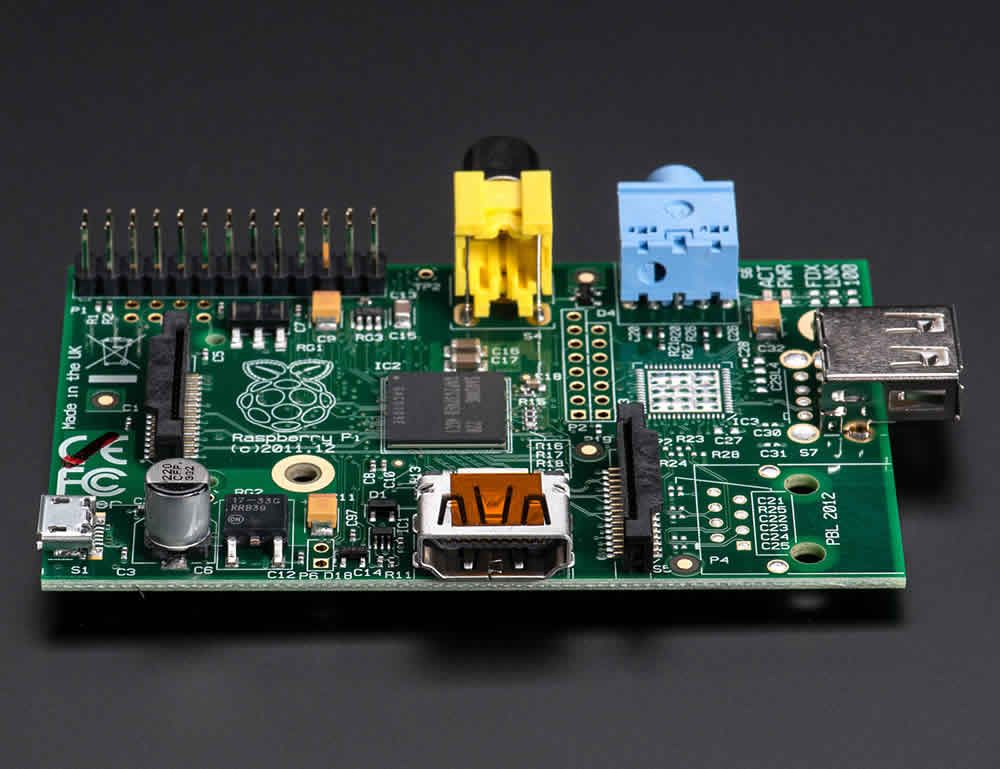
Secondly, we will need to install the camera (If you haven’t got one you can get one here), to do this go to the ribbon slot (the one directly behind the Ethernet port) using two fingers gently pull up on both sides of the connector.
Now the connector is open insert the ribbon cable with the metal leads facing away from the Ethernet port. Make sure it is nicely lined up and then gently press back down on the connector. The cable should now be locked in place, and we can now move onto the software.
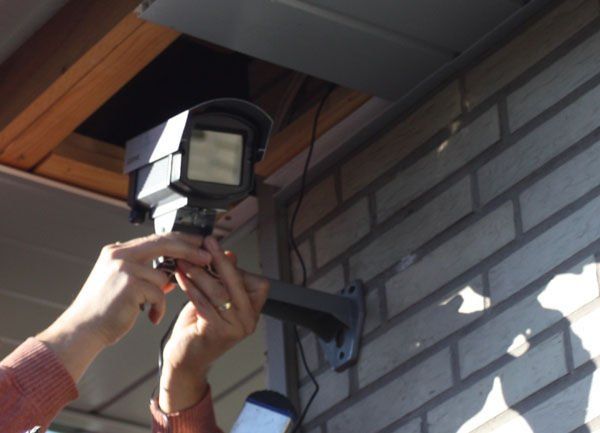
On a side note, if you want to install this into a more secure enclosure, there is some great equipment you can buy or even design to do this. To keep this tutorial pretty basic I am not going to go into a heavily customized camera enclosure.
Installing MotionEye OS
I settled on using MotionEye OS as it seems to be an all in one solution for what I require and it also didn’t involve as much fiddling around to get it to work.
Download & Format the SD Card
1. Download the MotionEye OS SD Card Image from the MotionEye OS GitHub repository.
2. You will need a formatting tool. Visit the SD Association’s website and download SD Formatter for either Windows or Mac.
3. Follow the instructions to install the formatting software.
4. Insert your SD card into the computer or laptop’s SD card reader and check the drive letter allocated to it, e.g. G:/
5. In SD Formatter, select the drive letter for your SD card (eg. G:/) and format
Install the MotionEye OS Image onto the SD Card
1. Download the Win32DiskImager.
2. Now unzip the MotionEye OS img file so you can install it onto the Pi safely.
3. Select the MotionEye OS img file and the drive letter your SD card is assigned (Eg. G:/)
4. Confirm you have the correct details and click on Write.
5. Once done you can safely remove your SD card from the computer.
Booting & Setting up MotionEye OS
Now we’re ready for boot up, so insert the SD Card, an Ethernet cord, and the power cord.
We will need to communicate to the Pi over the network rather than directly as I have done in most of the previous tutorials.
So now go ahead and boot the Pi up and then we can move onto getting it set up correctly.
Setting up the Raspberry Pi Security Camera
Once the Pi has booted you will need to do the following:
1. First, we will need the IP or hostname, so we’re able to connect to the Pi.
- If you’re using Windows, then simply go to network on the right-hand side in the File Explorer.
- You should see a computer names something like MP-E28D9CE5
- Go to your browser and add this to your browser bar e.g.
http://MP-E28D9CE5 - You should now have the MotionEye OS interface up.
2. Alternatively, you can find out the IP of the Pi by going to your router.
Since all routers are different, I will not go into how to do this. Please refer to your manufacturer’s manual.
3. To log in as the admin go to the key symbol in the upper-left corner.
The username is admin and the password is blank (Don’t enter any password), this can be changed later.
4. You can access all the setting for the camera stream here. If you’re interested in altering these settings, keep reading as I explain them as much as possible below.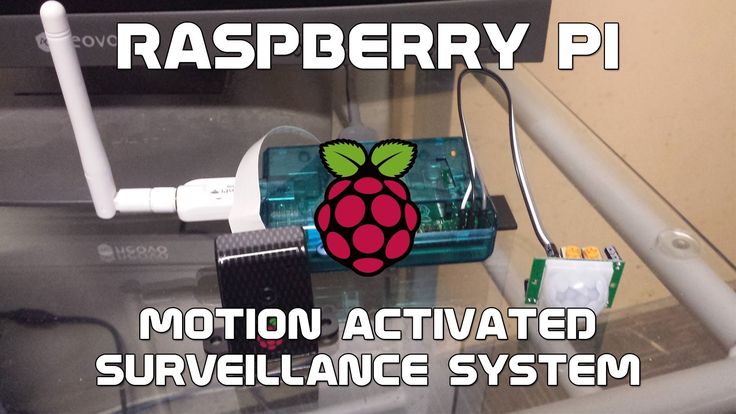
Now we should have a working security hub that we can configure!
Require the security camera to be wireless? No problem! Require to alert you with an email? No problem! Read more to find out what the settings do in MotionEye OS.
How to set up Multiple Network Raspberry Pi Security Cameras
If you want to run more than one Pi cameras, it is pretty easy to set this up, so you have all the streams under in one window.
You can even add a stream that has been set up using the Raspberry Pi Webcam server tutorial.
1. First, click on the three lines with dots on them in the upper left-hand corner.
2. Now up in the upper-left hand corner and click on the drop-down box and select add camera.
3. In here you have four settings to set up.
- Device: This allows you to select where the camera is located(network/local) and type. (Eg. MotionEye, MJPEG camera)
- URL: This is the URL to the other network camera.
 Eg.
Eg. http://othercamera:8080 - Username: This is the username of the camera device. (If no username/password is required, then leave the fields blank)
- Password: This is the password for the username chosen above.
- Camera: Select the camera you wish to add.
In the example below camera1 (Pi Camera) and camera2 (USB WebCam) are connected to the Pi running MotionEye OS. While camera3 is coming from a different Pi that was set up using the webcam server tutorial.
This method is a great way to set up a strong Raspberry Pi security camera network.
Connecting to the surveillance outside your network
Now that you have your Raspberry Pi security cameras setup it might be worth considering allowing access to the central Pi so you can monitor your cameras elsewhere.
To do this just head over to my guide on how to setup port forwarding and also how to setup dynamic DNS, you can find the guide at Raspberry Pi Dynamic DNS & Port Forwarding.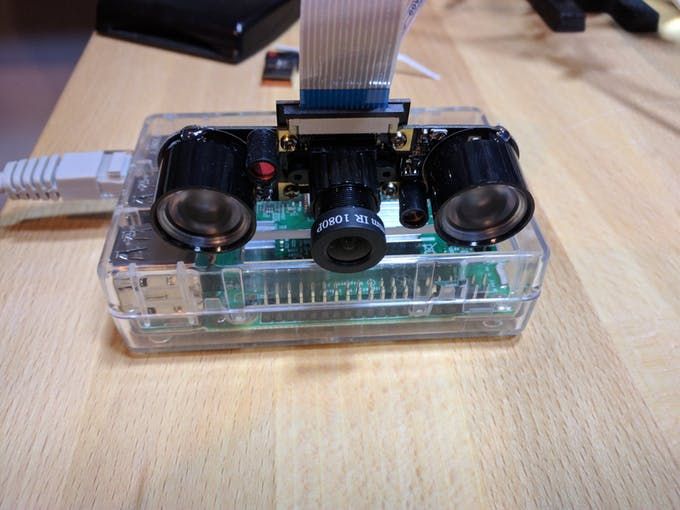
A few important bits of information you will need for the setting up the port forwarding.
- The IP of your Raspberry Pi for example mine is 192.168.1.108
- Internal port is 80.
Ensure you also have set up passwords on both the admin and the surveillance user to help avoid unwanted visitors.
Once set up, you should now be able to connect using your external IP address such as XX.XXX.XXX.XXX:80 (80 should be changed to something else, I would recommend changing it to avoid easy access for unwanted visitors)
Configuring the Settings in MotionEye OS
General Settings
In here you can set the administrator username and password. This account will have access to all the settings you see at the moment.
Surveillance username and password can also be set in here this can be used to just to access the camera interface.
To view all the settings available to set turn the show advanced settings to on.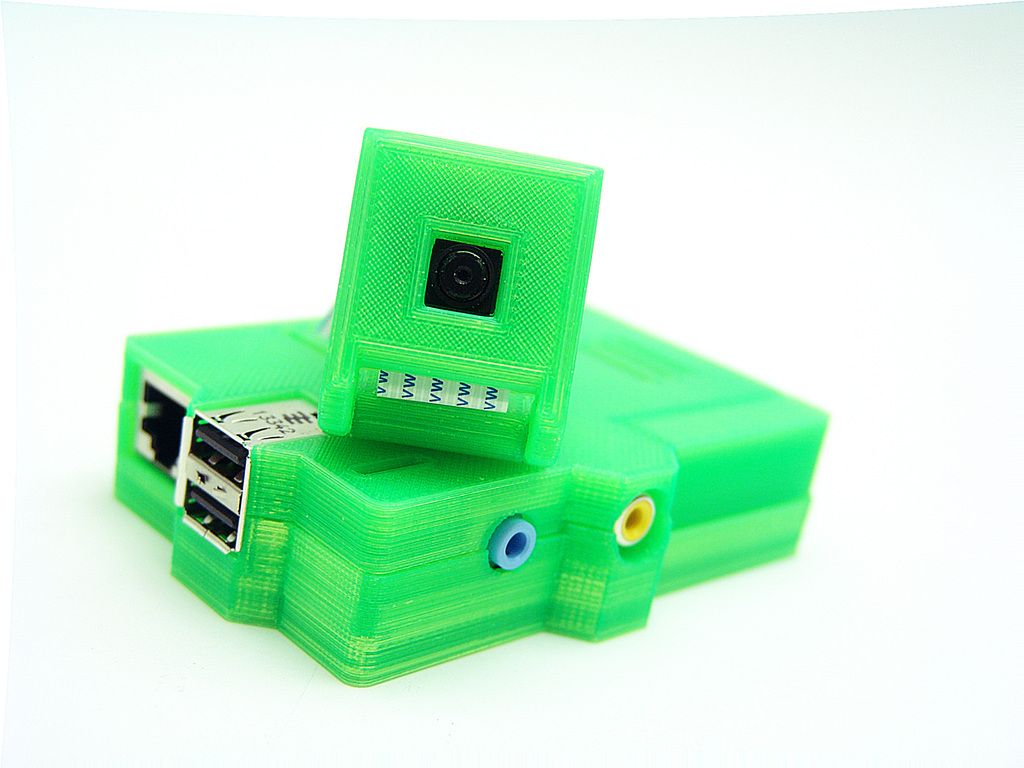
Wireless Network
Turn this on if you plan on connecting to the network via a wireless dongle. There are two things you will need to fill in here.
- Network Name: Enter the network name/SSID you wish to connect to in here.
- Network Key: Enter the network password/network key in here for the network you’re connecting to.
Once done you should be able to disconnect the Ethernet cord and remain connected to the network.
Video Device
Under this menu, you’re able to set certain settings regarding the Raspberry Pi camera device.
- Camera Name: Set this to whatever you would like the camera to be named. For example, the name kitchen would work well for a camera in a kitchen.
- Camera Device: You’re unable to edit this one, but this is the device name of the camera.
- Light Switch Detection: Enable this if you want sudden changes such as a light being switched on not to be treated as a motion.
 (This will help prevent false positives)
 - Automatic Brightness: This will enable automatic software brightness, this means the camera software will make adjustments for the brightness. You don’t need to activate this if your camera already handles this. In here you change the brightness, contrast, and saturation of the video of the camera.
- Video Resolution: Here you can set the video resolution of the camera. The higher the resolution, the more room it will take up and the more bandwidth it will need to use to stream the footage. I set mine to 1280×800, and that seems to work perfectly fine.
- Video Rotation: You can rotate your video from the Raspberry Pi security if you’re finding that it is looking the wrong way.
- Frame Rate: This sets the number of frames that will be sent be every second. The higher this is, the smoother the video, but again this will increase the storage used and bandwidth.
File Storage
Under this menu, you can specify where you would like the files stored for the Raspberry Pi security camera.
This location can be a custom path on the Pi, the predetermined path or the network path.
Text Overlay
In here you can set the text overlay on the output of the camera.
By default, the left text reads the camera name and the right read the time stamp (Today’s date and current time).
Video Streaming
This menu you’re able to set the video streaming options, this is the video you see in the browser.
- Streaming Frame Rate: This is the same as mentioned above under video device.
- Streaming Quality: You can reduce the video streaming quality. This setting is good to reduce if you need to access the camera on a low bandwidth device often.
- Streaming Image Resizing: Enable this if you want MotionEye OS to resize the images before being sent to a browser.
 (Not recommended on a Pi)
 - Streaming Port: This is the port that the device will listen to for connections looking to view the stream. Eg.
http://motionpie:8081 - Motion Optimization: This will reduce the frame rate whenever no motion is detected. This setting will save you bandwidth.
You can also see three URLs that can be used to access different footage.
These URLs are very important if you have multiple cameras per Pi as each camera will have a unique port that you listen to the stream.
Still Images
Here you can set the Raspberry Pi security camera to take still images whenever motion is triggered, during specific intervals or all the time.
Motion Detection
In here you can activate the Raspberry Pi security camera motion detection that is included in the software.
You can make adjustments to the settings here so that you can get better motion detection.
Motion Movies
In here you can set the Pi to record movies whenever motion is detected.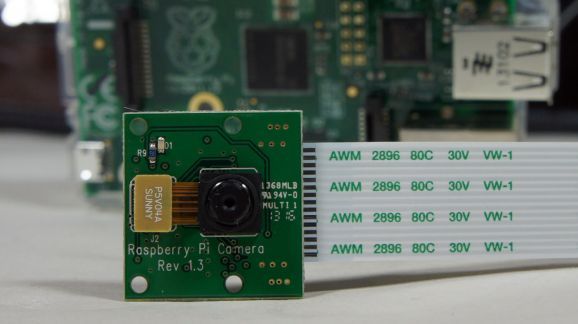
Motion Notifications
You’re able to set up email notifications, webhook notifications or even run a command whenever motion is detected.
This option will allow you to be notified whenever activity is detected on the cameras, perfect if they are monitoring areas with low traffic.
Working Schedule
Here you can set the days, and the hours of operation you would like the system to be monitoring (If you leave this off then it is 24/7).
This option is perfect if you only need it running during specific hours.
Summary
The Raspberry Pi security camera system is a great way to have multiple cameras hooked up both locally and over a network.
All the extra setting MotionEye OS provides allows you to have a strong functioning security hub for your home, office or wherever you’re setting this up.
I hope this tutorial has helped you in creating a fantastic Raspberry Pi security camera network.
If you have had any problems, provide feedback or have a great setup you would like to share then feel free to drop a comment below.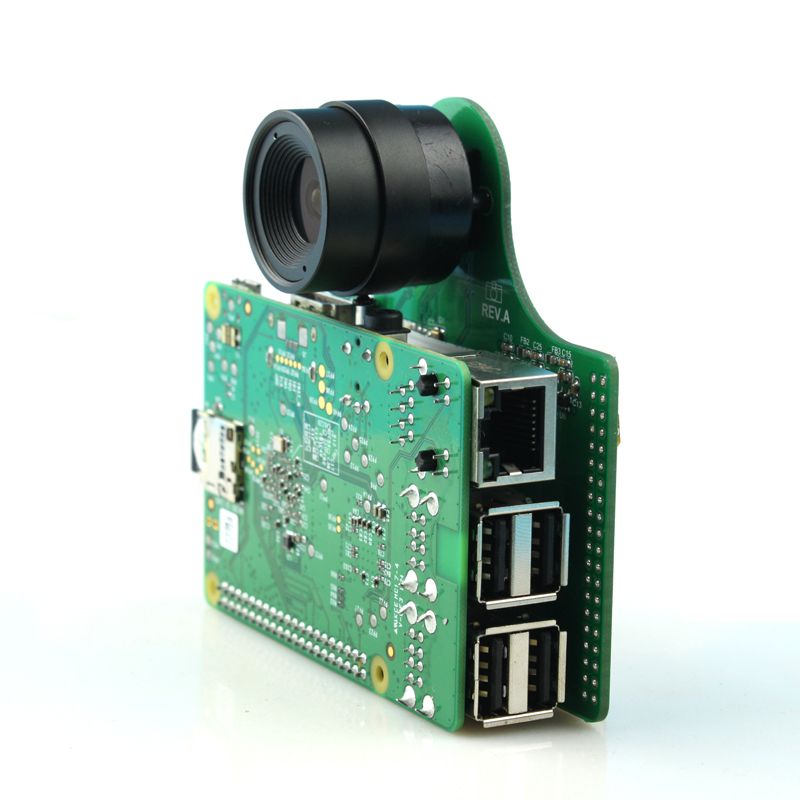
If you’re after more great Raspberry Pi projects, then be sure to check out many other great tutorials.
How to Build a Motion-Triggered Raspberry Pi Security Camera
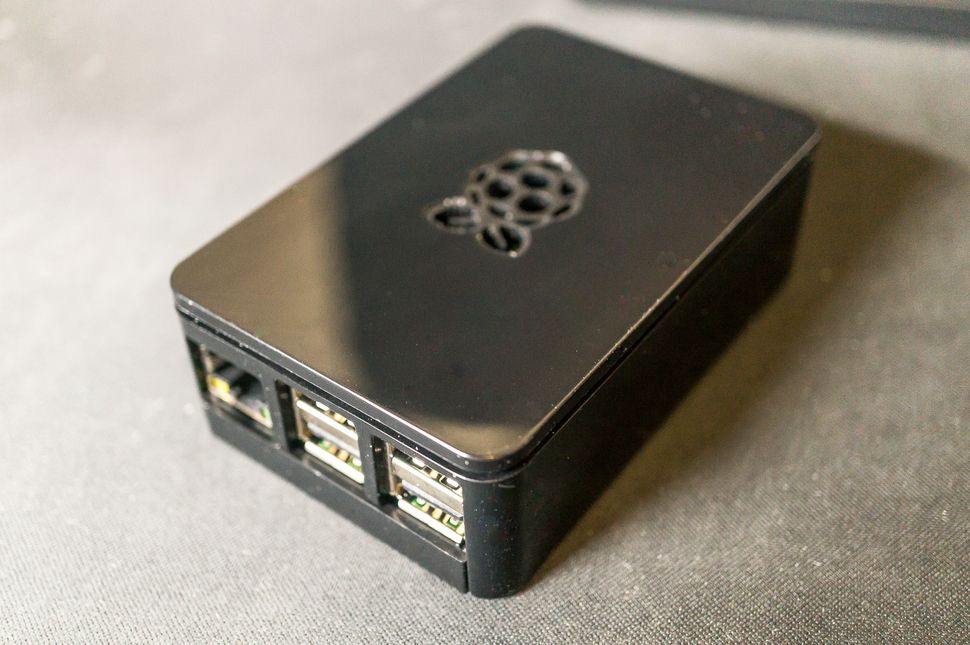
(Image credit: Tom’s Hardware)
Home security camera systems have exploded in popularity while decreasing in price over the past few years. For example, you could purchase a Ring Indoor Security Camera for around $60, but there are some drawbacks: first, vendors like Ring often charge a monthly fee to store your data and second, you might not want video and photos from inside your home being shared with a third party (in Ring’s case, Amazon) where strangers could potentially see them.
MotionEyeOS, a free open-source application, allows you to turn a Raspberry Pi with a camera into a home video monitoring system, where the photos and videos can either stay on your device (and home network) or, if you choose, be uploaded automatically to a cloud-storage service such as Google Drive or Dropbox.
In this tutorial, we will show you how to set up a Raspberry Pi security camera with MotionEyeOS. This software works with almost any Raspberry Pi (connected to the internet) and almost any webcam or Pi camera. There’s no fancy coding to be done in this project; it just works.
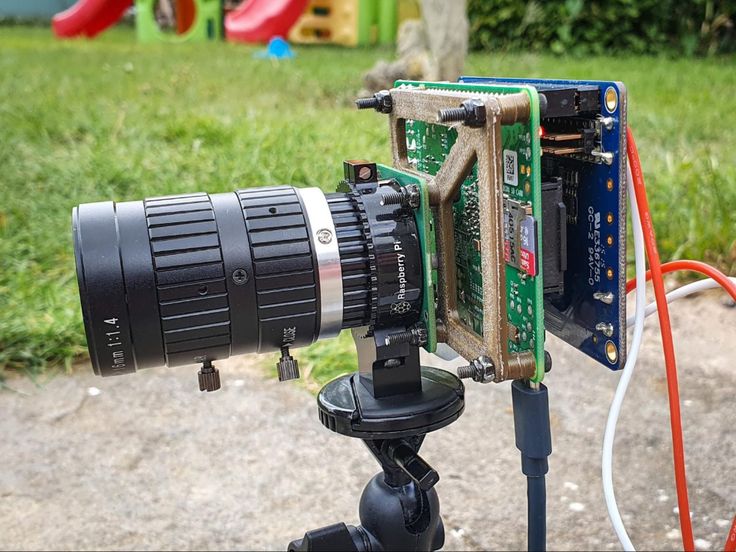
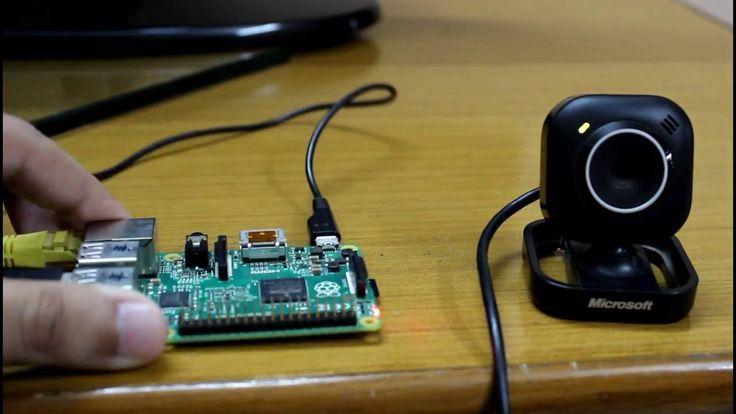
Here are a few of the cameras I’ve successfully used with MotionEye.
(Image credit: Tom’s Hardware)
This Raspberry Pi security camera can be used to record porch pirates, monitor children or pets or to watch out for burglars.
(Image credit: Tom’s Hardware)
Disclaimer: This article is provided with the intent for personal use. We expect our users to fully disclose and notify when they collect, use, and/or share data. We expect our users to fully comply with all national, state, and municipal laws applicable.
What You’ll Need
- Raspberry Pi 4 or Raspberry Pi 3B+ , or Raspberry Pi Zero W
- 8 GB (or larger) microSD card
- Raspberry Pi Cam, HQ Camera, Infrared Camera, or webcam
- Monitor/Power supply/Monitor/HDMI Cable (for your Raspberry Pi)
- Your Windows or Mac computer.

Install MotionEyeOS
In this section, we will download MotionEyeOS, flash to a microSD card for our Raspberry Pi security camera, and set our WPA credentials.
1. Download the latest version of MotionEyeOS corresponding to the specific model of Raspberry Pi you are using from https://github.com/ccrisan/motioneyeos/releases
Image 1 of 2
(Image credit: Tom’s Hardware)(Image credit: Tom’s Hardware)
2. Insert your microSD card into your computer to be read as a storage device.
3. Launch Raspberry Pi Imager. You can download the imager here if you don’t already have it installed on your computer.
4. Select “Use custom” for the Operating System.
(Image credit: Tom’s Hardware)
5. Select the motioneyeos version that you just downloaded. This should be a .img.xz file.
6. Select your microSD card under “SD Card. ” Note that all data on your microSD card will be erased in the next step.
(Image credit: Tom’s Hardware)
7. Click “Write” in the Raspberry Pi imager. The ‘write’ process could take 1 to 2 minutes.
8. When the process completes, physically remove and then reinsert your microSD card. We do this because the software automatically ejects the microSD card when the process completes, but we need to add one file before the next step.
9. Create a new file named wpa_supplicant.conf with the following text, replacing “YOUR_NETWORK_NAME” and “YOUR_NETWORK_PASSWORD” with your information. A source code editor such as Atom works great for this purpose. WordPad and Notepad are not recommended to create this file as extra characters are added in the formatting process.
country=us
update_config=1
ctrl_interface=/var/run/wpa_supplicant
network={
 scan_ssid=1
 ssid="YOUR_NETWORK_NAME"
 psk="YOUR_NETWORK_PASSWORD"
}
(Image credit: Tom’s Hardware)
10. Save wpa_supplicant.conf to your microSD card. Eject your microSD card.
11. Insert your microSD card into your Raspberry Pi.
12. Connect your camera, monitor and power supply to your Raspberry Pi. Power up your Pi.
(Image credit: Tom’s Hardware)
13. Find your internal IP address on the Pi screen. In most cases your internal IP address will start with 192.168.x.x or 10.0.0.x. Alternatively, if you do not have access to a monitor, you can download Angry IP Scanner and find your IP address for your Motioneye Raspberry Pi. Look for “MEYE” to identify your MotionEye Pi.
(Image credit: Tom’s Hardware)
14. Enter your internal IP address into a browser window of your Windows or Mac computer. Alternatively, you could use a Chromebook or a tablet. At this point your Motioneye should start streaming.
(Image credit: Tom’s Hardware)
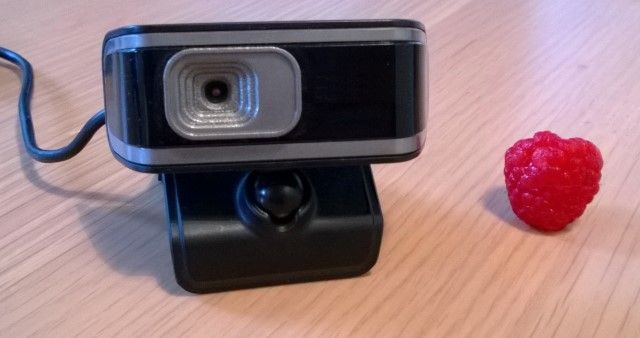
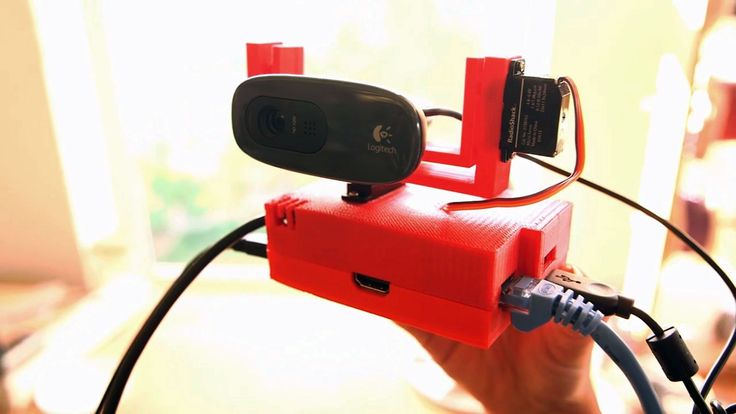
In most cases, the system will automatically stream from the attached camera. If no image comes up, the camera may be incompatible with the Raspberry Pi. For example, an HD webcam may be incompatible with the Raspberry Pi Zero, but will work with a Raspberry Pi 3. There may be some trial and error in this step. Interestingly, most older webcams (manufactured before the Pi) will work with Motioneye. Here’s an old Logitech Pro 9000 connected to a Pi Zero W with a 3D printed stand.
(Image credit: Tom’s Hardware)
Configuring MotionEye for Raspberry Pi Security Camera
In this section, we will perform a basic configuration of Motioneye and view our Raspberry Pi security camera video stream.
1. Click on the Profile icon near the top left within your browser menu to pull up the Login screen.
(Image credit: Tom’s Hardware)
2. Log in using the default credentials. The username is admin, and the password field should be blank.
3. Select your Time Zone from the dropdown menu in “Time Zone.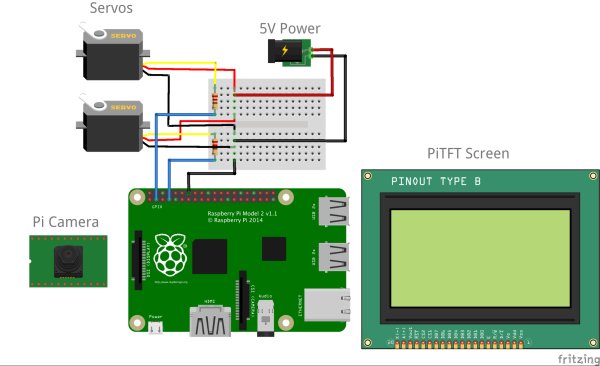 ” Click Apply. Motioneye will reboot which will take a few minutes. This step is important as each photo and video is timestamped.
(Image credit: Tom’s Hardware)
4. Motioneye detects motion when _% of frames change. The intent is to set your % low enough to pick up the movement you are tracking, but high enough to avoid recording a passing cloud. In most cases, this is achieved through trial and error. Start with your default 4% Frame Change Threshold and then move up until you reach your optimal setting.
(Image credit: Tom’s Hardware)
5. Click the down arrow to the right of “Still Images” to reveal the corresponding settings. Do the same for “Movies.” Set Capture Mode and Recording Mode to “Motion Triggered” and length of time to “Preserve Pictures” and “Movies.”
I have chosen “For One Week” since I’m only working with an 8GB microSD card. The photos saved locally will serve as a backup.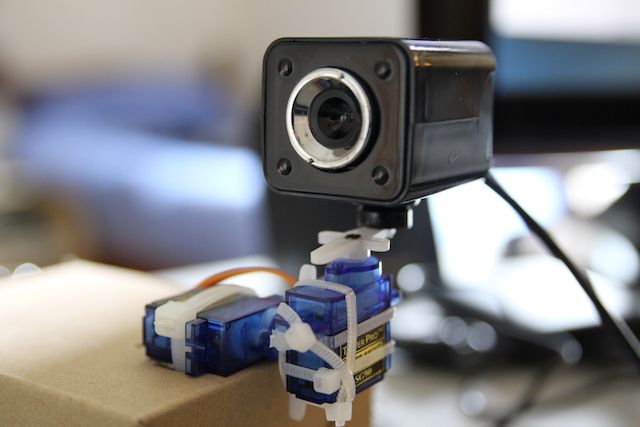 You’ll save all of the photos to Google in a later step. Click Apply to save your changes.
(Image credit: Tom’s Hardware)
6. Set your Camera Name, Video Resolution, Frame Rate and other options in the “Video Device” section. Click Apply to save your changes.
(Image credit: Tom’s Hardware)
Viewing Raspberry Pi Security Camera Images / Video Locally
If you don’t wish to upload images to a third-party service such as Google Drive, you can view the images and/or videos) captured locally on your Raspberry Pi security camera. If you choose this method, the images will never leave your local network.
1. Click on the live camera feed and new icons will appear.
2. Click on the image icon to view images.
(Image credit: Tom’s Hardware)
3. Or Click on the “Play”button icon to view movies.
(Image credit: Tom’s Hardware)
Automatic Uploading to Google Drive (Optional)
In this step, we will configure our Raspberry Pi security camera to automatically upload all of the photos (and videos) taken to Google Drive.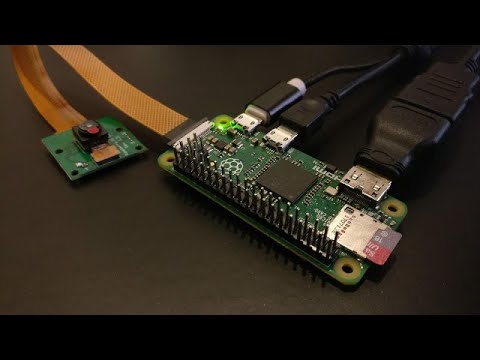 This method (with a couple of nuances) also works with Dropbox. Of course, you have to be comfortable with having your images in the cloud.
Most users create a separate Gmail account specifically for this purpose, to maximize free storage space from Google. Additionally, this will come in handy if you decide to enable email notifications in the next step.
1. Click the down arrow corresponding to “File Storage” in the main admin menu.
2. Toggle “Upload Media Files” to ON. This should automatically toggle “Upload Pictures” and “Upload Movies” to ON, but if not, hit ON.
3. Select Google Drive from the “Upload Service” dropdown menu.
(Image credit: Tom’s Hardware)
4. In your Google Drive, create a new folder for storing your photos and videos. I chose “PorchCam” for the name of my folder.
5. Enter “/” followed by your folder name for ‘Location.’
(Image credit: Tom’s Hardware)
6. Click “Obtain Key” and accept associated permissions by clicking “Allow.”
(Image credit: Tom’s Hardware)
7. Copy and paste the authorization code into your “Authorization Key” in Motioneye.
8. Click the “Test Service” button. If you don’t get an error message in Motioneye, then it was a success.
9. Go to your Google Drive folder and test your setup by pointing the camera at yourself and waving to the camera.
(Image credit: Tom’s Hardware)
In this optional step, we will configure our MotionEye to automatically send us emails with attachments containing the photos our Raspberry Pi security camera has taken. It is highly recommended that you create a separate Gmail account specifically for this purpose. These instructions are specific to Gmail only.
1. Enable “Less Secure Apps” in your Gmail account.
(Image credit: Tom’s Hardware)
2. Expand “Motion Notifications” in Motioneye.
3. Toggle ON “Send An Email”
4. Enter your Email address, password.
SMTP Server = smtp.gmail.com
SMTP Port = 587
Use TLS — Toggle to On
Enter a value for “Attached Pictures Time Span”
5. Click the “Test Email” button.
(Image credit: Tom’s Hardware)
The first email is a text only email. Subsequent emails will contain attachments.
(Image credit: Tom’s Hardware)
Mobile App Access to Raspberry Pi Security Camera
MotionEye also features a mobile app for iOS and Android / Google Play stores. Keep in mind that the app will only work while you are on the same network as your Raspberry Pi (unless you enable port forwarding, which is not encouraged for security reasons).
MotionEye iOS app — https://apps.apple.com/us/app/motioneyeos-client/id1485489242
(Image credit: Tom’s Hardware)
Google Play app — https://play. google.com/store/apps/details?id=com.jairaj.janglegmail.motioneye&hl=en_US&gl=US
(Image credit: Tom’s Hardware)
Topics
Raspberry Pi
Build a Raspberry Pi Security Camera 2022
Written By: Cherie Tan
Introduction
Ever wanted to make your own custom yet cost-effective security camera system?
In this guide, we will go through the steps required for you to get started with motionEyeOS and create your own security camera using the Raspberry Pi Zero W and a Raspberry Pi V2 Camera Board.
After completing this guide, you could go on to further customise it: Add a power button or on/off switch, 3d printed case, and much more for your build!
Step 1 Attach the Camera to Raspberry Pi
-
Before doing anything else, we will attach the Raspberry Pi Camera NoIR Infrared camera to the Raspberry Pi Zero W board.
 If you would like to monitor your environment in low-light settings, it is the ideal choice. Else, there is the Raspberry Pi Camera board V2.
 -
Please note that as the camera port on the Raspberry Pi Zero W is smaller, using either camera board with the Raspberry Pi Zero W requires a shorter camera adapter cable. We have listed the right camera adapter cable in the recommended parts list of this guide.
Step 2 What is motionEyeOS
-
motionEyeOS is a video surveillance operating system, a Linux distribution that can turn a single-board computer like the Raspberry Pi into a full-fledged video surveillance system.
-
It also supports other devices such as the Banana Pi, Odroid and Pine single board computers. This is what we will be using on the Raspberry Pi Zero W!
Step 3 Format SD Card
-
Use a SD card formatting tool like SD Formatter 4.
 0, please download it if you haven’t already got it
 -
Insert your microSD card into either an in-built or external SD card reader, then see the drive letter that shows up in the left hand column of Windows Explorer, or Finder on the Mac
-
Open SD Card Formatter 4.0
-
Select the correct letter drive for your microSD card
-
Choose ‘Quick Format’ or ‘Overwrite Format’
-
Click on Format button
Step 4 Install motionEyeOS
-
Go to motionEyeOS GitHub repository to download the SD Card Image for your Raspberry Pi Zero W
-
Run Etcher, or download it if you haven’t got it installed
-
Click on ‘Select Image’ and choose the image you downloaded in step 1
-
Click on ‘Select Drive’ and make sure to use the correct drive letter associated with your microSD card
-
Click on ‘Flash’ button to flash the motionEyeOS image onto the microSD card!
Step 5 Add wpa_supplicant.
 conf
conf
country=AU
ctrl_interface=DIR=/var/run/wpa_supplicant GROUP=netdev
update_config=1
network={
   ssid="my-wifi-ssid"
   psk="super-secret-password"
}
-
Save the file
-
Re-insert the microSD card back into the Raspberry Pi. Now power it up with the official power supply.
-
With motionEyeOS installed, it’s almost ready to be boot up! For simplicity’s sake, we will set up WiFi on the Raspberry Pi by manually configuring a file. This can be done by adding a text file to the boot directory of the newly flashed microSD card.
-
Insert microSD card into SD card reader and computer
-
Create a file in boot directory and name this file wpa_supplicant.
 conf
conf -
Add the text as shown
-
Replace «my-wifi-ssid» with your WiFi network name, leaving the quotation marks.
-
Replace «super-secret-password» with your WiFi password, also leaving the quotation marks as is.
Step 6 Connect to motionEye web interface
-
On first boot, it will perform some configuration for a few minutes. You will see: ‘Interface wlan0 has IP address (your Raspberry Pi’s IP Address will be listed here)’
-
Enter this IP address onto your web browser, this will bring up the motionEye web interface.
-
It will prompt you for login details.
 Enter ‘admin’ as the username, and leave the password blank.
 -
Click on the ‘Login’ button and you should now be able to access the settings panel.
Step 7 Change password
-
To make it more secure, you will want to change the password. So head over to the general settings menu.
Click on the blue hamburger menu icon on the top left-hand corner
-
Enter a password in the ‘Admin Password’ field
-
Enter a password in the ‘Surveillance Password’ field
-
You might also want to change the default camera name under ‘Camera Name’
-
Click the ‘Apply’ button to save changes.
Step 8 Video device settings
-
Change frame rate
-
Turn on automatic brightness
-
Change video rotation
-
Under video device, you can:
Change video resolution
Step 9 Customise your build
-
Now that you have motionEye running on the Raspberry Pi Zero W, you can choose to leave it in its Foundation Raspberry Pi Zero case while connected to a power supply, and it will run just fine.
-
But if you would like to make it even more portable, you can choose to use a portable battery pack such as the USB Battery Pack for Raspberry Pi — 4000mAh.
-
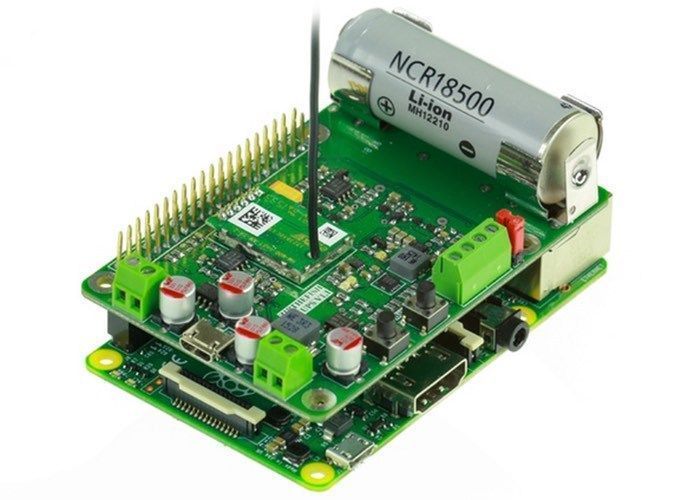
Alternatively, you could add a lithium ion polymer battery, a power charging board, and a switch to your build. You could even top it off with a custom 3D printed case.
Step 10 Advanced settings
-
By clicking on the ‘ON’ toggle button under ‘General settings’, you will have access to many useful extra settings.
-
These include:
- Changing timezone
- Changing host name
- Checking for updates
- Shut down
- Reboot
Step 11 Connect Powerboost 500C to Raspberry Pi
-
We will connect a PowerBoost 500 Charger with the Raspberry Pi Zero W. First, solder a red wire from the positive end of Powerboost 500C to 5V on the Raspberry Pi Zero W
-
Solder a black wire from negative end of Powerboost 500C to GND on Raspberry Pi Zero W
Step 12 Connect SPDT switch to Powerboost 500C
-
Together with the Powerboost 500C, a breadboard-friendly SPDT slide switch is used here.
 Solder a red wire from a leg on the SPDT switch to EN on Powerboost 500C
 -
Solder a black wire from another leg on the switch to GND on Powerboost 500C
Step 13 Connect LiPo battery to Powerboost 500C
-
Now attach the LiPo battery to the Powerboost 500C by using the JST cable.
There you have it, a LiPo battery attached to a battery charger circuit and an ON/OFF switch for your Raspberry Pi security camera!
Home video surveillance on Raspberry Pi
11/12/2019
As well as work video surveillance, outdoor video surveillance, office video surveillance and garage video surveillance.
Let’s say it’s time to take care of security and put cameras at home. You can buy special cameras, a video capture module and spend a lot of money on it.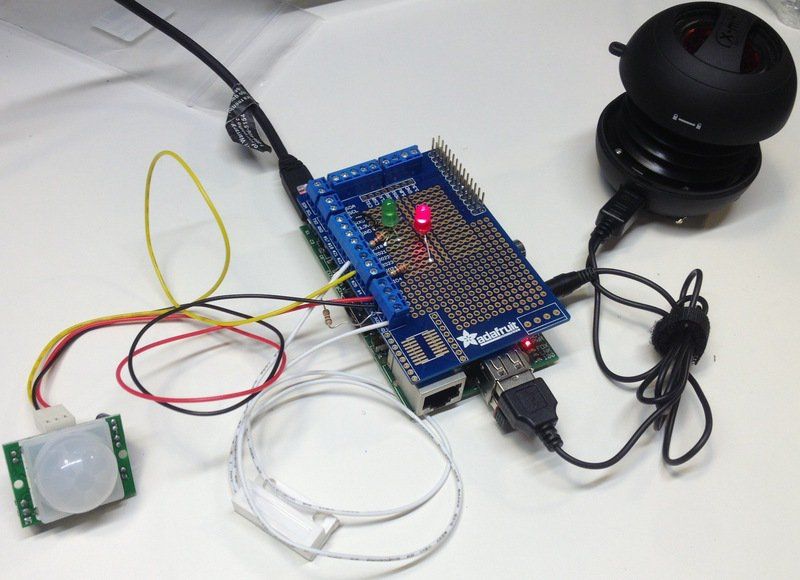 Or you can take a Raspberry Pi module with a native camera, spend 10 times less and get the same thing. Well, similar.
How 9 will work0009
Raspberry Pi will be the brain of our system. This is a single-board computer that can run a full-fledged operating system like Linux.
We will connect a camera to the computer: the Pi has its own port for it, but you can also use USB webcams. These will be our eyes.
On the Raspberry Pi we will install a special operating system tailored for video surveillance. Its interface will be available via the web: you can enter the address of our Raspberry Pi in the browser and access the cameras.
The operating room will look at the cameras. When movement is detected, she will take a picture of it and send it somewhere or save it on a card.
What you need
Raspberry Pi board. It is best to take the third or fourth version. If it doesn’t matter where to buy, start with Aliexpress. When you get comfortable, you will find a shop to your liking.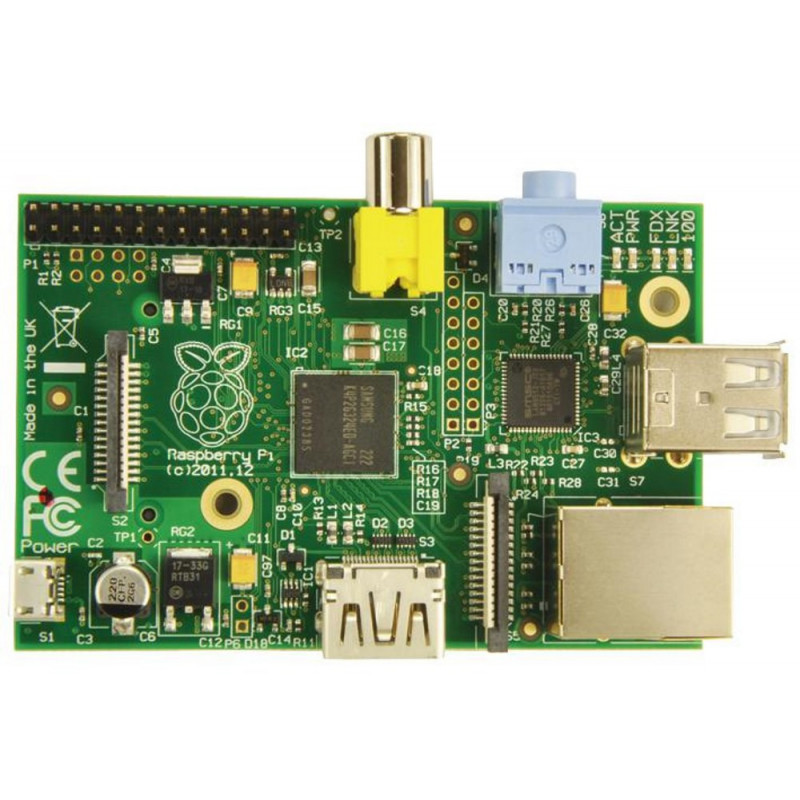
Chamber. For simplicity, we will use the official Raspberry Pi NoIR v2 camera. She does not shoot well in the dark, but for a start this is enough for us. If you want to shoot at night, choose the IR version and don’t forget about infrared illumination. The camera stand is a matter of taste, you can with it, you can without it. It will not affect the work, but it will be more convenient to install the camera.
Firmware. To turn your Raspberry Pi into a video surveillance server, use motionEyeOS. This is a special version of the Linux-based operating system, which already has everything you need to work with the camera. We go to the project page, select the desired device and download. We will install in the next step.
Firmware program. Etcher — simple and clear. Download the program to your computer and upload files to the card through it. If you throw them just like that, nothing will work.
microSD card and adapter.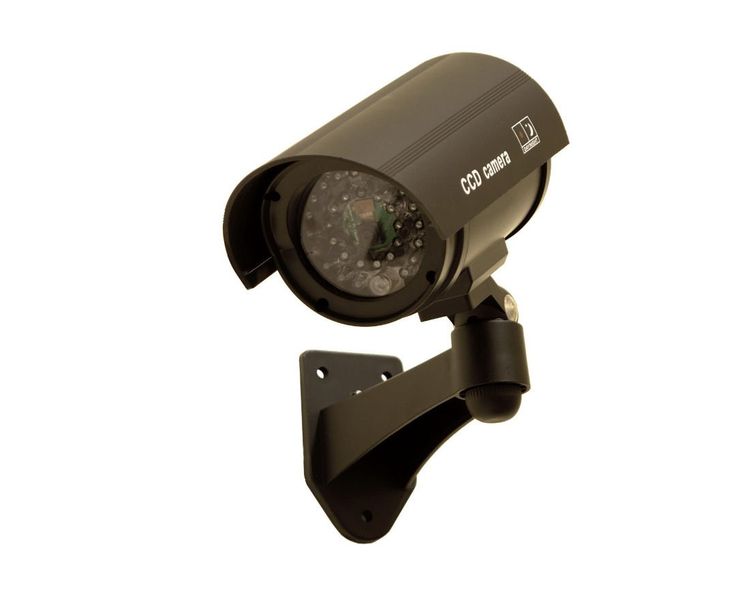 Simple card for gigabytes or more. The adapter is needed in order to upload the necessary files to the USB flash drive. If you already have an adapter on your computer or laptop, use it.
Power supply. So that the voltage does not sag and everything works stably, take a separate power supply. For some, the system works on charging for a mobile phone, but here it is already at your own peril and risk.
Preparing a flash drive
- Install Etcher on your computer and run the program.
- Insert the flash drive into the card reader and connect it. If the card reader is built into the computer, just insert the USB flash drive.
- In Etcher, select the firmware that we will install, select the disk for recording — our flash drive — and press the Flash button.
- We wait until the recording is over and take out the flash drive.
Sometimes you come across defective or old flash drives with broken memory elements, so in this case just replace it with another one.
Set up Wi-Fi
Modern Raspberry Pi has a LAN connector, but for the sake of interest, we will try to work over Wi-Fi.
How Wi-Fi actually works
At the last step after the firmware, the program turned off the USB flash drive itself, so, most likely, the computer no longer sees it. We pull it out, paste it again and create a file on it
wpa_supplicant.conf
— it is responsible for setting up the wireless network on the device.
We need to save this file in UNIX format. You can use any advanced text editor for this. We have Sublime Text, so we go to settings
Launching and configuring
We have left:
- Connect the camera and the Raspberry Pi module itself with a special cable (comes with the camera).
- Insert card into Raspberry Pi.
- Connect the power supply and plug the unit into the socket.
After this is done, wait 3-5 minutes for the system to boot up.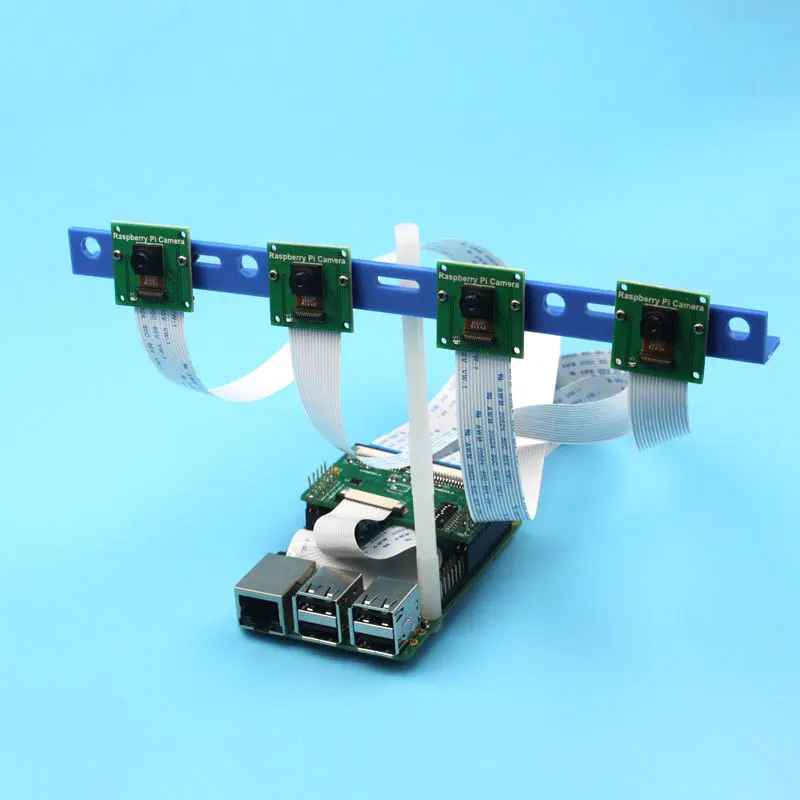 At this time, we download the IP address scanner to find the IP that our camera will have after launch. We use Angry IP Scanner, but this is a matter of habit.
As soon as the system has booted up and the scanner has found our module on the network, we drive its address into the browser line and enter the admin login. There is no password, so the first thing to do after logging in is to change the password to your own.
There is no password by default, which is bad from a security point of view.
After that, the desktop with cameras starts, and we see a picture with our house. This means that we did everything right and assembled our video surveillance server on the Raspberry Pi.
What’s next
You have an operating system web interface. Dig into the menu and set everything up. For example:
- organize video recording by schedule or by motion;
- change the IP to a static one so as not to look for it every time;
- make it so that you receive an email when someone passes in front of the camera;
- add multiple cameras;
- search the Internet for integration of motionEyeOS with Telegram and make your own bot that sends you photos from cameras.
Video surveillance on Raspberry Pi / Sudo Null IT News
Good day!
On New Year’s Eve, I had an idea to build some kind of video surveillance. I had everything I needed on hand:
- Raspberry Pi Model B single board computer
- LOGITECH HD Webcam C270
After reading the article, I decided to develop the author’s idea a little.
The main difference between my idea and the author’s idea is that I have the ability to view events in real time without losing the main function — video recording.
Acquaintance
So, first, let’s get acquainted with the main «component»:
Raspberry Pi appearance:
Specifications:
- Broadcom BCM2835 700MHz ARM1176JZFS processor with FPU and Videocore 4 GPU
- GPU provides OpenGL ES 2.0, hardware-accelerated OpenVG, and 1080p30 H.
 264 high-profile decode
 - GPU is capable of 1Gpixel/s, 1.5Gtexel/s or 24GFLOPs with texture filtering and DMA infrastructure
- 512MB RAM
- Boots from SD card, running a version of the Linux operating system
- 10/100 BaseT Ethernet socket
- HDMI video out socket
- 2 x USB 2.0 sockets
- RCA composite video out socket
- SD card socket
- Powered from microUSB socket
- 3.5mm audio out jack
- Raspberry Pi HD video camera connector
- Size: 85.6 x 53.98 x 17mm»
 pi@hall-pi ~ $ cat /proc/cpuinfo
processor: 0
model name : ARMv6-compatible processor rev 7 (v6l)
BogoMIPS : 2.00
Features : swp half thumb fastmult vfp edsp java tls
CPU implementer : 0x41
CPU architecture: 7
CPU variant : 0x0
CPU part : 0xb76
CPU revision: 7
Hardware : BCM2708
Revision : 000e
Serial: 000000005a82c372
A list of officially supported distributions can be found here. I opted for Raspbian without a graphical shell.
The installation process is quite simple and does not need a detailed description, so I will list the main facts that you should pay attention to:
- Setting the time zone
- Setting the computer name
- Enable SSH access
- System update
After completing all the necessary settings, you can proceed.
Preparation
First, let’s install all the necessary packages:
sudo apt-get install imagemagick libav-tools libjpeg8-dev subversion
Then download and build mjpg-streamer:
 sudo svn co https://svn.code.sf.net/p/mjpg-streamer/code/mjpg-streamer/ mjpg-streamer
cd mpg-streamer
make
Because we will store all data in the cloud, we will set up work with a remote file system via WebDAV:
sudo apt-get install davfs2 sudo mkdir /mnt/dav sudo mount -t davfs https://webdav.yandex.ru /mnt/dav -o uid=pi,gid=pi
In order not to enter the username and password each time, you need to add them to the file
/etc/davfs2/secrets
/mnt/dav user password
Working process
Add commands to /etc/rc.local to mount WebDAV and run the script for broadcasting to the network:
 mount -t davfs https://webdav.yandex.ru /mnt/dav -o uid=pi,gid=pi
cd /home/pi/mjpg-streamer && ./mjpg_streamer -i "./input_uvc.so" -o "./output_http.so -w ./www"
Now, by going to http://:8080/ we will get access to the camera. It remains only to do port forwarding on the router and you can access the camera outside the local network.
Creating a timelapse video
First of all, we need to get an image from the camera. Because it is already taken (the image is broadcast by the web server), then we will use the opportunity to get the current image from the web server:
curl http://localhost:8080/?action=snapshot > out.jpg
In case we want to draw the date of the snapshot onto the image, we can use the command convert
 timestamp=`stat -c %y out.jpg`
convert out.jpg -fill black -fill white -pointsize 15 -draw "text 5.15 '${timestamp:0:19}'" out_.jpg
Full version of the script:
 #!/bin/bash
filename=$(perl -e "print time")
foldername=$(date --rfc-3339=date)
curl http://localhost:8080/?action=snapshot > $filename
timestamp=`stat -c %y $filename`
mkdir /mnt/dav/out/$foldername
convert $filename -fill black -fill white -pointsize 15 -draw "text 5.15 '${timestamp:0:19}'" /mnt/dav/out/$foldername/$filename.jpg
rm $filename
The video is assembled using the avconv command:
avconv -r 10 -i %06d.jpg -r 10 -vcodec mjpeg -qscale 1 out.avi
Full video build script:
#!/bin/bash filename=$(date --rfc-3339=date) i=0 for f in `ls -tr /mnt/dav/out/$filename/*.jpg 2>/dev/null` do newf=`printf %06d $i`.jpg echo $f "-->" $newf mv $f $newf i=$((i+1)) done rmdir -R /mnt/dav/out/$filename/ avconv -r 10 -i %06d.jpg -r 10 -vcodec mjpeg -qscale 1 /mnt/dav/$filename.avi rm *.jpg
Now it remains only to register the execution of scripts in the Cron scheduler:
 * * * * * pi bash /home/pi/cam.sh
59 23 * * * pi bash /home/pi/build.sh
Sample video
Conclusion
This approach helps to get rid of the need to spend a lot of time watching videos, and also reduces the cost of the final product. Due to the presence of a full-fledged OS, it becomes possible to expand the functionality in the right direction.
Sorry to publish in the hubs «DIY or DIY, Hardware, Gadgets. Devices for geeks «did not have enough karma, chose the closest available.
We assemble our own video surveillance system for a private house with our own hands based on Raspberry Pi, webcams and MotionEye
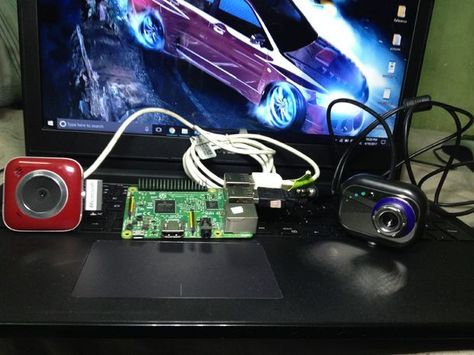
Hello everyone, today I will tell you how I assembled my home surveillance camera system based on a Raspberry Pi camera and two webcams, 1080P A4 — Tech and low resolution camera A4 — Tech. More cameras can be connected to the Raspberry Pi, but I suggest limiting yourself to two or three webcams.
I note that this article will not talk about how to access the tracking system from third-party devices (access only through the home network), only about how easy it is to install a video surveillance system at home or in the country.
Here is the list of parts I used:
- Raspberry Pi 2 Model B
- (I bought my board in 2015 when the Raspberry Pi 3 Model B was not yet released. If you are going to install video surveillance for a private house, I advise you to take the latest Raspberry model)
- Heatsink
- Case and cooler
- Memory card
- A4Tech Full HD 1080p webcam
- A4 – Tech webcam
- Wi-Fi adapter (if you take Raspberry Pi 3 Model B, then it is built-in)
- VGA-HDMI adapter
The heatsink and cooler are optional, it’s up to you, although I think it’s obvious that as a result of taking photos and videos, the temperature will rise. But, again, the cooling system is optional.
Step 1: Installing the OS
You have a new Pi in your hands and are wondering what you need to do next, so that in the end you have a video surveillance system of several cameras that react to movement and start video or photography .
Here’s what you need to do:
Download the latest OS here, I’ve installed RASPBIAN JESSIE WITH DESKTOP version «2017-07-05», the latest as of this writing.
Step 2: Etcher
Write this application to your SD card, download and install. It’s easy to use. Recording an image will take only a couple of minutes, depending on the power of your computer, after which there will be only a couple of free MB on the card, do not panic, it should be so.
Step 3: Memory card
Insert an SD card into the Raspberry Pi connector, remember — during the initial installation, the secure shell protocol (SSH) is disabled by default, so all work now is to connect the monitor to the HDMI connector, you will need a VGA adapter -HDMI.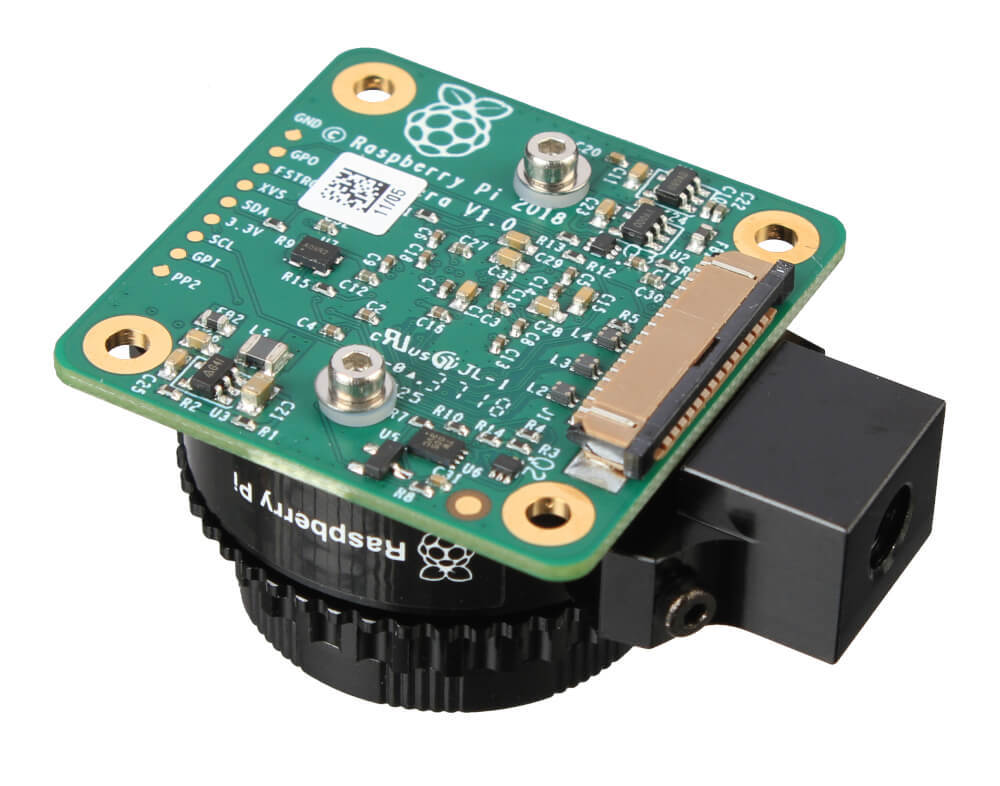 The protocol must be enabled so that you can access the system from other devices using the PuTTY client in case you need to shut down or reboot your PI system.
Once the Raspberry Pi interface has started, type the following command at the command prompt:
sudo raspi-config
After that, a list of options will appear like the picture in the next paragraph
Step 4: Enable secure shell protocol
Select #5 and in the next drop down box select P2 SSH, then the secure shell protocol will be enabled.
To install a fresh version of raspbian, you must set the root password manually (if you do not know the default password), to do this, enter the following command at the command line:
sudo passwd root
Step 5: Root Access
You must remember that some commands are available only to the root user (a user with unlimited access rights), so you must log in as root user in order to perform administrative tasks. To do this, type su at the command line and enter your root password.
While logged in as root, enter this command at the command line to update dependent PI objects:
sudo aptitude update && sudo aptitude upgrade
Step 6: Advanced Settings
Motioneye requires several dependencies to enable some features. You will need to install these dependencies in order to have access to all Motioneye features. Let’s start by installing ffmpeg for video, to do this, enter this command:
wget https://github.com/ccrisan/motioneye/wiki/precompiled/ffmpeg_3.1.1-1_armhf.deb
Once downloaded, install the program on your PI system. To do this, you need root privileges (which I talked about in the previous paragraph).
dpkg -i ffmpeg_3.1.1-1_armhf.deb
Step 7: Remove Extra Libraries
You must ensure that you do not have duplicate libraries in order for your security camera to work properly. Remove software packages that will interfere with Motioneye:
apt-get remove libavcodec-extra-56 libavformat56 libavresample2 libavutil54
Step 8: Add required dependencies
Install other required dependencies using this command:
apt-get install python-pip python-dev curl libssl-dev libcurl4-openssl-dev libjpeg-dev libx264-142 libavcodec56 libavformat56
libmysqlclient18 libswscale3 libpq5
Step 9: Add Motioneye
Download the Motioneye software package:
wget https://github.com/Motion-Project/motion/releases/download/release-4.0.1/pi_jessie_motion_4.0.1-1_armhf.deb After downloading, install the program: dpkg -i pi_jessie_motion_4.0.1-1_armhf.deb pip install motioneye
Step 10: Create a configuration folder
Create a configuration folder:
mkdir -p /etc/motioneye
And copy the config file in case you need to edit it:
cp /usr/local/share/motioneye/extra/motioneye.conf.sample /etc/motioneye/motioneye.conf
Create a datastore:
mkdir -p /var/lib/motioneye
Step 11: Create an initialization script
Create an initialization script, add it to autorun so that it starts Motioneye immediately:
  cp /usr/local/share/motioneye/extra/motioneye.systemd-unit-local
/etc/systemd/system/motioneye.service
systemctl daemon-reload
systemctl enable motioneye
systemctl start motioneye
Step 12: Complete Installation
Software installation is complete and you now have a Raspberry Pi based surveillance system. You need your Raspberry IP address to access the configuration. There are two ways to find out:
- If you are still connected to your Raspberry Pi, just type ifconfig 9 on the command line0048
- Or log in to your router control panel and look up your Raspberry Pi IP address there
If you found your IP address, enter it in your browser: Your-raspberry-ip-address:8765, you will be presented with a user login form.
Step 13: Motioneye Basic Setup
When you access the Raspberry’s IP address, you will be presented with an authorization form, the default user is admin, leave the password field blank.
Step 14: Connect Webcams
Connect webcams to your homemade home video surveillance system, wait a few seconds for Raspberry to «see» them.
Step 15: Advanced Settings
When you add cameras, you will need to access Motioneye advanced settings.
Step 16: Brightness Level
Auto Brightness is only available if the camera supports it, one of my cameras — 1080P A4-Tech — does.