Enable 5.1 Dolby Digital Live (DDL) and DTS Connect in Optical Input of Alienware Alpha :: Alienware Alpha Gaming
Enable 5.1 Dolby Digital Live (DDL) and DTS Connect in Optical Input of Alienware Alpha
Introduction
I recently got an Alienware Alpha, I’m pretty happy with it except for a big issue with the Optical input and its driver’s ability to encode sound using Dolby Digital Live (DDL) or DTS Connect on the fly.
Why is it important to encode audio on the fly?
Because that’s the only way we can send 5 channels of audio at the same time on the same optical cable. The optical cables can only transport 2 audio channels at the same time, that’s why all audio decoders will only serve the audio as stereo, so in order to enjoy 5.1 we need to encode all the PC audio to Dolby Digital or DTS.
Why PC needs to explicitly encode the audio but other devices as PlayStation 3, 4, Xbox 360, One and BluRay players don’t need this?
Actually PS, Xbox and BluRay players do it automatically, they encode all the audio for you since they correctly assume that optical cable can transport 5. 1 only when it is encoded, so depending of the game of the movie, they encode to Dolby Digital or DTS.
PC needs to explicitly encode the audio because you have the option to get the raw audio and send it to receivers that don’t need it encoded, actually almost all games don’t come with the audio already encoded so the decision to encode it or not is ours, that’s the reason why the config is needed, and also required when using Optical inputs.
So, if encoding audio is required when using Optical input to transport 5.1, WHY IT IS NOT SET TO ON AS DEFAULT?
That’s the most important question here, for me Alienware made a HUGE mistake with this, when you on the AlienUI select the Optical input as the main audio source, either Dolby Digital Live or DTS should be activated to encode all PC audio in these formats and be able to have full audio, but what’s the current state? It only servers stereo audio. This is unacceptable for the Alienware Alpha since it is sell under the concept of being a living room experience.
Alienware goof it so hard, that I actually don’t know how they were able to get 5.1 audio using Optical input on their quality tests when gaming, maybe they just went to the Audio settings on the Control Panel and made an Dolby Digital and DTS test, which works, but that test sends the audio encoded in these formats, but that doesn’t mean DDL or DTS Connect work. Let’s remember that almost all games doesn’t come with the audio tracks encoded in these formats, they actually come as separated channels.
So to summarize this, I detected 3 big problems:
- My Realtek Audio Manager DIDN’T WORK AT ALL, so it was really hard for me to start the troubleshooting of the issue, not sure if other users have the same problem but the speaker icon on the tray was not displayed and when I tried to manually start the program, nothing happened, not even a log file with details of the error
- After reinstall several versions of the driver, I found that only the Audio Manager packed on version R2.
 71 works fine, not even R2.78 which is the latest one or the one Alienware gives us as default (which I don’t know the number, probably R2.78)
 - Alienware didn’t notice that none of the drivers allow us to encode to Dolby Digital or DTS, so after digging around the web I found some people with the same problem (not from Alpha, not even on Alienware, people with RealTek sound cards) that were able to modify the driver to be able to encode the audio (for cards that have the needed hardware to do it, lucky us the Alpha’s card can do it).
References
- The source of the unlocked driver is this http://www.techpowerup.com/forums/threads/unlocked-realtek-hd-audio-drivers-with-dolby-digital-live-and-dts-interactive.193148/ so many thanks to techpowerup.com user “2bad” for this amazing unlocked driver.
- All the steps that I documented here are based on the ones described in this video
https://www.youtube.com/watch?v=z3vLvFgVlzY you should watch this video at least once before start with this procedure so you can have an overall idea on what to do and why.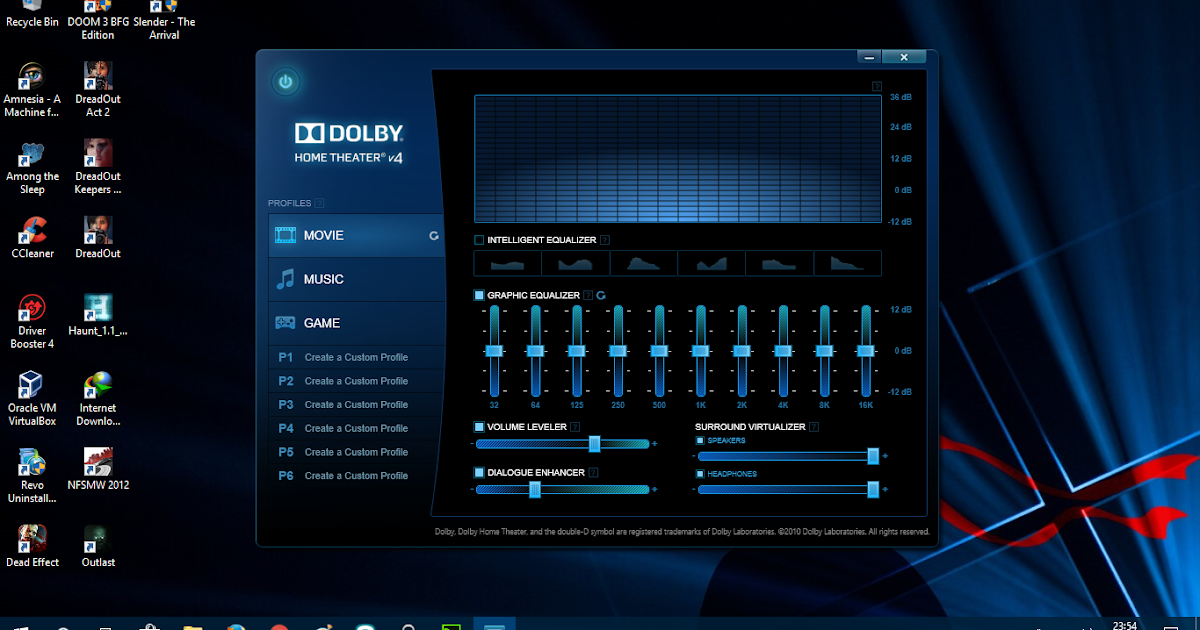 Thanks to Youtube user “SpoonHandle” for the detail explanation of the procedure.
All the following material are based on the previous references but with some changes and extra explanations from me to orient the user to apply the changes on an Alienware Alpha, also I will comment my own experience during that process.
Requirements
— Download «Realtek High Definition Drivers: R2.71», should be here http://www.realtek.com/downloads/ but it is not there anymore they just display newer versions (R2.78 at this time), so R2.71 is not on the list, in that case I’m sharing the one that I installed here https://drive.google.com/open?id=0B_QgKAk4BATMZ3RBMEtHT0NBZFk
— Download the unlocked R2.71 drivers named «Windows Vista / 7 / 8 — 32 bit and 64 bit — R2.71 M1» from this thread http://www.techpowerup.com/forums/threads/unlocked-realtek-hd-audio-drivers-with-dolby-digital-live-and-dts-interactive.193148/
If you don’t want to read the page, here is the direct download: http://www24. zippyshare.com/v/34731542/file.html
— Download the «Driver Signature Enforcement Overrider 1.3b» (DSEO13b.exe) from the page http://www.ngohq.com/?page=dseo
If you don’t want to read the page, here is the direct download: http://files.ngohq.com/ngo/dseo/dseo13b.exe
— OPTIONAL: Download the «My WCP Watermark Editor» (My_WCP_WaterMark_Editor.exe) from http://www.softpedia.com/get/Tweak/System-Tweak/My-WCP-Watermark-Editor.shtml
If you don’t want to read the page, don’t worry, the Download button is at the very beginning of the page.
— Disable Secure boot, it is needed in order to use the modded driver,so follow this easy step-by-step guide to disable it: http://itsfoss.com/disable-uefi-secure-boot-in-windows-8/
Steps
All the following steps need to be done on the Alpha’s Desktop Mode, so connect a mouse and a keyboard and send this page to the Alpha and follow the steps there.
1. Uninstall your current Realtek audio drivers and restart, (restart implies to restart Windows, then wait for the AlienUI to load and select Desktop Mode again, patience is required).
2. Install the official R2.71 RealTek drivers and restart.
NOTE: If you try to install R2.71 without removing the current installed driver, the installer will uninstall it first and ask for restart, but after that the installation process is not continued, you will need to start it again, so it is better to remove it before the installation.
3. Open a Command Prompt as Administrator, the easiest way is to hit Windows key + X in the Desktop, a menu is displayed and click on the option “Command Prompt (Admin)”, if you have troubles to start it, check here http://www.howtogeek.com/194041/how-to-open-the-command-prompt-as-administrator-in-windows-8.1/
Now with the Admin prompt opened, copy and paste these commands:
bcdedit -set loadoptions DISABLE_INTEGRITY_CHECKS
bcdedit -set TESTSIGNING ON
This last one has to remain on. If you disable test mode the modded drivers will not work, also it will display a “Test Mode” message on right side of the desktop, that’s normal, in step 7 there are instructions to remove the message, but it is totally optional, in my case I prefered to not touch the message.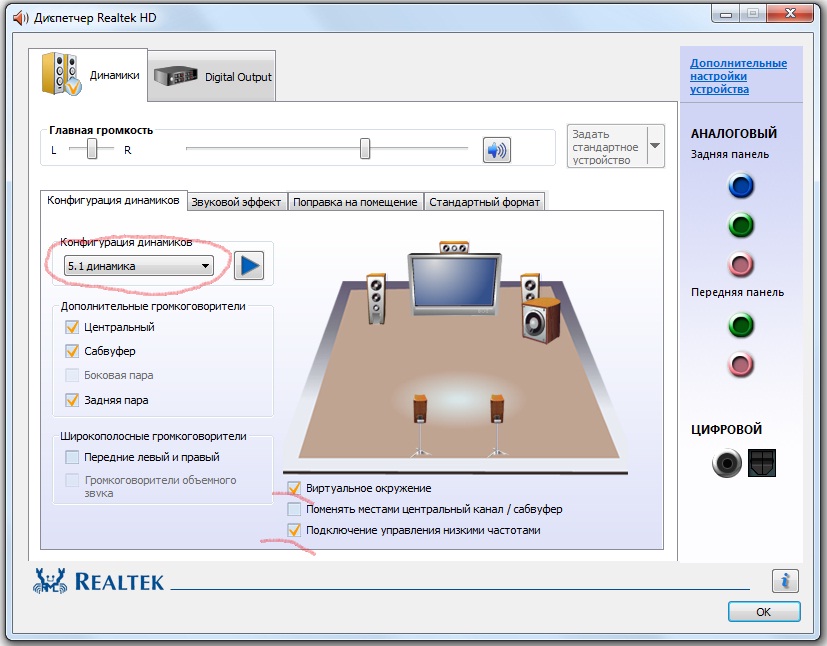
4. Unzip the unlocked RTKVHD64.SYS driver then run dseo13b.exe as an Administrator (right click on the program, Run as Administrator) and sign the unlocked RTKVHD64.SYS driver, this is the 64bits version.
If you want to skip this step, use mine which is already signed (the 64 bits version needed for the Alienware Alpha) https://drive.google.com/open?id=0B_QgKAk4BATMVVo4MXI3RnZEYms
5. Copy the signed driver to C:\WINDOWS\SYTSTEM32\DRIVERS
6. Restart computer.
7. NOTE 1: This step is OPTIONAL, in my case I didn’t do it, it is better for me to show the test mode message. You can skip this one and continue with step 8
NOTE 2: On Windows 8.1 My WCP Watermark Editor has been shown to cause issues with computers sleeping properly and breaking some Windows 8.1 apps. So I recommend just living with the TEST watermark at this point. If you have already ran My WCP Watermark Editor and want to undo the effects, run the following in an elevated command prompt: SFC /scannow
If desired use MY_WCP_WATERMARK_EDITOR. exe to remove the test watermarks. Restart computer
8. At this point the Realtek Audio Manager icon on the tray is displayed (it MUST be, it is required, otherwise the program is failing to start), double click it and you will see the Realtek audio settings, here select the optical input, select Dolby Digital Live or DTS Connect as the default output format and that’s it, you can go to the program called SupportAssist (Alienware software pre-installed on Alpha) and do an Audio test, you should now hear 5.1. As well as Dolby Digital Live, you can choose DTS Connect, both work as expected.
The ultimate test is to start a games and notice the individual usage
So now you have the audio well configured, these changes are seen and used on the AlienUI Console mode too, now Alpha is ready for some living room experience for real this time!!!
Just for the records, my audio system is a “Logitech Z-5500 THX-Certified 5.1 Digital Surround Sound Speaker System” which have a Dolby Digital and DTS decoder and uses optical output
http://www. amazon.com/Logitech-THX-Certified-Digital-Surround-Speaker/dp/B0002WPSBC
Dolby Digital Live/DTS Not Working on Windows 10/11
It is reported that many Creative Sound Blaster X-Fi users have encountered their Dolby Digital live or DTS failed to work on Windows 10/11. When they connect the Dolby Digital Live or DTS to the audio device, only to be told that this operation is unsuccessful, please try again or reinstall another application.
The first thing at that time they tried to do is to play the sound test for Dolby Digital Live or DTS in device manager, but to their surprise, Windows 10 prompts them that it failed to play the test tone.
Upset though you may be, you are supposed to fix this Dolby Digital Live or DTS not working on Windows 10 issue as soon as possible, for you are unable to appreciate the high-quality sound from your Realtek HD audio on Windows 10. And here is another Dolby error you may meet: unable to start Dolby audio driver on Windows 10.
Solutions:
- 1: Enable Dolby Digital Live/DTS
- 2: Uninstall and Reinstall Realtek Audio driver
- 3: Troubleshooting Dolby Digital Live/DTS
Solution 1: Enable Dolby Digital Live/DTS
In the first place, you can try to install the Media Feature Pack to turn on the Dolby Digital Live or DTS after Windows 11/10 Creator’s Update. The Media Feature Pack for N edition of Windows 10 Version 1703 can provide the same sound functionality as Windows 11/10.
After you download it, you are able to enable the Dolby Digital Live. And you can check the playback devices settings.
1. Right-click the Volume icon and choose Playback devices.
2. Right click the device and set it as the Default device.
3. Click Apply and Ok to save the setting changes.
Here you should make sure that you have enabled Show disabled devices and Show disconnected devices option.
Once you have enabled the Dolby Digital Live/DTS and set the Speaker or microphone as the default device, you can play the test for the Dolby Digital Live again to see if it can work correctly on Windows 10 this time. If not, you need to go ahead.
Related: Creative Sound Blaster Not Detected on Windows 11/10
Solution 2: Uninstall and Reinstall Realtek Audio driver
The corrupted or missing or even damaged audio driver can cause your Dolby Digital Live or DTS out of work as well, so at this point, you would better uninstall the problematic audio driver and install a new and latest one.
1. Go to Device Manager.
2. Expand Sound, video, and game Controller.
3. Right click the Realtek High Definition audio and choose to Uninstall it.
4. Restart your computer to let Windows 10 automatically reinstall a new Realtek HD audio driver for you.
But here if Windows 10 cannot find you a compatible Realtek HD audio driver and reinstall it to fix the Dolby Digital Live or DTS does not work on Windows 10, you can turn to Driver Booster to reinstall the latest Realtek HD audio driver for you.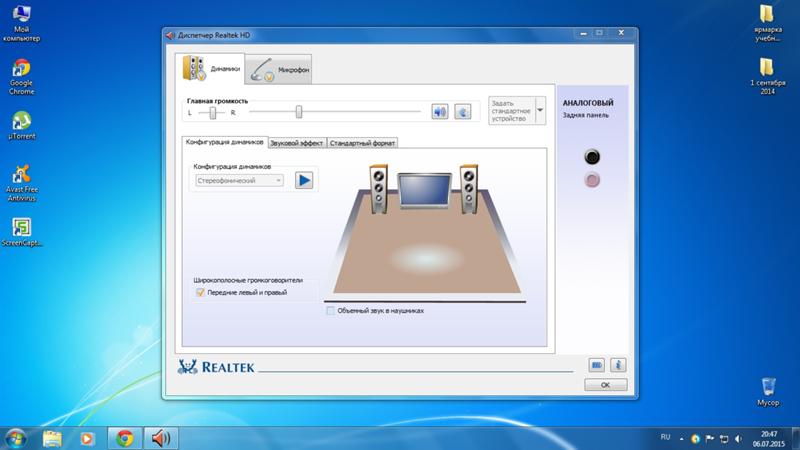
Driver Booster can help you download and install the newest and most compatible Realtek HD audio driver quickly and safely. It aims to fix numerous Windows 10 device errors, so you can try to use to resolve the Dolby Digital Live or DTS issue.
Having downloaded and installed Driver booster on your PC, you can launch it to reinstall a new Realtek HD audio driver.
In the process, Driver Booster will remind you to click Scan and Update. Driver Booster will automatically download and install the latest Realtek audio driver.
With the newly-downloaded Realtek HD audio driver, your Dolby Digital Live or DTS may be working now.
Solution 3: Troubleshooting Dolby Digital Live/DTS
If all the solutions above are useless for you to fix the Dolby Digital Live surround sound and DTS encoding not working on Windows 10 after Windows Creator Update. You may as well try to run Windows troubleshooter to help you detect and fix the audio issue.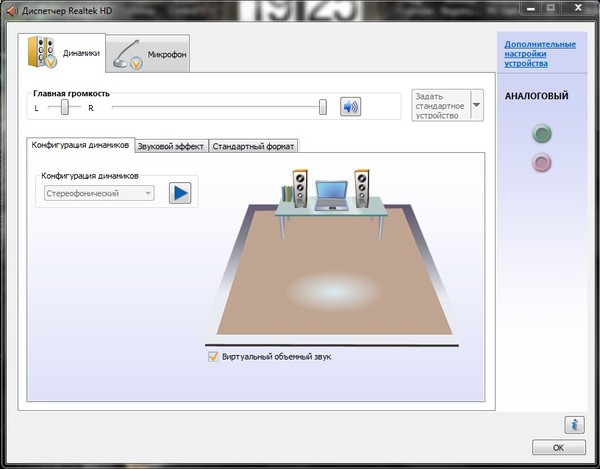
1. Type Troubleshoot in the search box and press Enter to open it.
2. Click Play audio and choose to Run the troubleshooter.
Then Windows 11/10 will automatically detect your computer errors and help to fix it. Maybe it is able to resolve your Dolby Digital Live not working on Windows 11/10.
Nevertheless, it is well-known that Windows 10 can only solve the basic system, so in a large sense, it may fail to fix the Dolby Digital Live or DTS issue.
Under this circumstance, if you ran across this issue just after you have upgraded your operating system to Windows 10 from Windows 7/8, you may as well try to restore your Windows system.
You can try to run this programs in compatibility mode to adjust to your restored Windows system.
All the solutions are offered to help you fix the Dolby Digital Live or DTS out of work on Windows 10, believe it or not, you can always find a suitable and effective way to get rid of this audio issue.
More Articles:
Download Sades Drivers for Windows 11, 10, 8 and 7
Fixed: Logitech Speakers Not Working Windows 11/10
Solved: Realtek Audio Manager Not Opening
How to Use Realtek HD Audio Manager to Improve PC Sound Quality ?
Realtek High Definition Audio Driver is one of the most used audio drivers, which provides high quality DTS, Dolby, Surround Sound. This driver software has a number of features and functionality, such as a six-channel digital-to-analogue converter (DAC), which fully supports 16/20/24-bit PCM format for 5.1-channel audio. The Realtek HD Audio driver is usually required for your audio device to work. The company released the latest audio drivers a month before Windows 10 was released to keep up with the redesigned desktop environment.
When you install this driver on your computer, you are provided with Realtek HD Audio Manager with which you can customize and play PC audio. In this guide, we’ll take a look at the Realtek HD Audio Manager Portal to set up speakers and microphone on your PC.
Realtek HD Audio Manager
This software is installed on your PC with the package when you install any Realtek HD Audio Driver. You can easily launch the software from the taskbar by double-clicking Speaker badge.
Alternatively, you can also run it from the Program Files folder on your system drive:
C:Program FilesRealtekAudioHDARtHDVCpl.exe
The executable file name may differ depending on the version of the software you install.
After launching Realtek HD Audio Manager, it looks like this:
In the above picture, you can see two tabs:
- Computer speakers
- Microphones
Let’s explore them one by one.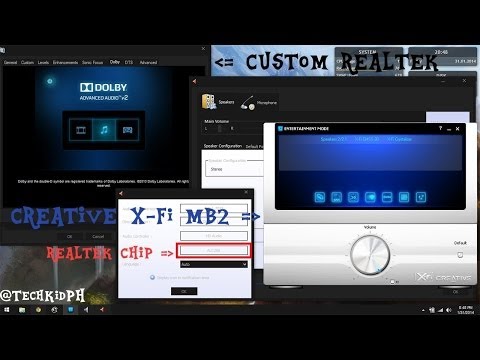
1] Speaker tab
In this tab you can modulate the parameters related to the speakers on your PC. Under Main Volume , you can adjust the system volume or balance the left right speaker audio output using the slider provided there. In addition, you can mute the speakers using the mute button.
Below you can see three tabs where you can customize how sound is played on your PC.
Speaker configuration
On this tab, you can check the stereo output of the speaker or headphones connected to the PC. Once you click on the play button provided there, both the left and right speaker will be tested by playing a sample audio clip. You can determine if there are any discrepancies by comparing the output for each. You can also use Headphone Virtualization , which uses advanced processing to create the illusion of a home theater experience when using stereo headphones. This is very similar to the Surround Sound system. In addition, you can choose to use full range speakers.
Sound Effects
You can apply effects to the sound output using the functions provided on this tab. It provides you with a long list of available volume leveling ambient effects to reduce perceived volume differences. You can choose from a variety of options to boost your speaker/headphone sound with impressive ambient effects. You can also use Equalizer and Voice Canceller to set the sound effect for your comfort.
Default format
On this tab, you can select the default audio quality in terms of sample rate and bit depth. If you are using an audio CD or DVD, you can set the audio format using CD Format and DVD Format respectively.
2] Microphones tab
This section allows you to configure how the microphones on your PC work. The following are the available sections for stimulation effects for the microphone device:
Microphone effects
It provides the ability to suppress static background noise when recording some sound. In addition, you can reduce the acoustic echo caused by the front speakers during recording. These features will help you record clear sound.
Default format
Like the Speakers settings, you can use this function to select the default audio format.
Modulating these settings to suit your needs can help you get the most out of your speakers and microphones. You can even control the power used to modulate these settings using the built-in Energy management option.
Clicking on the little battery icon in the lower left of the window opens the power management window where you can turn off changes while your computer is running on battery power.
Check out the features provided by Realtek HD Audio Manager and use it.
Sound problems? Do not read audio on a Windows PC.
Similar posts:
- Best Free Software Downloads for Windows 10/8/7
- How to Fix Audio Distortion Issues in Windows 10
- Troubleshooting No Video, Audio, or Audio in Skype Calls on Windows
- AIMP Audio Player Comes with Audio Converter , sound ripper, sound recorder, tag editor
- No sound or sound on Windows 10/8/7 computer
Tweet
Share
Link
Plus
Send
Send
Pin
About Dolby Atmos with Spatial Audio in Apple Music
If you have an Apple Music subscription, you can listen to some Dolby Atmos songs with spatial audio. To use this feature, see which devices support Dolby Atmos, how to change Dolby Atmos settings, and see the FAQ.
- Enjoy Dolby Atmos music on iPhone or iPad
- Listening to Dolby Atmos music on a Mac
- Listening to Dolby Atmos music on HomePod
- Listen to music in Dolby Atmos on Apple TV
- Listening to Dolby Atmos music on Android
- FAQ
Listening to Dolby Atmos music on iPhone or iPad
- Update your iPhone or iPad to the latest version of iOS or iPadOS.
- Go to the «Settings» menu.
- Press the Music button.
- Click Dolby Atmos under Sound.
- Select Automatic, Always On or Off.
If you select Automatic, you will need the following
Supported songs automatically play in Dolby Atmos when using the following devices:
- AirPods Pro, AirPods Max, AirPods (3rd generation) or Beats Fit Pro in spatial audio mode
- AirPods (1st or 2nd generation)
- BeatsX, Beats Solo3 Wireless, Beats Studio3, Powerbeats3 Wireless, Beats Flex, Powerbeats Pro, Beats Solo Pro or Beats Studio Buds
- Any Bluetooth headphone that can be classified as an iPhone or iPad headphone
- Built-in speakers on iPhone XS or later (excluding iPhone SE), iPad Pro 12.
 9inch (3rd generation or later), iPad Pro 11″ or iPad Air (4th generation or later)
If you select Always On, you will need the following
If you want to use wired headphones, select Always On.
Listen to Dolby Atmos music on your Mac
- Update your Mac to the latest version of macOS.
- Open the Apple Music app.
- From the menu bar, select Music >> Preferences.
- Open the Playback tab.
- Select Automatic, Always On or Off.
If you select Automatic, you need the following
Supported songs automatically play in Dolby Atmos when using the following devices:
- audio
- AirPods (1st or 2nd generation)
- BeatsX, Beats Solo3 Wireless, Beats Studio3, Powerbeats3 Wireless, Beats Flex, Powerbeats Pro, Beats Solo Pro or Beats Studio Buds
- Built-in speakers for MacBook Pro (2018 or later), MacBook Air (2018 or later), or iMac (2021)
If you select Always On, you will need the following
If you want to use other headphones that do not support auto play, select Always On.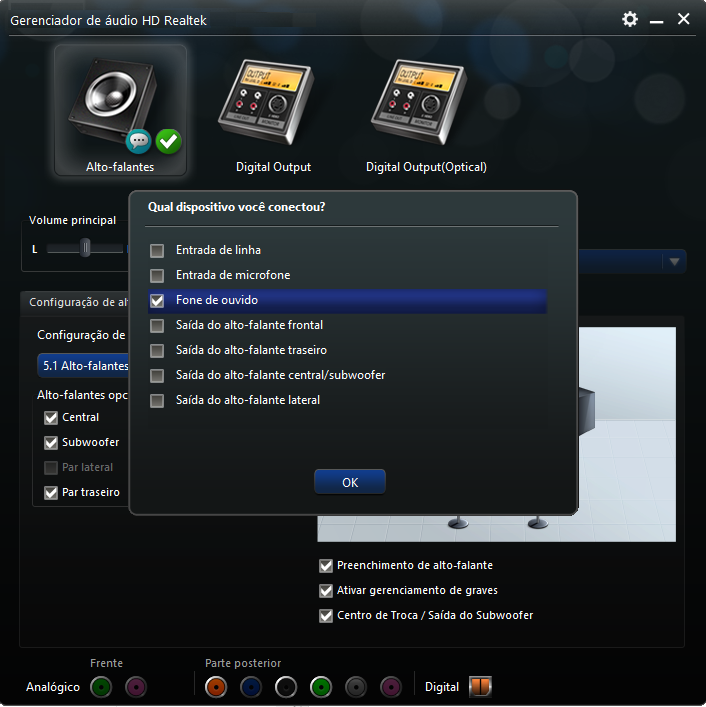
Listen to Dolby Atmos music on your HomePod
Turn Dolby Atmos on or off
- On your iPhone or iPad, open the Home app.
- Press the Home button.
- Click Home Settings.
- Click your name in the Users section.
- Click the Apple Music icon.
- Turn Dolby Atmos on or off.
Enjoy Dolby Atmos music on Apple TV 4K
Update your Apple TV 4K to the latest version of tvOS. Then make sure one of the following devices is connected:
- HomePods set to default
- Dolby Atmos compatible soundbar, AV receiver or Dolby Atmos compatible TV
- AirPods, AirPods Pro or AirPods Max
- Beats Fit Pro, BeatsX, Beats Solo3 Wireless, Beats Studio3, Powerbeats3 Wireless, Beats Flex, Powerbeats Pro, Beats Solo Pro, or Beats Studio Buds
Turn Dolby Atmos on or off
- On your Apple TV, go to Settings > Apps.
- Select «Music».

- Select Dolby Atmos to change the mode to Automatic or Off.
Listening to Dolby Atmos music on an Android device
- You need an Android device that supports Dolby Atmos. To find out if this mode is supported on your Android device, check with the device manufacturer.
- Update the Apple Music app to the latest version.
Turn Dolby Atmos on or off
- Open the Apple Music app.
- Click the «More» button.
- Select «Settings».
- Press Dolby Atmos to turn this format on or off.
FAQ
What should I do if Dolby Atmos songs sound quieter than stereo songs?
Turn on the «Volume Correction» function. Here’s how:
- On your iPhone or iPad, go to Settings > Music and turn on Volume Correction.
- On a Mac, open the Apple Music app. From the menu bar, choose Music >> Preferences. Click the «Playback» tab, then select «Volume Correction» to enable this feature.

- On Apple TV, go to Settings > Applications > Music and turn on Volume Correction.
Can I listen to music in spatial audio mode with dynamic head tracking?
How do I know if a song is available in Dolby Atmos?
Start playback and check if the Dolby Atmos icon is displayed on the Now Playing screen. If all songs in an album are available in Dolby Atmos, the album details page will display the Dolby Atmos icon. Some songs are only available in Dolby Atmos on certain album versions.
What is the best way to search for Dolby Atmos music?
Dolby Atmos music can be found in Apple Music Editorial Playlists.
How do I get the Dolby Atmos version of a song already downloaded to my library?
To get a Dolby Atmos version of a song already downloaded from Apple Music, simply delete it and redownload it from the Apple Music catalog.
Make sure that Dolby Atmos Downloads is enabled in your iPhone, iPad, Mac, or Android device settings. Here’s how to do it.
- On your iPhone or iPad, go to Settings > Music and turn on Downloads to Dolby Atmos.
- On a Mac, open the Apple Music app. From the menu bar, select Music > Preferences. Go to the «General» tab and select the «Downloads in Dolby Atmos» option.
- On your Android device, open the Apple Music app. Click the «More» button, then «Settings» and turn on the «Download Dolby Atmos» option.
How do I listen to a stereo version of a song downloaded in Dolby Atmos?
Downloading the Dolby Atmos version of a song also downloads the stereo version of the song. To listen to a stereo version of a song, simply turn off Dolby Atmos in Settings and play the song.
Information about non-Apple products or independent websites not controlled or tested by Apple is not endorsed or endorsed by Apple. Apple is not responsible for the selection, functionality, or use of third party websites or products. Apple is also not responsible for the accuracy or reliability of information posted on third party websites.