Netgear Router Red Light On Ethernet Port: 4 Ways To Fix
netgear router red light on ethernet port
When diagnosing issues such as these, it always helps if the manufacturer has built in a system so that the equipment can effectively communicate when something is going wrong or broken.
Some will choose to incorporate an error code system, which you will then have to look up to see which each one means. Netgear have gone one step further, making it even easier than that.
Netgear routers come with LEDs on the top of their devices for troubleshooting purposes. The job of these LEDs is to let you know the connection status between your various devices and the router itself.
They’ll also give you an insight into the status of such vital elements as the internet, Ethernet, and WPS. Basically, once you learn to read the lights, you’ll know immediately whether you need to take action or not.
As with most devices, a red light is never good news. If any of the light on your router are red, there is something up that needs your attention. In most cases, the red light that is on will just be the one that tells you that the router has no connection to the internet.
Okay, so now it’s time to get into what the red light or the lack thereof will mean for the performance of the router. Once we’ve gone through this, we’ll then show you how to fix the problem. This stuff is handy to know for the future though, so it’s still worth a read!
Should it be the case that the light on the Ethernet part of your router is off, this just means that there is no device hooked up to the Ethernet port of your router. This isn’t a problem whatsoever and won’t require any of your attention.
However, if the light is a solid red, this will mean that there is a device that is currently powered on and connected via the Ethernet port. Again, this isn’t a problem. It merely indicates that your router recognises the device and is currently supplying it with an internet connection.
It’s when the light starts flashing red that things begin to go downhill a bit.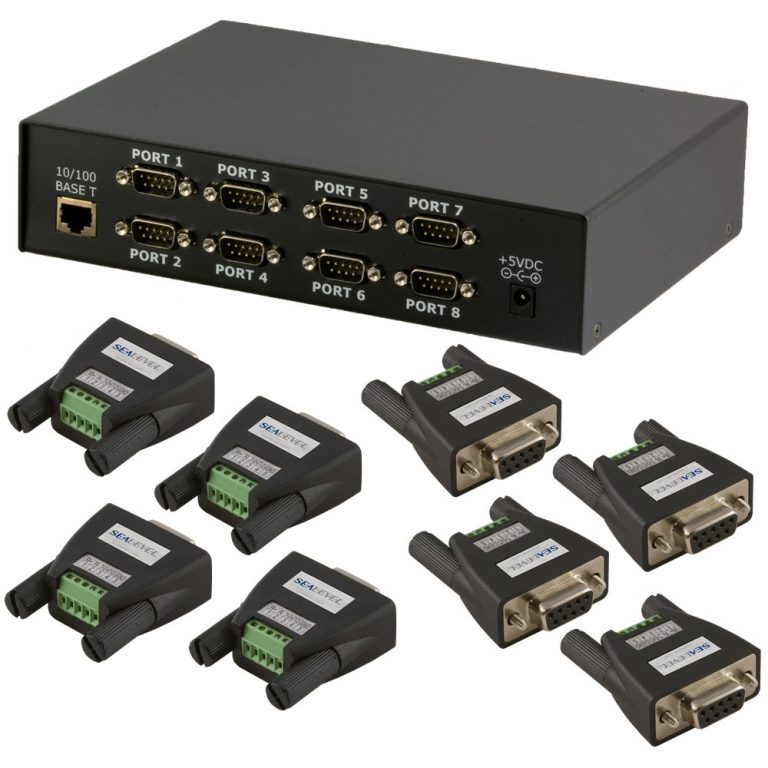 A blinking red Ethernet port should indicate that the port is actually sending and receive messages/signals. But it also means that the router is currently experiencing some issues.
The diagnosis itself is a bit vague, as it doesn’t tell you exactly what’s wrong – just that you need to get out your troubleshooting guide and get to fixing it. The good news is that this issue is normally pretty easy to fix. To do just that, just follow the steps below.
- Try updating the router’s firmware
With devices such as these, there is quite a lot of stuff that happens in the background that you won’t generally be aware of. Among these mystery activities is the fact that your router will regularly update itself with manufacturer-released updates.
These updates are designed to counter any bugs or glitches that may crop up over time, keeping the router running in its optimal state.
However, it is possible that it may miss an update here or there, causing bugs and glitches to continue accumulating. When this is allowed to happen, all sorts of weird performance issues can begin to rear their ugly heads. Luckily, this is pretty easy to counter.
To do so, all you need to do is go looking for updates and then install them manually. It sounds tough if you haven’t done it before, but the process is really easy once you know how. Here’s how it is done:
- The first thing you will need to do is type in the IP address of your router in your chosen web browser. In most cases, the IP address will be on a sticker on the underside of the router.
- Then, you will be prompted to type in your username and password.
- From here, you will need to find the updates section.

- If there is an update, you should download it immediately to your computer and install it from here.
And that’s it. If there was an outstanding update, this will most likely have resolved the issue. If not, it’s time to start diagnosing the Ethernet port itself.
- Make sure the Ethernet cable is in working condition
Quite often, we are really quick to blame the main components when it is actually something really simple letting the team down. We have often found that Ethernet cables age really badly, and pretty quickly too!
One part that seems to suffer the worst of this is the connecting end of the cable, which can just get looser and looser over time – even if it isn’t being moved. So, to remedy this, all you need to do here is just make fully sure that the connection is as tight as it can possibly be.
If you are just setting up the router, this is doubly important as you will need to have the router and the modem connected via this method for the setup process.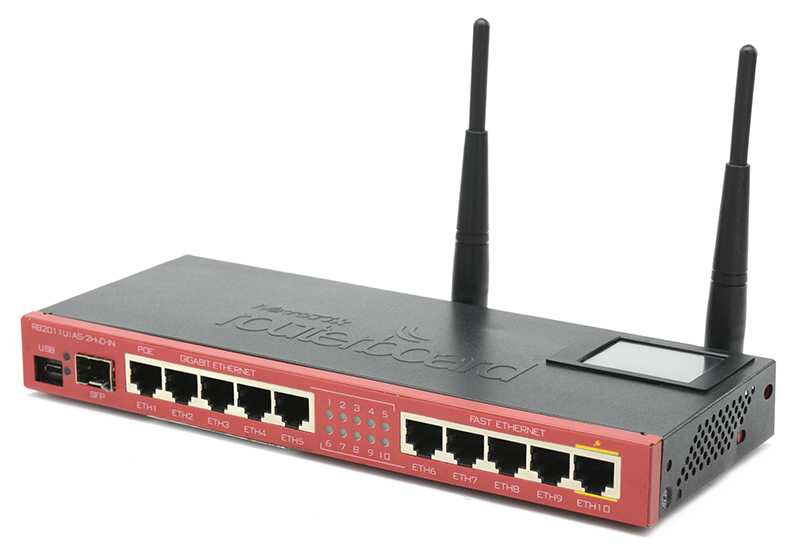
- Try replacing the Ethernet cable entirely
Okay, maybe we are being a bit too hasty with that title. It always helps to actually check these things first. So, to check an Ethernet cable, what you need to be looking for is any evidence of fraying along the length of the cable or any exposed inner workings.
If you happen to see anything that doesn’t quite look right, the only thing to do is to replace the cable entirely. When you are choosing a replacement, go for a higher-quality model. These will last much longer and probably actually save you money in the long run.
It is also worth noting that, although cables do have a finite lifespan, there are ways to ensure that they last for a decent amount of time. Basically, all you need to do is make sure that there are no tight bends along the length of the wire.
If these are left in this way over time, this is where fraying will begin to happen.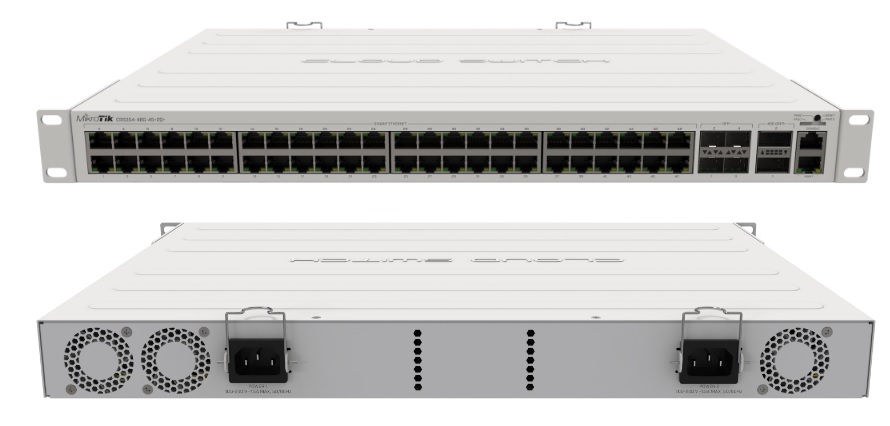 It is also a good idea to make sure that there is no weight being put over the cable at any point.
Once you have that taken care of, just have another check to see if the issue has been resolved. If not, we are going to have to up the ante a little bit to get to the bottom of it.
- Try a factory reset on the router
At this point, the fact that nothing above has worked so far would indicate that there may be a configuration issue at play here. Essentially, there may be a setting in place on the router that is actively working against you.
So, rather than painstakingly going through each and every one of the settings looking for the culprit, it is perhaps best to just nuke this one from orbit.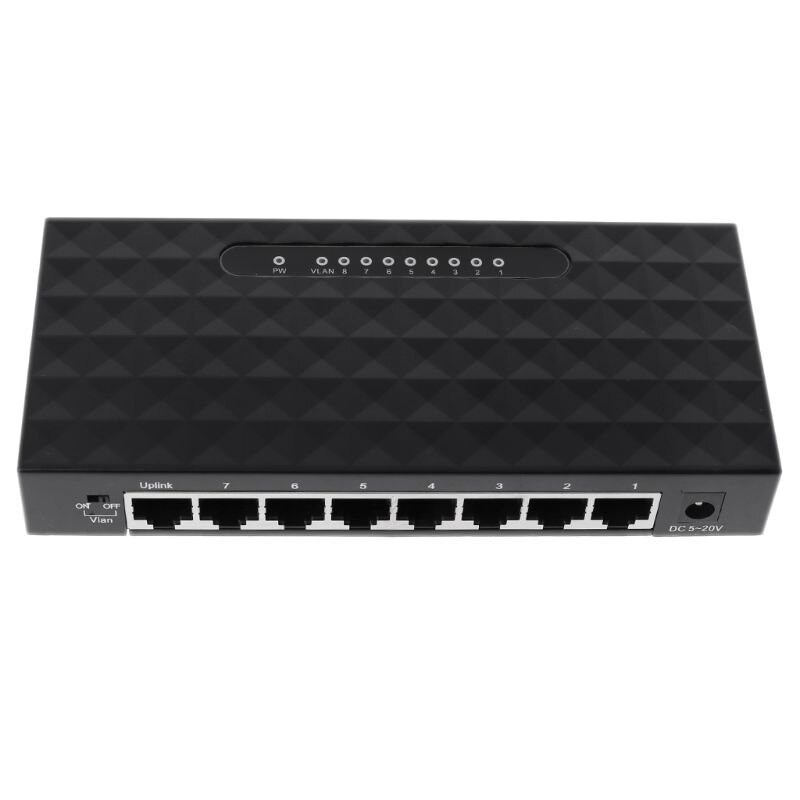 The best way to do this is to just restore the router to its factory settings. This can be done by means of a factory reset.
To perform a factory reset, the first thing you will need to do is to make sure that the router is powered on. The next thing to do is disconnect the router from client devices and the modem, effectively isolating it. Now all that remains is to locate the reset button.
This you will find buried in a hole on the router so that it isn’t pressed accidentally. So, you will need to grab a pointed object to help you get at this. Once you have it, just poke and hold down the button for a few seconds. Once you release it, the factory reset will begin.
The Last Word
Unfortunately, the above are the only tips that we have that can be performed from the comfort of your own home. Beyond this, we’re afraid that the only logical course of action is to get in touch with customer support and get them to begin working on a resolution.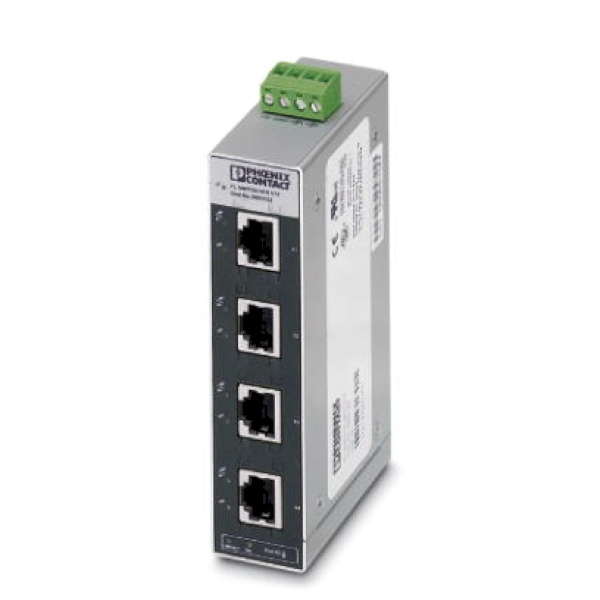
While you are talking with them, we would recommend that you let them know what you have already tried. That way, they will waste no time running over things you have already tried.
-
Facebook
-
Twitter
-
LinkedIn
-
Pinterest
-
Reddit
-
Facebook Messenger
-
Telegram
-
WhatsApp
-
Email
-
Print
-
More
Ethernet Port Light Colors: Meaning? (Everything to Know)
Here’s what the different Ethernet port light colors mean:
Blinking Ethernet light means that the port is transmitting information.
Solid light means a connection between the devices.
No light means that there is no current connection.
Depending on the manufacturer, each light can have a different meaning and color like green, orange, yellow, and red.
If you want to learn all about the varying colors of your Ethernet port indicator lights and their meaning, then you’re in the right place.
Let’s get started!
While most of the world is on Wi-Fi, plenty of times when plugging in an Ethernet cord is the better way to go.
When you do, you might see a few different lights right by the port.
Each Ethernet manufacturer gets to set its own rules on what indicator lights mean.
Despite that, there are a few standards that have emerged.
Regardless of the color of the light, a blinking Ethernet port light indicates one specific thing: there is an actively transmitting connection.
To use Ethernet cables, you have to plug each end of the cable into a compatible device.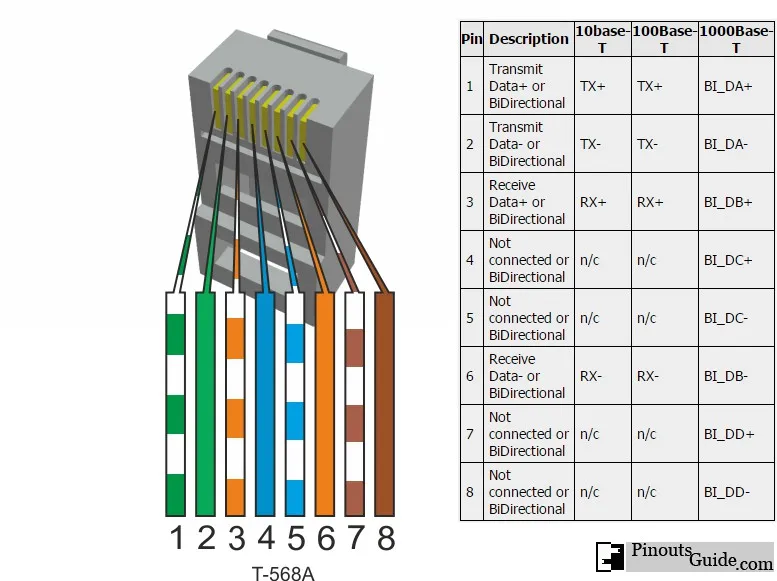
Just to simplify, let’s consider an example where you connect your laptop to your modem via an Ethernet cable.
Technically, your modem in this example is an all-in-one device.
That will come up later, but for now, we can establish that the cable runs from the computer to the modem.
The port on the back of the modem is where you will see the indicator light.
It can be a number of different colors (explained in a later section).
If it’s flashing, it’s telling you that the connection is good through both devices.
More than that, the blinking light indicates that the two devices are actively communicating at that moment.
Since, in our example, you’re using the cord to connect your computer to your modem, any time you download or upload anything to the internet, you should see a blinking light.
It’s one of your best indicators as to how the connection is fairing, and when you get through all of the sections, you’ll have a deep idea of how to interpret the information and use it for troubleshooting.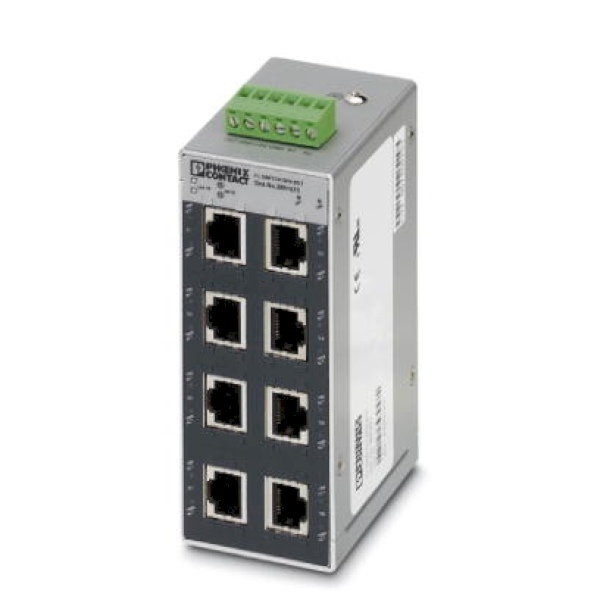
Before all of that, it’s important to understand one concept. Internet and networking communication can happen in a fraction of a second.
Because of that, the blinking lights are programmed to keep blinking for a few seconds even though the transmission is complete.
This is a feature designed to make it easy for you to note the blinking light.
If this bit of programming wasn’t in place, most communications would end so quickly that you would never actually see the light blink.
In a word, yes.
Depending on the device, there can be several blinking speeds, and different speeds are meant to provide meaningful information.
There are way too many different devices out there to break down every blinking speed here.
It would constitute several volumes of books.
But, there is still an effective breakdown that can help you understand blinking speeds.
In general, slow blinking speeds usually mean that things are good.
Slow can be anywhere from one to several seconds between blinks.
That rate of blinking is meant to provide a passive signal that tells you a connection is good.
Fast signals will usually start at one second per blink and speed up from there.
The key to fast signals is that they should still hold a rhythm.
When you see the faster rhythm, you can look up the LED signals for your specific device and see what it is telling you.
Things can get pretty specific.
Some lights will blink extremely rapidly and with no apparent rhythm.
This goes back to the original definition.
These lights indicate active traffic across the connection, which means things are working normally.
Based on what you have read above, you can conclude that a blinking Ethernet port light does not need to be fixed.
It is designed to blink, even at different speeds.
While a blinking light might grab a person’s attention or signal problems in other fields, it is a good sign when your Ethernet light is blinking.
The blinking light is intended to provide at-a-glance troubleshooting information.
If you are having internet problems, but your light is blinking, it informs you of a few things right away.
Most importantly, you know that the cable is properly connected between the two devices and successfully carrying information.
You will find more detailed relationships between the blinking light and troubleshooting a little further down.
Now that you understand the purpose of the blinking light, you can use it to glean more information about your network and connections.
In particular, the blinking light is extremely useful when you see it flashing at abnormal times.
Here’s an example.
Sometimes, the light blinks while your computer is powered down.
More specifically, this can happen while the device appears to be asleep.
If the blinking light means there is active communication, how can that be?
Well, a lot of modern devices have features that allow a network to wake them from sleep.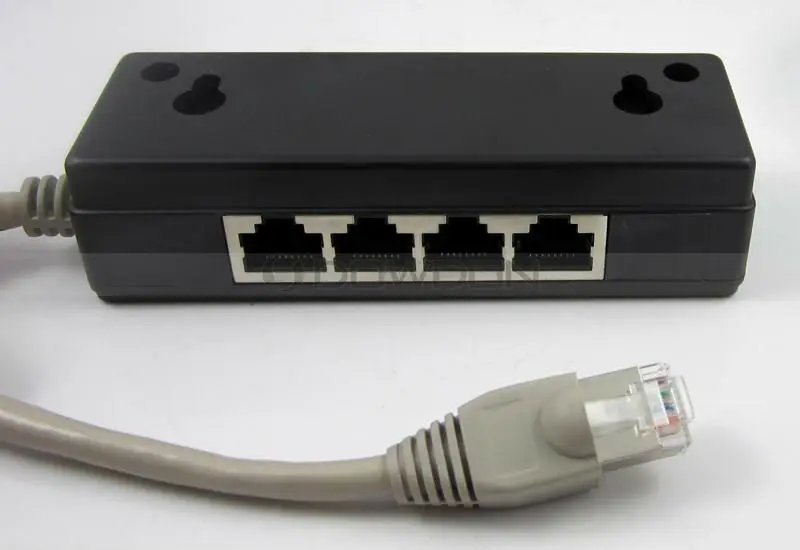
Your computer carries out a lot of tasks in the background, and plenty of them involve communication over networks.
This can include automatic updates.
Your computer can automatically check for new emails or other messages.
It can autosave information to the cloud.
The tasks are just about endless, and many of them can happen even when the computer screen is off, and the device is trying to save power.
If you see the light flashing in such a case, it means that your device has wake-on-LAN.
This is the technical term for when the network wakes the computer to carry out an automated task.
The good news is that this means everything is working normally, and there’s no cause for concern.
There’s another case where the light is blinking when you think it shouldn’t.
If you have no internet connection, how could your computer actively transmit across the cable?
The answer to that question has a simple and complicated explanation.
The simple answer is that your computer can send data across the cable even if there is no greater internet connection.
This is very useful when it comes to troubleshooting internet problems.
If your device can’t connect to the internet, but the Ethernet port light still blinks, it means that the problem is not with the cable or the direct Ethernet connection.
Here’s the deeper explanation.
In order to route traffic across your home network (or other local network), your modem has two other devices built into it: a router and a switch.
The router handles wireless connections, and the switch manages direct Ethernet traffic.
In a technical sense, your computer does not connect directly to the modem.
Instead, it connects to the switch, and the switch connects to the modem.
Even though the switch and modem are in the same plastic housing, they are independent devices, and if you were to take the all-in-one apart, you would be able to see the separate specialized parts.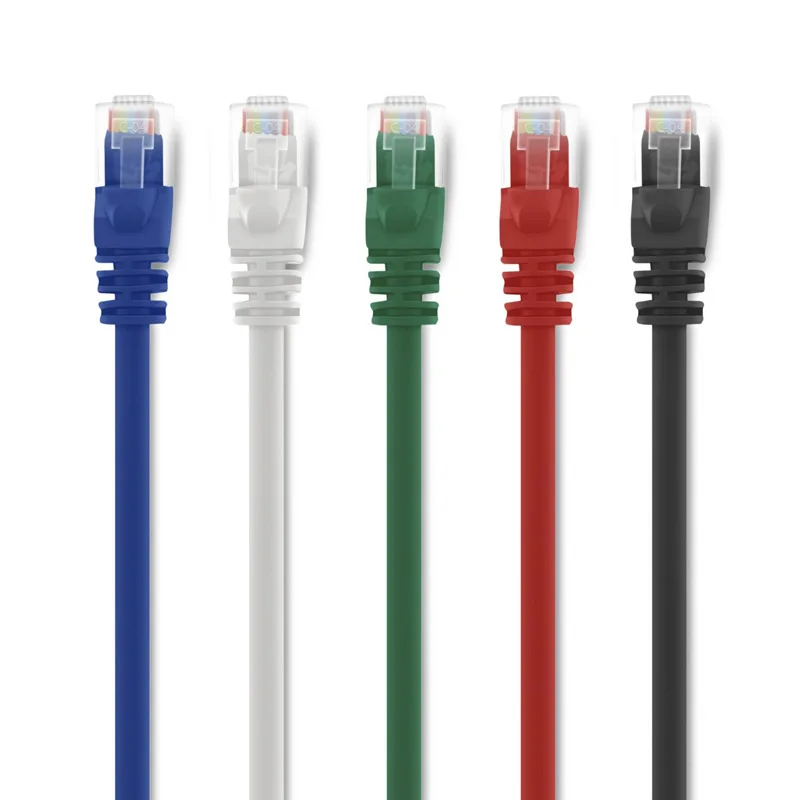
What does this have to do with the flashing light?
Well, the switch manages traffic from all of the different Ethernet ports and keeps everything organized for the modem.
Even if you only have one device plugged in, the switch still has to carry out its protocols.
These protocols require it to communicate with your computer.
Ultimately, this means that the switch and your computer will send data across the Ethernet cable even if you don’t have internet access through the modem.
That’s the value of the blinking light.
If you can’t get internet access but the light blinks, the problem is located outside your network.
You need to call your Internet Service Provider (ISP) because the issue is in their domain.
Learn more about a blinking Ethernet port light, but no internet here.
What Does a Solid Ethernet Light Mean?
Now that you have a deep understanding of blinking lights, we can move on to solid lights.
When you plug your device into the Ethernet port, it doesn’t always blink.
In many cases, it will present a solid light (colors are still further down).
What does a solid Ethernet light mean?
Once again, there is a short and a long answer.
The short answer is that the connection is good.
The solid port light is known as a test light, and it indicates that both devices are properly connected and the network is ready to go.
Since the light is not blinking, there is no active traffic going across the cable, but it’s ready to transmit whenever the devices need to communicate. This is often referred to as a state of “standby.”
Getting deeper into the topic, the solid test light is specifically noting that power can run across the Ethernet cable.
Ethernet cables are fairly complicated in their own right. While you see a single cord underneath the rubbery layer, you can find four different pairs of cords, each with its own function.
The test light does not involve all four pairs of cords in the wire.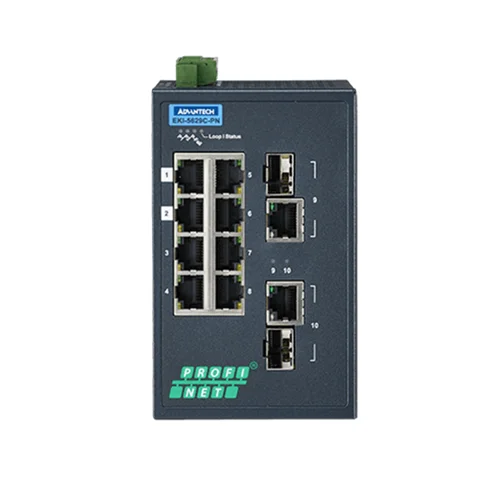 Instead, it tells you if any of the individual wires are able to connect to both ends.
Each wire is made of copper, and copper can carry electric current across it.
While that current is used to send signals along the wire, it also powers the indicator lights.
If any of the wires are connected well enough to carry any current, then the Ethernet port light can glow.
Let’s break down what this really means.
It’s possible to have a solid Ethernet light when you have a bad connection across the cable.
While that might sound like a bad thing, it’s actually how the color-coding systems work to enhance troubleshooting (again, this will be covered in full detail in the section on light colors).
The bottom line is that a solid light means you have a connection.
That information alone can’t tell you how good or bad the connection is, but if you have a solid light, you know that your device can talk to the switch at the very least.
When Should the Ethernet Port Light Be Off?
You expect a solid light whenever there is a working connection.
Should the light ever be off?
Absolutely.
There are plenty of times when you expect the lights to be completely off.
The most common is when the computer is off.
This is different from sleep or power standby modes.
When the computer is completely off, wake-on-LAN features can’t work.
That’s one of the main differences between sleep modes and off.
Learn all about why your Ethernet port light is blinking when your computer is off here.
When your computer is off, it is no longer sending power through the Ethernet cable.
That means that the Ethernet LED indicator light can’t turn on, and this is all quite normal.
You would expect the same results if the switch is off.
It’s pretty normal to plug a modem all-in-one into the wall and then leave it on forever.
Even if that’s the practice, the modems don’t actually stay on forever.
Whether they need to update or reset, they will sometimes go through cycles that cut power to the switch.
Additionally, you might lose power in general.
If no power is running to the switch, the LEDs cannot turn on.
This might sound obvious, but there are cases where a person is using their laptop on a battery and does not notice a power outage.
If internet connectivity stops, checking the Ethernet LED light can give you valuable information very quickly.
Another time you expect the light to be off is when there is no physical connection between the two devices.
If there is no cable at all, the indicator lights on both devices will be off.
As mentioned before, the cable carries the electricity that powers the lights.
No cable means no electricity and, consequently, no indicator lights.
Sometimes, this is a valuable troubleshooting tip.
If you plugged the cable in and you see no light on either port, it’s telling you that the connection isn’t complete.
You can always try reseating the cable on both ends.
It’s pretty common for an Ethernet cable to be most of the way in a port without fully connecting.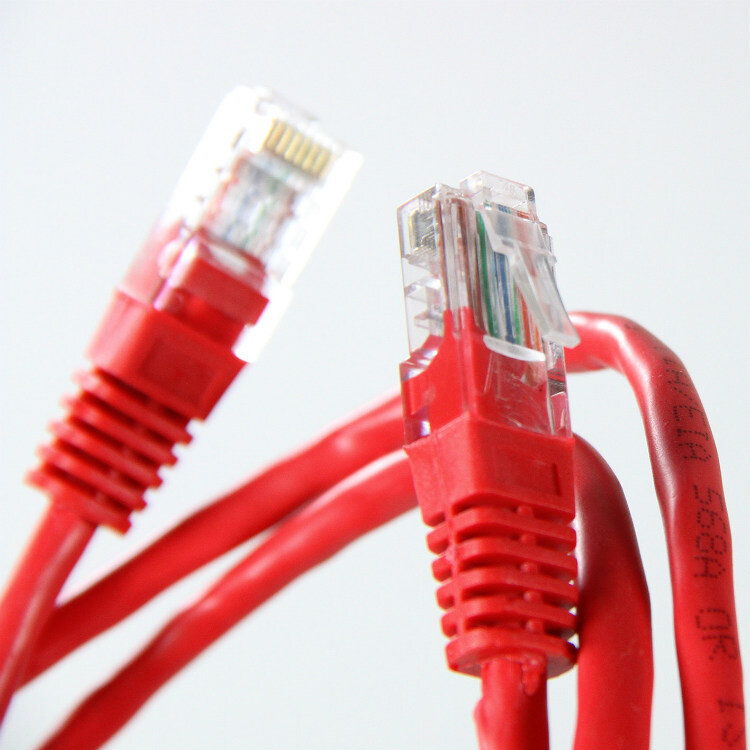
Ethernet connectors usually have a plastic clip that will ‘snap’ into place.
When you hear or feel the snap, that means it should be fully connected.
If you reseat the cable and run into the same problem, you can assume an issue with the cable or one of the ports.
The best way to sort out where the problem lies is to use known-good devices.
If you have a cable working fine with another connection, steal it to test the ports that are giving you trouble.
If the known-good cable doesn’t work, you have eliminated one of the variables. One of the ports is faulty.
You can use the same concept to test each port. If you have a computer that has a known good port.
Try it with the switch port in question.
If it doesn’t work, you’ve found the fault.
If it does work, repeat the test with a known-good switch port and the computer port that is uncertain.
This method allows you to isolate the exact root of the problem, so you know what needs to be repaired or replaced.
How Do You Fix a Solid Light on the Ethernet Port?
As discussed above, with the blinking light, a solid light on your Ethernet port is not something that needs to be fixed.
On the contrary, it shows you the reliability of the connection between the two devices, which is a great sign that your network is working as intended.
Even though the solid light does not need to be fixed, it is a useful tool when it comes to troubleshooting.
In fact, that’s the primary purpose of the Ethernet port indicator light.
It provides easy-to-absorb information that allows you to assess components of your network to find and resolve problems quickly.
Primarily, the solid light is intended to help network troubleshooters eliminate variables when they work to identify the root cause of a network issue.
This is reflected in the troubleshooting steps in the previous section.
Many Ethernet ports have two LED lights rather than just one.
This is particularly common on computer Ethernet ports, but it appears on many switch ports as well.
When two indicator lights are available, it is possible for one light to remain solid while the other blinks.
This is not providing additional information or codes intended for analysis and troubleshooting.
The presence of two lights allows you to see the solid light of the connection and the intermittent blinking light of active transmission.
In other words, it’s normal for the two lights on each port to provide signals independently.
If you are actively using your connection, you should expect to see both a solid light and a flashing light, provided your port has two LEDs.
If your port only has one LED, it will switch from a solid color to blinking when data moves through the cable.
Here is one final remark on multiple lights. If you have more than one LED light on the port, you can see more than one color at a time too.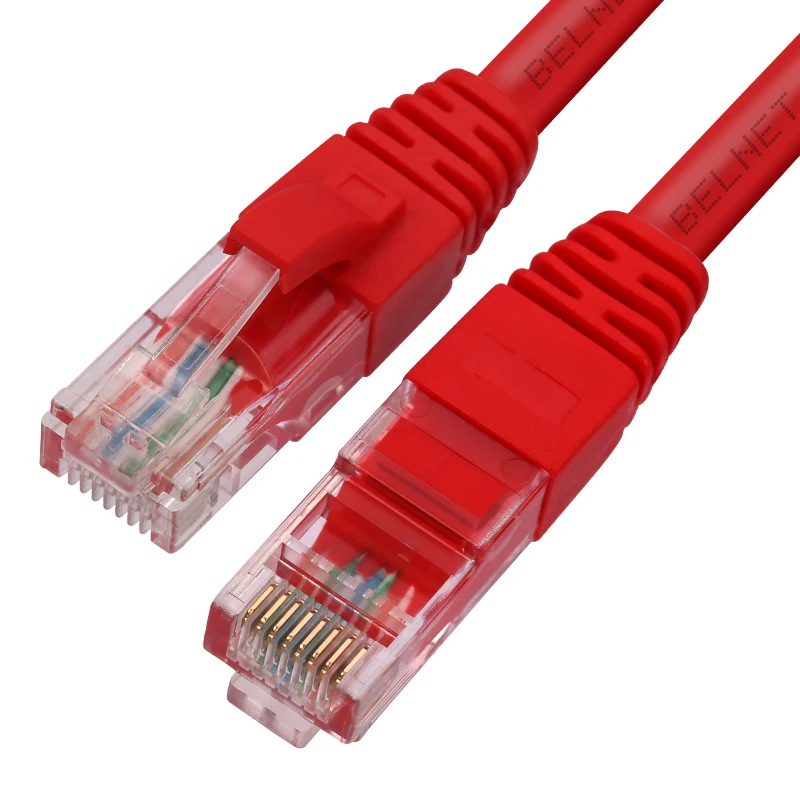
Each light has a specific meaning, and it is fine to see multiple colors at once.
What Do the Different Ethernet Port Light Colors Mean?
A blinking light tells you one thing; a solid light tells you something else.
Whether the light is blinking or solid, it can shine in different colors, and each of those colors means something different, depending on the manufacturer.
We’ll go through all of the major manufacturers in a moment, but let’s cover the simple concept first.
The colors on the indicator light are meant to tell you how fast the connection is across the cable. Additionally, they can identify specific networking problems that help with troubleshooting.
For most Ethernet cables, there are three possible connection speeds: 10 Mbps, 100 Mbps, and 1000 Mbps.
For now, suffice it to say that the larger number indicates a faster connection, and most modern devices can connect at the fastest speed when everything is working normally.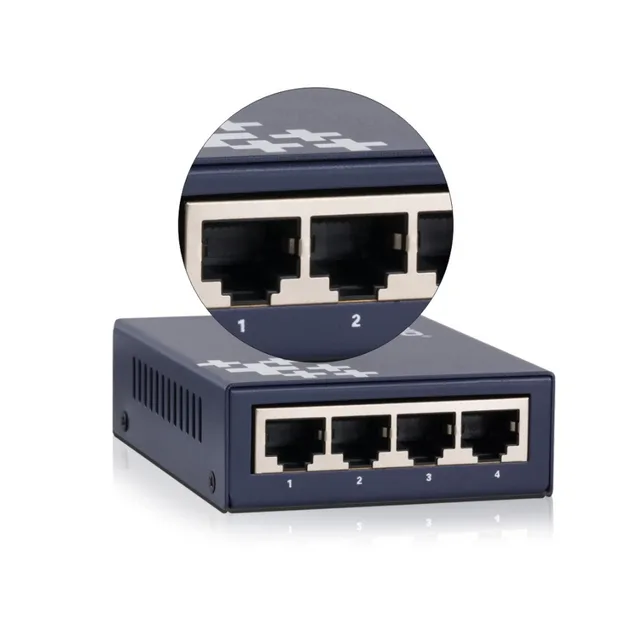
The color code is set by each manufacturer, and there is no standard.
So, when you go through each section, you can see which lights refer to which connection levels.
Before we get to that, it might help to go over the meaning of these different networking speeds.
Sure, 1000 is a bigger number than 10, but what can you really expect from these different connections?
What Do the Different Ethernet Connection Speeds Mean?
We don’t have to get bogged down in the technical aspects of computer networking and the definition of a bit.
We can understand these numbers by discussing how much data per second you really need to perform common tasks.
To stream music, you usually need between 10 and 20 Mbps for the songs to play continuously with no buffering or pausing.
These are the recommended connection speeds from Apple and Spotify, two of the most popular streaming services.
If you want to stream video, the numbers will vary more by source.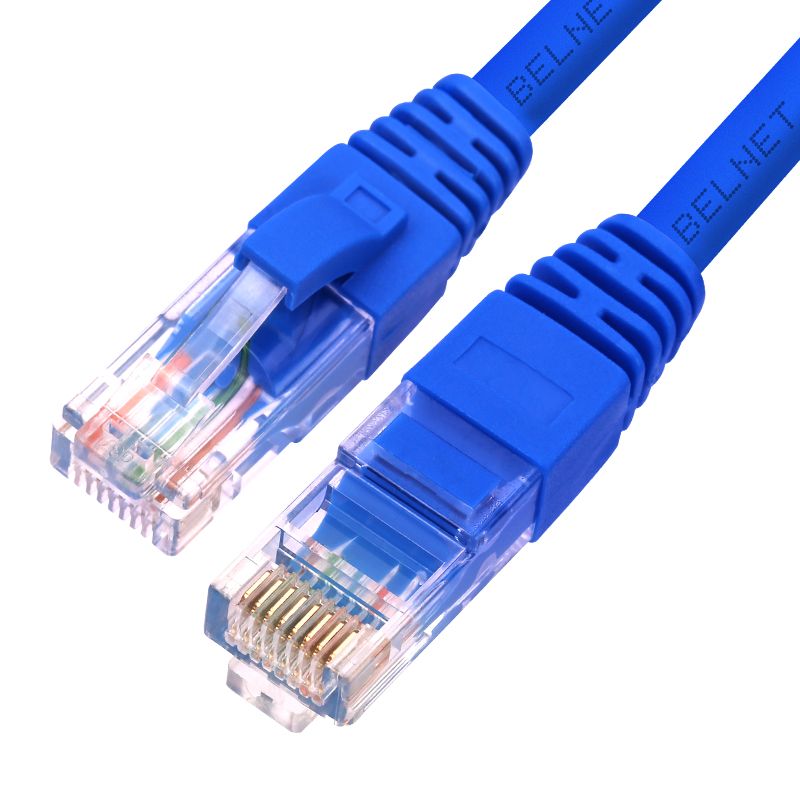
YouTube requires less speed than Netflix for the same quality of video.
That said, the speed you need for typical high-definition streaming is going to be around 25 Mbps.
If you want to stream 4k ultra or higher definition ratings, then your speeds will need to be above 30 Mbps.
This gives you an idea of how fast Ethernet really is.
Even 20-year-old Ethernet connections can easily handle ultra-high definition streaming, provided your internet connection is up to the challenge.
So, if the color of the light you see is telling you that you have the fastest level of connection, you can expect to do all of your normal internet activity without any problems.
Ok. Now that we’ve covered all of our bases let’s get on to LED colors.
What Does the Color Coding on Your Router Ethernet Port Mean? (4 Manufacturers)
Here are the different ethernet port color-coding definitions on your specific router.
#1 Cisco Ethernet Color Coding Meaning
Cisco is the biggest manufacturer in this business.
Not all networking devices are made by Cisco, but there’s a fair chance that your Ethernet switch is of their making.
Being such a large manufacturer, Cisco offers the widest variety of Ethernet switches of anyone in the industry.
While this is great for shopping around for the perfect device, it also means that there are no good standards for reading Cisco LED codes.
There is no hard rule for Cisco color codes, but more often than not, you can follow a general idea.
Green is good, and amber is bad.
There absolutely are exceptions to this, but solid green lights indicate a good connection for most Cisco devices.
Amber will usually denote a connection fault or a slow connection.
As great as it would be to provide you with a nice table that summarizes all of the Cisco devices, they make thousands of switches.
If you need to know the LED light code for a specific device, it’s best to contact Cisco support.
For many manufacturers, you can simply look up the user manual and find the information, but Cisco systems are so vast that even this task can be daunting.
Instead, you can have a short chat with a person or a bot.
When you take the link to Cisco support, you can put in your product name and get some specific information.
If you can’t find the color code, then start a conversation. They’ll be able to help.
You can also check the user manual for your device.
Those are rarely printed and included in the box these days, but you can do a basic Google search for your model and the words “user manual.”
As long as the link you follow starts with “www.cisco.com” you are in the right place.
Any of these methods are viable, and they can tell you the exact LED codes for your device.
#2 Netgear Ethernet Color Coding Meaning
Netgear is another very popular manufacturer of switches, and many homes and small businesses use Netgear modems, routers, and/or switches.
Netgear has several classes of products.
The most common is considered a consumer class, and all of their products in this class use the same LED light codes.
They are as follows:
- White: the cable is connected at 1000 Mbps.
- Green: the cable is connected at 1000 Mbps.
- Amber: the cable is connected at or below 100 Mbps.
To put that in the simplest terms, white and green lights mean that everything is connected at top performance.
Amber indicates that the connection is slow.
Why is the connection slow?
There are essentially two possibilities.
The first is that one of the devices in the network simply isn’t designed to connect at 1000 Mbps.
When that is the case, the devices will connect at the fastest available connection, and your indicator light will be orange.
The other possibility is that there is a problem with the connection, and it requires troubleshooting.
If your Netgear device is not in the consumer class, then things get more complicated.
There are a number of different codes that Netgear uses for various enterprise switches and networking devices.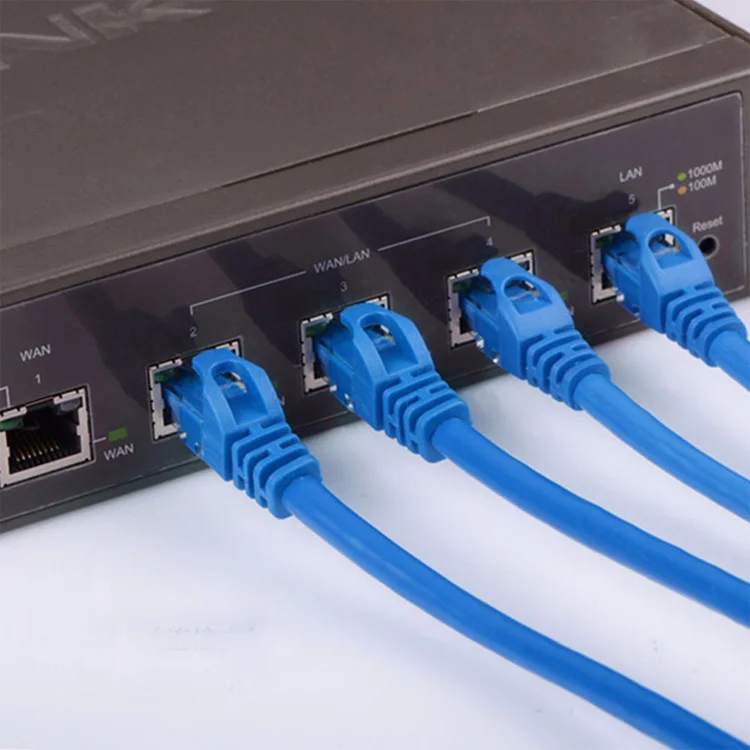
The best way to find the lighting code for your device is to look up the specific model on the Netgear support site.
#3 Linksys Ethernet Color Coding Meaning
If you don’t have a Cisco or Netgear device, it just might be a Linksys.
If that’s the case, then you will need the color scheme for these Ethernet port LEDs.
Unfortunately, Linksys is one of the most inconsistent manufacturers in this regard.
There is almost no standard among Linksys devices.
So, we can go over the most common Linksys devices to give you an idea.
If your device isn’t listed, you’ll want to take it up with Linksys tech support.
You can simply ask them about the color code for your specific model.
That will be the fastest way to get your answer.
As for the most common switches, we can begin with the EA 9000 series.
There are several models in the series, and they all use the same color-coding:
- Green light: indicates that the physical connection is good.

- Yellow flashing: indicates that data is actively transmitting.
For the EA 9000 series, there are no colors that indicate the speed of the connection.
Next up is the RE 7000 series.
This series only has a green light. A solid light denotes a connection.
A blinking light tells you that a transmission is active.
Linksys has a large number of Wireless-N routers.
These series range from E1000 through E3000, and all use the same code.
Once again, it’s ultra-simplified.
A solid white light tells you that the physical connection is good.
A slow flashing white light indicates that the device is in its default state.
A rapidly flashing light tells you that there is an error.
Another popular series is the Linksys Mesh series, also known as the MR set of devices.
For these, there are two colors to consider:
- Solid green light: means that the connection is good to go.
- Flashing orange light: is the code for active data transfers.
Once again, the Linksys system keeps it simple.
That covers the most common Linksys devices.
In almost all cases, the solid and flashing light rules are the same, but the colors vary by quite a bit.
#4 D-Link Ethernet Color Coding Meaning
D-Link primarily caters to home and small-business users.
Because of this, they keep things simple and fairly standardized.
For the vast majority of D-Link devices, the color doesn’t matter.
While not all devices will use the same LED color, the meaning behind them is always the same.
A solid light shows a good connection, and a blinking light denotes activity across the cable.
That’s all you need to know for D-Link.
How to Lookup Your Ethernet Port Manufacturer?
The four most common manufacturers are listed above, but there are dozens more that are common enough that they might be powering your internet connection right now.
If your device is not on the list, you can look up the port codes for your specific device.
If you read through everything above, you already know that color codes depend on more than the manufacturer.
They depend on the device itself.
The best way to look up the Ethernet indicator lighting code for your device is to look up the exact model that you have.
For most devices, you can find a sticker on the back or the bottom.
This will often have a serial number, model number, and model name.
Navigate to the manufacturer’s website—type in the serial number or model number (both typically work) in the search bar.
Each website is a little different, but these numbers will pull up sales and troubleshooting pages for your device.
You want to look for the user manual.
Once you load the user manual, you can use the table of contents to look up indicator lights.
That section will have the information you need to understand the different colors and blinking codes that you see on your switch.
That covers the bulk of switches, but there’s another half of the equation.
Many computer ports also have LED port lights, and we need to know what they mean too.
What Does the Color Coding on Your Computer Ethernet Port Mean?
The Ethernet port on the computer is referred to as the “host.”
The LED lights on this port follow the same basic rules for flashing and solid lights.
If it’s solid, the connection is on standby.
If it blinks, there is active communication happening.
Once again, this will depend on the manufacturer.
We’ll cover the most common cases, but always remember that your computer could prove to be the exception rather than the rule.
More often than not, you will see two indicator lights on your Ethernet port.
There is one in each of the upper corners. Usually, one of these lights is green, and the other is yellow.
The green light is there to identify solid physical connections.
It’s the solid light when everything is working correctly.
The yellow light will flash.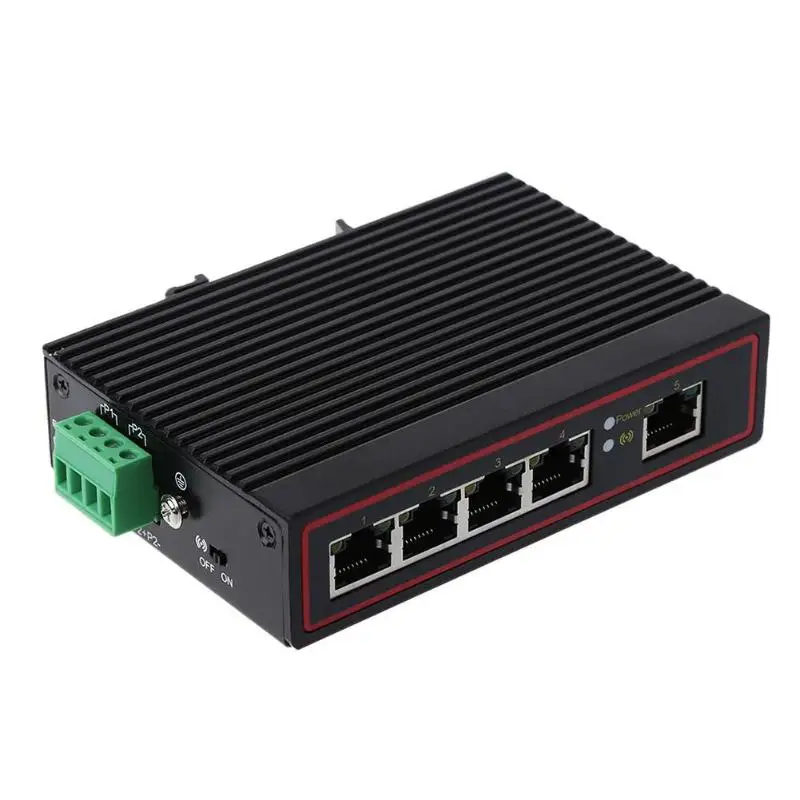
If it is flashing, you have active communication.
If you want to get into variable flashing speeds on this light, there are no standards.
It depends entirely on the model of your computer (or motherboard for custom machines).
That covers the basics of portlights on the computer side of things.
If your computer doesn’t follow this pattern, you’ll want to check the light codes with the manufacturer.
You can look that up the same way mentioned above for switches.
Go to the manufacturer’s website and try to find the user manual that matches your model name.
If you have trouble finding it, reach out to the support team directly.
What to do if the Internet does not work
Memo to GPON subscribers Payment via Sberbank Online Payment through the site What to do if the Internet does not work Recommended router models Configuring the Wi-Fi TP-LINK router Uninstalling Avast Antivirus Downloading the Dr.Web CureIt utility Paying for the Internet through the application Tinkoff
Step 1
The very first thing to do if the Internet stops working is to restart your computer. Some components of the operating system may malfunction, which can lead to a disconnection of the Internet. Restarting the computer will restart these components. Reboot and check if the Internet is working. If not, move on to the next step.
Step 2
The second thing to do if the Internet does not work is to restart the router if you have one. The router may freeze or malfunction. Restarting, as in the case of restarting the computer, will restart the router. In most cases, the problem with the lack of Internet is solved by rebooting the router. You can reboot the router by disconnecting the power supply from the outlet, counting up to 10, plug it back into the power outlet. If it doesn’t work, then move on.
Check if all cables are tightly connected to the router. To do this, disconnect each cable and connect it until it clicks, namely ports No. 3 and No. 4.
Description of the composite router:
1) This button can turn the router on and off.
2) Power cord.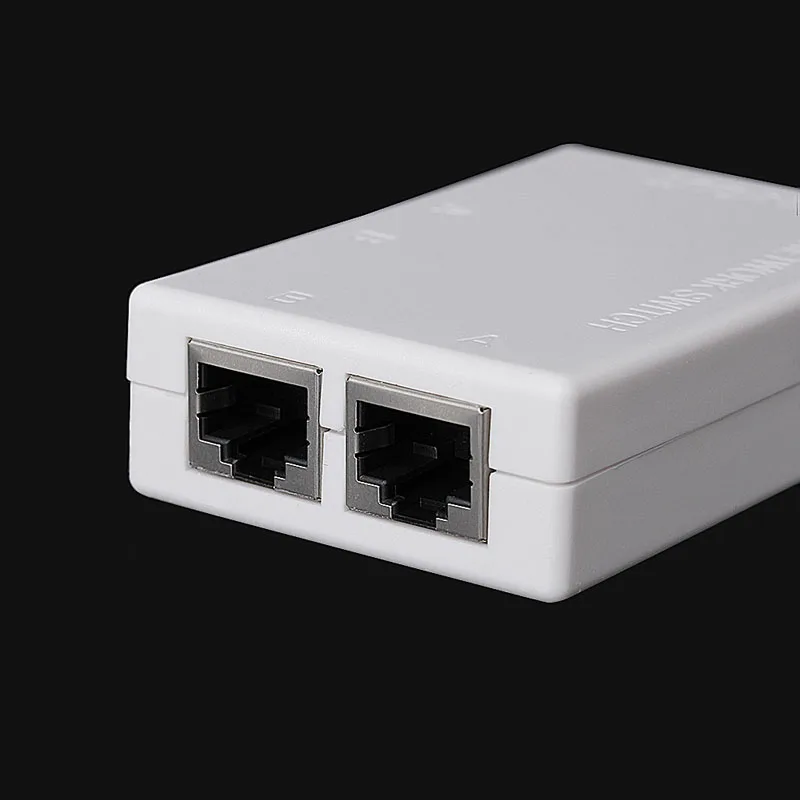
3) WAN connector required for Internet connection. The cable from the provider is inserted into this port.
4) LAN connector, through which we connected the router to the computer.
Buttons 5 and 6 must not be touched!
Step 3
If you did everything as described in “Step 2”, then you need to check the indicator lights on the router, since each indicator is responsible for the operation of the router. The very first indicator is the power indicator, it shows whether your router is turned off or on.
The second is the system indicator, if it blinks, then everything is in order, and if it is constantly on, then this indicates some kind of error in the system.
Third — informs us about the state of the Wi-Fi network. If the network is disabled, then the indicator is off, and if enabled, it flashes.
Indicators from 4th to 7th indicate the presence of local network connections. If this indicator is off, then there is no connection. If it is on, that is, and if it blinks, then information is being exchanged between the computer and the router.
The eighth is the Internet indicator. If it is lit, then the Internet is connected. When exchanging data, the indicator flashes, and if the cable is not connected, the light is off, if the cable is connected, and the light is red, then this indicates that there are problems in the cable.
The outermost indicator indicates the status of the QSS function (this is the so-called «Quick Secure Setup»).
Step 4
Check the condition of the wires and connections. Maybe your beloved pet chewed through the wires or you accidentally disconnected them. Check if the network cables are fully inserted into the computer or router.
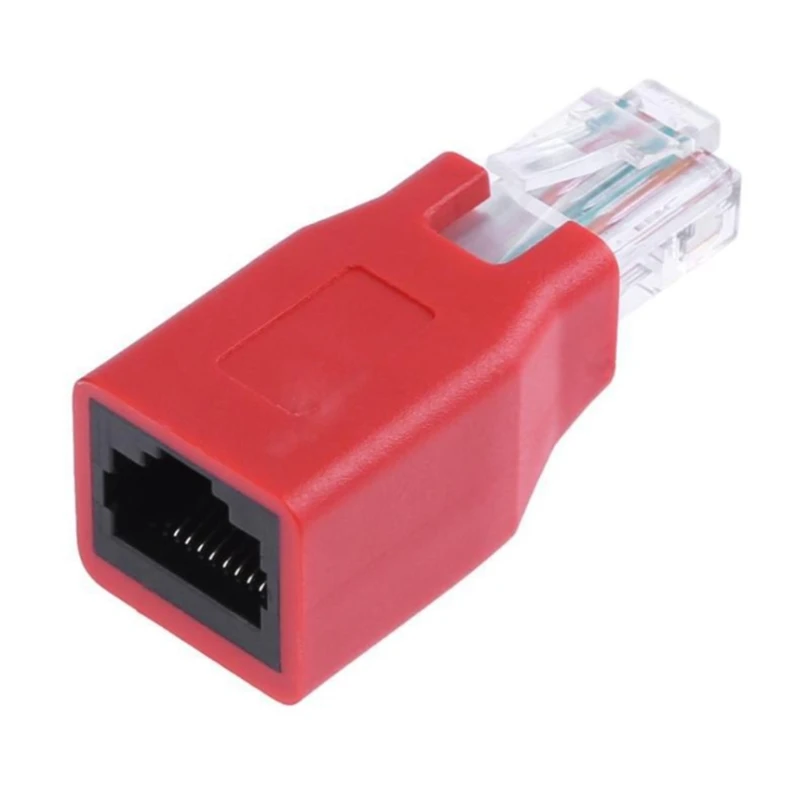
Checking the integrity of the patch cord, the appearance is shown in the photo. We check the length of the cable for damage or breaks.
Visually, in the absence of a connection between the Internet cable and the computer, you can find it as follows. On most desktop computers, if you have a working and turned on network card and an undamaged network cable, when you connect it to the computer, the connector itself is highlighted, i.e. has a light indication. Visually it looks like this.
The network card connector itself. Usually located on the back side of the computer system unit.
Check that the network card LED is lit when a cable is connected to it. If the cable is connected and the indicator is off, then disconnect the cable from the network card connector and plug it back in until it clicks. If the indicator does not glow, then the problem is in your computer’s network card.
External view of the network card connector on a laptop.
If it is damaged on the computer, when viewing the Internet connection indication, information of the following type will be contained: “Network cable is not connected”, or “No connection”. as in the photo below.
Step 5
If you can’t find the internet not working problem on your own, contact technical support. Support numbers: 3-93-93, 3-93-94 and 8932 555 33 33. At the same time, you will find out if any work is being carried out now or if some kind of emergency situation has occurred due to which the Internet does not work. Maybe it’s not your computer or router, but it’s just that the provider is not all right.
Troubleshooting
The problem is in the router
If you did everything as described in the “First Steps” paragraph, then you need to check
the router is not configured correctly (settings are wrong) or you need to buy a new one (repair the old one).
Try reconfiguring your router or ask your ISP for this service. Make sure you have entered all the setup data correctly. You should also try updating the router firmware. If reconfiguration and firmware did not help, then, unfortunately, you need to buy a new router or repair this one.
There is a problem with the computer
If your router is working or not working at all, then the problem is with the computer.
Step 1
Check the network connection settings, IP address, subnet mask, username and password. Since all the settings are crammed into your computer. Or, an IP is already registered on the computer (for example, from an old connection). In this case, you need to try to set automatic IP and DNS acquisition, or set these parameters manually.
First, try setting automatic IP and DNS acquisition. Go to Control Panel \ Network and Internet \ Network Connections, or as shown in the photo below:
Right-click on Local Area Connection and select Properties. And then we do as shown in the photo below:
Next, disconnect and reconnect the network cable. The Internet must work.
Step 2
You need to scan your computer for viruses. There are computer viruses that block the Internet. To do this, run a virus scan in your antivirus program, and then clean them.
Step 3
Check that your network card is working. Go to the device manager (Start — right-click on the “Computer” icon — control — device manager).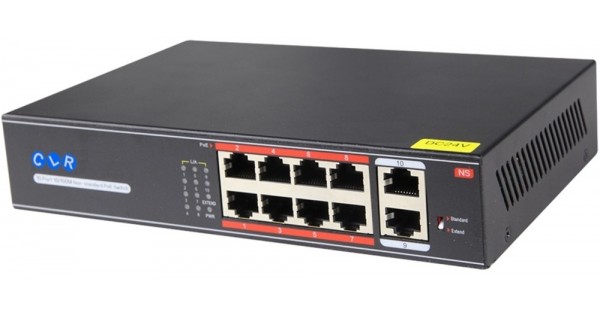 In the network cards section, there should be the name of your network card, if there is an exclamation mark next to it, then it does not work correctly. Try reinstalling the driver. If it is not there, but there are unknown devices, then update the network card driver. It may have been corrupted or removed due to a system error.
Step 4
See what programs you have recently installed. In rare cases, some programs may block Internet access. Remove the programs that you installed directly before the Internet disappeared.
Conclusion
There are several ways to find the reason why the Internet is not working. This article offers the most popular and effective methods. Follow all the steps to quickly find the reason why the Internet stopped working.
The orange (red) WAN Internet light on the TP-Link router is on
More than once, in the comments to various articles, he answered questions related to the Internet connection indicator (WAN) on TP-Link routers.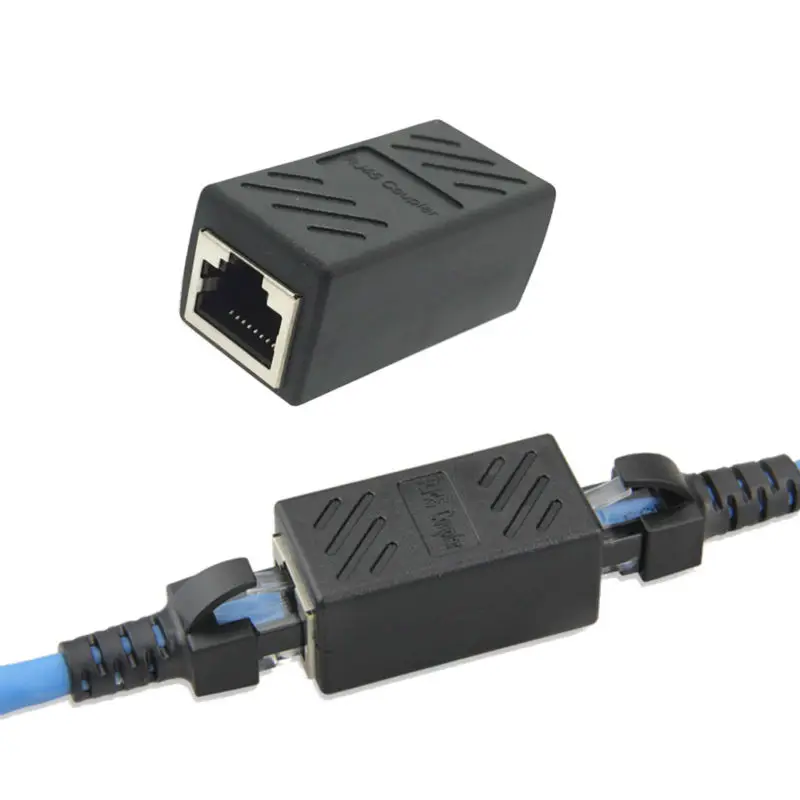 For many, it burns orange, and, accordingly, the Internet through the router does not work. Let me tell you right now that this is not a bug. The fact is that the router simply cannot connect to the Internet (to the Internet provider). And informs you about this error with an orange WAN indicator (planet icon).
Previously, all TP-Link routers did not have this orange indicator. All burned in the same color, they just blinked in case of an error, or something else. Such a chip appeared recently, and now, if there are problems with the connection and the Internet, the indicator lights up orange (or red). As I understand it, such changes on all router models: TP-link TL-WR841N, TL-WR740N, TL-WR941ND, TL-WR842ND, etc.
No matter what router you have, the problem itself looks something like this:
We just connect the cable to the WAN port of the router, and the indicator lights up orange, and the Internet through the router does not work. When all is well, the indicator should be green. If the router does not respond at all to connecting a cable to the WAN port, then see the solution to the problem in the article The router does not see the Internet cable. WAN port not working.
We have already found out that the problem is that the router cannot connect to the Internet. When setting up routers, this is probably the most popular problem that I wrote about in an article. When setting up a router, it says “No Internet access”, or “Limited”.
As practice shows, there are two main reasons:
- ISP has problems. Something on the line, problems with the equipment, you did not pay for the Internet, etc. You need to make sure that the Internet is working. The easiest way is to connect the Internet directly to your computer and check. You can call the provider and find out if there are any problems on their side. If the Internet does not work, then it is clear that the router cannot connect, and the WAN indicator is lit in orange.

- Incorrect router configuration. This is the main reason. It’s just that in the router settings you incorrectly set the parameters for connecting to the Internet provider, or did not set them at all. Also, the problem may still be in binding to the MAC address. If your provider makes such a binding.
Since the problem is mainly in the settings, let’s look into this in more detail.
Important! After purchasing and installing a router, you need to configure it to connect to an Internet provider. Select the type of connection in the settings, and set the necessary parameters. Only after that, the router will be able to connect to the Internet, and the WAN indicator will turn green.
Only if the provider uses the Dynamic IP connection type and does not use MAC address binding, you do not need to configure the Internet on the router, it should work immediately after connecting the cable to the router. Provided that the router is at factory settings.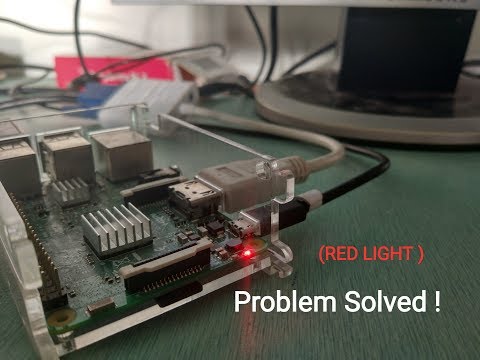
Let’s go point by point:
one
The first step is to find out what type of connection your ISP uses. And if this is not a Dynamic IP, then you must know additional data (password, username, server address). Also, you need to find out if the provider uses MAC address binding (there are not many such providers, but they exist). All the necessary information is usually specified in the contract for connecting to the Internet.
2
If you have already tried to configure the router, then it is better to reset the settings to factory settings. Next, go to the settings of the TP-Link router, and on the «Network» (Network) — «WAN» tab, select the connection type, and set the necessary parameters.
If you have a new control panel:
Once configured correctly, your router should connect to the internet and the WAN LED should turn green instead of orange.
3
Forgot about binding by MAC address. If your provider still does it, then you need to clone the MAC address to the router from the computer (to which the Internet was connected), more in this article. Or, register the MAC address of the router with the provider (it is indicated on the sticker on the device itself).
Many detailed instructions for setting up TP-Link routers of different models can be found in the section https://help-wifi.com/category/tp-link/.
If these tips did not help you, then describe your problem in the comments, I will try to help with advice.
Similar articles
TP-Link Archer AX23 Review – Inexpensive Wi-Fi 6 Router
Wi-Fi router TP-Link Archer C64 — overview, connection and configuration
Smart Wi-Fi light bulb TP-Link Tapo L530E — overview, connection, configuration and control
TP-Link Archer AX10: connection, configuration, firmware, troubleshooting
Windows 10 — all instructions for setting up the Internet and solving problems
Popular articles
New articles
Why doesn’t AirDrop work on iPhone, iPad, Mac?
How to view Wi-Fi password on iPhone?
Wireless Bluetooth mouse and keyboard in Windows 11: how to connect, configure, fix connection problems?
Setting up a DLNA server in Windows 11.