3 Ways to Fix MSI Afterburner FPS Counter When it’s Not Working
by Madhuparna Roy
Madhuparna Roy
A diploma holder in computers and with a keen interest in technology, Madhuparna is passionate about writing How-to guides and helping people solve the most intricate Windows issues…. read more
Published on
Affiliate Disclosure
- Whether the MSI Afterburner is showing the wrong FPS or not showing the framerate, you would need to enable the FPS counter.
- In such cases, it may show the GPU and the RAM details but will not show the FPS average, min, and max.
- It could be possible that the hardware monitoring statistics and the Show in On-Screen Display are enabled, but the recording option is not.
XINSTALL BY CLICKING THE DOWNLOAD FILE
To fix various PC problems, we recommend DriverFix:
This software will keep your drivers up and running, thus keeping you safe from common computer errors and hardware failure. Check all your drivers now in 3 easy steps:
- Download DriverFix (verified download file).
- Click Start Scan to find all problematic drivers.
- Click Update Drivers to get new versions and avoid system malfunctionings.
- DriverFix has been downloaded by 0 readers this month.
Do you use the MSI Afterburner app to track the Framerate of your game, and suddenly you notice that the FPS counter is not working anymore?
This is a known issue with the app, and many users have been reporting this for years.
For an issue like MSI Afterburner not working in Windows 11, you can refer to our detailed post for the workarounds.
However, before we get to the troubleshooting steps, let’s understand the common causes that lead to the MSI Afterburner FPS counter not working problem.
Why is my MSI Afterburner not showing FPS?
If the Afterburner is not showing the FPS counter, then it could be due to the below reasons:
- If the latest version of MSI Afterburner is not installed
- You did not install the RivaTuner Statistics Server
- The framerate option is not selected under the Monitoring Tab
- When the application detection level is not set to low in the RivaTuner Statistics Server (RTSS)
- The On-Screen Display support is not enabled in the Riva Tuner
- If your game doesn’t allow a third-party FPS counter
Is it safe to use MSI Afterburner?
Expert Tip: Some PC issues are hard to tackle, especially when it comes to corrupted repositories or missing Windows files. If you are having troubles fixing an error, your system may be partially broken. We recommend installing Restoro, a tool that will scan your machine and identify what the fault is.
Click here to download and start repairing.
MSI Afterburner is known to improve the average FPS using its overclocking facility, and also through its monitoring system that generates the live updates.
However, it’s suggested not to overuse MSI Afterburner to optimize the longevity of your graphics card.
How do I turn on my MSI Afterburner FPS counter?
1. Reinstall MSI Afterburner
- Press the Win + R keys together to launch the Run console.
- In the search bar, type appwiz.cpl and hit Enter to open the Uninstall or change a program window.
- Go to the right side of the Control Panel window, right-click on MSI Afterburner and select Uninstall.

- Once the program is uninstalled completely, visit the official Afterburner website.
- Here, download and install MSI Afterburner again.
- Make sure to check the required box during the setup process to download and install the Riva Tuner at the same time.
2. Enable Framerate from the Monitoring tab
- Open MSI Afterburner and click on Settings (gear icon) on the left.
- This will open the MSI Afterburner Properties window.
- Here, navigate to the Monitoring tab and select Framerate Avg under Active hardware monitoring graphs.
- Next, select Show in On-Screen Display under GPU usage graph properties.
- Now, go to Graph limits, select Override graph name, and type a name next to it, for example, FPS Avg.
- Go to Show in On-Screen Display again and click on the three dots next to it.

- In the On-Screen Display layout dialog, go Active layout properties.
- Here, under the Sizes library, double-click on Size 0.
- Edit size to 100 in the Size (in percents) field.
- Repeat steps 8 and 9 for Size 1 as well. Press Apply and OK to save the changes.
3. Change the settings under the Benchmark tab
- Now, in the Afterburner settings window, select the Benchmark tab.
- Go to the Global Benchmark Hotkeys section and in the Begin Recording field, type Num 1.
- Next, type Num 2 in the End recording field. Press Apply and then OK to save the changes.
This will also fix the Riva Tuner not showing the FPS issue. Now, open your game and check if the FPS counter is working in your game.
How do I show my Afterburner in-game?
Follow the below instructions to set the hotkeys that you can press even during the game to show or hide the overlay quickly:
- Launch MSI Afterburner and click on the gear icon (Settings) on the left.
- Next, navigate to the On-Screen Display tab.
- Here, go to the Toggle On-Screen Display and click on the box to change the hotkey.
- As you press the desired key combination, it will appear in the box.
- Now, click on Apply and OK to save the changes.
Your Afterburner tool should now show the FPS in-game.
Besides, if you are looking for alternatives to the MSI Afterburner, here’s a quick list of some of the best FPS counter software for Windows 10/11.
But if you are still facing any issues with the MSI Afterburner overlay, leave your thoughts below in the comments section.
Was this page helpful?
Start a conversation
Share
Copy link
Newsletter
Software deals
Friday round-up
I agree with the Privacy Policy regarding my personal data
How To Fix MSI Afterburner not Working [Complete Guide]
A lot of users have been complaining about the MSI Afterburner not working issue and we have taken it upon ourselves to compile this guide which details each and every scenario that you might face where a particular feature might not be working or the whole software ceases to work.
MSI Afterburner not working
MSI Afterburner is basically a must-have for most gamers that like to monitor their performance stats during games and it really keeps you up to date with the things that are happening with your hardware usage. However, we have been getting complaints from users that are unable to use it because MSI Afterburner not Working issue is being triggered.
What Causes the MSI Afterburner not Working Issue?
After going through some troubleshooting techniques commonly adopted by users to circumnavigate this error, we concluded that the following must be some of the most important reasons due to which this error message is triggered in the first place.
- Other Overlays: If you are simultaneously using the Nvidia and Steam overlays along with the MSI Afterburner overlay, it is recommended to disable all of them. This is because, using multiple overlays at the same time can cause misconfiguration issues and due to this, the MSI Afterburner not working issue will be triggered.
- Outdated Software: It is possible that your version of MSI Afterburner or RivaTuner Statistics Server has been outdated due to which the MSI Afterburner OSD not working issue is being triggered. the best way to circumvent this error is to simply uninstall both software and reinstall their latest versions after downloading them from the websites mentioned in the solution below.
- General Misconfigurations: Both the MSI Afterburner and RTSS require you to set them up according to your computer and desired configurations. If you haven’t completed this process or if you have misconfigured some of the settings, you will run into the MSI Afterburner not working issue.
- Missing DirectX Software: Another possibility is that you are missing the essential DirectX software that is very important in running any graphical applications on your computer. It serves as a communication channel between the GPU and applications demanding to use the GPU.
 Therefore, installing DirectX as mentioned in the solution below, can fix this issue completely.
 - Missing Admin Permissions: Sometimes, the software requires admin permissions to be able to monitor certain games or apps and if these permissions aren’t granted, it will be unable to do so. Therefore, as mentioned in the solution below, grant the app with admin permissions and it should fix the MSI Afterburner not working issue.
- Incorrect Rendering Mode: If the MSI Afterburner video capture not working issue is being triggered, you can try to change the rendering mode which is used by the software to render the overlay and video from your application. Doing so is known to sometimes fix this particular issue.
Now that you have been made familiar with most of the reasons behind this error, we can finally move on towards fixing this issue.
Before you Start:
- If MSI overlay is not showing in games, then try using it minimized instead of closing.

- Setting an ON/OFF key in the afterburner for OSD can sometimes solve the MSI Afterburner on-screen display not working issue. This can be done by going into settings, clicking on the “On Screen Display” button from the top, and then selecting the hotkey for toggling the OSD on and off.
Setting Hotkey for toggling OSD On and OFF in MSI Afterburner - Download and install RTSS if not installed with MSI. This can sometimes fix the MSI afterburner OSD not working issue.
- Delete the “CFG” file for MSI Afterburner located usually at the following location.
C:\program file(x86)\MSI Afterburner
Deleting the CFG
- Try pressing the “Ctrl + F” keys on your keyboard simultaneously as it increases the Fan speed. This way, you can get around the MSI afterburner fan speed not working issue.
- Delete all third party controllers except MSI afterburner, this is because you should ideally only have one such application installed on your computer, and having another one can cause incompatibility issues between the two applications.

- Try resetting MSI Afterburner to its default settings by clicking on the reset button after the program has been opened.
General Fixes:
There are a couple of different issues that you could be facing when you are running into the MSI Afterburner not working error. These can range from MSI afterburner OSD not working to MSI afterburner fan curve not working to MSI afterburner video capture not working. However, we have kept in mind all of the different errors with this issue and have compiled some general fixes that you can apply to fix these issues.
Fixing Errors with the MSI Afterburner:
Solution 1: Enable OSD for MSI Afterburner
Solution 2: Disable Steam Overlay
Solution 3: Disable NVIDIA In-Game Overlay
Solution 4: Reinstall Updated Afterburner and Riva Tuner Statistics Server
Solution 5: Set Detection
Solution 6: Run Program with Administrative Privileges
Solution 7: Disable Graphic card
Solution 8: Add Exclusion
Solution 9: Install DirectX
Solution 10: Change in File
Solution 11: Set Up MSI Afterburner Properly
Solution 12: Switch Rendering Mode
MSI Afterburner Video Capture Not Working:
Solution 1: Reconfigure Video Capture Settings
Solution 2: Disable Capture of 3rd Party Overlays
Solution 3: Reconfigure On-screen Display Settings
MSI Afterburner OSD Not Working:
Solution: Set Minimized Window
MSI Afterburner Fan Curve Not Working:
Solution 1: Install Latest GPU Drivers
Solution 2: Downgrade GPU Drivers
Solution 3: Set Fan Speed Manually
Solution 4: Setting a Custom Fan Curve
Solution 1: Enable OSD for MSI Afterburner
It seems like a pretty basic thing to do but many users haven’t properly enabled their OSD from MSI Afterburner settings due to which this issue is caused in the first place. Therefore, follow these steps below to fix the MSI Afterburner OSD Not working issue.
- Launch MSI Afterburner and click on the “Settings Gear” icon.
Launching MSI Afterburner Settings - Go to the “Monitoring” tab and checkmark the “Show in On-Screen Display” box.
Selecting Show On-Screen Display option - After that, Navigate to the “On-Screen Display” tab.
- In here, Set Hotkeys for “Toggle OSD”, “Show OSD” and “Hide OSD”.
- Checkmark the “Show on Screen Display on Captured Screenshots and Videos” box.
Configuring OSD Settings in MSI Afterburner - Press Backspace to delete the selections for any other options in this setting and this way set that to “None”.
- Click on “Apply” to save your changes and select “OK” to exit out of the software.
Solution 2: Disable Steam Overlay
Disabling Third-party overlays plays an important part in fixing this issue because third-party overlays are known to most commonly cause this error with users.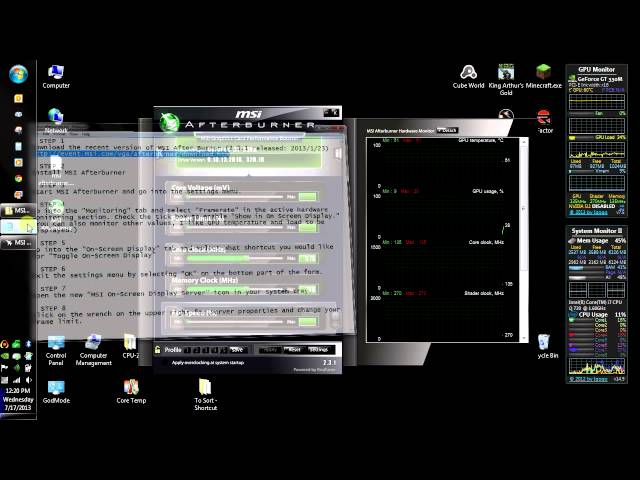 Therefore, follow the steps listed below to completely circumvent this issue by disabling the Steam Overlay.
- Press the “Windows + S” keys on your keyboard and type “Steam” in the search bar.
- Click on the first result to launch Steam on your computer.
- After that, go to the “Library” tab.
Opening Steam Library - Now, right-click on the game in which you are facing the MSI Afterburner not working issue.
- Select “Properties” from the menu and click on the “General” tab.
Selecting game properties in Steam - Make sure to un-check the “Enable the Steam Overlay while in-game” box.
- Finally, click on “Apply” to save your changes and exit out of Steam.
- Launch the game and check to see if the MSI afterburner not working issue has been resolved.
Solution 3: Disable NVIDIA In-Game Overlay
Nvidia In-Game overlay is another common overlay that most users might have enabled on their computers. Therefore, in this step, we will be completely disabling it as well. For that, follow the step by step instructions that are written as follows.
- Press the “Windows + S” keys on your keyboard and type “Geforce Experience” in the search bar.
- After that, click on the “Settings Cog” icon, located at the top right corner of the home screen.
- Navigate to the “General” tab and look for the “Share” or the “In-Game Overlay” option depending upon your version of the software.
Clicking on the “In-Game Overlay” option - Now, make sure to turn the toggle off to disable the Nvidia Overlay completely.
- Apply the changes made and launch the game with which you were facing this issue again.
- Check to see if the MSI Afterburner OSD not working issue is still persisting.
Solution 4: Reinstall Updated Afterburner and Riva Tuner Statistics Server
Sometimes, the application installation files can get corrupted due to which the MSI Afterburner not working issue might be triggered. Therefore, in this step, we will be reinstalling both apps involved in this process, and in doing so, we will also be installing their latest versions.
- Press “Windows + R” keys on your keyboard, type “appwiz.cpl” in the run prompt, and press the enter key to open the application wizard.
Typing “appwiz.cpl” - In the “Programs and Features” window, right-click on the “MSI afterburner” and “RTSS” applications in the list.
- Once you’ve found them, right-click on them one by one and select “Uninstall” to remove them from your computer.
Clicking on “Uninstall” - Complete the uninstallation process by following the on-screen instructions.
- After this, download MSI Afterburner and Riva Tuner Statistics Server.
- Install the downloaded executables and install them.
- Now, both the applications will have been updated to the latest available versions.

- Check to see if doing so fixes the MSI Afterburner not working issue.
Solution 5: Set Detection
It is very important to set the RTTS app in such a way that it is able to read and detect the applications that are currently running on your computer. Therefore, in this step, we will be setting its detection settings to be able to do so.
- Press the “Windows + S” keys on your keyboard and type in “RivaTuner Statistics Server” in the search bar.
- After that, click on the “Add” option, located at the bottom left corner of the “RivaTurner” window.
- Now browse for the game’s executable with which you are getting the MSI Afterburner not working issue and double click on it to add it to the list.
- Once the game executable has been added successfully, select the executable from the list and select it.

- Finally, you need to set the “Application Detection Level” option to high.
Adding the game to RivaTuner Statistics Server and setting the Application Detection Level to High - Save the changes and see if the issue resolved.
Solution 6: Run Program with Administrative Privileges
Missing admin permissions are another factor that can prevent the application from being able to work properly. Therefore, in these steps, we will be running the MSI Afterburner program with admin permissions to allow them to be able to monitor the applications properly.
- For this purpose, you need to open the main installation folder where the MSI afterburner is installed. If you have installed it at your preferred position, then go to that folder. Otherwise, the default location should be as follows.
C:\program file(x86)\MSI afterburner.
- Right-click on the “MSI Afterburner.exe” and select “Properties” from the menu.

- Then go to the “Compatibility” tab and uncheck the box associated with “Run this Program in Compatibility mode”.
Opening Compatibility Tab - Then checkmark the box associated with “Run this Program as an Administrator”.
- Finally, select “Apply” to save the changes made and close the window.
Running the Program as an Administrator - Launch the app again to see if MSI Afterburner not working issue has been fixed.
Solution 7: Disable Graphic card
- Turn on your PC and enter the BIOS mode. If instructions on your screen to enter the BIOS mode are displayed on the screen then, follow them. Otherwise, keep pressing Del, F1, or F2 key to enter into the BIOS settings.
- Then navigate to the “Advanced” tab and select the “Onboard Devices Configuration (or Chipset Configuration)-> Primary Graphics Adapter” option.
Prioritizing Dedicated GPU - Now disable it by pressing the enter key while highlighting the enabled option and set the PCI-E selection as enabled and make sure to set it first as well/
- After that, press the “Save your Changes and Exit” button which should be given on-screen.
Saving Changes and Exiting from Bios - Finally, the PC will restart, launch the game, and check to see if the MSI Afterburner not working issue has been resolved.
Solution 8: Add Exclusion
- First of all, Run MSI afterburner and click on the “Settings gear” icon.
Launching MSI Afterburner Settings - Then select the “On-screen Display tab->more” options.
Clicking on More - Now hold “Ctrl” and select “ADD” to open a window listing all the open 3D apps.
- After that, uncheck every box associated with applications other than your game.
Unchecking other apps except for our game - Save changes and run the game to check if the MSI Afterburner not working issue is fixed.
Solution 9: Install DirectX
Most modern operating systems come with pre-installed DirectX software. This software is most essential for people that perform graphical tasks with their computers and therefore, you should have it installed on your computer as well. Navigate to this link and download the DirectX software from the website once downloaded, install it on your computer by running the executable file.
Solution 10: Change in File
- Open the RTSS installation folder by navigating to the following location.
C:\Program Files (x86)\RivaTuner Statistics Server
- Now open the following file with Notepad.
ProfileTemplates\Global Config File
Launching the folder
- After that, search under “[RenderVulkan]” and replace “presentfromcompute = 0” to “presentfromcompute = 1”.

Changing the Value - In the end, click on the “File” option on the top left side and select “Save”.
- Restart MSI Afterburner and RTTS app.
- Launch the game and check to see if you have fixed the MSI Afterburner not working issue.
Solution 11: Set Up MSI Afterburner Properly
- Run MSI afterburner and click on the “Settings Gear”.
Launching MSI Afterburner Settings - Navigate to the “General” tab and the “Start with Window”, “Start Minimized”, “Unlock Voltage Control” boxes.
Changing MSI Afterburner settings - After that, move to the “Monitoring” tab and checkmark the “Show in On-Screen Display” option.
- Now go to the “On-Screen Display” tab and set your preferred hotkeys.
- Click on “OK” and save your changes.

- Check to see if by making these changes, you have fixed the MSI Afterburner not working issue.
Solution 12: Switch Rendering Mode
- Press the “Windows + S” keys on your keyboard and type in “RivaTuner Statistics Server” in the search bar.
- Click on the first option to launch the application.
- Go to “General Properties” and turn ON “Start with Windows”
- Then change “On-Screen Display Rendering Mode” to “Raster 3D”.
Selecting the Raster 3D option in RTSS - Click ok and close the “RTSS”.
MSI Afterburner Video Capture Not Working:
Solution 1: Reconfigure Video Capture Settings
- Launch MSI Afterburner and click on the “Settings gear” icon.
Launching MSI Afterburner Settings - Navigate to the “Video Capture” tab.

- Now set the hotkeys for screen recording in the box next to “Video Capture”.
- Then set your preferred “Video quality” and “Framerate” using the slider.
Clicking on the Video Capture tab and configuring the video quality settings - After that, set a path for saving recorded videos and make sure that the path is entered correctly.
- Apply the changes made, closeout of MSI Afterburner, and start it back up again.
- Check to see if by doing this, you are able to fix the MSI Afterburner video capture not working issue.
Solution 2: Disable Capture of 3rd Party Overlays
It is important that if you are getting this error with another video capture software, disable 3rd Party Overlays capture in its settings. Also, make sure to set MSI Afterburner Video capture settings to record the 3D Application.
Settings record mode to 3D Application
Solution 3: Reconfigure On-screen Display Settings
- Launch MSI Afterburner and click on the “Settings Gear” icon.

- Navigate to the “On-screen Display” tab.
Configuring OSD Settings in MSI Afterburner - After that, scroll down and uncheck the “Show On-Screen Display on Captured Screenshots and Videos” option.
- Run the game and try recording the screen.
- Check to see if you are able to fix the MSI Afterburner Video capture not working issue.
MSI Afterburner OSD Not Working:
Solution: Set Minimized Window
- Run MSI afterburner and click on the “Settings Gear” icon.
- Navigate to the “General” tab and make sure to check the “Start with window” and “start minimized” box.
Changing General Configurations - Save your changes and close out of the MSI Afterburner window.
- Check to see if you are now able to fix the MSI Afterburner OSD Not Working issue.
MSI Afterburner Fan Curve Not Working:
Solution 1: Install Latest GPU Drivers
It is possible that the MSI Afterburner Fan Curve not working issue is being triggered because MSI Afterburner is unable to recognize your GPU Properly.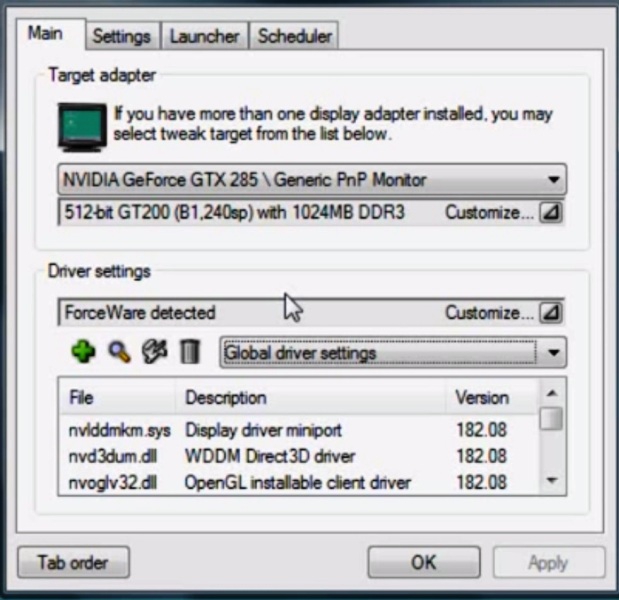 Therefore, in this step, we will be circumnavigating this issue by installing the latest available GPU Drivers. For that purpose, download AMD Drivers if you are using an AMD Provided GPU and download Nvidia Drivers if you are using an Nvidia GPU.
Solution 2: Downgrade GPU Drivers
- Press “Windows + R” keys on your keyboard to launch the Run prompt.
- Type “devmgmt.MSC” and press the “Enter” key to start the device management window.
Typing devmgmt.msc in the Run prompt - In here, look for “Display Adapters” in the list and expand it.
- Right-click on “GPU Driver Name” and select “Uninstall Device”.
Uninstalling GPU Device - After that, navigate to the AMD or the Nvidia site depending on your GPU and download an older version of the driver for your GPU.
- After completing the download, install the drivers and check to see if the issue gets resolved.

Solution 3: Set Fan Speed Manually
Launch MSI Afterburner and on the main screen, click on the “Auto” button under the Fan Speed option to disable the automatic control of your GPU Fans. From here, you can drag the slider up and down to adjust the GPU Fan speed accordingly.
Setting Fan Speed Manually
Solution 4: Setting a Custom Fan Curve
- Launch MSI Afterburner and click on the Gear icon to navigate into its settings.
- Navigate to the “Fan” tab from the top and checkmark the “Enable User-Defined Software Automatic Fan Control” option.
Checking the Enable User-Defined Fan Curve option - After that, select the “Custom” option from the “Predefined Fan Speed Curve” drop-down menu.
- Now manually adjust the parameters in the graph for the Fan Speed.
- You can set a particular value for the Fan Speed by dragging the parameter along the Y-Axis for a particular temperature by dragging it across the X-Axis.

- Try not to set the Fan Speed below 30% under any circumstances to ensure that your GPU remains chilled.
- Apply your changes and click on “OK” to exit out of the window.
- Check to see if you are now able to fix the MSI Afterburner Fan Curve not working issue.
If you are still unable to fix this issue, make sure to contact us and we can further troubleshoot it for you.
How to Use RivaTuner to Monitor Gaming Performance
The freedom to push your computer well beyond the stock specifications is the best part of PC gaming. If you have been facing niggling hardware troubles or otherwise want to learn how to use advanced overclocking tools to optimize your gaming setup without necessarily overclocking your components, we show you how to make use of RivaTuner Statistics Server (RTSS) to monitor your gaming hardware performance.
What Is RTSS?
RivaTuner Statistics Server was initially a companion to the RivaTuner open-source GPU overclocking tool designed for Nvidia GPUs, with limited support for ATI/AMD hardware. However, it has now become a standalone tool offering hardware and frame-rate monitoring capabilities, with additional support for frame limiting and video capture.
RivaTuner itself has since been assimilated into virtually all major GPU overclocking tools, such as MSI Afterburner, EVGA Precision X, and ASUS GPU Tweak. This guide is based around MSI Afterburner, which comes bundled with RTSS. Here’s what you need to do to get started.
Install and Configure RTSS
1. Download the latest stable release of MSI Afterburner bundled with RTSS.
2. Install the tool and be sure to select RivaTuner Statistics Server when you are prompted to choose components during the installation. It’s not possible to monitor critical hardware parameters without RTSS.
3. Open MSI Afterburner and dial in the overclock settings for the GPU. Alternatively, you can leave everything unchanged at the default settings and head straight to configuring RTSS by clicking on the Settings button represented by the gear icon.
4. Navigate to the Monitoring tab in the Settings window. The tab contains a list of hardware parameters relevant to the CPU and GPU.
5. Select the hardware parameter you wish to monitor. Make sure the checkmark beside it isn’t greyed out. Monitoring these parameters consumes CPU time, so choose what you need if you are concerned about the performance of RTSS.
6. With the desired parameter highlighted, tick the first checkbox below the list of hardware parameters named “Show in On-Screen Display.” The drop-down menu next to it allows you to choose whether you want this data displayed as text, a graph, or a combination of both. Repeat this procedure for all parameters you want to monitor.
7. Click on the OK button to save these settings. The next time you run a game, the selected parameters will be overlaid on the top left of the screen.
Customize RTSS
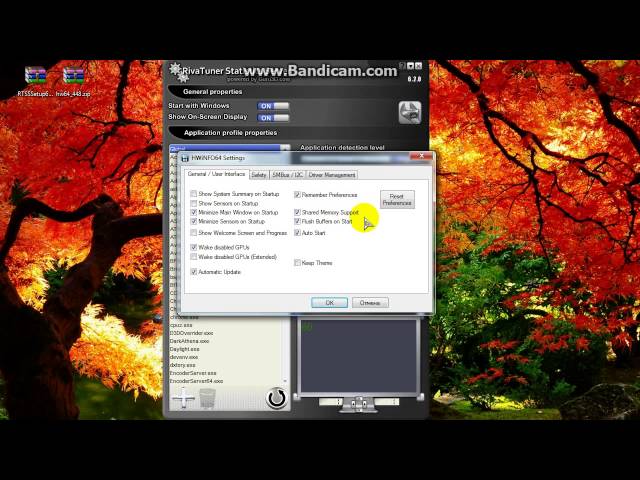
Whether you’ve opened RTSS with MSI Afterburner or separately, you can customize a lot of things with RTSS itself. Open the separate RTSS app either through the system tray or by navigating to the executable on your PC. (You can also search for “rivatuner” through the Start menu.)
You’ll see plenty of options in the Rivatuner app, such as starting it with Windows, the dimension of the OSD (on-screen display) and so on.
One of the more interesting features here is that if you click Add at the bottom-left corner, you can add RTSS profiles for specific programs and apps. I, for example, added the game Hades here.
With Hades selected, I can now change the different RTSS settings specific to that game. A good option for games, for example, is to enable Stealth mode, which will prevent it from interfering with anti-cheat software in online games. Other games, meanwhile, will require the “Custom Direct3D support” option to be enabled.
There’s a lot here, so have a play around and do some customizing!
Using RTSS to Monitor Hardware Performance
RTSS comes with a long list of features and capabilities, but we are primarily interested in the capability to monitor hardware parameters to improve the gaming experience. That involves keeping an eye on numerous statistics involving thermal, utilization, power, voltage, and clock speeds for the CPU, GPU, and memory subsystems. The following lays out the parameters you should take note of.
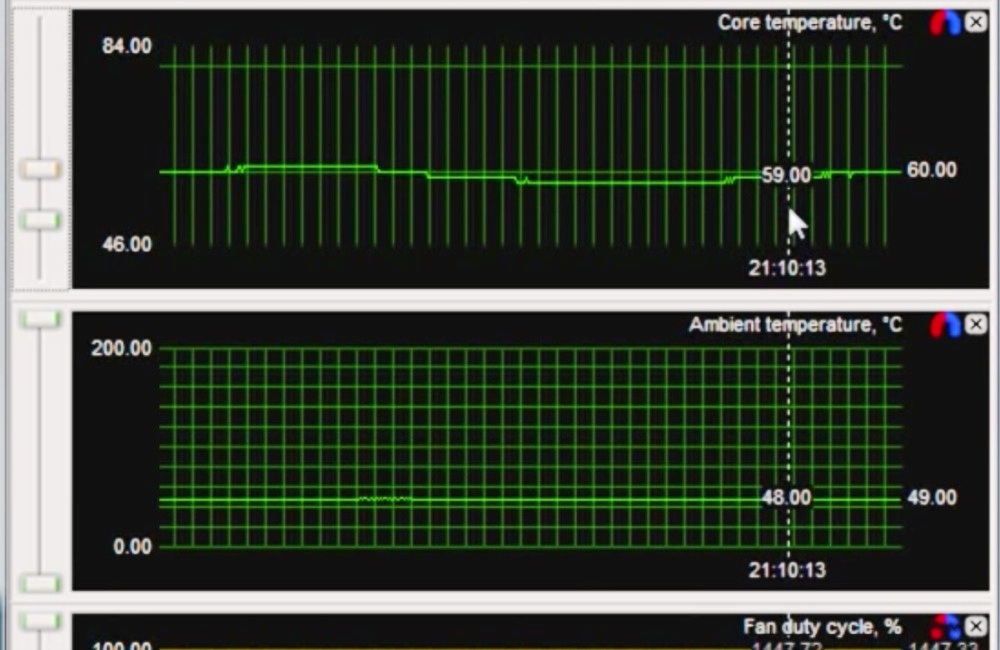
GPU Temperature
Keeping an eye on GPU temperature relative to the ambient temperature gives a good idea of the overall health of the cooling system of your graphics card. An overheating GPU is a sign that remedial measures such as GPU heatsink cleaning and thermal paste reapplication is required. Monitoring the Fan Speed to verify proper operation along with using aggressive fan profiles should also help.
Modern GPUs tend to take manual overclocking control away from users and instead base it on thermal headroom. Getting the most out of your GPU is no longer restricted to prevent thermal throttling, but to ensure that the GPU runs as cool as possible. Case in point: both Pascal and Turing Nvidia GPUs provide loads of extra boost clock speeds with every five-degree drop in temperature.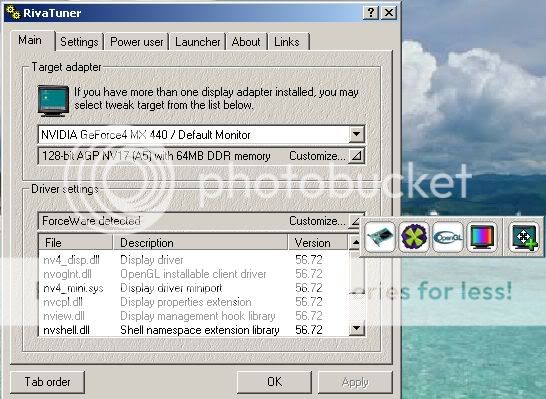 The Temperature Limit parameter is also a great means to know if your GPU performance is hit hard on account of thermal throttling.
CPU Temperature
The same reasons apply to CPU temperatures as well. However, processor clock speeds aren’t as temperature-dependent as that of GPUs. Thermal throttling is what we are looking for here. Be sure to use the CPU1 temperature-monitoring option. This is the accurate temperature reported directly from the CPU die. The option labelled CPU temperature is reported from software and isn’t quite accurate.
CPU and GPU Usage
These parameters are extremely important. Depending on how optimized a game is, CPU utilization will range from 40 to 80 percent for most gaming rigs. However, if your CPU is at 100 percent, that means it is the weak link and that your GPU is sitting idle, waiting for the CPU to finish its job. GPU utilization will be less than 100 percent in this case. You will get much better performance by upgrading to a more powerful CPU.
The converse holds true for GPU as well. However, your GPU should hit 100-percent usage under normal conditions. Otherwise, it is being bottlenecked by the CPU.
Memory Usage
This refers to the video memory (VRAM) and shouldn’t be confused with the RAM Usage option which pertains to the main system memory. Certain game settings, such as shadow quality, ambient occlusion, multi-sampled AA, and anything that uses normal maps will require extra VRAM. Once VRAM usage exceeds the max installed memory on your GPU, the framerate will drop catastrophically.
Some rare games, such as the new installments in the Resident Evil series, warn of potential memory bottlenecks, but for most other games, keeping an eye out for memory usage is critical if you experience sudden framedrops and/or microstutters.
BUS Usage
Consider keeping an eye on this parameter if your framerates drop precipitously without any explanation. BUS Usage is the utilization of the PCIe bus, which is the interface governing the communication link between the CPU and GPU.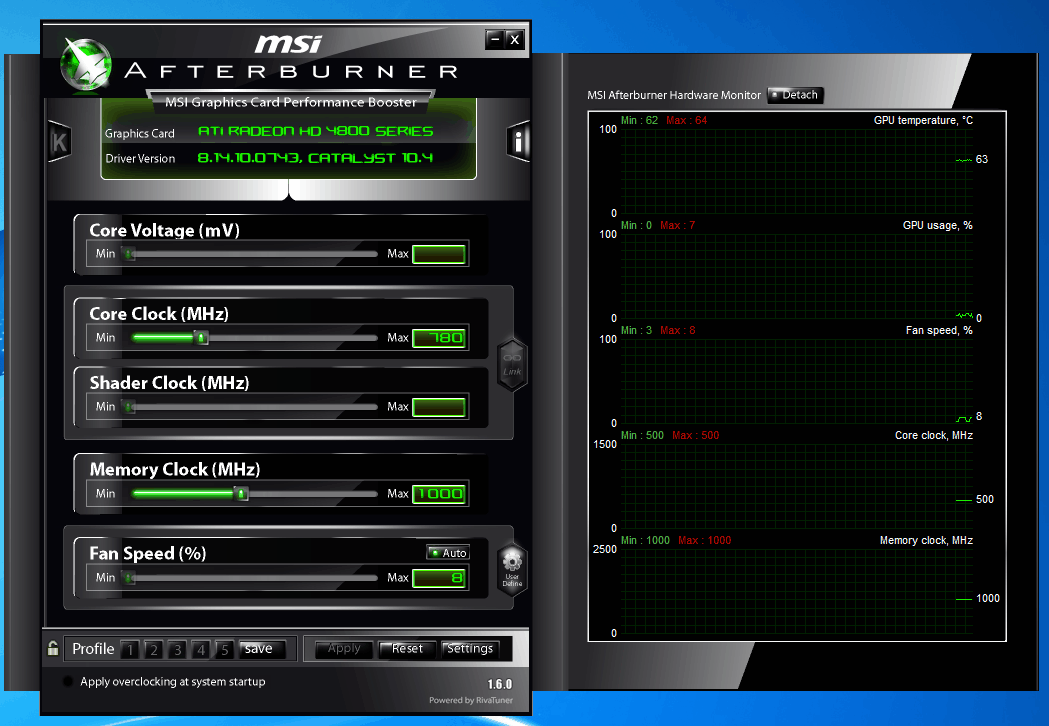 No current GPU is capable of saturating the modern PCIe 3.0 x16 bus, so this parameter should register low percentages under full load. If BUS Usage reads 100 percent, you’re looking at a problem with the PCIe bus.
This can be caused by a number of factors ranging from driver issues, incorrect BIOS setting, and even debris in the PCIe slot or an incorrectly-seated GPU preventing optimal electrical contact between the GPU and the motherboard. This problem is also caused by cheaply-made PC cases with misaligned rear I/O mounts that cause GPU seating issues. This can be further verified by running a GPU info/diagnostic tool such as GPU-Z.
Core/Memory Clocks
Once you know the maximum clock speeds of your CPU/GPU core and memory, any discrepancies therein are signs that the components are either experiencing thermal throttling or facing underutilization due to other underlying problems. This parameter also helps diagnose memory issues. Memory cooling on most GPUs is weak, so overclockers should watch memory clock speeds closely for signs of thermal throttling and dial down memory overclocks to prevent damage to the GPU.
No Load/Power Limit
Extremely useful for Nvidia laptop users. This will tell you if there’s some problem with the power-saving feature of the GPU. If no load limit shows while you have poor framerate, there’s some issue with the GPU. It could be the PCI-E bus or some power-saving feature, but you at least know what to troubleshoot. Power limit is important for overclockers. This will tell you whether the CPU/GPU is being throttled because the power delivery subsystem cannot provide enough wattage to hold the overclocks.
No Load/Power/Voltage Limit
These nifty monitoring parameters are a godsend for diagnosing odd GPU behavior and performance issues. No Load Limit basically tells you when the GPU is idling due to lack of processing load. You know there’s something amiss with your GPU when the No Load Limit pops up during actual gameplay while causing a severe drop in framerate. For example, Nvidia laptops using hybrid GPU configuration will hit the No Load Limit if the onboard GPU is used instead of the discrete GPU.
Power and Voltage Limit indicators are relevant to overclockers. Hitting these limits is a sign that your GPU is being throttled because the power delivery subsystem cannot provide enough wattage to hold the overclocks.
Wrapping Up
Keeping an eye on your hardware performance gives you a fair idea of the overall health of your system, which is critical to diagnosing any performance issues and underlying hardware troubles in time and without much heartburn. For more tips to monitor hardware performance, see our guide to stress-testing your GPU using Furmark, as well as stress-testing your CPU using Cinebench. Also, here’s how to stress test a graphics card on Linux.
Is this article useful?
Subscribe to our newsletter!
Our latest tutorials delivered straight to your inbox
Sign up for all newsletters.
By signing up, you agree to our Privacy Policy and European users agree to the data transfer policy.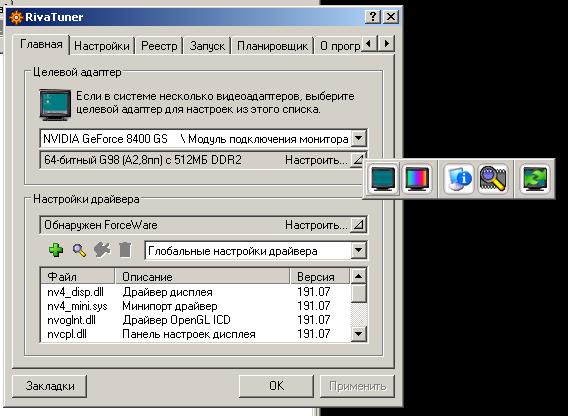 We will not share your data and you can unsubscribe at any time.
- Tweet
How to Enable FPS Counter in MSI Afterburner on Windows 10
How to Display FPS Overlay while gaming with MSI Afterburner.
- M. Mateen
Are you interested in the MSI Afterburner FPS Counter? Do you want your game to show FPS during gameplay?
It’s true that the MSI Afterburner shows FPS while playing the game. This tool has an advanced FPS counter which of course is an amazing feature of MSI Afterburner. Additionally, this tool also lets its users overclock GPU, and control fan speed on PC.
But many users ask how to enable the FPS counter in MSI Afterburner to see the framerate.
In this article, we have explained simple steps on how to use MSI Afterburner to show FPS. Follow these steps to activate the MSI FPS counter. If MSI afterburner not showing FPS then don’t worry we have also covered this part as well.
UPDATE YOUR DRIVER
in Windows 11, 10 and 7
Use Driver Easy to update all the missing & outdated device drivers on PC for free.
Free Download
What’s the Ideal Framerate to Play Smooth Games?
As a rule of thumb, most games run smoother at 60 FPS. Most gamers also agree with this range of 60 FPS and above makes your game more responsive. They also agree that anything less than 30 FPS is unplayable, and rubbish.
Read Also: What is the Ideal GPU Temperature Range While Gaming?
At 60 FPS there will be 16.67/ms (millisecond) between every frame. Meaning that if you move your mouse it will take 16.67ms before this action is reflected on your screen. This excludes additional latencies such as input lag and lag introduced by the game.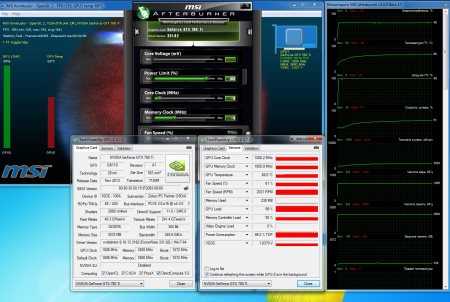
How to Enable FPS Counter in MSI Afterburner
Using MSI Afterburner to turn on the FPS counter is quite easy. Follow these steps:
Step 1. Download and Install MSI Afterburner
If you are new to using this tool then first download the latest version of MSI Afterburner. Just visit the official site look for the (For Windows) Version and download the file.
Once you are done with the download you will see a Zip folder extract the file and run the installation setup to completely install this tool. Make sure that checkbox for the RivaTuner Statistics Server is checked.
Step 2. Turn on MSI Afterburner On-screen display settings
Now Run Afterburner and click on the Gear icon to open its settings.
Within the settings click on the Monitoring tab and select any or all hardware monitoring options you want to show in the On-Screen Display.
To use MSI Afterburner to show FPS check the box “Framerate“.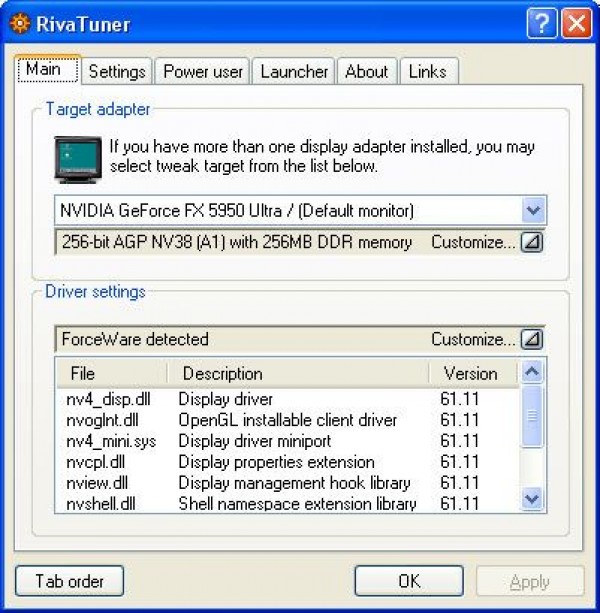 Once you have selected the required monitoring and FPS display option, make sure to check the checkbox for the Show in On-screen display.
Step 3. Enable Global On-Screen Display Hotkeys
Now you need to configure the hotkeys to turn on and off the MSI FPS counter. Click on the On-Screen Display Tab in the Settings.
Under the Global on-screen display hotkeys section, set up the keys by pressing the keyboard buttons. To show MSI FPS counter while gaming press F10 (select any key). Click on Apply and then OK.
How to Show FPS and Temp In-Game
Once you have set up the FPS counter and temp readings. You can enable MSI in-game overlay by pressing the F10 key.
How To Show FPS and Temperature In-Game
If you want to use third-party FPS counter software then many PC games have their own FPS counter and temp monitor. While playing games you can turn on the FPS, if you know the exact settings or commands.
You can enable FPS in-game in the following popular games.
- Call of Duty: Warzone: Go to Options > General > Telemetry and enable Frames Per Second (FPS) Counter.
- Dota 2: Head to Settings > Options > Advanced Options > Display Network Information.
- Fortnite: Look under Settings > Video > Show FPS.
- League of Legends: Press Ctrl+F in-game to view frame rate and latency stats.
- Overwatch: Check Options > Video > Display Performance Stats, and expand the Advanced menu to enable extra stats.
- Valorant: Open Settings > Video > Stats, then set the Client FPS to show text, graph, or both.

What If MSI Afterburner does Not Show FPS
If the MSI Afterburner not showing or displaying the FPS counter, then you need to make sure that:
- You have installed the latest version of MSI Afterburner along with the updated RivaTuner Statistics Server.
- If you are already using the latest version then try to download the previous version.
- You have actually selected the Framerate option within the Monitoring Tab.
- Also, make sure that the RivaTuner Statistics Server (RTSS) sets the application detection level to Low, and enables On-Screen Display support.
Read Also: Solved: MSI Afterburner Can’t Change Fan Speed
Still MSI Afterburner Framerate not showing, then it may be because the game you are playing doesn’t allow third-party FPS counter to run. It may also be due to games playing in trusted Mode.
If you want an on-screen Display, you need to add or allow third-party software.