Corsair VS450 Power Supply Review: Affordable and Reliable — Tom’s Hardware
Tom’s Hardware Verdict
The Corsair VS450 is one of the most affordable 450-watt power supplies on the market, but you’ll pay in decreased performance and efficiency.
Why you can trust Tom’s Hardware
Our expert reviewers spend hours testing and comparing products and services so you can choose the best for you. Find out more about how we test.
Today’s best Corsair VS450 Power Supply deals
No price information
For more information visit their website
Specifications and Part Analysis
Corsair VS450 Power Supply. (Image credit: Tom’s Hardware, Corsair)
For mainstream systems and users on very tight budgets, the Corsair VS450 looks to be a good choice at $40 (£31). It managed to survive all of our tough tests and its overall performance is at decent levels. We would like to see higher efficiency levels, but at this price point you cannot be extra picky. A strong opponent of the VS450 is the EVGA 450 BT which has a higher price tag, but from time to time there are rebates and offerings that bring its price to the same levels as the VS450.
Corsair’s entry-level PSU line is called VS and consists of highly affordable models, suitable for mainstream systems with low power requirements. Those units meet the 80 PLUS white standard’s requirements and are certified as ETA-S by Cybenetics. For today’s standards, those efficiency levels are low, but Corsair wanted to keep the price tags as low as possible and a more efficient platform would increase the production cost.
Despite its budget orientation, the VS450 promises reliable operation with a rated mean time between failures (MTBF) of 100,000 hours. We usually see such high MTBFs in more expensive products. Moreover, the provided warranty is three years long, showing that Corsair has faith in this product. Finally, the temperature for continuous full power delivery is lower than what the ATX spec recommends, at 30°C, but this is normal for a mainstream PSU destined for normal operating conditions. If you need something to cope with higher temperatures, you should invest (much) more.
Image 1 of 9
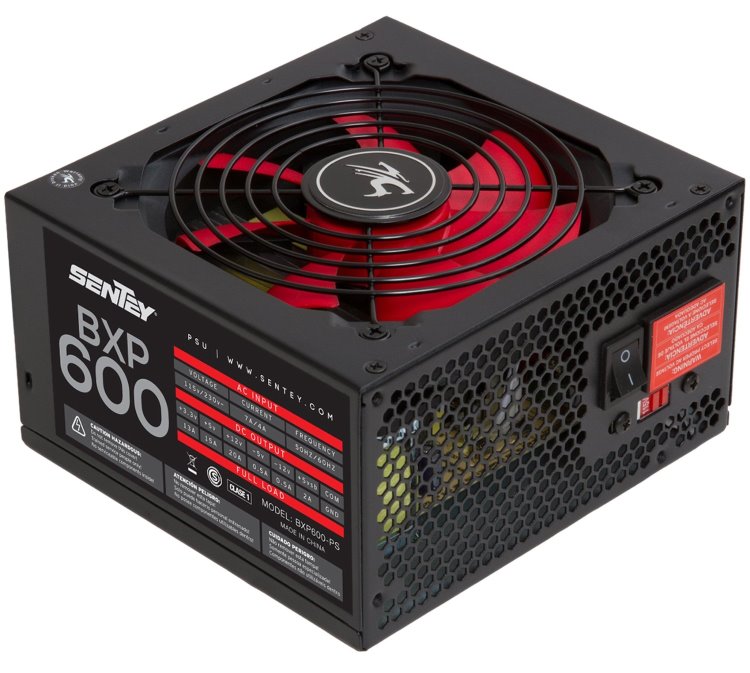
There are no modular cables of course, since those ones are the first to go, in order to keep the cost low. The 120mm diameter fan uses a sleeve bearing which is the most popular type of bearing in the entry-level PSU category.
Image 1 of 15
Specifications
Swipe to scroll horizontally
| Manufacturer (OEM) | HEC |
|---|---|
| Max. DC Output | 450W |
| Efficiency | 80 PLUS, ETA-S (82-85%) |
| Noise | LAMBDA-S++ (30-35 dB[A]) |
| Modular | ✗ |
| Intel C6/C7 Power State Support | ✓ |
| Operating Temperature (Continuous Full Load) | 0 — 30°C |
| Over Voltage Protection | ✓ |
| Under Voltage Protection | ✓ |
| Over Power Protection | ✓ |
| Over Current (+12V) Protection | ✓ |
| Over Temperature Protection | ✓ |
| Short Circuit Protection | ✓ |
| Surge Protection | ✓ |
| Inrush Current Protection | ✓ |
| Fan Failure Protection | ✗ |
| No Load Operation | ✓ |
| Cooling | 120mm Sleeve Bearing Fan (D12SH-12) |
| Semi-Passive Operation | ✗ |
| Dimensions (W x H x D) | 152 x 87 x 128mm |
| Weight | 1. 8 kg (3.97 lb) 8 kg (3.97 lb) |
| Form Factor | ATX12V v2.4, EPS 2.92 |
| Warranty | 3 Years |
Power Specifications
Swipe to scroll horizontally
| Rail | 3.3V | 5V | 12V | 5VSB | -12V | |
|---|---|---|---|---|---|---|
| Max. Power | Amps | 20 | 20 | 36 | 3 | 0.3 |
| Watts | 110 | 432 | 15 | 3.6 | ||
Total Max. Power (W) Power (W) |
450 |
Cables and Connectors
Swipe to scroll horizontally
| Captive Cables | ||||
|---|---|---|---|---|
| Description | Cable Count | Connector Count (Total) | Gauge | In Cable Capacitors |
| ATX connector 20+4 pin (560mm) | 1 | 1 | 18-20AWG | No |
| 4+4 pin EPS12V (620mm) | 1 | 1 | 18AWG | No |
| 6+2 pin PCIe (580mm+110mm) | 1 | 2 | 18AWG | No |
| SATA (460mm+120mm+120mm) | 2 | 6 | 18AWG | No |
| SATA (460mm) / 4-pin Molex (+120mm+120mm) / FDD (+120mm) | 1 | 1 / 2 / 1 | 18-20AWG | No |
| AC Power Cord (1380mm) — C13 coupler | 1 | 1 | 18AWG | — |
All cables are fixed and have sufficient length. It is nice to see a couple of PCIe connectors in a super-budget 450W unit, while the number of peripheral connectors is satisfactory. The FDD connector could be replaced though, with a 4-pin Molex one. Finally, the distance between the SATA and 4-pin Molex connectors should be a little longer, at 150mm.
Image 1 of 8
Component Analysis
We strongly encourage you to have a look at our PSUs 101 article, which provides valuable information about PSUs and their operation, allowing you to better understand the components we’re about to discuss.
Swipe to scroll horizontally
| General Data | |
|---|---|
| Manufacturer (OEM) | HEC |
| PCB Type | Single Sided |
| Primary Side | |
| Transient Filter | 4x Y caps, 2x X caps, 2x CM chokes, 1x MOV, 1x Discharge IC |
| Inrush Protection | 1x NTC Thermistor |
| Bridge Rectifier(s) | 1x GBU806 (600V, 8A @ 100°C) |
| APFC MOSFETS | 2x Champion GPT13N50D (500V, 13A @ 150°C, 0. 49Ohm) 49Ohm) |
| APFC Boost Diode | 1x NXP BYC8X-600 (600V, 8A @ 59°C) |
| Hold-up Cap(s) | 1x Teapo (400V, 270uF, 2000h @ 85°C, LH) |
| Main Switchers | 2x Champion GPT13N50D (500V, 13A @ 150°C, 0.49Ohm) |
| Combo APFC/PWM Controller | Champion CM6800TX |
| APFC Disconnect IC | Power Integrations SEN012DG |
| Topology | Primary side: Double Forward Secondary side: Passive Rectification & Group Regulation (12V & 5V tied together, 3.3V Indy regulated) |
| Secondary Side | |
| +12V SBRs | 2x PFR30L60CT SBR (60V, 30A) |
| 5V & 3.3V | 2x MOSPEC S40M45C (45V, 40A) |
| Filtering Capacitors | Electrolytics: 14x Teapo (1-3,000h @ 105°C, SC) |
| Supervisor IC | Weltrend WT7527 (OCP, OVP, UVP, SCP, PG) |
| Fan Model | Yate Loon D12SH-12 (120mm, 12V, 0. 3A, Sleeve Bearing) 3A, Sleeve Bearing) |
| 5VSB Circuit | |
| Rectifier | 1x PFR10L60CT (60V, 10A) |
| Standby PWM Controller | Power Integrations TNY289PG |
HEC is the manufacturer of this platform. This OEM is mostly known for its budget-oriented designs and this is why Corsair chose it for the VS line. As expected, a single-sided PCB was used to keep the cost down. The design is outdated, since on the primary side, we see a double forward topology, while on the secondary side a passive rectification scheme is used along with group regulation, where the 12V and 5V rails are generated by the same circuit.
Image 1 of 18
All capacitors are provided by Teapo, which is considered a reliable manufacturer. The 85 degrees Celsius bulk cap won’t have a problem under normal operating temperatures, close to 30 degrees Celsius, and the same goes for the Teapo SC filtering caps on the secondary side.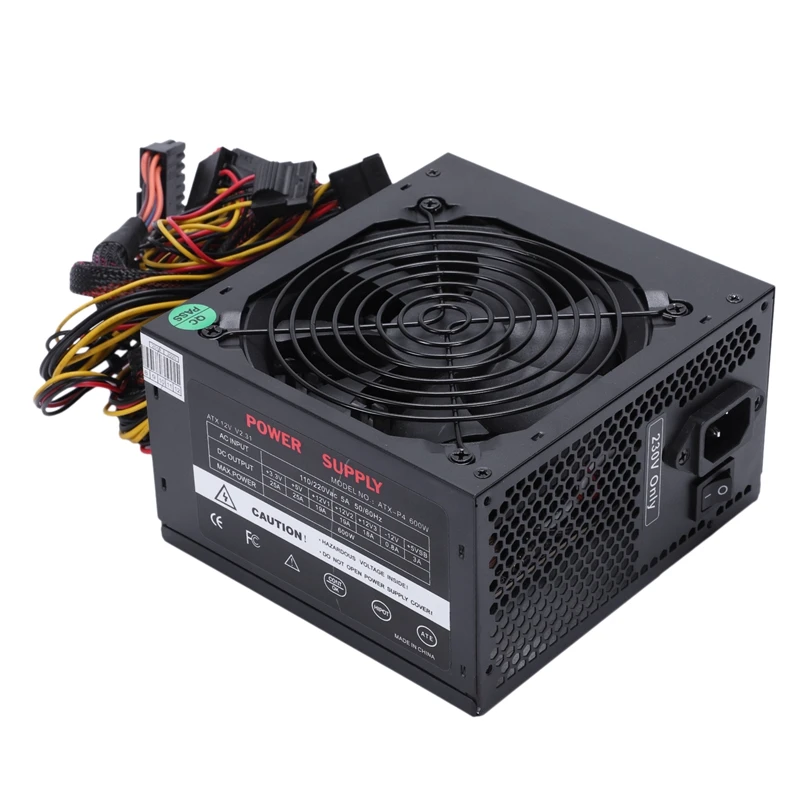 If you expose the PSU to higher than 40°C temperatures for prolonged periods, then most likely it won’t be able to outlast the three-year warranty. This is why Corsair set 30 degrees Celsius as the max temperature, for continuous full power output.
Image 1 of 20
The soldering quality is at good levels, especially if we take into account the restricted cost of this platform. We have seen better soldering jobs, of course, but in much more expensive products.
MORE: Best Power Supplies
MORE: How We Test Power Supplies
MORE: All Power Supply Content
- 1
Current page:
Specifications and Part Analysis
Next Page Load Regulation, Hold-Up Time, Inrush Current, Efficiency and Noise
Aris Mpitziopoulos is a Contributing Editor at Tom’s Hardware US, covering PSUs.
Best power supply for PC gaming in 2022
Watt’s the best power supply unit for PC gaming? Best PSU puns, FTW!
(Image credit: Corsair, Seasonic)
The best power supply (PSU) fuels your PC with the energy it needs to run your components. It’s a simple part of your rig, but a crucial one that could become a real pain. The best PSUs need to keep up with power-hungry graphics cards and CPUs and they need to do it with a good level of efficiency. A good PSU should take care of all that work for you, and that’s why it’s important to find the best there is.
Overly cheap PSUs aren’t worth it, so we chose the ones you want to spend a little more on to know you’re secure. Don’t think of it as wasted cash, however. The best PSUs run flawlessly, are more efficient, and can be carried forward to future builds. That doesn’t mean every PSU we recommend is expensive. They’re not—some PSUs we love are only $50. There’s just a big difference between a cheap PSU from a well-known brand and one from someplace else.
Don’t be worried about going over the top either—a few years ago, high-capacity PSUs were less efficient at lighter loads, but this isn’t the case anymore. If you select a modern Gold or higher, it will be efficient at lighter loads, regardless of its capacity (which is good). Intel has set some low-load efficiency requirements with its newest ATX PSU spec (v2.53), with the bar now at 70% efficiency and 10W (<500W capacity), or 2% of its max-rated-capacity loads.
Besides the low-efficiency requirements, Intel’s latest spec includes some PSU timing requirements that address the Alternative Sleep Mode (ASM), the thing that allows the system’s ultra-fast wake from sleep mode. Microsoft’s Modern Standby is an ASM example. Although there are no ASM-compatible motherboards at the time of writing, don’t forget that PSUs can last you for years, ready for when ASM does become mainstream.
If you’re still unsure about where to start when it comes to power supplies, don’t sweat, we’ve tested dozens of PSUs, and handpicked our favorites, highlighting the sort of builds they should be in.
The best power supply for PC gaming
Why you can trust PC Gamer
Our expert reviewers spend hours testing and comparing products and services so you can choose the best for you. Find out more about how we test.
Image 1 of 7
(Image credit: Future)(Image credit: Future)(Image credit: Future)(Image credit: Future)(Image credit: Future)(Image credit: Future)(Image credit: Future)
1. Corsair RM750x (2021)
The best mid-capacity PSU in 2022.
Specifications
Manufacturer (OEM): CWT
Max. DC output: 750W
Efficiency: 80 PLUS Gold
Form factor: ATX12V v2.4, EPS 2.92
Noise: Cybenetics A- (25-30dBA)
Cooling: 140mm Mag Lev fan (NR140ML)
Modularity: Fully modular
EPS connectors: 2
PCIe connectors: 4 (on two cables)
Warranty: 10 years
Today’s Best Deals
Reasons to buy
+
High build quality
+
Magnetic Bearing Fan
+
Ten-year warranty
Reasons to avoid
—
Average efficiency could be a bit higher
—
In cable caps might bother some
The newest version of the Corsair RM750x unit, introduced in 2021, managed to improve an already outstanding product.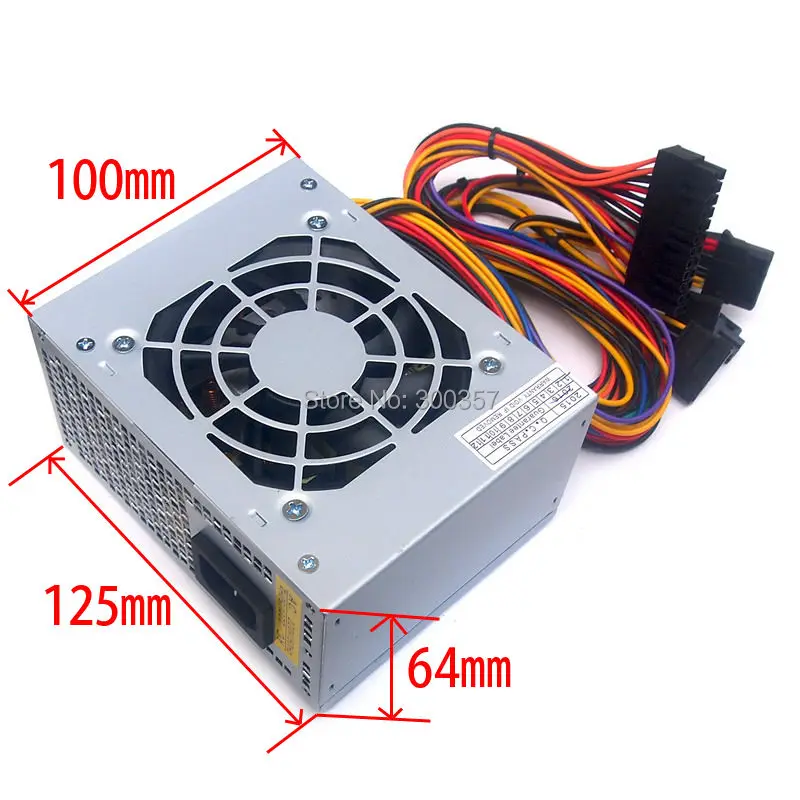 Corsair’s RMx line is among the best in the PSU market, combining high performance and reasonable prices, and the RM750x is clear proof of this. The competition is tough, but Corsair’s R&D manager, Jon Gerow (aka famed PSU reviewer Jonnyguru), and his team of engineers manage to create products that set the bar higher and higher.
The build quality is outstanding in this CWT platform, which is only available to Corsair. The caps on both primary and secondary sides are Japanese and the FETs, along with the magnetic levitation fan, won’t have a problem outliving the ten-year warranty.
The fan upgrade is a highly welcome feature, too. It boosts reliability, even under harsh conditions where most other fans would have issues in the long run. The cooling fan is the crucial part of every PSU, highly affecting its reliability, so it is important to use the best fan possible.
Read our full Corsair RM750X (2021) review .
Image 1 of 5
(Image credit: Future)(Image credit: Future)(Image credit: Future)(Image credit: Future)(Image credit: Future)
2.
 Seasonic Prime Titanium TX-1000
The best 1KW power supply
Specifications
Manufacturer (OEM): Seasonic
Max. DC output: 1000W
Efficiency: 80 PLUS Titanium
Form factor: ATX12V v2.4, EPS 2.92
Noise: Cybenetics A- (25-30dBA)
Cooling: 135 mm FDB Fan (HA13525M12F-Z)
Modularity: Fully modular
EPS connectors: 2
PCIe connectors: 6 (all on dedicated cables)
Warranty: 12 years
Today’s Best Deals
Reasons to buy
+
High performance and silent operation
+
High-quality components and top build quality
+
Fully modular
+
12-year warranty
Reasons to avoid
—
High OCP setting on all rails, especially the minor ones
—
High inrush current with 115V
Seasonic hit the jackpot with its Prime platform, which starts from Gold efficiency and goes all the way up to Titanium. Several high-impact brands have already used Seasonic’s base platform in their own PSUs, including Asus with its ROG Thor 1200W, Corsair’s AX line, and Antec with its legendary Signature line.
If Seasonic could make more of these units, I would expect more brands to get in line to source them, despite their high prices. The majority of buyers prefer low-efficiency and more affordable power supplies, unfortunately. Still, when an OEM is confident enough to provide a platform with a twelve-year warranty, you know that this is a bullet-proof product.
At light loads, the PSU achieves some of the highest efficiency readings we have seen.
The Seasonic TX-1000 is a great power supply featuring top-notch build quality. Besides great soldering work, it also uses Japanese capacitors everywhere, including many polymer caps besides electrolytic ones and a fluid dynamic bearing fan.
Seasonic’s engineers did their best to offer sky-high efficiency under all load regions and silent operation, at the same time, along with increased reliability. Performance-wise, this PSU belongs to the top league since it achieves tight load regulation on all rails, it has terrific ripple suppression without using the annoying in-line caps, and its hold-up time is great. On top of that, the 5VSB rail’s efficiency is high, and at light loads, the PSU achieves some of the highest efficiency readings we have seen so far.
Another asset of the TX-1000 is that it has six PCIe connectors on dedicated cables. You won’t have a problem powering energy-hungry graphics cards where the use of a single cable with two PCIe connectors should be avoided.
Read our full Seasonic TX 1000 review .
Image 1 of 5
(Image credit: Future)(Image credit: Future)(Image credit: Future)(Image credit: Future)(Image credit: Future)
3. XPG Pylon 450
The best cheap PSU
Specifications
Manufacturer (OEM): CWT
Max. DC output: 450W
Efficiency: 80 PLUS Bronze
Form factor: ATX12V v2.4, EPS 2.92
Noise: Cybenetics A- rating (25-30dB[A])
Cooling: 120mm Fluid Dynamic Bearing Fan (HA1225M12F-Z)
Modularity: No
EPS connectors: 1
PCIe connectors: 1
Warranty: 5 years
Today’s Best Deals
Reasons to buy
+
High build quality
+
Compatible with the Alternative Sleep Mode
+
Fluid dynamic bearing fan
+
Five-year warranty
Reasons to avoid
—
Non-modular
—
Lower than 17ms hold-up time
—
Lower than 60% efficiency with a 2% load
This XPG is our favourite for such low wattage nowadays, covering just the bare essentials in terms of PC performance, as Corsair decided to withdraw the popular CX450 model. That used a modern but expensive platform, making it hard to keep its price low. From the moment the CX450 is out of the equation, the road is open for the XPG Pylon 450 to shine.
From 2022, XPG upgraded the warranty on all Pylon models to five years to keep up with the competition. Given the fluid dynamic bearing fan and the reliable platform, the warranty upgrade makes sense. The significant compromise that had to be made to keep the cost down was the use of an outdated platform.
The non-modular cable design won’t please most users, but modular cables would notably affect the final price, so they had to go to. Given the not-so-high number of cables in this PSU, the non-modular design isn’t the worst. Thankfully, the five-year warranty that XPG provides is the cherry on top of this product.
Read our full XPG Pylon 450 review .
Best CPU for gaming | Best graphics card | Best gaming motherboards
Best SSD for gaming | Best DDR4 RAM | Best PC cases
Image 1 of 5
(Image credit: Future)(Image credit: Future)(Image credit: Future)(Image credit: Future)(Image credit: Future)
4.
 BeQuiet! Pure Power 11 FM 550W
The best low-capacity PSU
Specifications
Manufacturer (OEM): CWT
Max. DC output: 550W
Efficiency: 80 PLUS Gold
Form factor: ATX12V v2.4, EPS 2.92
Noise: Cybenetics A (20-25dBA)
Cooling: 120mm Rifle Bearing Fan (BQ QF2-12025-MS)
Modularity: Fully modular
EPS connectors: 1
PCIe connectors: 4 (on two cables)
Warranty: 5 years
Today’s Best Deals
Reasons to buy
+
High performance
+
Silent operation
+
Compatible with the Alternative Sleep Mode
+
Good build quality
Reasons to avoid
—
Only two 4-pin Molex connectors
Be quiet! has developed a unique platform alongside OEM partner Channel Well Technology for its Pure Power 11 FM line, and the results are fantastic. The Pure Power 11 FM with 550W capacity is our top choice for this wattage category, and it is ideal for not demanding systems where users require a top-quality PSU under $100.
The PSU is 80 PLUS Gold and Cybenetics Gold certified in efficiency and has a Cybenetics A noise rating, proving it is quiet. The dimensions are standard, with 160mm depth, and the cooling fan uses a rifle bearing for increased reliability. The five-year warranty is half than what the competition provides (e.g., the Corsair, RM550x). Still, you cannot call it short.
The Pure Power 11 FM 550 showed in testing that it has no problem facing intense competition from Corsair, Seasonic, EVGA, Cooler Master, and others. Perhaps its best competition is the Seasonic Focus Plus Platinum 550W, but this is still the outright winner.
Read our full BeQuiet! Pure Power 11 FM 550W review .
Image 1 of 5
(Image credit: Future)(Image credit: Future)(Image credit: Future)(Image credit: Future)(Image credit: Future)
5.
 Corsair AX1600i
The best power supply over 1KW
Specifications
Manufacturer (OEM): Flextronics
Max. DC output: 1600W
Efficiency: 80 PLUS Titanium
Form factor: ATX12V v2.4, EPS 2.92
Noise: Cybenetics A (20-25dBA)
Cooling: 140 mm Fluid Dynamic Bearing Fan (NR140P)
Modularity: Fully modular
EPS connectors: 2
PCIe connectors: 10 (on eight cables)
Warranty: 10 years
Today’s Best Deals
Reasons to buy
+
Powerful with top performance in all sections
+
High build quality
+
Silent operation
+
Software control
Reasons to avoid
—
Super expensive
—
Small distance between peripheral connectors
The Corsair AX1600i was the first desktop PSU to use its cutting-edge power supply technology, but even several years after its initial release, few other PSUs utilize it. In short, the AX1600i uses a totem-pole PFC converter, utilizing GaN MOSFETs, which can offer up to 99% efficiency compared to the 96% efficiency levels that the most advanced conventional APFC converters can deliver. Okay, those are the technical details, but what you really need to know is that this is about as efficient as power supplies get.
Besides the totem-pole PFC, the AX1600i also uses two Digital Signal Controllers (DSCs) to manage its circuits. A single microcontroller (MCU) is the communications bridge between the system and the PSU, allowing users also to control some vital functions of the PSU (for example, the fan speed profile and the selection between multiple and single +12V rails, setting up the OCP limits, etc.) besides monitoring tasks.
The AX1600i is the worthy successor of the legendary AX1500i. Both units are made by Flextronics, using cutting-edge technology while offering the best performance that money can buy today, thanks to their digital platform. Besides being highly efficient, the AX1600i also offers outstanding load regulation, excellent transient response, long hold-up time, and excellent ripple suppression.
Despite its high capacity, it remains impressively quiet in operation, thanks to the relaxed fan profile and a high-quality FDB fan. Finally, using the Corsair Link software, you’re able to choose between three fan modes: performance, balanced, and quiet, so every user will be able to set the PSU according to their needs. You will pay a lot to get your hands on a Corsair AX1600i, but there is nothing else able to meet this PSU eye-to-eye when it comes to overall performance.
Read our full Corsair AX1600i review .
Image 1 of 6
(Image credit: Future)(Image credit: Future)(Image credit: Future)(Image credit: Future)(Image credit: Future)(Image credit: Future)
6. SilverStone SX1000 Platinum
The best small form factor power supply
Specifications
Manufacturer (OEM): Enhance Electronics
Max.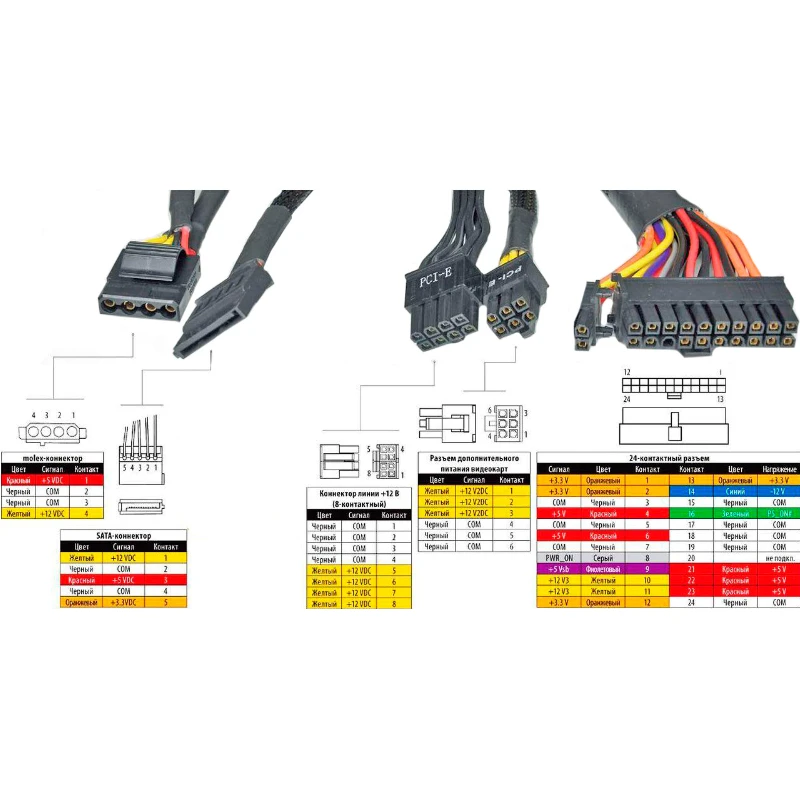 DC output: 1000W
Efficiency: 80 PLUS Platinum
Form factor: SFX-L
Noise: Cybenetics Standard+ (35-40dBA)
Cooling: 120mm Double Ball Bearing Fan
Modularity: Fully modular
EPS connectors: 2
PCIe connectors: 6
Warranty: 5 years
Today’s Best Deals
Reasons to buy
+
Extremely high power-density
+
High build quality
+
Efficient
+
2x EPS and 6x PCIe connectors
Reasons to avoid
—
Expensive
—
Low efficiency at light loads
Don’t want to build?
If PC building isn’t part of your skillset, look at our guides for the best gaming PCs and best gaming laptops that can give you the most bang for your buck and save you a headache.
The SilverStone SX1000 is the strongest small factor unit we have tested so far, and it has enough connectors to support a strong gaming system even in a tight space. It even appears way stronger than its specs list appears, since we pushed it close to 1500W without issue.
SilverStone has equipped this PSU with two EPS and six PCIe connectors to ensure it can deliver its full power without any problems. Moreover, all cables are modular, making the PSU’s installation a breeze. Because of the small PCB, the temperatures at the internals can go high, so a double ball-bearing fan is used, which can handle hot conditions without any problems.
Since everything small and powerful is usually expensive, especially in the IT world, the SX1000 will empty your wallet. That said, PSUs are inexpensive given the vital role that they have in every system, so a 250-300 dollar power supply doesn’t look that expensive. Especially if you consider that you will keep it for many years.
Read our full Silverstone SX-1000 review .
(Image credit: Corsair)
How we test power supplies
Besides the experience and vast knowledge of electronics, the evaluation of power supplies also requires insanely expensive equipment, which not everyone can get their hands on. On top of that, even if you have the proper equipment, you need to know how to operate it, and above all, you have to properly maintain it (AKA calibrate it in frequent intervals to ensure that your results are correct).
This is why there are so few PSU reviewers, and even fewer can deliver good PSU reviews. The recommendations that we list in this article are based on data that we gathered using the equipment shown below:
(Image credit: Aristeidis Bitziopoulos)
We use top-of-the-line equipment to test power supplies, including Chroma electronic loads, Keysight AC sources, N4L power meters, Keysight and Picoscope oscilloscopes for PSU timing, and ripple measurements, along with other specialized equipment.
We take complete readings at normal operating temperatures, 28-32 degrees Celsius, and under high operating temperatures (>40C), which expose the slightest problem that a power supply might have. Testing a PSU only at room temperatures doesn’t provide the whole picture, and this is where most PSU reviews suffer.
When it comes to noise measurements, besides a highly accurate sound analyzer, we also have a hemi-anechoic chamber at our disposal, with a close to 6dBA noise floor. The noise measurement’s set-up is depicted in the photos below.
Image 1 of 2
(Image credit: Aristeidis Bitziopoulos)(Image credit: Aristeidis Bitziopoulos)
The best power supply FAQ
What PSU wattage do I need for my PC?
You don’t need a degree in rocket science to work out the wattage requirements for your system. The recommended system power requirement listed on the specs list for your current or future graphics card is a great place to start. Still, we recommend using an online power calculator to get the most accurate figure. OuterVision’s Power Supply Calculator is our go-to.
What efficiency rating is best for a PSU?
Once you’ve found out the wattage you’ll need for your PC, you’ll need to decide what efficiency you can afford. Power supply manufacturers all tend to agree to the same PSU efficiency rating system: 80 Plus.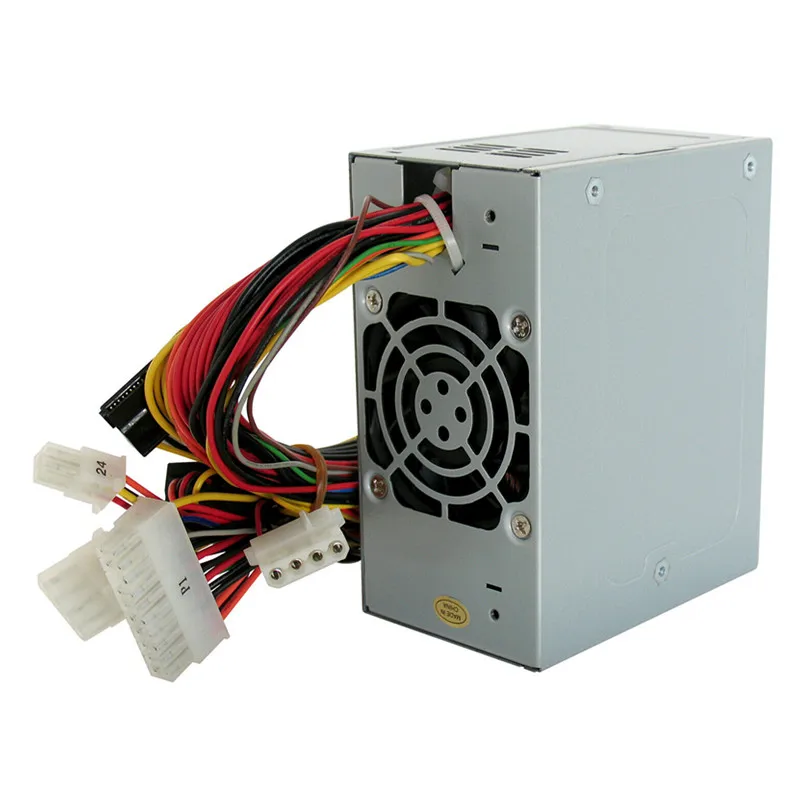
There are six ratings to look out for with your PSU:
- Bronze
- Silver
- Gold
- Platinum
- Titanium
An 80 Plus Titanium certified power supply is more efficient than a Bronze one, meaning the parts within waste less power (heat) during the AC to DC conversion. These are often measured across three load levels: 20%, 50%, and 100%. Most PSUs tend to be rated at their most efficient at 50%, although Titanium PSUs tend to perform just as well, if not better, under heavy load.
Higher efficiency also means the internal components are subjected to less heat and are likely to have a longer lifespan. They may cost a bit more, but higher certified power supplies tend to be more reliable than others. Luckily, most manufacturers offer warranties.
What do we look for in a PSU?
Reliability, customer support, warranty, and manufacturer reputations are among the first things you should look for when choosing the best power supplies. Since there isn’t exactly a single solution that makes sense for every build, we decided on several categories to fit the needs of most PC gamers. For each, we also took into account budgets, compatibility, unique features, and design.
Our top selections were made based on a combination of the criteria listed above and overall efficiency ratings. While it isn’t by any means the all-telling solution for PSU performance, the 80 PLUS certification program provides some form of standardization and expectations for efficiency. More efficient PSUs mean less heat and lower energy consumption.
Do I need a modular PSU?
It pays to future-proof against any upgrades further down the line. A modular PSU will allow you to add extra cables as needed or remove unused ones to free up valuable room inside your case. This is handy if you’ve got your heart set on a beefier graphics card or want the flexibility of being able to add other peripheral connections later.
However, you can absolutely make do without, as even semi-modular or fixed cable designs will do the job just as well if only with a few extra cables lying around. You can usually tuck these into the back of your PC case to keep them out of your eyesight.
As a word of warning, compatibility is a significant factor when it comes to power supply units. Using cables from different PSUs could put your entire PC at risk, so stick with those provided. Even if they are from the same manufacturer, not all PSU cables will be universally compatible either, complicating things further. If you absolutely must splinter from the cables included, have a look at your PSU’s PIN connectors and make sure your cable set has ones that match to avoid any unnecessary frustration and breakages.
Round up of today’s best deals
Corsair RM750x
£150
View
See all prices
Seasonic Prime TX-1000
£416. 50
50
View
See all prices
Corsair AX1600i
£429.98
View
See all prices
SilverStone SX1000 SFX-L
£249.98
View
See all prices
powered by
Sign up to get the best content of the week, and great gaming deals, as picked by the editors.
Contact me with news and offers from other Future brandsReceive email from us on behalf of our trusted partners or sponsors
How do I place the power supply with the fan up or down?
The lower the location, the colder
Posted on 02.11.2019, 06:43 Comments: 15
Block, or power supply. How to position the fan up or down? This is a topic of great debate, as well as one of the most frequently asked questions by many users when building their new computer. Newbie PC builders, or even some experienced PC builders, often get confused about how they should hold the fans up or down. So, let’s open the veil of secrecy and clear all your doubts about it, taking into account all possible factors and conditions.
Content:
- Computer case types
- PC power supply housing bottom
- Top mount PC case
- Fan orientation/mounting position
The
Power Supply is one of the most important components of a PC as it is considered to be the only component that provides power to all of your computer’s internal components, including the processor, motherboard, hard drive, SSD, video card, case fans, etc. heats up during load and for this it is equipped with a fan for cooling. Yes, there are some fanless PSUs out there, but they are quite expensive and not that popular.
Almost all modern standard ATX power supplies come with a 120mm fan that can be mounted on the top or bottom. This cooler acts as an intake fan for the power supply, sucking in air and pushing it to the components inside the power supply where it exits the rear vents of the power supply. You can see the PSU airflow in the diagram below.
The device is equipped with one exhaust fan
Some older and cheaper PSUs come with an 80mm fan in the back. Here, the rear 80mm cooler works as an exhaust fan for the power device.
It is very important to install the power supply or the orientation correctly, because if you do it incorrectly, you can restrict the air flow of the power supply and this can damage the power board of the power supply, as well as some other components. So, here I’m going to walk you through how to properly install the power supply and whether the fan side should stay up or down, depending on different conditions and types of computer cases.
Computer chassis types for power supply
There are only two positions in which the computer case allows you to install the power supply, which is either top or bottom.
PC power supply housing bottom
With bottom holes
Most modern computer cases have a power supply design on the bottom. Almost all of these PC cases have vents at the bottom where the power supply is installed, and most of them have a dust filter installed on the vents to prevent dust from getting on the fan and power supply components. So, if you have this position, then the PSU cooler should be pointing down. This allows the fan to draw in air from below and exhaust warm air from the back. You can clearly see this in the image below.
Airflow is drawn in from the bottom of the chassis and exhausted from the back
I strongly advise against holding the power supply fan up if you have a chassis with vents and an air filter mounted on the bottom. This is because if you keep the fan on, the cooling efficiency of the power supply will be degraded, as the fan will suck in hot air that is inside the case instead of cold air and blow it to the power supply components.
In addition, the power supply will accumulate more dust due to the lack of a filter on the cooler, and there is also a risk of something getting inside the power supply through the fan grill, which can cause serious damage to your device. In a custom water-cooled system, you don’t want to keep the fan running because if liquid somehow leaks and accidentally gets inside the unit, your unit is bound to burn out.
Without bottom holes
If your case doesn’t have bottom vents and instead has a solid panel, then you need to place the cooler up. This is the only way to install the power device in these cases. However, I don’t think there are many cases like this, but if there are, then you should avoid buying them in the first place, and better choose a new computer case with bottom vents and an air filter for your box.
With power supply cover
Some computer cases come with a power supply shroud or cover that provides extra protection for the device as well as for bottom-mounted drives. The PSU shroud is a solid metal cover with no vents (mostly), so the fan position should only stay down no matter what. Some shrouds come with top vents that may allow you to position the fan up, but if there are bottom vents, it’s best to only keep the fan down if there are no PSU fan vents at the bottom.
Power supply shroud without top ventsPower supply compartment with top vents
Keep it on a flat surface
Always keep your cabinet on a hard flat surface and never on uneven, soft or soft surfaces because uneven and soft surfaces will restrict the air flow to the unit’s fan and therefore to the power supply itself. Also, if the computer case has short legs, you should keep it up by providing some sort of packaging or support for the lower legs or stands so that the power supply can have sufficient airflow.
Avoid placing the system enclosure on carpet
Never lay the computer case on carpet with the power supply fan installed from the bottom down. Carpeting blocks airflow to the PSU and in the worst case, if you don’t have a fan filter installed, small fiber particles from the carpet can settle into your PSU and can also clog the fan. In addition, these carpet fibers are very dry and static in nature and can catch fire inside your device, which can cause serious damage, as well as other computer components if you are not lucky. So, to solve this problem, you can use a wooden board or plywood cutout to place the computer case, or install the power so that the fan is facing up.
Don’t place it on the carpet if you have the PSU on the bottom with the fan down!
Top mount PC case
Computer cases with a top-mounted power supply are very rare these days, but they do exist. Typically, you can find several mini tower cases, OEM cases, and cheaper top power cases. In these types of computer cases, the fan position should be limited only because they usually do not have top panel vents, but if your case has top vents, then you can keep the fan position up for better airflow and cooling.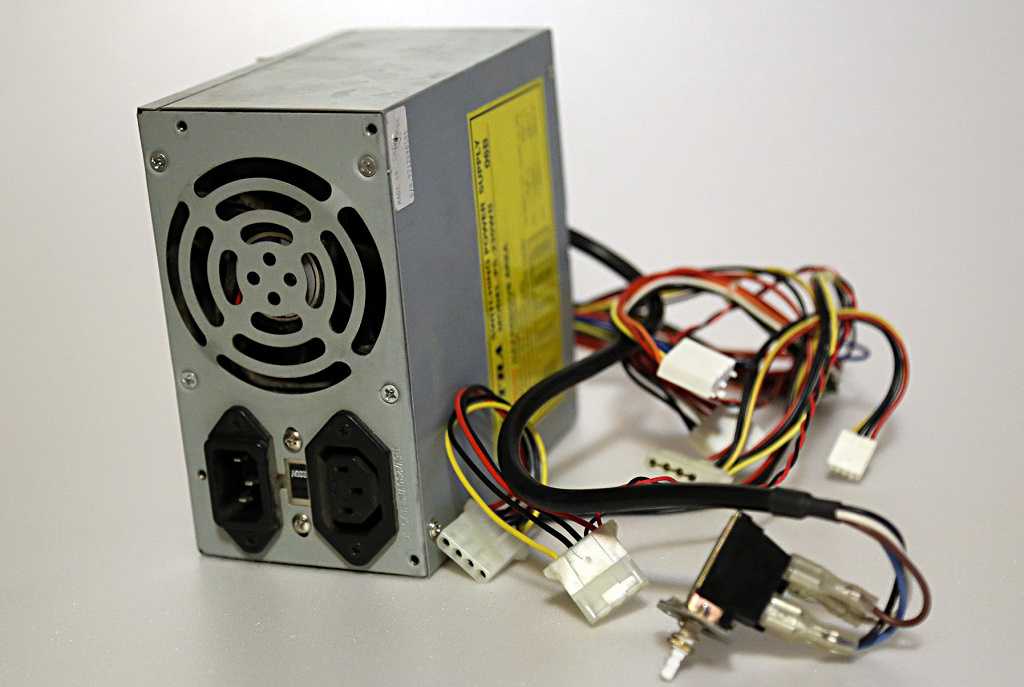 . In some of these cases, a power unit top shroud may also be installed (very rare), so the fan must be adjusted accordingly in the direction of the vents.
Top-mounted PCB PSU
Fan Orientation/Mounting Position
| Enclosure type | Vanes down | Blades up | Warm air blower |
| Lower PSU | yes | not available | down |
| Lower PSU | no | not available | up |
| Lower PSU | yes | no | down |
| Lower PSU | no | yes | up |
| Upper power supply | not available | no | down |
BP up or down? (page 2)
Sensors 1-5 measure the difference between the temperature of the measured points and the air outside the system unit. Sensor number 6 indicates the temperature of the printed circuit board, it is located somewhere in the depths of the motherboard, presumably near the top PCI slot, and its readings do not carry much meaning.
First test.
|
Sensor |
Fan speed, rpm |
BP up, degrees |
BP down, degrees |
Difference, degrees |
|
nForce4 |
1500 |
35.1 |
31.8 |
3.  3 3 |
|
1000 |
38 |
37.8 |
0.2 |
|
|
1000 ** |
37.9 |
36.9 |
1 |
|
|
System memory |
1500 |
22.4 |
24.2 |
-1.8 |
|
1000 |
25.  2 2 |
30.5 |
-5.3 |
|
|
1000 ** |
26.6 |
30.2 |
-3.6 |
|
|
CPU heatsink |
1500 |
22.3 |
25 |
-2.7 |
|
1000 |
27.9 |
31 |
-3. 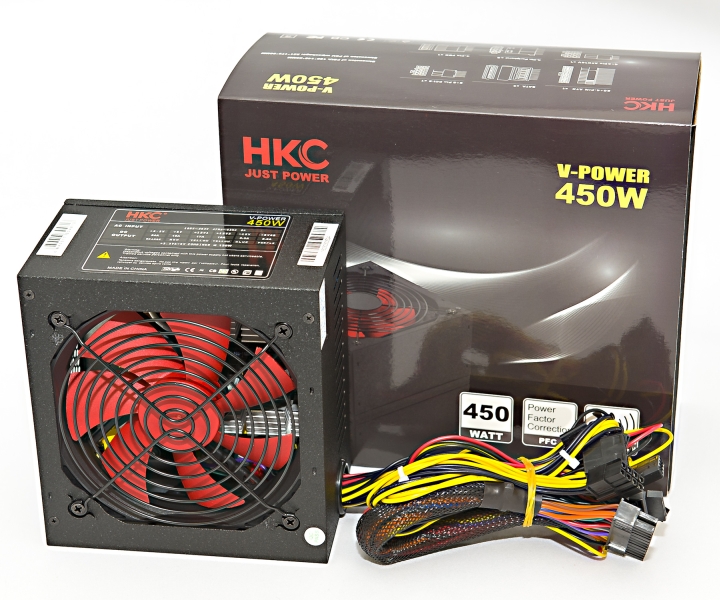 1 1 |
|
|
1000 ** |
27.4 |
29.2 |
-1.8 |
|
|
BP grille |
1500 |
13.2 |
12.8 |
0.4 |
|
1000 |
15.5 |
14.4 |
1.1 |
|
|
1000 ** |
16 |
14.  5 5 |
1.5 |
|
|
Exhaust fan |
1500 |
11.1 |
13.5 |
-2.4 |
|
1000 |
14.8 |
19.7 |
-4.9 |
|
|
1000 ** |
14.9 |
19 |
-4.1 |
|
|
Motherboard * |
1500 |
54 * |
53 * |
1 |
|
1000 |
57 * |
57 * |
0 |
|
|
1000 ** |
51 * |
56 * |
-5 |
* All sensors, except for this position, indicate overheating to ambient temperature outside the system unit.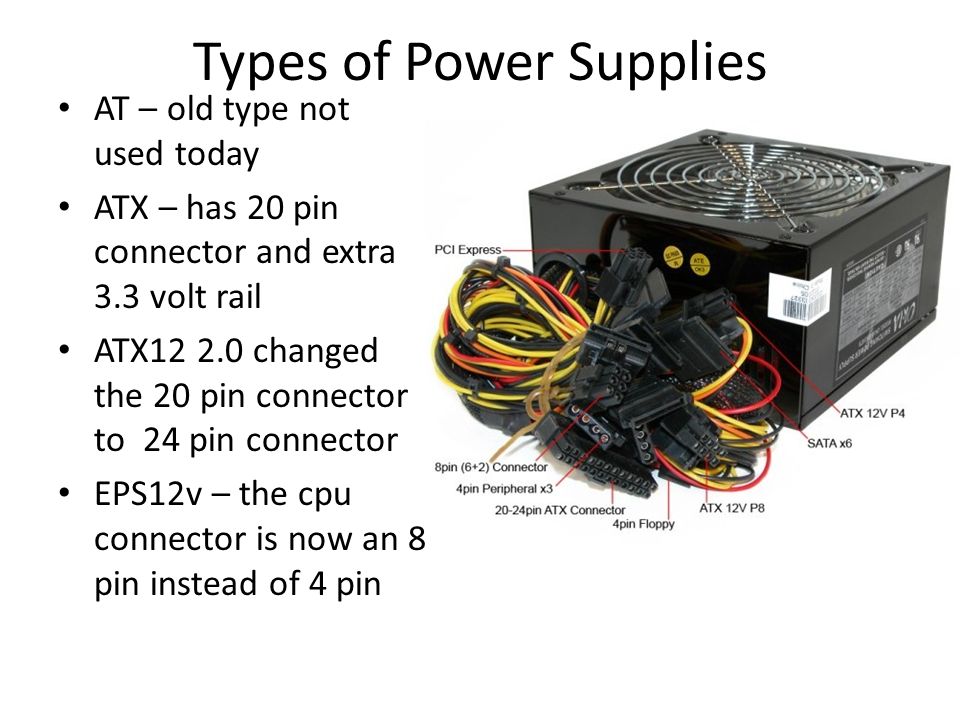
** Blanks for free expansion cards removed.
Second test.
The bottom position of the power supply, the orientation of its inlet up or down, and additional perforation at the bottom of the case. The case fans ran at 1000 rpm.
|
PSU Inlet Orientation |
Additional perforation at the bottom of the case |
Air from the PSU, degrees |
Air from the case, degrees |
|
hole up, case air |
No |
13.5 |
18.  9 9 |
|
There is |
10.1 |
16.8 |
|
|
hole down, outside air |
No |
4.3 |
20 |
|
There is |
3.6 |
17.7 |
|
|
No * |
8 * |
19.5 * |
* The air supply to the PSU fan is closed (rather stupid mode).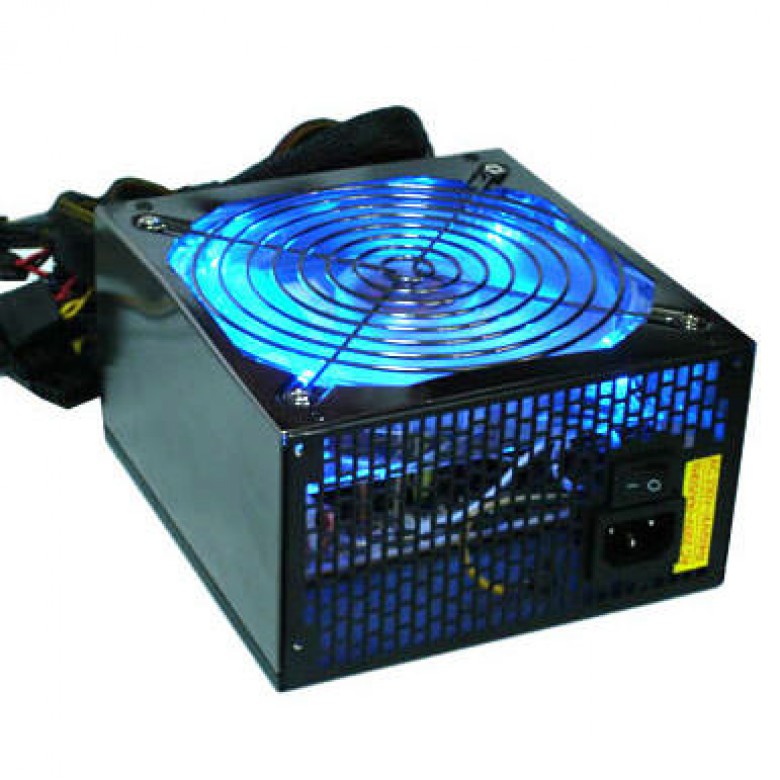
recommendations
If you just glance at the last column of the table of the first test, then you involuntarily come to the conclusion that the placement of the power supply at the bottom involuntarily comes to mind — the ‘average’ temperature has become higher, and the power supply itself remained as hot as it was. But this is a cursory glance, let’s dig deeper, and there is definitely a sense in this.
Sensor number 6.
It is installed on the motherboard and is located to the left of the PCI connectors, and therefore reflects the temperature in this zone. While the plugs are installed, its readings do not depend much on the installation option for the power supply. If you remove them, then this will provide an influx of cool air and the temperature will drop … but only for the case with the power supply at the top. With its lower location, it is not cool air that will penetrate into the case through the open slots of the expansion cards, which immediately affected the result — 56 degrees instead of 51.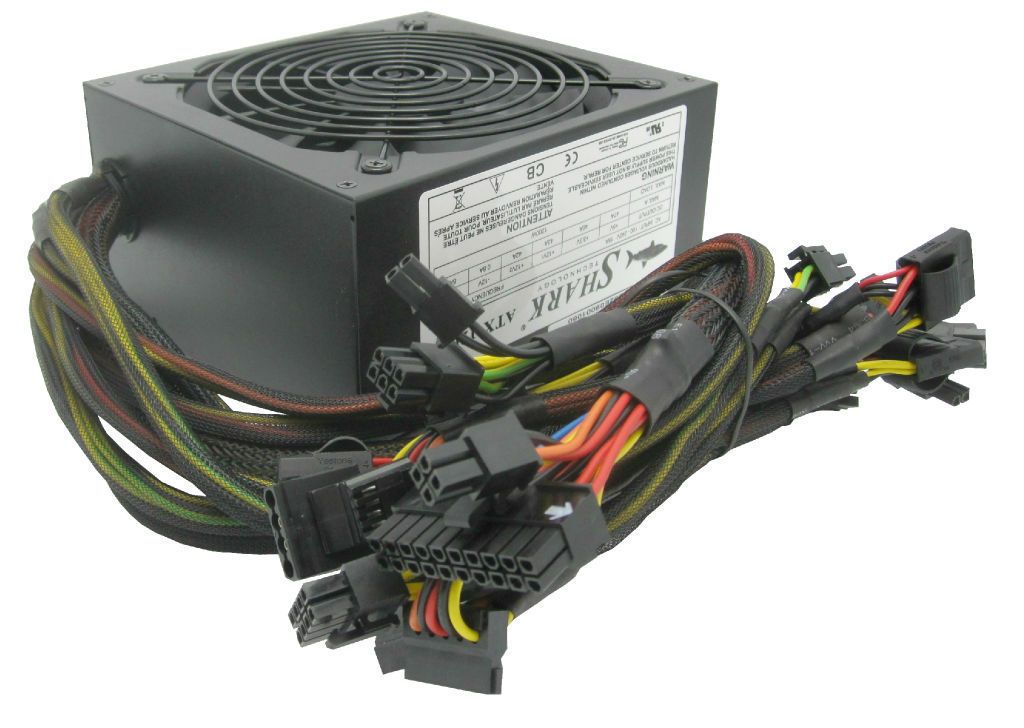
However, if you compare the change in the readings of this sensor with all the others, then it becomes clear that it is useless to use software monitoring to obtain adequate measurement results. Well, judge for yourself — when the plugs were removed, this sensor showed a decrease in temperature by 6 degrees, while other sensors recorded changes only by 0.5-1 degrees.
Sensors 1-5 show the temperature difference with the environment, hence the ‘small’ numbers. If you want absolute values, then add the air temperature that you have in the room. Let’s say it’s 27 degrees. So, the readings of the sensor ‘16 degrees’ should be understood as 16 + 27 = 43 degrees, and this is already perceived as ‘quite warm’.
Sensor number 1, nForce4 chipset.
Its feature is that right under it is a video card emulator, a heating element. When the power supply is at the bottom, it takes some heat from the ‘video card’ and somewhat improves the mixing of the air mass in this area. It is rather strange that the greatest effect is obtained at a higher rotational speed of the case fans.
Sensor number 2, system memory.
For the case of placing the power supply at the bottom, this place showed a clear deterioration in cooling. There are several reasons.
First, by placing the power supply at the bottom, the motherboard itself ‘lifts’ to the top of the case. It’s still nothing, but the heated air is collected at the top, in the absence of active mixing, the top of the motherboard is warmer. The obtained measurements confirm this premise — with an increase in the rotational speed of the case fans, the temperature of the system memory decreases.
Secondly, when the power supply is installed at the top, it captures the system memory area a little. More precisely, not so, its fan is closer to the memory, and therefore it takes a little heated air from the thermal zone above the memory, which slightly reduces its temperature. System memory emits little heat, but it is not blown at all, which is why it is so sensitive to even the slightest airflow (warm air intake).
Sensor number 3, processor heatsink.
Everything is simple here and there are no discrepancies. When the power supply is at the top, it works in tandem with the case fan, which provides better cooling. When you move the power supply down, you immediately get a deterioration of 2-3 degrees. As an excuse, let me remind you that cases with the power supply located down quite often provide space or have already installed two case fans for blowing. One to the usual place and another (optional) to where the power supply would be in the standard version.
Sensor number 5 (we’ll skip the fourth one for now), case exhaust fan.
The lower its speed, the higher the temperature of the outlet stream. When the power supply is at the top, it helps the case fan, especially at low fan speeds.
Sensor number 4, air flow temperature from the power supply.
Well, we have reached the most interesting part. The power supply is placed down only for the reason that it does not heat up with heat from the video card and processor. Did you test and it turned out that the temperature of the power supply does not change depending on the location? Well, judge for yourself — the table shows that the difference between both installation options is 1-2 degrees. There is no point! … Not really. There is no error in the numbers, the whole point is the absence of one more characteristic. Alas, but so far I can not measure the fan speed in the power supply. I hope the gap will be eliminated, but for now you have to take my word for it.
When the power supply was installed in the standard version, from above, the air flow from it was approximately equal to the flow from the case fan at 1500 rpm. When installed downwards, a barely perceptible whiff came out of the power supply. Even more, in the first few minutes the fan on it almost did not rotate. As the system unit warmed up, the flow from the PSU became more noticeable, but still it was disproportionately smaller than the installation option from above.
There is a quite usual explanation for this ‘stupidity’.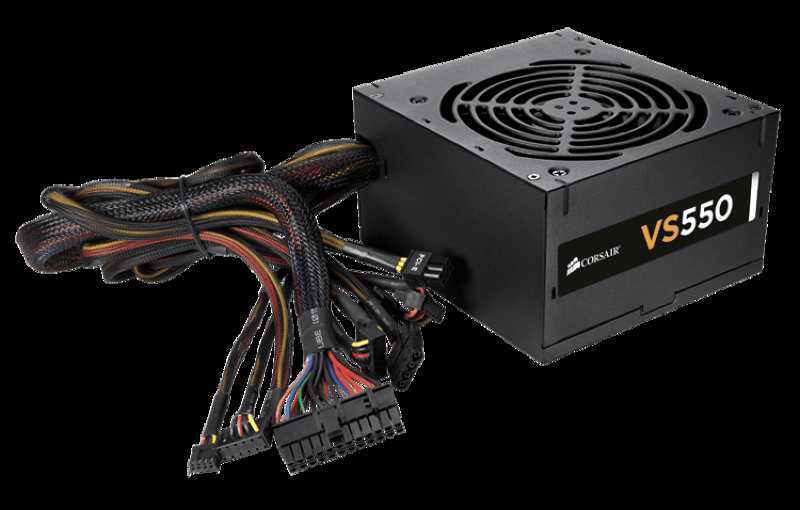 The fact is that modern power supplies regulate the speed of rotation of their fan depending on the temperature at the control point, which is usually located on the radiator of rectifier diodes. The essence of the idea is that the greater the load on the power supply, the more the rectifier diodes heat up and the more vigorously the fan spins.
But if the load is not very large (300W for a ‘550W’ power supply is not much), then the heatsink of the rectifier diodes does not get hot enough and the fan rotates slowly. In general, there are two types of regulators — one stops the fan at a temperature below the threshold, like a test power supply (
FSP550-80GLN
), and there are those that simply reduce the rotation speed to a minimum, but continue to spin. The latter option is more suitable for placement down.
Well, the fan in the power supply is spinning weakly, but why is the air from it heated so much? Above the power supply is a video card emulator that heats the air.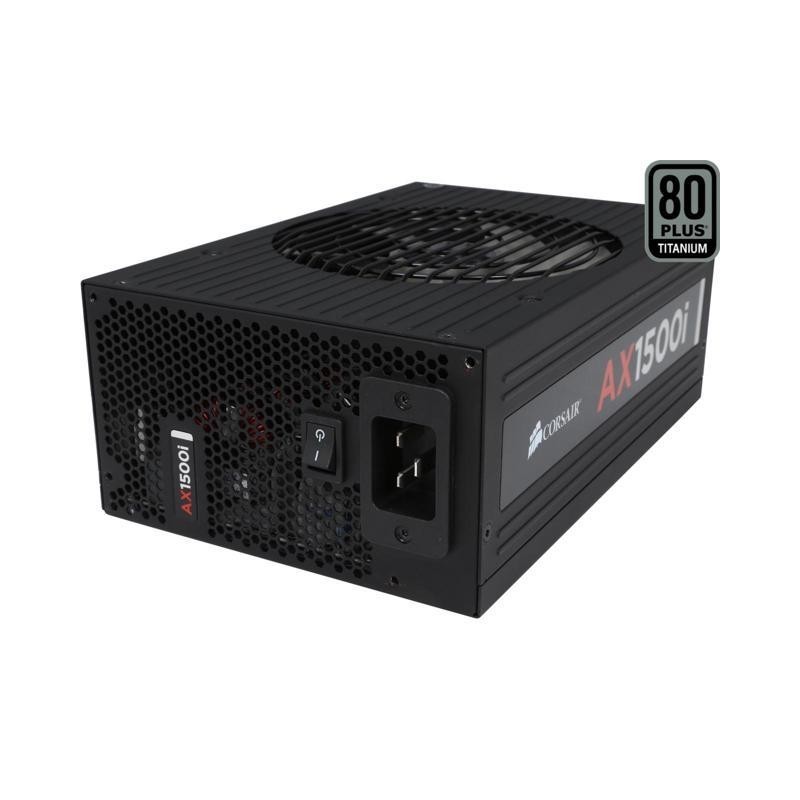 In theory, this air should rise up and be removed from the case by the upper case fan, in addition, there is a screen from the PCI video card. Yes, everything is true, but the relatively high speed of air pumping through the system unit does not allow the heated air to rise up quietly. Mixing occurs and the entire area around the ‘video card’ receives approximately the same temperature, including under the ‘card’. Further, air with an elevated temperature enters the power supply and exits. And so it turns out — even though the power supply was put down, the air temperature from it remained high.
The second test allows you to evaluate the sensitivity of the cooling system to the source of cooling air of the power supply and the effect of additional air flow from the bottom of the case, from perforations in the bottom.
When the power supply draws air from the chassis for cooling, the air temperature is significantly higher than when using an external supply. This affects the performance of general cooling, but somehow sluggishly. Here, a simple perforation in the bottom of the case is more effective.
The last option of setting the power supply, in the second test, with its stupidity, brought some useful information. In this case, the PSU was installed with the fan window down, but the bottom in the system unit case remained closed. There was a small gap between the power supply and the bottom, and air was taken in through this gap for cooling. In fact, it turned out to be a type ‘1’ installation with air flow from the case, but the intake point is lower and the warm zone from the ‘video card’ (heating element) was additionally shielded by the case of the power supply itself.
The result is something in between both PSU orientations, 8 degrees. Let me remind you that the ‘normal’ installation of the fan window up or down gave 13.5 and 4.3 degrees, respectively. It is rather difficult to come up with a practical application of such a solution. Unless, with a lot of dust in the room and the mandatory use of a filter on the intake case fan.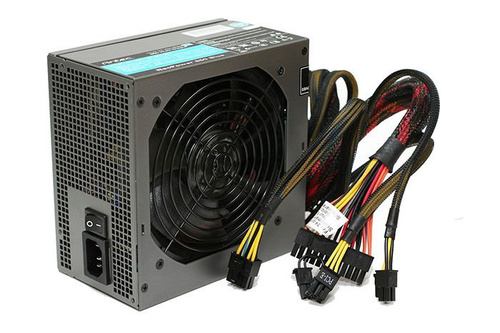
From the point of view of the cooling system, everything is clear — placing the power supply on the bottom allows you to ‘make’ it cooler and quieter. As for overall cooling, this arrangement places the full load on the case fans to remove heated air. When the power supply was at the top, it worked in tandem with the top case exhaust fan and took on some of the load. We put the power supply down — you have to increase the blowing. Usually, in system units with a lower PSU location, two exhaust fans are installed in the upper part of the case. As for the perforation in the bottom, this solution has no drawbacks. Therefore, if the bottom of the case is made of holes, this is only good.
There is one more thing that can tip the scales towards moving the power supply down. Modern CPU coolers are not just big, they are very big. It is clear that in a small volume the power of a four- or six-core processors cannot be dissipated, so we must rely on the worst case scenario. For example, in my personal computer on Core 2 Quad, the following layout turned out:
Note the heatsink is next to the PSU intake. Well, how will it work if the flows in the radiator move anyhow? It is noticed that the fan starts to emit increased noise if the obstacle is directly in front of it. Try somehow to take it and bring your palm in front of it and behind it (in the direction of the air flow). If you raise your hand ‘after’, then the noise level practically does not change, but ‘before’? Alas. This means that in my layout I got more noise ‘just for fun’. And what if there are no options.
And one more thing. Not so significant, but also interesting. Pay attention to the bundles of wires from the power supply for the first and second options. If the power supply is at the top, then the power cables go there, forming a bunch. When placing the power supply at the bottom, these cables litter the bottom and are not conspicuous. It is clear that they can be beautifully tied up or put into a pallet, but this still needs to be done, and the efficiency of changing equipment is lost.
So, briefly — the lower placement of the power supply reduces its temperature, which has a beneficial effect on the noise level and durability of the PSU itself.