How to Uninstall Drivers in Windows
Skip to content
Home / Software / How-To
How-To
By Michael King
PCWorld
Installing drivers can be a hair-raising adventure, even on today’s modern operating systems. These finicky pieces of code act as the middleman between your PC’s hardware and its operating system. Although they install with ease just like any other software, they integrate deeply into the OS, sinking their teeth into areas most other software doesn’t go near. Most of the time the driver installation process is simple, seamless, and transparent to you, as it should be.
On those occasions when things go wrong, however, they can go really wrong, and even crash your entire computer. For example, when Microsoft’s Windows Vista came out in 2007, critics lambasted it for being slow and prone to crashing; Microsoft investigated the causes and found that a majority of crashes were due to driver issues.
Thankfully, when you prepare yourself for battle with a problematic driver, you have a couple of tricks that can help. Microsoft has introduced an easy way to roll back to a previous (and, you hope, more stable) version of the driver, or remove it from the system altogether, giving you a clean slate to try again or install a different version.
Roll Back to a Previous Driver
- Click Start, type Device Manager, and press Enter.
- Find and double-click the category of device causing the issue (for instance, the graphics card would be listed under Display Adapters).
- Double-click the problematic device to bring up the Properties window.
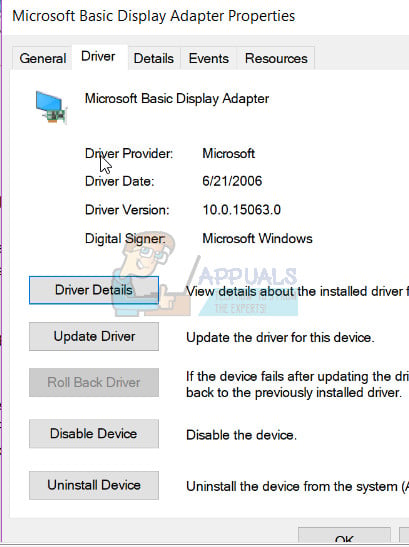
- Click the Driver tab.
- Click the Roll Back Driver button.
- A dialog box will ask you to confirm your decision to roll back to a previous driver. Click Yes to begin the roll-back process.
Use the Properties menu to uninstall your driver software or roll back to a previous version.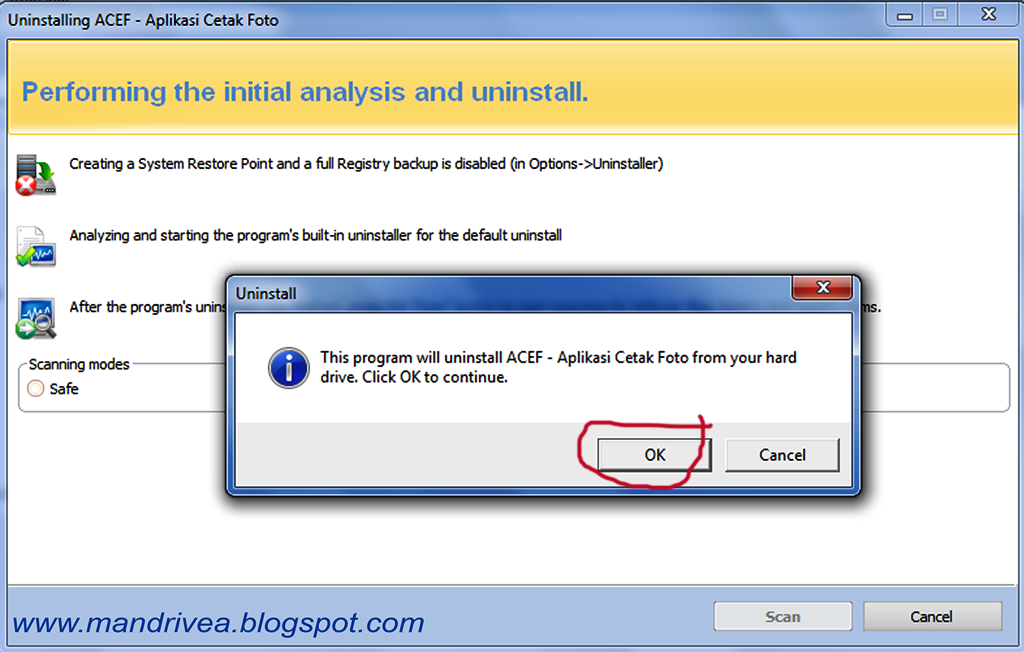
At this point Windows will automatically remove the current driver for the device and reinstall the previous driver. You may then receive a notification that the system settings have changed, and Windows will ask you to reboot. If you see that message, you should reboot your computer as soon as possible.
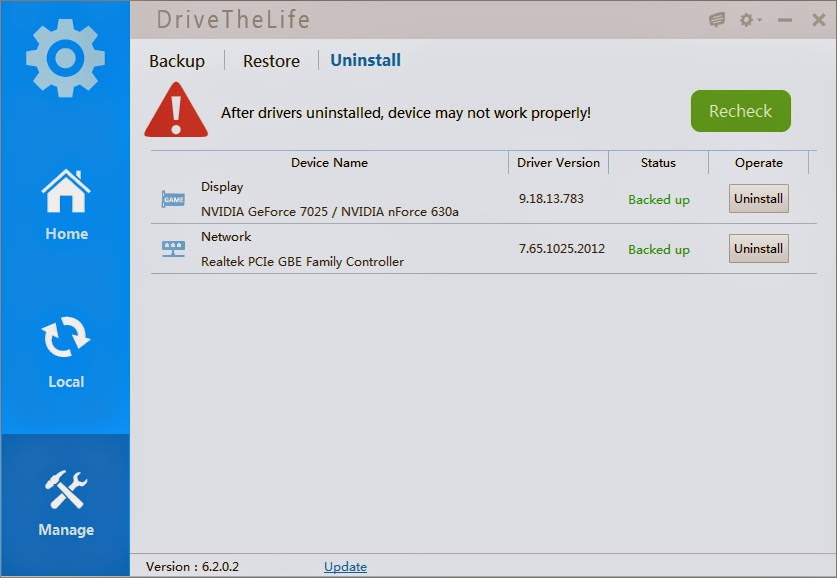
Uninstall a Driver
When you need to uninstall a driver completely, the best and safest method is to use the device’s uninstaller program (if it has one). If you added the device to your system through an installer (as is the case with most graphics card and sound card drivers, for instance), you can uninstall it just as you would any other program.
- Click Start, type Uninstall Program, and press Enter.
- In the Uninstall window that appears, go through the list and find your device or drivers. Double-click the entry to begin the uninstallation process.
Sometimes devices won’t have an uninstaller, or the uninstaller will not appear in the list. In those instances, you can use the Device Manager to remove the driver completely.
- Click Start, type Device Manager, and press Enter.
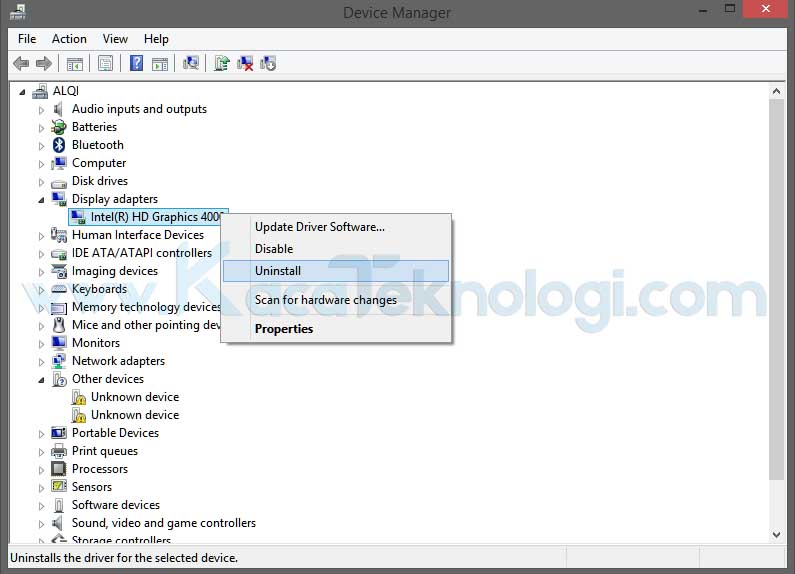
- Find and double-click the category of device whose driver you wish to uninstall (for example, the graphics card would be listed under Display Adapters).
- Right-click the device, and click Uninstall.
- Windows will prompt you to confirm the device’s removal. Click OK to remove the driver.
- After the uninstallation is complete, reboot your computer as soon as possible.
In a pinch you can use the Windows Device Manager to uninstall troublesome driver software.
After you roll back or uninstall a problematic driver, you can try downloading and installing the latest version from the manufacturer’s website, or try a specific version that previously worked to get your computer back on its feet.
How to Completely Uninstall Existing GPU Drivers the Right Way
Regardless of how careful you are, there will always be times when a new driver update messes your PC. This is very often the case with GPU drivers. After updating to an unstable GPU driver, you might notice screen flickering or black screen issues. While uninstalling the GPU driver is the way to go about it, chances are it might not solve your issues.
This happens because the default uninstall tool still leaves behind a few files and registry entries. So when you install a stable driver on your PC, these leftover files will cause issues with the installation. This guide will show how to uninstall GPU drivers completely using the Display Driver Installer (DDU) software. So let’s get to it.
Why Use Display Driver Uninstaller (DDU)
The default uninstaller leaves residual files on your PC. However, Display Driver Uninstaller is designed to search and remove all residual files and folders, clean up the corrupt registry entries, and remove all traces of the GPU drivers. Essentially, when you try and install a GPU driver after using DDU, it will be similar to a clean installation.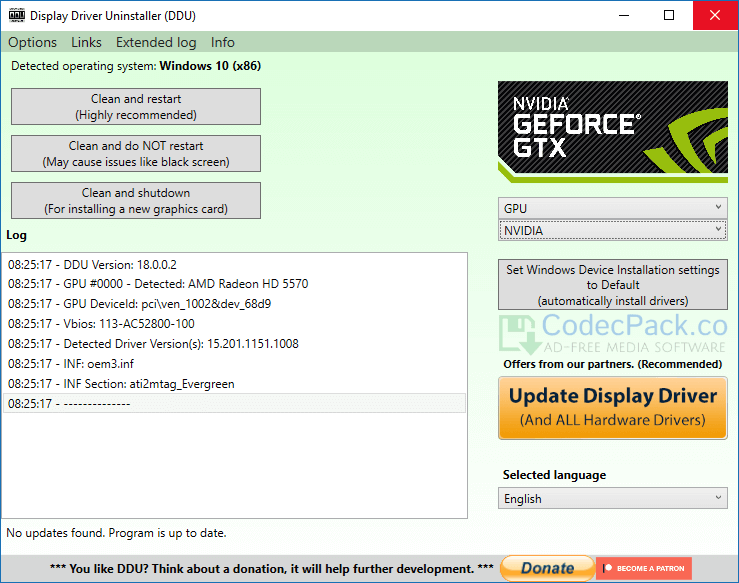
While DDU is undoubtedly a great tool to use, the various options and configuration settings it offers can confuse first-time users. This is why we will be highlighting the easiest way to use DDU without causing any harm to your PC.
Things to Keep in Mind While Using DDU
While using DDU software is simple, but you’ll need to keep in mind a few things. First, ensure that your system isn’t connected to the internet. This is to ensure that Windows Update doesn’t interfere with the GPU drivers’ uninstallation. Secondly, DDU will not work on a network drive. So you’ll need to install and run it on your Windows computer. Also, it’s recommended to exclude the DDU folder from your antivirus software.
It’s recommended to use DDU in the Windows Safe Mode. However, if you choose to use DDU in the Normal mode, you’ll need to repeat the entire process twice to ensure that it cleans all the files properly. Now, let’s get down to the actual process.
How to Uninstall GPU Drivers Using DDU
Step 1: Download the DDU installer located at the bottom of the Guru3D website. Pick a download location of your choice.
Download DDU for Windows
Step 2: Once you’ve downloaded the installer file, unzip the file to the location of your choice. Now open the extracted folder and double-click on DDU.exe to launch the self-extraction tool.
Step 3: Once the files have been extracted, you will have to reboot your system to the Safe Mode.
Step 4: Once your PC restarts into Safe mode, open the DDU folder and double-click on Display Driver Uninstaller.exe to launch it.
Step 5: In the Options window that pops up, select your preferences. However, if you wish to keep certain files or add-on software installed on your system, uncheck them from the list.
Step 6: Once you’ve made the changes as per your preferences, click on Close.
Step 7: The DDU window should now open up. On the right side, select your device type – GPU.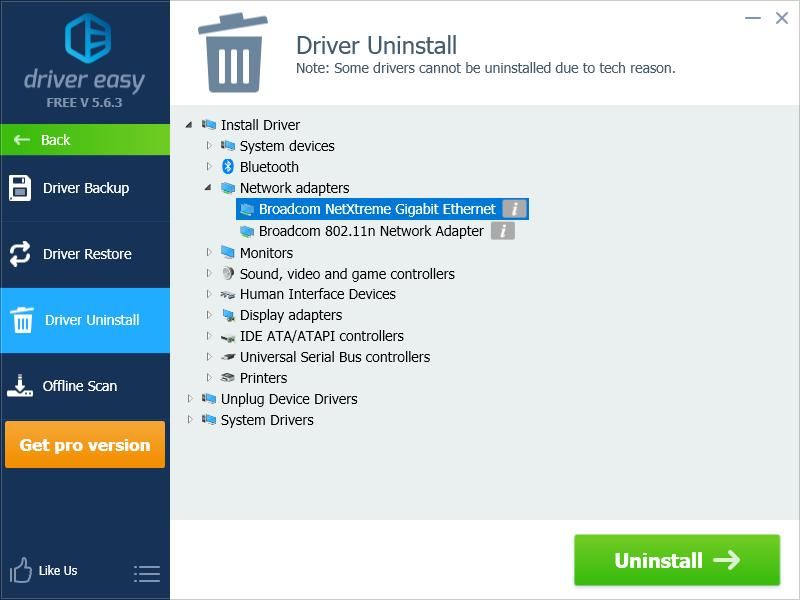
Step 8: Now select your GPU manufacturer – NVIDIA, AMD, or Intel
Step 9: Finally, click on Clean and restart.
And that’s it. DDU will uninstall your graphics driver, clean up the registry, remove any leftover files, and then reboot your system. Once your PC boots up, connect your PC to the internet an Windows will automatically fetch the latest stable driver.
Start Afresh
Once Windows finishes installing the GPU driver for you, you can continue using your PC as you like. However, do note that Windows does not install the latest GPU driver. Instead, it installs the version that it thinks is the most stable one. You might want to update your GPU driver later on to the latest version if you are sure it is stable now. If your computer has NVIDIA’s graphics, you can check our guide on installing and updating NVIDIA’s drivers without GeForce Experience.
How to uninstall display drivers in Windows 10 and 11
Windows 10 drivers. If not, uninstall the drivers by going to Device Manager > Display Adapters and selecting the driver from the list.
Uninstalling display drivers allows you to fix driver problems or install your own. You can use your video adapter’s own tool to complete the process. Or you can use Settings or Windows Device Manager. We’ll show you how to do it on Windows 10 and 11.
Contents
- Which uninstall method to use
- Use settings to uninstall display drivers.
- In Windows 10
- In Windows 11
- Use Device Manager to uninstall display drivers
Which uninstall method to use
If your display adapter offers a driver removal tool, this tool should be your first choice to remove installed drivers. If you don’t have such a tool, use the settings to uninstall the drivers.
If your drivers don’t show up in the settings, use Device Manager as this tool allows you to uninstall your drivers whether there is an uninstall tool or not. This is a universal way to uninstall drivers for all your hardware devices, including video adapters.
Use settings to uninstall display drivers.
Using the Windows Settings application is one way to get rid of display drivers. In this method, you uninstall your drivers just like an application on your PC. .
If you did not find your drivers in the application list using this method, please use Device Manager method below.
On Windows 10
Launch settings by pressing Windows + i on your keyboard. Then select «Apps»
On the «Apps & Features» page, click the «Search this list» button and enter the name of the video adapter manufacturer (for example, Nvidia). Or manually find your drivers in the list.
Select your drivers from the list and click “Uninstall.”
Click «Delete» at the prompt.
Windows will begin uninstalling the drivers you selected.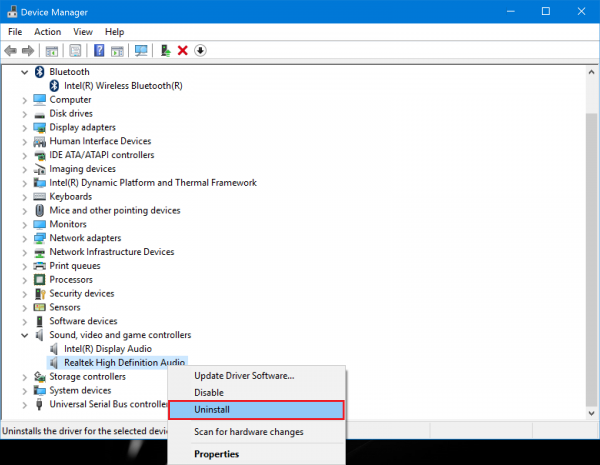
On Windows 11
Start by launching Settings with Windows + i.
In the settings on the left sidebar, select “Applications” Then, on the right panel, click “Apps & Applications. Capabilities.»
In the Applications & Features section, look for display drivers. Then, next to those drivers, click on the three-dot menu and select Uninstall.” Select «Delete» when asked to complete.
Use Device Manager to uninstall display drivers
You can also get rid of drivers using Device Manager on your Windows PC. The steps are the same whether you’re using a Windows 10 or 11 PC.
To get started, launch Device Manager on your computer. You can do this by opening the “Start” menu, searching for “Device Manager” and selecting the tool from the search results.
In Device Manager, next to Display adapters, click the right arrow icon to expand the menu.
In the expanded section of “Display adapters” of the menu, right-click the video adapter and select “Uninstall device”
Under the “Uninstall device” prompt, turn on “Delete the driver software for this device”, then click “Uninstall .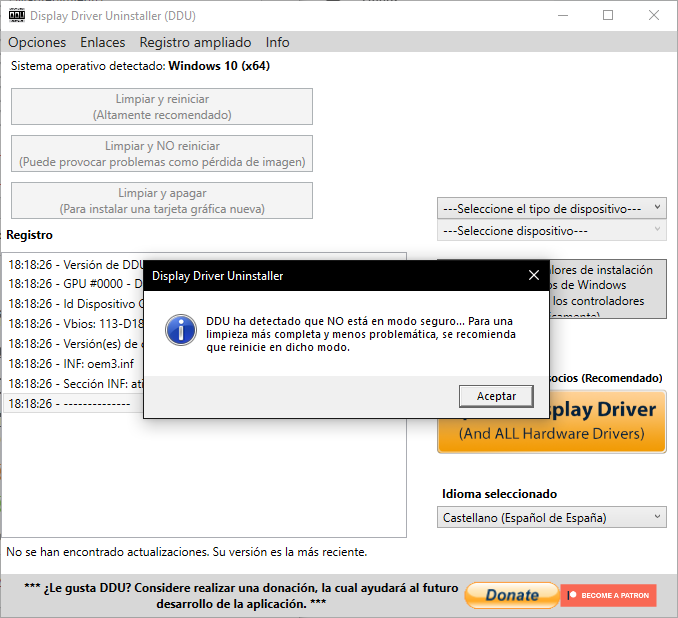 ”
”
The Device Manager will begin uninstalling the display drivers. All is ready.
Now that your drivers are removed, you can download fresh new drivers for Nvidia or other video adapters.
How to use the Windows 10 Display Driver Uninstaller [EASY GUIDE]
What is the Display Driver Uninstaller and how to use it in Windows 10?
What does the Display Driver Uninstaller do?
Uninstall the video card driver using the Display Driver Uninstaller.
Remove video card drivers from safe mode
Last modified: March 28, 2019
Keep your PC up to date by updating its drivers. This tool will help you detect old and faulty drivers and automatically find the correct version. Thus, you will use all the components of your system to their full potential. Check your drivers in 3 easy steps:
- Download DriverFix now for free (Secure Boot)
- Run the program and press the icon scan
- Wait for the scan to complete and start installing the required drivers.
- DriverFix was successfully downloaded by 36,821 readers this month.
Having the latest drivers installed on your Windows 10 PC is critical if you want the best performance and stability. However, sometimes driver issues can occur and you may need to uninstall certain drivers from your PC.
If you’re having problems with your video card and need to uninstall its drivers, you might be interested in a tool called DDU: Display Driver Uninstaller.
Display Driver Uninstaller is a great tool and in this article we will cover the following issues:
-
Uninstall Windows 10 Nvidia drivers. If you have problems with your Nvidia drivers, you can completely uninstall them using this tool.
-
How to use DDU – Display Driver Uninstaller is an easy to use tool and in this article we will show you how to use it properly.
-
AMD, Intel, Nvidia Display Driver Uninstaller — The Display Driver Uninstaller can remove almost any video card driver from your PC.
 The tool fully works with AMD, Nvidia and Intel drivers.
 -
Display driver uninstaller safe mode. Sometimes, in order to uninstall a specific driver, it is recommended to remove it from safe mode. The Display Driver Uninstaller can automatically enter Safe Mode and remove the problematic driver from your PC.
-
Nvidia Display Driver Uninstaller Old Versions – If you want to completely remove old versions of Nvidia drivers, Display Driver Uninstaller might be the perfect tool for you.
-
Display Driver Uninstaller Portable — Display Driver Uninstaller is a completely portable application and you don’t need to install it to run it.
-
Clean removal of the AMD display driver. If you’re having problems with your AMD display driver and want to completely remove it from your computer, the Display Driver Uninstaller is the perfect tool for you.
-
- *
- What does the Display Driver Uninstaller do?
- Uninstall the video card driver using the Display Driver Uninstaller.
- Remove video card drivers from safe mode
What does the Display Driver Uninstaller do?
Display Driver Uninstaller is a free third-party application designed to uninstall video card drivers. Sometimes you may experience issues with your graphics card, and in order to resolve these issues, you may need to reinstall your graphics card drivers.
You can always uninstall the graphics card driver from the Device Manager or using a dedicated uninstaller, but the Display Driver Uninstaller allows you to completely uninstall the driver from your PC.
Some drivers may leave installation packages or registry entries after they are uninstalled, but the Display Driver Uninstaller will remove all files associated with your graphics card, including installation packages and registry entries.
Sometimes it may happen that you are unable to uninstall the video card driver due to a certain error in Windows 10 and therefore tools such as Display Driver Uninstaller can be helpful.
If you are concerned that the currently installed driver is causing any problems on your system, you can completely remove it from your computer using this tool.
Because it is such a powerful tool, it is recommended that you create a system restore point before using it. If something goes wrong while uninstalling the driver, you can easily restore your system using a system restore point.
If you are interested in more information on how to create a restore point and how it will help you, check out this simple article to find out everything you need to know.
It is also recommended that you add the Display Driver Uninstaller to the exclusion list in your antivirus software so that it can take full control of your system when you remove the driver.
Check if DDU is being blocked by your firewall and add it to the exception list with this simple guide.
Uninstall the graphics card driver using the Display Driver Uninstaller.
The Display Driver Uninstaller works with Nvidia, AMD and Intel drivers and you need to follow these steps to remove the driver from your system:
- Download the latest Display Driver Uninstaller.
- The tool will be downloaded as a 7zip archive. Find the downloaded file and double click it.
- You will now be prompted to remove the tool. Choose a location to extract and click Extract .
- After extracting the tool, double-click the Display Driver Uninstaller, icon to launch it.
- You should see a warning message that this tool is recommended to be used in safe mode. You can boot into Safe Mode by simply selecting the 9 option0038 Safe Mode» in the «Startup» menu. After selecting Safe Mode, press the Restart button. You can also start the application without using safe mode by simply selecting the Normal option from the startup options menu.
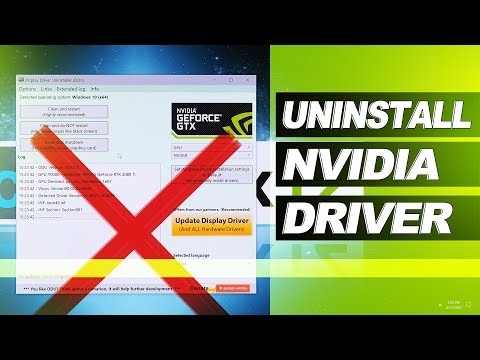
 When the Display Driver Uninstaller opens, the log will show you information about your graphics card. You can also select your graphics card driver from the menu on the right, but in most cases the Display Driver Uninstaller should automatically detect your graphics card driver.
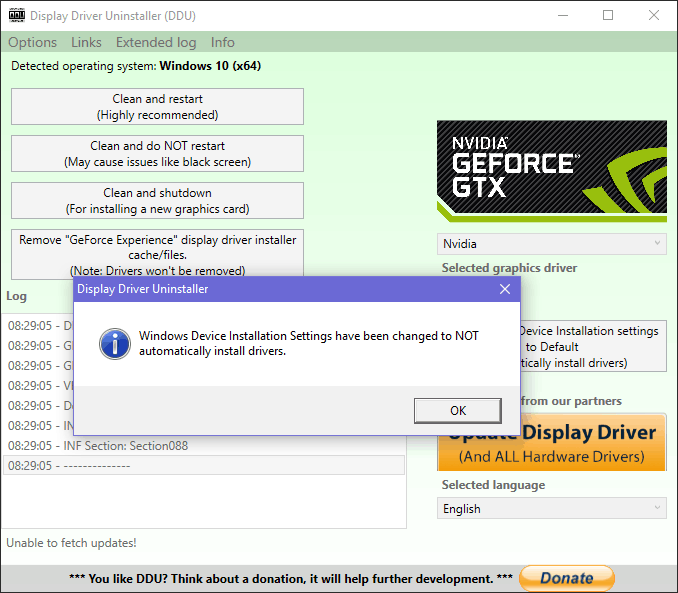
 - On the left side you will see three buttons. If you are installing a new driver for your graphics card, just click the Clean and Restart button. If you are installing a new graphics card, you can use the Clean and Shut Down button to remove the driver and shut down your computer. There is also an option to clean the driver without restarting the system, but sometimes this option can cause some minor issues with your computer.
- After selecting the desired option, wait while the Display Driver Uninstaller uninstalls the driver.
After restarting the PC, the display driver will be completely removed and all problems related to the graphics card drivers will be resolved. Now you just need to install a new driver for your graphics card and check if the issue is resolved.
Want the latest GPU drivers? Bookmark this page and always be up to date with the latest and greatest.
Uninstall graphics card drivers from safe mode
If you are unable to access safe mode from the display driver uninstaller, you can run the tool directly from safe mode. To enter safe mode, you need to do the following:
- Press the Start button, hold down the Shift key and press the Power button . Hold down the key Shift, select the option Restart .
- After the computer restarts, select Troubleshoot > Advanced Options > Startup Options and click the Restart button .
- You will see a list of options. Select any version of Safe Mode by pressing the appropriate number on your keyboard.
- After starting Safe Mode, run the display driver uninstaller and follow the instructions above to uninstall the display driver.
Safe mode not working? Don’t panic, this guide will help you solve download problems.
As you can see, Display Driver Uninstaller is a simple yet powerful tool, and you don’t need to install it on your computer to use it. This means that you can easily run this tool on any PC without any problems.
In terms of compatibility, the Display Driver Uninstaller is fully compatible with older versions of Windows and supports both 32-bit and 64-bit systems.
We should also mention that this tool supports multiple languages, so it’s possible that your native language is available in the translation list.
Finally, this tool is quite lightweight and doesn’t use much of your computer’s resources, so you can run it on almost any computer without problems.
The Display Driver Uninstaller is an extremely useful tool, especially if you’re having problems with your graphics card and need to remove all traces of old display drivers.