Troubleshoot the Azure Monitor agent on Windows virtual machines and scale sets — Azure Monitor
Edit
Twitter
LinkedIn
Facebook
Email
-
Article -
-
Overview for Azure Monitor agent
Before you read further, you must be familiar with Azure Monitor agent and Data Collection Rules.
Terminology
| Name | Acronym | Description |
|---|---|---|
| Azure Monitor Agent | AMA | The new Azure Monitor agent |
| Data Collection Rules | DCR | Rules to configure collection of data by the agent, i.e. what to collect, where to send to, and more |
| Azure Monitor Configuration Service | AMCS | Regional service hosted in Azure, which controls data collection for this agent and other parts of Azure Monitor. The agent calls into this service to fetch DCRs. |
| Logs endpoint | — | Endpoint for sending data to Log Analytics workspaces |
| Metrics endpoint | — | Endpoint for sending data to Azure Monitor Metrics databases. |
| Instance Metadata Service and Hybrid | IMDS and HIMDS | Services hosted in Azure which provide information about currently running virtual machines, scale sets (via IMDS) and Arc-enabled servers (via HIMDS) respectively |
| Log Analytics workspace | LAW | The destination in Azure Monitor that you can send logs collected by the agent to |
| Custom Metrics | — | The destination in Azure Monitor that you can send guest metrics collected by the agent to |
Basic troubleshooting steps (installation, agent not running, configuration issues)
Follow the steps below to troubleshoot the latest version of the Azure Monitor agent running on your Windows virtual machine:
-
Carefully review the prerequisites here.
-
Verify that the extension was successfully installed and provisioned, which installs the agent binaries on your machine:
- Open Azure portal > select your virtual machine > Open Settings : Extensions + applications from the pane on the left > ‘AzureMonitorWindowsAgent’should show up with Status: ‘Provisioning succeeded’
- If not, check if machine can reach Azure and find the extension to install using the command below:
az vm extension image list-versions --location <machine-region> --name AzureMonitorWindowsAgent --publisher Microsoft.Azure.Monitor
- Wait for 10-15 minutes as extension maybe in transitioning status. If it still doesn’t show up, uninstall and install the extension again and repeat the verification to see the extension show up.
- If not, check if you see any errors in extension logs located at
C:\WindowsAzure\Logs\Plugins\Microsoft.on your machine Azure.Monitor.AzureMonitorWindowsAgent
 - If none of the above helps, file a ticket with Summary as ‘AMA extension fails to install or provision’ and Problem type as ‘I need help with Azure Monitor Windows Agent’.
-
Verify that the agent is running:
- Check if the agent is emitting heartbeat logs to Log Analytics workspace using the query below. Skip if ‘Custom Metrics’ is the only destination in the DCR:
Heartbeat | where Category == "Azure Monitor Agent" and 'Computer' == "<computer-name>" | take 10
- If not, open Task Manager and check if ‘MonAgentCore.exe’ process is running. If it is, wait for 5 minutes for heartbeat to show up.
- If not, check if you see any errors in core agent logs located at
C:\WindowsAzure\Resources\AMADataStore.<virtual-machine-name>\Configurationon your machine - If none of the above helps, file a ticket with Summary as ‘AMA extension provisioned but not running’ and Problem type as ‘I need help with Azure Monitor Windows Agent’.

- Check if the agent is emitting heartbeat logs to Log Analytics workspace using the query below. Skip if ‘Custom Metrics’ is the only destination in the DCR:
-
Verify that the DCR exists and is associated with the virtual machine:
- If using Log Analytics workspace as destination, verify that DCR exists in the same physical region as the Log Analytics workspace.
- On your virtual machine, verify the existence of the file
C:\WindowsAzure\Resources\AMADataStore.<virtual-machine-name>\mcs\mcsconfig.latest.xml. If this file doesn’t exist:- The virtual machine may not be associated with a DCR. See step 3
- The virtual machine may not have Managed Identity enabled. See here on how to enable.
- IMDS service is not running/accessible from the virtual machine. Check if you can access IMDS from the machine. If not, file a ticket with Summary as ‘IMDS service not running’ and Problem type as ‘I need help configuring data collection from a VM’.
- AMA cannot access IMDS. Check if you see IMDS errors in
C:\WindowsAzure\Resources\AMADataStore.file. If yes, file a ticket with Summary as ‘AMA cannot access IMDS’ and Problem type as ‘I need help configuring data collection from a VM’. <virtual-machine-name>\Tables\MAEventTable.tsf
- Open Azure portal > select your data collection rule > Open Configuration : Resources from the pane on the left > You should see the virtual machine listed here
- If not listed, click ‘Add’ and select your virtual machine from the resource picker. Repeat across all DCRs.
- If none of the above helps, file a ticket with Summary as ‘DCR not found or associated’ and Problem type as ‘I need help configuring data collection from a VM’.
-
Verify that agent was able to download the associated DCR(s) from AMCS service:
- Check if you see the latest DCR downloaded at this location
C:\WindowsAzure\Resources\AMADataStore. <virtual-machine-name>\mcs\configchunks
 - If not, file a ticket with Summary as ‘AMA unable to download DCR config’ and Problem type as ‘I need help with Azure Monitor Windows Agent’.
- Check if you see the latest DCR downloaded at this location
Issues collecting Performance counters
- Check that your DCR JSON contains a section for ‘performanceCounters’. If not, fix your DCR. See how to create DCR or sample DCR.
- Check that the file
C:\WindowsAzure\Resources\AMADataStore.<virtual-machine-name>\mcs\mcsconfig.lkg.xmlexists. If it doesn’t exist, file a ticket with Summary as ‘AMA didn’t run long enough to mark and Problem type as ‘I need help with Azure Monitor Windows Agent’. - Open the file and check if it contains
CounterSetnodes as shown in the example below:<CounterSet storeType="Local" duration="PT1M" eventName="c9302257006473204344_16355538690556228697" sampleRateInSeconds="15" format="Factored"> <Counter>\Processor(_Total)\% Processor Time</Counter> <Counter>\Memory\Committed Bytes</Counter> <Counter>\LogicalDisk(_Total)\Free Megabytes</Counter> <Counter>\PhysicalDisk(_Total)\Avg. Disk Queue Length</Counter>
</CounterSet>
Disk Queue Length</Counter>
</CounterSet>
If there are no
CounterSetnodes, then the DCR wasn’t parsed correctly. File a ticket with Summary as ‘AMA unable to parse DCR config’ and Problem type as ‘I need help with Azure Monitor Windows Agent’.
Issues using ‘Custom Metrics’ as destination
- Carefully review the prerequisites here.
- Ensure that the associated DCR is correctly authored to collect performance counters and send them to Azure Monitor metrics. You should see this section in your DCR:
"destinations": { "azureMonitorMetrics": { "name":"myAmMetricsDest" } } - Run PowerShell command:
Get-WmiObject Win32_Process -Filter "name = 'MetricsExtension.Native.exe'" | select Name,ExecutablePath,CommandLine | Format-List
Verify that the CommandLine parameter in the output contains the argument «-TokenSource MSI»
- Verify
C:\WindowsAzure\Resources\AMADataStore.file is present. <virtual-machine-name>\mcs\AuthToken-MSI.json
 - Verify
C:\WindowsAzure\Resources\AMADataStore.<virtual-machine-name>\mcs\CUSTOMMETRIC_<subscription>_<region>_MonitoringAccount_Configuration.jsonfile is present. - Collect logs by running the command
C:\Packages\Plugins\Microsoft.Azure.Monitor.AzureMonitorWindowsAgent\<version-number>\Monitoring\Agent\table2csv.exe C:\WindowsAzure\Resources\AMADataStore.<virtual-machine-name>\Tables\MaMetricsExtensionEtw.tsf- The command will generate the file ‘MaMetricsExtensionEtw.csv’
- Open it and look for any Level 2 errors and try to fix them.
- If none of the above helps, file a ticket with Summary as ‘AMA unable to collect custom metrics’ and Problem type as ‘I need help with Azure Monitor Windows Agent’.
Issues collecting Windows event logs
- Check that your DCR JSON contains a section for ‘windowsEventLogs’.
 If not, fix your DCR. See how to create DCR or sample DCR.
 - Check that the file
C:\WindowsAzure\Resources\AMADataStore.<virtual-machine-name>\mcs\mcsconfig.lkg.xmlexists. If it doesn’t exist, file a ticket with Summary as ‘AMA didn’t run long enough to mark and Problem type as ‘I need help with Azure Monitor Windows Agent’. - Open the file and check if it contains
Subscriptionnodes as shown in the example below:<Subscription eventName="c9302257006473204344_14882095577508259570" query="System!*[System[(Level = 1 or Level = 2 or Level = 3)]]"> <Column name="ProviderGuid" type="mt:wstr" defaultAssignment="00000000-0000-0000-0000-000000000000"> <Value>/Event/System/Provider/@Guid</Value> </Column> ... </Column> </Subscription>If there are no
Subscription, nodes then the DCR wasn’t parsed correctly. File a ticket with Summary as ‘AMA unable to parse DCR config’ and Problem type as ‘I need help with Azure Monitor Windows Agent’.
File a ticket
- Open a data collection rule and on the menu on the left, select New Support Request. You can also open the Help + support pane and select Create a support request.
- Select:
- Issue type: Technical.
- Subscription: Select the subscription where your machines reside.
- Service type: Data collection rules and Azure Monitor Agent.
- Is your issue related to a resource?: Yes. Select your machine by using the resource picker.
- Enter Summary and Problem type as indicated from the troubleshooting steps. Accurate information leads to faster resolution of the issue.
- Select Next and review the recommended solutions to see if they help.
- If they don’t help, select Next and fill in the next set of details.
- Select Next, review the final details, and select Create.
Feedback
View all page feedback
HDX Graphics Modes – Which Policies Apply to DCR/Thinwire/H.264
CTX202687
{{tooltipText}}
Article
|
|
{{likeCount}} found this helpful
|
Created:
{{articleFormattedCreatedDate}}
|
Modified:
{{articleFormattedModifiedDate}}
Information
Legacy graphics
Legacy graphics is a host (computer) policy and its use should be treated as an always on or always off. Behavior will differ between Workstation OS VDA and Server OS VDA. You should only ever be using legacy mode for OSs for which it is designed i.e. Windows 7, Windows 2008 R2 and earlier (that s, Legacy OSs). Legacy graphics is highly optimised for legacy OSs and should be regarded as the first choice for those operating systems unless other factors are involved.
NOTE: Legacy graphics mode is not supported in combination with modern operating systems: Windows Desktop OS: 8, 8.1, 10 or Windows Server 2012, 2012 R2 & Windows Server 2016.
Thinwire plus (aka: TW+ orcompatibility mode) should be used and is the replacement for legacy mode.
Documentation Thinwire Compatibility Mode
Blog post: «To use or not to use?»
Policy templates
We recommend users configure policies for XD/XA 7.6 FP3 via the built in templates available in studio. Further information on policy templates can be found here:
- Policy template documentation
- Simplify HDX Policy Administration to Amplify the User Experience
- HDX Policy Templates — Whitepaper
- Additional online templates (including Cloudbridge, HTML5, Framehawk use cases): — Group Policy Management Template Updates for XenApp/XenDesktop
XenDesktop/XenApp 7.
 6 FP3 Installation
With XD/XA 7.6 FP3, you don’t have to disable DCR as it is now disabled by default.
Because the FP3 release is a VDA-only update, to be able to use the new policies with FP3 you will also need to apply a small update your DDC. If you have stand-alone installations of Citrix Studio on other systems, those should also have the update applied in order to be able to see the new policies.
The file to install on your DDC is “CitrixGroupPolicyManagement_x64.msi”
After installing the update, your “Citrix Group Policy Management” version 2.5.0.0 will appear in Control Panel > Add Remove Programs. Note that on a 7.6 Delivery Controller with no updates this component, while available, does not appear in the Add Remove programs list.
How to check which graphics modes are you using
The graphics mode used will be determined by the policies set and the hierarchy in which those policies apply (see policy precedence table below).
- A useful tool is available (here) that allows you to survey all the receivers and sessions on a site and check what graphics mode they are using.
- You can also follow the advice in this blog on how to check which graphics mode you are using. (If you are ever submitting an HDX bug – you can use the xml export feature of HDX monitor or the output of the wmic commands to provide information on the graphics mode).
- This information can be accessed via the Director console.
When you are using “Thinwire Compatibility” mode you will see the encoder used to be the CompatibilityEncoder. This is a bit confusing, as earlier versions have a compatibility mode, which is completely different code and performance footprint (we generally don’t recommend the old one for general use as usually better performance available via other modes).
Graphics policies available in XenDesktop / XenApp 7.6 FP3
Here is a table of all graphics policies available and which graphics modes they apply to (note how most policies only apply to legacy mode – policies that apply only to legacy mode are in grey cells):
| Policy | User/Computer | Framehawk | DCR | H. 264 264 |
Thinwire Compatibility mode (ECM) |
Legacy Graphics Mode | Comment |
| Desktop Composition graphics quality | User | X | |||||
| Desktop Composition Redirection | User | X | See graphics display precedence table | ||||
| Display memory limit | Computer | X | X | X | See CTX201696 – Citrix XenDesktop and XenApp – Support for Monitors Including 4K Resolution and Multi-monitors | ||
| Display mode degrade preference | Computer | X | For legacy graphics only. If the Display Memory limit was exceeded, prefer to degrade Color depth or resolution If the Display Memory limit was exceeded, prefer to degrade Color depth or resolution |
||||
| Dynamic window preview | Computer | X | X | X | X | Enables the windows contents to update even when not displayed on screen, this is so the thumbnails in taskbar, Alt-Tab, etc. keep updated, thus enhancing a rich user experience. This can lead to higher bandwidth and server CPU utilization | |
| Extra color compression | User | X | X | Extra Color Compression is an optimization that can save up to 20% (of size) when compressing graphical screen areas at the expense of quality. Turning it off makes some images, like text over a complex background appear sharper. Turning it off makes some images, like text over a complex background appear sharper.Savings are most notable in Legacy graphics and less in ECM |
|||
| Extra color compression threshold | User | X | See: CTX201802 – FAQ: HDX Extra Color Compression (ECC) Policy in XenApp and XenDesktop | ||||
| Framehawk display channel | X | See graphics display precedence table | |||||
| Framehawk display channel port range | X | Use this setting in a base (Computer) policy if you desire to change the default UDP ports used. Not necessary if the default ports are used Not necessary if the default ports are used |
|||||
| Heavyweight compression | User | X | |||||
| Image caching | Computer | X | |||||
| Legacy graphics mode | Computer | X | See graphics display precedence table | ||||
| Lossy compression level | User | X | |||||
| Lossy compression level threshold value | User | X | |||||
| Minimum image quality | User | X | Valid for Legacy Adaptive Display ONLY : it sets the minimum acceptable quality for transient (moving) images. This setting has been replaced by the ‘Visual Quality’ setting for modern display encoding methods |
||||
| Moving image compression | User | X | X | Enables or disables Adaptive Display, allowing for automatic graphics quality degradation to maintain frame rate over bandwidth constrained environments. Recommended to be disabled on double hop scenarios, for the connection between the application and the desktop/access session. | |||
| Maximum allowed color depth | Computer | X | On legacy graphics, we could request applications to render graphics at lower color depth. A similar setting has been implemented in ECM to allow the reduction color depth when encoding. Currently accepting 16bpp and 24bpp values |
||||
| Notify user when experience is degrade | Computer | X | For legacy graphics only. NOTIFY If the Display Memory limit was exceeded, prefer to degrade Color depth or resolution | ||||
| Persistent cache threshold | Computer | X | |||||
| Preferred color depth for simple graphics | User | X | Allow encoding at 16bpp. Default value 24bpp. Some experimental values available at the time of writing Default value 24bpp. Some experimental values available at the time of writing |
||||
| Progressive compression level | User | X | If enabled, adaptive display is disabled and switch to progressive display | ||||
| Progressive compression threshold value | User | X | |||||
| Queuing and tossing | Computer | X | |||||
| Target frame rate | User | X | X | X | Maximum allowed/desired frame rate. |
||
| Target minimum framerate | User | X | X | X | Value at which the image quality should be degraded in favor of maintaining the desired frame rate value. Please note this value is not guaranteed, actual FPS depends also on the ‘Visual Quality’ setting and could be lower if the bandwidth does not allow it | ||
| Visual quality | User | X | X |
Note: You should only ever be using legacy mode for legacy OSs for which it is designed i. e. Windows 7, Windows 2008 R2 and earlier. Taking the table above and deleting every policy that only relates to legacy graphics mode will leave the only policies in XenDesktop 7.6 FP3 as it was initially released which you need to consider if you are not explicitly setting your deployment to use legacy mode. As shown in the table below:
| Policy | User/Computer | Framehawk |
DCR | H.264 | Thinwire Compatibility mode (ECM) |
Comment |
| Desktop Composition graphics quality | User | X | When using DCR, what quality should graphics be. Low value can cause text over graphics to be fuzzy Low value can cause text over graphics to be fuzzy |
|||
| Desktop Composition Redirection | User | X | See graphics display precedence table | |||
| Display memory limit | Computer | X | X | See CTX201696 – Citrix XenDesktop and XenApp – Support for Monitors Including 4K Resolution and Multi-monitors | ||
| Dynamic window preview | Computer | X | X | Enables the windows contents to update even when not displayed on screen, this is so the thumbnails in taskbar, Alt-Tab, etc. keep updated, thus enhancing a rich user experience. This can lead to higher bandwidth and server CPU utilization keep updated, thus enhancing a rich user experience. This can lead to higher bandwidth and server CPU utilization |
||
| Extra color compression | User | X | Extra Color Compression is an optimization that can save up to 20% (of size) when compressing graphical screen areas at the expense of quality. Turning it off makes some images, like text over a complex background appear sharper. Savings are most notable in Legacy graphics and less in ECM See: CTX201802 – FAQ: HDX Extra Color Compression (ECC) Policy in XenApp and XenDesktop |
|||
| Framehawk display channel | X | See graphics display precedence table | ||||
| Framehawk display channel port range | X | Use this setting in a base (Computer) policy if you desire to change the default UDP ports used. Not necessary if the default ports are used Not necessary if the default ports are used |
||||
| Legacy graphics mode | Computer | See graphics display precedence table. Note: If enabled, will override: EVERYTHING in RDS (server OS) Thinwire h.264 and/or ECM for Workstation OS |
||||
| Moving image compression | User | X | Enables or disables Adaptive Display, allowing for automatic graphics quality degradation to maintain frame rate over bandwidth constrained environments. Recommended to be disabled on double hop scenarios, for the connection between the application and the desktop/access session. |
|||
| Preferred color depth for simple graphics | User | X | Allow encoding at 16bpp. Default value 24bpp. Some experimental values available at the time of writing | |||
| Target frame rate | User | X | X | Maximum allowed/desired frame rate. | ||
| Target minimum framerate | User | X | X | Value at which the image quality should be degraded in favor of maintaining the desired frame rate value. Please note this value is not guaranteed, actual FPS depends also on the ‘Visual Quality’ setting and could be lower if the bandwidth does not allow it Please note this value is not guaranteed, actual FPS depends also on the ‘Visual Quality’ setting and could be lower if the bandwidth does not allow it |
||
| Visual quality | User | X | X |
IMPORTANT: You must not extrapolate this reduced table to later Feature Packs of XD/XA 7.6, this information related to XenApp/XenDesktop 7.6 FP3 as it was released.
Or presenting it another way, the only policies that apply if you are using non-legacy mode are:
| Graphics Mode | Policies that have effect |
| Framehawk | Framehawk display channel Framehawk display channel port range |
| DCR | Desktop Composition graphics quality Desktop Composition Redirection |
H. 264 264 |
Display memory limit Dynamic window preview Target frame rate Target minimum framerate Visual quality |
| Thinwire Compatibility | Display memory limit Dynamic window preview Extra color compression Moving image compression Preferred color depth for simple graphics Target frame rate Target minimum framerate Visual quality |
IMPORTANT: You must not extrapolate this reduced table to later Feature Packs of XD/XA 7.6, this information related to XenApp/XenDesktop 7.6 FP3 as it was released.
Graphics display precedence table
Assuming legacy policy and mode are not in use.
| Framehawk | Will have precedence if: 1. Enabled 2. Receiver and VDA are compatible (VDA 7.6 FP2 or higher, Receiver for Windows 4.  3.100 or higher or IOS 6.x or higher) 3.100 or higher or IOS 6.x or higher)3. Connection on the required UDP ports is possible |
| DCR | Will be used if: 1. Enabled – please note: 7.0 to 7.6 FP2 VDA will be enabled by default 2. Framehawk is NOT IN USE (see above) 3. Receiver and VDA OS are compatible (VDA Windows 7, 8 or 8.1, Receiver for Windows 3.0 or higher or Receiver for Mac 11.9 or higher) 4. Client device has a suitable GPU (most likely yes) 5. VDA 5.x will stop DCR if bandwidth not available |
| Thinwire H.264 | Will be used if: 1. Use Video Codec for compression allowed 2. Higher precedence encoders are NOT IN USE (see above) 3. Receiver is compatible. a. Windows 3.4 or higher b. Mac 11.8 or higher c. Linux 13.0 or higher d. IOS 5.9 or higher e. Android 3.  4 or higher 4 or higherf. Chrome/HTML5 1.4 (SF2.1 or higher) 4. No modification to the VDA registry have been made (some registry modifications have been recommended in the past to enable experimental/tech preview features) |
| Enhanced Thinwire compatibility mode | Will be used if: 1. Use Video codec for compression set to : Do not use 2. Higher precedence encoders NOT IN USE (see above) 3. As noted above, some receivers will not support any of the above encoders. For sake of completion they are listed here: a. Windows receiver earlier than 3.4 b. Mac receiver earlier than 11.8 c. Linux receiver earlier than 13.0 d. Linux receiver with h.264 support disabled (see documentation) e. Dell/Wyse ThinOS with receiver 13.0.0.6685 f. IOS receiver earlier than 5.9 g. Android receiver earlier than 3.4 h. Very old HTML5 i.  Any receiver not listed here Any receiver not listed here |
Related Links
- Some useful information on XenDesktop/XenApp graphics modes available in the base 7.6 (pre-dating the release of the new Framehawk and “Thinwire Compatibility” modes) can be found here: What’s new with HDX display in XenDesktop & XenApp 7.x?
- Information on the new “Thinwire Compatibility” mode can be found here: A Big Leap in ICA Protocol Innovation for Citrix
- Information on Framehawk can be found here: Our First Release of Framehawk Technologies and here: Got Framehawk? We’ve Got Remote Access Tips and Tricks!
Additional Resources
- Some useful information on XenDesktop/XenApp graphics modes available in the base 7.6 (pre-dating the release of the new Framehawk and “Thinwire Compatibility” modes) can be found here: What’s new with HDX display in XenDesktop & XenApp 7.x?
- Information on the new “Thinwire Compatibility” mode can be found here: A Big Leap in ICA Protocol Innovation for Citrix
- Information on Framehawk can be found here: Our First Release of Framehawk Technologies and here: Got Framehawk? We’ve Got Remote Access Tips and Tricks!
- Citrix Documentation — Graphics policy settings
- Citrix Consulting: HDX 7.
 X: Do You Know Your Graphics Mode? — https://support.citrix.com/article/CTX201812
Disclaimer
Citrix is not responsible for and does not endorse or accept any responsibility for the contents or your use of these third party Web sites. Citrix is providing these links to you only as a convenience, and the inclusion of any link does not imply endorsement by Citrix of the linked Web site. It is your responsibility to take precautions to ensure that whatever Web site you use is free of viruses or other harmful items.
DSR | Dynamic Super Resolution Technology | NVIDIA
DSR Technology
Dynamic Super Resolution allows games to be rendered at higher resolutions and then upscaled to match your monitor’s resolution, delivering 4K graphics on an HD screen.
Our new Maxwell architecture introduces a range of innovative technologies that dramatically improve your gaming experience. One such technology, Dynamic Super-Resolution (DSR), has the biggest impact in boosting image quality in any game that supports resolutions above 19. 20×1080.
How does DSR work?
Simply put, dynamic super resolution allows you to render your games at a higher resolution and then upscale the result to match your monitor’s resolution, delivering 4K 3840×2160 graphics on any screen.
Enthusiasts with compatible monitors and technical knowledge refer to this process as downsampling or supersampling. DSR greatly improves this process by using a high quality filter specially designed for this task. DSR also greatly simplifies the process with the built-in ability to enable/disable the technology directly within GeForce Experience. It is compatible with all monitors, does not require special knowledge to use, and is part of the optimal gaming settings offered by the GeForce Experience utility.
In the opening scene of Dark Souls II, the player finds himself in the middle of waving grass.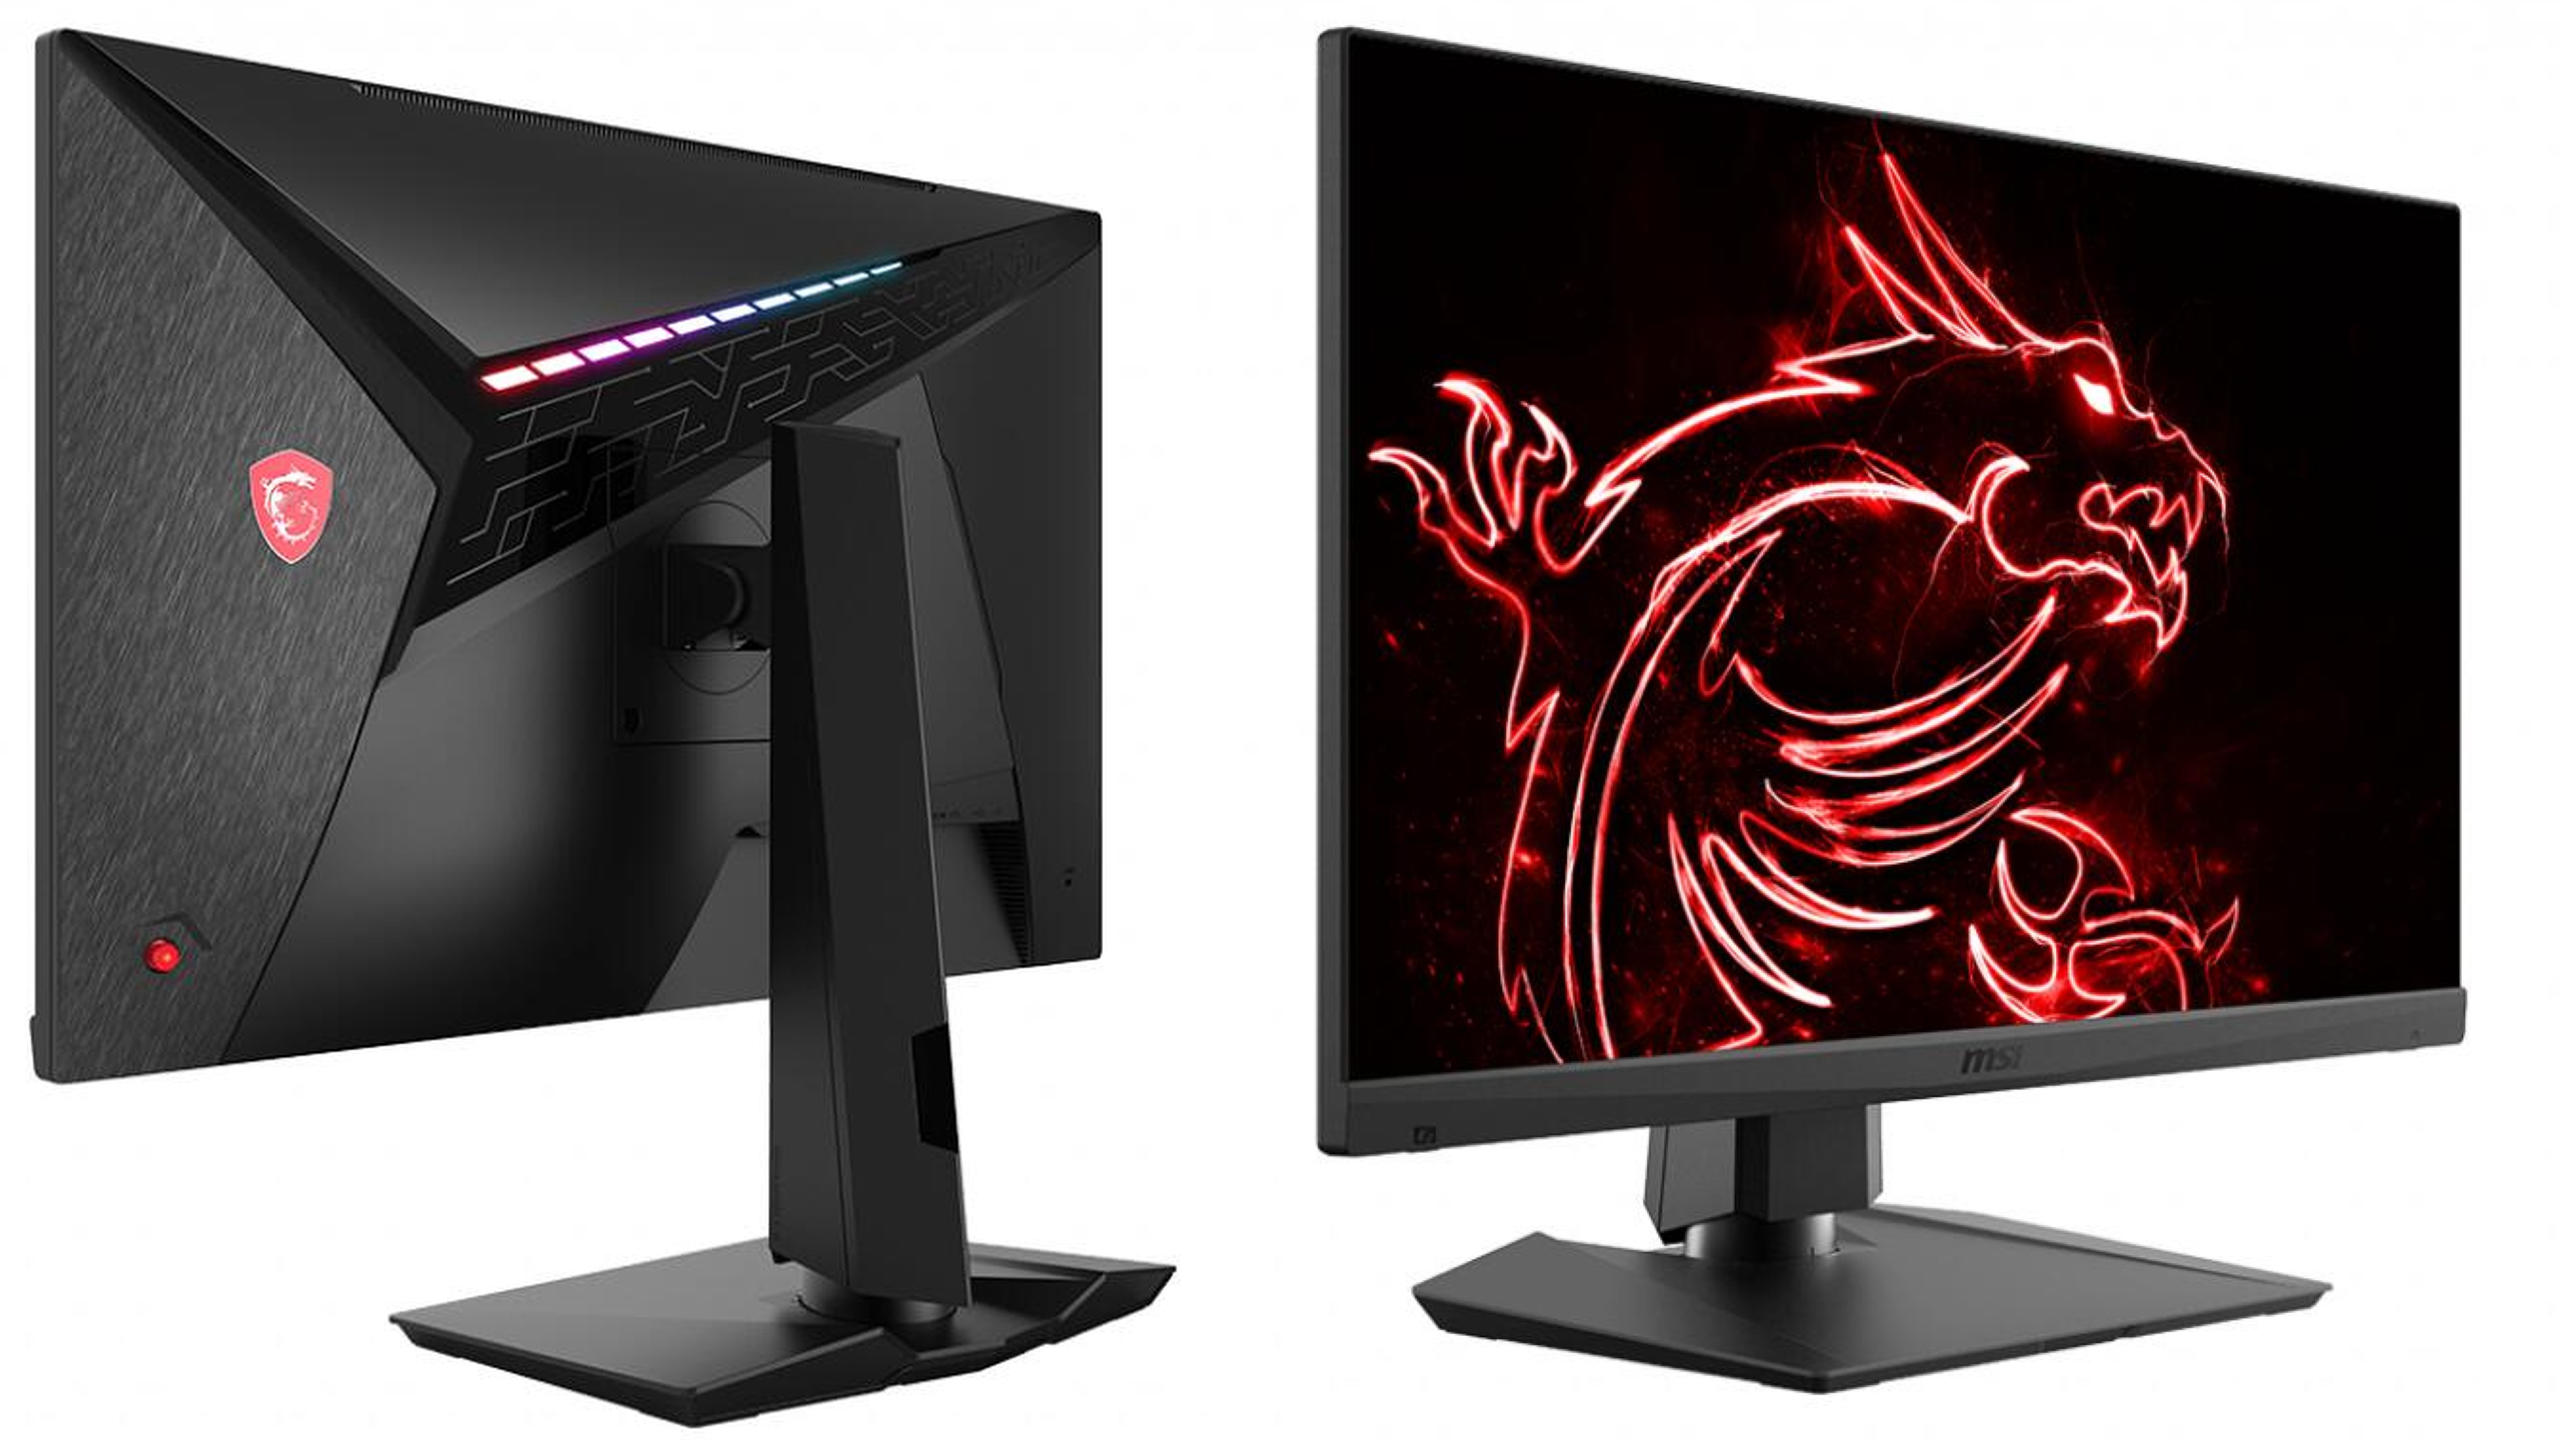 At 1920×1080, the grass flickers and ripples a lot when moving, and part of the image seems to disappear, as shown in the screenshot above:
At 1920×1080, there are not enough sample points to display fine details.
At 3840×2160 (4K), the number of sample points is increased by 4 times, making every blade of grass more detailed in the game.
DSR also applies a specially designed Gaussian filter when scaling a 4K image to 1920×1080 to be displayed on the monitor:
images, and thanks to the use of a Gaussian filter, aliasing artifacts that can be observed with traditional downsampling, are significantly reduced and even completely disappear, which further improves the quality of the picture.
Grass is a great example for demonstrating sample points, but don’t think it’s the only place DSR can be used. In almost every game, DSR will improve the quality of textures, shadows, effects, anti-aliasing, ambient occlusion shading models, geometric details.
Enabling DSR is easy: just click the Optimize button in GeForce Experience 2.1.2 by installing the GeForce 344.11 WHQL driver or later. This technology cannot be applied only to games that do not support UI scaling and / or do not support resolutions above 1920×1080. However, if you still want to enable DSR in these games or in games that are not supported by the GeForce Experience utility, log in to the NVIDIA Control Panel, select the DSR scaling options you want to use and the appropriate DSR resolution.
In addition, you can adjust the sensitivity of the Gaussian filter using the NVCPL option in the NVIDIA Control Panel. With this, gamers can customize the image displayed with DSR technology. This feature is similar to the sharpening controls in the popular SweetFX plugin for image processing in games.
DSR technology is literally changing games. In 4K, details are sharper, effects and shadows are more impressive, and the overall picture quality is much better. Just click the «Optimize» button in the GeForce Experience app and you’ll instantly elevate your games to unprecedented levels of detail and experience gameplay like you’ve never seen before.
This technology is also being used to enhance VR gameplay.
AOC AGON AG405UXC 40″ Gaming Monitor Introduced
Blogs
Blogger Post rewarded
144Hz IPS 2K panel with lots of features
Recommendations
AOC has unveiled its next monitors for different countries. One of the novelties is a 27-inch 2K model that will be sold in China. The other monitor is the 40-inch AGON AG405UXC with IPS 2K panel for European customers.
The latter has an aspect ratio of 21:9 and a resolution of 3440 x 1440, a pixel density of 93 ppi, a response time of 1 ms and a frequency of 144 Hz. Brightness reaches 320 nits, 100% sRGB color gamut and 89% DCI-P3 are supported. VESA DisplayHDR 400 certification means high contrast and a wide range of brightness levels.
DisplayPort 1.4, two HDMI 2.0 and one USB 3.2 Type-C with DisplayPort Alternate Mode and 90W are available for connectivity. There are four USB 3.2 Gen 1 Type-A connectors for peripherals.
The stand can be adjusted in height and inclination. The monitor can be rotated to a portrait orientation and secured using the VESA mount.
For gamers, AMD FreeSync Premium is intended to avoid tearing the picture. The AOC Game Color function allows you to adjust the color temperature and gamma curve. AOC Shadow Control brightens dark areas. Clear Vision reduces image noise and makes it sharper. Dynamic Contrast Ratio (DCR) technology is needed for dynamic contrast adjustment, Motion Blur Reduction (MBR) reduces motion blur. Dynamic Color Boost (DCB) makes colors more saturated, and there is also a flicker-free technology. HDR mode enhances contrast and brightness, Low Blue Light reduces blue light emission.
recommendations
Sales in the UK will start at the end of June at a price of 570 pounds, and in the European Union for 709 euros, writes Gizmochina.
This material was written by a site visitor and has been rewarded.
#monitors
#aoc
Related materials
Effective advertising for your business
The New York Times: «Alligators» Ka-52s burn down columns of tanks, and smart bombs break the defense of the Armed Forces of Ukraine know what it is
Spiegel told what tricks the crews of Leopard tanks use to avoid launching a counteroffensive of the Armed Forces of Ukraine
Why Israel will not sell 200 Merkava tanks to Ukraine, and how the Armed Forces of Ukraine will receive 200 units of M84 and T-80UK
In Kiev, they plan to strike with Storm Shadow missiles at the airfields of the army aviation of the Aerospace Forces of the Russian Federation
Russian troops captured the Leopard 2A4 tank and the Bradley infantry fighting vehicle near Orekhovo
Overclocker CENS for the first time overcame 3.