How to Install Windows 10 on Raspberry Pi 4 [Full Guide]
Can Raspberry Pi run Windows? What do you need to prepare for the installation? How to install Windows 10 Raspberry Pi 4? If you are trying to figure them out, this post of MiniTool is what you need.
Can You Run Windows 10 on Raspberry Pi 4
Raspberry Pi is a series of small single-board computers developed by the Raspberry Pi Foundation, while Windows 10 is a personal computer operating system created by Microsoft as a part of the Windows NT family. It is a type of bare computer without an operating system and you have to install the official Raspberry Pi OS on an SD card to boot the computer.
Here comes a new question: can Raspberry Pi run Windows 10? According to Microsoft, the only operating system for Raspberry Pi is an old version of Windows 10 IoT Core, which allows you to execute Visual Studio code on the computer, but it can’t work as a personal OS with a GUI. That is to say, there is still no way to directly install Windows on Raspberry Pi.
Fortunately, many developers have made it possible to run Raspberry Pi Windows 10 by using some tools like the WoR project. Well, how to install Windows 10 on Raspberry Pi? Don’t worry. We will guide you through the entire installation process.
What You Need to Install Windows 10 on Raspberry Pi 4
The installation is a relatively complex and time-consuming process. To complete the installation smoothly, you need to prepare some important hardware and software. Here we list them as follows:
Hardware requirements:
- A Raspberry Pi 4 computer (Windows 10 is a fairly heavy system. So, it’s highly recommended you use a Raspberry Pi 4 with 8GB RAM if possible.)
- A Windows 10 computer
- A 16GB or larger microSD card
- A keyboard, mouse, HDMI, and power cable for the Raspberry Pi 4
- USB to Ethernet or Wi-Fi dongle
- Bluetooth dongle (if you want to use Bluetooth)
Software requirements:
- The WoR (Windows on Raspberry Pi) tool
- The UUP file for Windows 10 RAM (It will help you download the cmd file used to build the Windows 10 Raspberry Pi ISO file)
Once you have already these tools and files, you can proceed with the following tutorial.
How to Install Windows 10 on Raspberry Pi 4
There are 6 main parts on how to Windows 10 on Raspberry Pi 4. Since the process is relatively long, please follow the steps below patiently and carefully.
Part 1. Update Your Raspberry Pi Firmware
Before installing Windows 10 on the Raspberry Pi, you need to ensure that your Raspberry Pi 4 firmware is up to date. If not, you can follow the simple guide below to check and update its firmware:
Step 1. Start your Raspberry Pi computer and click on the Terminal icon at the top menu bar to access the Command Line. Also, you can select Menu > Accessories > Terminal or press Ctrl + Alt + F1 keys to open the Command Line.
Step 2. In the pop-up command prompt window, run the following commands in order:
- sudo apt update
- sudo apt full-upgrade
Once done, you can turn off your Raspberry Pi computer temporarily and switch to the Windows 10 computer.
Part 2. Download the Necessary Tool and File
The second part is to install the necessary tool and file on your Windows 10 computer. There are 2 important things to download: the WoR tool and UUP file. WoR is a practical tool developed to flash an ARM image of Windows 10 Raspberry Pi to a microSD card. The UUP file can be used to build the Windows 10 Raspberry Pi ISO file on your computer.
Step 1. Click here to download the WoR tool, and then extract the zip file and install the tool from the executable file.
Step 2. Click here to download the UUP file. On the download page, select the Type, Version, Language, Edition, and type download from the drop-down menu based on your needs.
Step 3. Select the “Download ISO compiler in One click!” option from the type download section and click on the first link on the right side to download the cmd file.
After you have downloaded the WoR program and UUP file, you can proceed to build the Raspberry Pi Windows 10 ISO file.
Part 3. Create the Windows 10 Raspberry Pi ISO File
Now, it’s time to build the Raspberry Pi Windows 10 ISO file on your computer. Since the cmd file may be blocked by your Windows Firewall from running, you can turn off Windows Defender Firewall temporarily.
Note: Here we highly recommend you back up the Windows system beforehand in case anything goes wrong.
Step 1. Double click the cmd file on your computer and click on Yes in the User Account Control window.
Step 2. Now, a terminal window pops up and it will begin downloading many important files. This process will take you a while because it will download several gigabytes from the Microsoft servers. So, make sure that your computer is connected to a stable internet connection during the process.
Step 3. Once downloaded, the tool will start creating the Windows 10 Raspberry Pi ISO file. It may take a few hours to complete depending on your computer performance.
Tip: If you are stuck in somewhere, you can try pressing Enter to continue.
Part 4. Format Your SD Card to FAT32
After you create the ISO file successfully, you can flash the file into your SD card using the WoR tool. Here you need to use a 16GB or larger SD card and make sure it is formatted to FAT32. If not, you need to format it first.
How to format SD card to FAT32? You can use Windows built-in tools like Disk Management and Diskpart, but both 2 tools have limitations in formatting an SD card larger than 32GB to FAT32. In addition, you may encounter some issues like formatting takes forever. So, we highly recommend you use MiniTool Partition Wizard. It is a multifunctional partition manager that can format SD cards, convert NFTS to FAT32, migrate OS, convert MBR to GPT, etc.
Free Download
Step 1. Connect your SD card to the Windows 10 computer.
Step 2. Launch MiniTool Partition Wizard to get its main interface, and then select the SD card from the disk map and click on Format Partition from the left pane.
Step 3. In the pop-up window, select FAT32 from the File System drop-down menu and click on OK to save changes. Besides, you can set its Partition Label and Cluster Size based on your needs.
Step 4. Click on the Apply button to execute this formatting.
Now, the SD card should be formatted to FAT32 and you can proceed with the following part to flash the Windows 10 Raspberry Pi ISO file to the card.
Part 5. Flash the ISO File to SD Card
This part will show you how to flash the ISO file to your SD card. For that:
Step 1. Make sure your SD card is connected to the computer.
Step 2. Open the WoR installation folder and double click the WoR.exe file in it, and then click on Yes to run it.
Step 3. A pop-up window like this shows up. Click on Next to continue.
Step 4. Select your SD card from the Storge drive drop-menu and select Raspberry Pi 4 from the Device type section, then click on Next to continue.
Note: Make sure you select the right storage device. Otherwise, you will experience data loss.
Step 5. In the Select image tab, click on the three-dot icon to select the ISO file you just created and select the Windows edition from the drop-down menu, and then click on Next.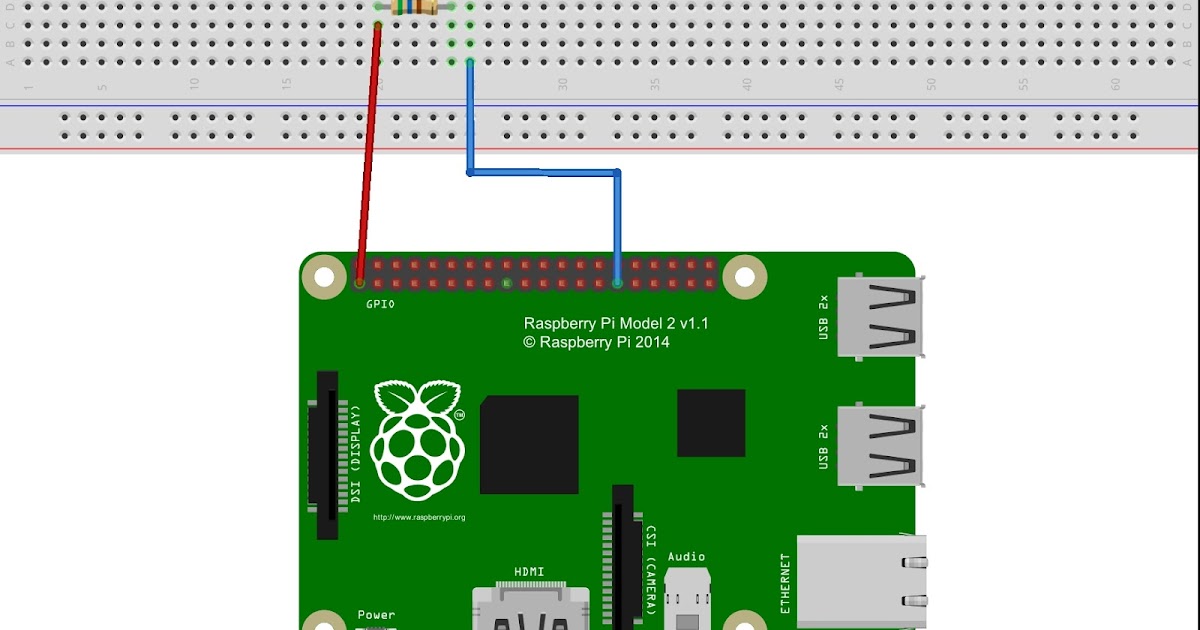
Step 6. Select the Use the latest package available on the server option and click on Next.
Step 7. In the Configuration tab, you can set up the Partition scheme, Boot options, and Install image based on your demands. Click on the Advanced button, you can change the Memory limit.Then click on Next to go on.
Step 8. Go to the Install tab and click on Install after you double-check everything for the Windows 10 Raspberry Pi 4 installation. This installation process will take you a few hours to complete depending on the speed of your SD card.
Once done, you can safely eject the SD card from your Windows 10 PC and continue with the last part.
Part 6. Install Windows 10 on Raspberry Pi 4
Now, you can switch to your Raspberry Pi 4 computer and start installing Windows 10 on Raspberry Pi 4.
Step 1. Insert the microSD card you just flashed into the Raspberry Pi4 computer.
Step 2. Connect the keyboard, mouse, HDMI, and power cable to your Raspberry Pi 4.
Step 3. Restart your Raspberry Pi computer and select the SD card as the boot drive.
Step 4. Then you can complete the standard Windows 10 installation process by following the on-screen prompts.
Step 5. Open the Command Prompt as administrator and run the following command to enable 3GB of RAM.
bcdedit /deletevalue {default} truncatememory
Step 6. Restart your Raspberry Pi computer for the changes to take effect.
Step 7. Connect to the network via a USB to Ethernet or a compatible WiFi dongle.
Step 8. Now, you can install Microsoft Edge by double-clicking the Edge icon on your desktop or install other programs you need just like installing in Windows 10.
I want to install Windows 10 on Raspberry Pi 4, but the process is pretty long and complex. Fortunately, I made it with the help of this post. It provides detailed and clear steps.Click to Tweet
Have a Try Now
How to install Windows 10 on Raspberry Pi 4? The entire installation procedure has been illustrated. Now, it’s your turn to have a try. If you have any other ideas on this project, you can leave them in the comment zone. You can send us an email to [email protected] for any difficulties in using MiniTool Partition Wizard.
How to Install Windows 10 on a Raspberry Pi 4
When you purchase through links on our site, we may earn an affiliate commission. Here’s how it works.
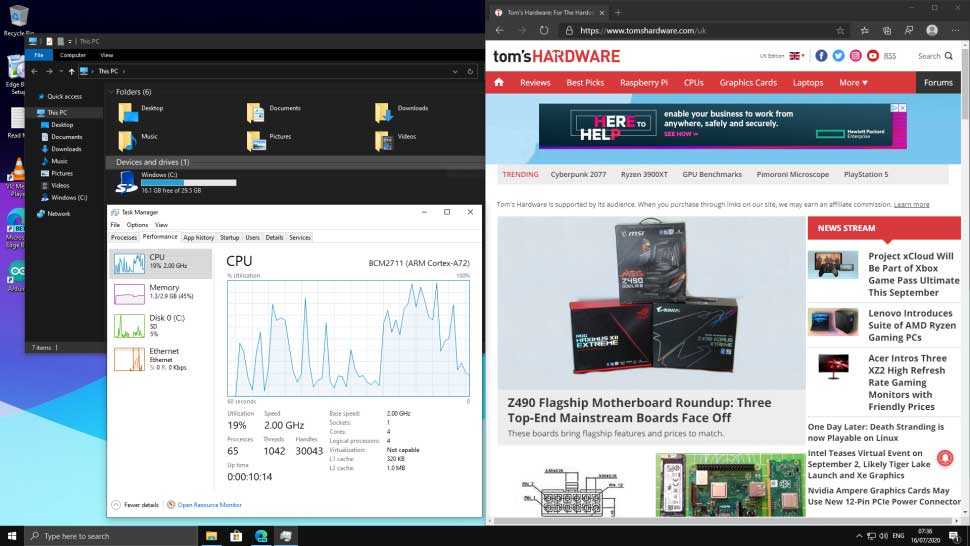
(Image credit: Tom’s Hardware)
The Raspberry Pi is commonly associated with Linux operating systems such as Raspberry PI OS. But what about running Windows 10 on your Raspberry Pi? Officially, Microsoft’s only operating system for the Pi is an old version of Windows 10 IoT Core, which just lets you execute Visual Studio code on the computer but doesn’t work as a standalone OS with a GUI (in other words, no “windows”). However, the lack of support from Microsoft hasn’t stopped some ambitious developers from finding a way to run a full desktop version of Windows 10 on Raspberry Pi.
In 2019, we tried installing a hacked version of Windows 10 on a Raspberry Pi 3 and it ran, but it was extremely painful to use. Recent developments have now made it possible to run Windows 10 somewhat-competently on a Raspberry Pi 4, at least as a proof-of-concept We’ll show you how to install Windows 10 on your Raspberry Pi below.
However, before you begin, please note that this is not an official Microsoft product and the source of the images and software used is from a passionate and vibrant community working together to create this project. Amir Dahan is the creator of Windows 10 Lite, Marcin is responsible for UEFI and Pete Batard responsible for the 3GB RAM fix. The Windows 10 image file and RAM fix you’ll need to make this work are constantly changing as are their download locations so you’ll need to find them via the Windows on Raspberry Pi Discord Group, which is where all the developers hang out and share updates. We can’t vouch for the safety or legitimacy of any of the custom files the community has created for this project so proceed at your own risk.
At the time of writing this project runs surprisingly well (see below for more details) but has a lot of caveats. . The Raspberry Pi’s onboard Ethernet, Bluetooth and GPIO do not work so you’ll need a USB Ethernet or USB Wi-Fi dongle to get online (there’s no list of supported dongles so we can’t guarantee yours will work). Audio via HDMI is also not available but Bluetooth audio via a USB Bluetooth dongle is possible.
What you will need to install Windows 10 on a Raspberry Pi 4
- Raspberry Pi 4 4GB or 8GB
- 16GB or larger microSD card, (see best microSD cards for Raspberry Pi)
- Windows 10 PC
- USB to Ethernet or WiFi dongle
- Bluetooth dongle (if you want Bluetooth)
- Keyboard, mouse, HDMI and power for your Raspberry Pi
How to Install Windows 10 on the Raspberry Pi 4
1. Download the latest pre-release version of WoR tool https://www.worproject.ml/downloads and extract the files.
2. Visit the Windows on Raspberry Pi Discord server and go to the Downloads channel to Download the latest stable image, currently 0.2.1.
3. Open the WoR Alpha tool and select your language.
(Image credit: Tom’s Hardware)
4. Insert microSD card and select the drive. The Raspberry Pi 4 mode is currently experimental, but has worked reliably in our tests.
(Image credit: Tom’s Hardware)
5. Select your Windows on ARM image.
(Image credit: Tom’s Hardware)
6. Select the latest package of drivers from the server.
(Image credit: Tom’s Hardware)
7. Use the latest UEFI firmware available.
(Image credit: Tom’s Hardware)
8. Check the configuration and when happy click Next.
(Image credit: Tom’s Hardware)
9. Double check everything before clicking Install.
(Image credit: Tom’s Hardware)
The installation process can take as long as two hours to complete, depending on the speed of the microSD card.
10. Download the RAM fix for Rpi 4 file from the Windows On Raspberry Pi Discord server. Extract the contents.
11. Copy winpatch.exe to the root of C: drive.
12. Locate the drive containing the Windows 10 on ARM installation, make a note of the drive letter.
13. Open a Command Prompt as Administrator and go to the root of C: drive.
cd \
14. Patch the USB driver to enable USB ports on the Raspberry Pi 4. Change the drive letter to match your installation.
winpatch X:\Windows\System32\drivers\USBXHCI.SYS 910063E8370000EA 910063E8360000EA 3700010AD5033F9F 3600010AD5033F9F
15. Overclock the Raspberry Pi. This step is optional but highly recommended (though you’ll want a cooling fan). Edit the config.txt file found in BOOT drive. Add these two lines at the end of the file. Overclocking will require cooling for your Raspberry Pi.
over_voltage=6
arm_freq=2000
16. Eject the microSD card and insert it into the Raspberry Pi 4. Connect your keyboard, mouse etc and power on the Pi.
17. Follow the standard Windows 10 install process and after a short while you are ready to use Windows 10 on your Raspberry Pi 4.
18. As an administrator open a Command Prompt and run this command to enable 3GB of RAM. Press Enter to run the command.
bcdedit /deletevalue {default} truncatememory
19. Reboot the Raspberry Pi for the update to take effect.
(Image credit: Tom’s Hardware)
20. For network access, use a USB to Ethernet or a compatible WiFi dongle.
21. Install Microsoft Edge by double clicking on the Microsoft Edge desktop icon.
22. Installing software works in the same manner as a typical Windows 10 install. We tested GIMP Photo Editor and the Arduino IDE and both installed, albeit slowly and were usable for basic tasks.
Image 1 of 3
(Image credit: Tom’s Hardware)(Image credit: Tom’s Hardware)(Image credit: Tom’s Hardware)
How does Windows 10 on Raspberry Pi Perform?
In our testing, overall performance is akin to a low end Intel Celeron / Atom CPU. Windows 10 on Raspberry Pi is usable, but more as a proof-of-concept than a daily driver. . Boot times were considerably longer than Raspberry Pi OS, at a sluggish 2 minutes 12 seconds.
Once the desktop was loaded the overall feel of Windows 10 on Raspberry Pi was responsive. The Edge web browser provided a good browsing experience. Heavy sites such as YouTube proved troublesome but that was compounded by our sluggish 100 Mbps Ethernet USB dongle and is not indicative of the OS as a whole.
We installed three applications in WIndows 10 on Raspberry Pi: GIMP Photo Editor, Arduino IDE and Python 3. 8. We downloaded each program’s 32-bit installer and set it up without any issues. GIMP ran well and, while it would not be up to speed for a professional photo editor, it was quick enough for hobbyists to use.
The Arduino IDE was slow, mainly due to the way that the IDE uses Java behind the scenes. Again if you have a little patience, then the experience is good. Not every application can be installed, though. We tried Visual Studio Code and it flat out refused to install. But Python 3.8 was easily installed and ran well. The Python REPL (interactive shell) was available and the core modules were available for use. We installed an additional module, GPIO Zero, which is used to interact with the GPIO of the Raspberry Pi. Sadly, despite our best efforts, we were unable to use the GPI via Python 3.8 on Windows 10.
MORE: Windows 10 on Raspberry Pi: Hands-On
Get instant access to breaking news, in-depth reviews and helpful tips.
Contact me with news and offers from other Future brandsReceive email from us on behalf of our trusted partners or sponsors
Les Pounder is an associate editor at Tom’s Hardware. He is a creative technologist and for seven years has created projects to educate and inspire minds both young and old. He has worked with the Raspberry Pi Foundation to write and deliver their teacher training program «Picademy».
Trying to use Raspberry Pi 4 as a desktop. Part 2, Ubuntu / Habr
Hi Habr.
The first part looked at the possibility of using the Raspberry Pi 4 as a desktop with the native Raspbian operating system installed. But as you know, since recently Ubuntu v20.10 Groovy Gorilla has official support for Raspberry Pi 4, and as stated, Raspberry Pi is now «first-class citizen» for this version.
What came of it and how “first class” is true, details under the cut.
Installation: Ubuntu 20.04.1 LTS
The installation process is not much different from the standard Raspbian installation — you need to download the system image, upload it to the memory card and start the device. The images themselves can be downloaded from ubuntu.com/download/raspberry-pi:
it is this version that has the “RECOMMENDED” status, and install the missing components yourself. Download, boot, get into the standard Ubuntu console.
First you need to configure WiFi, for which we edit the 50-cloud-init.yaml file with the command sudo nano /etc/netplan/50-cloud-init.yaml . Add access point parameters to it:
 network:
    ethernets:
        eth0:
            dhcp4:true
            optional: true
    version: 2
    wifis:
        wlan0:
            optional: true
            access points:
                "MYWIFIPOINT":
                    password: "12345678"
            dhcp4: true
After the reboot, you can check for the presence of the network with ping 8.8.8.8 and if everything works you can install ubuntu-desktop. Run the commands sudo-apt-get update , sudo apt-get upgrade and finally sudo apt-get install ubuntu-desktop . The process takes about half an hour, after which you can reboot the system and get a full-fledged UI:
It was probably easier not to do all this and immediately download the finished version with the desktop. But so uninteresting.
First impressions
The very first impression is that the system is quite crude. For version 20.04.1, you can just open window after window and write bugs:
WiFi. WiFi itself works, but it is not shown in the system settings, WiFi Unavailable is displayed and the list of networks is empty.
In this case, ifconfig shows a normally working wlan0 adapter in the running status and the ip address.
— Display. The monitor resolution was determined incorrectly, I had to enter the HDMI parameters in the configuration file.
— Sound. By default, for some reason, the headphone output is active — there is no sound on the display speakers. You can switch the sound to HDMI in the settings, but after a reboot everything becomes as it was.
— Keyboard. For some reason, the layout switch button cannot be changed. A pop-up window appears, but it does not respond to button presses. As a result, you can switch between Ru / En layouts only with the Win + space key combination. But unlike Raspbian, there is a language icon in the tray, which pleases. On the other hand, there is another strange bug — after switching the layout, the first typed letter sometimes disappears.
— Built-in program manager looks quite nice:
But it was not possible to install any of the programs, the process “hangs” in the Pending status:
However, the good old apt-get from the console works fine.
Browser
Let’s return to the browser — there were main hopes for it, because. built-in Chromium is limited in functionality. Indeed, Google makes it possible to download Chrome for Ubuntu:
However, when I try to install the package, I get the error «package architecture (amd64) does not match system (arm64)». In general, it seems that there is no version of Chrome for ARM yet. So everything written in the first part is also relevant here, because. and under Ubuntu Chromium remains the default browser. And the “icing on the cake” — the web.basemark.com test showed a result of only 36.4 versus 64.8 for Chromium in Raspbian:
At this point, it was decided to stop the test of version 20.04. recommending that anyone install a version that not only has a lot of bugs, but is also twice as slow as the standard version of Raspbian, I have no desire.
Installation: Ubuntu Desktop 20.10
This version at the time of writing has the status of «latest development release with nine months of support, until July 2021», i.e. so far this is not the final release. But compared to what it was, it certainly will not be worse.
Indeed, the Ubuntu developers did a great job! The WiFi bug has been fixed, the application drawer now works correctly, the display resolution is determined correctly, and it also feels like the responsiveness of the system has increased noticeably. The background image has also changed, in general, everything looks quite stylish.
The result of the benchmark in Chromium has grown, but still does not reach the original Raspbian:
this is the same Chromium, everything written in the first part is also relevant here.
As suggested in the comments, the Firefox browser has better support for hardware acceleration. In practice, the answer was not so unambiguous. Youtube does indeed play noticeably smoother, but the benchmark showed only 44.3 in Firefox, i.e. even a little less. The conclusion is simple — Firefox only speeds up video, but everything else in it is no faster, on the contrary. In general, Raspberry Pi 4 is in principle somehow suitable for working with texts (this text is completely written on Raspberry Pi under Ubuntu), but in terms of the entertainment and media center, “raspberry” is not very good yet — it’s more like a struggle with the system than to enjoy using it. Youtube, to the credit of their creators, works fine in Firefox (with the h364ify plugin installed), and on other sites — as it will. Somewhere the video is not shown at all, somewhere it is shown only in low quality. But there is also a positive point: CPU usage when playing video in the browser has decreased slightly:
In Raspbian, it was stable at 95-100%. The temperature of the metal case, by the way, does not exceed 50C even during stress tests: . But in general, version 20.10 is much better than 20.04, so those who want to experiment on their own can be advised to start with it. Probably a lot of work has been done to improve the drivers, because. interface responsiveness, smoothness when dragging windows and other «little things» have improved significantly.
Conclusion
To be honest, the final opinion about Raspbian vs Ubuntu has not yet developed. Raspbian is more stable, but the latest version of Ubuntu looks much more attractive in terms of design, and the speed and smoothness of the interface in the latest version has noticeably increased.
As for the subjective opinion about using the Raspberry Pi as a desktop: there is potential for this, but so far the system is too raw. In principle, the device can be used to work with text (given, of course, that you should not expect the comfort and speed of a Core i7 from a $50 PC). For watching videos, the possibilities are more limited — Youtube works, when using Firefox with the h364ify plugin installed, we managed to achieve the best picture quality, but not on all other sites the video opens normally. Google Chrome for Ubuntu exists, but there is no version for ARM yet. Sites with paid content (tested on Amazon Prime) may require DRM support, which is not yet officially available (description of plugin installation using third-party scripts added to the first part). So the capabilities of the device in terms of «entertainment center» are somewhat limited. On the other hand, compactness, noiselessness and low power consumption are not bad. Also, Raspberry Pi 4 can be useful for learning to program and for learning Linux, and as a gift to a schoolboy or student for the New Year / Christmas (if, of course, he is passionate about computers and IT).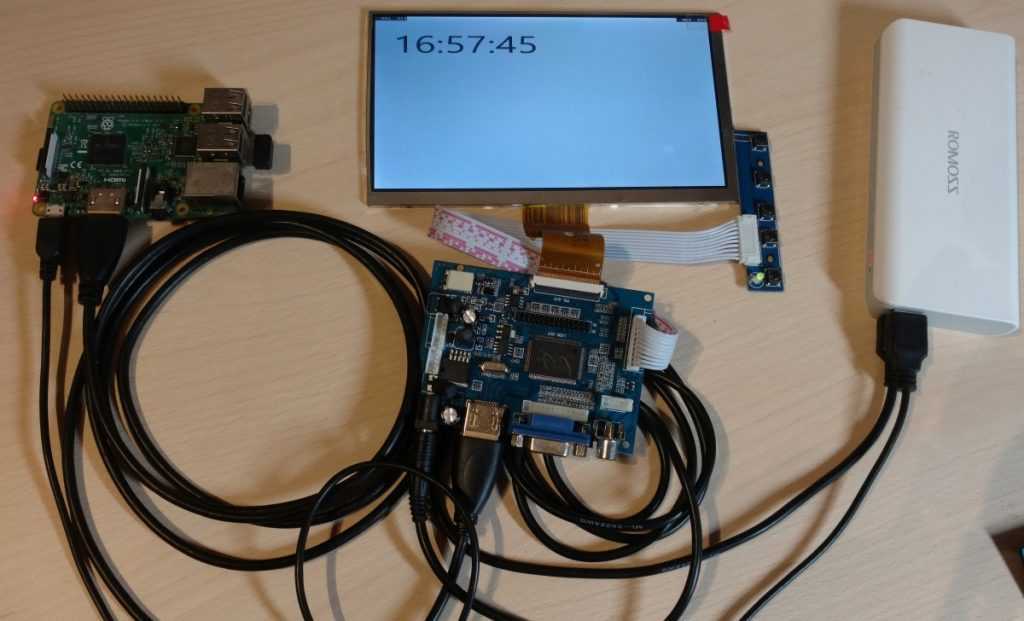
I’ve built a budget IRL streaming kit for Raspberry Pi. Part two — step by step setup of Raspberry — Personal experience on vc.ru
Thank you very much for your comments and interest in the previous post. This article is a continuation of my story about IRL streaming. The first part is here. Today I’ll tell you how to make a mobile router out of raspberries step by step from scratch.
3572
views
Starter pack budget hotspot
Many people were interested in the idea of creating an access point that will fit in a backpack or car glove box. It turned out that the information in the public domain is not enough and it is difficult for beginners to understand. I have hands-on setup experience and would love to share with you, but! I consider myself a novice Linux user, so my instructions are just my vision of setting up a Raspberry Pi 4 and for seasoned Linux users, it may seem incomplete (add chips in the comments if you know).
We need:
1) Rasbperry Pi 4, 4GB + SD card from 4GB with speed class 6 or higher.
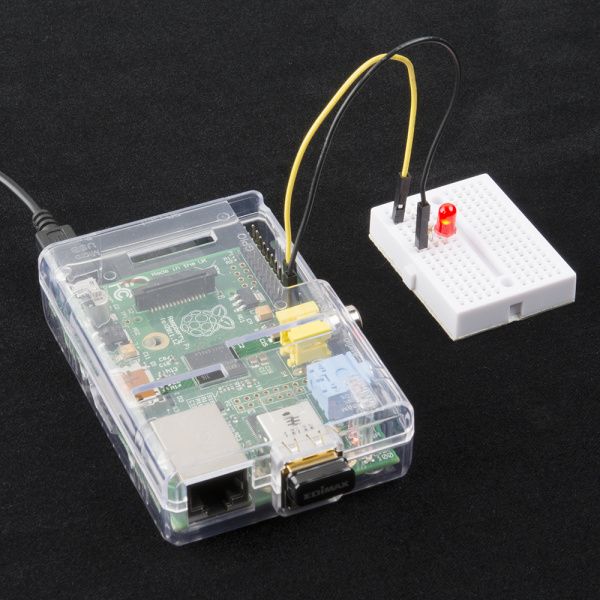
I have such a raspberry, but it will most likely work on RP3. As for the SD card for raspberries, I do not recommend taking non-nem cards, a slow card significantly reduces the speed of work and random errors may occur. Also, be sure to install the simplest cooler in the raspberry case!
2) Power supply or Power bank with output current 5V 3A.
We are going to connect modems to the raspberry, distribute wi-fi from it and also load the system. When the voltage drops, the USB ports will be disabled and the processor will start throttling. As a power source, I use Mi Power Bank Pro 3 20000 via type-c port. A top gadget, you can charge 1-2 more devices with it, but I could not completely discharge it in 4-5 hours.
3) USB modem whistles and/or smartphone with USB cable.
Select the sources for the future connection according to your task individually.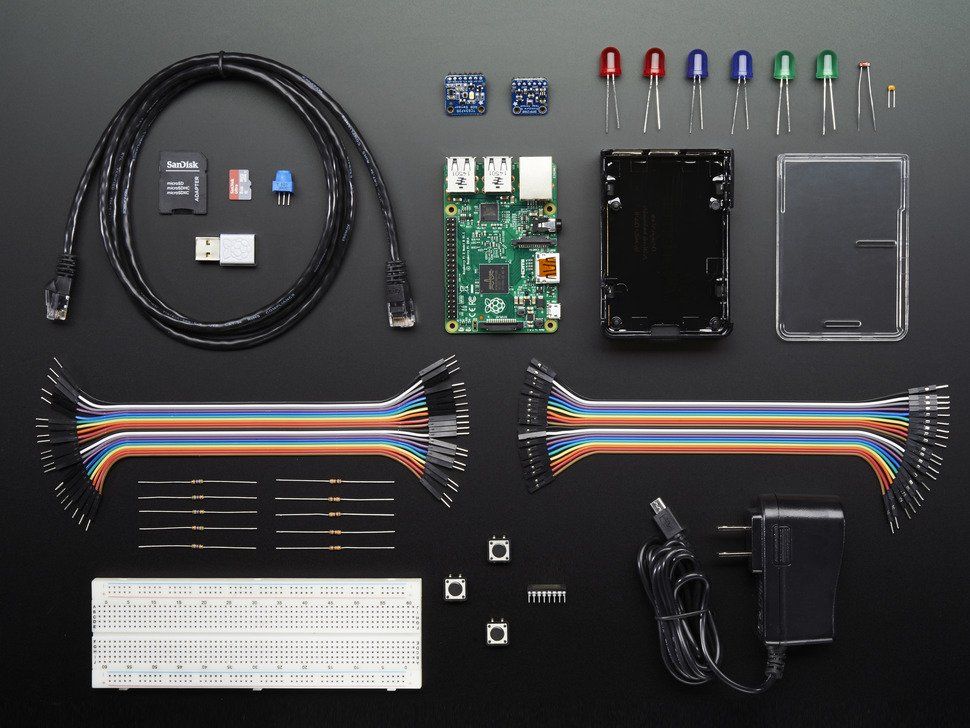 The huawei E3372H modems and its analogues work properly. The modem needs to be stitched under Hilink, it can be found on the Avito of your city. Also, any Android or Iphone in USB modem mode will do. I use a bunch of modem and phone with different operators. When using your phone, insert the SIM card of the fastest operator with 4G+ support into it.
4) Windows/Mac PC with card reader.
All instructions will be for Windows. I’m sure that on a poppy you can do the same, but I have a laptop on Windows.
So, we collected the equipment, stretched our fingers and set aside a couple of hours of great time in the company of gadgets, which we will soon make work for us!
Step 1. Create a bootable map for Raspberry Pi.
The easiest stage, warm-up. Everything is simple here and problems rarely arise. I recommend using the official Raspberry Pi Imager software. Install it and run it. Select Raspbian from the list of systems.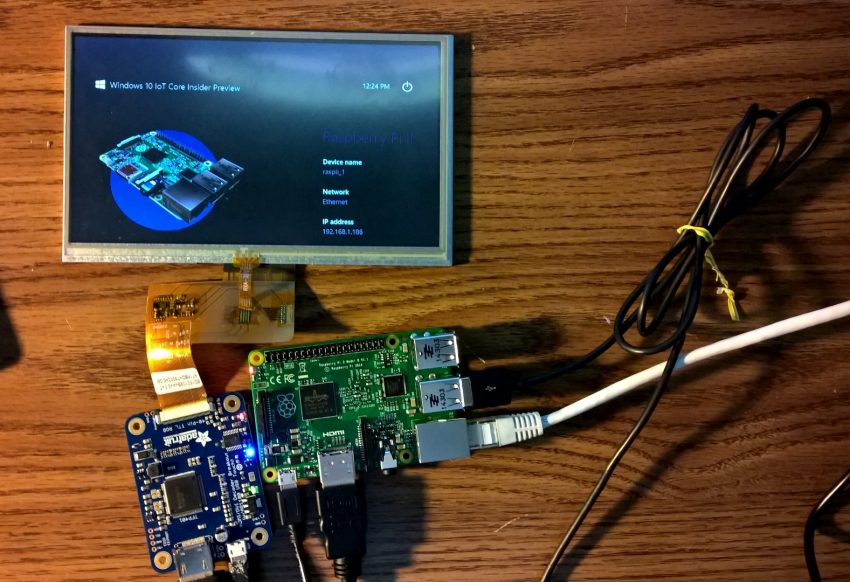 The image will download and install automatically. Watch the video how to do it:
For beginners, I recommend using the Raspberry Pi Imager. There are alternative options, for example, download the image separately and install using balenaEtcher or similar software. If the image is not written or read, then most likely the problem is in the memory card or card reader.
Installing and verifying the image takes up to half an hour. If the registration is successful, do not rush to remove the card. In the BOOT section that appears, you need to add a couple of files:
- Empty file ssh.txt
- wpa_supplicant.conf text file. Create and write in it the data of your wi-fi network, to which the raspberry will connect after downloading.
ctrl_interface=DIR=/var/run/wpa_supplicant GROUP=netdev
update_config=1
network={
ssid=»YOUR NETWORK SSID»
psk=»NETWORK PASSWORD»
key_mgmt=WPA-PSK
}
Congratulations! The card is ready to be installed in Raspberry Pi!
Stage 2.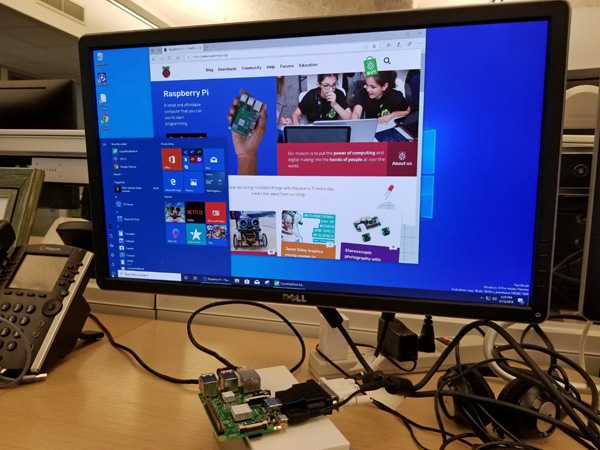 Connecting to the raspberry and initial setup.
Insert the card into the raspberry, connect the power and wait up to 10 minutes. If we did everything right in the first step, then the raspberry has already booted up and connected to your home network. I prefer a visual interface for work, so I want to immediately turn it on and click on the buttons in the shell to minimize the work with the command line.
1) Determine the IP address of the raspberry in your network and connect to it.
First you need to install Putty — a terminal for connecting to raspberries.
It looks like Putty
In the Host name field, it is usually suggested to enter [email protected], however, this works for me every other time. If you are unable to connect, then you need to find out the IP address of the raspberry on your network. To do this, I went into the interface of my router and spied on the IP address of the raspberry, you can also use IP scanners, an example is below.
photo from Amperka.ru, good guide
After a successful connection, we see a login and password entry window.
Default login is pi and password is raspberry . Note that the password you enter is not displayed.
Hooray, we are connected and can control the raspberries through the console!
Next command sudo raspi-config open the main settings and enable VNC in section Interfacing Options
Also go to Network Options and enable Use Predictable Network Names YES for further work with Speedify.
Exit the settings and restart the raspberry. We put a VNC client on the PC and create a connection in it with the same IP address, login and password as in Putty.
Hooray! Now we have a desktop and the ability to manage raspberries using a familiar interface. Go through the initial setup, install the country and system language (example here). I also recommend installing a VNC client on your phone in order to be able to manage a single-payer on the go.
Step 3: Install Speedify VPN and get ready to launch.
To get started, register and pay for a monthly (yearly) plan on the Speedify website. For PC and mobile phones there is a free trial for 2GB of traffic, but such a bun is not provided for raspberries, which is a pity. The subscription costs about $14 per month, you can turn it off at any time through technical support. Your username and password will be useful to us later.
To install Speedyfy on raspberries, copy this command to the terminal (terminal icon on the top right) and press Enter:
wget -qO- https://get.speedify.com | sudo -E bash —
Once installed, the Speedify application will appear in the Internet section. I’ll make a reservation right away that I periodically had problems with installing applications on Linux: sometimes errors, then it is not installed immediately, then it does not start.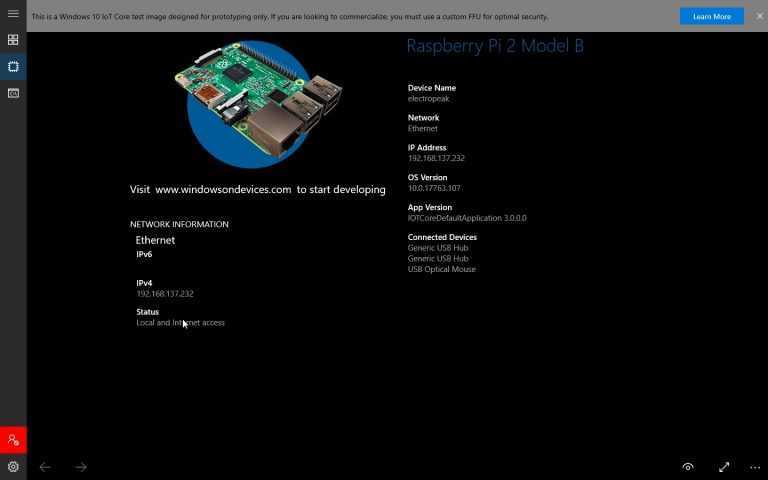 I personally do not know how to get around this and therefore asked questions in profile chats on raspberries, for example, here. Special thanks to the responsive people from the chat who helped out the newbie and gave the correct command options. Don’t be shy too! Alternative installation options on the Speedify website.
To use the iPhone as a source, install the driver on the raspberry with the command:
sudo apt install usbmuxd
Also, for stability, I recommend increasing the current on the USB ports of our raspberry so that it pulls several devices at once. Command:
sudo nano /boot/config.txt opens the configuration file
Add the line to the end of the file:
max_usb_current=1
Save the file CTRL+O and then reload the raspberry .
Stage 4. Final! Setting up an access point and bonding.
Let me remind you what the task is before us. We want the raspberry to distribute the Internet via Wi-Fi, which consists of two or more modem and / or phone connections.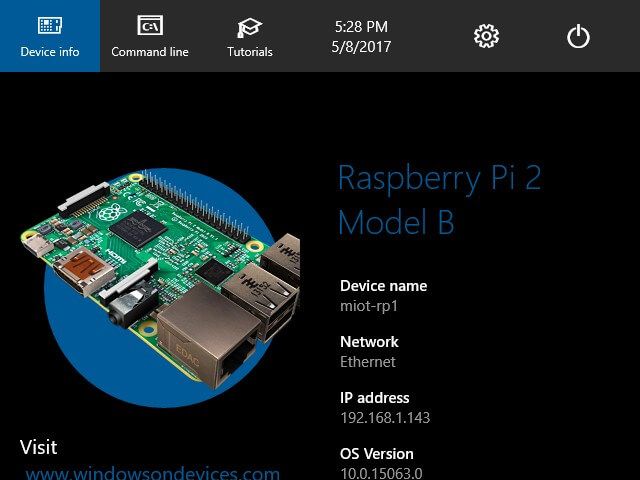 There are other options, for example, to distribute the Internet using an Ethernet cable using Wi-Fi + USB modems. The setting will be similar, just replace the distribution interface with the one you need. The main guide in English is here, for a detailed dive and troubleshooting, use it.
Let’s get started. You need to edit the Speedify settings file for yourself. Command:
sudo nano /etc/speedify/speedify.conf
WIFI_interface=»wlan0″
WIFI_SSID=»Create a name for your point»
WIFI_password=»Create a network password of at least 8 characters»
WIFI_MODE=»5″
If you need a 5 GHz network, then leave «5». By default, a 2.4 GHz point is created. The 2.4 GHz network hits farther than 5 GHz has a smaller radius, but 5 GHz has a larger margin in speed, it will be noticeable from 100 Mb / s and higher, but not all devices support it.
WIFI_channel=»1″ (Wi-Fi channel, if needed. 1st by default) raspberry Wi-fi region, otherwise it will not work)
Okay, substitute your values and save the file CTRL+O and then CTRL+X to exit.
Open the console again and turn on Wi-Fi sharing with the command:
sudo service speedify-sharing restart
You need to wait a few minutes after the first start and the network will appear in the wi-fi list for other devices. But now she’s offline! It remains quite a bit to connect the devices.
This is what Speedify looks like, waiting for a device to connect to share the Internet.
Finally open Speedify and log in with your username and password. I see no reason to change anything in the program settings. You can enable autorun and select a server, but I left everything on auto.
Time to connect our devices. For example, I will show the display of the modem and phone in the interface:
All icons are grey, because the phone and modem are connected without internet.
You can set up a primary connection and an additional one. Choose the fastest as the main one. You can test the speed inside the application to measure and select the optimal bundle.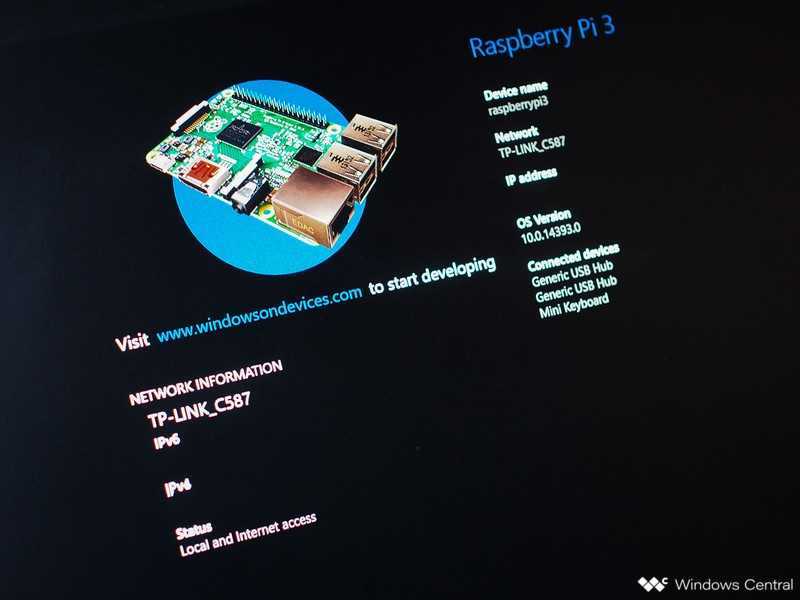 I will give an example according to my measurements:
One USB modem 75% 4G signal gives about 7-8 Mb / s
One Smartphone with 4G + 75% signal gives 25-50 Mb / s
Get more than 5 Mb / s with a 3G signal it didn’t work for me
To get the desired channel speed, set the number of devices you need. However, to install three or more modems, a separately powered USB hub may be required. It makes no sense to use less than two sources, because the redundancy will not work. Also, always use different carriers on your devices to stay connected in different locations.
By the way, the smartphone will not sit down with such a connection, since the raspberry will recharge it.
Hooray, the end!
Congratulations! We managed to independently create and configure an access point with bonding and channel reservation! Now you can use it and enjoy stable Internet on the road. Next time I will tell you what software I used to stream and transfer video using this setup.