How to Turn Off Notifications on Windows 10
Notifications are a great way to keep updated with what’s happening in the world. However, there’s a time and place for everything — sometimes, you want things to be quiet and undisruptive. To do this, you can turn off notifications on Windows 10 and enjoy some peace.
TL; DR:
Turn off notifications in Windows during certain times
- Select Start > Settings > System > Notifications .
- To turn on Do not disturb, select On.
- You can also turn on do not disturb automatically.
- When do not disturb is on, the notification center icon will change and hide any incoming notifications
Table of Contents
- Method 1. How to disable all notifications on Windows 10
- Method 2. How to disable individual app notifications on Windows 10
- Method 3. Temporarily mute notifications on Windows 10
Disable/Turn Off/Mute Notifications on Windows 10
There are multiple ways to turn off notifications on Windows 10 entirely, or on a per-app basis. In this article, we’ll be showing you all the required steps with detailed instructions.
Tip: If you found our article helpful, make sure to come back to us and explore what our Help Center has to offer!
Method 1. How to disable all notifications on Windows 10
This method completely disables all forms of Windows 10 notifications until you turn them back on. It’s used by people who wish to entirely stop receiving notifications from applications and other senders.
- Click on the Start menu in your taskbar. This icon has the Windows 10 logo on it. If you’re not familiar with the Windows 10 interface, we recommend reading the How to Get Started with Windows 10 article on our website.
- Select the Settings icon, indicated by a gear. Alternatively, you can use the Windows + I keyboard shortcut to reach this application quicker.
- Click on the System tile.
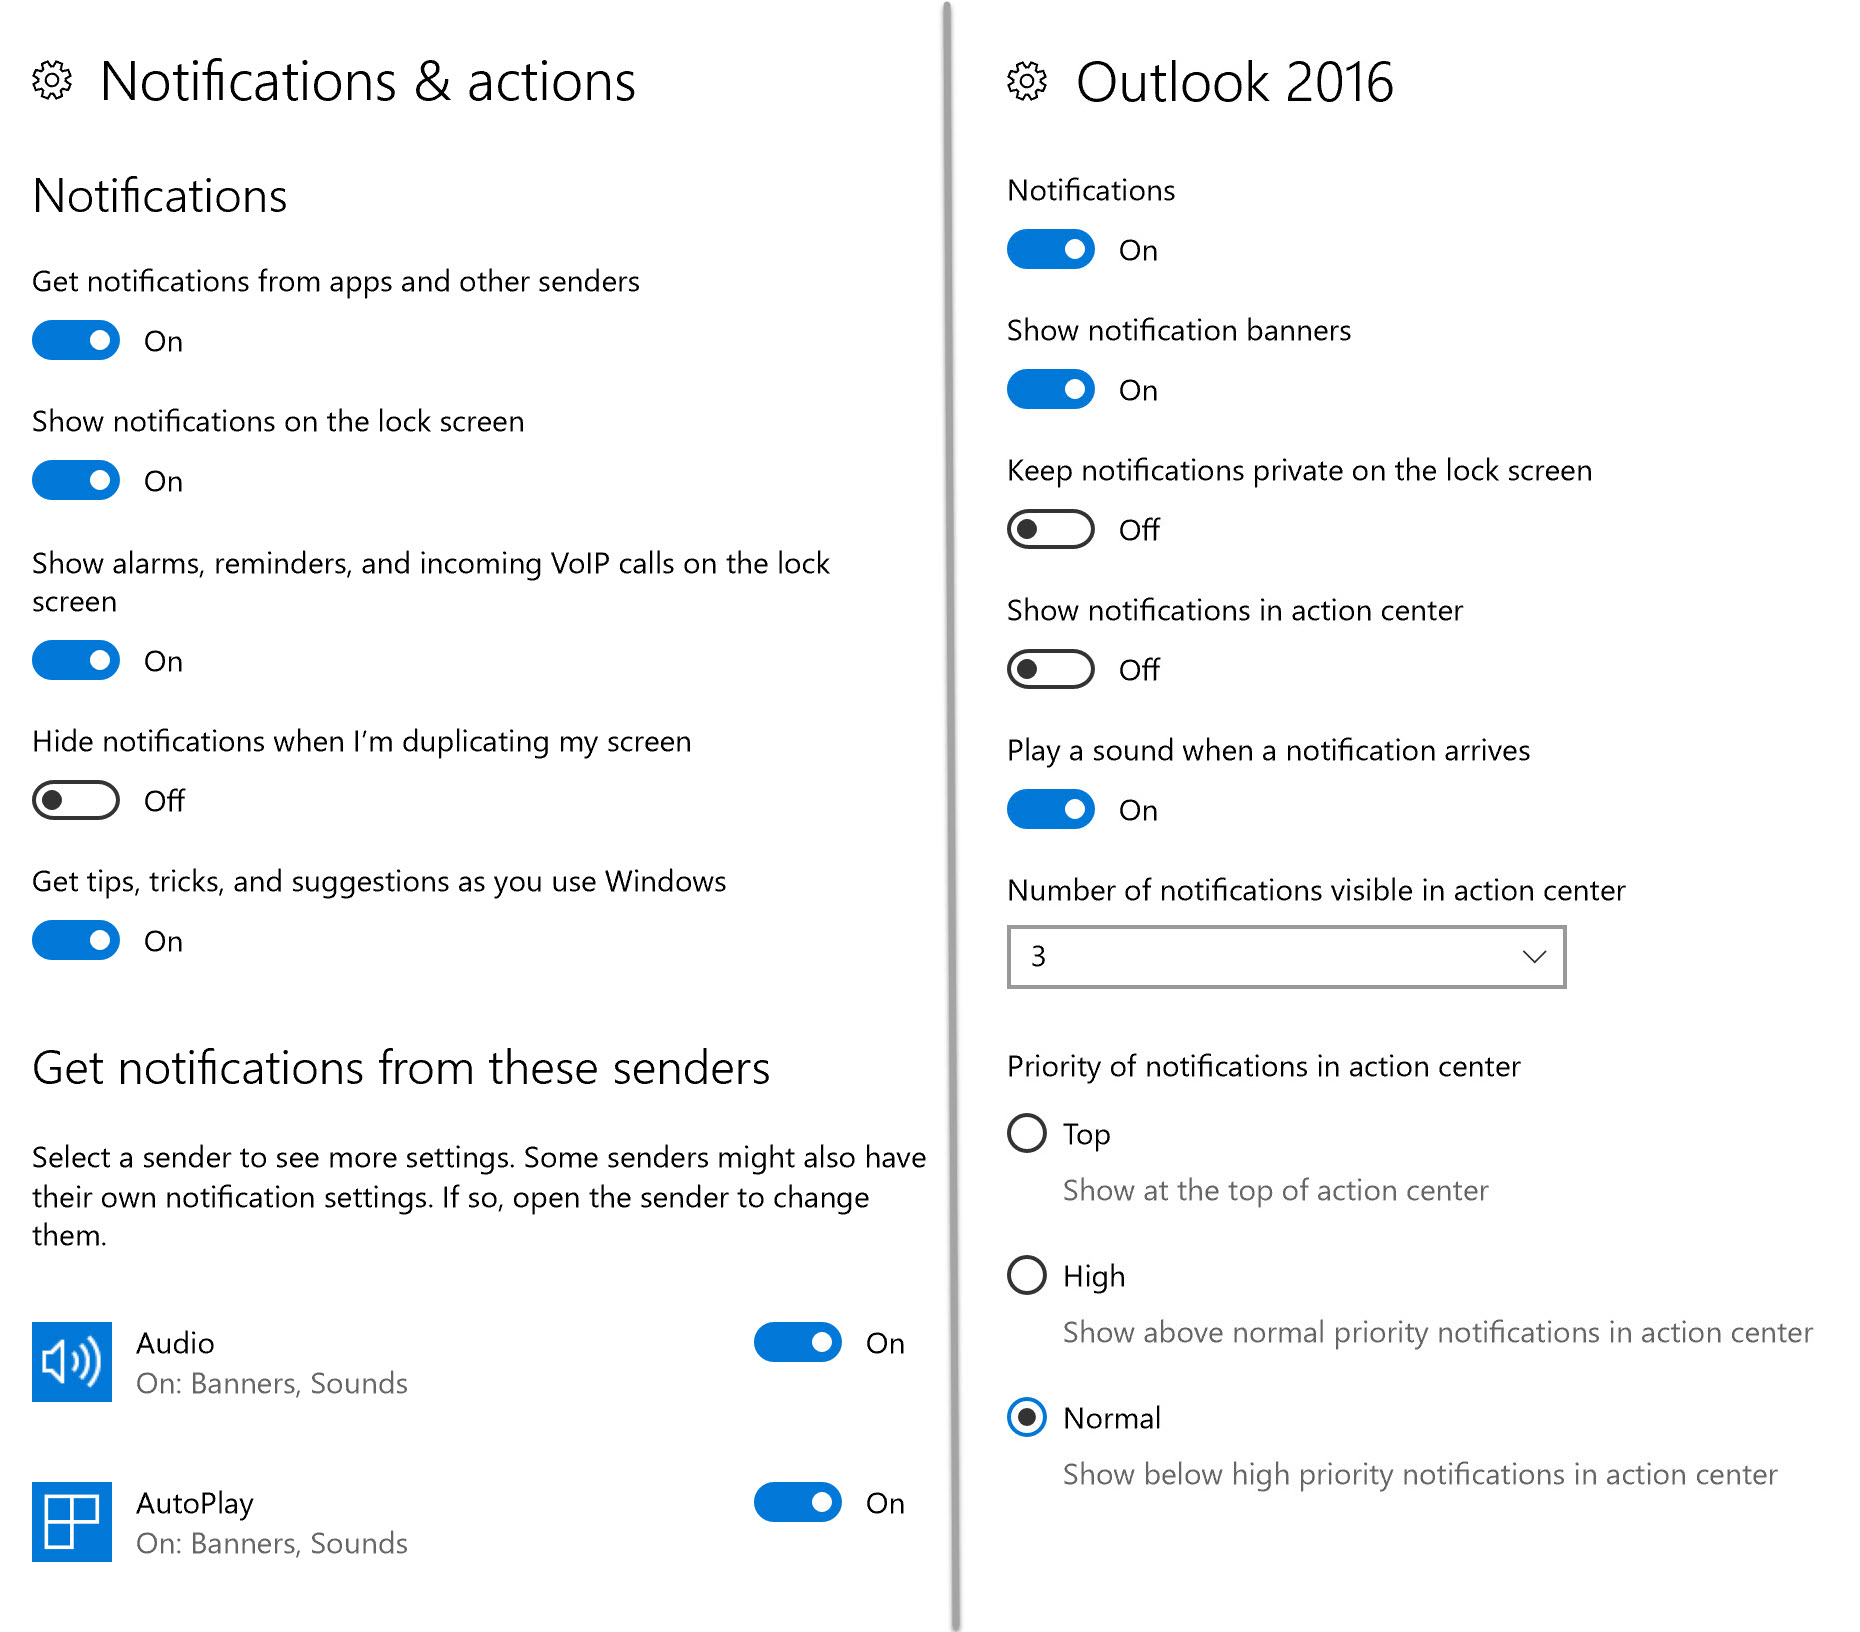
- Switch to the Notifications & actions tab on the left side of the panel.
- To disable your Windows 10 notifications, set the “Get notifications from apps and other senders” toggle off. After this, you shouldn’t see any more notifications from applications and other senders.
- If you wish to turn your notifications back on, simply click on the toggle again and ensure it’s set to on. You’ll start receiving notifications again.
Method 2. How to disable individual app notifications on Windows 10
If you want to stop receiving notifications from a specific application, you can use the method below to disable its ability to notify you. Following this method won’t stop all notifications entirely, and instead allows you to pick and choose what sources you want to get them from.
Please note that this method only works for apps and senders that use the traditional Windows 10 notification function. Apps with custom notifications will not be affected — for these, you need to open the software and find the individual notification settings.
- Click on the Start menu in your taskbar.
- Select the Settings icon, indicated by a gear. Alternatively, you can use the Windows + I keyboard shortcut to reach this application quicker.
- Click on the System tile.
- Switch to the Notifications & actions tab on the left side of the panel.
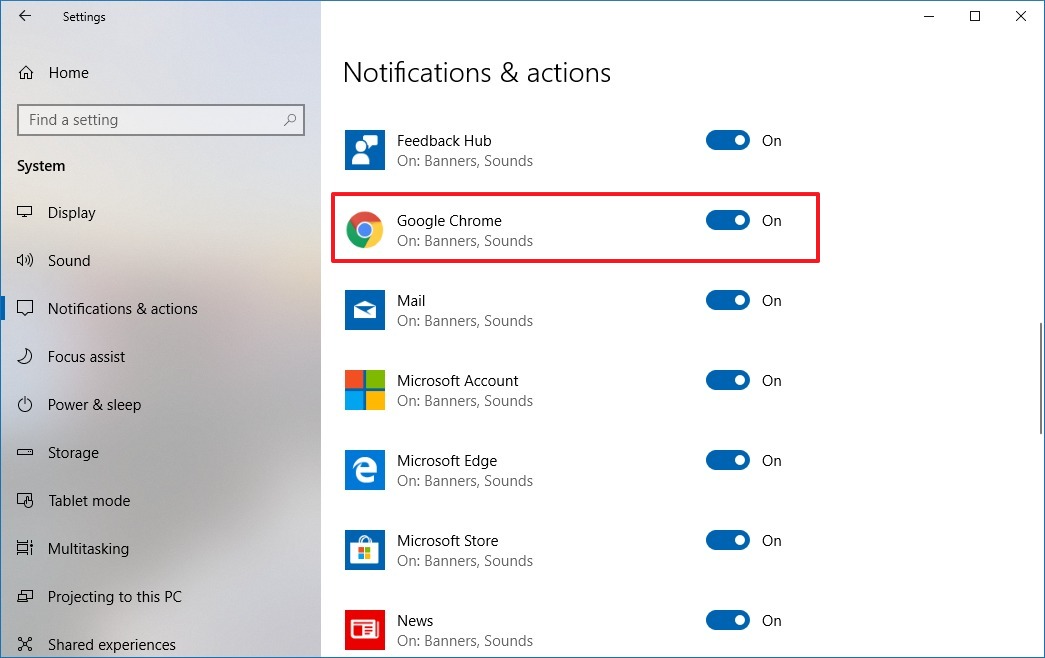
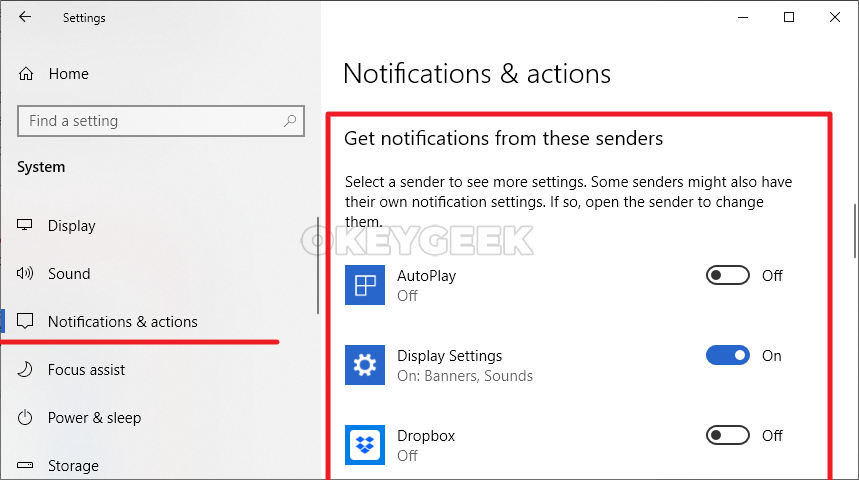
- Scroll down until you reach the “Get notifications from these senders” section. Here, you should see a list of applications and other sources that send you notifications.
- Toggle an application’s switch to Off in order to stop receiving its notifications. You can set as many apps on silent as you wish, there’s currently no limit to this.
Method 3. Temporarily mute notifications on Windows 10
Need a temporary break? The steps below guide you to mute notifications for a set amount of time using the Quiet Hours feature, after which you continue receiving them.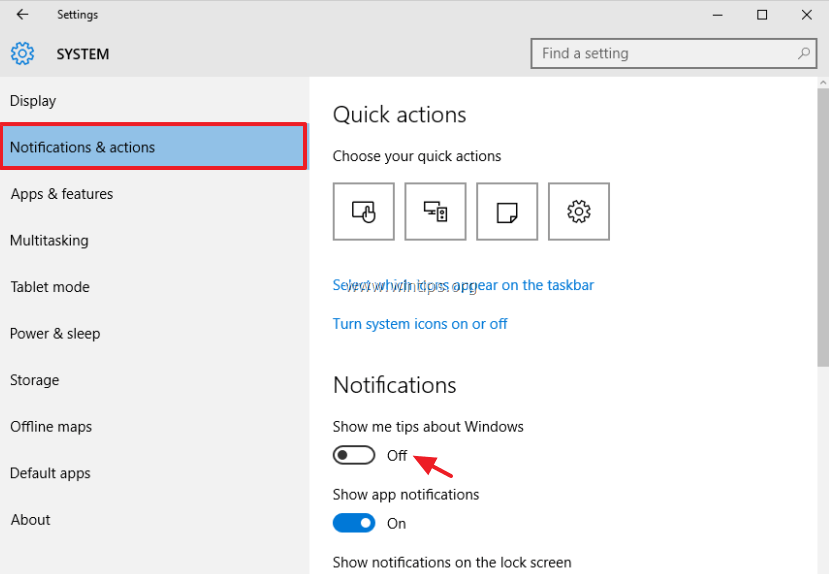 This allows you to take a break from being bombarded with pings and distractions but doesn’t require you to manually go back and restore notifications.
- To activate Quiet Hours (also known as Focus Assist or Do Not Disturb), click on the Action Center icon near the bottom right corner of your taskbar. Alternatively, press the Windows + A shortcut.
- Click on the Quiet Hours (or Focus Assist) tile to toggle it on or off.
- Don’t see this tile? Click on the “Expand” link at the bottom of the Action Center to reveal additional options.
- Click on the Start menu in your taskbar.
- Select the Settings icon, indicated by a gear. Alternatively, you can use the Windows + I keyboard shortcut to reach this application quicker.

- Click on the System tile.
- Switch to the Focus Assist tab and customize your experience. You can always come back here and adjust the time frame to work for your relevant activities.
Final thoughts
If you need any further help, don’t be afraid to reach out to our customer service team, available 24/7 to assist you. Return to us for more informative articles all related to productivity and modern-day technology!
Would you like to receive promotions, deals, and discounts to get our products for the best price? Don’t forget to subscribe to our newsletter by entering your email address below! Receive the latest technology news in your inbox and be the first to read our tips to become more productive.
Read Also
> What are the Windows 10 N and KN Editions?
> How to Set Up Security in Windows 10
> New: Microsoft Releases a Windows File Recovery Tool
How to Turn Off Notifications in Windows 10 in 2 Ways
How to Turn Off Notifications in Windows 10 in 2 Ways
Jump to
- Main content
- Search
- Account
ReviewsThe word Reviews
Account iconAn icon in the shape of a person’s head and shoulders.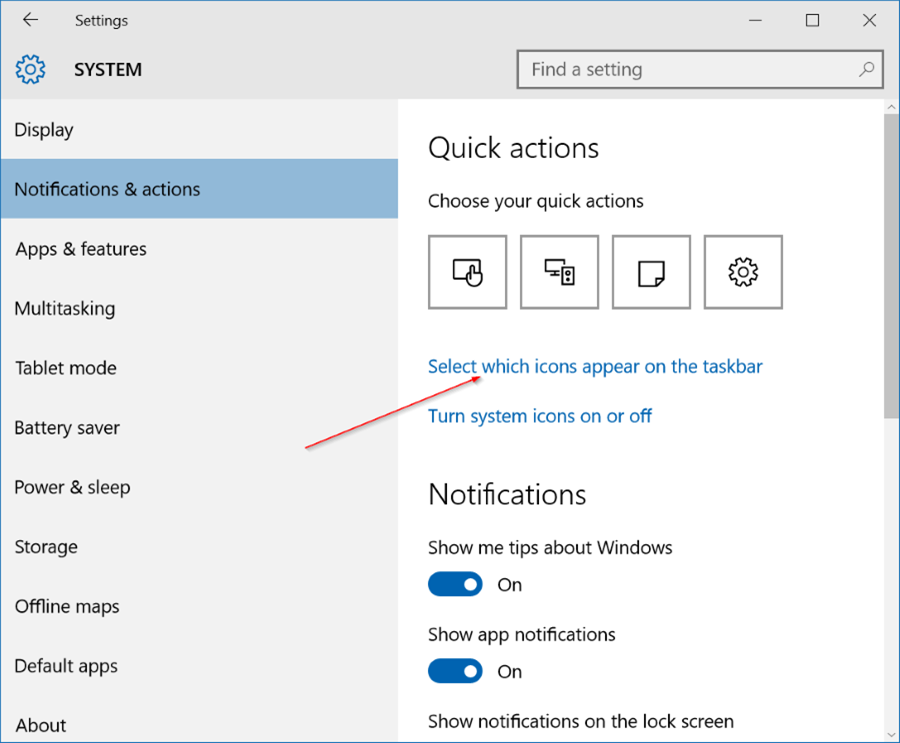 It often indicates a user profile.
Account iconAn icon in the shape of a person’s head and shoulders. It often indicates a user profile.
Back to Top
A white circle with a black border surrounding a chevron pointing up. It
indicates ‘click here to go back to the top of the page.’
Reviews
Tech
Written by
Ross James
2019-12-27T21:09:00Z
Save Article IconA bookmarkShare iconAn curved arrow pointing right.
Read in app
You can turn off notifications in Windows 10 in two ways.
Hollis Johnson/Business Insider
- To turn off notifications on a Windows 10 computer, you’ll need to open your system’s «Notifications and actions settings» menu.
- You can turn off all notifications at once, or choose to mute notifications only for specific programs.
- To reach the menu where you can turn off all of your notifications, you just have to use Windows’ Start menu.
- Visit Business Insider’s homepage for more stories.
If you’ve been using Windows 10 for long enough, you’re probably used to being swarmed by notifications. It seems like every program has something to tell you.
And perhaps you’d like to avoid seeing another notification about plugging or unplugging a USB.
Luckily, salvation from one of Windows’ consistent annoyances is at hand.
Here’s how to turn off notifications in Windows 10 — either from all your applications at once, or only from certain programs.
Check out the products mentioned in this article:
Windows 10 (From $139.99 at Best Buy)
Lenovo IdeaPad 130 (From $299.99 at Best Buy)
How to turn off notifications on Windows 10
1. Open the Start menu by pressing the Windows key, or by clicking the Windows icon at the bottom-left of the screen.
2. Search «Notifications» and select «Notifications and actions settings» in the search results.
Select «Notifications and actions settings» from the Start menu.
Ross James/Business Insider
3. A new menu will open. Near the top of this menu, there should be a toggle switch labeled, «Get notifications from apps and other senders.» Switch it to «Off.» This will turn off all notifications.
4. Two checkboxes remain: «Show me the Windows welcome experience…» and «Get tips and tricks…» These are like tutorials — if you’re already familiar with how Windows 10 works, it’s recommended that you uncheck these boxes as well.
Set the first switch to «Off» to disable all notifications.
Ross James/Business Insider
5. Alternatively, if you scroll down, you can turn off notifications on an individual application-by-application basis. If you turned all your notifications off already, these switches will be greyed out.
If it’s just a select few applications annoying you, you can turn them off one-by-one.
Ross James/Business Insider
-
How to convert a JPG file to a PDF on a Windows 10 computer using the default Photos app
-
How to search in Windows 10 to find a file, folder, or program faster, using 2 different methods
-
How to clear cookies on your Windows 10 computer in 3 different browsers
-
How to create a shortcut in Windows 10 to open any program, file, or folder faster
-
How to change your default web browser on Windows 10, where you can install and switch between different browsers
Ross James
Ross James is a freelance writer for Business Insider.
Read moreRead less
Insider Inc. receives a commission when you buy through our links.
Tech How To
Windows 10
Notifications
More…
How to turn off Windows 10 notifications
The operating system notifies the user about events that occur: an OS update is out, a new wireless network is detected, and so on. Some people find these notifications annoying. The question arises — how to turn off the notification system? We will tell you more in this article.
Why alerts are needed
The Windows operating system displays alerts in the lower right corner of the monitor, next to the clock. This area is called the «Notification area» or «system tray».
Notification area
Notifications try to keep the user informed about what is happening in the operating system.
For example, when a flash drive is connected, a notification about a new device and operation options that are available for the media will appear in the system tray.
Notifications are also sent by programs that have access to the Windows Action Center. For example, the GreenShot utility (performs screenshots and basic operations with an image) sends a message about the operation after saving the screenshot.
How to turn off the notification system
Most users ignore the text by closing the notification with the mouse. Here are specific examples of how to turn off Windows notifications.
Through the «Control Panel»
The easiest way is to go to the «Control Panel». Right-click on the «Start» button, then go to «Settings».
Section «Parameters»
Select the item «System».
Item «System»
Switch to the tab, which is highlighted in red in the screenshot.
Subsection «Notifications and actions»
Go to the «Notifications» option.
Item «Notification»
By default, the slider is moved to the right side, which means «Enabled». Let’s move it to the left. The lower three options will also be automatically disabled.
Notifications are deactivated
If you want to disable notifications of only a specific application, then go to the end of the page where the settings for applications are located.
Program notifications
Do not disturb mode
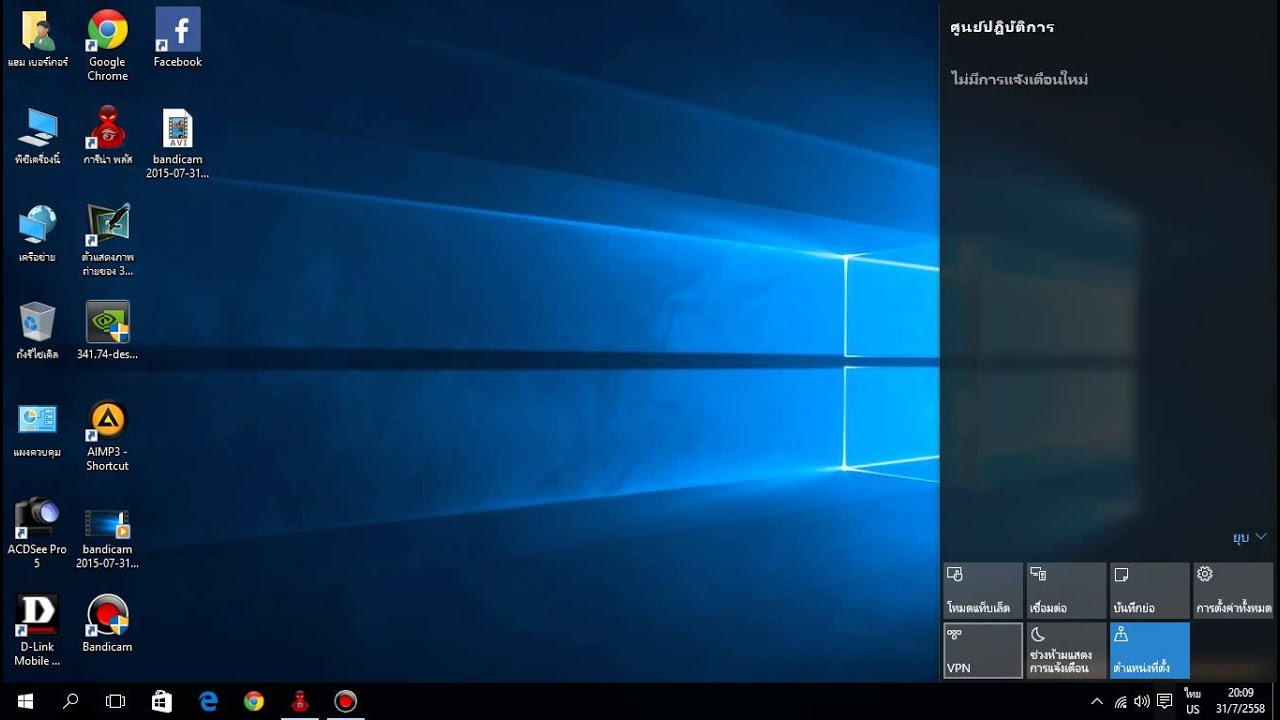
The second option will take 2 minutes. Move the manipulator pointer to the lower right icon and press the right button.
Enable mode
The context menu will open, select Do Not Disturb. The OS will no longer send notifications.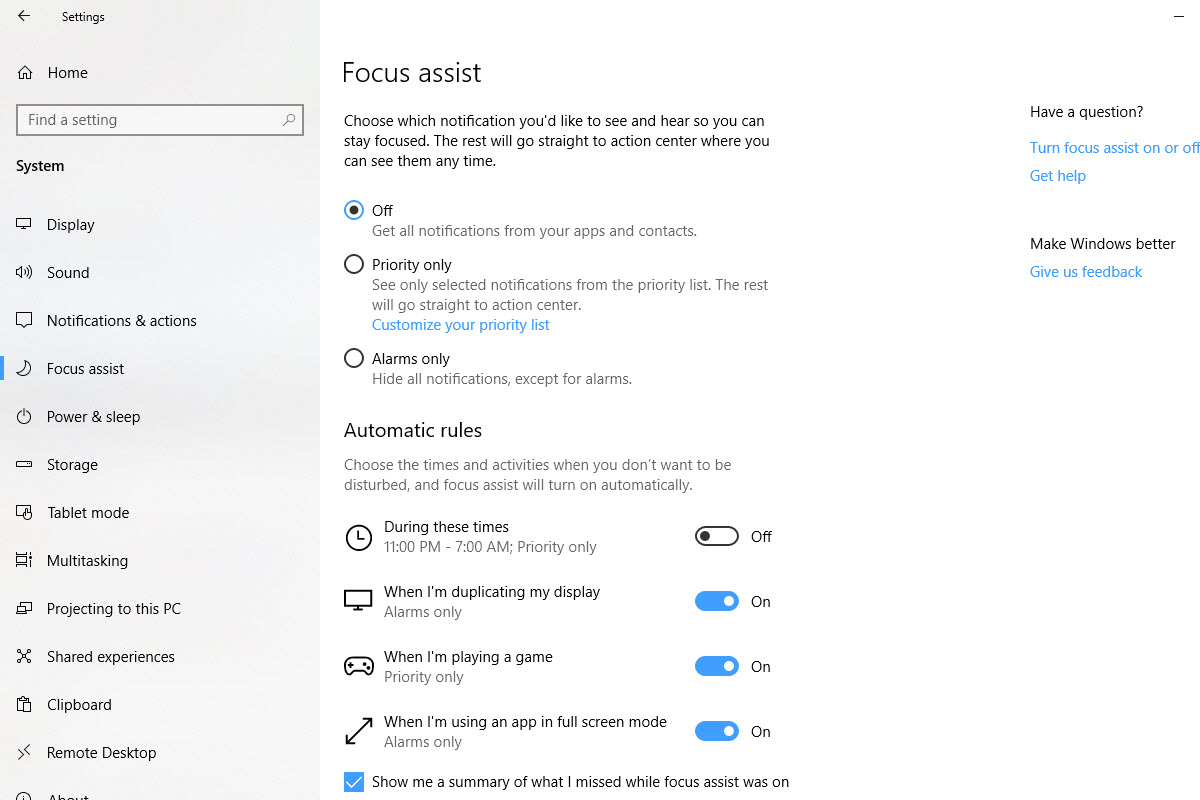
An alternative way to activate the mode is to press the left mouse button on the tile. On the right side, a vertical menu with options pops up.
Activation of the mode by an alternative method
Select the item as shown in red on the screenshot. We close the panel.
Via the Windows Registry
The third option assumes that the user knows how to work with the operating system registry.
Press the key combination Win + R, enter the command regedit.
regedit command
Important! To perform operations, the user must have local administrator rights.
A new work area opens. Crossing op paths:
HKEY_CURRENT_USER — Software — Microsoft — Windows — CurrentVersion — PushNotifications.
Go to the right side of the branch, select the ToastEnabled key.
Branch ToastEnabled
Activate the left button twice, open properties. In the «Value» field, enter the number «0».
Key properties
Click OK, close the registry and restart the computer.
Via Group Policy
Another way to disable notifications is to configure a policy on the workstation. Press Win + R, enter gredit.msc.
Call Group Policy
A new workspace will open. We go along the path:
«User Configuration» — «Administrative Templates» — «Start Menu and Taskbar» — «Notifications».
Select the item marked in red in the screenshot.
Option «Disable pop-up notifications»
Activate the option by double-clicking the mouse. Change the status to «Enabled».
Notifications disabled
Click OK, close the Group Policy Editor and restart your computer.
Mute notification sounds
Some users need notifications, but the sound of incoming messages is annoying. Let’s see how to turn it off.
Open the context menu of the desktop: right-click on an empty area. Select the option as shown in the screenshot below.
«Personalization» item
Go to the «Themes» tab, «Sounds» option
«Sounds» section
A new working window will open. Switch to the «Notifications» item in the list of sounds.
Find a sound notification
At the bottom of the menu is the Sounds item. Activate it by the arrow next to it, select «No».
Turn off the sound
Click OK, close the settings.
An alternative is to change the sound scheme. In the same menu, select the item, as in the screenshot below.
Select «Sound scheme»
Switch to «Silent» mode. Now notifications come without sound, but other user actions will no longer be accompanied by sounds.
What is the «Notification Center»
The «tenth version» of Windows has been supplemented with the «Notification Center» function. It is designed to store and later view alerts. Its working principle is as follows.
The user is notified but does not pay attention. After 5 seconds, it automatically moves to the Center. In the future, the PC owner views messages that he has not read before.
The function can also be disabled using two methods. Let’s consider both.
Registry Editor
Press the Win + R combination, then enter the regedit command.
Launching the utility
The Registry Editor will open. Go to the next section:
HKEY_CURRENT_USER — Software — Policies — Microsoft — Windows — Explorer
«Explorer» branch
If the section does not exist, then create it. Right-click on the previous branch, select the option «Create» — «Section».
Create a new branch
Set the name — the name of the Explorer. The next step is to create a key in a new branch. Right-click on the right field, select «DWORD».
Creating a new key
Name the newly created entry DisableNotificationCenter. Activate it by double-clicking the left mouse button. The properties of the entry will open.
Key settings
Set the «Value» — the number «1». We press OK.
Close the registry editor and restart the workstation.
Important! If it is necessary to restore the functionality of the «Notification Center», we go along the same path and change «1» to «0».
Group Policy Editor
The second option is the Group Policy Editor. Open it as indicated in the «Group Policies» section. Go to the section «User Configuration» — «Administrative Templates» — «Start Menu and Taskbar». We find the item marked in the screenshot in blue.
Option responsible for «Notification Center»
Activate it through the left button of the manipulator.
Disable «Center».
Set the parameter to the «Enabled» state. Click OK, and then restart your computer.
Conclusion
The publication talked about Windows OS alerts and how to turn off messages if they interfere. Also considered is the «Notification Center», which stores all messages.
Post Views: 2,789
How to disable annoying notifications in Windows 10
Windows
March 20, 2018
Do this for all apps, or select only the most annoying ones.
Turn off all notifications
- Press Win + i to open Windows Settings.
- Go to System tab → Notifications & Actions.
- Scroll down, find the option «Receive notifications from apps and other senders» and turn it off.
You will no longer be bothered by messages from pre-installed Windows apps, programs downloaded from the Microsoft Store, or other sources.
Keep important notifications only
- Press Win + i to open Windows Settings.
- Go to the «System» tab → «Notifications and actions».
- Scroll down to the «Get notifications from these senders» list and turn off unnecessary applications.
Turn off notifications temporarily
If you need some quiet time, you can turn off notifications for a while.
- Open the notification panel using the Win + A combination or click on the icon in the lower right corner.
- Select Do Not Disturb.
While this mode is active, all messages are stored in the Notification Center so that you can return to them later.
Turn off advertisements
The first thing that comes to mind is a pop-up message that suggests trying Microsoft Edge. To get rid of it forever, you need to do the following.
- Press Win + i to open Windows Settings.
- Go to the «System» tab → «Notifications and actions».
- Scroll down a bit and turn off the «Get tips, tricks and tricks while using Windows» option.
Turn off lock screen notifications
Windows 10 allows apps to show information on the lock screen. You can view tasks on your calendar or check your mail without having to unlock your computer. Quite a convenient option that can always be disabled if necessary.
- Press Win + i to open Windows Settings → Personalization.
- Go to the Lock Screen tab.