Switch from IDE to AHCI after installing Windows 7 or Windows 8
Advertisement
RECOMMENDED: Click here to fix Windows issues and optimize system performance
Advanced Host Controller Interface (AHCI) is a technical standard defined by Intel that specifies the operation of Serial ATA (SATA) disk controllers. When it is supported by your operating system and PC hardware, you will get the benefits of features such as native command queuing and hot swapping. For an older OS like Windows XP which does not support AHCI mode out of the box, without OEM-supplied drivers, it is possible to turn on the legacy (IDE) mode in the BIOS to get it to install properly. If your installed your Windows 7 or Windows 8 accidentally in the legacy IDE mode, and want to switch to the AHCI mode, Windows will not boot after you switch from IDE to AHCI in the BIOS. Here is how to fix it.
Advertisement
First switch SATA to the legacy/IDE mode. Please refer to your motherboard manual to learn the exact location of the SATA options in your BIOS.
In Windows 7
In Windows 8 and Windows 8.1
Option one
Option two
In Windows 7
- Open the Registry editor.
- Navigate to the following key
HKEY_LOCAL_MACHINE\SYSTEM\CurrentControlSet\services\msahci
Tip: How to jump to the desired registry key with one click.
- Change the Start DWORD value from 3 to 0 as shown in the picture below.
- Reboot your PC and set the SATA mode to AHCI.
You are done. Now Windows 7 will boot successfully.
In Windows 8 and Windows 8.1
Option one
- Power down or restart the computer and enter the system BIOS.
- Change the ATA Drive setting back to ATA Mode, press enter to accept the change and restart the computer.
- Click Yes to the Warning about the detected mode change on the embedded ATA controller.
- The system will boot normally to the Start screen.
NOTE: Be sure you know the Local Admin account and password and are able to boot successfully before proceeding.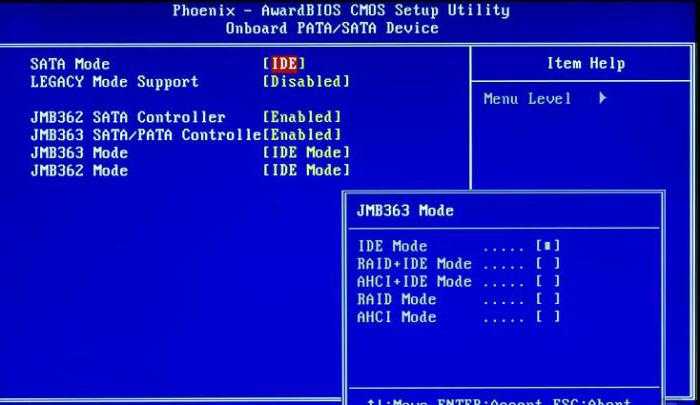
- Open an elevated command prompt and run the following command to enable Safe Mode boot:
bcdedit /set {current} safeboot minimal - Restart the computer and boot to the system BIOS.
- Change the ATA Drive setting from ATA/IDE Mode to AHCI Mode, press enter to accept the change.
- Click Yes to the Warning about the detected mode change on the embedded ATA controller.
- The system will boot normally to the Start screen in Safe Mode.
- Open an elevated command prompt and run the following command to remove the Safe Mode boot option:
bcdedit /deletevalue {current} safeboot - Restart the computer and boot normally, the system will boot successfully to the Start screen.
Option two
That’s it
RECOMMENDED: Click here to fix Windows issues and optimize system performance
Support us
Winaero greatly relies on your support. You can help the site keep bringing you interesting and useful content and software by using these options:
If you like this article, please share it using the buttons below. It won’t take a lot from you, but it will help us grow. Thanks for your support!
Advertisment
Author Sergey TkachenkoPosted on Categories Windows 8.1Tags IDE to AHCI, Windows 7, Windows 8
Change controller mode from IDE (or ATA) to AHCI without reinstalling Windows 7 — Windows — Tutorials
By default, motherboards are configured with an IDE controller mode (to improve compatibility with various existing operating systems).
Although it works without problem, it’s still preferable to use the AHCI (Advanced Host Controller Interface) which allows to benefit from new features and which makes it more efficient.
However, you cannot change controller mode without first performing some manipulations in the Windows 7 registry.
- Issue
- Solution
1. Issue
You change the controller mode in your computer’s BIOS from IDE (or : ATA) to AHCI, for better performance.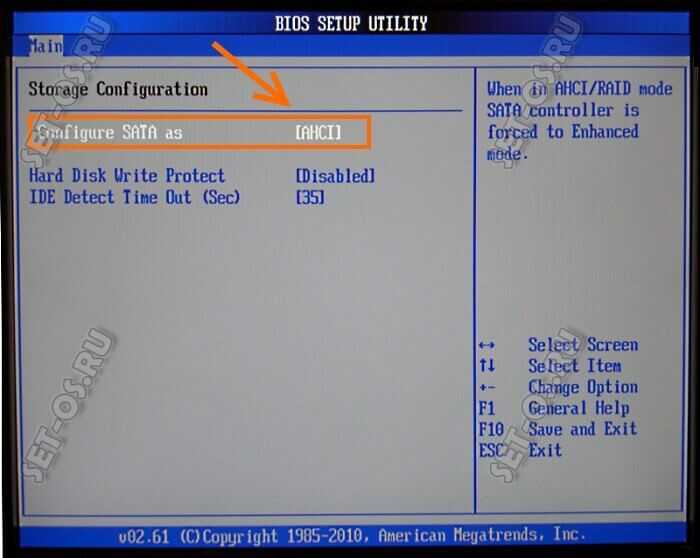
You restart your computer. The Windows 7 logo appears at startup.
Then, a blue STOP screen appears.
Plain Text
A problem has been detected and Windows has been shut down to prevent damage to your computer.
...
Technical information:
*** STOP: 0x0000007B (0xFFFFF880009A97E8, 0xFFFFFFFFC0000034, 0x0000000000000000, 0x0000000000000000)
2. Solution
As reported on Microsoft’s website, this problem is caused by changing controller mode after installing Windows.
Indeed, when you install Windows, any driver which will not be used by Windows 7 will be automatically deactivated.
So, when the controller mode is set to IDE and you install Windows 7, the AHCI driver is automatically disabled. Hence this blue STOP screen displayed at startup.
To solve the problem, all you have to do is reactivate this AHCI driver in the Windows registry before changing the controller mode to AHCI in the BIOS of your motherboard.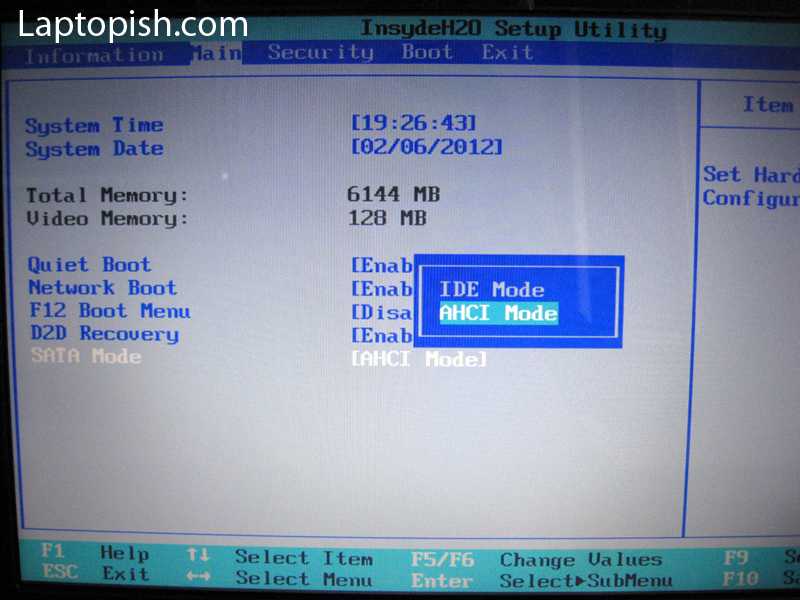
If you look in Windows 7’s Device Manager, these are the controllers currently in use.
To access Device Manager, open File Explorer and right click «Manage» on «Computer». Then, click on «Device Manager» in the left column.
Launch the «regedit.exe» program which corresponds to the registry editor of Windows 7.
Go to the «HKEY_LOCAL_MACHINE\SYSTEM\CurrentControlSet\Services\msahci» registry key and locate the «Start» data.
Double click on it to change its value, specify 0 in the box and click on OK.
Do the same for the «HKEY_LOCAL_MACHINE\SYSTEM\CurrentControlSet\Services\pciide» key.
Change the value of the «Start» data item to 0.
And finally, go to the «HKEY_LOCAL_MACHINE\SYSTEM\CurrentControlSet\Services\iaStorV» key.
And also change the «Start» data to 0.
Then, restart your computer and enter BIOS to change controller mode to AHCI.
If necessary, refer to our tutorial : Change the hard disk controller mode.
After restarting, when you get into your Windows session, Windows will detect new devices and automatically install the drivers for them :
- Standard AHCI 1.0 Serial ATA Controller
- ATA Channel 0
- Disk drive
- … ATA Device
- and more
Once the drivers are installed, a «Microsoft Windows» window will appear asking you to restart.
Click on : Restart now.
After restarting, you will find a new device «Standard AHCI 1.0 Serial ATA Controller» in the «IDE ATA/ATAPI controllers» section of the Device Manager.
How to enable AHCI support in Windows 7
Advanced Host Controller Interface (AHCI) technology is a standard introduced by Intel that improves the read/write speed of SATA-connected hard drives by using advanced features SATA technologies such as integrated command queuing (NCQ), in addition, the standard supports hot swap technology for hard drives. The Windows 7 and Windows Vista operating systems already have the ability to support AHCI, and if during the installation of Windows 7 the system detects that the computer supports AHCI, the AHCI driver is installed automatically.
In older motherboards, although the chipset supports AHCI technology, its support is disabled at the BIOS level. Therefore, if during the installation of Windows 7 / Vista, the installer did not determine the presence of ACHI support on the chipset, then the AHCI device driver will not be installed. As a result, if in such a system, after installing Windows, you activate ACHI support in the BIOS, then the system may stop booting or it will fall into the blue screen of BSOD.
Therefore, if after installing Windows 7, you find that your motherboard supports AHCI mode, but this feature is disabled in the BIOS, then this guide will help you activate AHCPI support in Windows 7/Vista.
Attention! This sequence of actions must be performed BEFORE enabling AHCI in the BIOS settings, otherwise the system will stop booting!
- Open the Registry Editor by typing RegEdit in the Start bar.

- To the UAC request “Do you want to allow the following program to make changes to this computer?”, we answer Yes .
- In the registry editor, navigate to the following branch: HKEY_LOCAL_MACHINE\SYSTEM\CurrentControlSet\services\msahci
- In the right pane, select the key Start and edit it ( Modify) .
- Set the “Start” parameter to 0 , and click OK. Default value (ACHI support disabled): 3
- Close Registry Editor.
- Restart your computer.
- Go to BIOS, enable AHCI support on your motherboard. Save your changes and restart your computer again.
- After downloading, Windows 7 will automatically install the AHCI device drivers. After finishing their installation, Windows will reboot one more time.
- After the system boots, the hard drives will support the AHCI standard.
Windows 8 users will have different instructions for enabling AHCI.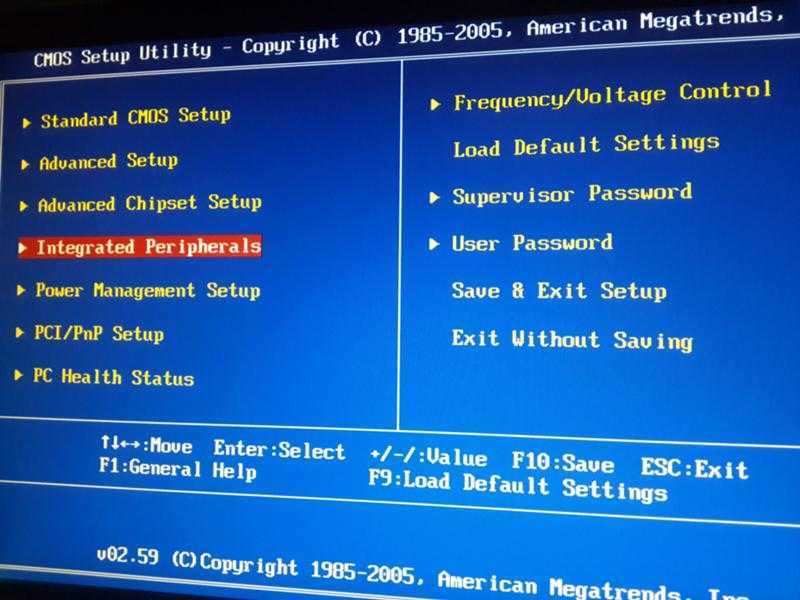 Details in the article: How to enable AHCI in Windows 8 without reinstalling the system.
If you are not sure if AHCI support is enabled or not in your Windows 7, then following this guide will help you determine this fact.
- Open the device manager (in the Start menu, type Device Manager ).
- The UAC prompt “Do you want to allow the following program to make changes to this computer?” answer Yes .
- Open section IDE ATA/ATAPI controllers .
- If Windows has an AHCI driver installed, then something like Standard AHCI 1.0 Serial ATA Controller or Intel(R) 5 Series 6 Port SATA AHCI Controller will be in the device list.
In the event that you cannot find anything about the AHCI Controller, then you should assume that AHCI support is disabled in your system. And you can enable AHCI in Windows (according to the instructions above), and then enable AHCI in the BIOS.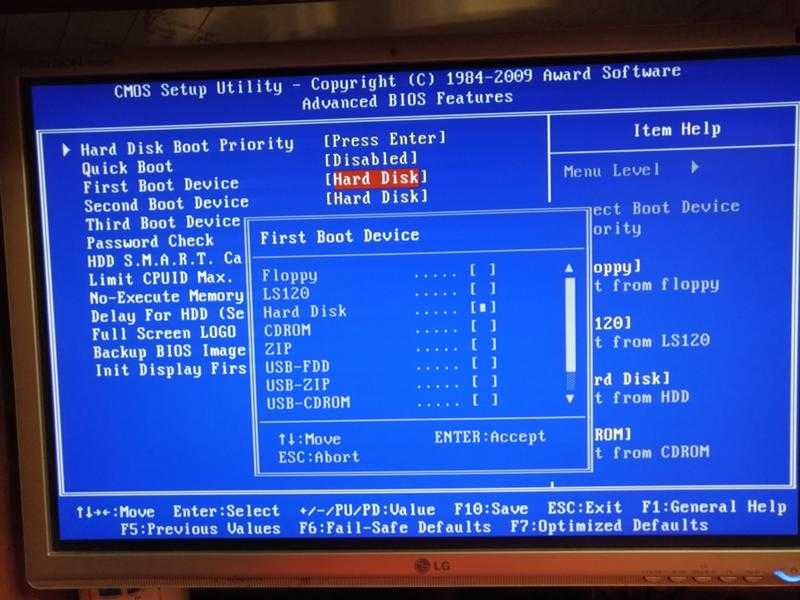
How to enable AHCI | remontka.pro
This manual describes how to enable AHCI mode on computers with an Intel chipset in Windows 8 (8.1) and Windows 7 after installing the operating system. If after installing Windows you just enable AHCI mode, you will see error 0x0000007B INACCESSABLE_BOOT_DEVICE and the blue screen of death (however, in Windows 8 sometimes everything works, and sometimes there is an endless reboot), so in most cases it is recommended to enable AHCI before installation. However, you can do without it.
Enabling the AHCI mode for hard drives and SSDs allows you to use NCQ (Native Command Queuing), which in theory should have a positive effect on the speed of the drives. In addition, AHCI supports some additional features, such as hot plugging disks. See also: How to enable AHCI mode in Windows 10 after installation.
Note: The steps in the manual require some computer skills and an understanding of what is being done. In some cases, the procedure may not be successful and, among other things, require you to reinstall Windows.
Enabling AHCI in Windows 8 and 8.1
One of the easiest ways to enable AHCI after installing Windows 8 or 8.1 is to use safe mode (the same method is also recommended by the official Microsoft support site).
First, if you experience errors when starting Windows 8 in AHCI mode, change back to IDE ATA mode and turn on the computer. The next steps are as follows:
- Run a command prompt as an administrator (you can press the Windows + X keys and select the desired menu item).
- At the command prompt, type bcdedit /set {current} safeboot minimal and press Enter.
- Reboot the computer and before booting the computer, enable AHCI in BIOS or UEFI (SATA Mode or Type in the Integrated Peripherals section), save the settings. The computer will boot into safe mode and install the necessary drivers.
- Run command prompt again as administrator and type bcdedit /deletevalue {current} safeboot
- After executing the command, restart the computer again, this time Windows 8 should boot without problems with AHCI enabled for the drive.

This is not the only way, although it is the most frequently described in various sources.
Another option to enable AHCI (Intel only).
- Download the driver from the official Intel website (f6flpy x32 or x64, depending on which version of the operating system is installed, zip archive). https://downloadcenter.intel.com/Detail_Desc.aspx?DwnldID=24293&lang=rus&ProdId=2101
- Also download the SetupRST.exe file from there.
- In Device Manager, install the f6 AHCI driver instead of the 5 Series SATA or other SATA controller driver.
- Restart your computer and enable AHCI mode in BIOS.
- After the reboot, run SetupRST.exe.
If none of the described options helped, you can also try the first method of enabling AHCI from the next part of this manual.
How to enable AHCI in Windows 7 installation
First, let’s look at how to enable AHCI manually using the Windows 7 registry editor. So, launch the registry editor, for this you can press the Windows + R keys and type regedit .
Next steps:
- Navigate to registry key HKEY_LOCAL_MACHINE\SYSTEM\CurrentControlSet\services\msahci
- In this section, change the value of the Start parameter to 0 (default is 3).
- Repeat this step under HKEY_LOCAL_MACHINE\SYSTEM\CurrentControlSet\services\IastorV
- Close Registry Editor.
- Restart your computer and enable AHCI in BIOS.
- After the next reboot, Windows 7 will begin installing disk drivers, after which a restart will be required again.
As you can see, nothing complicated. After enabling AHCI mode in Windows 7, I recommend checking if disk write caching is enabled in its properties and enable it if not.
In addition to the described method, you can use the Microsoft Fix it utility to remove errors after changing the SATA mode (enabling AHCI) automatically. The utility can be downloaded from the official page (update 2018: the automatic fix utility is no longer available on the site, only information on manual fixing the problem) http://support.