Motherboard Audio Ports/Jacks Explained By Color
If you’ve ever plugged in anything audio-related to your motherboard, I’m sure you’ve seen the abundance of audio ports scattered on the side of your motherboard.
What are they for, anyway? And why do you need so darn many?
And that’s precisely what I’ll explain in this article.
Main Motherboard Audio Ports
These are the main three audio ports you’ll find on pretty much every motherboard. They provide all the essential audio functionality.
Light Blue – Line-in
The light blue port, or the “Line-In” port as it’s technically known, is the port you use when you want to connect some sort of audio to the PC.
This means that everything from CD/DVD players, amplifiers, mixers, certain instruments, microphones, and pretty much anything that can output audio can be connected to the line-in port.
However, just because you can, doesn’t mean you should.
For example, you could connect a microphone to your line-in and it’ll most likely work, but your line-in port probably won’t have the same level of amplification as your actual mic-in port.
So you will most likely get very quiet audio from using the line-in port compared to using the mic-in port.
Lime Green – Line-Out/Front Speaker/Headphones
The lime green port, or the “Line-Out” port as it’s technically known, is the port you use when you want to get some sort of audio out of the PC.
So everything from headphones, speakers, and anything else that can play audio can be connected to the line-out port.
In a surround sound setup, the line-out port is also where you should plug in your front-side speakers.
Pink – Mic-in
And rounding off the main trifecta is the pink port or the “mic-in” port as it’s technically known.
As the name implies, it’s the port you use when you want to connect some sort of microphone to the PC.
It’s as simple as that.
Surround Sound Motherboard Audio Ports
These are audio ports that most motherboards have, but some motherboards choose to omit.
They provide you with surround sound capabilities, allowing you to split audio between the front, rear, and side for a more immersive experience.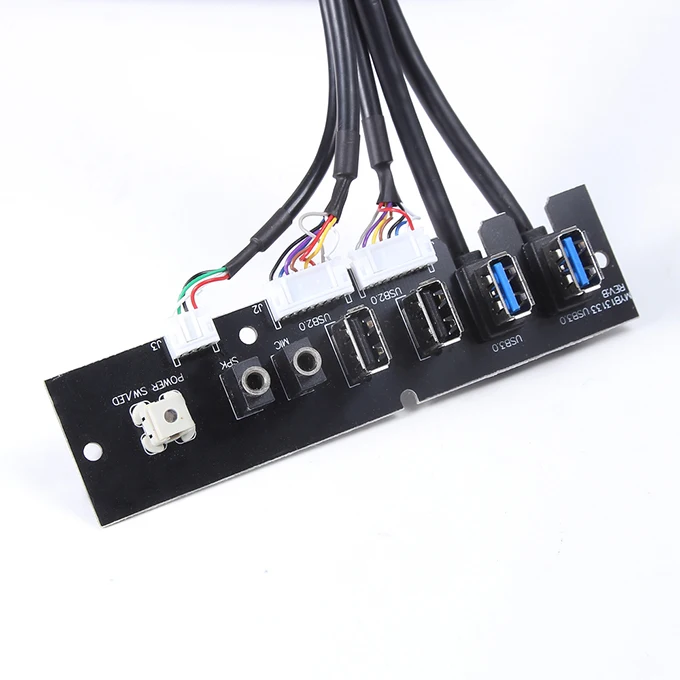
Orange – CS-Out/Center/Subwoofer
The orange port, or the “CS-Out” port, is the port you use when you have a dedicated subwoofer or a center speaker in your audio setup and want to send it the isolated, center/bass channel signal you get in surround sound supporting media.
If you have any sort of front speakers or a soundbar, or a dedicated subwoofer, this is the port you should plug them into.
Black – RS-Out/Rear Speakers
The black port, or the “RS-Out” port, is the port you use when you have rear speakers in your audio setup and want to send it the isolated, rear channel signals you get in surround sound supporting media.
If you have any sort of rear speakers, this is the port you should plug them into.
Gray/White – SS-Out/Side Speakers
The Gray/White port, or the “SS-Out” port, is the port you use when you have side speakers in your audio setup and want to send it the isolated, side-channel signals you get in surround sound supporting media.
If you have any sort of side speakers (to your direct left and right, not in front) this is the port you should plug them into.
Other Motherboard Audio Ports
These are more exotic audio ports where it’s basically a toss-up on whether a motherboard might have them or not because not a lot of people use these ports.
6.35mm High Power Out
Image Credit: MSI
This is an audio port that is found on just a handful of high-end motherboards. It’s basically a line-out port but can output a lot more power to drive high-end headphones.
Most people with such high-end headphones typically choose to get dedicated DACs and amps, so a port like this is mostly useless, but it’s still pretty cool to see.
S/PDIF Out
Image Credit: MSI
S/PDIF or “Sony/Philips Digital Interconnect Format” is another type of audio port that you might find in your motherboard.
It’s similar to your line-out port, but instead of outputting analog signals, it outputs digital signals straight from your PC without converting them.
It’s mostly used for home theater applications and other audio applications where high-quality audio transmission is needed.
An S/PDIF port can come in handy if you have a surround home theater setup with an S/PDIF port.
In that situation, you can simply connect the two with just one cable instead of having to individually connect all your different speakers into the analog ports.
Coaxial Out
Image Credit: MSI
The coaxial out port is the same thing as the S/PDIF port, just with a different connector.
What if Your Motherboard Doesn’t Have Any Color-Coded Audio Ports or Only Has One?
If your motherboard has no color coding and no symbols showing you what port is what, the best thing you can do is to look into your motherboard manual.
If you don’t have the physical manual available, simply Google the model of the motherboard, and you will find a download for the manual on the manufacturer’s website.
And if your motherboard only has one port colored in, it is most likely the line-out port.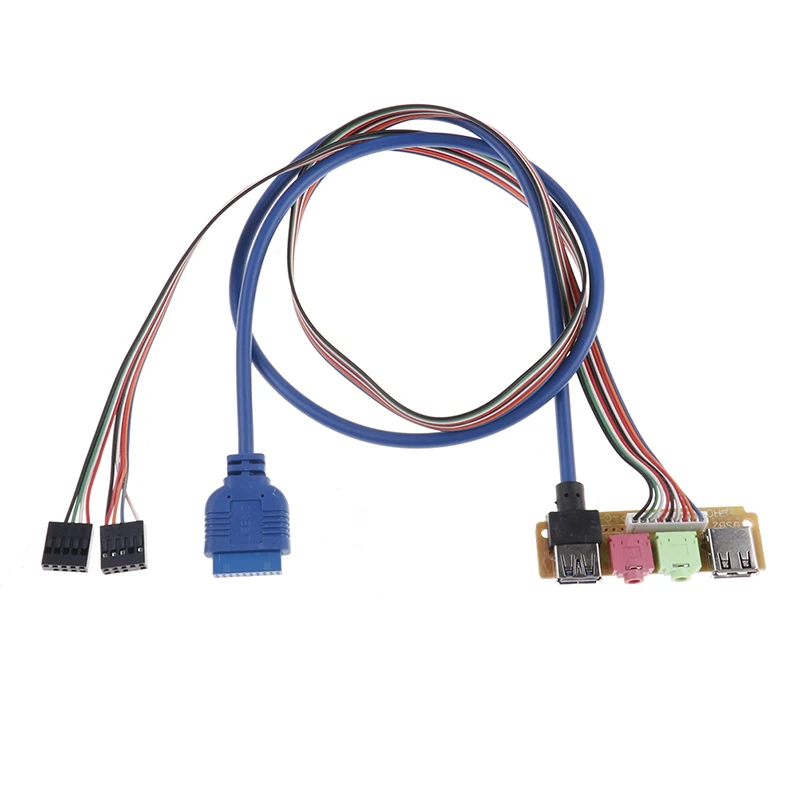
That should give you a good frame of reference to figure out where the rest of the ports are, but it’s still best to look in your manual to find exactly which port is what.
FAQ
What Port(s) Should You Connect to if You Have a Two-Speaker Setup?
If you have a two-speaker setup with two RCA cables or bare copper cables for each speaker, you need an amplifier first.
Connect the speakers to the amp and then connect the amp to your line-out port.
If you have active speakers that connect to each other with a 3.5mm male jack, simply connect it to your line-out port.
What Port(s) Should You Connect to if You Have a 3.1 Setup?
Connect the speakers to your amp and then connect the appropriate input (rear, side, or front sides) to your RS-Out/SS-Out/Line-Out ports.
Afterward, connect your center/subwoofer to your CS-out port.
What Port(s) Should You Connect to if You Have a 5.1 Setup?
It’s the same as if you had a 3.1 setup. Just make sure that you connect the right set of speakers to the right port.
E.g. rear to rear, side to side.
What Port(s) Should You Connect to if You Have a 7.1 Setup?
Connect the speakers to your amp and then connect the rear speakers to the RS-Out port, the side speakers to the SS-Out port, the center/subwoofer to the CS-out port, and the front side speakers to the Line-Out port.
What Port(s) Should You Connect Your Headphones To?
You should connect your headphones to the line-out port.
If you have a 6.35mm jack and your motherboard also has a 6.35mm port, I would suggest you connect to that instead.
Are All Audio Ports the Same Between Motherboards?
Motherboard audio port layout and amount aren’t really standardized, but most motherboard manufacturers follow the PC System Design Guide created by Microsoft and Intel in the 90s.
So, most motherboards come with around 6 – 5 audio ports generally in the same location (on one side of the back I/O), with the same port layout.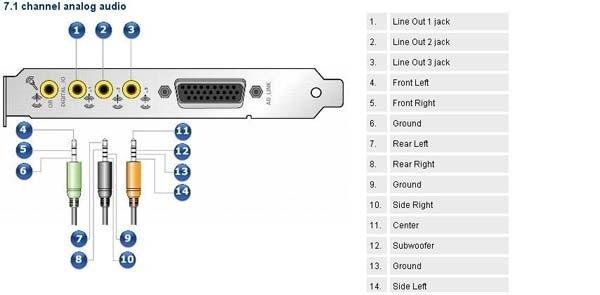
But there are some outlier motherboards that can have more or fewer ports and weird layouts.
But that shouldn’t be a concern for you unless you’re buying an extremely exotic motherboard.
Over to You
Hopefully, that explains everything you need to know about every possible audio port you might find on your motherboard!
Have any other questions about PC components? Feel free to ask us in the comments or our forum!
CGDirector is Reader-supported. When you buy through our links, we may earn an affiliate commission.
Motherboard Audio Ports Explained: [Colors & Their Functions]
It is a confusing thing to find the right audio port when you try to connect your speaker to the computer. Along with the multiple audio ports, you can see multiple colors like Red, Black, Yellow, etc. But what do these all colors mean and why don’t we have a single audio port on the motherboard?
In a few minutes, you’ll find the complete information about the audio ports on a computer.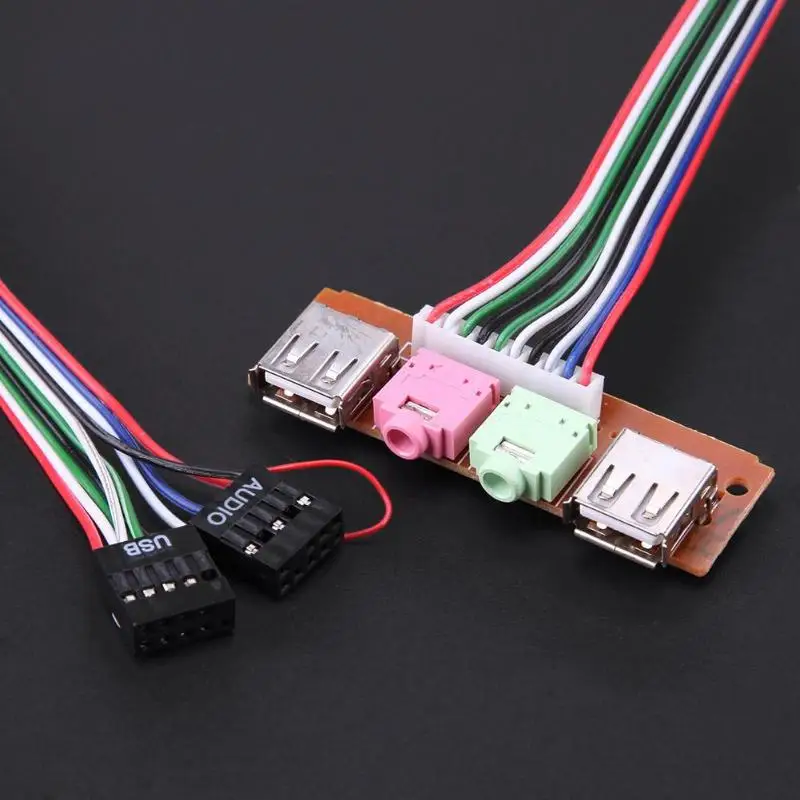 First, you need to know the meaning of an audio port on a computer.
On this page
What is an Audio Port in a Computer?
The audio port on a computer motherboard is used to connect audio objects like speakers, microphones, home-theater, etc. The audio port only works when you connect a device with a wire or cable. When you use Bluetooth technology, audio ports are unnecessary.
On a desktop computer, you can find the audio ports on the front and rear sides of the CPU. But on the laptop, you’ll see the audio port on either the left or right side of the keyboard based on the manufacturer. Here you can find multiple ways to know the motherboard model on your computer.
Motherboard Audio Ports of a Desktop Computer
The CPU on the desktop computer will contain two 3.5 mm jack ports at the front. One of them is for getting audio signals (for speakers) and the other is for giving audio input (microphone). You can find the difference between CPU and motherboard here.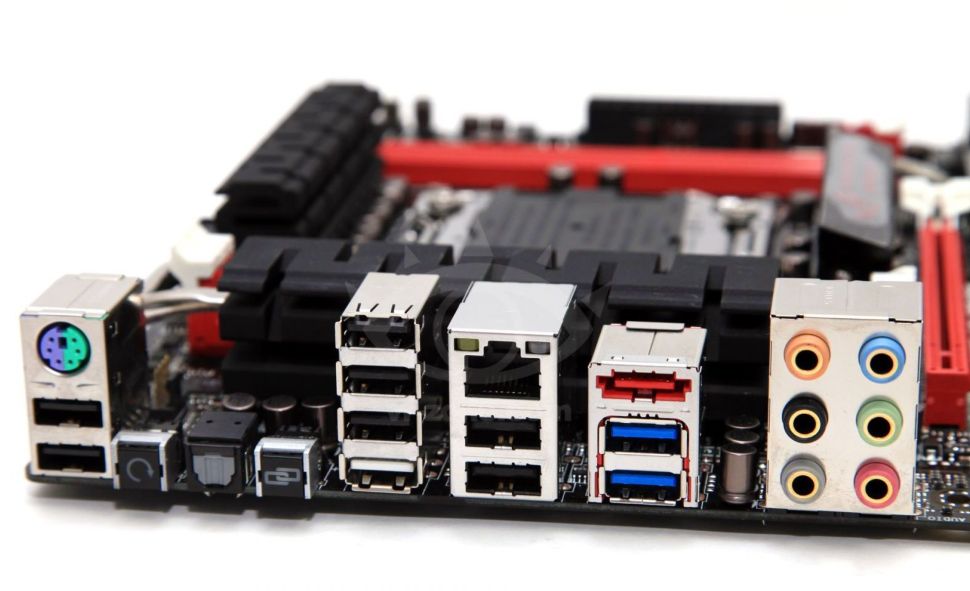
So these two ports are used for basic purposes. But at the rear side of the CPU, you can see the audio port sections with different colors. These colors are used to understand its functioning capability and compatibility.
For example, if you put the microphone in the speaker port, your microphone device will not work. This is because of the signal passing error between devices.
What Are The Different Audio Ports In Motherboard?
There are 3 main audio ports on a computer or on the motherboard, Green, Pink, and Blue. The Green audio port is the primary one here which is used to listen to music or any type of audio on the headphones or speakers. The Pink colored port is for microphones to record audio and the Blue is for other audio devices like home theaters, subwoofers, etc.motherboard audio ports
On the front side of the CPU, you can find two audio ports. One is for the speaker and the other is for the microphone or receiver. If you want to use both these functions at a time, you need to use the 3. 5 mm audio jack splitter.
If you don’t find the pins that you need on your computer motherboard, then you can buy a new audio card.
>>Click here to buy an audio card now
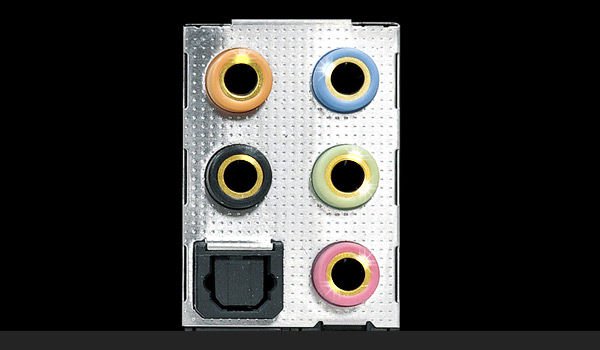
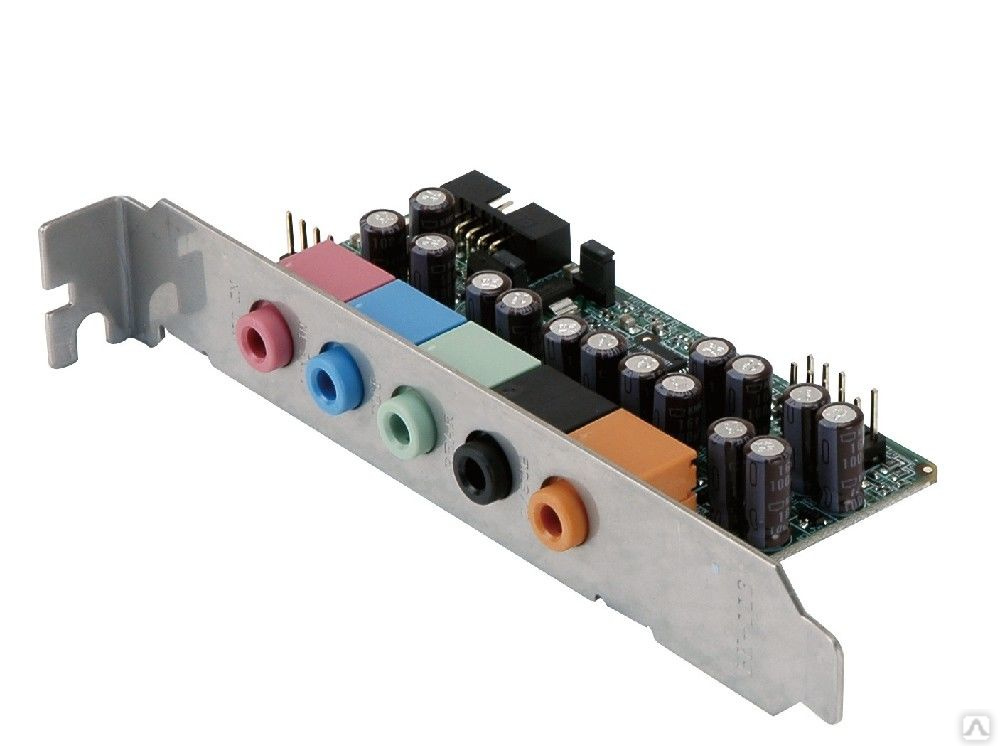
Audio Port Colors With Their Functions
The normal computer motherboard came with the 3 main audio ports (Green, Pink, and Blue). But the latest motherboard comes with advanced features including 6 audio ports (Orange, Black, and Silver included).
The latest motherboards come with the SPDIF pin instead of the traditional silver-colored audio port. Sony/Philips Digital Interface (SPDIF) is used to convert the digital audio signals from one device to another device without losing their quality. Here you can find more about it.motherboard audio port functions
All these audio ports have different functionalities. Let’s see what they are…
| Audio Port Color | Compatible Devices | Functionality |
| Green | Headphones, earphones, etc | To listen to music or any audio |
| Pink | Microphones, Headphones, or earphones with a microphone | To record the audio that you want |
| Blue | Home-Theater, Amplifier, Speaker, etc | To listen to the audio or music |
| Orange | Woofer, Subwoofer, Speaker | Centralize the audio signals |
| Black | Subwoofer, Speaker | Color for rear audio sound |
| Silver | Speakers | To play side audio particularly |
Motherboard audio ports and their functions
Green:
The Green is the primary audio port on the computer. With this port, you can connect your headphones, earphones, speakers, and other audio output devices. This port sends the audio signals in an equal direction, both left and right.
Even if you have a microphone on your audio device like headphones, this port can’t support it to record your audio.
Pink:
The Pink colored audio port is used to record audio either from the separate microphone or the audio device included with a microphone (headphones, earphones, etc).
Blue:
The Blue colored audio port is used to connect the additional audio device to your computer. For example, if you want to connect an amplifier to your computer, then you need to use the Blue color port. It is also compatible with other audio systems like home-theater, woofers, speakers, etc.
Orange:
When you are using this port, the sound signals are centralized in your audio system. This means the sound is playing at the center of the room, or at least you feel it.
If you are watching a movie in the home theater, then this is the main way you can hear the audio of the movie or character conversation.
Black:
The black is for rear audio sound signals. This audio port controls the rear side audio signals to send the right signals to the right speaker whether it is left or right based on the frequency.
The Dolby Atmos sound system will give more natural and quality sound effects.
Silver:
The silver-colored audio port is used to play the audio in the side speakers. You need to have at least 5.1 channels to use these sound features.
All the audio systems don’t support the latest 7.1 channels. If your audio device supports it, then you are ready to use all the 6 audio ports on your computer motherboard.
Till now, there are four audio channels: 2.0, 2.1, 5.1, and 7.1. To use Orange, Black, and Silver audio ports, your audio system must have either 5.1 or 7.1 channels.
To find what channel your audio system has, check its manual.
shop audio card now
Audio Ports on laptops
Unlike the motherboard in the desktop computer, the laptop contains only the limited or main audio port which is able to record audio (if you connect the microphone to it) and send audio signals to your speaker.
Some laptops only have a single audio port by which you can listen and record audio. All the functionalities of colored audio ports in desktop and laptop computers are the same.
If your desktop PC motherboard doesn’t have 6 audio ports, I guess it is an outdated one. Here is the guide to finding the perfect time to upgrade your PC motherboard.
Motherboard Audio Ports | A Complete Beginner’s Guide
We live in an expressive world where audio and video play an important role. In computers, sound helps the user with a good multimedia experience. You can listen to songs, watch movies or TV Shows, or any other online content. Sound in computers also helps in troubleshooting any problems (with error tones). So, in this guide, we decided to cover everything you need to know about Motherboard Audio Ports.
Outline
What is the Purpose of Motherboard Audio Ports?
Sound from a computer is important to users as well as technicians. While users use sound to listen to music or record it, technicians use it to identify the problem.
On most personal computers, a special audio circuit generates the sound. If you dial the time back to a couple of decades ago, PCs at the time had dedicated expansion boards known as “Sound Cards”.
These cards contain all the audio circuitry that the computer needs to produce the sound.
But most modern PCs have the “audio” circuit built right into the motherboard. The job of these dedicated sound cards or integrated audio circuits is to generate the electrical signals that are responsible to produce sound.
This is where motherboard audio ports come into the picture. The electrical signals from the audio circuitry terminate at the audio ports (either on the motherboard or on the sound card).
We can connect speakers, headphones, etc. to these audio ports and hear the audio. You can find audio ports on the front as well as the rear of a personal computer.
Different Types of Motherboard Audio Ports
An understanding of different types of Motherboard Audio Ports is very important to set up your sound system.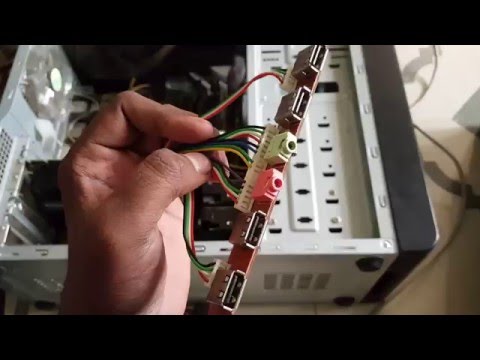
The four common types of Audio Ports on a modern motherboard are:
- 3.5mm Audio Jacks
- Optical S/PDIF Port
- Coaxial S/PDIF Port
- 6.35mm Audio Jack
Let us see more details about these three audio ports on a typical motherboard.
3.5mm Audio Jacks
One of the popular and most common types of motherboard audio ports is the 3.5mm jack. We use them to connect headphones as speakers. These ports accept the widely popular 3.5mm TRS Audio Connector.
Most motherboards have at least three 3.5mm jacks in the colors Green, Blue, and Pink.
In this, the Green 3.5mm Audio Port is known as the Line Out Port. This is the main audio port for connecting two-channel (stereo) headphones or speakers using a 3.5mm Audio Cable.
The Blue 3.5mm Audio Port is known as Line In. We use this port to connect external audio equipment such as CD Players, Amplifiers, Certain Musical Instruments, Audio Mixers, Microphones, etc. to the computer.
We basically use this port to connect audio sources to the PC.
The last “basic” port on a motherboard is the Pink 3.5mm Audio Port. It is known as Mic In, which is short for Microphone In.
As the name suggests, we use this port to connect microphones to the computer. Even though the Line In Port accepts a Microphone, the amplification level of the actual Mic In Port or the Pink Port is much better
While these are the three basic 3.5mm Audio Ports, some motherboards have up to three additional ports, making it a total of six 3.5mm Audio Ports.
These three additional ports allow you to set up a surround sound system. The color codes of these ports are Orange, Black, and Gray.
The Orange 3.5mm Audio Ports is known as CS OUT or C/Sub Port. In a surround sound setup, the center channel acts as the main vocal channel and a sub-woofer produces that tight and punchy low-frequency bass audio.
We use this Orange Port to connect to the center channel as well as the sub-woofer speakers.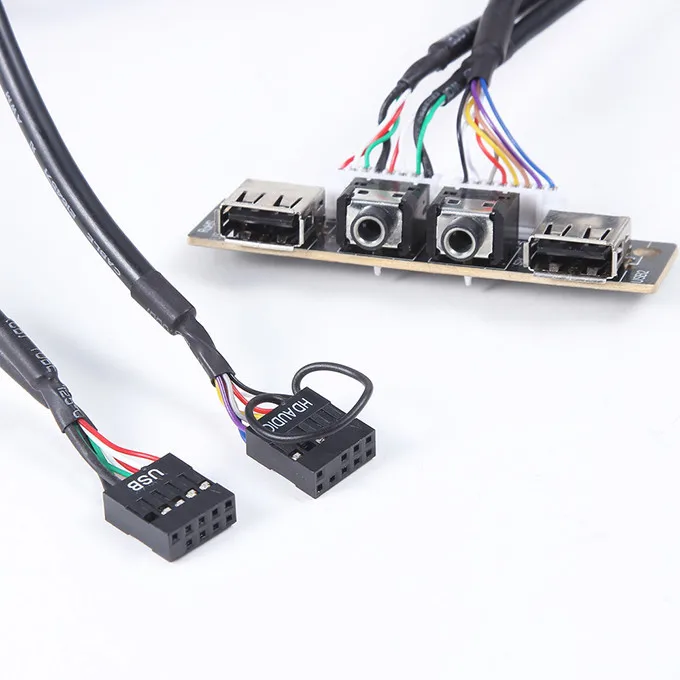
Next, we have the Black 3.5mm Audio Port. It is known as RS OUT or simply Rear. In your surround sound system, you have to connect the rear speakers to this port.
Finally, we have the Gray 3.5mm Audio Port. This port is useful if you are setting up a 7.1 channel surround sound system. In such a system, there will be two side channels and we connect these speakers to the Gray port.
The following image shows the six 3.5mm Audio Ports on a modern motherboard along with their color codes and speaker configurations.
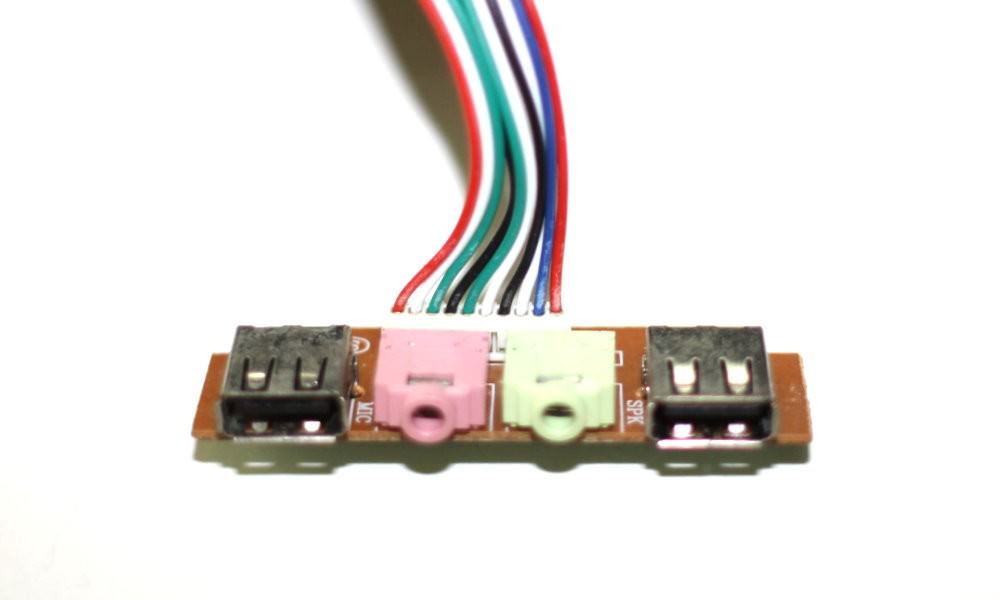
Some computers have front audio and the ports are Green and Pink. So, you can connect your speakers or headphones as well as a microphone in the front itself.
S/PDIF Port
The 3.5mm Audio Jacks we saw earlier generate analog audio signals. But with the growing popularity of digital audio, Sony and Phillips developed a new digital audio protocol known as the Sony Phillips Digital Interface or S/PDIF.
Using S/PDIF, you can transmit multi-channel audio through a single cable.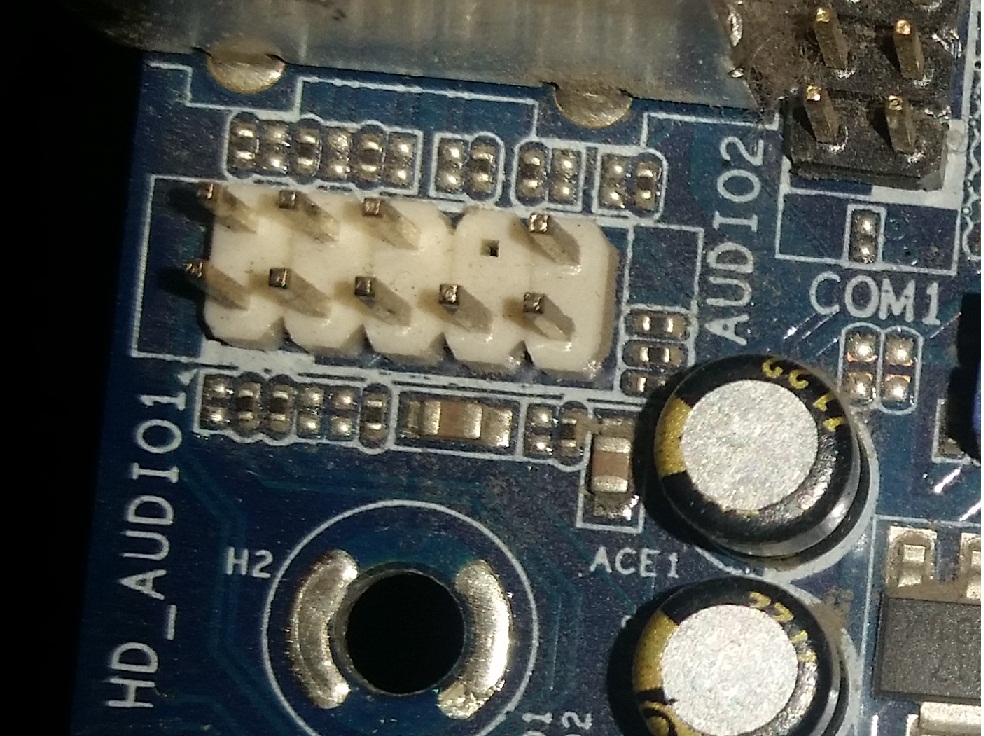 Speaking of cable, there are two popular physical media that carry S/PDIF signals. They are Optical and Coaxial.
The Optical S/PDIF uses a TOSLINK, which is short for Toshiba Link, connector, and an optical fiber medium. On the other hand, the coaxial S/PDIF uses a coaxial cable and an RCA Connector.
As it can carry compressed 5.1 DTS or Dolby Digital Audio, the S/PDIF Port is suitable if you are setting a surround sound system with the help of a single cable.
6.35mm Audio Jack
It is very rare but some motherboards have a 6.35mm Audio Jack. This jack is suitable if you have a high-quality home or professional audio equipment.
What if the 3.5mm Audio Ports are not Color Coded?
Nowadays, most motherboard manufacturers are making their boards to improve the looks and aesthetics of the PC. As a result, some motherboards don’t have the regular color coded 3.5mm jacks.
Instead, you will find them blacked out or in other colors to match the overall build of the motherboard.
How to find out the ports if all of them are black in color?
If you have the motherboard’s user manual, then look in there. Usually, motherboard manufacturers describe all the ports on the motherboard in the manual to help new PC builders.
Sometimes, even if all the motherboard audio ports are black in color, there will be a silkscreen (white paint) near each port describing the name or its symbol.
Conclusion
Audio plays an important role in modern computers. Whether you are using high-quality headphones or setting up a multi-channel surround sound system, you need a basic understanding of all the available audio ports on a motherboard.
In this guide, we saw some commonly available motherboard ports including the famous 3.5mm Audio Ports as well as the popular S/PDIF Port.
We also saw the significance of each port and what sort of speakers go into each of those ports.
Connectors on the computer motherboard: what are they, purpose
Greetings to all, dear readers of the Pc-information-guide. ru blog! In my previous articles, and specifically in this one, I mentioned some ports or connectors that any modern motherboard is literally “stuffed” with. So, in this article we will try together with you to understand the purpose of these connectors.
Scheme
Connectors on motherboards can be located both inside the computer case (we do not see them), and outside — on the back and front of the system unit. The latter often duplicate each other for the convenience of connecting various devices. All the information below is also relevant if you have a laptop, because its ports are no different from those on a regular PC.
Content
- 1 For components
- 1.1 Processor
- 1.2
- 1.3 graphics card
- 1.4 hard drive
- 1.5 Cooling
- 1.7 Additional 1
- 1.7 Additional 1
- 1.7 Extract
- 3 On the back of the system unit
- 3.1 PS/2
- 3.2 COM port
- 3.3 USB ports
- 3.4 Network and Internet
- 3.
 5 Video
 - 3.6 Audio
- 4 Notebook specific
For accessories
And this is the first category of connectors, perhaps the most extensive of all. It includes a large number of connectors on the computer motherboard. If you are already familiar with the computer device, you should know that the motherboard is the most important «board» in the computer, because all other components are connected to it, such as: processor, video card, RAM and others. Therefore, all these devices have their own connectors.
Processor
The processor socket on a computer motherboard is often referred to as a socket. Let’s imagine that the socket is a lock, and the processor is the key to it. It turns out that only your key is suitable for a single lock. Only in our case, several “keys” (processors) can approach the conditional “lock” at the same time. Do you understand what I mean? Each socket limits the number of processors that can be installed in it.
 I already had a separate article about sockets, I recommend reading it.
 It is easy to determine the location of the socket, it looks like a large square with many «holes» or «pins», and is located almost in the very center of the board — closer to its top. Different processor companies use their own sockets, for example, the following types of sockets are suitable for Intel:
- Socket 1150
- Socket 1155
- Socket 1356
- Socket 1366
- Socket 2011
But AMD processors use the following sockets:
- Socket AM3
- Socket AM3+
- Socket FM1
- Socket FM2
RAM
For RAM, the motherboard also has its own slot, or rather several. They have an oblong shape and are located slightly to the right of the processor, and their number, as a rule, does not exceed 4 pieces. At the time of this writing, DDR3 memory is already being used everywhere in the world, although DDR2 is still found in some places.
 You can read about all their differences here.
 Now, we are only interested in the fact that DDR2 and DDR3 have their own ports. And you can’t just take and install DDR2 memory in a DDR3 port, it just won’t go there. By the way, these differences in ports are noticeable even visually. And yet, when viewed from above, you can notice the different colors of these connectors, for example, from 4 ports for RAM — two of them are painted in one color, and the other two — in a different color. This is the so-called «two-channel» mode.
Video card
There is also a connector for the video card on the motherboard. Once, a long time ago, the AGP interface was actively used to connect a video card, which was then successfully replaced by PCI e x16 or PCI express x16. In this case, the number 16 is the number of lines. There are also x4 and x1, but you can’t install a video card in them.
Video card connectors are located at the bottom of the motherboard, and there may be several, I mean PCI express x16.
 True, this is not common, only on «gaming» motherboards, and all this is needed to create SLI, or Cross Fire. This is when several video cards, often no more than two, are connected to the motherboard and work in parallel, that is, their power is combined, roughly speaking.
 Hard drive
The SATA cable is often used as an interface for connecting a hard drive to the motherboard, which is connected to the appropriate connector. There are other connection options, such as: IDE and FDD, for example. FDD is no longer used, it used to be used to connect the Floppy drive, where floppy disks were inserted. But IDE in the past was the main option for connecting hard drives, until the sata connector came to replace it.
Now even optical disc drives (CDs) are connected to the motherboard using a SATA connector. There are different generations of Sata that look the same but differ in data transfer speed. Also, there are varieties of the Sata connector — «eSata», «mSata», which already differ structurally.
 In addition, some HDDs can also be connected via a USB port, not to mention «SCSI», or the no less exotic «Thunderbolt».
 I recommend reading: hard disk interfaces
Power
Power connectors are located on the motherboard in two places: next to the RAM (24-pin connector) and just above the processor socket (processor power — see the diagram at the very beginning of the article). If at least one of these connectors is not connected, the computer will not work. On older motherboards (before 2001-2002), this connector had only 20 pins, but now their number can be in the range of 24-28. This is the main motherboard power connector.
Cooling
Without cooling, no computer can work for a long time, so coolers (fans) are installed in the computer for effective cooling, the most important of which is designed to cool the processor and is installed directly on it. To power these fans on the motherboard, there are special connectors with two, three or four pins:
- 2 pins — this is a regular cooler;
- 3 pins — fan with tachometer;
- 4 pins — a cooler that uses a pulse-width converter, which allows you to change the speed of its rotation.
 The processor cooler is connected just to this connector.
If desired, conventional fans (without speed control) can be powered from the Molex connector of the power supply. This may be necessary if the motherboard does not have free connectors for coolers.
Accessories
This number includes a variety of optional expansion cards: audio cards, network cards, RAID controllers, TV tuners, and so on. All of them can be connected to the motherboard via a PCI connector, but not an «express» one, but a regular one. This should also include a round-shaped connector for the “CMOS” battery, due to which the time on the computer does not go astray every time it is turned off, just as the BIOS settings do not go astray.
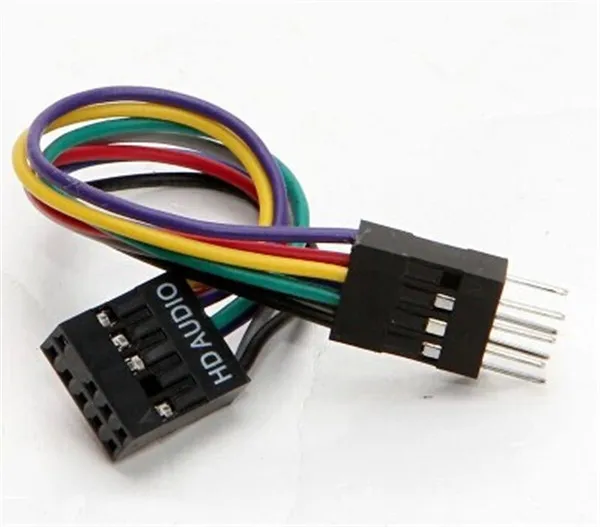
Pay attention to the CD IN connector plug on the motherboard, it is necessary to connect CD drives with the ability to listen to CDs and control — switching tracks forward / backward. Somewhere nearby stick out pins labeled “SPDIF” — this connector can be used to connect a home theater, for example.
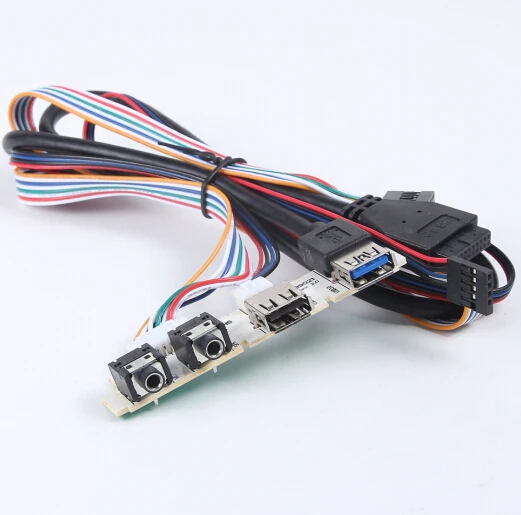
 To do this, a special bar with this port is ordered, which is attached to the back wall of the system unit, the bar is connected to the motherboard via a cable.
 The SPDIF port is usually found on expensive motherboards. It is not installed on budget models, however, on the board itself, you can find contacts designed to connect this port.
On the front panel of the system unit
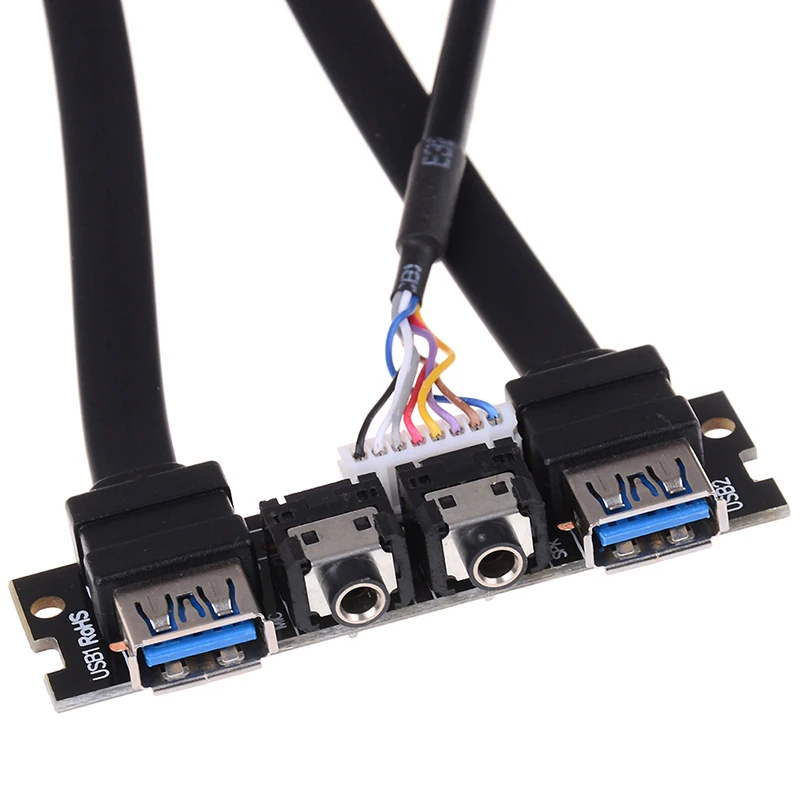
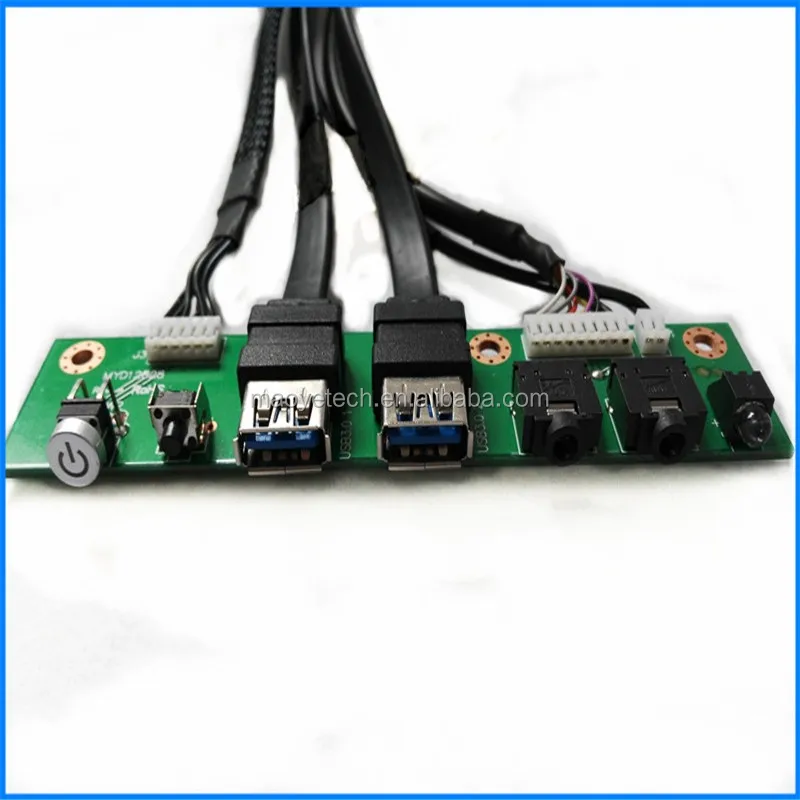
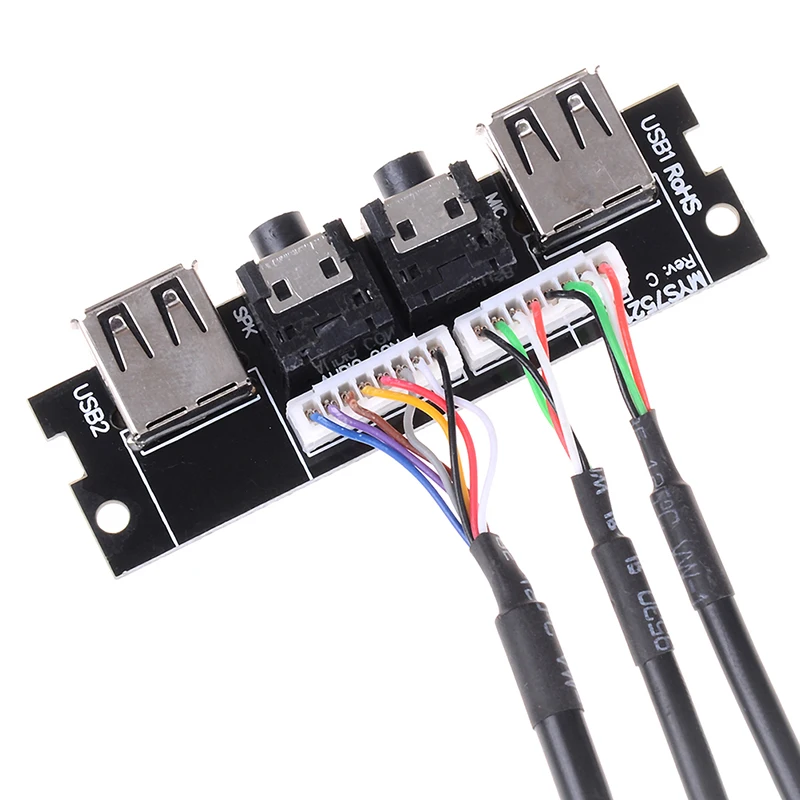
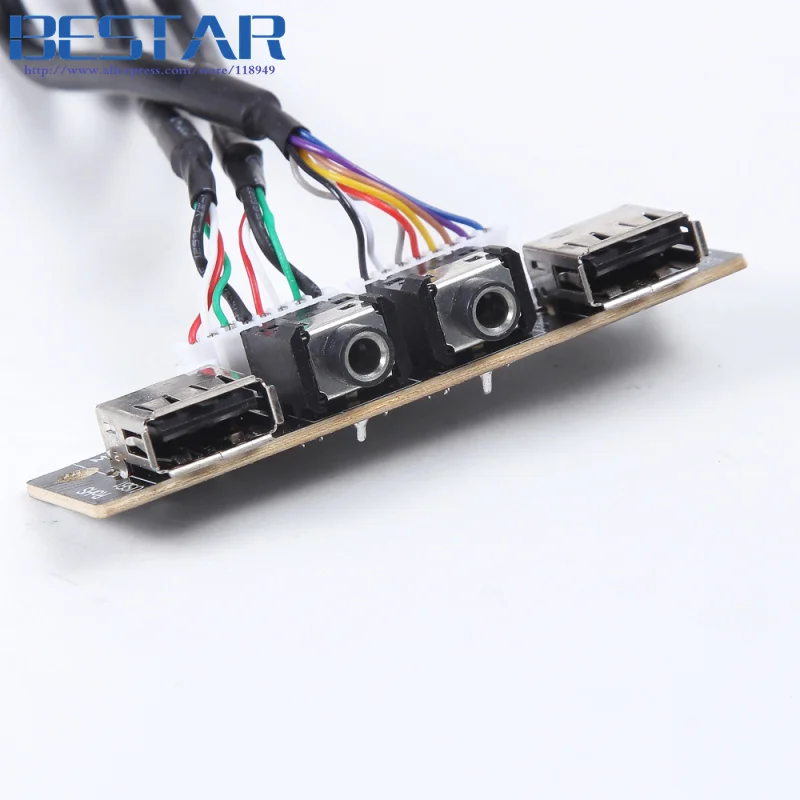
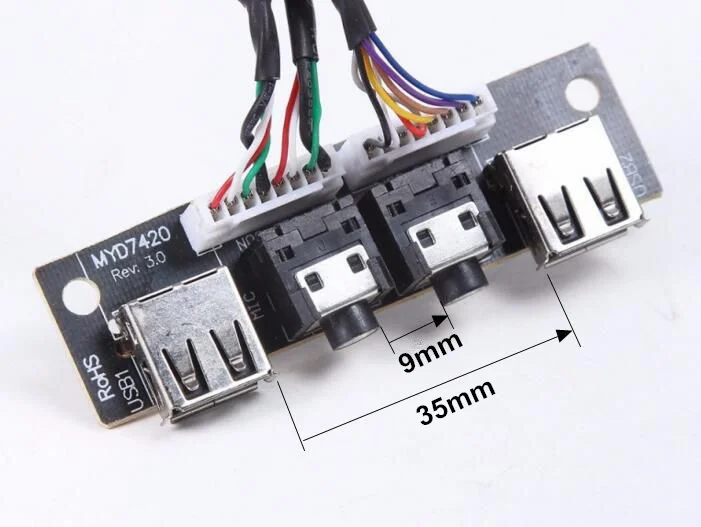
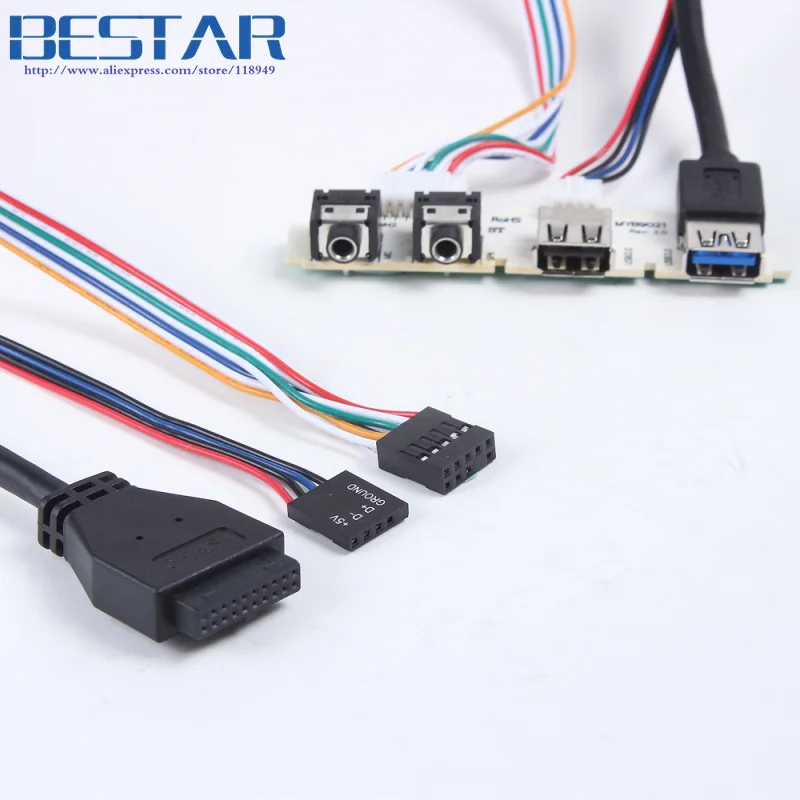
On the front panel of any modern (and not so) computer, for convenience, there are several USB connectors, as well as a headphone and microphone input — the latter is usually painted pink. But, as you understand, these connectors will not work by themselves, they must be connected with wires to the motherboard. For this, it provides contacts that are signed accordingly.
The same manipulations must be done with the audio outputs (contact group «FP Audio» or «Front Panel Audio»), as well as with the card reader — if it is installed on the front panel. A card reader is an extremely convenient device for reading memory cards and it must be connected with wires to the pins designed to connect USB ports.
And on the front panel you can often find an IEEE 1394 (FireWire) port used to connect digital devices such as a photo or video camera. And for him, the motherboard also provides contacts that are signed. In general, they always write about where and how to connect something in the instructions for the motherboard, but, as you can see, it’s quite possible to figure it out yourself.
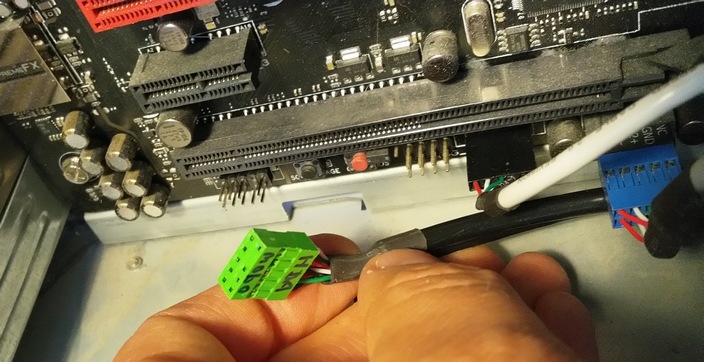
Well, everything seems to be (just kidding), there are also buttons to turn on / off the computer and LED indicators of its operation. For their connection, a special area with contacts is allocated on the motherboard, located closer to its lower part (next to the battery) . I’ll make a reservation right away, there is no single standard, so the type and location of these contacts on each motherboard can be different.
So, the computer power button (Power) and the reset button (Reset) are connected to the motherboard using the Power switch and Reset switch connectors, respectively.
 Using similar connectors, a computer operation indicator (Power Led) and a hard disk loading indicator (HDD Led) are connected. These connectors look like small plastic «pads» with two wires (2 «pins»), one of them is positive, the other is negative.
 wide
small
There are two types of connection (2 varieties) of pads on the motherboard reserved for buttons and front panel indicators:
- wide connection — the most convenient option;
- small connection;
- without inscriptions at all. For example, many MSI boards do not indicate designations at all, and you can figure out the connection there only with the help of the instructions.
On the back of the system unit
There are many connectors on the back of the system unit, some of which completely duplicate those located on the front. Their number can be completely different, again, it all depends on the model of the motherboard.
PS / 2
Today, this connector is considered obsolete, but on many motherboards it is still present and feels good, so to speak.
 Used to connect a mouse or keyboard. It is noteworthy that there are adapters from USB to PS / 2.
 COM port
It is almost impossible to find a COM connector on modern motherboards. Previously, it was used to connect all sorts of printers and other peripherals that are now connected via USB. The COM port has an analogue — LPT, which is even less common, it has an oblong shape and is colored pink.
USB ports
As a rule, if there are 4 of these connectors in the front, then there are at least no less of them in the back. Again, everything is done so that you can connect as many devices as possible to your computer at the same time. And if the front ports are usually occupied by all kinds of flash drives, then “long-playing” devices are often connected to the rear ports, that is, which you will not constantly connect / disconnect. Well, for example, it can be a keyboard with a mouse, as well as printers, scanners.
There are two main varieties of these ports:
- USB 2.
 0
0 - USB 3.0
Of course, the third version is preferable because of the higher bandwidth, such a port is even marked with a different color — blue.
USB 2.0 and 3.0 compatible.
Network and Internet
A single connector is responsible for the network and the Internet — «Ethernet», which is also sometimes called «RJ 45». If you look closely, you will notice that there are small “windows” on this connector — these are indicators of network operation; when data is being transferred, they signal this. If the indicators do not light up, most likely the connector has stopped working and needs to be re-crimped (using a special crimp).
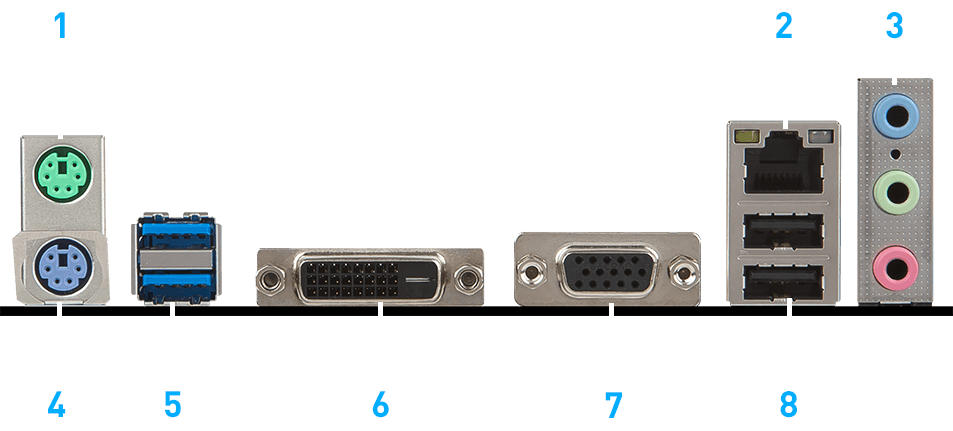
Video
Any monitor is connected to the computer (motherboard) using video connectors, which are located just behind. There are quite a few varieties of them, it would not be entirely appropriate to talk about each one here, especially since the site already has a separate article about video connectors.
 In my opinion, only three of them can be called the most popular video ports:
 - analog VGA port
- digital DVI
- digital HDMI
The rest are not so popular and are rare.
Audio
Typically three or six inputs for connecting multiple speakers and a microphone. On budget segment boards, the number of audio connectors usually does not exceed three, but at the same time, all the necessary functionality is present, and these are:
- Red — for a microphone;
- Green — for speakers;
- Blue — for connecting external sources, such as a TV, player or radio.
If your motherboard has six audio outputs, then know that the other three are used to connect additional speakers and a subwoofer.
Typical for a laptop
It is worth saying a few words about the rare, I would even say “exotic” connectors that are found in laptops or some other devices, but which are not found on a regular PC.
 These are two slots: PCMCIA (ExpressCard) and Kensington Lock. The latter is used to protect the device from theft. A special cord with a lock is inserted into the Kensington Lock connector and tied to any object, be it a table or a battery, for example. Naturally, only you have the keys to the castle.
 express card
Kensington Lock
But the «ExpressCard» is a narrow slot, covered with a plug, into which a certain expansion card is inserted, which can host ports for connecting other devices. With such a card, you can easily add some USB 3.0 ports to your laptop, if only because there is a shortage of them on any laptop.
Well, that’s all, we have sorted out all the types of connectors that can only be found in a computer, if I suddenly missed something (the article is long, you know) — write about it in the comments. Good luck and see you soon on the pages of pc-information-guide.ru!
Where, how and in which connector to connect headphones or speakers to the motherboard?
At first glance, the task is simple and does not cause many problems.
 However, there are cases when the motherboard has a lot of different connectors. An external sound card may be installed that does not have symbols and colors on it.
 What to do in this case:
1. The simplest method is to enumerate .
Turn on music on your computer and simply plug your speakers/headphones into different jacks. Before checking, make sure that the sound is not turned off. Check the volume slider.
2. Connect headphones to the Line Out jack.
If a microphone is to be connected, the plug must be inserted into the Line In socket.
3. On most motherboards, all sockets are of different colors, each color performs its own functions, namely:
— blue connector — line input. Responsible for connecting external audio devices. For example, a CD player or electric guitar;
— red or pink — microphone connector;
— green or light green connector — line output.
 It is designed to connect speakers/headphones, 2.0/2.1 speaker systems. If you need to connect speakers, then insert the plug into this jack. The connector is designed for use with front speakers;
 — white port — software controlled port. When connected to this connector, the system will ask which device to start. To connect audio, select line-out.
In the audio card software, you can reassign each connector to your liking. If the settings are knocked down, then return them to default to restore the standards.
4. Download the manual / manual for your motherboard.
Read this guide for important information on connecting external devices to the motherboard connectors.
5. What should I do if everything is connected correctly, but nothing works and there is no sound?
— If speakers with an amplifier are used, check that the device is powered by 220 volts or USB.
— Check if the headphones/speakers themselves work.
— Is the volume control on the speakers in the correct position.
— A mobile phone/smartphone/tablet can be used to test the speakers themselves.
— Check driver settings and correct operation.
— Check the settings of the specialized software for your sound card chip / reset the settings to default.
— Check if the sound is turned on in the mixer.
Perhaps you were changing settings in the BIOS before the sound problems started and accidentally turned off the sound settings? In this case, you need to return the default settings. The Onboard Devices Configuration items are responsible for sound settings in the BIOS. It is necessary to replace Disabled (disabled) with Enabled (enabled).
Check the contact / connection of the speaker plugs and the connector itself. If the sound worked, but then abruptly disappeared, then try restarting your computer.
Reinstall the drivers. Download them for your motherboard from the official website or a reliable source.
 It is advisable to install the latest version of the drivers. The motherboard may use different audio chips, so download the drivers for your revision.
 Go to sound settings. Start > Control Panel > Sound or type «Sound» in the search and go to the new window responsible for playback. Check if the selected device is correct. To play sound on the speakers, you must select the default — «Speakers». Keep in mind that when you connect your TV via HDMI, the sound from your computer may be redirected to the TV’s speakers automatically.
I hope that after rechecking, according to my above recommendations, you managed to return the normal sound of the speakers / headphones on the computer. If something did not work out or you solved the problem in your own way, then leave comments. I think they will be helpful for other people who are in a similar situation.
I wish you well and good mood. Thank you for your attention!
Dear users!
If you have any questions about this material — leave your comment, help is nearby.
Regards, Site Administrator snapcomp.ru
Dear friend You might be interested in the following articles:
  - Why does the computer “wake up by itself”.

  - What to do, there is a complete freeze of the computer.

  - The best free antiviruses in Russian0263
 - The Print Screen button does not work, do not take a screenshot
Audio outputs on the motherboard
Most modern motherboards have the same audio connectors. And through these small holes, audio signals are delivered to the boards for acoustics, speakers, headphones, even stereo. It is also possible to connect a microphone or an external audio device. Basically, these connectors are signed, but the computer may be located in such a way that it can be difficult to see. And therefore, you can easily mix up the connector when, for example, we connect headphones or speakers.
Search for data on your request:
Schemes, reference books, Datashites:
Price List, prices:
Discussions, Articles, Manuals:
Dill for the end of the search in all bases.
Upon completion, a link will appear to access the found materials.
Content:
- Audio connectors on motherboard
- System unit connectors
- How to set up sound on a computer
- How to connect 7.1 sound to a board with three audio connectors?
- How to connect a 7.1 system if there are only 3 audio outputs on the motherboard?
- Why is there no sound on my computer or laptop
- Audio connectors on motherboard
WATCH RELATED VIDEO: No Sound on Computer (Asus P5PE-VM) — Problem Solving