Display Driver Uninstaller 18.0.5.3 free download — Software reviews, downloads, news, free trials, freeware and full commercial software
Display Driver Uninstaller 18.0.5.3 free download — Software reviews, downloads, news, free trials, freeware and full commercial software — Downloadcrew
Store
News
Thoroughly remove graphics drivers from your PC
Rating:
Operating Systems:
Windows 10, Windows 7 (32 bit), Windows 7 (64 bit), Windows 8, Windows Vista, Windows XP
License:
Freeware
Developer:
Wagnard
Software Cost:
Free
Category
System & Desktop Tools
Date Updated:
29 July 2022
Downloads To Date:
12462
Languages:
English
Download Size:
1.16 MB
Download
100% Free
Tested & Secure
Review
Specifications
Changelog
One of the trickiest tasks can be removing or updating graphics drivers. If you’re upgrading or replacing your card how can you be sure the installer has removed all traces of the previous driver from existence? And what happens if your installation corrupts to the point the installer isn’t capable of either installing over the top of itself or removing the corrupt installation?
This is where Display Driver Uninstaller comes into play. It claims to thoroughly remove drivers and leftover files and Registry entries from NVIDIA, AMD and Intel graphics chipsets. While Intel support is still in its infancy, both NVIDIA and AMD support is well established.
Fire up the app and it’ll prompt you to boot into Safe mode to make sure the removal is clean – it’ll even do this for you automatically, a nice touch. Once there, you have three choices: remove and reboot and remove and do nothing are mainly for removing corrupt installs, while remove and shutdown is for those who are fitting a new card. Click one, then wait while the tool does its work.
Once complete, Display Driver Uninstaller is capable of booting back into normal mode automatically. It’ll also disable Windows from automatically detecting and installing a new driver as soon as you’ve rebooted, allowing you to then install your driver of choice.
In our test, everything proceeded smoothly, leaving us with a basic display adapter that allowed us to download and install a brand new driver without having to worry about what was left behind.
Verdict:
If you’re looking for a clean uninstall of your graphics drivers for whatever reason, Display Driver Uninstaller could be your knight in shining armour.
-41%
IObit Uninstaller 12 PRO
Offer Ends In:
Secure & Tested Software
Instant Download 24/7
10+ Years of Service
Chocolatey Software | Display Driver Uninstaller 18.
 0.5.8
0.5.8
Requires Puppet Chocolatey Provider module. See docs at https://forge.puppet.com/puppetlabs/chocolatey.
## 1. REQUIREMENTS ## ### Here are the requirements necessary to ensure this is successful. ### a. Internal/Private Cloud Repository Set Up ### #### You'll need an internal/private cloud repository you can use. These are #### generally really quick to set up and there are quite a few options. #### Chocolatey Software recommends Nexus, Artifactory Pro, or ProGet as they #### are repository servers and will give you the ability to manage multiple #### repositories and types from one server installation. ### b. Download Chocolatey Package and Put on Internal Repository ### #### You need to have downloaded the Chocolatey package as well. #### Please see https://chocolatey.org/install#organization ### c. Other Requirements ### #### i. Requires puppetlabs/chocolatey module #### See https://forge.puppet.com/puppetlabs/chocolatey ## 2. TOP LEVEL VARIABLES ## ### a. Your internal repository url (the main one). ### #### Should be similar to what you see when you browse #### to https://community.chocolatey.org/api/v2/ $_repository_url = 'INTERNAL REPO URL' ### b. Chocolatey nupkg download url ### #### This url should result in an immediate download when you navigate to it in #### a web browser $_choco_download_url = 'INTERNAL REPO URL/package/chocolatey.1.2.0.nupkg' ### c. Chocolatey Central Management (CCM) ### #### If using CCM to manage Chocolatey, add the following: #### i. Endpoint URL for CCM # $_chocolatey_central_management_url = 'https://chocolatey-central-management:24020/ChocolateyManagementService' #### ii. If using a Client Salt, add it here # $_chocolatey_central_management_client_salt = "clientsalt" #### iii. If using a Service Salt, add it here # $_chocolatey_central_management_service_salt = 'servicesalt' ## 3.
ENSURE CHOCOLATEY IS INSTALLED ## ### Ensure Chocolatey is installed from your internal repository ### Note: `chocolatey_download_url is completely different than normal ### source locations. This is directly to the bare download url for the ### chocolatey.nupkg, similar to what you see when you browse to ### https://community.chocolatey.org/api/v2/package/chocolatey class {'chocolatey': chocolatey_download_url => $_choco_download_url, use_7zip => false, } ## 4. CONFIGURE CHOCOLATEY BASELINE ## ### a. FIPS Feature ### #### If you need FIPS compliance - make this the first thing you configure #### before you do any additional configuration or package installations #chocolateyfeature {'useFipsCompliantChecksums': # ensure => enabled, #} ### b. Apply Recommended Configuration ### #### Move cache location so Chocolatey is very deterministic about #### cleaning up temporary data and the location is secured to admins chocolateyconfig {'cacheLocation': value => 'C:\ProgramData\chocolatey\cache', } #### Increase timeout to at least 4 hours chocolateyconfig {'commandExecutionTimeoutSeconds': value => '14400', } #### Turn off download progress when running choco through integrations chocolateyfeature {'showDownloadProgress': ensure => disabled, } ### c.
Sources ### #### Remove the default community package repository source chocolateysource {'chocolatey': ensure => absent, location => 'https://community.chocolatey.org/api/v2/', } #### Add internal default sources #### You could have multiple sources here, so we will provide an example #### of one using the remote repo variable here #### NOTE: This EXAMPLE requires changes chocolateysource {'internal_chocolatey': ensure => present, location => $_repository_url, priority => 1, username => 'optional', password => 'optional,not ensured', bypass_proxy => true, admin_only => false, allow_self_service => false, } ### b. Keep Chocolatey Up To Date ### #### Keep chocolatey up to date based on your internal source #### You control the upgrades based on when you push an updated version #### to your internal repository.
#### Note the source here is to the OData feed, similar to what you see #### when you browse to https://community.chocolatey.org/api/v2/ package {'chocolatey': ensure => latest, provider => chocolatey, source => $_repository_url, } ## 5. ENSURE CHOCOLATEY FOR BUSINESS ## ### If you don't have Chocolatey for Business (C4B), you'll want to remove from here down. ### a. Ensure The License File Is Installed ### #### Create a license package using script from https://docs.chocolatey.org/en-us/guides/organizations/organizational-deployment-guide#exercise-4-create-a-package-for-the-license # TODO: Add resource for installing/ensuring the chocolatey-license package package {'chocolatey-license': ensure => latest, provider => chocolatey, source => $_repository_url, } ### b. Disable The Licensed Source ### #### The licensed source cannot be removed, so it must be disabled.
#### This must occur after the license has been set by the license package. ## Disabled sources still need all other attributes until ## https://tickets.puppetlabs.com/browse/MODULES-4449 is resolved. ## Password is necessary with user, but not ensurable, so it should not ## matter what it is set to here. If you ever do get into trouble here, ## the password is your license GUID. chocolateysource {'chocolatey.licensed': ensure => disabled, priority => '10', user => 'customer', password => '1234', require => Package['chocolatey-license'], } ### c. Ensure Chocolatey Licensed Extension ### #### You will have downloaded the licensed extension to your internal repository #### as you have disabled the licensed repository in step 5b. #### Ensure the chocolatey.extension package (aka Chocolatey Licensed Extension) package {'chocolatey.extension': ensure => latest, provider => chocolatey, source => $_repository_url, require => Package['chocolatey-license'], } #### The Chocolatey Licensed Extension unlocks all of the following, which also have configuration/feature items available with them.
You may want to visit the feature pages to see what you might want to also enable: #### - Package Builder - https://docs.chocolatey.org/en-us/features/paid/package-builder #### - Package Internalizer - https://docs.chocolatey.org/en-us/features/paid/package-internalizer #### - Package Synchronization (3 components) - https://docs.chocolatey.org/en-us/features/paid/package-synchronization #### - Package Reducer - https://docs.chocolatey.org/en-us/features/paid/package-reducer #### - Package Audit - https://docs.chocolatey.org/en-us/features/paid/package-audit #### - Package Throttle - https://docs.chocolatey.org/en-us/features/paid/package-throttle #### - CDN Cache Access - https://docs.chocolatey.org/en-us/features/paid/private-cdn #### - Branding - https://docs.chocolatey.org/en-us/features/paid/branding #### - Self-Service Anywhere (more components will need to be installed and additional configuration will need to be set) - https://docs.chocolatey.
org/en-us/features/paid/self-service-anywhere #### - Chocolatey Central Management (more components will need to be installed and additional configuration will need to be set) - https://docs.chocolatey.org/en-us/features/paid/chocolatey-central-management #### - Other - https://docs.chocolatey.org/en-us/features/paid/ ### d. Ensure Self-Service Anywhere ### #### If you have desktop clients where users are not administrators, you may #### to take advantage of deploying and configuring Self-Service anywhere chocolateyfeature {'showNonElevatedWarnings': ensure => disabled, } chocolateyfeature {'useBackgroundService': ensure => enabled, } chocolateyfeature {'useBackgroundServiceWithNonAdministratorsOnly': ensure => enabled, } chocolateyfeature {'allowBackgroundServiceUninstallsFromUserInstallsOnly': ensure => enabled, } chocolateyconfig {'backgroundServiceAllowedCommands': value => 'install,upgrade,uninstall', } ### e.
Ensure Chocolatey Central Management ### #### If you want to manage and report on endpoints, you can set up and configure ### Central Management. There are multiple portions to manage, so you'll see ### a section on agents here along with notes on how to configure the server ### side components. if $_chocolatey_central_management_url { package {'chocolatey-agent': ensure => latest, provider => chocolatey, source => $_repository_url, require => Package['chocolatey-license'], } chocolateyconfig {'CentralManagementServiceUrl': value => $_chocolatey_central_management_url, } if $_chocolatey_central_management_client_salt { chocolateyconfig {'centralManagementClientCommunicationSaltAdditivePassword': value => $_chocolatey_central_management_client_salt, } } if $_chocolatey_central_management_service_salt { chocolateyconfig {'centralManagementClientCommunicationSaltAdditivePassword': value => $_chocolatey_central_management_client_salt, } } chocolateyfeature {'useChocolateyCentralManagement': ensure => enabled, require => Package['chocolatey-agent'], } chocolateyfeature {'useChocolateyCentralManagementDeployments': ensure => enabled, require => Package['chocolatey-agent'], } }
How to reinstall video card drivers
When using a computer, some users have to reinstall the video card driver.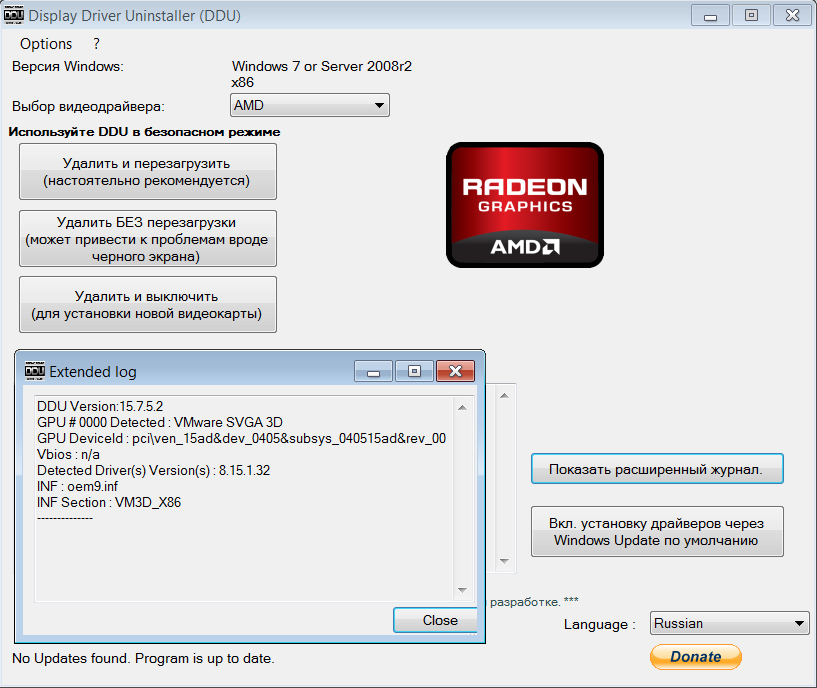 Usually, this happens when replacing equipment: one video card was changed to a video adapter of a different type, or in case of problems with the software of this device, driver damage.
Newer versions of drivers can be installed over old ones, but in some situations this cannot be done, and in the case of a new graphic card of a different type, you will need to reinstall the video driver.
Contents:
- How to reinstall video card drivers on Windows
- Downloading the driver from the video adapter manufacturer’s website
- How to uninstall the video driver on Windows — method 1
- How to remove the old video driver — method 2
- How to completely uninstall the video driver in the Display Driver Uninstaller — Method 3
- Installing a new video driver
- Conclusions of the article
If the driver began to conflict with the Windows operating system, game or program, you will need to roll back the driver state to the previous version or perform a clean installation of the video driver.
The video driver can be rolled back to a previous version, but this does not always solve the problems that have arisen. For example, on my computer, there was a problem updating the graphics accelerator driver.
The video driver update process stopped at one point and hung. The driver itself managed to get a new up-to-date number, the computer worked as usual, no errors or warnings were displayed in the Device Manager. I don’t play computer games, so I didn’t feel any discomfort.
Retrying to update the driver after a while also failed, although NVIDIA Experience updated without problems. I have only one way out: I need to reinstall the video drivers on my computer.
How to reinstall video card drivers on Windows
How to reinstall video card drivers? To do this, you need to follow a certain procedure. Now, we will look at how to properly reinstall the drivers on the video card.
The reinstallation process has several steps:
- Downloading a new driver from the official website of the hardware manufacturer: NVIDIA or AMD.

- Removing the old video driver from the computer.
- Installing a new video driver in the Windows operating system.
This will remove the old software from the PC and then install the new software. In most cases, this will solve the problems that arise.
It is important to make sure that after removing the old video driver, there are no tails left on the computer from the removed graphics device software.
In this guide, you will find instructions on how to uninstall the video driver in several ways, and how to reinstall the video driver on the Windows operating system.
Before performing operations to uninstall or reinstall drivers on your computer, create a Windows restore point so that you can roll back the system in case of problems after reinstalling the drivers.
Download the driver from the website of the video adapter manufacturer
Download new drivers in advance from the official website of the video card manufacturer: AMD or NVIDIA.
How to find and download NVIDIA drivers:
- Log in to NVIDIA official website.
- In the NVIDIA Driver Downloads section, manually enter your graphics card details, operating system, and language.
- Click on the «Search» button.
- On the next page, click on the «Download Now» button.
To download AMD drivers follow these steps:
- Log in to AMD official website.
- Use the search or select the product yourself from the list, and then click on the «Submit» button.
- On the next page, select your computer’s operating system, and then download the suggested driver.
How to uninstall the video driver on Windows — 1 method
First, we will look at how to remove the driver using the Windows operating system. We will use Device Manager.
If there are problems with the drivers on the computer, a yellow question or exclamation mark appears in the Device Manager in front of the corresponding device, indicating a problem.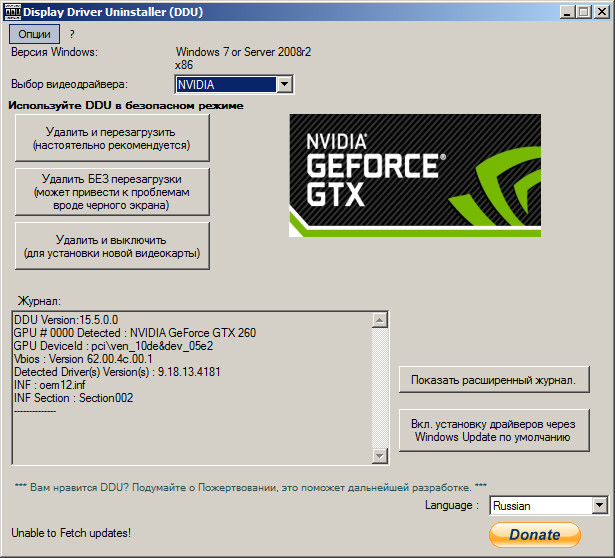 In other situations, these signs will not be, but the problem with the drivers still exists.
Do the following:
- Log in to Device Manager.
- Find your video adapter in the list of devices.
- Right-click on the video device, select «Remove Device» from the context menu.
- In the «Remove a device» window, check the «Delete the driver software for this device» box, and then click the «Delete» button.
- Restart your computer to finish uninstalling the driver.
How to uninstall the old video driver — method 2
Another way: uninstall video drivers in the standard way using the system uninstall program function.
Universal method that works on different versions of Windows (Windows 7, Windows 8, Windows 8.1, Windows 10):
- Enter Control Panel (small icons).
- Click on Programs and Features.
- In the Uninstall or Change a Program window, select the software related to your computer’s video adapter.

- Right-click on the relevant software, select Uninstall/Change from the context menu.
- The uninstaller will run to remove this software.
- Restart your PC.
- Remove all programs from this manufacturer from your computer.
In Windows 10, you can use another option to access the list of installed programs:
- Enter the Start menu, click on Settings.
- In the Settings application window, click on Applications.
- Under Apps & Features, select the software from the video driver manufacturer.
- Uninstall this software and then restart your computer.
How to completely remove the video driver in Display Driver Uninstaller — method 3
When you remove video drivers with system tools, it is not always completely removed software remnants. Data that has not been deleted may adversely affect the installation of new drivers, when installation errors occur, or the subsequent operation of the device.
Therefore, it is worth using third-party programs. The free Display Driver Uninstaller (DDU) program performs a complete removal of video drivers from your computer.
Download the Display Driver Uninstaller program from the official website of the application developer. The DDU program does not require installation on a computer, the application is launched from a folder. There is support for the Russian language.
Display Driver Uninstaller download
Go through the following steps:
- Unzip the archive with the program, run the file «Display Driver Uninstaller — Application» from the folder.
- Display Driver Uninstaller (DDU) will open on the desktop. The application has detected the video adapters on this computer.
- In the window that opens, DDU warns that the application was not launched in «safe mode». For better cleaning and to avoid possible problems, it is recommended to restart the computer and then enter safe mode.

- Enter Windows Safe Mode.
- Run the Display Driver Uninstaller again.
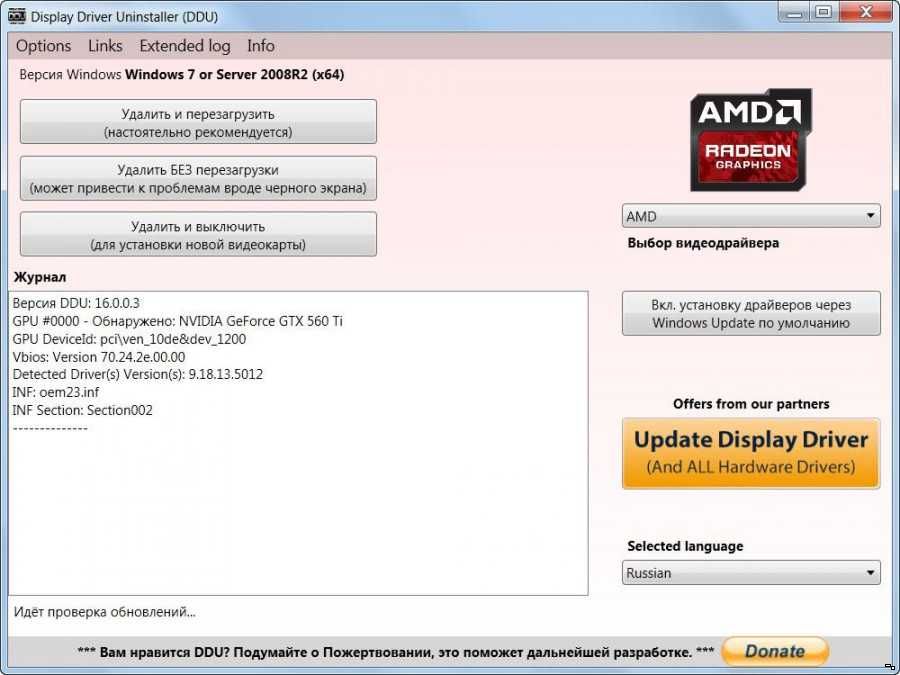
- In the «GPU» field, select the graphics card.
For example, my computer has two video devices: an NVIDIA discrete graphics card and an integrated Intel HD Graphics. Therefore, I must select the device whose drivers need to be removed.
- After selecting the device, click on the «Uninstall and restart (highly recommended)» button.
- The Display Driver Uninstaller program removes drivers, cleans the system of residues.
The computer will then restart. The Windows desktop will open in low resolution.
Installing a new video driver
Now you need to install a new video driver on your computer. The NVIDIA and AMD driver installers install the software themselves, with a minimum of user interaction.
The installation order is approximately the same for NVIDIA or AMD drivers:
- First, the hardware compatibility is checked.
- The user must then accept the license agreement.
- Next, you need to select the installation order: express installation (quick) or custom installation (custom). Manufacturers recommend choosing a quick express installation.
- Drivers are installed automatically. During installation, the screen will briefly go out, and the resolution on the monitor screen will also change.
After the installation of the video driver is completed, you can continue to work on the computer.
Conclusion of article
If the computer has problems with the video adapter software, the user needs to uninstall the old drivers and install new drivers for the video card instead. You can uninstall the drivers using the system tools or using the Display Driver Uninstaller program. Drivers are installed automatically using software from the video adapter manufacturer.
By clicking on the button, I agree to the processing of personal data and accept the privacy policy
How to update video card drivers — AMD and Nvidia?
Get the most out of your graphics card by updating your graphics card drivers.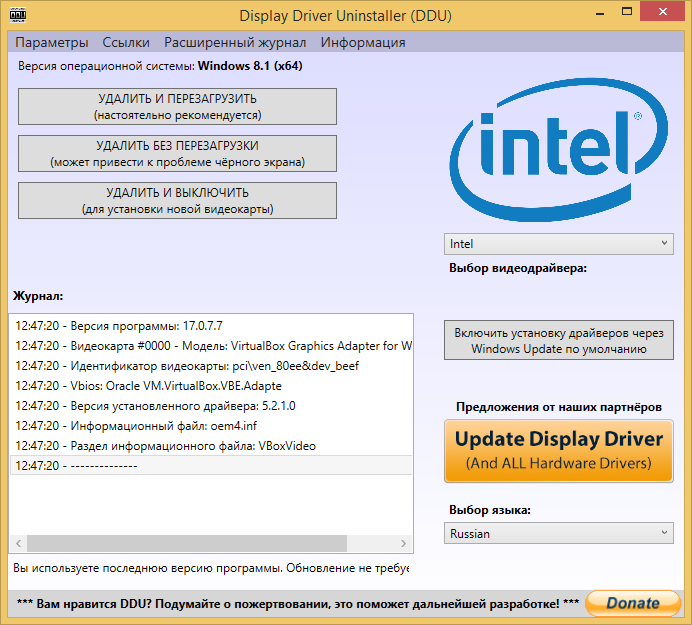
If you want to update your graphics driver, there are various ways to do so. If you want to make sure you can play your next game or want to get the next new features, updating your drivers is a good idea. This ensures that your hardware is working as it should or that you are taking advantage of the latest software benefits. For example, if you want to improve scaling or ray tracing in games and make sure they work well.
When updating graphics drivers, you need to know which GPU model you have and which major brand, AMD or Nvidia. This is important to make sure you’ve downloaded the correct file, especially if you don’t already have the software for your graphics card. Or, if you’ve already done so, this is a much simpler process by which we can walk you through all the options.
Contents
- Optional — uninstall current graphics driver
- Step 1: Download DDU (video driver uninstaller)
- Step 2: Restart in safe mode
- Step 3: Run DDU
- Update Nvidia graphics driver
- Option 1: Check Geforce Experience
- Nvidia
- Update AMD graphics driver
- Option 1: Check AMD Radeon
- software Option 2: Download directly from AMD website
- Conclusion
Optional — Uninstall the current graphics driver
If you already have a driver installed, we recommend that you uninstall it before upgrading to the new driver.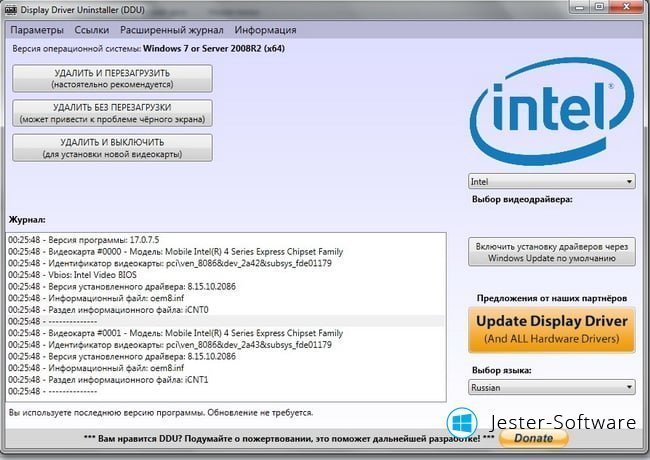 It’s not necessary, but if you want to do it, here’s how.
Step 1: Download DDU (Video Driver Uninstaller)
Go to the DDU download page to get the latest download and extract the program after it is completed.
Graphics driver removal can be done using Windows and driver software, but they usually do not remove key registries or deeper rooted changes.
Step 2: Restart in safe mode
DDU must be running in safe mode for best performance. To get there, go to Windows settings and in the System Restore section, reboot into advanced startup.
After restarting, you will have a blue screen with strange resolution for navigation. There you want to go to troubleshooting > advanced > and launch settings where you want to restart your device again.
Once again faced with the blue screen, you want to choose safe mode (the fourth option in our case) to finally return to Windows.
Safe Mode is a great way to diagnose and fix your Windows and drivers because it only works with the minimal needs of the OS.
Step 3: Run DDU
Finally, you want to open DDU and clean up your driver. Be sure to select the driver you want to uninstall. You want to select the GPU and then your graphics driver, Nvidia, AMD, or Intel. Then select Clean and Restart to return to normal Windows and continue.
Cleaning and shutting down is a good way to uninstall the driver if you are planning to upgrade your video card, as it allows you to start fresh on first boot.
Update Nvidia Graphics Driver
First, we will look at how to update the Nvidia graphics driver either using Geforce or by downloading it from their website.
Option 1: Check Geforce Experience
If you already have Nvidia Geforce Experience installed and are logged in, open the app to check for a new driver.
Once opened, go to the drivers tab where you can check for updates. If there is a new one, you can easily install the graphics driver in express or custom.
After starting the installation, you will be up to date.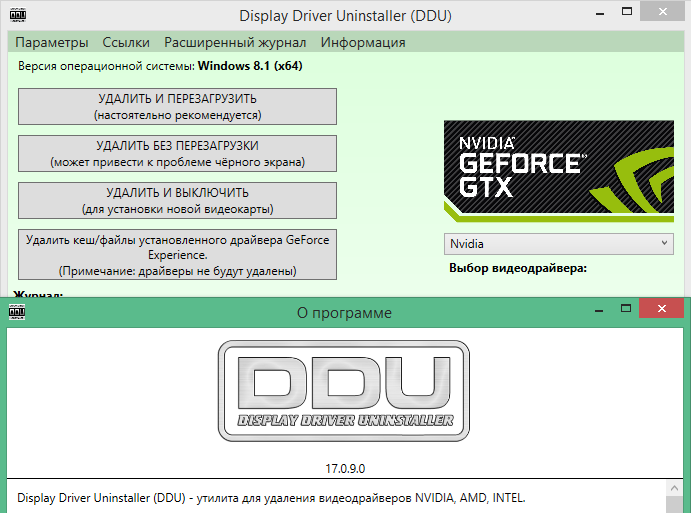
Nvidia requires you to be logged in to update your drivers through Experience, so going directly to their website will save you the hassle if you don’t want to have an account with them.
Option 2: Find the driver on the Nvidia website
To find a new graphics driver, go to the Nvidia drivers page. Be sure to insert your graphics card to find the latest driver.
Once you get to the right driver, download it.
After downloading install the driver, you will be able to install only the driver but also the Geforce Experience.
Custom install will also allow you to perform a clean install to reset your drivers.
Update AMD graphics driver
If you have an AMD card, this section is for you and tells you how to update these graphics drivers.
Option 1: Check AMD Radeon Software
If you already have AMD Radeon software installed, you can open it to check for updates.
After opening, go to the settings (gear) in the upper right corner. Then on the system tab, you can check for updates for the software that also runs the software.
Then just follow the installation process.
Option 2: Download directly from the AMD website
Go to the AMD website to find the correct graphics driver.
Search for your GPU and enter it to go to the corresponding page where you can download the Radeon software.
Once downloaded, install the software and follow the onscreen instructions to complete the driver installation.
Advanced installation options also allow you to clean install the AMD graphics driver.
Conclusion
There you have some easy ways to update your graphics driver. If it’s either AMD or Nvidia and whether you have their graphics software installed or not. It’s important to keep your drivers up to date to make sure everything works as expected when it comes to new game releases or new features that are available.
It may also be helpful to uninstall the old driver first to make sure the new driver is not conflicting or corrupted.