How to manually set up your RAM speed, timings and voltage
Is your RAM running at the speed it should be?
Published: 31st December 2013 | Source: RushKit | Author: James Riley
Introduction
When a system is first put together, or the BIOS is reset, certain settings will revert to their stock state. This can mean CPU overclocks are reset, fan speed profiles may be lost, hard drive boot priorities may become scrambled, and also the RAM will reset to the default speed of 1333Mhz (on DDR3). We show you how to manually adjust the memory settings to set it to the rated speeds set by the manufacturer.
Method
First things first, you need to check your memory specifications. To do this, you can either check online from the retailer/manufacturer that you bought the Memory from, or take out one of the sticks of RAM and it will say on the label. Take note of the memory speed (2400MHz for example), the timings (10-12-12-31 for example), and the voltage of the memory (1.65v for example).
Before touching any setting in the BIOS, it would be advisable to download CPU-z here, and under the ‘Memory’ tab, double check what you have your RAM set to. Remember, as ‘DDR’ stands for double data rate, you need to double whatever value it shows next to ‘DRAM Frequency’. For example, if 666.5MHz is showing, then the RAM will be running at 1333MHz. Now, if you’ve bought 2133MHz memory, then you’re losing a considerable amount of speed in not having it set to the correct values.
Now, getting into the BIOS should be a simple case of tapping delete as you turn the system on. It may be another button on the keyboard, so if that doesn’t work, check in your motherboard manual. Once into the BIOS, find your way to the ‘Overclock’ settings and once there, look for memory settings.
From there, you need to look for a setting ‘DRAM Timing Mode’, and then ‘Advanced DRAM Configuration’ which will take you to another screen where you will be able to manually input the values for the Memory Timings. Usually, these will default to 9-9-9-24, and a lot of 1600MHz memory already uses these timings, in which case you won’t need to change anything here. However, with higher memory speeds such as 2133MHz, the timings will often be a little higher, so you will need to manually change them. (its worth remembering each board can be worded slightly differently but we are sure you will be able to work it out)
After doing this, go back to the previous menu and look for DRAM Voltage. This will most likely display ‘Auto’, in which case, you need to change this to your specific value. This will most likely be 1.65v, 1.5v or maybe 1.35v for DDR3, but it may be different if you have low voltage RAM.
Finally, look for the DRAM Frequency and then on the drop down list, choose the correct speed for your RAM.
You can now press F10 to save your settings and reboot the PC. It should start up normally (maybe even a few milliseconds faster if you’re lucky!) and then you can check again in CPU-z to make sure the settings have saved correctly.
It may be worth checking with a benchmark program to make sure your system can support very fast memory. 1600MHz and 1866MHz should be fine with most systems, however, it is worth testing anything higher with something like OCCT, some older CPU’s just can not run very high memory speeds and others need a little more tinkering in the BIOS to get them to play ball. If you have any issues or questions, feel free to ask on the OC3D Forums.
1 — Is your RAM running at the speed it should be?«Prev 1 Next»
Most Recent Comments
31-12-2013, 17:36:51
Remmy
03-01-2014, 17:32:44
Wraith
Reply
How to Change the RAM Timing in BIOS | Small Business
When you upgrade memory, your computer typically detects the change and adjusts itself accordingly, but with recent changes in technology, this isn’t always the case.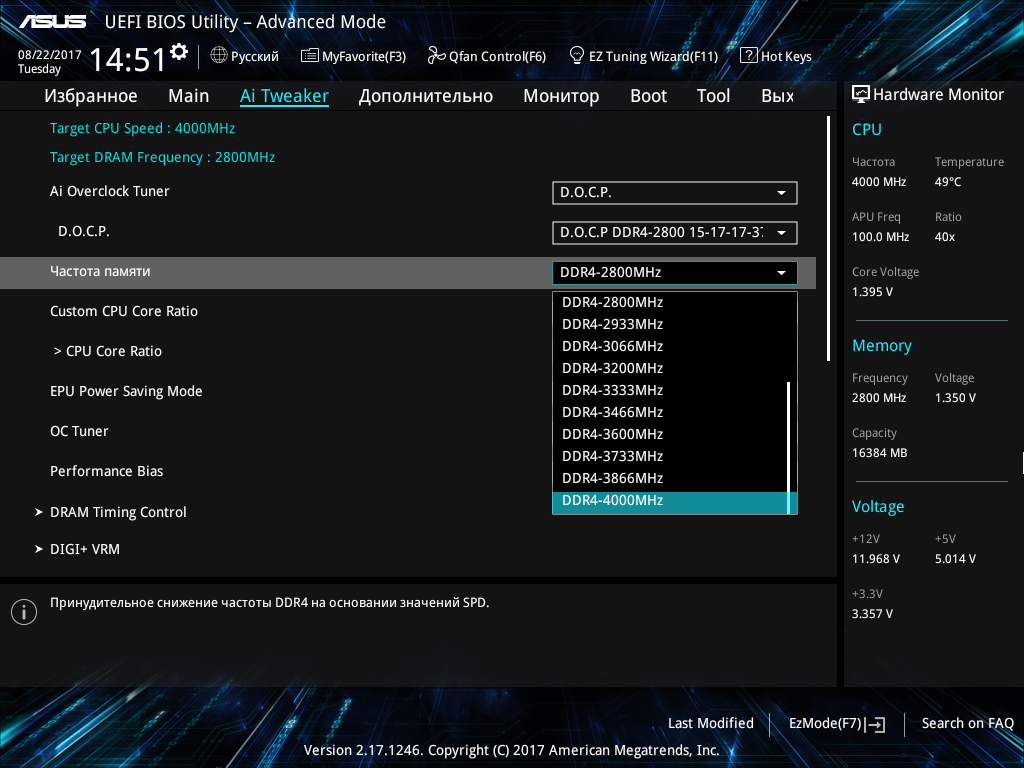 Today’s fastest memory, or RAM, may have outpaced what your computer was designed to handle. If this is the case, tweaking your XMP setting in BIOS should give you the speed you paid for.
Checking Your Memory
Download the CPU-Z app from CPUID. This free utility tells you the type of memory you have, its size, its timing settings and module specifications. It also gives you a wealth of information about your processor, motherboard and chipset.
Open CPU-Z
Launch CPU-Z and click its SPD tab if you’re not sure what kind of memory is installed. It tells you about each memory module in your computer, including its RAM size, manufacturer, part number and it’s maximum speed in MHz. Select each slot to see what’s installed.
Find Your RAM’s Best Speed
Check your memory’s maximum speed as listed by the manufacturer using the information provided in the SPD tab.
Look at Your RAM’s Current Speed
Click the CPU-Z Memory tab.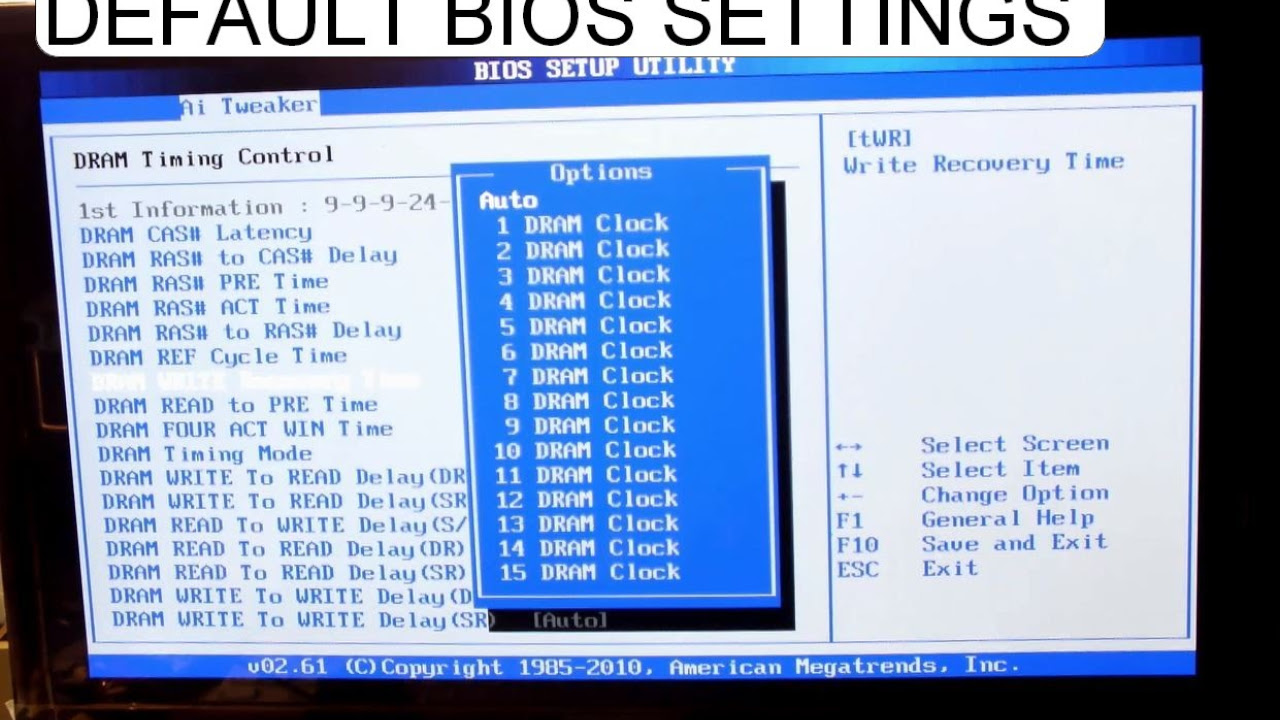 This is where you see your memory’s speed in MHz (frequency). If you’re using DDR RAM, the speed displayed here is half of what it really is. That’s because DDR (double data rate) memory has an effective speed that is twice the frequency. If your CPU-Z says your memory is running at 1400 MHz, your DDR RAM has an effective speed of 2800 MHz.
If CPU-Z tells you that your memory is running at a slower rate than what the manufacturer says it can, you should be able to optimize it in the BIOS.
How to Get Into BIOS
Getting into BIOS involves restarting your computer and, just before it starts up again, pressing a specific combination of keys. The key combination varies from one computer to another, so it’s best to go online to find out what that is. Tom’s Hardware has a pretty good guide to the keys used by different manufacturers, but if you’re impatient to get started, the keys are usually DEL, F2 or F1.
Press and hold the correct key immediately after restarting the computer. When the BIOS or UEFI screen appears, release the keys. BIOS is an acronym for Basic Input/Output System, while UEFI stands for Unified Extensible Firmware Interface. For this purpose, they are the same thing.
It’s important to note that not all computers give you a way to get into BIOS. This is particularly true with laptops.
How to Change RAM Speed in BIOS
After you’re in BIOS or UEFI, look for an XMP button. XMP stands for Extreme Memory Profile and is an Intel technology that allows you to select a profile for your memory to change its timings.
Where the XMP button is located depends on your computer manufacturer. If you’re using MSI-BIOS, then it is typically in the main menu. For other computers, you may have to go through a few menu options to find it, so start with Memory if that’s an option.
Click the XMP button to turn on the feature so that it reads Enabled. In some cases, this is all you need to do, but if your RAM has more than one XMP option, select the fastest one.
Press the keys listed in BIOS to save and exit. Again, the buttons vary; however, Esc is almost always the exit key.
Unless you are a computer expert, it’s inadvisable to manually change the advanced settings in the BIOS, including memory speed.
How to set up random access memory (RAM) in BIOS: instructions in 4 sections
To speed up the computer system, you can «play around» with RAM, increasing its performance. How and why else you need to set the RAM settings, as well as where in the BIOS to change the frequency and timing settings, the article will tell.
Why you need to configure RAM in BIOS
After installing the RAM, changing its settings can be useful. After all, without additional bar settings, operatives can work at a minimum of their capabilities. And by setting up the RAM in your own way, you can overclock it — increase the frequency. This can improve the performance of your computer. However, it is worth knowing that not every operative and not all motherboards support this. So if such an opportunity is needed, you should take care of this before buying components.
Advice : if you plan to install new brackets in your PC yourself, it is better to install complete models, such as HyperX SO-DIMM DDR3 , with the same timings and frequency. Otherwise, the higher frequency version will automatically function at the speed of the slower one, or they will conflict and the whole system will stop working.
Note : A pair of 4 GB sticks works better than one 8 GB stick. The dual-channel mode makes it possible to obtain an increase in CPU performance by 5-10%, and GPU — up to 50%. If the PC has 4 slots, and the user has two modules, then to activate multichannel, you should install them through one.
Read also: How to choose the right processor for your PC: 5 essential parts Each of them corresponds to the firmware of the motherboard installed in the system. For this reason, the user should study the characteristics of the motherboard before changing anything.
Warning ! Touching the subsystem to an unprepared user means the possibility of spoiling something, violating the terms of the warranty. If there is uncertainty, it is better to go to a specialist.
Award BIOS
1. While the computer is restarting, enter the BIOS using a special key or keyboard shortcut. It may vary depending on the motherboard.
2. Use the Ctrl + F1 combination to get to the settings.
3. A window will open where you need to use the keyboard arrows to navigate to «MB Intelligent Tweaker (M.I.T.)» and press Enter.
4. Find «System Memory Multiplier» in the next menu. Here you can set the RAM clock speed up or down by changing the multiplier. Do not overestimate the specified value, otherwise there is a risk of making it worse.
Important! Any changes should be made gradually: one step at a time, and after each change, restart the PC and check if everything is in order.
5. Save parameter changes, exit.
After that, it is recommended to run the software for testing the RAM. It can be AIDA64 or any analogue available to the user.
Note : You can increase the performance of the RAM by increasing the voltage, but this should be done with extreme caution. The safe maximum is 0.15 volts.
Curious: Which motherboard to choose — 8 key criteria
AMI BIOS
This system is not much different from the previous one. Unless the names of the items have been changed. So, after entering, you need to find «Advanced BIOS Features» and go to «Advanced DRAM Configuration», and then change the settings in the same way as the above diagram.
UEFI BIOS
The solution that is installed in most modern motherboards. It has a clear and attractive interface, usually Russified and supports mouse control. For owners of such boards, moving through BIOS sections with arrows is a thing of the past.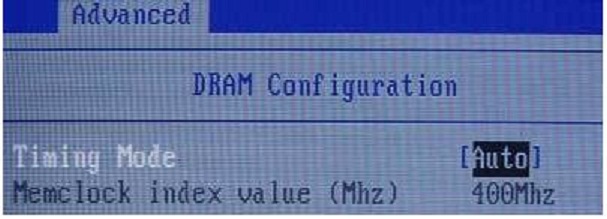
There are much more options for configuring RAM here than in previous versions. What can be done, the table suggests.
Find out: Which processor is better for gaming, AMD or INTEL — choose from 2 manufacturers The lower the timing, the more productive the RAM, so changing the timings is a useful procedure.
But to carry out such operations intuitively is a dangerous undertaking, because in this way you can disable the RAM, and most likely it will not be possible to reanimate the modules. Therefore, it is necessary to pre-test the components with basic Windows tools. If the operative is working fine, you can adjust the timings. Then in Windows you can check if the setup was successful.
It is recommended to perform such operations through the BIOS: in case of failure, the user will be able to quickly roll back the settings to the factory settings.
Useful: Installing the processor on the motherboard: 3 steps
How to change the frequency of RAM in BIOS
Where to set the value has already been described in the settings section, so here it tells you what to consider when changing.
Things to keep in mind:
- When the user himself sets the frequency, for example, 2400 MHz, the RAM operates at basic timings, for example, 11-14-14-33. But even with a reduced response, many models function without interruption.
- The most effective combination: timing — low, frequency — high, but you need to consider the compatibility of values.
- To improve performance, it is recommended to activate the dual-channel mode, and if the motherboard has 8 slots for memory strips, it’s even better: this is already a four-channel mode.
Interesting : The 16 GB HyperX Predator kit clocks at 3600 MHz. It also has backlighting and support for Extreme Memory Profiles technology, which allows you to quickly and conveniently configure memory.
- It should be understood that overclocking success is not 100% guaranteed. If the settings are too high, the memory will not work.
- If the system does not respond after several attempts to start the PC, you must undo everything that has changed.
 The Clear CMOS jumper (aka JBAT) will help with this.
Gamers: Top 10 Best Inexpensive Gaming Video Cards
It’s easy to upgrade your RAM to its best performance to add speed to your PC. You just need to know how to change the settings correctly and proceed with caution.
How to configure RAM in the BIOS of a computer?
Posted in Computer Maintenance
- Choice of RAM for games
- Installing Windows
- Selection of RAM
One way to speed up your computer is to increase its RAM. But there are ways to make your PC run faster even without installing additional RAM. To do this, you need to change its settings in the BIOS interface — frequency, timings and voltage. Features of different methods depend on the firmware of the motherboard and the type of BIOS.
Award BIOS
BIOS version, which was installed on 90% of desktop computer motherboards a few years ago. Now this interface is less common, but still remains popular. The process for setting it up is as follows:
- Reboot the computer and go to its BIOS by pressing one or more keys (for this version, this is usually Delete).
- Go to settings by pressing Ctrl and F1 at the same time.
- Select MB Intelligent Tweaker and press Enter.
- Jump to the System Memory Multiplier section.
- Adjust memory settings by changing the multiplier.
- Save changes and reload.
All changes are recommended to be made gradually, within 5%. The total increase should not exceed 15%. After rebooting, you should check the performance and performance of the RAM using special software — for example, AIDA64 or MemTest86.
AMI BIOS
Another type of interface is BIOS from AMI. It is often found on Lenovo, MSI or ASUS laptops. There are few differences from the Award version, and the list of RAM settings includes:
- Entering the BIOS (pressing the F2 or F10 keys when restarting the computer).
- Selecting Advanced BIOS Features.
- Goes to the Advance DRAM Configuration section.
- Perform frequency, timing and voltage changes.
The computer must be restarted after all settings have been made. Verification is performed using the same benchmarks. It is advisable to run them several times, making sure that the RAM is working properly.
UEFI
The latest BIOS available on most motherboards. It features a simple interface and support for mouse control. Provides more options for memory settings. The procedure is as follows:
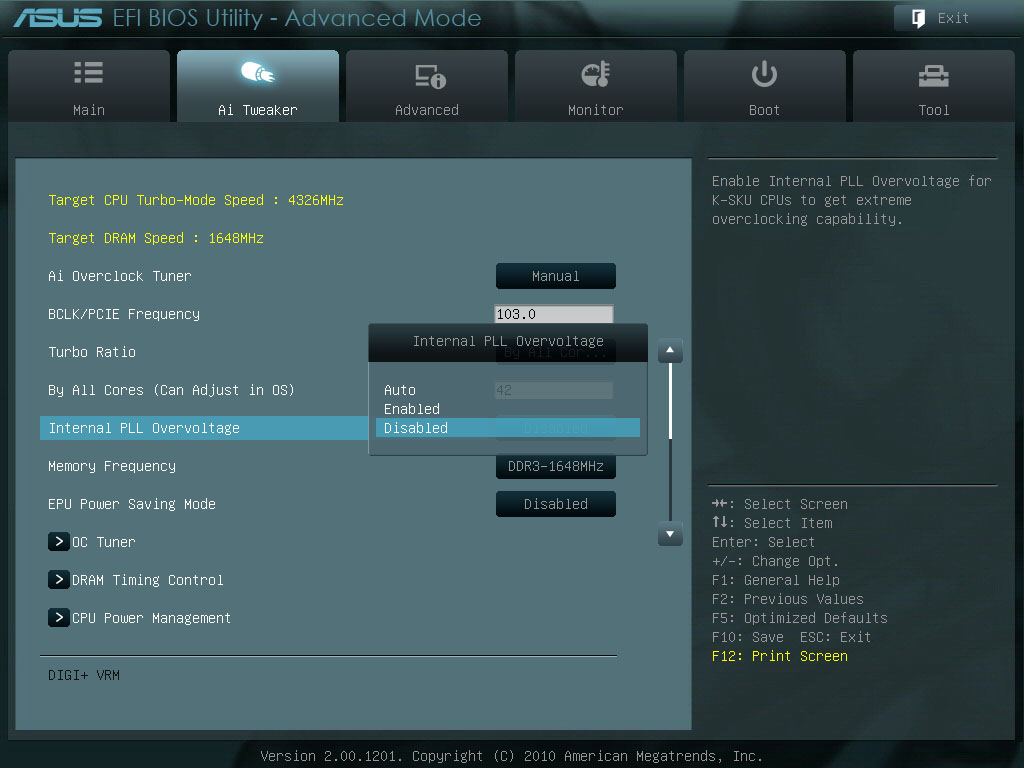
- Enter BIOS. Go to the Advanced Mode/Ai Tweaker/Memory Frequency section.
- Select the desired frequency.
- Select DRAM Timing Control section.

- Changing timings.
- Change to DRAM Driving Control.
- Increase the multiplier for overclocking RAM.
After completing the changes, return to the advanced settings, select Advanced and Northbridge. Here, in the Memory Configuration section, the RAM parameters are changed.
Changing values
Before setting the timings, you should first perform a memory test. To do this, open the system and security section and the Administration item. Here they launch a tool for checking the system memory, test the RAM, restart the PC and enter the BIOS.
Timings are changed in the CAS Latency item. The value is reduced by 0.5 and the changes are saved. As performance increases, they continue to reduce the response time in the RAS Precharge delay item.
With memory settings, not only timings are changed, but also the frequency. Parameter values must be compatible with each other. For low timings, you should choose a high frequency. In addition, to increase the speed of work, it is desirable to activate the two- or four-channel mode.
Conclusions
When configuring the memory parameters, you should not count on a noticeable increase in speed. On average, memory performance is improved by 10-15%. And during the overclocking of the RAM, its work can become unstable. The Clear CMOS jumper will help to cancel all changes, setting it to a different position resets the BIOS settings.
computer, RAM, BIOS
- Views: 26155
Related content
How to know if your Windows computer is infected with a virus
June 29, 2020
8990
The appearance of malicious code on a Windows computer is not always detectable …
2020 Online Gaming PC Build (Wot, WoW, PUBG, Fortnite)
June 27, 2020
10063
Modern online games require the gamer to purchase a sufficiently powerful game…
What is services.
 exe process in Windows and can it be a virus?
June 25, 2020
10542
The system process called services.exe cannot be seen by opening the Task Manager…
What is winlogon.exe process in Windows, can it be a virus?
June 24, 2020
8402
You can only see the winlogon.exe process in Windows 7, 8 or 10 by opening the Manager …
What is the taskmgr.exe process in Windows and can it be a virus?
June 23, 2020
7442
In the list of programs in the Task Manager of any version of Windows, you can see many …
What is the taskhost.exe process in Windows, can it be a virus?
June 22, 2020
10997
When a virus enters a computer with Windows OS, it can also be accompanied by a slowdown in speed …
What is the chrome.exe process in Windows and can it be a virus?
June 21, 2020
7516
In the list of processes in the Task Manager of the Windows operating system, you can see which .