NVMe BIOS Update for Asrock Z77 extreme 4
JavaScript is disabled. For a better experience, please enable JavaScript in your browser before proceeding.
This is the official BIOS update with instructions from Asrock.
It is not available on the download site.
If you would like to install M.2 NVMe device (ed. in PCIe Slot), please update BIOS to P2.90Q.
Please download from attached file.
And follow the below steps to install OS with GPT mode.
1.Please set CSM(Compatibility Support Module) at disable.
path: BIOS -> Boot -> CSM.
2.Please press «F11» enter to Boot menu.
3.Please select «uefi: USB/DVD OS Image Drive» to install OS with GPT mode.
4.When you finished install OS, please reboot the system and press «Delete» to UEFI menu.
5.Please select Boot to Boot Option, and choose Boot Option#1 then select M.2 storage.
Z77EXT42.zip 4393k .zip file
-
Z77EXT42.zip
4.3 MB
Views: 1,965
Reply
Save
Like
Reactions:
2
1 — 12 of 12 Posts
Hello,
I can find this BIOS nowhere else, what is provided by ASRock support ? What does it fix exactly ?
Thank you
Reply
Save
Like
Boot nothing gpt mode
Reply
Save
Like
Where is that bios from?
Reply
Save
Like
Quote:
Originally Posted by microtiger
This is the official BIOS update with instructions from Asrock.
![]()
It is not available on the download site.If you would like to install M.2 NVMe device (ed. in PCIe Slot), please update BIOS to P2.90Q.
Please download from attached file.And follow the below steps to install OS with GPT mode.
1.Please set CSM(Compatibility Support Module) at disable.
path: BIOS -> Boot -> CSM.
2.Please press «F11» enter to Boot menu.
3.Please select «uefi: USB/DVD OS Image Drive» to install OS with GPT mode.
4.When you finished install OS, please reboot the system and press «Delete» to UEFI menu.
5.Please select Boot to Boot Option, and choose Boot Option#1 then select M.2 storage.Z77EXT42.zip 4393k .zip file
Click to expand…
I can confirm this worked for me with a Z77 Extreme4 and Samsung 960 Pro, highest speed I get is 2800 MB/s read so far and usually 2400 MB/s sequential read, write speed is always 2100 MB/s over 300k IOPS for read/write, Thank you for that bios modification!
Reply
Save
Like
I can also confirm that the previously attached 2.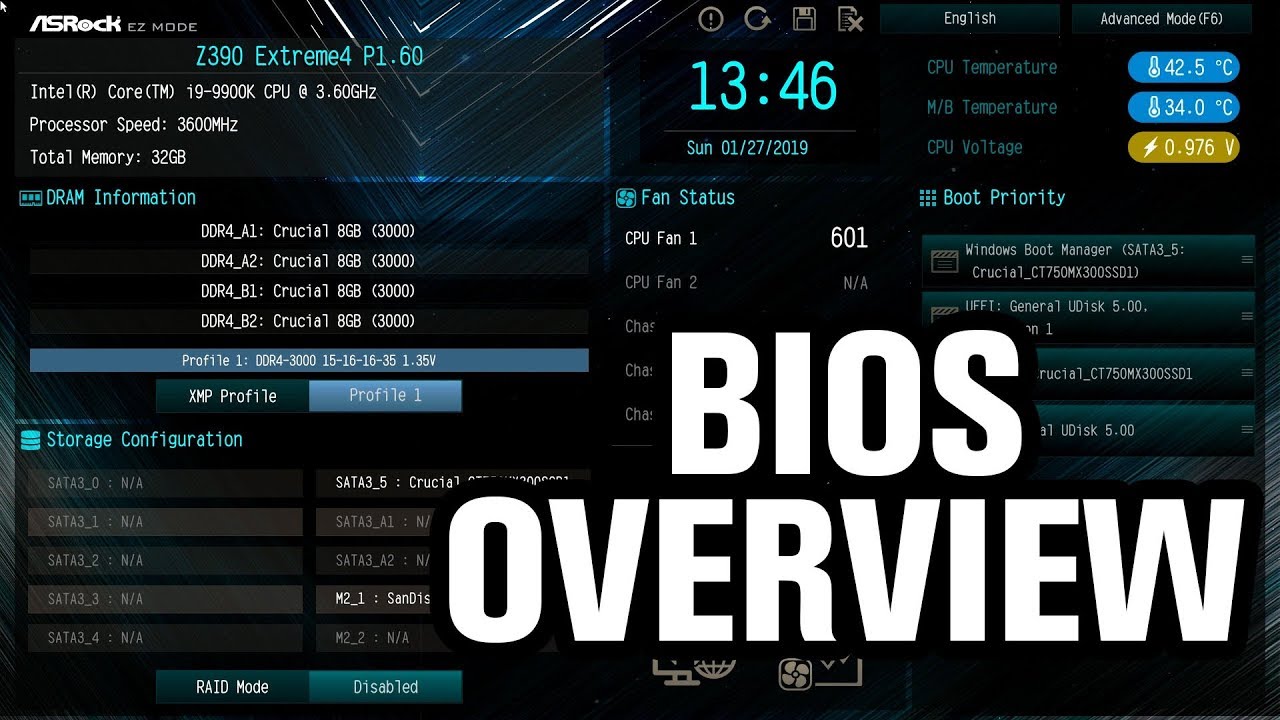 90Q bios works for nvme, however, it crashes every time on resuming from sleep when using an intel750 as the boot drive.
Booting from another device and trying suspend-to-ram mode shows that the i750 device does not come back properly.
After using UBU to update the integrated RST blobs (also did the integrated graphics blobs and latest microcode updates), the system now resumes from sleep.
For anyone trying NVME+Asrock z77 extreme4, consider trying the attached bios. As usual with these sorts of things, your hardware, your problem if anything goes wrong. This works for me though
.
Edit: Disabling CSM is not necessary, but booting the os install media in UEFI mode is.
For those needing to make a win10 usb installer, try using the RUFUS tool in GPT+UEFI+NTFS mode. The win7 dvdtool does not work.
mod_Z77EXT42.zip 4367k .zip file
-
mod_Z77EXT42.zip
4.3 MB
Views: 733
See less
See more
2
Reply
Save
Like
Hi everybody,
thank you for the bios, it works!
However I have my GPU running in PCIE 3. 0 x8 and m2 adapter ASUS HYPER x4 (SSD 960 evo) at PICE 3.0 x2, instead of x4.
Well i did the following configurations in order to try, but i do not understand why my PCIEs do not work properly:
— only GPU in PCIE 2: it works PCIE 3.0 x8 (I do not remember if before it worked well)
— only GPU in PCIE 3: it works PCIE 3.0 x2 (never done before)
— PCIE2 GPU; PCIE3 m2 ssd. they work GPU PCIE 3.0 x8, SSD PCIE 3.0 x2
— PCIE2 m2 ssd; PCIE3 gpu. they work GPU PCIE 3.0 x2, SSD PCIE 3.0 x4
Could this «issue» be linked with this bios 2.90Q?
Thank you,
See less
See more
Reply
Save
Like
Does anyone suppose this 2.90Q bios is newer than the 2.90M that is available in the beta section of the ASrock site?
http://www.asrock.com/mb/Intel/Z77%20Extreme4/?cat=Beta
Reply
Save
Like
Hello all — new here. I’m trying to do something very similar (run a Samsung 960 EVO on an older mobo) but I’ve got the extreme6, not the 4. Is there a bios available for this or need I create one?
Reply
Save
Like
Hi, I’ve have successfully been able to boot off my NVMe drive with the modded BIOS. However, there is one issue. I do not see On Board HDMI Audio settings in the BIOS as an option anymore. Does this new BIOS disable this feature for you too? Please inquire. Thanks.
Reply
Save
Like
I was able to install win10 and boot from nvme ssd using AKASA m.2 to pciE adapter and sabrent rocket nvme ssd. (without any bios modifications, stock bios P2.90Q is working like a charm with CSM enabled) and i have zero issues.
Reply
Save
Like
This is good news for me! Also, where to these boards like to top out at? I can’t seem to get past 48 multi stable no matter the CPU voltage, wondering if it’s the board or if anything on the board needs more voltage.
Reply
Save
Like
1 — 12 of 12 Posts
- This is an older thread, you may not receive a response, and could
be reviving an old thread.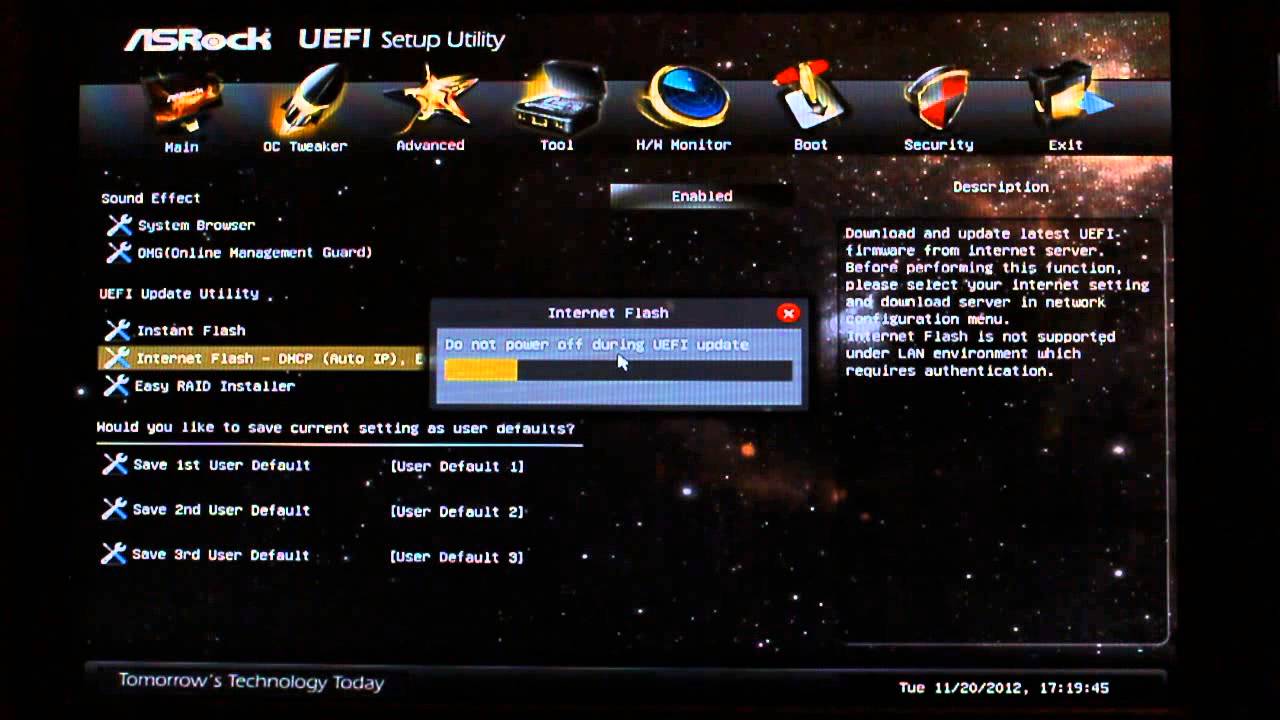 Please consider creating a new thread.
Top
Can’t boot into BIOS! — ASRock z77 Extreme 4
JavaScript is disabled. For a better experience, please enable JavaScript in your browser before proceeding.
I’ve been trying to get into my BIOS and I can’t seem to get into it.
I have a ASRock z77 Extreme 4 mobo, I just updated my BIOS.
Everytime I press F2, it always shows if I want to boot into Windows 7
Under tools it has Memory Diagnostic thing.
Isn’t F2 the button I’m supposed to be pressing?
Reply
Save
Like
1 — 18 of 18 Posts
I don’t know this board, but mine needs the Delete key to be held down during the POST.
Reply
Save
Like
Also puts me into boot manager
See less
See more
1
Reply
Save
Like
Quote:
Originally Posted by Degree
Also puts me into boot manager
Click to expand…
Then all I can recommend is to check the manual. I mean, I could probably look for it on the internet, but I think that by the time I find it, you would probably be in the BIOS by then.
Reply
Save
Like
Should be delete, thats what it is on my Z68. At least from memory that’s what I believe it is.
Reply
Save
Like
I think the secret is to hold down Delete all the way through the POST. If you are holding it down and only letting go once you get to the boot manager, then something must be wrong.
Reply
Save
Like
I’ve been tapping really fast, I guess I’ll give the Hold method a try soon.
Reply
Save
Like
Quote:
Originally Posted by Degree
I’ve been tapping really fast, I guess I’ll give the Hold method a try soon.
Click to expand…
Well, holding is the only way it should be done.
However, some boards only require one key press at a specific time. For example, when I had the EP45-UD3P, I only pressed Delete once at a specific time, and then I would be in the BIOS.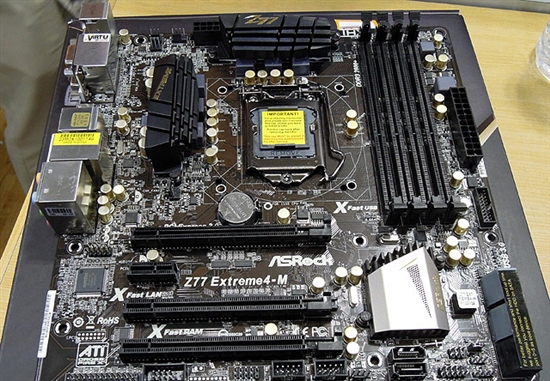 I never had to hold it or press it more than once.
Still, hold it down.
Reply
Save
Like
Maybe it’s something like your keyboard isn’t recognised in time? Maybe try changing the hardware, like disconnecting the harddrive or removing some memory and see if the bios halts at ands you to acknowlege the change at bootup. I’m guessing that wont work most modern bios dont work like that. You could alway try to clear the CMOS- maybe resetting the system clock and resetting defaults will force it to prompt you to make changes.
Reply
Save
Like
I have a similar issue,the board doesn’t recognize my 2nd 6970 card. I tried clearing cmos different video drivers still only shows 1 card.Changed my xfire ribbon 3 times uninstalled 4 times and still nothing worked fine with initial install but nothing now. I have decided to replace this board with Asus z77 Sabertooth anyway.
Reply
Save
Like
Oh I forgot to post but I fixed the issue.
I can only get in if I plug in my old dell PS2 keyboard, but my USB mechanical won’t work.
@[email protected]
Reply
Save
Like
Quote:
Originally Posted by Degree
Oh I forgot to post but I fixed the issue.
I can only get in if I plug in my old dell PS2 keyboard, but my USB mechanical won’t work.
@[email protected]Click to expand…
I hate asking this because I feel like I am rude when I do, but were you plugging it into a USB 2.0 port or a USB 3.0 port?
Reply
Save
Like
Quote:
Originally Posted by TwoCables
I hate asking this because I feel like I am rude when I do, but were you plugging it into a USB 2.0 port or a USB 3.0 port?
Click to expand…
2.0, does it matter?
Reply
Save
Like
you can press del or f2 to get in to the bios, have you tried using the clear cmos button?
Reply
Save
Like
Quote:
Originally Posted by HardwareDecoder
you can press del or f2 to get in to the bios, have you tried using the clear cmos button?
Click to expand.
..
I can get in the BIOS, just with my PS2 keyboard though, not my USB mech keyboard.
Reply
Save
Like
Quote:
Originally Posted by Degree
2.0, does it matter?
Click to expand…
Well, this would normally occur if it’s plugged into the USB 3.0 port. Although, I’m going by what the manual says for the P8P67 series. So, try the USB 3.0 port.
Reply
Save
Like
Quote:
Originally Posted by TwoCables
Well, this would normally occur if it’s plugged into the USB 3.0 port. Although, I’m going by what the manual says for the P8P67 series. So, try the USB 3.0 port.
Click to expand…
I’ll try the 3.0 in a bit
EDIT: Just tried, same result. Goes to Windows Boot Manager instead of BIOS.
Reply
Save
Like
I have the same problem with my Extreme6 Z77. I can’t access bios with my logitech g510 or Corsair K90. So i have no possibility doing something. I tried a cmos and now i have the message «uefi defaults loaded» press del or f1 at every start up. i connected the keyboards to the red usb 2.0. no idea what i can do.
Reply
Save
Like
1 — 18 of 18 Posts
- This is an older thread, you may not receive a response, and could
be reviving an old thread. Please consider creating a new thread.
Top
How to update ASRock BIOS | IT Specialist
There are many reasons why it is sometimes necessary to update the BIOS version. I have already described how to do this on Asus, Gigabyte motherboards. Now I will describe how to update the ASRock BIOS. This guide is dedicated to her.
There is nothing complicated in updating the Asrock bios, following the recommendations of this article, any user can handle it.
Do not interrupt the microcode update procedure at the time of flashing the Asrock BIOS, this will lead to a malfunction of the computer, you will have to take it to a service center to flash the BIOS through the programmer.
I am attaching two versions of the instructions, video and text, whichever is more convenient, use it.
ASRock BIOS update video
Text version of the manual
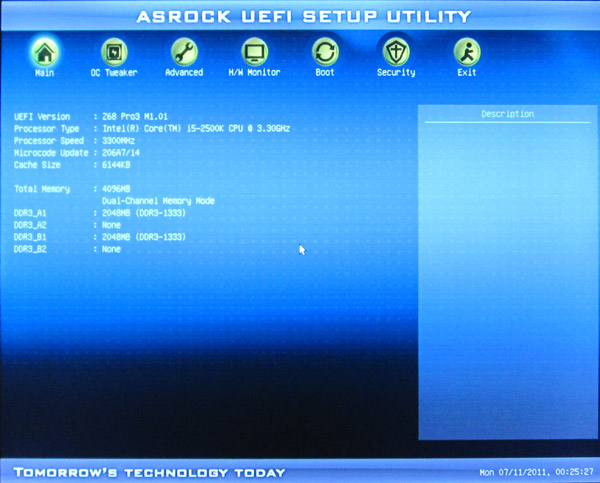
First, turn on the computer and as soon as the first picture appears on the screen, press F2 to enter the BIOS.
You need to determine your BIOS version and the name of the motherboard (you can also see the motherboard model by opening the system unit or on the box that came with the purchase), to make it easier to do, noted in the photo below.
Remember or write down the firmware version and motherboard model. Next, we open the official website of the manufacturer asrock.com, through the search we find the model of your motherboard.
If the search results in several models with different revisions, then select according to yours.
Go to the «Support» category, select «BIOS».
Further in the article there is a small fork, as I will describe two ways to update the BIOS microcode on ASRock, divided into two subheadings.
ASRock BIOS update via Instant Flash
On the page that opens, you will see a list of available BIOS versions for updating. Near each there is a description of the changes made. You can download any more recent version, but I recommend the latest one, it carries wider functionality and fixes of detected errors. Do not download beta versions! And so, we are interested in the microcode with the line «Instant Flash», click on «Global» (multilanguage version).
The downloaded file is in the archive, extract it and copy it to the root of the flash drive with the FAT32 file table. I already wrote about how to format in FAT32.
Reboot your computer, when you turn it on, press F6 to get into the Instant Flash interface and update the BIOS on the asrock motherboard.
The utility will automatically scan the media and determine the appropriate file for the update, click «Update», in the pop-up window confirm the action — Yes, wait for the procedure to complete, at the end the computer will restart and start in normal mode. When rebooting, the image may be missing for up to 30 seconds, do nothing.
If for some reason the F6 key does not work, then you need to enter the ASRock BIOS using the F2 key when starting the PC.
To access more settings, click on the «Advanced Mode» button or press the F6 key.
Select the «Tool» tab, click «Instant Flash». After the program finds a suitable firmware, click «Update», confirm by clicking «Yes», wait until the end.
ASRock BIOS update via .exe file
There is another way to update the microcode firmware — from under Windows. We return to the choice of BIOS versions, only this time we download by clicking «Global» in the Windows line.
Unpack the downloaded .exe file, run it with administrator rights by right-clicking on it and selecting the appropriate line — «Run as administrator». Confirm the action by clicking «Yes». The computer will restart, wait for it to complete.
That’s all, and to make sure you have the latest version, go to the BIOS and look.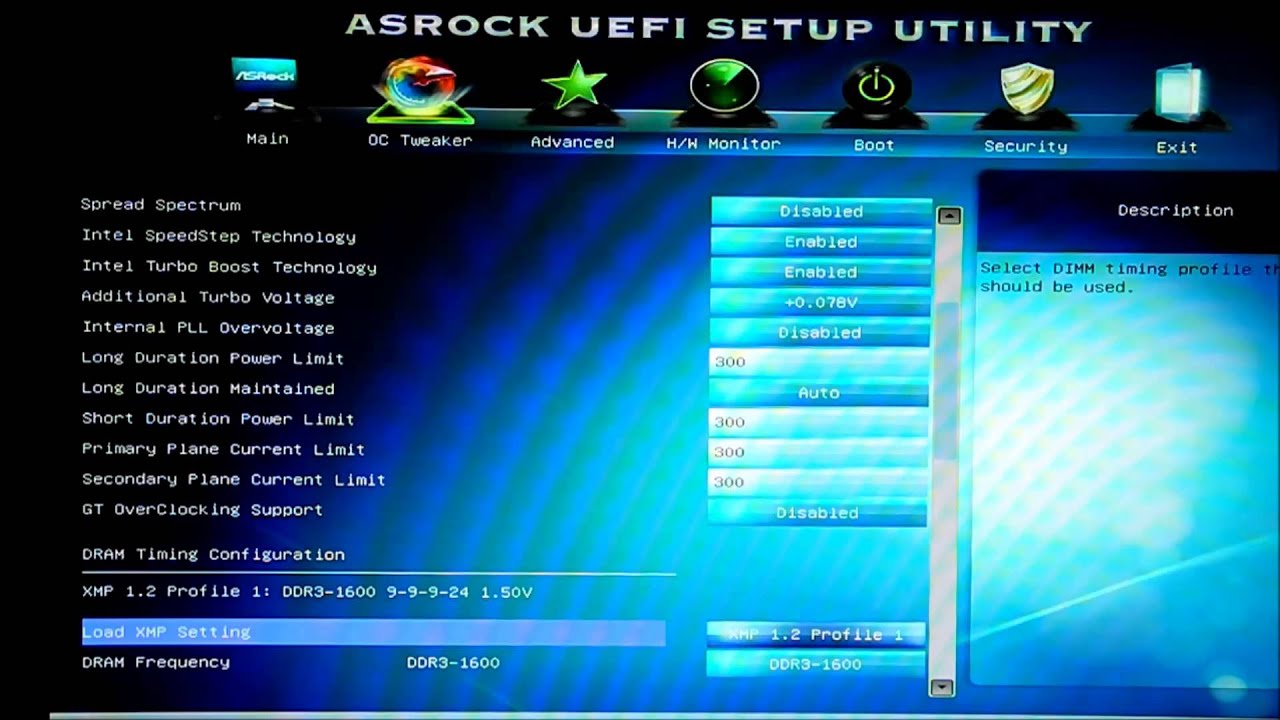
How to update BIOS on ASRock motherboard
Hello everyone! In my last article, I wrote about overclocking the processor and left one small gap regarding updating the BIOS, which I would like to fill. Today I will tell you about the general principles of this topic and analyze an example directly on my Asrock Z170m Pro4s motherboard. In general, when updating the BIOS, there is always a risk that some kind of failure will occur, and the consequences can not always be corrected in two clicks. Therefore, one of the rules of a good system administrator is very relevant here: “do not touch what works anyway.” But if you are determined and you just need an upgrade, then be very careful, be patient and have a good uninterruptible power supply. Yes, yes, you You heard right.If there is a sudden power outage during the update, everything is possible, up to the complete failure of the equipment.Do everything at your own peril and risk.
Author Denis Mikhailov!
So, the first thing we need to do is find out the revision of our motherboard and the version of the BIOS installed on it.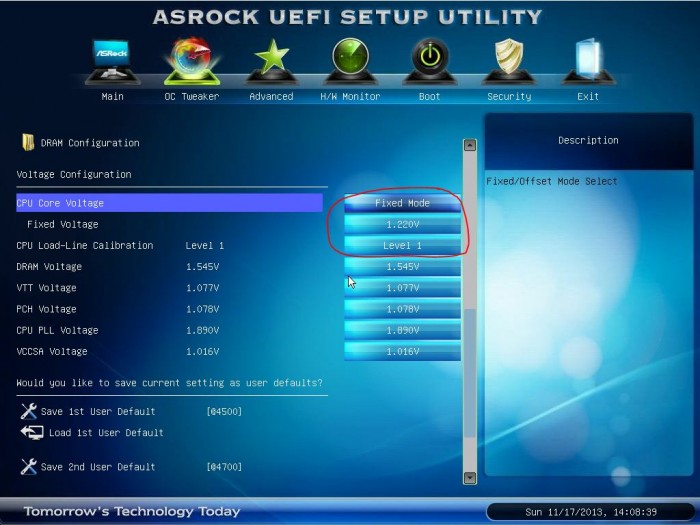 This is necessary for our further actions. I want to note that a revision is needed to update the BIOS of outdated motherboards, and to update new motherboards, it is enough to know the BIOS version.
As a rule, the revision is indicated on the motherboard itself, depending on the model, it can be located in different places. In any case, we are looking for the inscription rev.0.1 or similar.
In most cases, it is present both on the box and on the documentation that came with the motherboard.
In order to find out the current BIOS version, press the key combination windows + R on the keyboard and enter the command msinfo32 in the field that opens.
Now that we are armed with the necessary information, we go to the website of the manufacturer of our motherboard. Further actions, as a rule, are the same, or very similar to each other.
Namely: we find our motherboard and go to the section «download», «download» or similar.
The next steps will differ depending on how you want to update.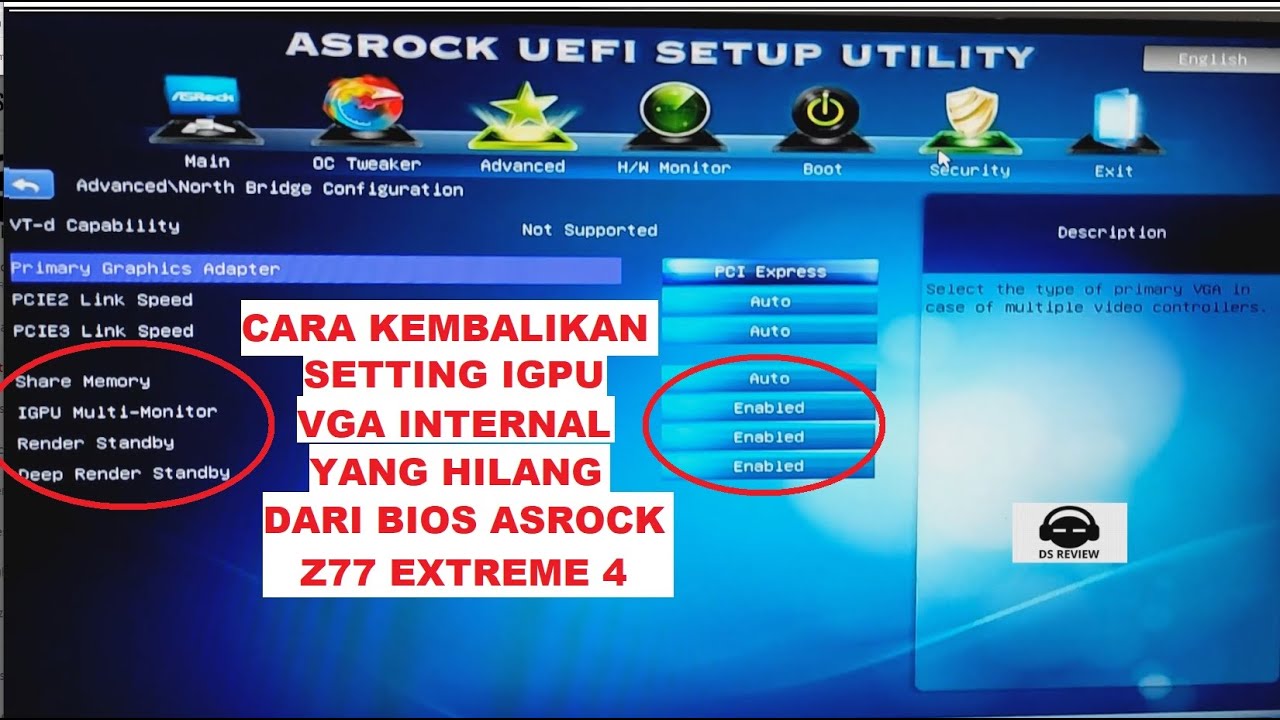 There are three in total.
In my opinion, is the simplest and most understandable. And if you do not want to bother, then I advise you just him. The method itself is that you either download a ready-made file with an updated BIOS version, simply run it and follow the further instructions, or do it using a proprietary utility (MSI Live Update, ASUS Update, etc.), which does the same without your participation.
Occurs due to the creation of a bootable USB flash drive with the firmware file, which is downloaded again on the manufacturer’s website. This method, as for me, is the most tricky and confusing, so I do not recommend it.
The method I was about to describe. It lies in the fact that the upgrade is due to the built-in utilities of the BIOS itself. In my case, this is Instant Flash from Asrock.
So, as I wrote above, first of all we go to the website of the manufacturer of our motherboard and enter the name of the motherboard in the search field, click «Search»:
http://www. asrock.com/index.ru.asp
Download
Download BIOS
Download the latest firmware (Instant Flash).
Next, take a fat32 flash drive (required) and upload the file we downloaded earlier to it. Reboot, go to BIOS.
We follow the Tool tab and see our utility (Instant Flash).
Click on it, after which the program checks all media on which the update file can be found, checks if this firmware version is suitable for our BIOS and, after our consent, starts the update process itself. And if everything goes according to plan, the computer will reboot and we will have an updated BIOS.
I also want to note that some BIOSes have utilities for searching and downloading firmware via the Internet. In my case it is Internet Flash.
This utility does everything, the same as the previous one, only it can still download the necessary update files if you have access to the Internet. Instructions for use are exactly the same.