How to Minimize and Maximize windows in Windows 11/10
If you are a Windows user, you definitely know how to switch among the opened apps and how to minimize and maximize the opened windows. Almost all of us use the maximize and minimize buttons on the top right side of the apps for this purpose. Do you know there are multiple other ways in Windows 11/10 to maximize and minimize windows? In this article, we will see how to maximize and minimize windows in Windows 11/10.
If you have ever noticed that apart from maximizing and minimizing a window, there is one more option available in Windows 11/10, i.e., Restore. Before we begin our discussion on the different ways to maximize and minimize windows in WIndows 11/10, let’s see the difference between these three terms.
- Maximize: When we say maximize, we refer to the app that has covered the entire screen of a user’s computer irrespective of his screen size.
- Minimize: Minimizing an app hides it from your desktop or laptop screen without closing it.
The app remains open but only gets hidden from your screen. You can access it by clicking on its icon on the Taskbar.
- Restore: Restoring a window neither maximizes it to the full screen nor minimizes it to the Taskbar. When you press the Restore button, the size of the selected window will change. You can consider it as a state between maximize and minimize. When you restore an app, both maximize and minimize options become available.
You can maximize and minimize active, inactive or all open windows in WIndows 11/10 by using the following methods:
- By using the maximize and minimize buttons
- By clicking on the Title Bar of the app
- By using the Title Bar menu
- From the Taskbar
- By using the keyboard shortcuts
- Maximize and Minimize all the opened windows
Let’s see all these methods in detail.
1] Maximize and Minimize windows in Windows 11/10 by using the maximize and minimize buttons
Let’s start with the method that is known to almost all Windows users. Almost all of you are familiar with this method. You can maximize and minimize the apps by clicking on the respective buttons. These buttons are available on the top right side of an app or opened window.
When an app is not opened in full-screen mode, you will see both maximize and minimize buttons on the top right side. The minus sign minimizes the app and the square box button maximizes the window or app. Click on the button as per your need.
When you maximize a window, you will see that the single square box button has turned into a double square box button. This is the Restore button. If you click on this button, the size of the opened window will change.
2] Maximize and Restore an app by clicking on its Title Bar
This trick does not minimize the window. Instead, it restores and maximizes it. To maximize and restore an app, you just have to double-click on the empty space on its Title Bar. If the app is opened in the full-screen mode, double-clicking on its Title bar will restore it and vice-versa.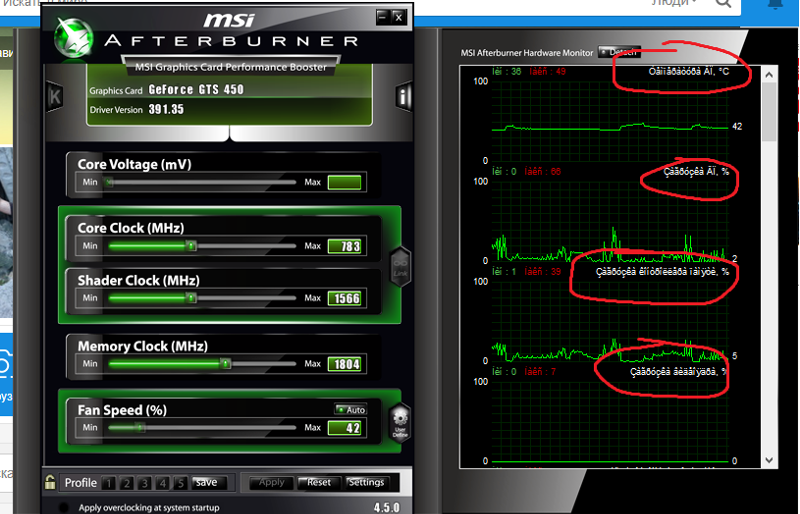
3] Maximize and Minimize an opened window by using the Title Bar menu
Above, we have seen that double-clicking on the Title Bar of an opened window only maximizes and restores it. You cannot minimize an app by double-clicking on its Title bar. But if you use the Title Bar menu, you can maximize, minimize, and restore the window.
To bring the Title Bar menu, right-click on the Title Bar of an app or press the Alt + Spacebar. After that, select the desired option. In the Title Bar menu, you may find a certain option greyed out. This is because your app is currently in that mode. For example, if your app is in the full-screen mode (maximized), you will see that the Maximize option in the Title Bar menu is greyed out.
4] Maximize and Minimize windows from the Taskbar
The icons of the apps or programs that we open appear on the Taskbar. We can switch between the opened apps or programs by clicking on the respective icon on the Taskbar or by pressing the Alt + Tab keys.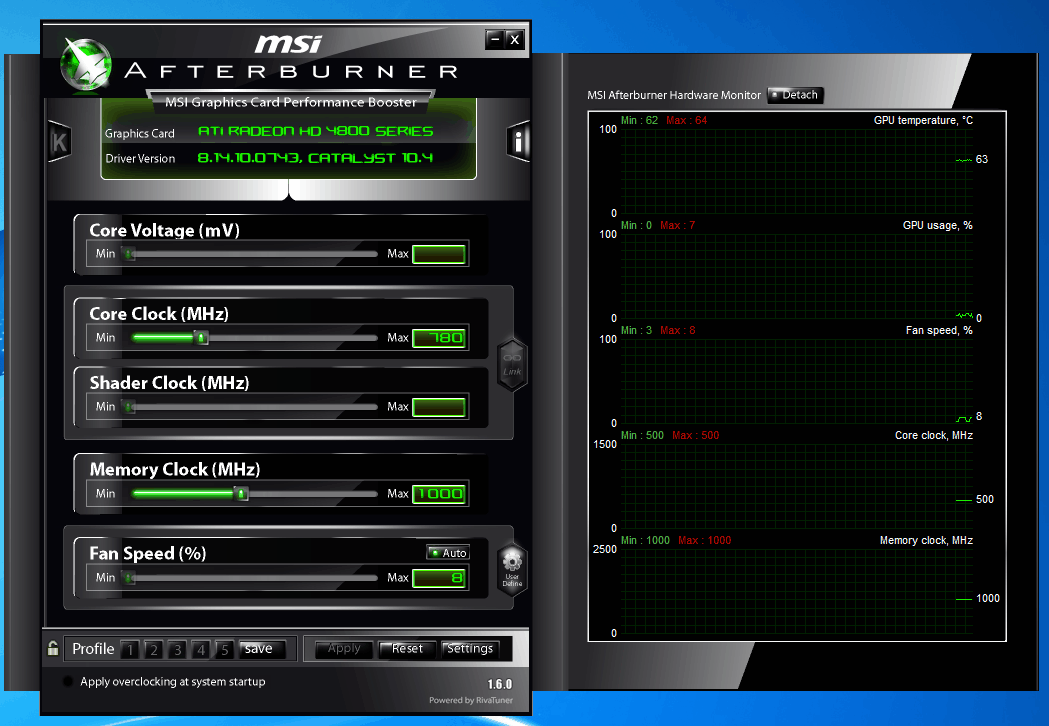 Most of you probably do not know that you can maximize and minimize the apps from the Taskbar.
The following steps will help you maximize and minimize windows from the Taskbar.
- Hover your mouse cursor over an app icon.
- You will see the thumbnail preview of that app. Right-click on it.
- When you right-click on the thumbnail preview, Windows will show you the menu to minimize, maximize, restore, and close the app.
- Select the desired option.
5] Maximize and Minimize the apps by using Windows 11/10 keyboard shortcuts
You can maximize and minimize the opened windows using keyboard shortcuts. Let’s see what these keyboard shortcuts are and how to use them.
- Win + Up Arrow Key: This key combination maximizes the window.
- Win + Down Arrow Key: When you use this keyboard shortcut, the opened window is first, restored, then minimized.
- Win + Right Arrow Key: Maximizes the window to the right of the screen.
- Win + Left Arrow Key: Maximizes the window to the left of the screen.
- Win + Home: This key combination minimizes all the windows except the active desktop window.
- Win + Number Keys: This keyboard shortcut is used to open the apps pinned on the Taskbar. For example, if you want to open the 4th app pinned on the Taskbar, you have to press the Win + 4 keys and so on. This keyboard shortcut works only for up to 9 apps because 9 is the largest single-digit number.
You can also use this Win + Number Keys shortcut to maximize and minimize the windows. For example, if you have opened an app that is pinned on the 6th number on the Taskbar, you have to press the Win + 6 keys to minimize it. Press the Win + 6 keys again to maximize it.
In the above screenshot, I have numbered the apps pinned on the Taskbar from 1 to 7. If all these apps are opened, the keyboard shortcuts to maximize and minimize the windows are as follows:
- Win + 1: File Explorer.

- Win + 2: Microsoft Edge.
- Win + 3: Mozilla Firefox.
- Win + 4: Paint dot net.
- Win + 5: Notepad++.
- Win + 6: Bluetooth.
- Win + 7: Microsoft Store.
6] Maximize and Minimize all the open windows
Pressing Win+M will minimize all open windows. If you want to maximize or minimize all the opened windows at once, you can use the Win+D keyboard shortcut. Pressing this shortcut will minimize all the opened windows. Pressing it again will maximize all the minimized windows. Apart from this keyboard shortcut, there is one more way to maximize and minimize all the opened windows at once. On the bottom right side of the Taskbar, there is a vertical strip. When you click on that strip, all the windows will be minimized. If you click on that vertical strip again, all the minimized windows will be maximized.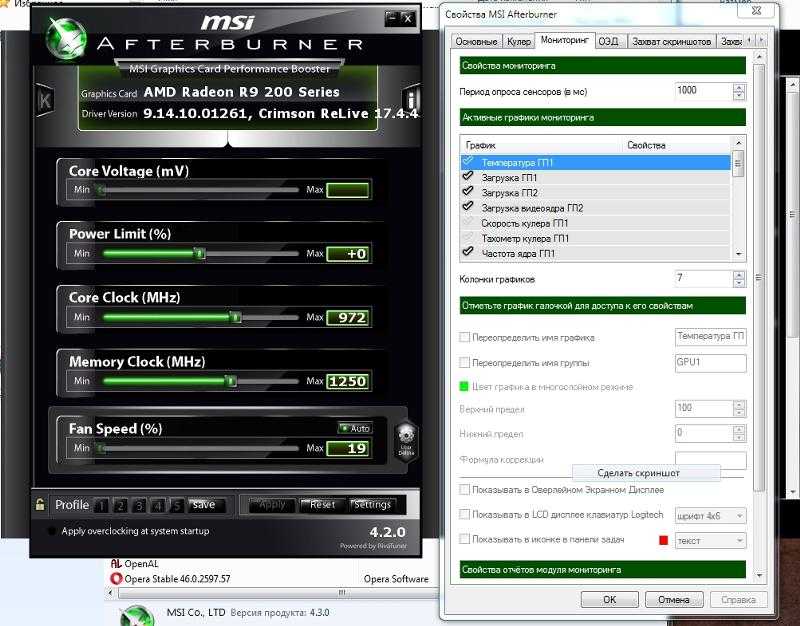
Read: How to Select, Copy and Paste, Delete, Rename Multiple Files and Folders in Windows 11/10
How do I maximize a window in Windows 11?
There are multiple ways to maximize a window in Windows 11. The most common way is to use the maximize button present on the top right side of an opened window. This is the method used by most Windows users. Apart from this, there are several other methods to maximize a window in Windows 11. You can use the keyboard shortcuts, Title Bar menu, etc., for the same. In addition to this, double-clicking on the Title Bar of the opened window also maximizes and restores the windows.
We have described all the methods to maximize and minimize windows in Windows 11/10 in this article.
Read: Windows 11 File Explorer Tips and Tricks
What are the shortcut keys for maximizing and minimizing the window?
You can use Win + Arrow Keys to maximize and minimize the windows. If you press the Win + Up Arrow Keys, your window will be maximized.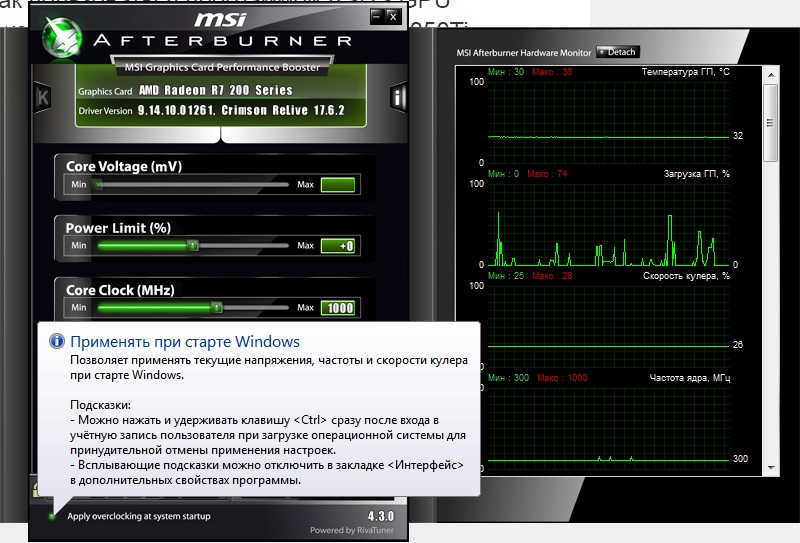 If you press the Win + Down Arrow Keys, your window will be minimized. Apart from that, you can also use the Win + Number Keys for the same. We have explained all the keyboard shortcuts to maximize and minimize windows on Windows 11/10.
Hope this helps.
Read next: Managing Files and Folders in Windows.
How to Show CPU and GPU Temperature on Taskbar
There can be many reasons that can make you want to keep a check on your CPU and GPU temperature. Here is how to show CPU and GPU temperature on the Taskbar.
If you just do office and school work on your laptop or desktop, keeping a check on CPU and GPU monitors may seem needless. But, these temperatures are crucial in determining the efficiency of your system. If the temperatures go out of a controlled range, it can cause permanent damage to your system’s internal circuitry. Overheating is a cause of concern that shouldn’t be taken lightly.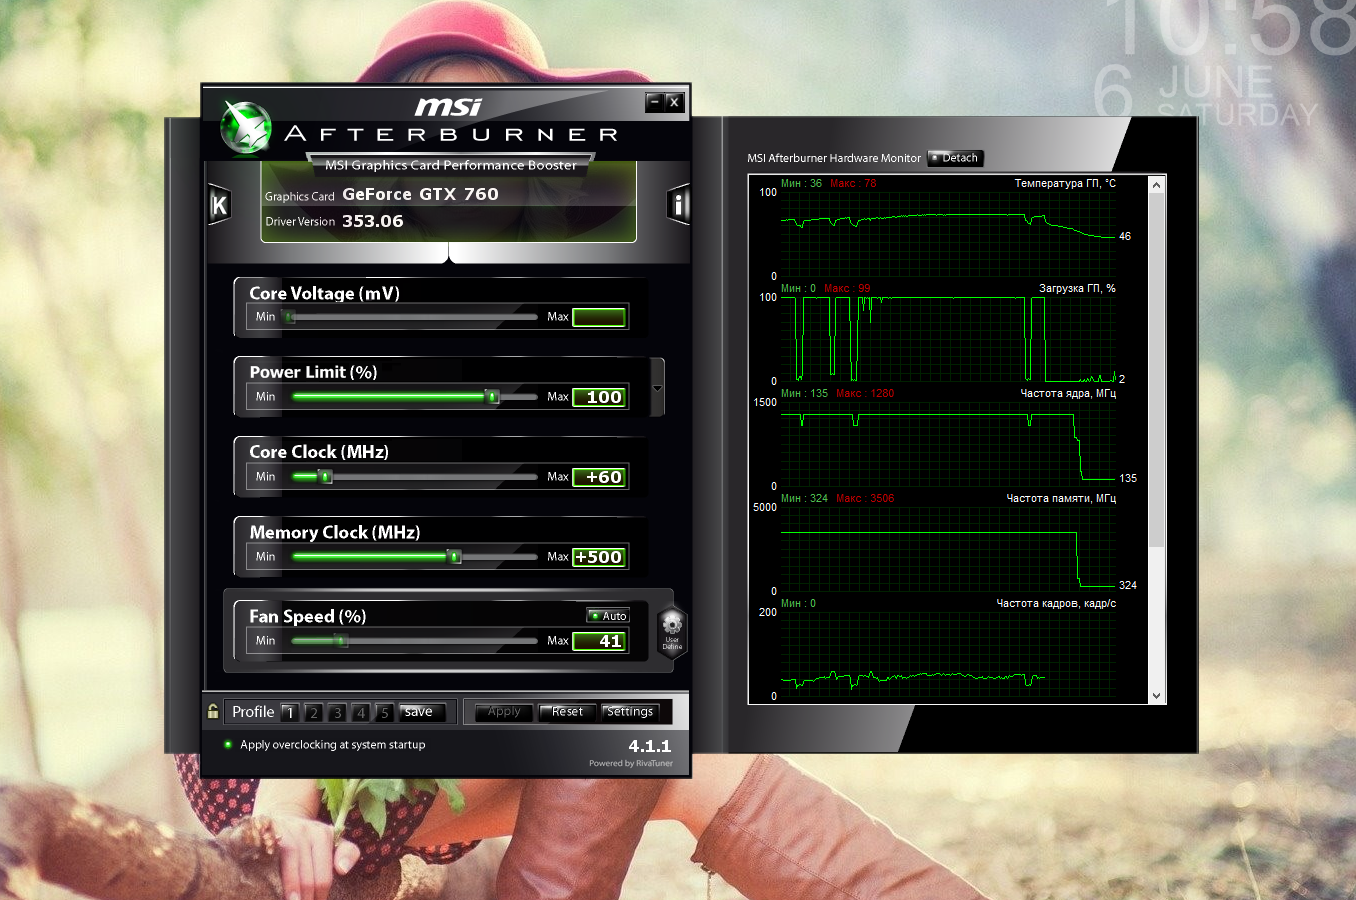 Thankfully, there are many free-to-use software and applications to monitor your CPU or GPU temperature. But, you wouldn’t want to dedicate a lot of screen space just to monitor the temperatures. An ideal way to keep track of temperatures is by pinning them on the taskbar. Here is how to show CPU and GPU temperature in the taskbar.
Contents
- How to Show CPU and GPU Temperature on Taskbar
- 3 Ways to Monitor CPU or GPU Temperature in Windows System Tray
- 1. Use HWiNFO Application
- 2. Use MSI Afterburner
- 3. Use Open Hardware Monitor
There are many free-to-use software and applications available to monitor your CPU or GPU temperature in Windows’ System Tray. But first, you need to understand what should be the normal temperature and when do the high temperatures become alarming. There is no specific good or bad temperature for a processor. It can vary with the build, brand, the technology used, and the highest maximum temperature.
To find information about a processor’s maximum temperature, search the web for your specific CPU’s product page and find the maximum ideal temperature. It can also be stated as ‘Maximum operating temperature’, ‘T case’, or ‘T junction’. Whatever the reading is, always try to keep the temperature 30 degrees less than the maximum limit to be safe. Now, whenever you monitor CPU or GPU temperature on Windows 10 taskbar, you’ll know when to be alerted and stop your work.
3 Ways to Monitor CPU or GPU Temperature in Windows System Tray
There are many user-friendly and free-to-use third-party applications that can help you show CPU and GPU temperature on the colored or uncolored Windows 10 Taskbar.
1. Use HWiNFO Application
This is a free third-party application that can give you lots of information about your system hardware, including the CPU and GPU temperature.
1. Download HWiNFO from their official website and install it in your Windows software.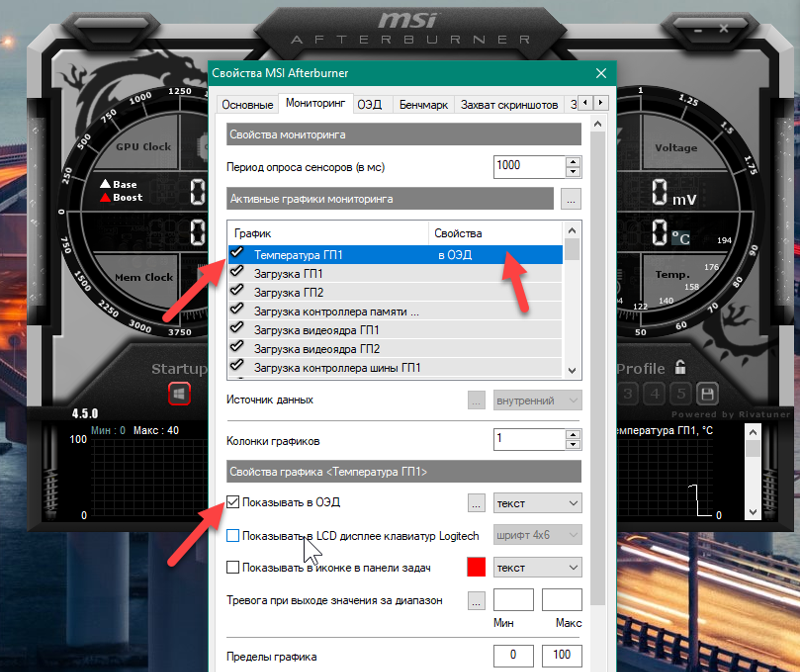
2. Launch the application from the Start Menu or simply double-click on the icon on the desktop.
3. Click on the ‘Run’ option in the dialogue box.
4. This will allow the application to run on your system to gather information and details.
5. Tickmark on the ‘Sensors’ option then click on the Run button to check the gathered information. On the sensor page, you’ll see a list of all the sensor statuses.
6. Find the ‘CPU Package’ sensor, i.e. the sensor with your CPU temperature.
7. Right-click the option and choose the ‘Add to tray’ option from the drop-down menu.
8. Similarly, find the ‘GPU Package temperature’ and click on ‘Add to tray’ in the right-click menu.
9. You can now monitor CPU or GPU temperature on Windows 10 Taskbar.
10. You just have to keep the application running to see the temperatures on your Taskbar.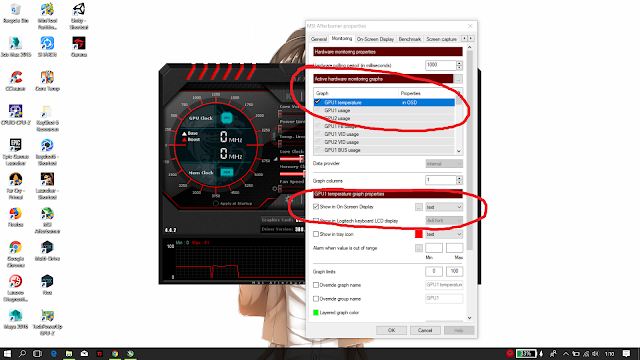 Minimize the application but don’t close the application.
11. You can also make the application run every time automatically, even if your system restarts. For this, you just need to add the application to the Windows Startup tab.
12. From the Taskbar tray right-click on the ‘HWiNFO’ application and then select ‘Settings’.
13. In the Setting dialogue box, go to the ‘General/User Interface’ tab and then check a few options.
14. The options you need to check the boxes for are:
- Show Sensors on Startup
- Minimize Main Window on Startup
- Minimize Sensors on Startup
- Auto Start
15. Click on OK. From now on you’ll always have the application running even after your system restarts.
You can add other system details to the Taskbar too in a similar manner from the sensor list.
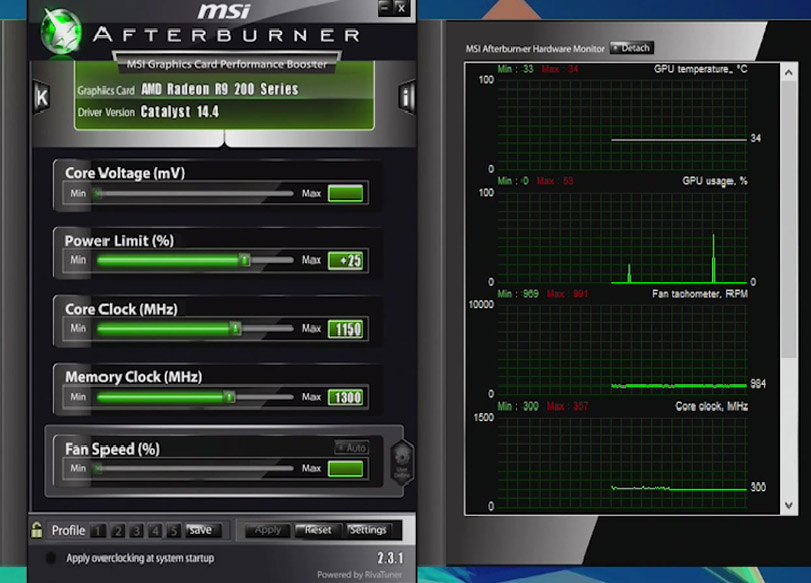
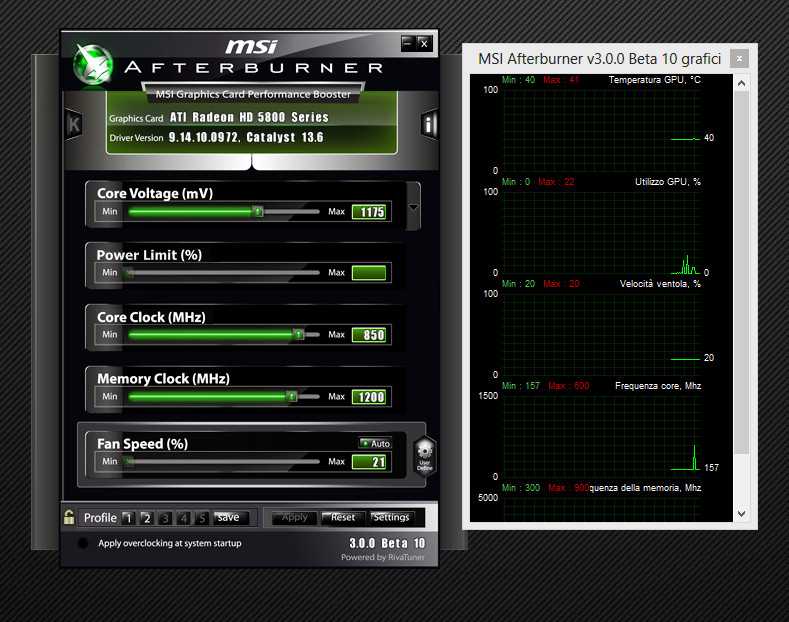
2. Use MSI Afterburner
MSI Afterburn is another application that can be used to show CPU and GPU temperature on the taskbar.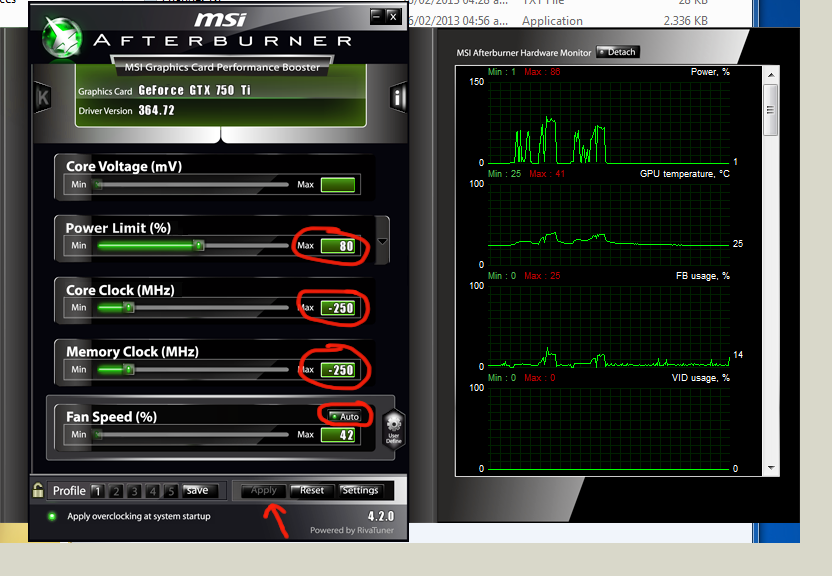 The application is primarily used for overclocking graphics cards, but we can also use it to see our system’s specific statistical details.
1. Download the MSI Afterburn application. Install the application.
2. Initially, the application will have details like GPU voltage, temperature, and clock speed.
3. To access the MSI Afterburner settings for getting the hardware statistics, click on the cog icon.
4. You’ll see a setting dialogue box for MSI Afterburner. Check the options ‘Start with Windows’ and ‘Start minimized’ below the GPU name to start the application every time you start your system.
5. Now, go to the ‘Monitoring’ tab in the setting dialogue box. You’ll see a list of graphs that the application can manage under the heading ‘Active hardware monitoring graphs’.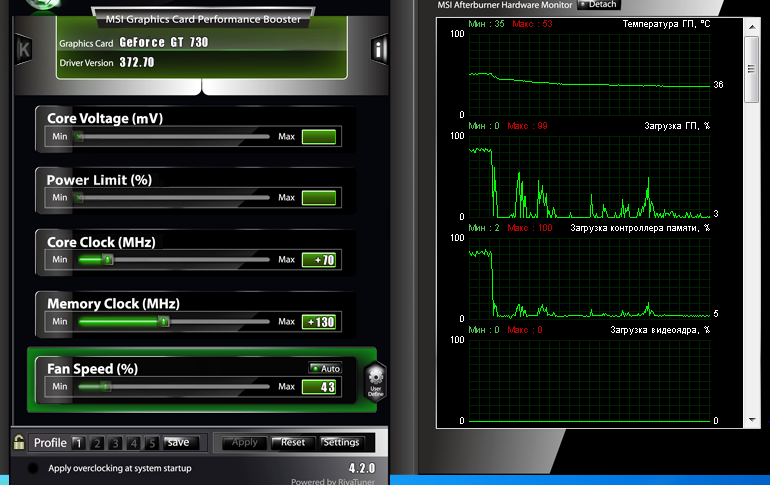
6. From these graphs, you just need to tweak the graphs you are interested in pinning on your Taskbar.
7. Click on the graph option that you want to pin on Taskbar. Once it is highlighted, check the ‘Show in-tray’ option on the menu. You can show the icon with the details as text or a graph. The text should be preferred for accurate readings.
8. You can also change the color of the text that will be used in the Taskbar for showing the temperature by clicking the red box on the same menu.
9. An alarm can also be set to trigger if the values are exceeding a fixed value. It is excellent to prevent the system from overheating.
10. Follow the same steps for any details that you want to show on your Taskbar. Also, check that the icon is not hidden in the inactive system tray. You can change it in the ‘Taskbar setting’ by right-clicking on the taskbar.
11. MSI Afterburner also has an independent icon shaped like an airplane in the taskbar. You can hide it by going to the ‘User Interface tab’ in the Setting dialogue box and checking the ‘Single tray icon mode’ box.
12. In this way, you can always monitor your CPU and GPU temperature in Windows’ System Tray.
3. Use Open Hardware Monitor
1. Open Hardware Monitor is another simple application that can be used to show CPU or GPU temperature in the taskbar.
2. Download the Open Hardware Monitor and install it using the on-screen instructions. Once done, launch the application and you’ll see a list of all the metrics that the application keeps track of.
3. Find your CPU’s and GPU’s name. Below it, you’ll find the temperature for each of them respectively.
4. To pin the temperature to the Taskbar, right-click on the temperature and choose the ‘Show in Tray’ option from the menu.
Recommended:
- Fix Service Host: Diagnostic Policy Service High CPU Usage
- Fix Windows Audio Device Graph Isolation high CPU usage
- 4 Ways to Check FPS (Frames Per Second) In Games
- How To Auto-Reply to Texts on the iPhone
Above are some of the best third-party applications that are easy to use and can show the CPU and GPU temperature on the Windows 10 Taskbar.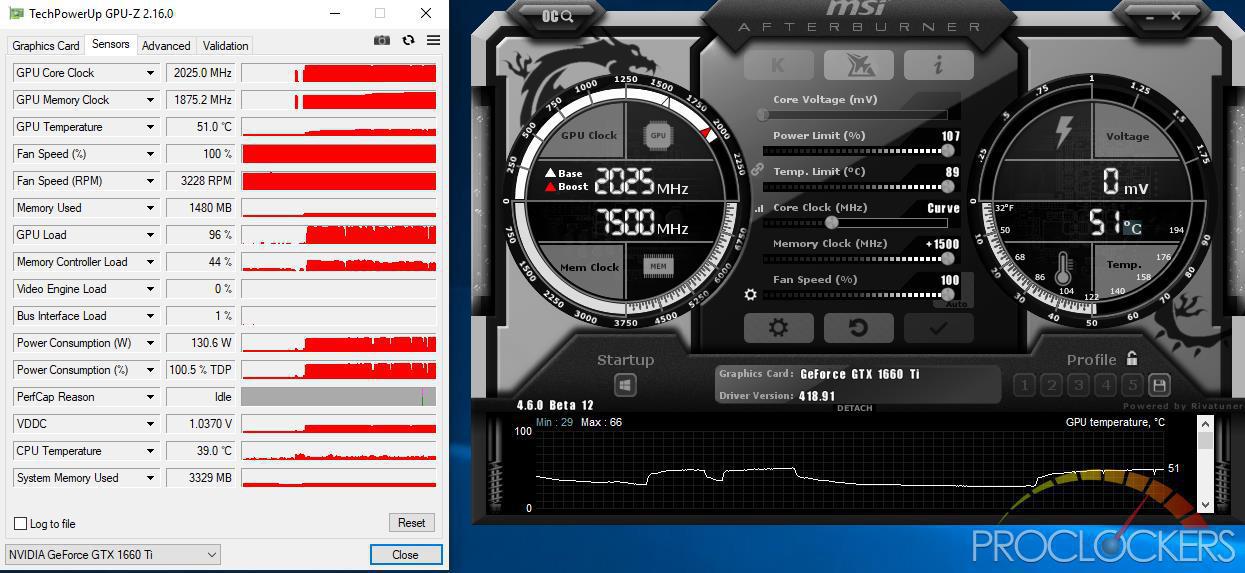 Overheating can damage your system’s processor if it is not handled in time. Choose any of the applications above and follow the steps to monitor your CPU or GPU temperature in Windows’ System Tray.
MSI News — NVIDIA WORLD
Intel will soon release 13th Generation Core processors based on new platforms. The top chipset will be the Z790, but despite its status, this chipset will support legacy DDR4 memory.
Given the imminent release of the new platform, motherboard manufacturers are actively engaged in development, and therefore, sometimes leaks occur. And now, such interesting news came from MSI.
Videocardz has reported that some non-top-end MSI motherboards for socket LGA1700 with Z790 chipset will still work with DDR4 memory. However, there is no doubt that DDR5 memory with a maximum frequency of 6800 MHz will be a priority, and the release of Alder Lake showed that this type of memory is being adopted by users successfully.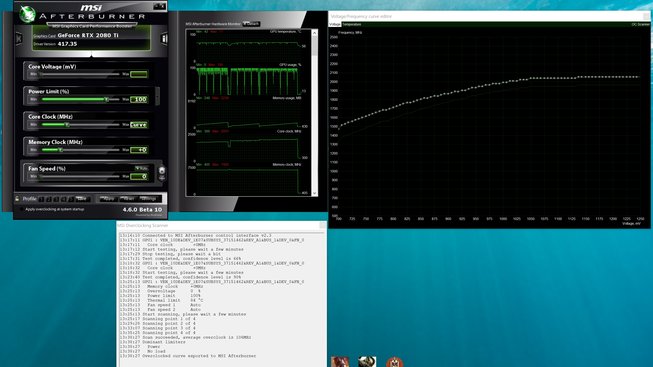
As for DDR4, it will be supported in the highest possible configuration at 5333 MHz.
9
Eteknix
MSI has introduced a new 27” WQHD traditional resolution white monitor with a Rapid IPS type matrix capable of outputting up to 170/s .
The G274QRFW features a range of legacy technologies for its class, including NVIDIA G-Sync Compatible for smooth gaming. In addition, there is «night vision» to improve the picture in dark conditions, Anti-Flicker to eliminate backlight flicker and Less Blue Light Pro to apparently reduce blue.
Monitor MSI G274QRFW
Claimed panel brightness is 300cd/m 2 and contrast ratio is 1000:1. Color gamut reaches 88% in Adobe RGB, 90% in DCI-P3 and 125% in sRGB. Viewing angles are traditional — 178 ° both vertically and horizontally.
From interfaces, the monitor offers two HDMI inputs, one DisplayPort 1.4 and a headphone output.
The display stand is very ergonomic.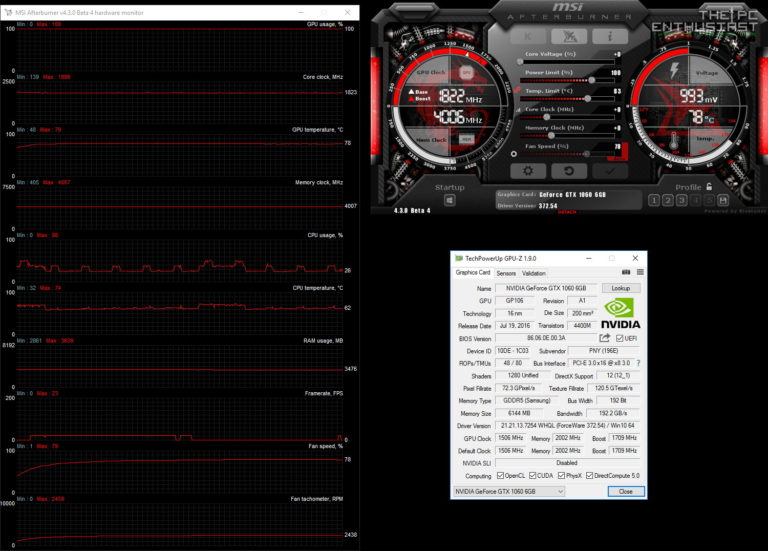 It allows you to tilt the screen in the range from -5° to 20°, rotate by ±45° and rotate by 90° in both directions. In addition, the screen itself can be raised to a height of up to 130 mm.
The developers have not yet announced the availability and price of the MSI G274QRFW monitor, but given the characteristics, we can assume that the price will not be exorbitant.
IPS MonitorMSI
Comment Related News
Guru of 3D
MSI has introduced a new all-in-one PC model AM242P 11M-1440. This computer model is equipped with a 23.8″ IPS display with Full HD resolution and is supplied exclusively by order on the company’s website.
As you can see, the computer screen is quite normal for an office machine. An IPS-type matrix provides 60 fps and a resolution of 1920 × 1080 pixels. At the same time, the hardware component of the PC is very good. The computer is based on a Core i7-1165G7 processor with 4 cores / 8 threads, equipped with 16 GB of DDR4 RAM (2 sticks of 8 GB) and a 512 GB NVMe-SSD.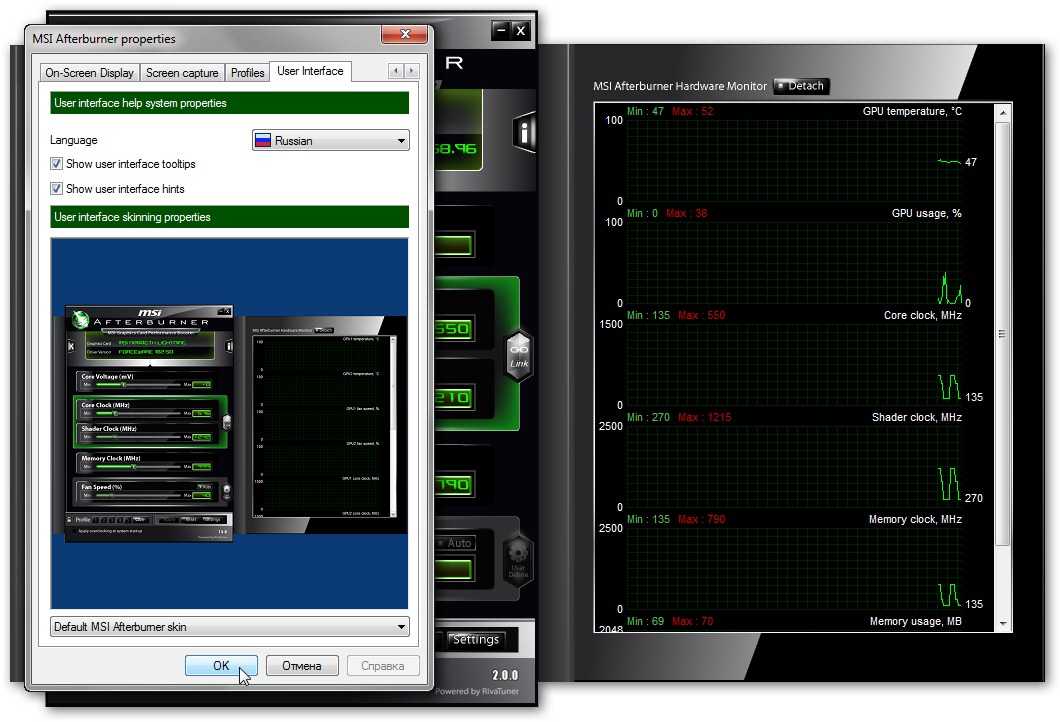 The case also provides space for an additional 2.5″ drive. The machine comes with Windows 11 Pro preinstalled.
All-in-one PC MSI AM242P 11M-1440
From the peripherals in the computer, one can note the presence of a gigabit network based on Realtek RTL8111H, as well as an Intel AX201 Wi-Fi 6 wireless network. There are USB 3.2 Gen.2 Type-C x 2, USB 3.2 Gen.2 Type-A x 2 ports, USB 2.0 x 2, headphone out, HDMI 2.0 out and HDMI in. There is also a built-in 720p webcam with shutter and face recognition.
Includes wireless keyboard, mouse and 120W power supply.
All-in-one PC MSI
Comment Related news
Guru of 3D
MSI is actively preparing for the advent of the PCIe 5.0 era by developing the new MEG and MPG V2 power supply series, which have compatible connectors and provide power up to 1300W.
Guru of 3D has released photos of two MSI power supply lines that are being actively developed and will be released in the coming months.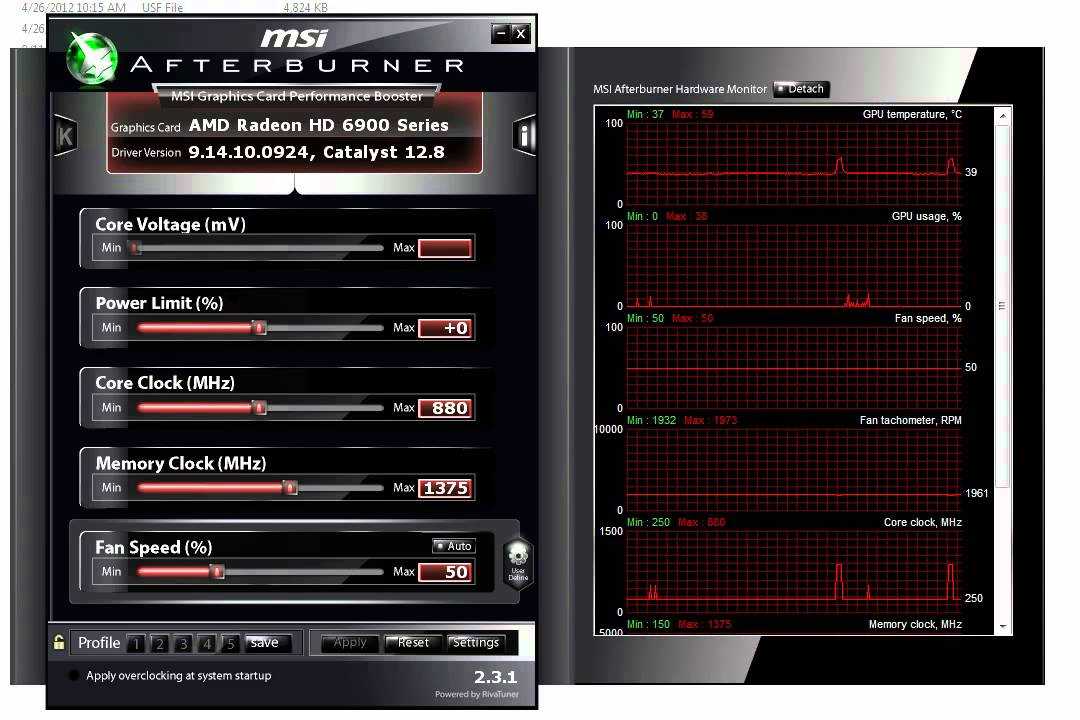
Power Supply MEG 80 Plus Platinum. Connectors
We are talking about two models MSI MEG 80 Plus Platinum and three MPG 80 Plus Gold. The first pair of power supplies offer 1300W and 1000W. Both will be based on the new G.I Engine and will be able to power the most energy demanding CPUs and GPUs. As for the MSI MPG line, these blocks are designed for high-end computers and offer 1000W, 850W and 750W power.
MEG 80 Plus Platinum power supply. General viewPower supply unit MEG 80 Plus Platinum. MarkingPower supply unit MEG 80 Plus Platinum. Connectors and cables
As you can see in the pictures, the design of both series of power supplies is fully modular, while a special 16-pin connector is prepared for powering the video card, which can provide power up to 600 W, and it is compatible with the PCIe Gen 5.0 power standard. Unfortunately, it cannot be used with legacy PCIe Gen 2 or Gen 3 graphics cards. 9
Guru of 3D
MSI announced its latest MEG 271Q Mini-LED backlit monitor at CES, featuring NVIDIA mini-LED backlight MEG 271Q -SYNC ULTIMATE.
This monitor features a WQHD resolution IPS panel with an incredible 300Hz frame rate and ultra-fast 1ms gray-to-gray response.
MSI MEG 271Q Monitor
Clearly the perfect solution for advanced gamers and e-sports players, where smooth video is ensured by NVIDIA G-SYNC ULTIMATE adaptive sync. This technology provides a variable frame rate in the entire possible range, from 0 fps to the maximum that the matrix can produce.
Mini-LED backlight with over 500 local dimming zones for excellent contrast. In total, more than 1000 LEDs were used for illumination.
When MSI plans to start production and delivery of the MEG 271Q monitor, it has not yet announced.
Mini-LEDIPS MonitorMSI
comment on related news
TechPowerUp
MSI has announced its new gaming monitor. It was the world’s first 34” ultra-widescreen model with Mini-LED backlighting.
The MSI MEG Artymis 341 Mini LED monitor is built using an AUO amLED panel.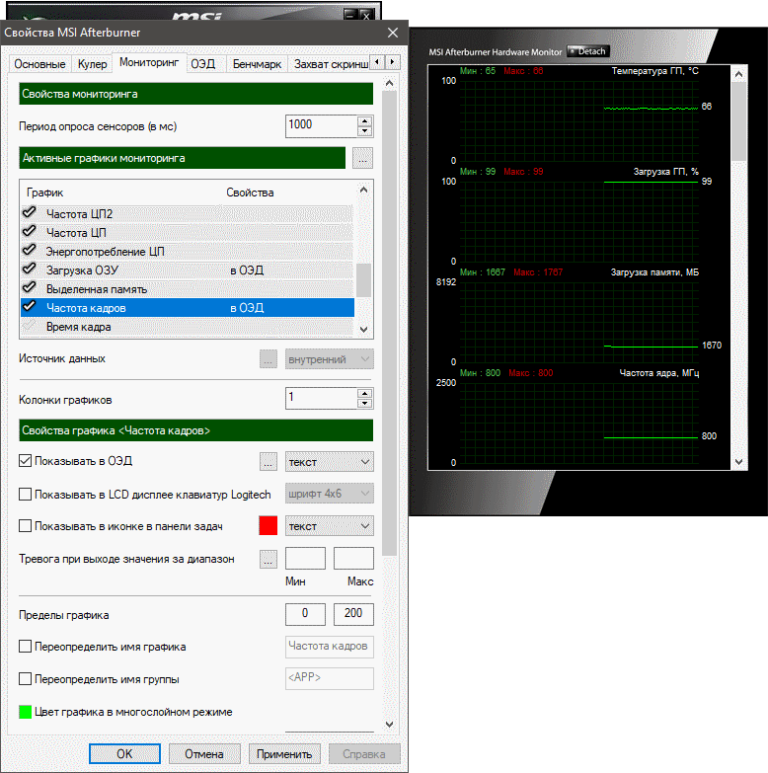 It is a curved panel with a radius of 800 mm and a resolution of 3440 × 1440 pixels. with high frame rates up to 165 Hz. Given this type of backlight, the maximum brightness is 1000 cd / m 2 is not surprising. The VESA DisplayHDR 1000 certification is not surprising either. There is also local dimming, however, the number of zones is not called.
MSI MEG Artymis 341 Mini LED Monitor
Unfortunately, the first ultra-wide screen gaming monitor with Mini-LED backlighting does not come with HDMI 2.1, which means that you can’t enjoy 4K resolution at 120Hz by connecting modern game consoles.
The MSI MEG Artymis 341 Mini LED monitor will most likely not be available until next year.
Mini-LEDDisplayHDR 1000monitorMSI
comment on related news And that’s the biggest payoff.
It is based on the flagship Z690 chipset and measures 305x310mm, almost a perfect square. This means GODLIKE is even bigger than ASUS ROG Maximus Z690 Extreme at 305x277mm and larger AORUS Z690 Xtreme, dimensions 305×285 mm.
MSI Z690 MEG GODLIKE Motherboard
The GODLIKE sub-series offers the highest quality components and maximum design features from MSI, which means that the upcoming LGA1700 series motherboard will not be an exception.
The reverse side of MSI Z690 MEG GODLIKE board
Z690 GODLIKE board will receive 22-phase CPU power, support for 4 DDR5 modules with a frequency of more than 6666 MHz and a capacity of up to 128 GB. The platform is powered by a standard 24-pin connector and a pair of 8-pin EPS connectors, which are located above the memory on the right. There are only three PCIe slots on the board. Two of them are Gen5 (x16 and x8), and one is PCIe Gen4x8. But on it there was a place for as many as 6 M.2 slots for drives (four Gen4x4 and two Gen3x4).
The company hasn’t announced the GODLIKE Z690 motherboard release date yet, nor has there been any price information (small spoiler: it will be expensive).
PCI-Express 5.0 motherboardMSI
Comment Related news designed to interact.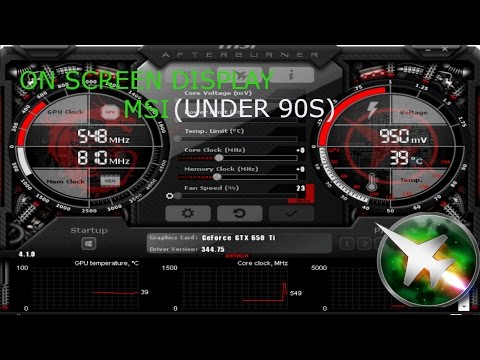
The new model has a slightly unusual size. The MSI MEG381CQR Plus monitor is built on a 38″ curved IPS panel with a frame rate of 175 Hz and a resolution of 3840×1600 pixels. The response time is 1ms. The monitor has 10-bit color, 1000:1 contrast ratio and brightness up to 600 cd/m 2 . It covers 96.2% DCI-P3 and 128.7% sRGB. Of course, it’s DisplayHDR 600 certified. As an excellent gaming solution, the monitor also supports the G-Sync Ultimate feature set for a perfectly smooth picture.
MSI MEG381CQR Plus Monitor. Front view
In addition, the monitor has a special mouse cable holder, as well as a clip for a webcam, which facilitates its installation on the top frame. As for the HMI, it is a secondary screen and a joystick for control. With it, users can easily and intuitively adjust the display modes.
MSI MEG381CQR Plus Monitor. Rear View
The monitor supports a pair of HDMI 2.0 ports and one DisplayPort 1.4 port. There is a microphone input and a headphone output, a USB hub with 3 ports.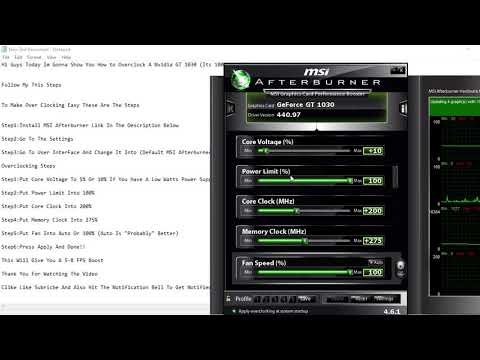 There is also a backlight on the back, which is synchronized with the picture displayed on the screen.
The price of the MSI MEG381CQR Plus monitor has not yet been announced, but given its functionality, one cannot count on availability.
G-Sync UltimateIPS monitorMSI
comment on related news
Kit Guru
MSI has introduced a new shortened GeForce RTX 3060Ti AERO ITX has rate (lighthOCHR 8G rate) graphics card.
It is built on NVIDIA Ampere architecture GPU and provides ETH mining performance of 25 MX/s.
The accelerator received a two-slot VGA cooler, while the PCB is shortened to 172 mm, which makes it compatible with Mini-ITX format systems, saving usable space.
MSI GeForce RTX 3060Ti AERO ITX 8G OC
The installed GPU has 4864 CUDA cores, its maximum clock speed is 1695 MHz. The board houses 8 GB of GDDR6 video memory with a bus width of 256 bits and a bandwidth of 14 GB / s.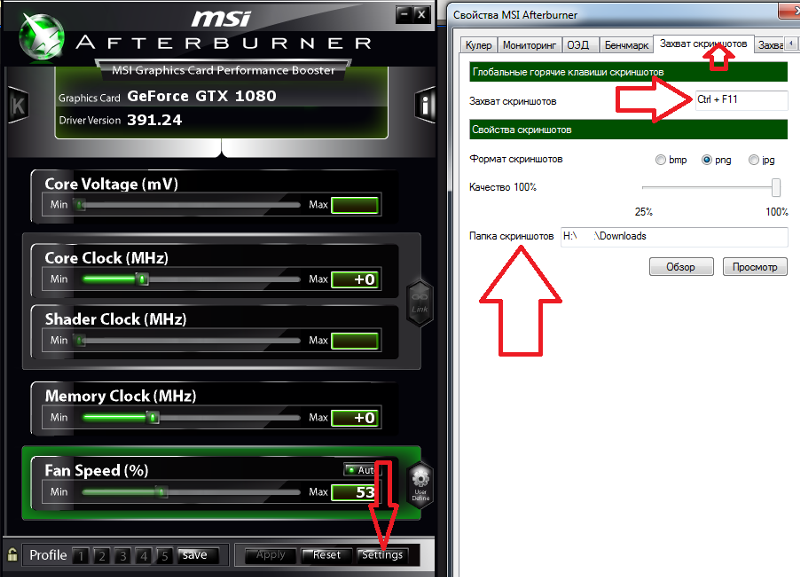
Interface list includes USB 2.0 Type-A, DisplayPort 1.4a, HDMI 2.0. The maximum number of connected displays is 4, and the maximum resolution is 7680×4320 pixels.
The dimensions of the video card are 125×172×43 mm, the weight is 559 grams. The power consumption of the card is declared at the level of up to 200 W with the need to connect an 8-pin auxiliary power plug.
The price of the MSI GeForce RTX 3060Ti AERO ITX 8G OC LHR has not yet been announced.
MSIGeForce RTX 3060 Ti
video cards
This machine is equipped with a 27” 27” anti-glare IPS screen. With anti-glare technology and a blue light reduction system, it provides the ability to work for a long time at the computer with minimal eye fatigue.
The display is capable of displaying images with brightness up to 300 cd/m 2 , viewing angles of 178°, and a contrast ratio of 1000:1.
All-in-One PC MSI AM271P 11M-232JP —
Display The machine is based on a Core i5-1135 G7 processor with integrated Intel Iris Xe graphics.