How to Enable the DDR4 RAM and Set the Speed in BIOS?
After you bought the flashy and beautiful DDR4 memory, did you install them directly on your computer and start using it? Do you know that without additional settings, the memory will not perform as it could?
How to set it up? The straightforward way is to enter the BIOS settings and enable relevant configurations. After knowing how to identify memory and how to install from the first two guides, let’s take a look at how to unleash the real performance inside the memory on the MSI Motherboard.
BIOS Settings
To enter the BIOS setting screen of the motherboard, you must press Delete[del] or F2 on the keyboard as the «MSI Logo» appears when the computer is turned on. If the player feels that the screen is fleeting and it is too late to operate, you can also choose Before the screen appears, keep pressing until you enter the screen.
Take MSI’s B560 series motherboard as an example, the screen after entering the BIOS will be as shown above.
After entering the screen, if the player is using Intel Chipset, usually the motherboard will provide two methods — «Automatic» and «manual settings», the former is called «XMP (Intel Extreme Memory Profile)».
Enabling XMP is quite simple. For MSI’s B560 motherboard, BIOS interface is quite intuitive, just click «XMP Profile»on the upper left of the screen with the mouse or keyboard on the default “EZ Mode” page. The motherboard will then automatically read and apply the configurations saved in the memory. Then press to “exit and save the settings” to complete (the hotkey of MSI motherboard is F10), pretty simple.
Intel Chipset motherboard users only need to enable XMP settings (yellow rectangle) to apply the pre-recorded settings provided by the manufacturer.
If it is AMD Chipset, MSI motherboard also provides A-XMP (yellow rectangle), allowing players with AMD processors to enable the predetermined settings originally saved in the memory with one click.
As for manual, more steps are required.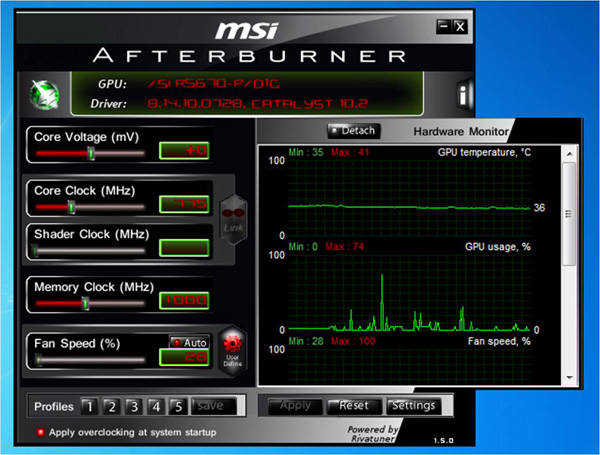 Users can switch to Advance Mode in BIOS if they want to challenge. And then find «DRAM Frequency», «DRAM Voltage» and «Advance DRAM Configuration» under OC tab for detailed adjustment.
Furthermore, if you are not familiar with each memory parameter, you can use «Memory Try It!» function provided by the MSI motherboard exclusively. This function recommends overclocking parameters for common memory modules on the market. For those who are not satisfied with XMP presets profile, but also are worried about damaging PC parts due to improper manual settings, “Memory Try It !” is a nice starting point to give a try. It’s easier to release more power with this function.
Memory Try It! (in the red rectangle) is a simple overclocking tool provided by MSI motherboard. A variety of overclocking parameters have been saved in advance for user challenge memory overclocking at lower risk.
In DRAM Frequency, players can adjust the clock of the memory. If you want to start overclocking, it is recommended to have the memory run at the frequency shown in the product description (claimed by memory manufacturer), because this is a value that has been officially verified to work stably.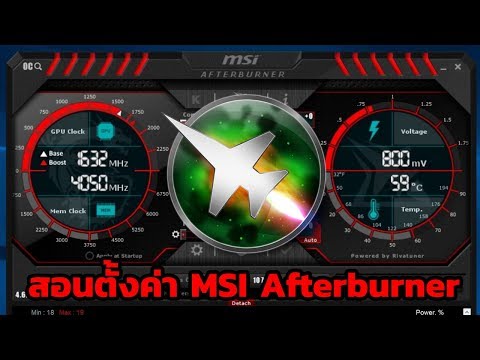 Once the PC is confirmed to work properly, you can then add the frequency up bit by bit.
After entering Advance Mode, players can find “DRAM Frequency” on the OC page.
Clicking DRAM Frequency, and select the clock speed of the memory.
DRAM Voltage adjusts the voltage supplied to the memory. You only need to enter the numbers. Please note that although the higher the voltage, the memory can perform a higher clock (theoretically), the probability of memory damage is also greater at a higher voltage. It is recommended to set the voltage below 1.5V, and at the same time, do not rush to make a large adjustment.
For the DRAM Voltage, directly input the value with keyboard.
The settings of Advance DRAM Configuration are more detailed, it’s used to adjust the «CL Value» (Timings) of the memory, which is the “latency” period. Users can check the product packaging or official website introduction of the memory product. Usually there is a row of numbers written in 3 or 4 groups and separated by truncated numbers, such as 18-22-22-48. This group of values is the CL of the product.
If the user is not doing overclocking, he/she only needs to input the CL value of the product in the order of tCL, tRCD, tRP, tRAS. If there is no numbers shown on product packaging, simply keep it as “Auto”.
The adjustment of CL Value is under “Advance DRAM Configuration.”
The level of CL value will affect the user experience of the system, and need more attention.
As for friends who want to overclock, it is recommended not to adjust the CL value until the end, since the CL value will affect the fluency of the system. The higher the CL value, the longer the read/write delay time of the memory. It will cause response lag, causing the bad experience even though the frequency is high, so you need to be more careful when adjusting.
Quick summary
If you want the memory to run at a higher frequency, you need to press Delete [del] or F2 to enter the BIOS screen of the motherboard.
If you only want to meet the claimed frequency advised by the memory manufacturer, Intel Chipset users can enable the XMP settings with one click; while AMD Chipset may have A-XMP function built in. For users who want to experience overclocking, try it in the Advance Mode first and use the frequency suggested by “Memory Try It !”. After familiarizing with the various parameters, adjust the DRAM Frequency, DRAM Voltage, Advance DRAM Configuration and other details. Whether you want to overclock or not, we recommend using the official default value first. Make further adjustments when the PC is confirmed to operate properly.
One last reminder, the challenge of overclocking should be adequate. Aggressive parameters may cause damage to the memory or even the PC system. Users should be careful when operating! We wish you a good results in the OC competition.
This article was originally published on http://www.pcdiy.com.tw/detail/20136 (Mandarin)
Difference Between Memory & Core Clock Speed (GPU)
Jacob Tuwiner
- Memory Clock Speed Explained
- What’s The Difference Between Memory Clock and Core Clock on a GPU?
- Does Memory Clock Speed Affect FPS?
- Core Clock Speed Explained
- Does Boost Clock Matter?
- GPU Clock Speed Test and Utilities
On a GPU spec sheet, I’m sure you’ve seen it, there’s a ton of numbers, right?
There’s the GPU’s name, the core clock speed, the amount of onboard VRAM, and finally there’s the clock speed of the VRAM.
But how important is your memory clock, really? And what about your GPU’s core clock speed?
The memory clock of your GPU is actually almost as important as your core clock, if not more important.
In the following article we will cover exactly how important GPU memory clock speed is for gaming, so you can make a more informed decision.
Memory Clock Speed Explained
The memory, or VRAM on your GPU is used to temporarily store assets like textures that are being used in whatever game you may be playing.
This means that having faster VRAM allows your graphics card to process these assets quicker, and having more VRAM allows for more assets to be stored.
So, having a higher VRAM clock speed can help your games render much faster.
Overclocking can also be a huge factor in your graphics card performance and just like the core clock, you can overclock your GPU memory.
We always suggest overclocking to get the best possible performance out of your components.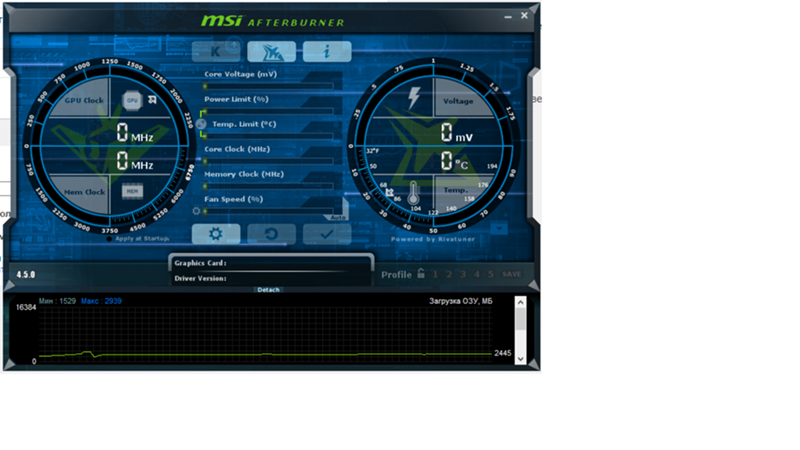
What’s The Difference Between Memory Clock and Core Clock on a GPU?
The memory clock is the speed of the VRAM on the GPU, whereas the core clock is the speed of the GPU’s chip. You can compare a GPU’s core clock to teh CPU clock and the RAM clock in a gaming PC. Usually core clock affects gaming performance more than memory clock does.
Does Memory Clock Speed Affect FPS?
Well, I actually don’t know what to tell you here.
Just kidding, of course I do.
To sum it up briefly, there is no real clear one-size-fits-all answer I can give you as to whether or not GPU memory clock speed does anything to your FPS in games.
When choosing a GPU you would, of course, want to compare the raw performance of each individual graphics card and graphics card model.
One thing that varies between third-party models, is the memory clock. The core clock can vary as well, but we’ll cover that elsewhere.
Most people tend to look at just the core clock for a scope on what kind of FPS they should be expecting in games, but does the memory clock affect that at all?
Relatively speaking, if you were to overclock your GPU memory clock it should give a very slight performance increase in most cases, it varies from game to game.
Some games just happen to benefit a lot more for VRAM frequency than others, and those others just don’t seem to value it as much.
So, GPU Memory clock can affect FPS, be it by 1% or by 10%, it just depends on what game you’re playing.
Core Clock Speed Explained
What is very important for FPS, is the actual graphics processor’s core clock speed.
This will be the most invaluable number you find on your graphics card, because bigger means better.
Generally the faster your core clock, the higher FPS games will run at, but this only applies when comparing the same type of graphics card to a different model of itself (eg. 2080 FE vs. 2080 ROG Strix) since different cards have varying number components and build structure.
The GPU core clock speed measures how fast your graphics processor can, well, process graphics. So overclocking your GPU core clock will always directly affect the FPS you get in games.
Memory clock ratio, however, as we explained earlier is a measure of how quickly your graphics card’s onboard memory can store and redeploy assets such as textures into the game world.
Increasing this clock will improve the VRAM’s efficiency in processing game assets stored within, thus running your game smoother without really improving FPS too much in most instances.
Does Boost Clock Matter?
Boost clock may not seem that important, but for someone planning on keeping their graphics card at base settings it can be a key factor in choosing your next card.
What is boost clock anyway?
Well boost clock is kind of like a turbo speed set by the manufacturer for when your graphics card is undertaking a heavy workload.
Meaning, when your GPU is working hard it may boost itself up an extra 100MHz or 200MHz to provide a bit of a performance increase for the heavy load.
When not overclocking, your boost clock will be extremely important for your graphics card since it will be the highest possible clock your card can reach. The higher this clock is, of course, the better performance (higher FPS) you can expect to observe.
If you are planning on overclocking, though, you can completely ignore your graphics card’s boost clock. Overclocking changes the base core clock of the GPU, effectively making your boost clock useless as your base clock may overtake it.
Your boost clock does not scale with your overclock.
GPU Clock Speed Test and Utilities
If you already have a graphics card, finding and testing your GPU’s performance may be a worthwhile endeavour when looking to upgrade. Tools like UserBenchmark and 3DMark can test your graphics card’s performance, score it, and compare it to other similar or higher end GPUs.
UserBenchmark will test all of the components in your computer and score them in a percentile range as it directly compares your unit to other tested units of the same model. It scores it based on the performance when compared to the lowest test received to the highest test received.
This is a great way to get a scope of what you have compared to what you could have.
3DMark, on the other hand, is a lot more intense of a benchmark. 3DMark throws the hardest possible load at your card and just hopes it’ll run. Most modern cards can at least make to the end of the test, regardless of how low the score is.
Unlike UserBenchmark, 3DMark doesn’t immediately compare your score to that of other benched cards, you have to do that yourself. 3DMark does give the user a better idea of gaming performance, though.
3DMark also offers paid services that allow you to use more benchmarks to get a more grounded idea of what your graphics card is capable of. It is also available on Windows, Android, and iOS.
You may also want to try using a GPU monitoring tool such as GPU-Z to properly monitor your temperatures and clock speeds.
And for Overclockers, MSI Afterburner is the one stop shop for all your overclocking needs (GPU-wise). It’s fairly simple to use and your settings are customizable to most any configuration you may need.
How To Check RAM Speed
There are several reasons to check your RAM speed. For one, knowing the clock speed can tell you whether you can run certain apps or games. RAM speed can also be an indicator of something not working properly with your system. That is, of course, if you know the baseline value.
The higher RAM speeds the more applications and processes you can run at one time. Unlike the memory on your SSD or HDD, RAM is the current memory and not the total amount of information stored on your device. So, if your RAM speeds are low, your programs will run slower or have problems.
Here are just some of the ways to check your device’s RAM information whether you’re using a Windows PC, Mac, smartphone, or tablet.
Checking RAM in Windows
Windows makes it easy to check how much RAM is being used and how much is available at any given time. There are three ways to do this:
1. Control Panel
To bring up Control Panel, you can simply type its name into the Windows search bar and then click on the icon showing in the results. From this folder, you should look for System and Security.
Look for the phrase “View amount of RAM and processor speed”.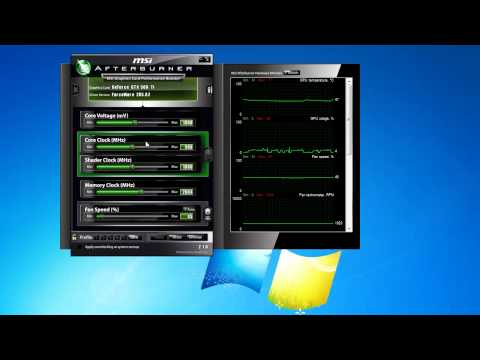 Clicking this option will open a new window that displays how much memory you have, what OS you are using, and how your processor is currently performing.
2. Task Manager
If you bring up the Task Manager window (Ctrl + Alt + Delete), the Processes tab will show you how much memory various apps are using.
3. This PC Properties
Press the Win key + E to bring up a folder. Right click on “This PC” in the left panel and click on Properties. This will also bring up the System Information window mentioned in step 1.
As you can see, Windows is lacking one particular feature. That is, showing you the RAM speed. So how can you get around this limitation? The answer is third-party apps, some of which are free to use.
Although Windows offers a Command Prompt command to get information on the chip speed (wmic memorychip get speed), this might not always work. Using something like CPU-Z will give you the most accurate results.
CPU-Z
CPU-Z is an app that’s been around for some time. The app is constantly updated to ensure it works well on both Windows and Android systems. The degree of accuracy is impressive for a piece of freeware that gathers and displays information on many main components of a computer.
After you install the app, simply open it and click on the “Memory” tab. Depending on which version of the app you’re using, the interface might differ slightly. Either way, you should see the following information:
- RAM type (DDR3, DDR4, etc.)
- Size (how many GB of RAM you have)
- Channel
- Frequency
- DRAM frequency
- Refresh cycle times
- Clock speed and more
Motherboard BIOS
If your computer has a newer gaming motherboard, the BIOS most likely has an intuitive interface with multiple readings for important components such as CPU, GPU, fans, RAM, storage devices, etc.
You can always turn on or restart your computer and load up the BIOS by pressing F2 (setup) or F12 (boot menu) depending on what system you have. Once there, simply scroll or navigate to the RAM or Memory section to check clock speeds and other information.
Note that you can also overclock your RAM from BIOS so that it always runs at the highest frequency possible. Gamers and game designers often do this in order to give the CPU and GPU a small boost. Some motherboards come with preset overclock settings. If yours doesn’t, check some online guides on how to calculate the appropriate voltage settings so that you don’t risk burning up your system.
Check RAM Speed on macOS
If you’re using a Mac, the process is slightly different from Windows. You will need to access Mac’s Activity Monitor to get details on your RAM. It’s important to note that Apple doesn’t exactly give us the RAM speed like Windows. Instead, it shows us how much RAM we’re currently using in real-time.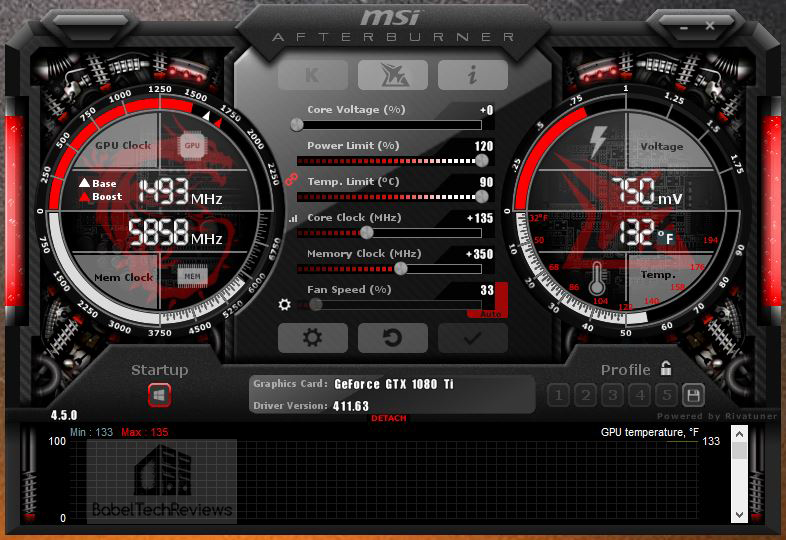
To access the Activity Monitor use the Cmd+Space keyboard shortcut to access Apple’s Spotlight. Then type in ‘Activity Monitor’ and click on the first option that appears. Of course, you can also follow the Finder>Applications>Utilities path to access the Activity Monitor.
View the ‘Memory Pressure’ bar for information about your RAM status. A green bar means your computer’s RAM speeds are efficient. A yellow bar means you’re on the fast track to needing more RAM while a red bar means you need more RAM right now.
What About Smartphones?
Owners of Android-based smartphone won’t be able to see RAM speed or usage. Unlike them, iPhone owners can check the storage and look at a graph of memory usage. Unfortunately, checking the memory speed is not possible since most smartphones tend to run at a constant frequency as opposed to computers which alternate depending on what apps you’re running.
The Takeaway
Running a third-party app like CPU-Z all the time may be a good idea whether you have a gaming PC or a workstation.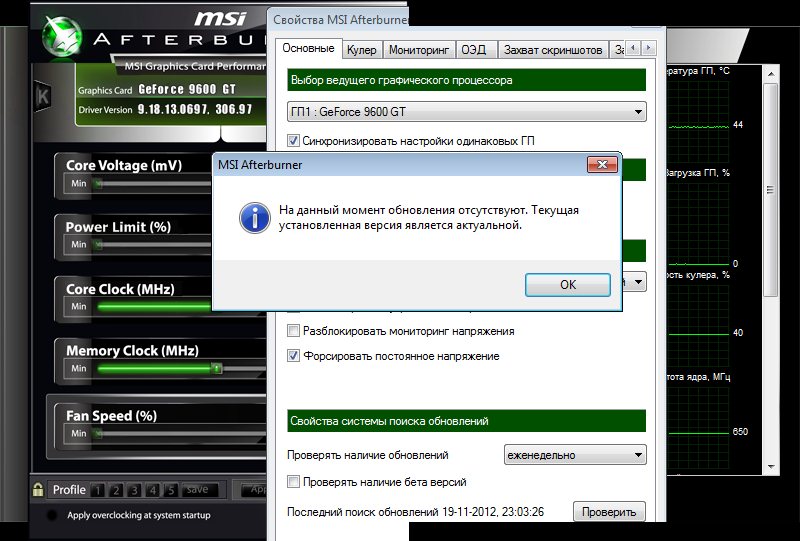 Not only will it show you accurate real-time information on your RAM clock speed but it will also offer a wealth of information about your other essential and non-essential hardware.
Memory Force and Memory Try It!
Memory Force is the latest exclusive memory overclocking feature developed by MSI. It is an indicator of the degree of overclocking and helps to understand whether this or that action in the BIOS settings contributes to faster operation of the memory modules.
On the right side of the BIOS interface, you can see an indicator bar similar to the fuel indicator in a car. If the bar becomes shorter, moving to the left, then the memory modules are working with higher performance. If any changes in the BIOS settings cause memory to slow down, the indicator becomes longer, shifting to the right.
▲The Memory Force function can be found under Overclocking\Advanced DRAM Configuration (Overclocking -> Advanced Memory Settings).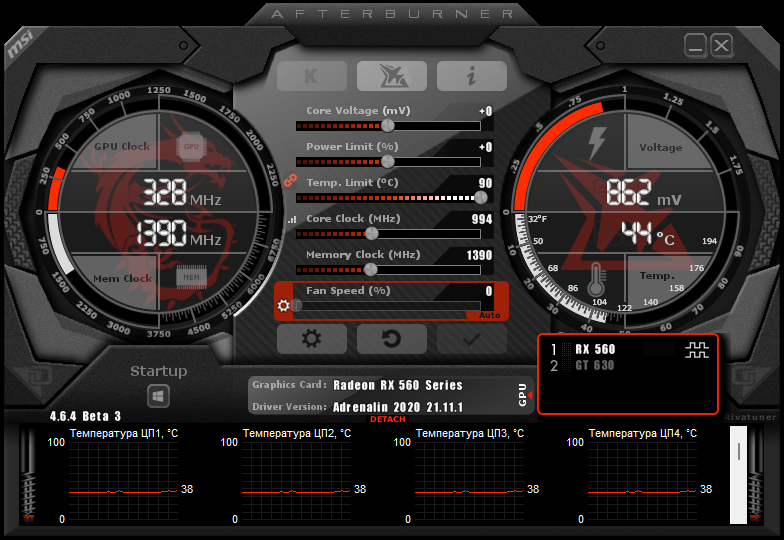
The indicator on the right side of the screen indicates how much the memory modules are overclocked. The stronger their acceleration, the shorter the indicator.
The following illustration shows how the Memory Force indicator changes as the memory frequency increases. The stronger the acceleration, the shorter the length of the indicator.
▲Example of how the length of the Memory Force indicator varies with memory frequency.
Thus, the Memory Force function shows how strongly the RAM is overclocked, but it does not say how exactly this was done. For many users, overclocking memory is not an easy task. What frequency to set? What timings and voltage will be optimal? These questions are constantly faced during overclocking.
MSI motherboards are much less of a hassle, as they support the Memory Try It feature, which is specifically designed for memory overclocking.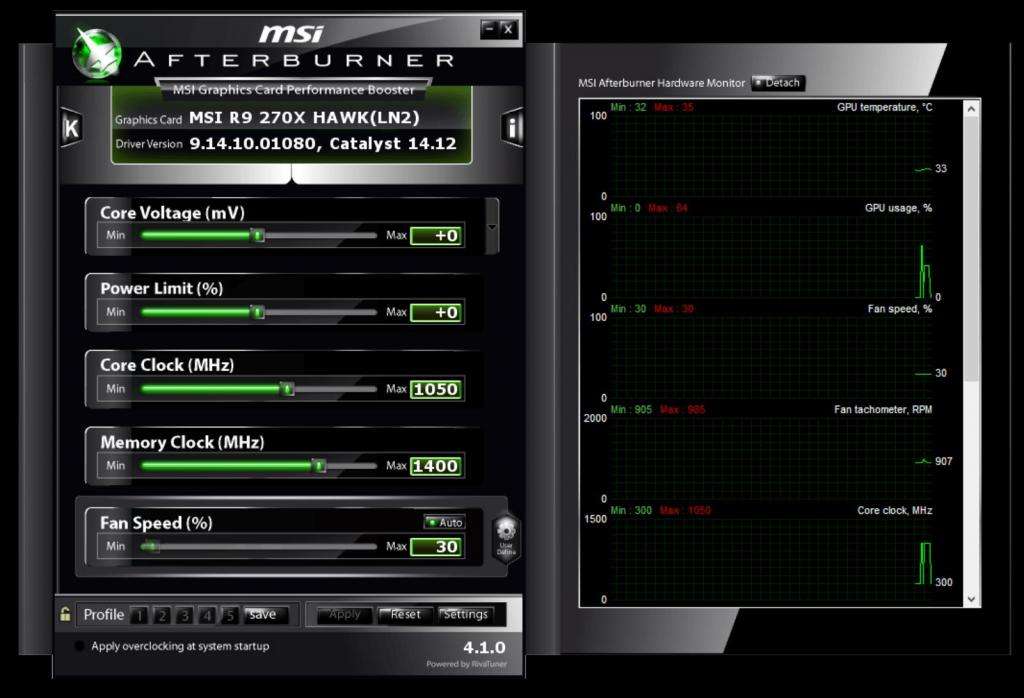 And it pairs perfectly with the Memory Force function, which will immediately show whether everything was done correctly.
Notes:
*Memory Force is only available on MSI Z490 MEG series motherboards.
**Memory Try It function allows you to apply preset profiles with settings. Stable operation of the computer with each profile is not guaranteed.
Overclocking DDR4-3600 to 4500 MHz using Memory Force and Memory Try It
The exclusive Memory Try It function is used to overclock memory modules by loading profiles with settings corresponding to the most popular chips, including chips from Samsung, Hynix, Spectek , Nanya, PSC and many other companies.
By automatically identifying memory chips, Memory Try It offers several overclocking profiles suitable for them. The user only needs to select the desired profile from the drop-down menu and check the stability of the computer. If the computer works with the profile without problems, you can try choosing the next one — with a higher frequency or lower latency. And so on up to the maximum frequency at which the computer will remain stable. In addition, you can try to find the minimum voltage at which the memory modules will work without problems.
Let’s see how to use the Memory Try It and Memory Force functions to overclock a set of ADATA XMP3600 modules.
Memory Try It — DDR4-3866 mode
Let’s start with DDR4-3866 mode — it shouldn’t be a problem for the Z490 Unify motherboard. For the DDR4-3866 frequency, two profiles are available that differ in latency: CL17 and CL14. It is recommended to start with the less aggressive CL17 and then try the faster one.
▲Memory Try It is an overclocking profile with settings for memory modules. Just choose the right profile.
MemTest stability check
Now it’s time to check the stability of your computer. This can be done using a stress test such as AIDA64 or MemTest. The results indicate that the computer works seamlessly with the DDR4-3866 CL17 profile. The read speed, according to the AIDA64 benchmark, exceeds 54000 MB / s, which is 41-42% faster than standard DDR4-2666 memory and 6% faster than using the XMP profile (3600 MHz).
▲According to AIDA64 benchmark, DDR4-3866 memory bandwidth is about 6% higher than DDR4-3600 XMP profile. This value may vary depending on the configuration of the computer.
▲Computer runs stable with DDR4-3866 memory.
Returning to the BIOS interface, you can see that the Memory Force indicator has become shorter compared to the XMP (3600 MHz) and standard (2666 MHz) modes. This means that the memory modules are overclocked and operate at an increased speed.
▲In DDR4-3866 mode, the Memory Force indicator became shorter.
We continue to accelerate to DDR4-4500
Then you can try to go to a higher frequency. Using a set of ADATA 3600MHz modules, we were able to load our computer configuration in DDR4-4600 mode with CL-17-19-19 timings, but the system was unstable. After a number of attempts, we found a point of stability: 4500 MHz with CL-19-21-21 timings.
Memory overclocking is affected by various voltages (both memory modules and processor units), so if the computer becomes unstable when applying any Memory Try It profile, you can try to gradually increase these voltages. Or set less aggressive timings.
▲Memory Force indicator in DDR4-4600 mode.
▲Computer is stable with DDR4-4500 (CL19-21-21).
Increasing memory bandwidth with memory frequency
Many users are concerned about how much memory bandwidth increases as memory frequency increases. The following diagrams show that as the frequency increases, both the bandwidth and latency of the memory modules improve. Thus, the higher the frequency, the higher the speed.
▲Memory bandwidth increases with frequency.
Processor cooler
MSI MSI MAG Corelique 360R
Operating system
Windows 10 Pro 1909
Stress tests
AIDA64, MEMTEST, and RUNMEMTestPro
Where to look at the frequency of RAM
. look at the RAM frequency? What this indicator gives, tells the manual. It also describes five simple methods to help identify this setting on a Windows PC.
What is the frequency of RAM
Double Data Rate — an indicator that determines the speed of information transfer. This is the number of operations that RAM performs on a specific channel in one moment. Such a parameter is indicated in mega transfers — MT.
The frequency value is always indicated in the characteristics of the RAM. It looks like this: DDR3-1333. The four digits after the dash is the speed parameter.
See also: How to choose the right RAM for your computer: 10 recommendations
What gives the frequency of RAM
The higher the value, the faster the RAM transfers data for processing by other components. It turns out that this affects the performance of the entire assembly.
Be aware that megatransfers per second is not a reflection of clock speed because DDR shows twice the speed. The number of cycles is two times less. So, DDR3-1333 operates at 666 MHz.
Also keep in mind that usually indicate the maximum speed. And if you put two bars with different frequency indicators into the computer, then the PC will work in accordance with the “ceiling” of the slower bar.
However, this performance degradation is one of the safest consequences. And it happens that this gives very unpleasant errors in the operation of the operating system. That is why it is advised to purchase modules of equal parameters.
Advice: When buying RAM, you need to check its compatibility with the board, namely the maximum volume and speed, as well as the type.
Learn: What is Dual mode RAM: a guide in 3 sections
How to find out the frequency of RAM
The indicator can be viewed in Windows:
- In the system search, type cmd to launch the command window.
- Enter wmic memorychip get Speed and confirm with ENTER.
If the user has several modules installed in the PC, this method can be used to find out the value of each.
Special programs are also available.
CPU-Z
The software is publicly available on the official website. You don’t need to pay for it.
How to determine the frequency of the RAM using CPU-Z:
- Run the program and find «SPD» on the main screen.
- Find the «Max Bandwidth» parameter. It will show both the maximum speed and the actual speed.
AIDA64
One of the most effective component condition testers. There is a free version with fewer features than the paid version.
How to find out the RAM frequency using AIDA64:
- Open software.
- Find «Motherboard».
- Go to «SPD» and find the information you need in «Memory Speed».
Interesting: How to quickly clear RAM on Windows 10: 7 easy ways But it is for advanced users. Without knowledge, it is better not to enter the subsystem, so as not to accidentally worsen the operation of the system.
Manual: What to do if Windows does not see all the RAM: 4 reasons and solutions
Is it possible to overclock the frequency
Usually, you do not need to overclock the RAM, because the BIOS automatically determines the required frequency of its operation.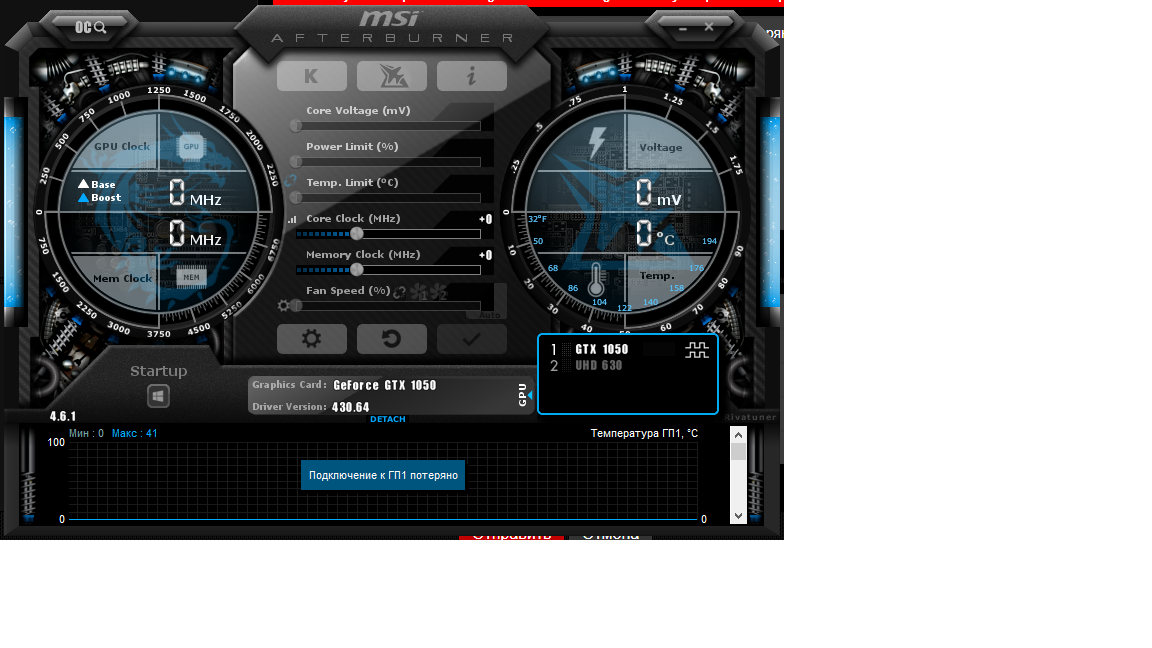
But when you need to increase performance, you can overclock the RAM. You just need to remember: the frequency should be increased by a maximum of half a step at a time. And then — to test RAM. Otherwise, the components may be severely damaged.
Note : When overclocking the RAM, it is often necessary to adjust other parameters, such as timings and voltage.
How to:
- Enter BIOS as described above.
- Enter advanced settings.
- Find «Memory Frequency». It is worth remembering that it can be called differently. The partition name must be «Memory», «Mem», or «DRAM».
- Increase the frequency value by 0.5 steps.
- Save and restart PC.
- Test the RAM in Windows using the «Memory test» option. It can be found by searching the system or in the «Administration» section.
Important ! Overfrequency leads to increased heat dissipation. Additional cooling may be required.
To the topic: How to set up RAM in BIOS — instructions in 4 simple sections It is easy to determine it both with the help of specific software and using system tools. RAM can also be overclocked to speed up the PC. However, you need to act very carefully so as not to damage anything.
MSI Afterburner Setup
MSI Afterburner Setup
03/18/2017
MSI Afterburner is primarily designed to overclock the video adapter in a computer system. Most often it is used by overclockers — enthusiasts in the field of overclocking computer components who achieve extreme performance. But it’s also suitable for casual users who need a slight boost in performance from their graphics card.
Using the program
In addition to overclocking the video card, MSI Afterburner has a number of additional functions, such as system monitoring with temperature graphs and the load of the main computer components.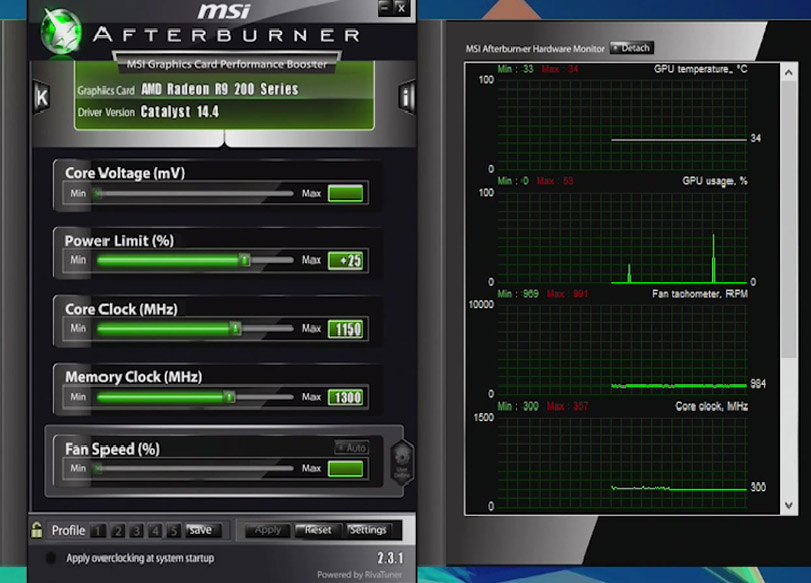
Installation
To start using the utility, you need to download it from the official website.
MSI Afterburner Download
- Go to the Downloads tab and click on the Download Afterburner button.
- Run the installation file, select the language and follow the instructions.
- Then a small window appears — this is the RivaTuner statistics module installation window. Select the language and install the module.
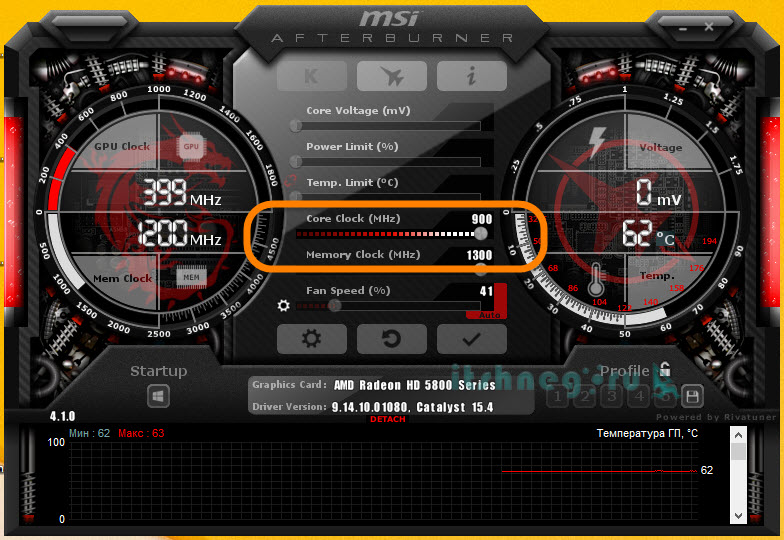
General view
After starting, we see the program divided into 2 sections. In the left section is the main overclocking panel, and on the right is the system monitoring window.
Consider the main panel.
Main panel includes:
- Video adapter model.
- Video card driver version.
- Information tab — information about the CPU and video adapter.
- « Core Voltage » — core voltage control.

- « Power Limit » — power consumption limit.
- « Core Clock » — GPU core clock.
- « Memory Clock » — memory frequency.
- « Fan Speed «- video card cooler speed.
- Button « Reset » — reset all settings.
- Option « Apply overclocking at system startup » — apply overclocking at system startup.
- Button «Settings» — utility settings.
The main points for overclocking a video card at home are the memory frequency and the GPU core frequency. By properly increasing the sliders, the performance of the video card increases. With standard settings, there are restrictions on increasing the frequencies for the correct operation of the video card. General users are not recommended to change the core voltage and power consumption limit. You can also change the speed of the video card cooler to arbitrary, if necessary.
Dashboard
Final graphics
Dashboard includes:
- GPU temperature
- GPU load
- Cooler speed
- Cooler tachometer
- Core frequency
- Memory frequency
- Graphics memory load
- CPU virtual thread temperature
- Processor temperature
- Processor Thread Loading
- Loading the processor itself
- Loading RAM
- Loading the paging file
You can also detach the monitoring window from the main panel:
To do this, press the button » Detach «.
A window will appear that can be fixed anywhere on the screen.
Basic settings
To open the settings menu, press » Settings «.
The basic settings are opened.
Here we see that control (Core Voltage, Power Limit) and voltage monitoring are disabled by default. Some graphics cards may not support these features. Under « AMD Compatibility Properties», there is a function « Extend Limits for Official Overclocking Mode», which increases GPU core and memory overclocking limits and voltage management. Users who are not well versed in overclocking are not recommended to enable these features.
Cooler
In this item, you can set the dependence of the temperature and speed of the cooler:
Put a tick in front of the function « Enable software user auto mode «.
This option is useful for heavy overclocking in order to use the cooler to the maximum. In no case should you set the fan speed to 100%, otherwise it will break. If overclocking is minimal, it is recommended not to check this option.
Monitoring
In this tab, you can remove unnecessary charts from the monitoring window and leave only the main ones:
To do this, before the unnecessary item, uncheck the box and click « OK «.
The default reading rate is 1000 ms, it can also be changed:
Enter the number, press « OK «.
Another advantage of this utility is the ability to write a monitoring report to a text document. You can specify the maximum file size, as well as overwriting reports when starting a new session:
- Check the box next to « Write history to report «, select the save folder and click « OK «.
- To view the report, click « View «.
- Select the desired file.
- After opening, the monitoring report for the period appears.
Profiles
In order not to spend a lot of time on overclocking, you can simplify it:
- It is necessary to set the desired frequencies, then press « save » and select a number from 1 to 5.
- You can also bind any key to a specific profile. Go to « Settings » and select the « Profiles » tab.
- 5 slots will appear, in the column of the desired slot, press any key and press « OK «.
Interface
If necessary, in the « Interface » tab, you can remove pop-up tips, change the language, change the temperature format, time format and customize the design of the main panel:
- To change the design, click on the button under the column « User interface skin properties».
- Then select the design you like from the drop-down list and click « OK «.
- After these steps, a modified utility interface will appear.