How to perform a clean graphics card driver installation : Dovetail Support
Solution home
PC Support
PC Tech Support
Modified on: Wed, 10 Nov, 2021 at 11:54 AM
A common problems for many Windows users is the presence of multiple/incomplete graphics card drivers. This can occur but is not limited to when you have changed the brand of graphics card you are using during your computers lifetime (e.g. AMD to Nvidia), installed the wrong driver, or interrupted a driver installation. Furthermore, this can lead to crashes and performance issues which may appear as hardware/software faults.
Often it is not enough to uninstall/reinstall/update your drivers to resolve the problem, as this can leave behind files, folders and register entries. Therefore, it may be necessary to thoroughly remove your drivers with a specialised app called Display Driver Uninstaller.
- Firstly, we will need to download the latest WHQL approved driver for your graphics card, while being sure not to download drivers marked as «beta/optional».
Please make sure you are confident that you are downloading the correct driver for your brand and model of graphics card. Both websites provide an automated option, if you are unsure of which model you are using.
- Nvidia: https://www.nvidia.com/en-gb/geforce/drivers/
- AMD: https://www.amd.com/en/support
- Save the driver to your desktop and we will come back to this later.
- Next, we need to download Display Driver Uninstaller which is a free, third-party app which is used to completely remove all traces of graphics card drivers on your computer.
- Download Display Driver Uninstaller: https://www.guru3d.com/files-details/display-driver-uninstaller-download.html
- Please fully read the instructions and license agreement before use.
- Open the download and extract the files to a folder on your desktop.
- Follow the instructions provided for either Nvidia or AMD depending on your brand of graphics card.
 You may need to run the tool multiple times if you have used or accidently installed drivers for both brands in the past.
- DDU AMD Support Thread: https://forums.guru3d.com/threads/display-driver-uninstaller-thread.379505/
- DDU Nvidia Support Thread: https://forums.guru3d.com/threads/display-driver-uninstaller-thread.379506/
- How to restart Windows 10 in Safe Mode: https://support.microsoft.com/en-us/windows/start-your-pc-in-safe-mode-in-windows-10-92c27cff-db89-8644-1ce4-b3e5e56fe234
- Once you have successfully removed all traces of previous graphics card drivers and have restarted Windows in normal mode, we can install the latest graphics card driver which we left on the desktop earlier.
- Do not interrupt the installation process and then restart you computer once it has been completed.
Did you find it helpful?
Yes
No
Send feedback
Sorry we couldn’t be helpful. Help us improve this article with your feedback.
How to completely uninstall graphics driver using DDU on Windows 10
If you’re having trouble removing the graphics driver, the Display Driver Uninstaller makes sure everything is deleted correctly on Windows 10, and here’s how.
Mauro Huc
@pureinfotech
On Windows 10, you can always use the manufacturer uninstaller and Device Manager to uninstall graphics drivers. However, sometimes the process won’t complete successfully, or it’ll remove the packages, leaving behind leftovers that may cause problems when installing new drivers, and this is when “Display Driver Uninstaller” (DDU) comes in handy.
“Display Driver Uninstaller” is a tool that uninstalls AMD and Nvidia graphics drivers completely without leaving behind any registry keys, files, folders, or driver store when the uninstall fails, or you need to delete the graphics card driver completely.
In this guide, you will learn the steps to use the Display Driver Uninstaller tool to delete Nvidia and AMD graphics drivers from Windows 10.
Warning: This is a third-party application offered “as-is.” Use it at your own risk. Before continuing, creating a full backup is highly recommended to revert the changes if something wrong happens. In addition, it’s recommended to disconnect your computer from the internet until you reinstall the display driver.
To use the Display Driver Uninstaller to completely remove the graphics driver on Windows 10, use these steps:
-
Open the guru3d website.
-
Under the “Download Locations” section, click the Display Driver Uninstaller download link nearest to your location to save the file.
-
Double-click the zip folder.
-
Click the Extract all button from the “Compressed Folder Tools” ribbon.
-
Click the Extract button.
-
Double-click the DDUvxx.x.x.x.exe file.
-
Click the Extract button.
-
Save your work and close any running applications.
-
Open Start.
-
Press and hold the Shift key, click the Power button, and select the Restart option to launch the Advanced startup experience to access Safe mode.
-
Click the Troubleshoot button.
-
Click on Advanced Options.
-
Click on Startup Settings.
-
Click the Restart button.
-
Select the Enable Safe Mode option (F4).
-
Open the “DDU vxx.x.x.x.exe” folder with the extracted files.
-
Double-click the Display Driver Uninstaller.
 exe file.
 -
Select the settings to use to remove Nvidia or AMD drivers on Windows 10. (The default settings should work in most cases unless you know what you’re doing.)
-
Select the Nvidia or AMD graphics card using the drop-down menu on the right side.
-
Click the Clean and restart button.
Once you complete the steps, the tool will thoroughly delete the current Nvidia or AMD driver, and the computer will restart automatically. After the restart, you can reinstall the new graphic driver on Windows 10.
While these instructions will help you to completely remove the graphics driver from your device, according to the author of the software, you should only use this tool when having a problem uninstalling or installing a driver or when switching GPU brands. And you shouldn’t use it every time you need to update the driver.
If you’re having issues with the Display Driver Uninstaller software, you should check the guru3d website for more details and help.
- How activation works in Windows 10: Digital license vs. product key
- How to install network camera on Windows 11
Or subscribe with this link to get emails weekly
We hate spam as much as you! Unsubscribe any time
Powered by follow.it (Privacy), our Privacy.
How can I fix Attsetup-[guru3d.com].exe related errors?
EXE problems associated with attsetup-[guru3d.com].exe are most commonly caused by a corrupted, missing, or infected executable and are often seen during the startup phase of the ATI Tray Tools software. As a rule, obtaining a new copy of the EXE file that does not contain viruses will solve the problem. As a last resort, we recommend using a registry cleaner to fix any invalid attsetup-[guru3d.com].exe, EXE file extensions, and other file path references that might be causing the error message.
Executable files that are in the Windows Executable File format usually contain the EXE file suffix. You can download a new copy of attsetup-[guru3d.com].exe for %%os%% (and some Windows operating systems) in the table below. Not all versions of attsetup-[guru3d.com].exe are available for download, but you can request the necessary files by clicking the Request button below. If you cannot find the file version you need in our database, you can also contact Ray Adams for further assistance.
The correct location of the attsetup-[guru3d.com].exe file is critical to successfully troubleshooting these types of errors. However, it will not be superfluous to perform a quick check. Try re-launching ATI Tray Tools to see if the error message still appears.
| attsetup-[guru3d.com].exe File Description | |
|---|---|
| Ext: | EXE |
| Category: | ATI Tray Tools |
| App: | ATI Tray Tools |
| Version: | 1. 7.9.1573 7.9.1573 |
| Created: | Ray Adams |
| Name: | attsetup-[guru3d.com].exe |
| KB: | 2132399 |
| SHA-1: | 45d2115a5acb9290bfdaecc0d301ea1b435d5570 |
| MD5: | 6f07a32829a9435a9784a453c14abd23 |
| CRC32: | |
Product Solvusoft
Download
WinThruster 2022 — Scan your PC for attsetup-[guru3d.com].exe
Windows
11/10/8/7/Vista/XP 9 registry errors0005
Install optional products — WinThruster (Solvusoft) | License | Privacy Policy | Terms | Removing
EXE
AttSetup- [guru3d.com] .exe
Identifier of Article: 1108388
AttSetup- [guru
Windows XP
2
Application
ATI Tray Tools
⦥
| File name | File identifier (MD5 checksum) | Size (in bytes) | Download | ||||||||||||||||||||
|---|---|---|---|---|---|---|---|---|---|---|---|---|---|---|---|---|---|---|---|---|---|---|---|
+ attsetup-[guru3d. com].exe com].exe |
6f07a32829a9435a9784a453c14abd23 | 2.03MB | |||||||||||||||||||||
|
|||||||||||||||||||||||
Common problems Attsetup-[guru3d.
 com].exe
The following are the most common attsetup-[guru3d.com].exe errors that can appear on a Windows-based computer:
- «Attsetup-[guru3d.com].exe program failed. «
- «Attsetup-[guru3d.com].exe is not a Win32 application.»
- «Attsetup-[guru3d.com].exe encountered a problem and will close. «
- «The file attsetup-[guru3d.com].exe was not found.»
- «Attsetup-[guru3d.com].exe not found.»
- «Problem starting application: attsetup-[guru3d.com].exe. «
- «Attsetup-[guru3d.com].exe is not running.»
- «Attsetup-[guru3d.com].exe exited. «
- «Invalid application path: attsetup-[guru3d.com].exe.»
ATI Tray Tools attsetup-[guru3d.com].exe problems occur during installation, while attsetup-[guru3d.com].exe-related software is running, during shutdown or startup, or less likely during an update operating system. Highlighting attsetup-[guru3d.com].exe errors is paramount to finding the cause of your ATI Tray Tools problems and reporting them to Ray Adams for help.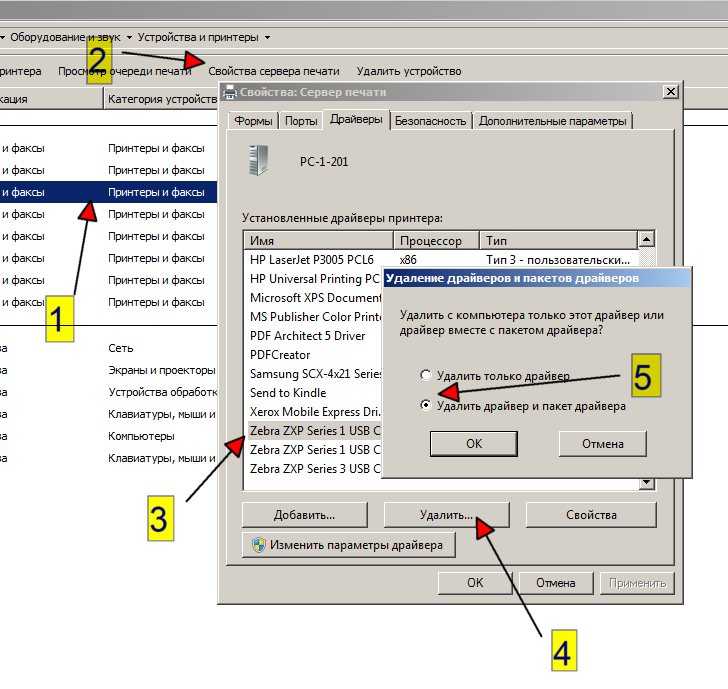
Attsetup-[guru3d.com].exe problem root
These attsetup-[guru3d.com].exe problems are caused by missing or corrupt attsetup-[guru3d.com].exe files, invalid ATI Tray Tools registry entries, or a malicious software.
First of all, attsetup-[guru3d.com].exe problems are generated:
- Invalid or corrupted Attsetup-[guru3d.com].exe entry.
- Malware has infected attsetup-[guru3d.com].exe, creating corruption.
- Malicious removal (or error) of attsetup-[guru3d.com].exe by another application (not ATI Tray Tools).
- Another application conflicting with attsetup-[guru3d.com].exe or other shared links.
- ATI Tray Tools/attsetup-[guru3d.com].exe is corrupted from incomplete download or installation.
How to remove drivers from PC
In this tutorial I will show you how to remove drivers from PC. We will learn how to use software uninstallers, Windows 10 system tools, and special applications.
Contents:
- A bit of theory
- Method 1: Uninstall using the uninstaller
- Method 2: Using system tools
- Method 3: Third party software
Some theory
The driver is an integral part of the software. It is necessary for the correct interaction of the operating system and hardware. Without it installed, the device will function incorrectly or very limited.
Modern Windows 10 comes pre-installed with software for most devices, and most likely there will be no problems with basic setup. But, for example, for video, audio, printer, installing a native driver is highly recommended.
When you might need to uninstall the driver:
- You installed an incompatible version with your device.
- A driver update failed.
- The device has been replaced/disconnected from the PC.
Since there are a huge number of devices for a computer, I, of course, cannot show how to remove the driver for each of them.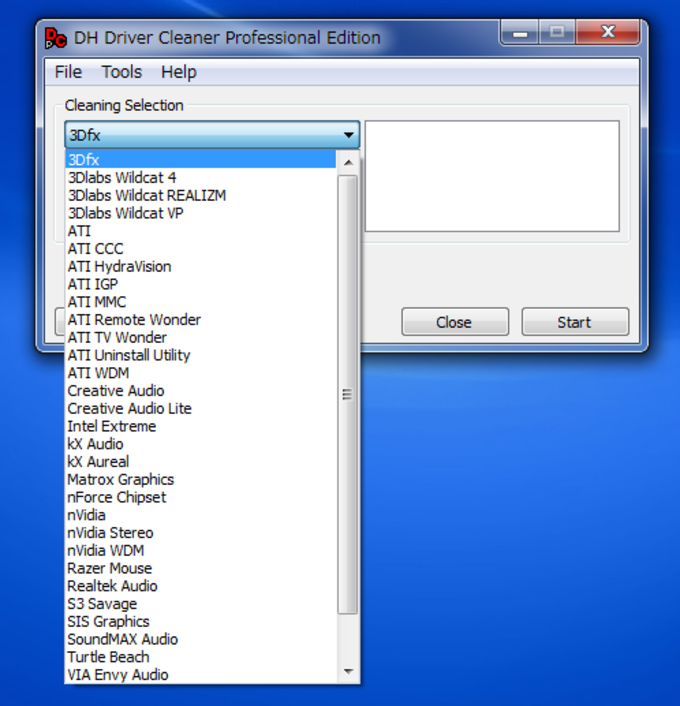 But we will look at ways to remove the most common models and the general principle for all devices.
Method 1: uninstall using the uninstaller
1. Open the Start menu and enter Settings.
2. Go to the Applications section.
Video card
NVIDIA
Scroll down a bit until a list with NVIDIA software appears.
Click on «NVIDIA Graphics Driver». The «Delete» item will open below, click on it.
Confirm the action.
Do the same for the rest of the programs.
AMD
In the list of programs, look for items with installed software from «AMD Catalyst» and remove everything one by one.
Intel HD Graphics
Intel HD Graphics is a graphics adapter built into the processor core, the driver of which I would not recommend removing. It can come in handy if the external video card fails or you decide to disconnect it from the computer.
The procedure itself is similar: you need to find the item «Intel Graphics Driver or Intel HD Graphics» in the list and remove it.
Sound Card and Printing Devices
Most motherboards come with a built-in Realtek High Definition Audio sound card by default. The application icon looks like this.
Clicking on the «Remove» button will initiate the uninstallation process.
Print drivers can also be found in the list by name. The most popular among them are Canon, HP, Kyocera, Epson and others. If the printer or scanner is no longer available to you, you can remove all software and free up memory on your PC.
Device uninstaller can in some cases be found by name in the Start menu and can be cleaned without going to Settings.
Method 2: using system tools
Next, we will look at the features of Windows 10, with which you can manually remove a non-working or unnecessary driver.
In the device manager
You may encounter a situation where the uninstaller is not on the PC. This is especially true for older devices. Then we proceed as follows.
1. Right-click on the Start menu and open the «Device Manager».
2. Expand the list of devices where the driver is installed.
3. Right-click on it and select «Delete device».
4. Confirm the action with the «Delete» button.
System cleaner
System cleaner can scan for obsolete devices and remove them if necessary.
1. Open the This PC folder.
2. Right-click on Local Disk C and open «Properties».
3. Click the Disk Cleanup button.
4. Next, click on the «Clean up system files» button.
5. Device Driver Packages will show the amount of obsolete files that can be cleared by checking the box and clicking OK.
Removing Disabled Device Drivers
If you have connected many different devices to your computer that you have long forgotten about, you can view and remove them by displaying them in Device Manager. But before that, you need to do the following.
1. Right-click the This PC icon and go to Properties.
2. Open the item «Advanced system settings».
3. Click the Environment Variables button.
4. Click Create.
5. In the Variable name field, insert devmgr_show_nonpresent_devices. In the Variable value field, set the parameter to 1 and click OK.
6. Go to Device Manager.
7. On the View menu, click on Show Hidden Devices.
All disabled devices will be displayed. Now they can be removed.
Using the command line
The method is useful if the standard driver cannot be removed. For example, disabled or old, which conflicts with new hardware and crashes the system.
1. From the Start menu, type command prompt and run the application with administrator rights.
2. Type pnputil.exe -e > C:\drivers. txt and press the Enter key.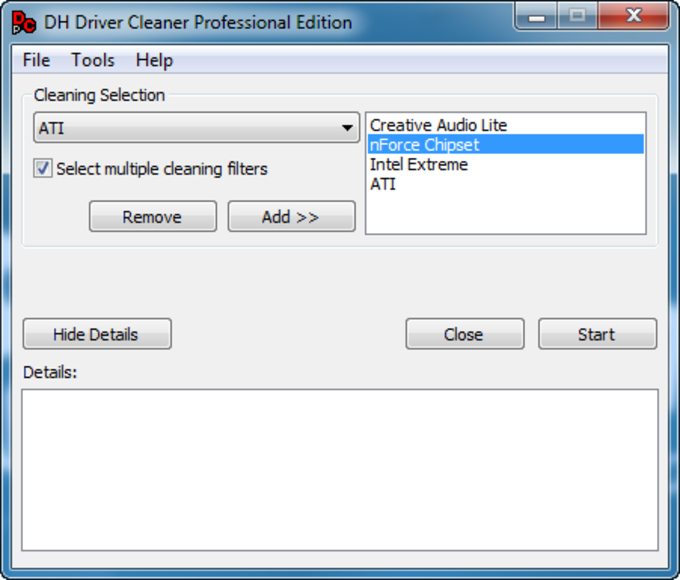 This is a command to create a text file with a list of devices uploaded.
3. Go to Local Disk C and open the text file drivers.txt.
4. Scroll through the list and find the name of the device you want to remove. Minimize Notepad, but don’t close it, and reopen the Command Prompt with administrative rights.
Type pnputil.exe -d oem11.inf, where oem11.inf is the hardware driver file to remove.
If this message is displayed, the device must be force-wiped.
5. Enter the pnputil.exe -f -d oem11.inf command, where the f switch specifies the force removal command.
That’s it! The hardware and its file have been successfully removed.
Method 3: third-party programs
At the end of the lesson, I will show you some useful programs designed to force clean drivers and more.
Display Driver Uninstaller
The program is designed to uninstall popular models of video and audio drivers.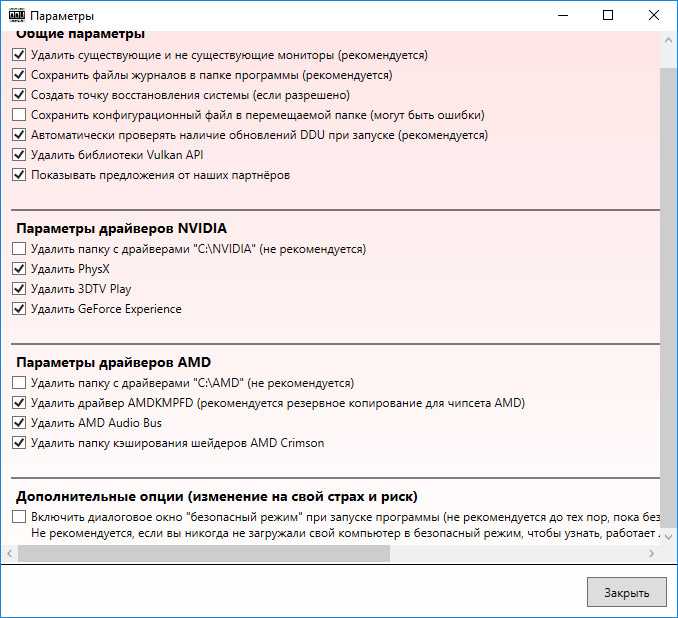 With it, you can select the desired device in visual mode and remove it in a couple of mouse clicks.
1. Official site for downloading the program: guru3d.com/files-details/display-driver-uninstaller-download.html. After unpacking, run the «Display driver uninstaller.exe» file.
2. The program will prompt you to reboot in safe mode, as some files may be involved in the system.
To reboot into safe mode, follow these steps:
- From the Start menu, type msconfig and run the application as an administrator.
- On the Boot tab, check the box next to Safe Mode and click Apply.
3. Restart your computer and run the program. In the right switch, select the type of equipment.
In the next radio button, select the manufacturer from the list.
Click Uninstall and Restart.
4. Wait for the process to finish. Upon completion, do not forget to uncheck the safe mode to return to the usual mode of operation.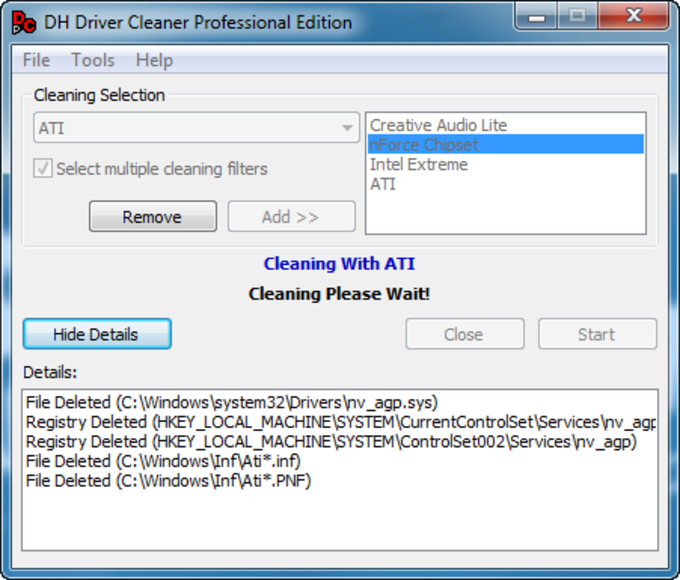
Benefit:
- Available for free download.
- Does not require installation.
- Has an intuitive interface.
Driver Fusion
Driver Fusion is a paid program with limited features in the free version. However, it allows you to remove some obsolete drivers even in the free edition.
You can download and install the program from the official website: treexy.com/products/driver-fusion. In the main window of the program, go to the «Driver Cleaner» tab and select the type of device.
If the program detects an uninstaller, it will recommend that you perform a cleanup in the application settings. Next, you can click on the «Clean» button to completely clean up residual files.
Program advantage:
- Large selection of equipment.
- Fast and high quality PC scanning.
- Russian menu interface.
Driver Booster
The program is available for download in two editions: paid and free.