Fractal Design Node 304 review
Written by
Antony Leather
September 19, 2012 | 08:17
Tags: #best-mini-itx-case #mini-itx #mini-itx-case #small-form-factor
Companies: #fractal-design
1 — Fractal Design Node 304 Review2 — Fractal Design Node 304 — Interior3 — Fractal Design Node 304 — Cooling Performance4 — Fractal Design Node 304 Performance Analysis and Conclusion
Manufacturer:Fractal Design
UK Price (as reviewed): £70 inc. VAT (approx)
US Price (as reviewed): $90 ex. Tax (approx)
We’ve certainly taken an interest in the small form factor side of things recently here, and for good reason. Practically every major motherboard manufacturer will have a Z77 mini-ITX enthusiast motherboard on sale before the end of the year. So far, that includes Zotac, Asus and ASRock (see our reviews of the latter two here), with Gigabyte, EVGA and MSI soon to follow suit. There are plenty of pre-release board shots in the wild already.
It’s the first time that so many big guns have taken the mini-ITX enthusiast market seriously on a single CPU socket, although much of this is likely due to the low power requirements of Intel’s latest CPUs — TIM issues aside, Ivy Bridge is very power efficient indeed. Cramming all the needed power circuitry into such a small motherboard is still an expensive bushiness — Asus’ P8Z77-I Deluxe for example, which sports the most power phases of any Z77 mini-ITX board yet, costs around £150. However that goes with the territory. The point is, that if you want a very small PC that’s just as powerful and overclockable as a micro-ATX or full-size system, you’re now spoiled for choice when it comes to hardware.
Case manufacturers have been quick to capitalise on this expanding market, and we’ve seen some interesting cases in the form of BitFenix’s Prodigy and Cooler Master’s Elite 120. And with a history of interesting and edgy cases, Fractal Design is also delving into the fray with the Node 304.
Click to enlarge
This one’s a fairly standard looking cube-style mini-ITX case, the likes of which we’ve seen plenty of in the past from Lian Li, SilverStone and a host of budget/re-branded models besides. However, the Node 304 isn’t without innovation — it has plenty of interesting features but read on if you’re thinking about adding it to your shortlist.
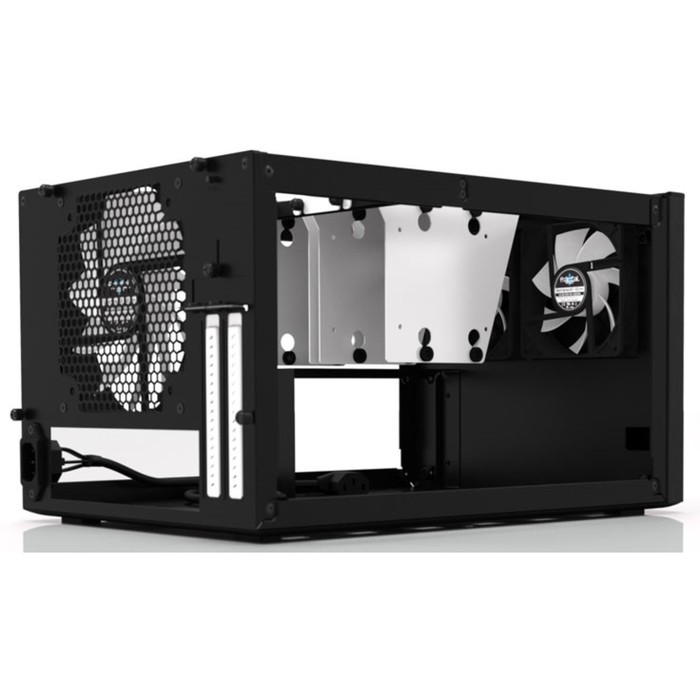
If the Prodigy was too large for your liking, then the Node 304 is a true mini-ITX case, barely any bigger than a shoebox at 374mm long. Despite its diminutive size, the Node 304 can cater for full-size ATX PSUs, and has enough clearance for graphics cards up to 310mm in length and CPU coolers up to 165mm in height. Its build quality is also very good — no rattly panels or wobbly case feet here, unlike the Prodigy, and it retains an elegant, refined style that’s more akin to a sub woofer than a PC case.
Click to enlarge
The vents in the side panels allow for the PSU and graphics card (located either side) to draw in (graphics card) or vent (PSU) air through the side panels. The rear of the case is strangely devoid of a PSU mount — the PSU is located at the front of the case with a right-angled power adaptor routing the power cable to the rear of the case. This allows the motherboard to have free-reign at the back, giving it ample headroom to take tall CPU coolers. The power button, two USB 3 ports and mini-jacks are located at the side too.
What you see is what you get as far as external drive bays are concerned — zero. This may put some of you off at a stroke; thankfully if you’re keen on having an element of fan control in the equation, the Node 304 has a switch-type controller at the rear of the case, although you’re obviously stuck if you’re looking for a home for an optical drive or fan controller. It’s surprising that more manufacturers don’t at least add a slimline drive option but as it stands, the Node 304 has no external expansion.
Specifications
- Dimensions (mm) 250 x 374 x 210 (W x D x H)
- Material Steel, Plastic
- Available colours Black
- Weight 4.8kg
- Front panel Power, (side of case), 2 x USB 3, stereo, microphone
- Drive bays 6 x internal 3.5in
- Form factor(s) Mini-ITX
- Cooling 2 x 92mm front fan mounts (fan supplied), 1 x 120/140mm rear fan mount (140mm fan supplied)
- CPU cooler clearance 165mm
- Maximum graphics card length 310mm
- Extras Removable dust filters
1 — Fractal Design Node 304 Review2 — Fractal Design Node 304 — Interior3 — Fractal Design Node 304 — Cooling Performance4 — Fractal Design Node 304 Performance Analysis and Conclusion
Fractal Design Node 304 Mini-ITX Case
The Design Node 304 is an evolution of Fractal’s earlier Mini ITX NAS Case geared primarily for server duty.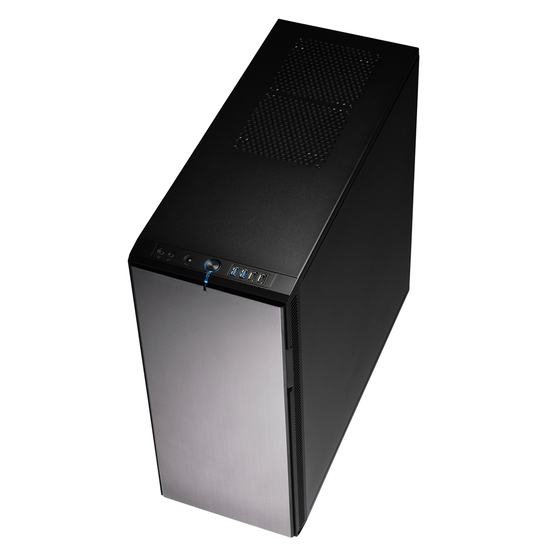 How well does it manage the noise and vibration of six 3.5″ drives? Can this modest 20 litre case keep the system cool enough?
Fractal Design Node 304 Mini-ITX Case
December 10, 2013 by Lawrence Lee
|
Product |
Fractal Design Node 304 |
|
Manufacturer |
Fractal Design |
|
Street Price |
US$90 |
Though the mini-ITX form factor has been around for over a decade and become
significantly more popular over the past few years, there is no defined case
specification like ATX for manufacturers to work from. While 8 out of 10 ATX
towers have near identical layouts, with mini-ITX, all bets are off. There is
no convention for how big a mini-ITX case should be — some are so compact
they can be mounted behind a monitor, some are long and slim mimicking home
theater equipment, while others are big enough to be mistaken for microATX models.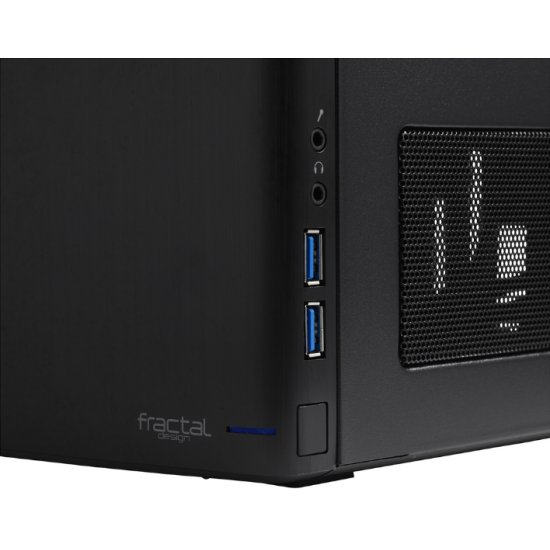
The overall dimensions, features, layout, and component support ultimately comes
down to how the system is going to be used. One thing we’ve noticed is that
the strict physical limitations create more potential points of failure as the
versatility increases. The more things you try to add, the more likely design
elements will interfere with one another.
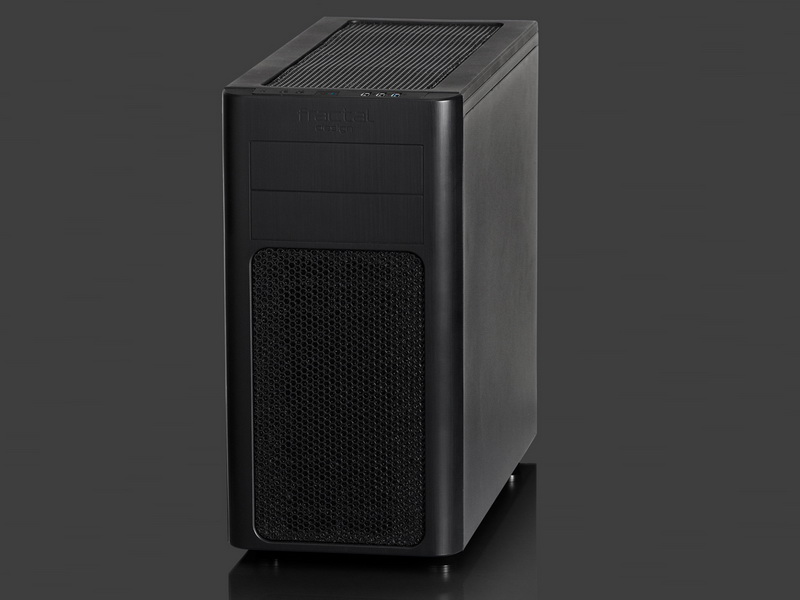
At first glance, the Fractal Design Node 304 doesn’t have the demeanor of an
overly ambitious case. It’s a fairly plain looking, compact box that shares
a minimalist aesthetic and glossy finish with other Fractal models, particularly
the Fractal Design Array Mini ITX
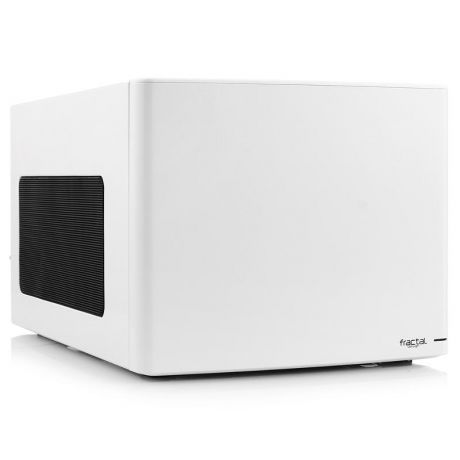
NAS Case we reviewed in 2010. Our sample is the white version (it also
comes in black) which in our opinion has a more attractive appearance and is
more resilient to smudges and fingerprints. The body is made of steel while
the rounded front bezel is composed of plastic with a thin aluminum face. Interestingly,
the Node 304’s footprint is identical to that of the recently reviewed BitFenix
Phenom Mini-ITX, but at 21 cm tall, the Fractal case is shorter by a
significant 12 cm.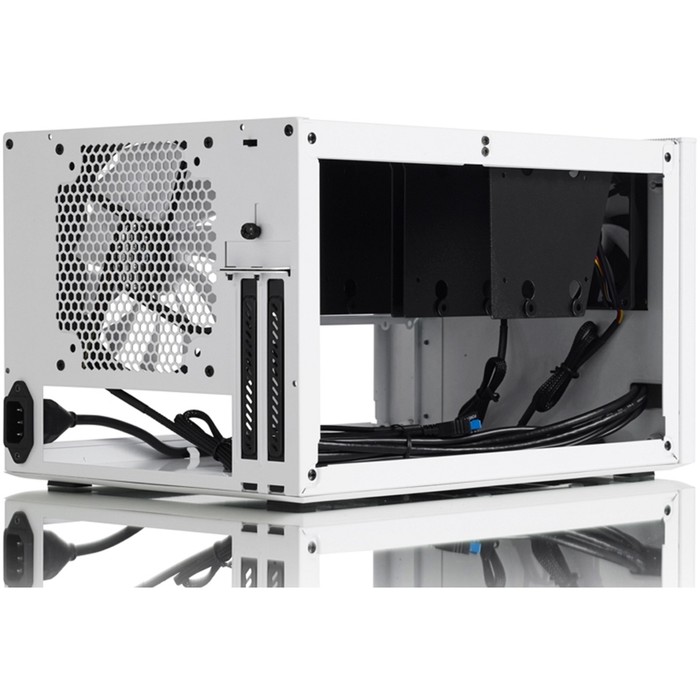
|
The Node 304 box. |
|
The Node 304 (white). |
Despite the size disparity, the Node 304 and the Phenom Mini-ITX cases share
many similarities. They’re both designed with small servers in mind, accommodating
up to six 3.5 inch hard drives, but they also attempt to offer more than simply
high capacity storage. There’s room for an ATX power supply, a good-sized tower
CPU cooler, and a long graphics card. However, the Node 304 uses an interior
design that veers farther from standard tower style cases than the Phenom to
pack all these features into a smaller form. Instead of 2 x 120 mm fans (with
the option for one more), the Fractal case is equipped with a pair of 92 mm
and a lone 140 mm fan, and a fan controller is included. The Node 304 promises
better airflow than the Phenom with air vents on both sides as well as on the
top and bottom of the front panel.
|
Accessories. |
The accessories that ship with the Node 304 are scant. A very brief manual is included that doesn’t actually have any assembly instructions, just a single diagram of how all the pieces go together in multiple languages. The case also comes with the necessary screws and standoffs, and a few plastic zip-ties for bundling up cables.
|
Specifications: Fractal Design Node 304 |
|
| Motherboard | Mini ITX, DTX |
| Drive bays | 6 – supports either 3.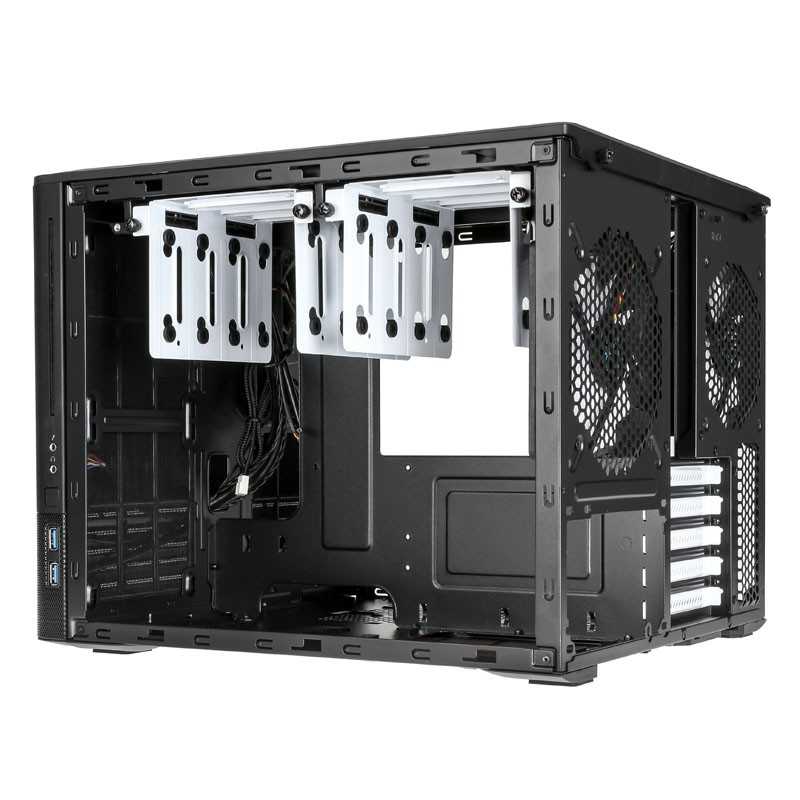 5″ or 2.5″ HDD / SSD 5″ or 2.5″ HDD / SSD |
| Power Supply | ATX PSUs, up to 160mm in length (To fit in combination with a long graphics card, PSUs with modular connectors on the back typically need to be shorter than 160 mm) |
| Expansion | 2 slots |
| Graphics Card | Up to 310mm in length, when 2 HDD slots (1 HDD hanging bracket total) are removed (Graphics cards longer than 170 mm will conflict with PSUs longer than 160mm) |
| CPU Cooler | Tower coolers, up to 165 mm tall |
| Dimensions | 250 x 210 x 374 mm (W x H x D), 19.6 liters |
| Case volume | 19.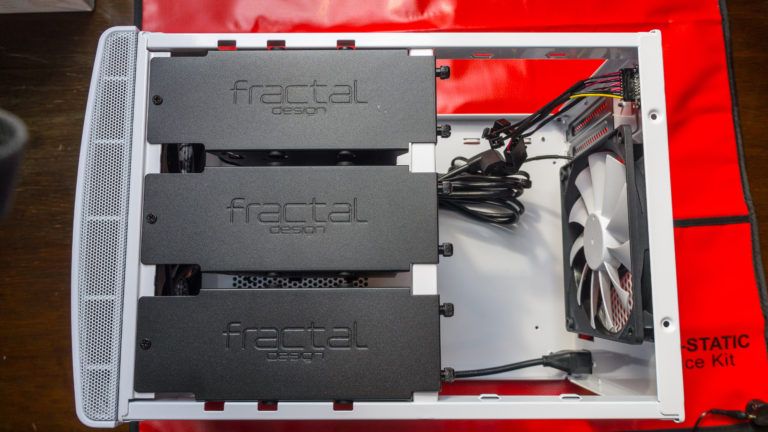 5 Liters 5 Liters |
| Net weight | 4.9 kg |
| Colors available | Black and White |
| Cooling System | Front: 2 x 92mm Silent Series R2 hydraulic bearing fans, 1300 RPM speed (compatible with 80mm fans) – included
Rear: 1 x 140mm Silent Series R2 hydraulic bearing fan, 1000 RPM speed (compatible with 120mm fans) – included Air filters: Removable filters for front fans, PSU, graphics card Fan control: Fan controller for all 3 fans included |
| Front interface | 2 – USB 3.0 (Internal 3.0 to 2.0 adapter included) 1 – 3.5mm audio in (microphone) 1 – 3.5mm audio out (headphone) Power button with LED HDD LED |
| Package contents | Node 304 computer case User manual Accessory box |
EXTERIOR & COVER
The Node 304 measures 25.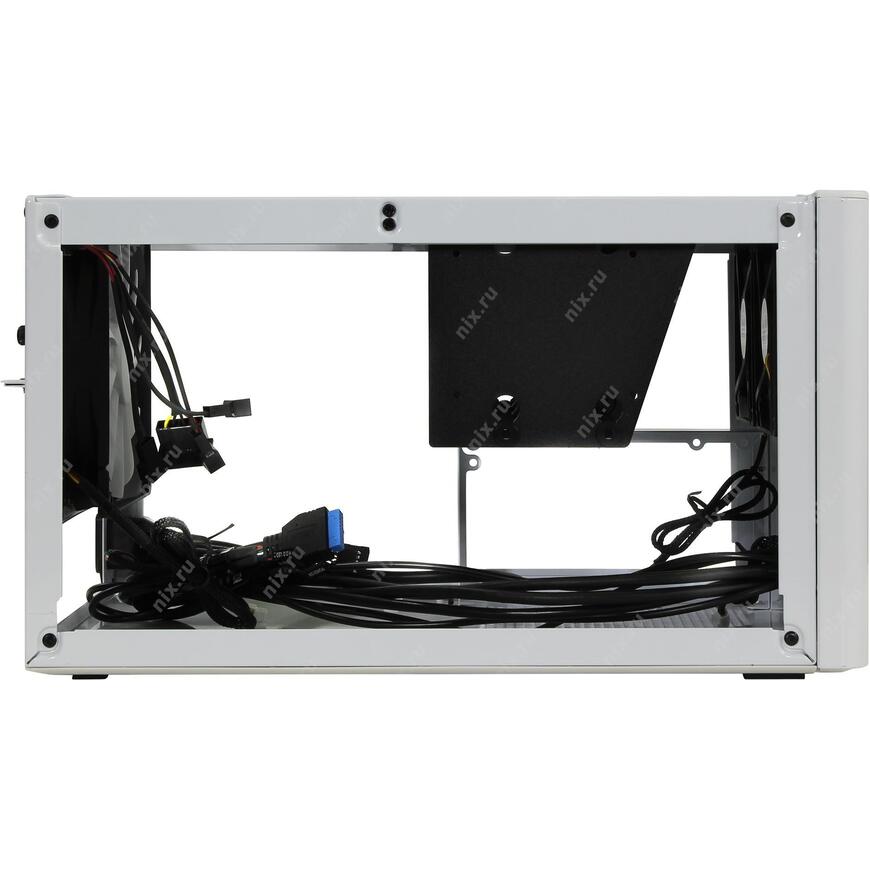 0 x 21.0 x 37.4 cm or 9.8 x 8.3 x 14.7 inches (W x H x D), giving it a total volume of 19.6 liters, and it weighs 4.9 kg or 10.8 lb. The main chassis and outer cover are made of steel and the front bezel is plastic with a aluminum surface.
|
Running down the right side of the front face are line-out and mic ports, the power switch, and a pair of USB 3.0 connectors. If your motherboard lacks an internal USB 3.0 header, the cable has a USB 2.0 option as a backup. Located on the right side is an exhaust vent for the internal front-mounted power supply. |
|
Unusually, fresh air is pulled in from the top and bottom of the front bezel rather than from the sides. The top portion has a mesh grill while the bottom is completely open. |
|
The only removable external dust filter (the rest must be removed from the inside) services the power supply’s intake fan. |
 The chassis is elevated by four short rectangular rubber pads, creating only 10 mm of clearance under the power supply vent.
 |
At the rear is a 140 mm exhaust fan placement residing above the motherboard tray, the switch for the fan controller, and a pair of expansion slots. The top and sides come off in one piece via four thumbscrews like most cases of this style. |
|
The included fan controller can power three fans and has three speed settings: low, medium, and high. |
|
Measuring 0.9 mm thick, the external cover is reasonably strong. Multiple latches are employed to create a snug fit. The side-facing power supply exhaust port has a basic of steel mesh acting as a dust filter, with only malleable tabs keeping it in place. |

|
The much larger vent on the opposite side near the expansion slots has a proper removable filter with a plastic frame. |
INTERIOR
The interior of the Node 304 seems fairly well-built. The frame is stiff as is the support beam at the top of case, and the drive trays are relatively thick. Except for a cheap mesh dust filter on the right side of the case, nothing inside feels substandard in quality.
|
A lot of space is taken up by the hard drive trays. They occupy |
|
The brackets are supported by the top/front portion of the chassis frame and by removable support beam running through the center of the case. |
 Each bracket is held on with three screws and supports a pair of 3.5/2.5 inch drives a piece.
 |
A pair of 92 mm fans pull in air through the front, push it through the hard drive bays towards a rear 140 mm exhaust fan at the back. There’s room for a big tower CPU cooler as well which is a huge plus. Sitting below the drives, the power supply is isolated, pulling air in from the floor and exhausting it out the side. An extension cable is routed through the case interior so it can be connected to AC power at the rear. |
|
140 mm fans are rare in even ATX towers so it’s nice to see one in a mini-ITX case. Next to it in the corner is a molex-powered fan controller which supports up to three 3-pin fans, just enough for all the included stock fans. |
|
Dual front fans are also unusual for a mini-ITX model but in this case, given the layout of the rest of the chassis, it’s a perfect fit. |
 Having two smaller fans allows them to cover more horizontal area, providing direct airflow over every drive, even if the case is filled to capacity.
 |
The front panel is easily removed in case you need to service the front fans or the dust filter. |
|
Along the floor of the left side of the case are some spots for employing zip/twist-ties. Unfortunately, given the cramped layout, there really isn’t much room for excess cabling. |
ASSEMBLY
Assembly of the Node 304 is fairly straightforward thanks to the modular design
but spacing is incredibly tight, and there is little room reserved for cables.
A modular power supply is highly recommended.
|
The hard drive brackets are 1. |
 2 mm thick and support two drives a piece. 3.5 inch drives are secured with four screws dampened by rubber grommets.
 |
One compatibility issue we ran into was the cables coming off the back of the drives interfering with the fan of our Noctua NH-U12P heatsink — we had to move it to the other side in the «pull» position next to the exhaust fan |
|
Most of the cables end up on the left side of the case, making it difficult to install a long graphics card. Adding a full sized GPU also means one of the hard drive brackets must be removed. |
|
Perpendicular SATA cables would help but the drives are not mounted in the same orientation. If you want the cables to face the same direction, you’ll need both right-angle and left-angle connectors. Given the proximity of the CPU cooler and the rear exhaust fan, we briefly |
|
There was an additional ~25 mm of space available above our Noctua NH-U12P cooler, making the total CPU heatsink clearance approximately 183 mm, 18 mm more than Fractal Design’s specified limit. The width of the heatsink is more of an issue than the height. |
|
The long hard drive activity LED is diffused somewhat, making for a pleasant blue glow. |
 The white power LED underneath the bezel shines brightly downward like a spotlight and is blinding when viewed directly. We recommend leaving it disconnected.
 TESTING
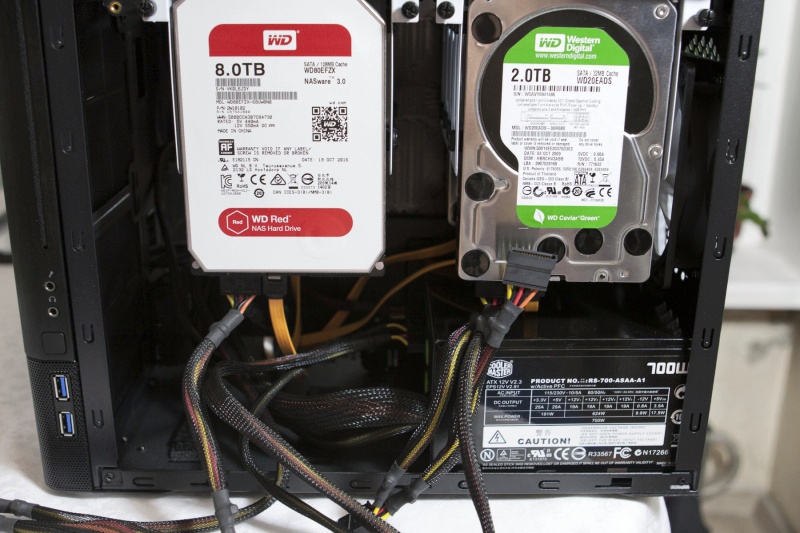
System Configuration:
- Intel Core i5-2500K processor
– 3.3GHz, 32nm, 95W, integrated GMA HD 3000 graphics - Noctua NH-U12P CPU cooler – Nexus 120 mm fan at 12V
- Asus P8H67-I Deluxe motherboard
– H67 chipset - Kingston ValueRAM SODIMM memory – 2x2GB, DDR3-1333
- Seagate Barracuda XT
hard drive – 2TB, 7200 RPM, 64MB cache - Samsung EcoGreen F3
hard drive – 2TB, 5400 RPM, 32MB cache - Western Digital SE16
hard drive – 320GB, 7200 RPM, 16MB cache - Western Digital Red
hard drive – 3TB, 5400 RPM, 64MB cache - Coolermaster
Silent Pro M700W – modular ATX power supply - Microsoft
Windows 7 operating system – Ultimate, 64-bit
Measurement and Analysis Tools
- Prime95
processor stress software.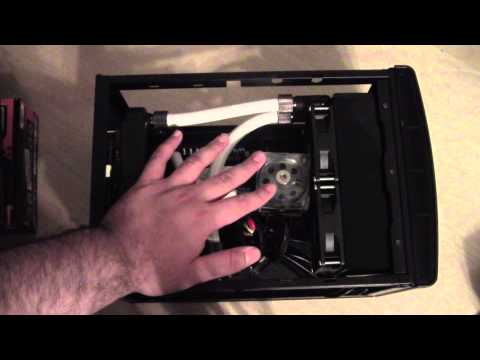
- FurMark
stability test to stress the integrated GPU. - RealTemp
to monitor CPU core temperatures. - GPU-Z to
monitor GPU temperatures and fan speed. - SpeedFan
to monitor system temperatures. - Extech
AC Power Analyzer 380803 AC power meter, used to measure the power consumption
of the system. - Custom-built, four-channel variable DC power supply, used to regulate
fan speeds during the test. - PC-based spectrum analyzer:
SpectraPlus with ACO Pacific mic and M-Audio digitalaudio interfaces.
- Anechoic chamber
with ambient level of 11 dBA or lower - Various other tools for testing fans, as documented in our
standard fan testing methodology.
System temperatures were recorded with RealTemp, SpeedFan, and GPU-Z
at idle and on load using Prime95 (small FFT setting) and FurMark, an OpenGL
benchmarking and stability testing utility. Power consumption and noise levels were also measured.
|
Test Drive Noise Summary |
||
|
Drive |
Vibration |
Idle Airborne Acoustics @1m |
|
Seagate Barracuda XT 2TB |
7~8 |
17 dBA |
|
Samsung F3 EcoGreen 2TB |
7 |
15~16 dBA |
|
WD Caviar SE16 320GB |
6 |
18~19 dBA |
|
WD Red 3TB |
9 |
13~14 dBA |
Usually we test cases with a single hard drive but for models designed or marketed
for use as a server we also test with three additional drives.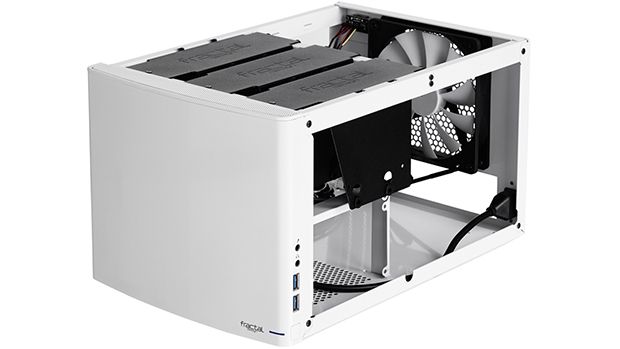 The acoustic
properties of the drives used are detailed above. Incidentally, the Seagate,
Samsung, and WD SE16 drives are the models used for our single drive configuration
mini-ITX, microATX, and ATX case systems respectively.
Baseline Noise
The Node 304 ships with a trio of fans, 2 x 92 mm and 1 x 140 mm, belonging to their Silent Series R2 line. The case also includes a built-in 3-speed fan controller that’s capable of controlling all the included fans.
|
Stock Fan Noise Level |
|
|
Fan Speed Setting |
SPL @1m |
|
Low |
17 dBA |
|
Med |
19~20 dBA |
|
High |
27 dBA |
|
Measuring mic positioned 1m at diagonal angle left/front |
|
Baseline noise was tested with our test system on but the CPU fan disconnected, so the only noise generators aside from the system fans was a power supply fan and single hard drive. Generally we consider an overall noise level of 20 dBA@1m and below to be quiet and the stock fans certainly met this standard with ease. Our instruments measured 17 dBA@1m and 19~20 dBA@1m on low and medium speed, respectively. The high setting was much louder and probably unnecessary for a server type configuration. Hard drives don’t require much in the way of airflow.
Both the 92 mm and 140 mm fan had a similar acoustic quality. They droned at
high speed and clicked when slowed down. With the cover was secured on, these
deficiencies were only audible at close proximity and other noise producing
components mask these negative qualities further. At distances of one foot or
further, it sounded completely benign.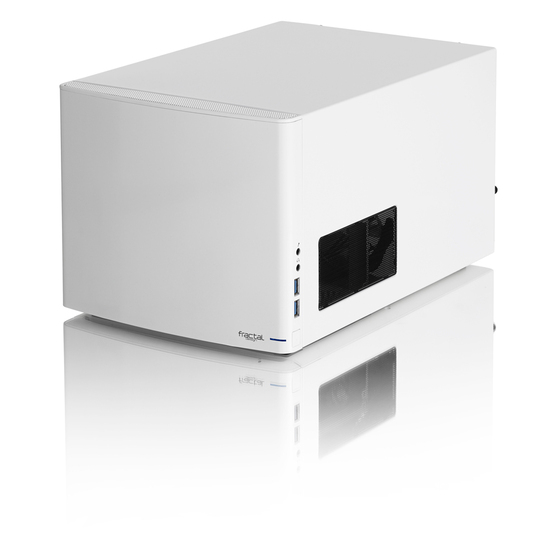
TEST RESULTS: Test System with Intel HD 3000 Graphics
|
System Measurements: HD 3000 IGP Test System |
|||
|
System State |
Idle |
CPU + GPU Load |
|
|
System Fan |
Low |
Med |
|
|
CPU Temp |
30°C |
52°C |
51°C |
|
PCH Temp |
28°C |
40°C |
38°C |
|
HD Temp |
33°C |
34°C |
34°C |
|
System Power (AC) |
37W |
132W |
134W |
|
SPL@1m |
21~22 dBA |
23 dBA |
|
|
CPU fan at full speed. |
|||
Sitting idle with the CPU fan at full speed and system fans set to low via
the included controller, the interior was comfortably cool and the machine’s
noise level was a respectable 21~22 dBA@1m. Putting the system on full load
brought the CPU and PCH temperatures up by 22°C and 12°C respectively
while the hard drive only heated up by a single degree. Our power supply is
very quiet, not ramping up its fan at this load so there was no difference in
noise level. For this configuration, increasing the system fan speed was completely
unnecessary as switching it to medium gave us only minute thermal improvements.
|
System Measurements: HD 3000 IGP Test System |
|||
|
System State |
Idle |
CPU + GPU Load |
|
|
System Fan |
Low |
Med |
|
|
CPU Temp |
31°C |
55°C |
53°C |
|
PCH Temp |
29°C |
42°C |
40°C |
|
HD Temp #1 |
36°C |
38°C |
37°C |
|
HD Temp #2 |
31°C |
32°C |
31°C |
|
HD Temp #3 |
34°C |
34°C |
34°C |
|
HD Temp #4 |
31°C |
32°C |
31°C |
|
System Power (AC) |
53W |
149W |
149W |
|
SPL@1m |
23~24 dBA |
25 dBA |
|
|
CPU fan at full speed. |
|||
At idle with the system fans set to low speed, three extra drives didn’t really change the overall climate inside, barely heating up the CPU and motherboard, though the it did bring up the first drive’s temperature by 3°C. Still, thermals were excellent across the board and the noise level was only 2 dB higher. On load, the we recorded a similar temperature rise to the single drive test and three of the drives stayed below 35°C. This time increasing the system fan speed had more of an effect in this slightly hotter environment but the gains were marginal.
The four drive system was only louder by 2 dB, but the vibration level was
more impressive. With a single drive there were some minor tremors but nothing
noticeable was picked up by the mic or our ears. With four drives, the system
produced some resonance but it was completely inaudible once we got further
than one foot away.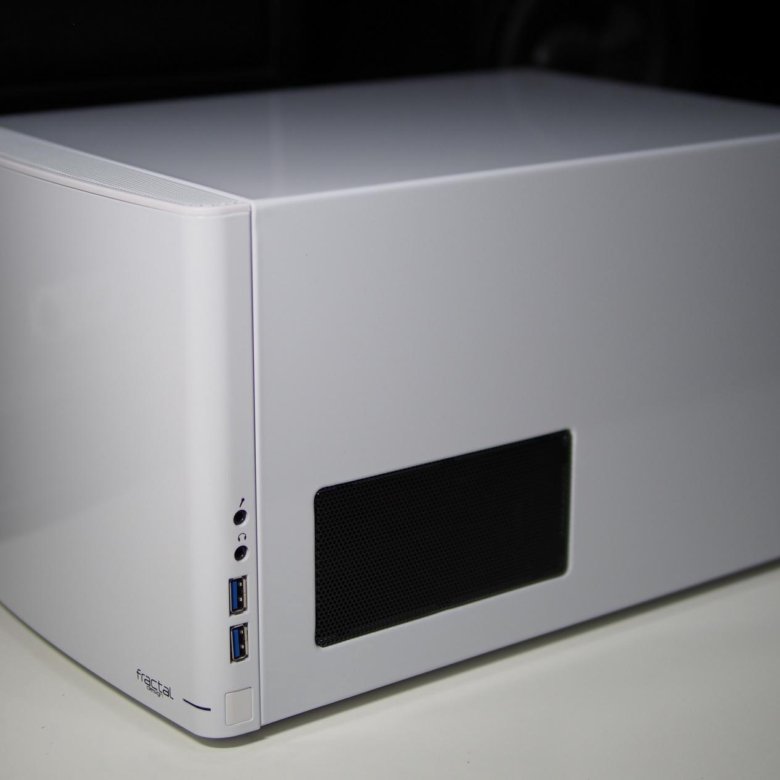 Using our test components, cases with poor structural support
for the hard drives often produce high tonal peaks at 90 and 120 Hz (corresponding
to 5400 and 7200 RPM drives respectively) but for the Node 304 these were minor.
Dampened drives hanging on their sides to a rigid support structure appears
to an excellent strategy for taming the vibration generated by spinning hard
disks.
|
System Measurement Comparison: HD 3000 IGP Test System |
||||
|
Case |
Lian Li PC-Q18* |
BitFenix Phenom** |
Chenbro SR30169*** |
Fractal Node 304** |
|
System Fan Speed(s) |
5V |
800 RPM |
500 RPM |
Low |
|
CPU Temp |
24°C |
33°C |
39°C |
31°C |
|
SB Temp |
29°C |
33°C |
37°C |
29°C |
|
HD #1 Temp |
35°C |
40°C |
42°C |
36°C |
|
HD #2 Temp |
35°C |
31°C |
35°C |
31°C |
|
HD #3 Temp |
30°C |
37°C |
37°C |
34°C |
|
HD #4 Temp |
36°C |
31°C |
33°C |
31°C |
|
System Power (AC) |
54W |
53W |
60W |
53W |
|
SPL@1m |
21~22 dBA |
23 dBA |
23 dBA |
23~24 dBA |
|
Ambient temperature: 21°C. |
||||

Against other mini-ITX cases housing our four drive server configuration, the Node 304 measured the loudest but the difference was small compared to the BitFenix Phenom and Chenbro SR30169, and the Node 304’s noise increase from the one to four drive configuration was modest. Also, vibration effects were substantially worse with the Lian Li PC-Q18 and BitFenix Phenom, to the point where this factor was more annoying than the airborne acoustics. The Node 304 also boasted the second lowest hard drive temperatures.
AUDIO RECORDINGS
These recordings were made with a high resolution, lab quality, digital recording
system inside SPCR’s own 11 dBA ambient anechoic chamber, then converted to
LAME 128kbps encoded MP3s.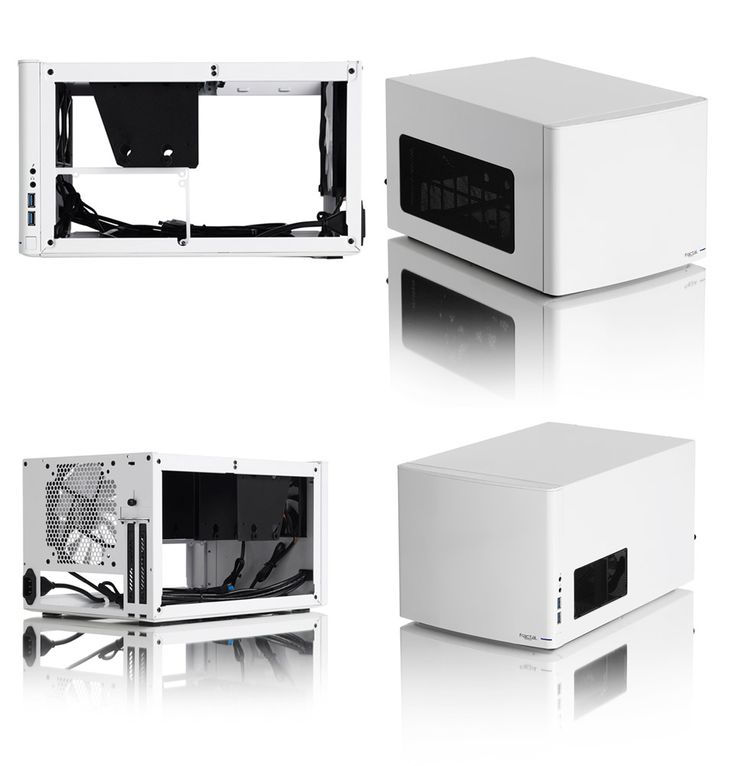 We’ve listened long and hard to ensure there is no
audible degradation from the original WAV files to these MP3s. They represent
a quick snapshot of what we heard during the review.
Each recording starts with ambient noise, then 5~10 second segments of product
at various states. For the most realistic results,
set the volume so that the starting ambient level is just barely audible, then
don’t change the volume setting again while comparing all the sound files.
- Fractal Design Node 304 – Baseline – Intel HD 3000 test system, CPU fan off
— stock fans at low (17 dBA@1m)
— stock fans at medium (19~20 dBA@1m)
— stock fans at high (27 dBA@1m)
- Fractal Design Node 304 – Intel HD 3000 test system, CPU fan at 12V
— idle/load, single hard drive, stock fans at low (19 dBA@1m)
— idle/load, four hard drives, stock fans at low (23~24 dBA@1m)
— idle/load, four hard drives, stock fans at medium (25 dBA@1m)
FINAL THOUGHTS
The Node 304 has a clever design that maximizes its cooling potential.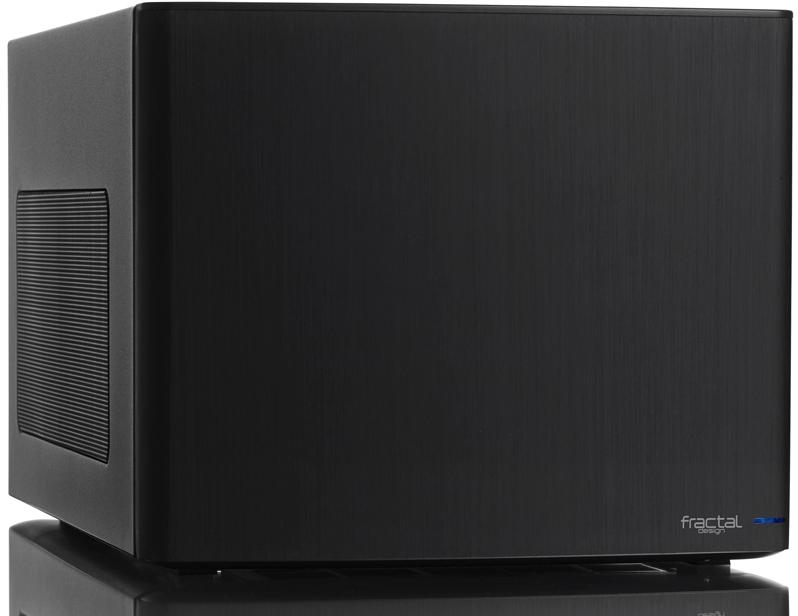 It begins
with two 92 mm intake fans pulling in air from the top and bottom of the well-ventilated
front bezel and blowing it through the hard drives toward the motherboard. The
CPU cooler height is limited in many mini-ITX cases due to interference from
the power supply but the Node 304’s PSU is located at the front of the case
on the floor which isolates it from the rest of the system. This frees up space
above the motherboard, allowing the use of a highly efficient tower cooler which
is further complemented by a 140 mm fan at the back acting as an exhaust.
Noise in the case is also well managed. The fans aren’t the best in terms of
acoustics but its undesirable characteristics are only noticeable when the cover
is removed. They’re also a bit noisy at full speed but the included 3-speed
fan controller makes this a complete non-issue. Hard drive vibration, the biggest
noise-related complaint we typically have with cases designed for server utilization,
is mitigated with hanging drive trays which dissipate much of the side-to-side
tremors generated by hard drives. With four hard drives, it did produce some
faint rhythmic pulsing but this was only audible at very close proximity. Furthermore,
the case is well built and easy to assemble and service. The front panel, power
supply bracket, drive trays, and the support beam supporting the drives are
all easily removed, as are the dust filters which cover every intake position.
Our complaints about the case are far and few between. Overall, the Node 304’s dimensions are sufficient for what’s inside though we wish feet were raised as the stubby rubber pads it sits on creates only 1 cm of clearance underneath the power supply intake vent. If placed on carpet, this area will become clogged up quickly. The interior can be very cramped depending on the configuration. Moving to the interior, we recommend utilizing a thin tower heatsink like the Scythe Ashura, Phanteks PH-TC12DX, Noctua NH-U12S/U14S, or SilverStone Argon series. Thicker models, such as the Noctua NH-U12P we used, may interfere with the SATA data/power cables connecting the drives. Cable management isn’t a pleasant experience, but to be fair, no mini-ITX excels in this department. Almost all the cables are routed to the left side of the case and while there are positions there to tie them down to the floor, if you exercise the option of using a full sized graphics card, things get very tight.
A well designed case offers good build quality, as many features as possible
in the allotted dimensions, and noise-limiting elements that don’t sacrificing
airflow. It’s a tall order for a case of a any form factor, let alone mini-ITX,
but surprisingly Fractal Design hits every mark with the Node 304. While it
can serve other purposes, it’s best utilized as as an enclosure for server or
HTPC with multiple hard drives. It delivers a compelling blend of drive support,
cooling, and noise control, all in a shorter package than competing cases that
boast similar capabilities. Best of all, the Node 304 is relatively affordable,
currently selling for around US$90. (Editor’s Note: The
Node 304 is a natural evolution from the earlier Fractal Design Array Mini ITX
Case, which it outperforms in every way. Nice to see a company learn and improve
on an earlier design.)
Our thanks to Fractal Design
for the Node 304 case sample.
* * *
Fractal Design Node 304 wins the SPCR Editor’s Choice
Articles of Related Interest
BitFenix
Phenom Mini-ITX Case
Chenbro
SR30169 Mini-ITX Server Chassis
Silverstone ML05
mini-ITX HTPC Case
Fractal Design Array Mini ITX NAS Case
Lian
Li PC-Q18: The Perfect Mini Server Case?
* * *
Discuss
this article in the SPCR Forums.
Fractal Design Node 304 Review
- Brand – Fractal design
- Model – Fractal Node 304
- Price – £70 (at time of review)
The Concept of Fractal Design is to provide products with an extraordinary design level, without compromising the important factors of quality, functionality and pricing. Founded in 2007 Fractal Design has grown to become one of the best manufacturers of computers cases and components, known worldwide for excellent quality and design.
Today I am taking a look at the Fractal Node 304, which is currently Fractal Designs only ITX case available. Originally only produced in black and most recently circa 2013, it has been re-released in White. So let’s take a look at the Fractal Node 304. Does it live up to Fractal Designs reputation for quality products or does it fall short of the mark?
- Mini ITX, DTX motherboard compatibility
- 2 expansion slots
- 6 – supports either 3.5″ or 2.5″ HDD / SSD
- ATX PSUs, up to 160mm in length (To fit in combination with a long graphics card, PSUs with modular connectors on the back typically need to be shorter than 160 mm)
- Graphics cards, up to 310mm in length, when 2 HDD brackets are removed (Graphics cards longer than 170 mm will conflict with PSUs longer than 160mm)
- Tower CPU coolers, up to 165 mm tall
- Case dimensions (W x H x D): 250 x 210 x 374 mm
- Case volume: 19,5 Litres
- Net weight: 4,9 kg
- Colours available: Black and White
Cooling / ventilation
- 2 – Front mounted 92mm Silent Series R2 hydraulic bearing fans, 1300 RPM speed (compatible with 80mm fans) – included
- 1 – Rear mounted 140mm Silent Series R2 hydraulic bearing fan, 1000 RPM speed (compatible with 120mm fans) – included
- Removable air filters for front fans and PSU
- Fan filter for graphics card
- 1 – fan controller for all 3 fans included
Front interface
- 2 – USB 3.
 0 (Internal 3.0 to 2.0 adapter included)
 - 1 – 3.5mm audio in (microphone)
- 1 – 3.5mm audio out (headphone)
- Power button with LED
- HDD LED
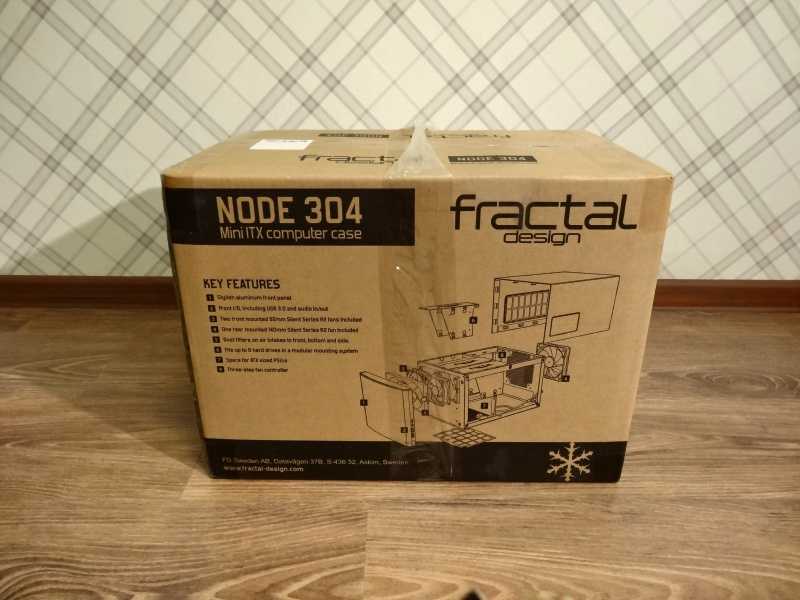
The outer packaging is extremely clear and concise as to what is inside, not only with the branding but also the image of the case itself, as well as a more detail image which is on both sides of the box.
Once we opened up the box we find that the case itself is protected by two thick pieces of polystyrene as well as being inside a clear plastic bag.
Below is an image of the front of the case, Fractal Design have gone with a brushed aluminium finish on the front of the case with a small printed logo on the bottom right corner.
Like almost all Fractal design cases the front panel comes off, and the Fractal Node is no different. Simply pulling on the front panel allows it to come away quite easily giving access to the air filter which is also removable.
As you can see the air filter simply unclips and can be easily cleaned without it being attached to the case.
This case does not have a traditional two piece side panel, instead Fractal Design have opted for a single piece of folded steel. On the left side of this panel there is a large grill allowing are to be drawn in by a graphics card if one is fitted.
On the right side of the panel there is another grill allowing more movement of air.
As you can see in this photo there are also two USB 3.0 Ports, Microphone and Headphone Ports as well as a Power Switch.
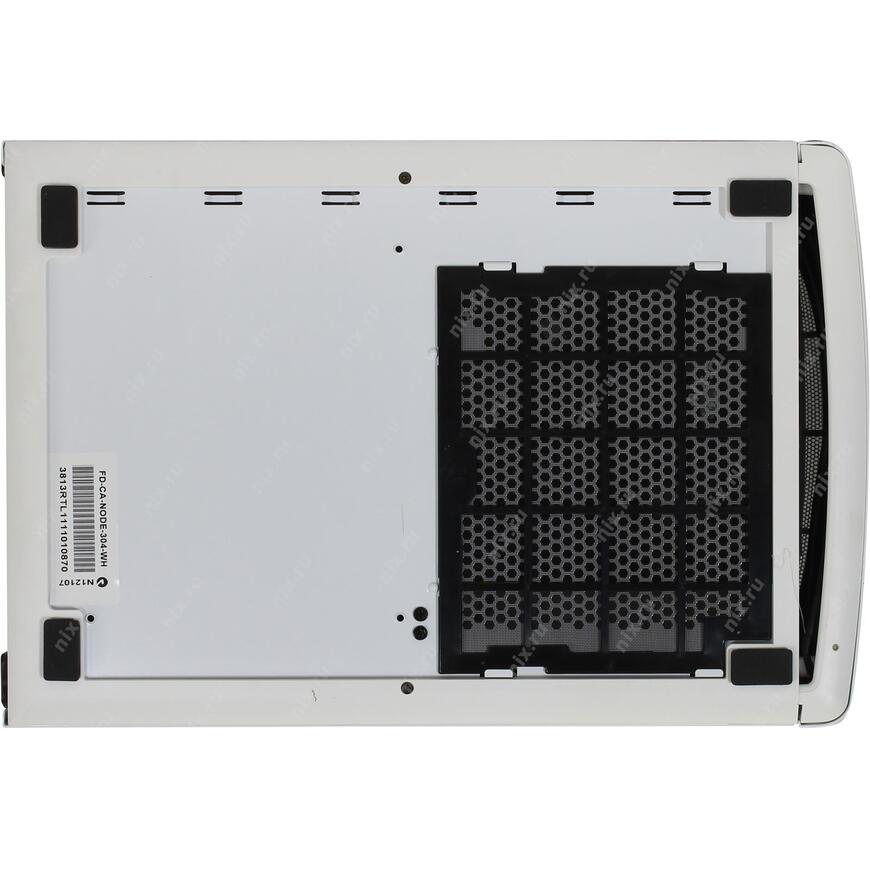
The base of the case has four rubber feet to protect any surface that the case is placed on as well as another large air intake grill and removable filter. This is because the Power Supply is installed in the front of the case face down.
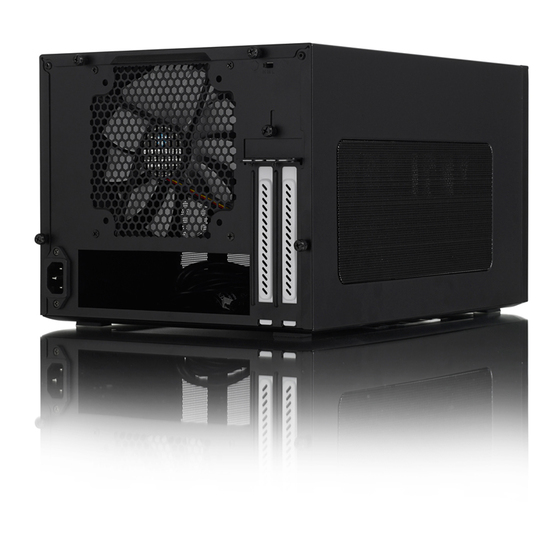
The rear of the case we see a large 140mm fan grill as well as two PCI-E expansion slots and the rear IO placement.
Now let’s take the lid off and take a look inside.
From the image below we see that the Fractal Node has three removable Hard Drives bays each allowing two Hard Drives to be fitted. These support both 3.5” and 2.5” Hard Drives. The power supply is fitted in the front of the case underneath the Hard Drive bays.
Installing the Power Supply was a reasonably easy affair, sliding it in first before other components is recommended as there is a certain amount of clearance needed to get it in correctly. It is held in place by three screws. Installing the motherboard was really easy also. After fitting the stand-offs it was a simply case of sliding the motherboard in place and using screwing it down with the screws provided.
With the power supply being at the front of the case, the Fractal Nodes used a male to female Kettle Plug. This does mean that the Power Supply is permanently powered on but that simply means that if you wish to completely kill all power to the system you simply turn the plug socket off.
I found that fitting all the required cables was reasonably easy but making them neat and tidy was troublesome. This due to the small form factor of the case good cable management is a must for almost everyone myself included and I was never completely happy with the way the cables looked inside the case. But after all once the main panel was on the case no one will be able to see it.
Like with many Fractal design cases, a fan speed controller comes supplied and pre fitted. The Fractal Node comes with three fans and the controller is designed to support these three fans and has three fan speeds also which are high, medium and low; This shows the attention to detail Fractal Design have gone into with the design and build of this case.
I would like to note that whilst I did not install a graphics card in this build the case does support graphics cards up to 310mm that is dependent on the size of the power supply used as well as the placement of hard drive bays. If I were to have installed a graphics card with the power supply I have used the maximum clearance would be 170mm.
I would like to point out if all hard drive bays where used that clearance then drops to even less to around 140mm. This is one of the major limiting factors with ITX PC’s. Something which cannot be helped ultimately but many manufacturers are choosing to create smaller graphics cards that cater for the small form factor market.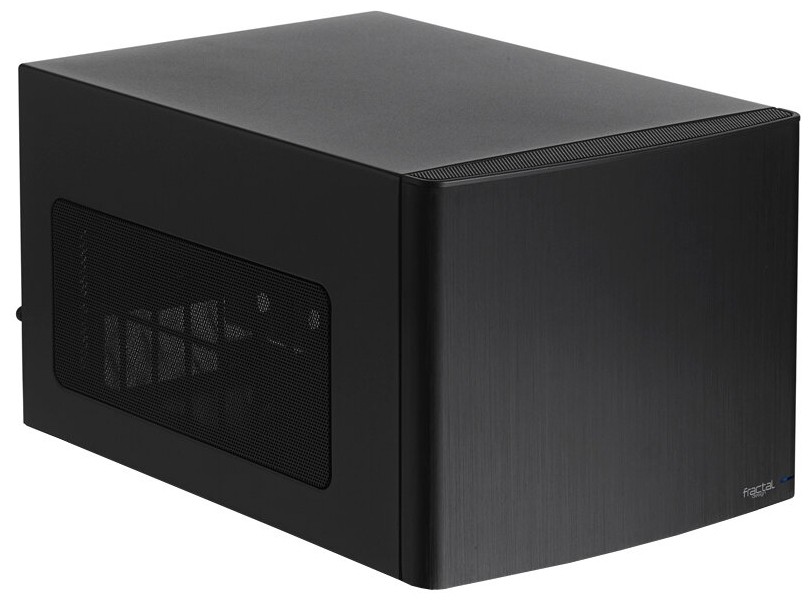
Whilst I am using the stock cooler on the installation of this system the case fans I am using are the ones supplied. Taking a look at Fractal Designs website we see that the two front intake fans which are 92mm Silent Series R2 fans are rated with a max speed of 1300rpm, and have a CFM of 24.6. I can say that whilst these fans are far from silent they are not overly loud either. The maximum noise level in decibles is 12.5 of course this could be double due to there being two fans installed.
The rear outtake fan is another Silent Series R2 except it is a 140mm, The maximum fan speed this fan is rated for is 1100rpm. As I have said before the Fractal Node comes fitted with a fan controller which all three fans are connected too. This controller has three fan speeds, Low, Medium and High. The lowest voltage this controller can supply is 6volts because that is the minimum start voltage that the three fans are rated for.
The room temperature when I did my testing was 25c this is rather warmer than normal simply due to the warmer weather. The CPU temperature at idle was 35-40c this is using the stock cooler and under load the cpu hit 62c which isn’t bad in all honesty but could be improved by not using the stock cooler.
As ever with any product with moving parts there is an element of noise that will eminate from it. With that in mind I used my trust Decebel Meter to test the accoustic performance of the Fractal Node. The performance will vary between the case fan speeds which will be set using the pre installed fan controller which I said previously has three speeds to choose from. This will also take into account the power supply Fan and the CPU cooler fan as they also create noise.
To get an accurate reading I have tested the acoustic performance away from my own computer and also made sure that any background sound is kept to the minimum. Below is a graph of the results and to gauge an accurate acoustic performance or noise, I took four readings at each fan speed from different locations around the case. The front, the back and from the sides having done than I averaged each set of results.
The graphs below are to give a visual image of the results I recorded. I will say that due to everyones hearing being different what I may find is an acceptable amount of noise emanating from the Fractal Node will differ.
As ever Fractal Design have created a fantastic ITX Case, whilst it does fall short in some areas and I will explain my reasoning. So let’s get on with the conclusion.
Looking at the case from a purely atheistic perspective, I can say that Fractal design have continued with their minimalistic approach to case design, the finish on all parts is of high quality from the edges of all the metal work to the paint on all parts of the case.
Even down to the fine detail that has gone into the Hard Drive bays, you cannot tell from the photos and I did struggle to find the right light to be able to show you but on all the drive bays the Fractal Design logo has been embossed into the metal work.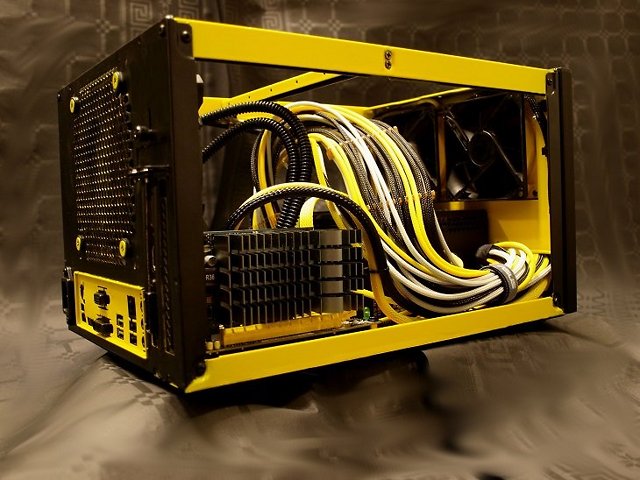 This was unexpected and I quite liked the fact that Fractal went into that much detail on parts that will never be on show. With many ITX cases lacking a large amount of internal storage space, I love the fact that Fractal Design have chosen to omit the standard DVD Drive bay from the case design and instead focused on storage. The three hard drive bays can fit two hard drives in each. This appealed to me more than any other ITX case I have seen on the market. Personally almost everything I want to watch, I get via a digital outlet so this kind of design suits my needs and not having a DVD drive etc. keeps the simple and clean look of the case.
Before I started building the system I took a good look around the case, looking for any faults in the build quality. I can say that the production quality is one of the finest I have ever come across in a computer case and there was no danger of ever slicing my fingers on any rough or unfinished edges within the case. Overall the case is of a solid build quality and the design appealed to me simply because I like the minimalistic approach Fractal Design go with their cases.
Building a system within the case took around an hour, I was well prepared for building the system, having all components and anything else I may have needed to hand at the time. The only issue I can see many people having and one that did occur to me at the time was the very minimal cable management available.
All of the required cables seem to just about fit on the one side and this will conflict with the installation of a graphics card. In this build I used all standard length cables and there were no custom cables used. This may affect anyone’s use of this case simply due to where the cables fit.
The case does adequately fit all cables, but adding a Graphics Card will affect that space, I will also add that only a dual slot Graphics card will fit in this case. There are only two PCI-E expansion slots and this may cause issues. Luckily there are plenty of graphics cards to choose from and I know of one GPU designed for ITX systems.
One important factor with any system build is the amount of noise that the system makes, unless you are willing to either buy a system with noise dampening foam pre fitted or go out and buy some and fit it yourself there will be a certain amount of noise that the system makes.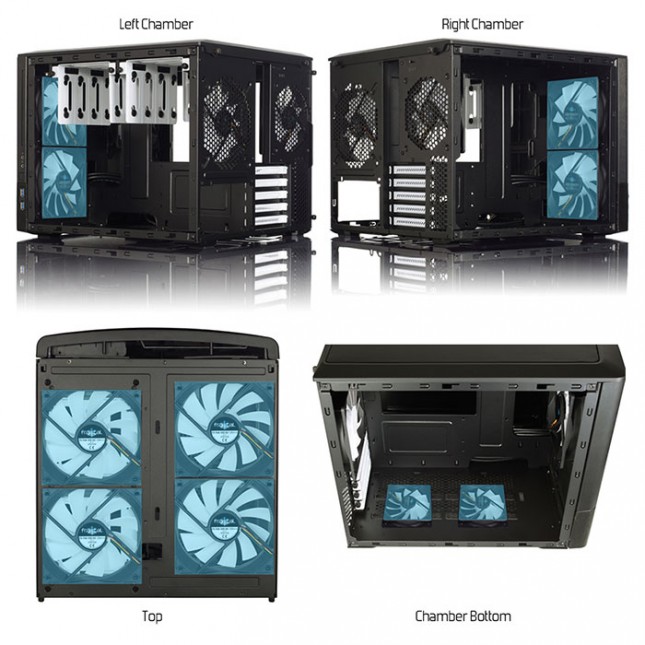 And due to the need for air vents etc. there will still be some noise. Like with all Fractal Design cases they supply it with their Silent Series R2 fans.
With the fans set to the lowest fan speed they were barely audible but obviously you are then sacrificing the cooling ability of the case by doing so. I believe that using this system purely as a Home Theatre PC using low or medium fan speeds would be acceptable.
Overall I really like the build quality of the Fractal Node and this is simply due to the high pride that Fractal design takes into their case design as well as the quality checks that they make during the manufacturing process. The Fractal Node is an excellent case, with high build quality excellent internal storage options.
If not without some flaws and these are only minor in my opinion the lack of cable management space could be issue for some people, but I found there to be just enough room. As with buying any popular brand of computer case there is always a price to be paid.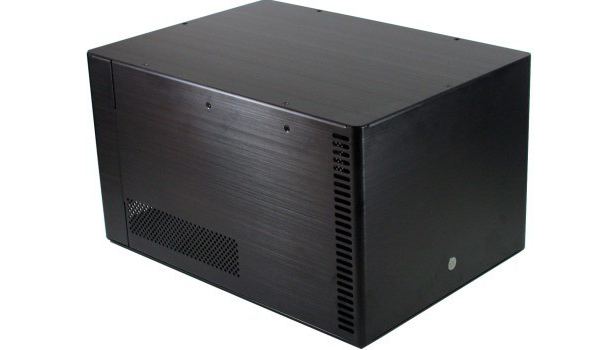 And £70 for this case does seem a little steep but I feel that it is worth the money. For that reason I am giving the Fractal Node the Editor’s Choice Award.
-
Performance
-
Design
-
Value
Sending
User Review
0
(0 votes)
Fractal Design NODE 304 — Test and Review —
So what is Fractal Design Node 304?
It’s one of the latest Fractal Design chassis first released this summer offering a compact dimensions and full modular design for full configurability. The case is meant to be used with small motherboards like mini ITX or DTX and big VGA cards.
The case arrived in a pretty simple carton box with very simple and stylish drawings and a lot of technical details on the back side of the box.
After I took a look on the features described on the box I was so excited about what to expect from this small “beast”. I was so eager to touch the case itself that I was planning to tear apart the carton box. But I restrained my feelings and took it out of the package very gently.
The case offers a pretty clean and stylish design. It’s made of parts made of SECC and painted in black, while the front panel is made of plastic and covered with aluminium sheet. Again painted in black.
Let’s not forget the mesh installed on the left and the right side of the main panel. I say main panel because the top, left and right panels are made as one part. Remember those cases with “turbo button” used about 20 years ago ? Yeah…. the panel closing the case is made just like this. But let’s not see this as an old technology. This case is a brand new model, using a classic feature.
I believe now is the time to tell that the small mesh part on the left side of the panel is actually the place where the hot air from the power supply is blown away from the case.
So to make this review properly I’ve decided to “destroy” Fractal Design NODE 304, ops I mean to disassemble every single part and while rebuilding it to describe every single feature used in the case.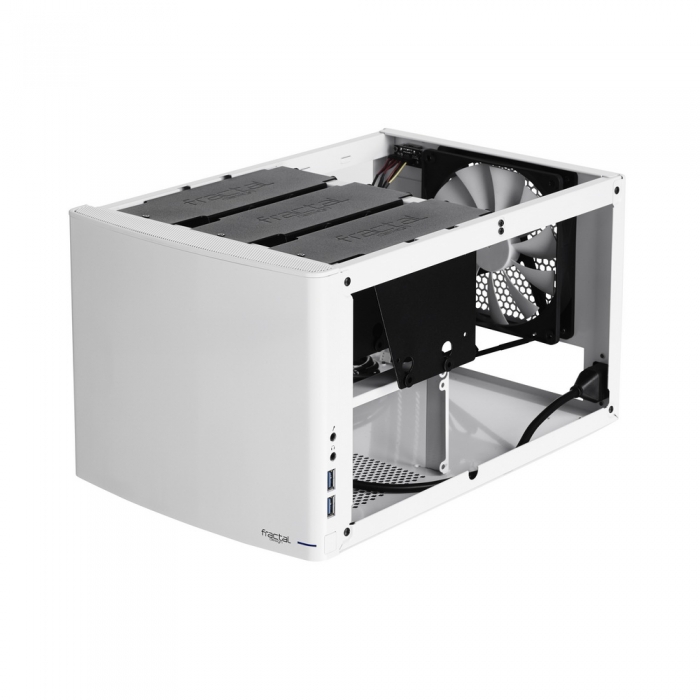
After 10 minutes unscrewing and disassembling the case and 30 minutes of chasing a fallen screw, which by the way I couldn’t find, I’ve decided to start with the review.
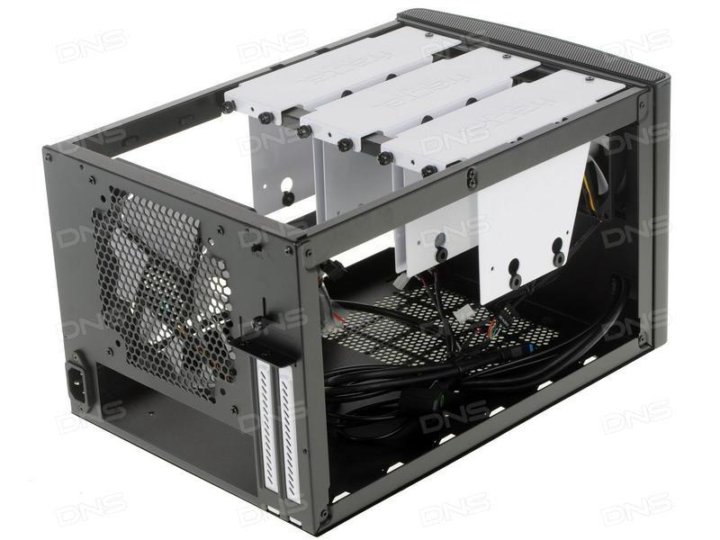
So here is a look of the case with all parts removed and just a pure frame.
The case itself is made of a 1mm SECC material painted in black with a lot of holes for attaching the additional parts. Parts like fans, brackets, fan controller and so on. Before I continue I should say that there are at least 3 types of screws and if somebody ever decides to completely disassemble the case he should sort the screws or else it is a lot of wondering which one should go to which hole. I tell it from personal experience ?
And this is how the case looks from the back:
After all of the parts were removed they looked like that:
Unfortunately I forgot the manual, so I kindly request to be forgiven. Anyway all the parts used in this case are:
- 2 x 92mm Silent Series R2 hydraulic bearing fans working at 1300 revolutions per minute in black and white colour scheme
- 1 x 140mm Silent Series R2 hydraulic bearing fan working at 1000 revolutions per minute in black and white colour scheme
- 3 x white HDD holding brackets with rubber dumpers for reducing if there are vibrations from the hard drives
- Front dust filter for the 2 x 92mm fans
- Bottom dust filter for the PSU hole
- Side mesh bracket for the left panel
- Fan controller with some basic regulating features
- 10A power cable extender to make connection between the back panel and the installed power supply
- Power supply holding bracket
- A part to cover the case used as top/left/right pannel
- A tons of screws and zipties needed so the hardware can be installed
- Some PCI brackets, hdd holding frame and fixing plate
As I said from the beginning of this article I will remove all parts from the case and while adding them back I will describe every single feature.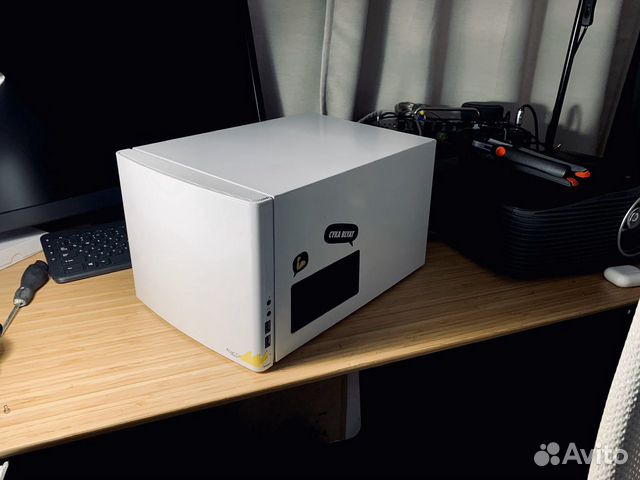
So, let’s get started.
I will start with installing back the bracket used to hold the power supply and the power supply cable extender:
On the picture above, you can see the cable extender and the bracket holding the power supply. You will notice that the power supply should be installed on the front right side of the case with the cooling fan sucking cold air from outside of the case and blowing the hot air outside of the case through the mesh installed on the right panel. Now is the time to say that the PSU holding bracket is attached to the body of the case on front and on the bottom with 4 screws. It is really tight and secured.
Since the power supply will use cold air from outside, the guys from Fractal Desing predicted the need of dust filter to be attached on the hole.
Something that really made me smile. There is a clip to hold the 10A power supply cable extender. Not much but still it is cute and for sure effective. You know, details do matter.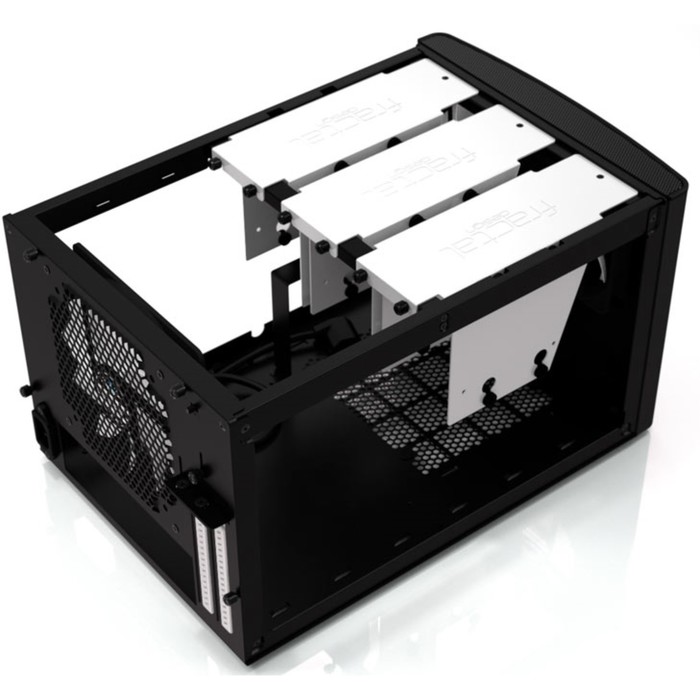
I believe I am done with installing the parts related with the power supply. Now let’s continue with something more interesting, especially for me. Yes… that’s the cooling system.
Fractal Design offered 3 fans, a fan controller and a dust filter to handle cooling the parts installed inside the case. Will that be effective? Well, I don’t know and unfortunately I don’t have a proper motherboard to test it :(. So let’s install the parts back:
The 2 x 92mm fans are installed on the front SECC plate so half of the fan is inside the case and the other half is a bit in front. With this they made some more space for the hardware that will be inside. Each of the fans is installed via four metal screws to the front metal part. Apart from that the case can use even 80mm fans.
With the dust filter installed.
It’s a plastic part with a mesh and of course the Fractal Design logo. It is attached with clips.
Next part that to get back to its place was the 140mm fan. And this is how it looks.
The last part of the cooling system is the fan controller, which is actually a small pcb with 3 positions switch for regulating all of the 3 fans. The fan controller itself is powered directly from the power supply and the 3 fans are connected to it. Now is the time to say that the fans are build with long sleeved in black cables that can reach the fan controller without a problem.
Don’t you think these PCI slots are a bit annoying like this?
Yeah, let’s install the parts to make them look better.
Here is something I really like, that is the white PCI brackets and the fixing plate. To be honest I really like the whole idea of entire in black case with just a few details in white. It really improves the overall appearance.
And the fixing plate in action:
Nice!
Maybe you saw this hole on the front panel on any of the pictures above so let’s describe its purpose. This is the cut inside the front metal plate from which all the cables leading from the motherboard to the external input/output connectors which are on the right side of the front panel:
The front panel is made of plastic with aluminium sheet on the front and of course everything is in black.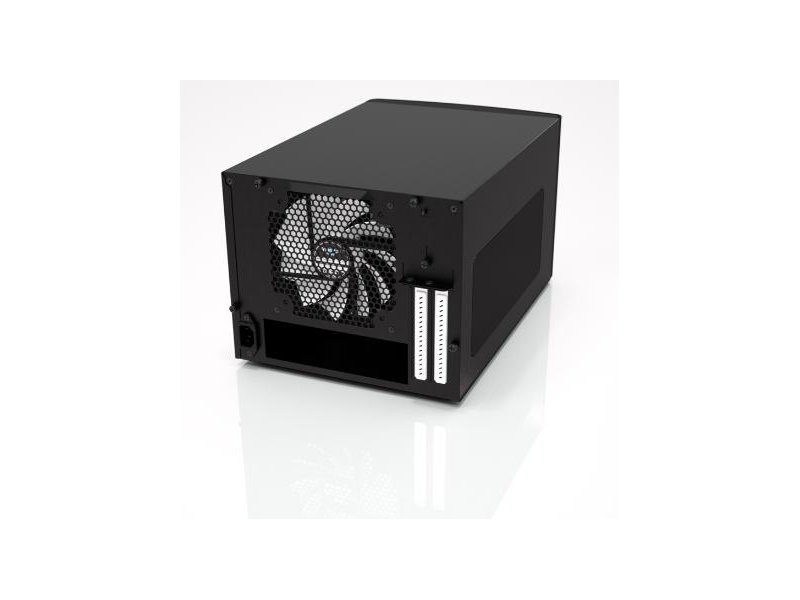
Installed:
And last but not least it is time to install the brackets holding the drives inside the case. According to the technical details and my observations this case can hold up to 6 x 3.5″ hard or 6 x 2.5″ solid state or hard drives. But when all of them are installed a long video card can’t be used. So if somebody is planning to use this case as HTPC it is possible but with only 4 drives. If it is used as NAS system it will be without a long video card. I should say really nice because this case can be used for many purposes only because of it’s modularity.
Before I install the HDD brackets I had to install the fixing frame back. It is held really tight by 4 screws and this is how it looks:
And this is how the brackets look inside the case. The drives will be in vertical position.
All of them back inside the case. I just realized there is the Fractal Design logo on each one of them.
The last thing to do was to install the part covering all of the hardware and that is the top/left/right metal plate.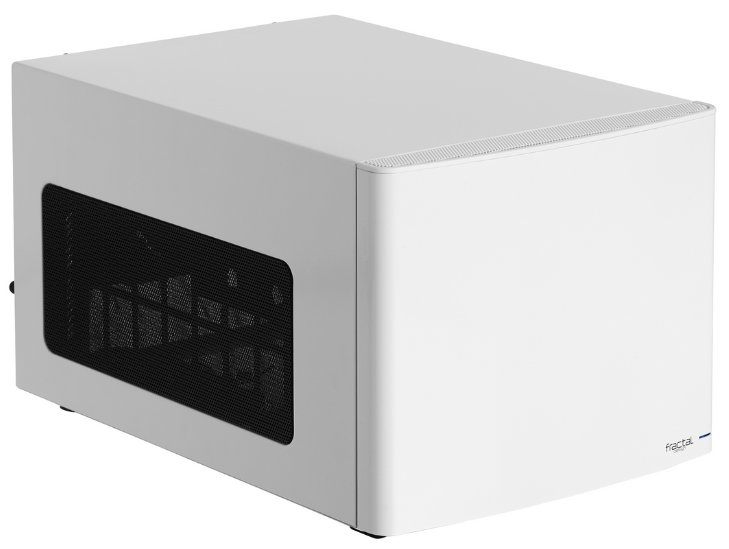
On the left panel there is a cut in which a mesh should be installed working as a dust filter.
Voila! The case parts are all in place together again.
Before I finish with this article I really wanted to do some tests, unfortunately I don’t have a proper motherboard to install and do some temperature tests but I want to show you how parts should look when they are inside:
The motherboard:
Well this motherboards is probably older than me with integrated CPU and PATA connectors. I can’t even connect the other parts to it since they are much newer.
With SSD and HDD installed on the white brackets.
I want to point that the hard drivers are installed via long bolts and rubber vibrations dumpers for reducing the noise if there is any:
I hope there are still awake readers after that long and detailed article and I believe they will be interested in seeing my conclusions:
- Appearance: Fractal Design NODE 304 offers a very elegant and clean design which can fit very well near a big flat TV or as a small black box connected to a network as a NAS system.
 I want to say that the black matt and white colour scheme is very beautiful and stylish.
 - Performance: Unfortunately, I can’t say much about the performance because of my lack of proper hardware but from what I saw we have 2 x 92mm fans installed on the front plate cooling all of the hard drives or a video card if there is one and providing fresh air to the rest of the parts inside, while the 140mm fan is blowing the hot, or better say warm air outside of the case. The other interesting feature is the power supply which is not interfering in any way with the inner airflow of the case. The power supply is working with cold air from outside of the case and blowing the warm air outside of the case. The added fan controller is a really nice and probably effective feature.
- Noise level: Fractal Design NODE 304 is using 2 x 92mm fans working at 1300 revolutions per minute and a 140mm fans working at 1000 revolutions per minute as standard fans. At these rotating speeds of all of the fans there shouldn’t be any noise at all.
 I couldn’t prove it but from my experience testing other fans, these should be quiet at 100%. If they are not, there is the fan controller to reduce the voltage and decrease the fans rotating speed manually.
For me the case is really nice and I can say the modularity is a real plus and this case is suitable to be used as HTPC system or a NAS system.
Before I give the reward I want to point out some points that can be improved:
- The covering pard used as a top/left/right panel was a bit hard for me to install. I’ve always hated these panels when they were used in the old computers, but after some attempts I got used to it and later there was no problem.
- The motherboard standoffs were a bit hard to screw without tools. And I guess not everybody has a full package of tools at home. So it will be nice to see a small tool that can be attached to a screwdriver just to fasten the standoffs.
I think Fractal Design NODE 304 deserves the following reward:
Official price (MSRP):
Fractal Design NODE 304 – 89. 90 usd without VAT
Warranty – 24 months
I thank Fractal Design for the sample!
Fractal Design Node 304 case review « Icrontic
I haven’t built a PC in 10 years. I’ve gotten tired of the dismal gaming performance of my MacBook Pro, however, and decided I needed a change.
The problem is—I’ve gotten married since the last time I built a PC, and I really like hanging out on the couch with my wife. So, gone are the sloppy bachelor days when I could just plonk down something like an NZXT Phantom 820 in the living room. No worries, though, because this is where the Fractal Design Node 304 comes in.
Fractal Design is a Swedish company, and their design sensibilities reflect Scandinavian ideals of form, function, and simplicity.
Specifications
You can find these details on the product page. But, for quick reference, here’s the skinny:
- Mini ITX, DTX motherboard compatibility
- 2 expansion slots
- 6 removable drive bays – supports either 3.
 5″ or 2.5″ HDD / SSD
 - ATX PSUs, up to 160mm in length (To fit in combination with a long graphics card, PSUs with modular connectors on the back typically need to be shorter than 160 mm)
- Graphics cards, up to 310mm in length, when 2 HDD brackets are removed (Graphics cards longer than 170 mm will conflict with PSUs longer than 160mm)
- Tower CPU coolers, up to 165 mm tall
- Case dimensions (W x H x D): 250 x 210 x 374 mm
- Case volume: 19,5 Liters (you know, in case you want to fill the case with some kind of… fluid)
- Net weight: 4,9 kg
Overview
Small as it is, there’s not much to the Node 304. That’s good, because it leaves more room for cramming in hardware.
Fractal Design Node 304 opened up
Something you won’t see here, though, are external drive bays. No optical drives, no card readers, nothing. This case has just a seamless aluminum curve for a face, with no trap doors or openings beyond USB and audio jacks on the side. This made me feel a little dumb at first, when I grabbed my Windows 7 DVD for install and face-palmed. But, you can prepare a USB stick as boot media, so it’s all good.
The Node 304 with drive brackets removed
Beyond the lack of external bays, the case supports up to six internal drives. These can be mounted in pairs on white brackets. If you’re not filling the case with server storage, you can pull out two of the brackets to make room for a double-wide graphics card and leave extra space for airflow.
And speaking of airflow, this thing is built like a wind tunnel: There are two 92mm fans up front and one 140mm fan in the back. These are powered with a single 4-pin Molex connected to a simple high / medium / low switch mounted on the rear of the case. From there, three smaller connectors can join up with cables leading to each of the fans.
It might have been nicer if these fans’ speed could have been software-controlled, or at least if the switch was accessible from the front. But, no big deal: Just reach back and flip the switch if you’re planning an intense gaming session. Or, leave it on “high” all the time: This is not a particularly quiet case, anyway. Anything that aims to make noise will be heard through the generous ventilation grilles.
More on those grilles: They include a side grille positioned just right for one of those aforementioned double-wide graphics cards, and a grille underneath for the power supply fan.
Fractal Node 304 grilles with bottom-side filter
This bottom grille comes with a plastic filter insert, which can help manage dust or crud pulled in from a desk or the floor. But, you’ll need to keep an eye on this thing, especially if you plan on transporting this case to LAN parties and suchlike: The filter is retained by just a pair of shallow bumps stamped into the metal, and the plastic flexes enough to easily jar it loose with bumps or vibration during transit.
Front panel connection cables
Finally, the front panel offers a power switch; power & HDD activity lights; headphone & mic jacks; and two USB 3 connectors. Accordingly, you’ll find cables associated with each of these extending back from the front panel. The USB 3 header cable also offers a little USB 2 header in a pigtail off to the side, but with a note advising the use of only one or the other as appropriate to your chosen motherboard.
Build
The Fractal Design Node 304 comes with adequate screws to mount any combination of 2.5″ and 3.5″ drives; a quartet of brass motherboard standoffs; screws to close the case itself; and even a few zip-ties. The zip-ties are a nice touch, but you’ll probably need more: This case offers no other means of cable management.
An ATX power supply fits sideways
One of the particularly nice features of this case is that it can take a full-sized ATX power supply. It goes in sideways, vents from the bottom, and there’s even a thoughtful cut-out in the bottom side of the case to accommodate a screwdriver while mounting the supply.
And, since the three-prong power socket now points to the side, the case also includes a short internal extension cord to re-route power from the back plate of the case.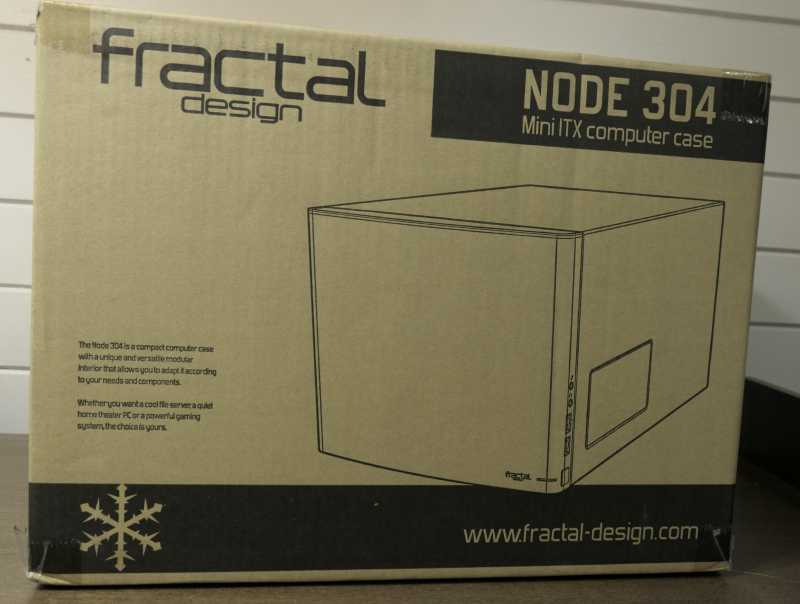
Something to keep in mind, though: Watch the physical depth of your chosen power supply. Since my goal was to build a gaming PC, I needed to make room for a big graphics card that extends nearly the full length of the case. So, I picked a non-modular power supply less than 4.5″ deep, but I could have probably gone slightly larger.
Mini-ITX motherboard installed
The Gigabyte GA-H77N-WIFI Mini ITX motherboard that I ordered fit in just fine atop the included brass standoffs. I also used the cooler that came out-of-box with my Intel Core i3-3220 CPU. But, there’s still room here for a much taller CPU cooler that can stand up into the flow of air through the case.
Did I mention that there’s no cable management in this case? That’s not a showstopper, since there’s plenty of space left when you remove two of the three hard drive brackets. But, once you’ve got things squared away, you’ll want to bust out those zip-ties and wrangle the rat’s nest a bit. You don’t want anything falling into the fans in front, back, or atop your CPU. And, it would be nice to block as little of that airflow as possible.
Video card installed
The final major piece to my build was a Diamond Radeon HD 7870 2GB Video Card, which fit with room to spare. This is where the concern over power supply length comes into play: Had that PSU extended much farther, or had I used a modular PSU, there might not have been enough room for this card—or a larger card, should I decide to upgrade in the future. But, this turned out fine, and as mentioned earlier the case housing offers a vent grille right next to the fan for this card.
It’s also worth mentioning that you’ll probably only get one expansion card out of this form factor, though there is room for two. That wasn’t a problem for me, because the motherboard I picked came integrated with most everything else I wanted (eg. Wi-Fi and Bluetooth).
Note the lack of cable management
Here, you can see my final tweaks with regard to cable management: I zip-tied a few of the fan cables and the HD audio header from the front panel to one of the structural beams in the case, which seems not to interfere with the case lid and keeps things nicely out of the way. I also looped the rest of the major cable bundles through the drive bracket—that keeps the airflow clear and seems not to crowd the single installed HDD much.
I’m sure someone who’s built more PCs in the past decade could come up with cleaner cable management than this. But, this case has no windows, and I don’t plan to show off the internals—just the opposite, in fact, because I plan to make the whole thing as invisible as possible. So, this is good enough for me.
The living room test
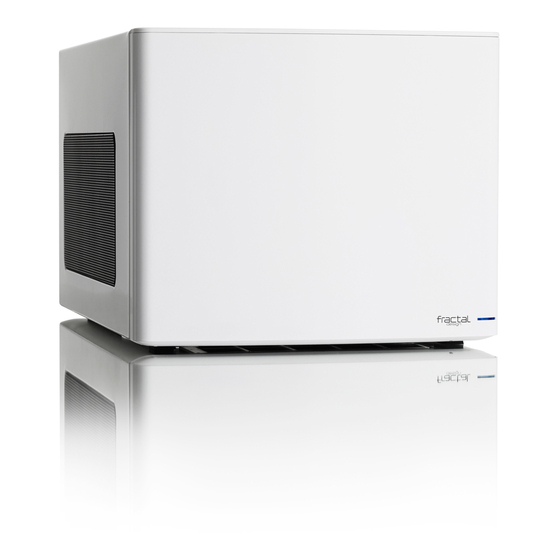
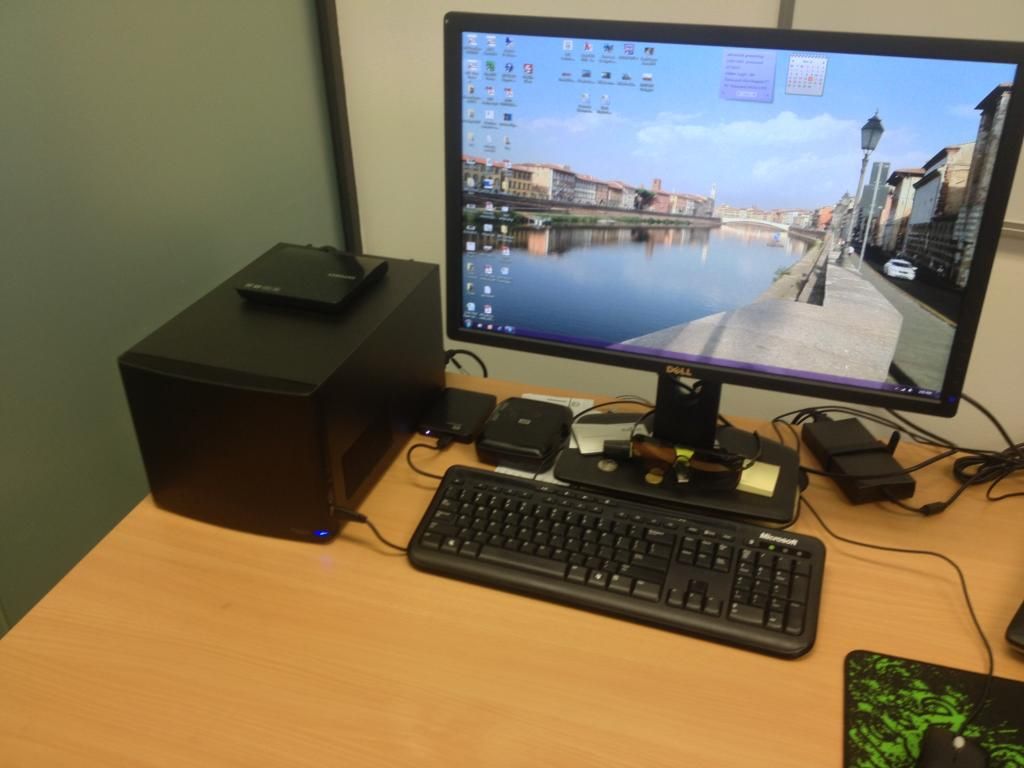
Let’s play a game of “spot the Node 304”, here in my living room:
Spot the Fractal Design Node 304 in my Living Room
It might be a little unfair, because I hid the PC on top of the sub-woofer for our 5.1 receiver. And, well, also because I took cruddy pictures with my phone.
The power light is a blue bar at the bottom right of the faceplate, near the audio and USB connectors. The HDD activity light is a white LED poking out from under the lip of the face plate. This has a neat effect somewhat like sparks coming from the case, or welding underneath. Beyond that, there’s nothing flashy or gratuitous about the looks of this case—which is exactly what I was going for.
Fractal Node 304 and its blinkenlights
But, with clever placement, this PC case can blend into almost any living room. It might even fit into your entertainment center, though it’s quite a bit taller than most components. Still, it’s not much bigger than it needs to be.
Conclusion
Where the Fractal Node 304 lacks in terms of cable management or other niceties, it makes up for by just getting out of the way—both internally and in external style. It’s also very solidly built and shows no sign of flex or bend anywhere in the structure.
Having been away from the PC market for a long while, I’m used to cruddy things stamped out of sheet metal with sharp edges and twisty angles that assured you’d shed some blood at some point during assembly. The last machine of comparable size I dealt with was a Shuttle mini-barebones system, and I think I still have at least one scar from tinkering around inside there.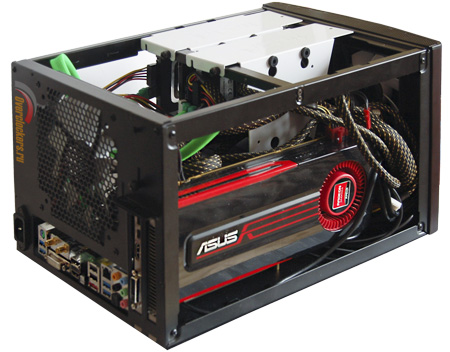 Nothing of the sort happened with this case, and I was continually surprised with how much room I had to play with, even despite initial worries about PSU depth vs graphics card length.
Overall, I’m a fan of this case. I wanted a small, elegant PC with a focused set of hardware inside—and that’s just what this case let me build. If this is the kind of thing you’re looking for, I’d highly recommend the Node 304. I think it’s worthy of at least 1.5 thumbs up, though I’d throw up the second if there were better options for cable management and fan speed.
We’re happy to award the Fractal Design Node 304 our Stamp of Approval for a product we’d recommend for those looking to build a clean and non-intrusive Mini-ITX build.
The Fractal Design Node 304 is available now at NewEgg for $89.99 and Amazon for $129.
Fractal Design Node 304 Chassis Review
January 29, 2014
Jeremy Gulley
Chassis
0
I remember the first LAN party that I ever attended in which I found myself hulking around my large and quite heavy steel mid-tower chassis. The experience was less than desirable, to say the least. Setting up a large bulky PC in your living room could have also been an eye-sore as well. Then the Mini-ITX form factor came along to rescue us from all of this peril. While all of this has been a long time coming, it has been most certainly worth the wait. Smaller, more powerful components are now available for the small form factor.
Over the years, the idea of building your own HTPC has increased in popularity and demand. It really is amazing the amount of performance we can now fit into such a tiny box and is a testament to the strides made in the technology used in our electronics.
Today we will be taking a look at the Node 304 mid-tower chassis from none other than Fractal Design, who is well known in the world of computer chassis, power supplies, and case fans. It will be interesting to see what the Node 304 offers over other chassis in a market saturated with so many options.
There are an abundant number of chassis manufacturers with an equally abundant number of chassis to choose from.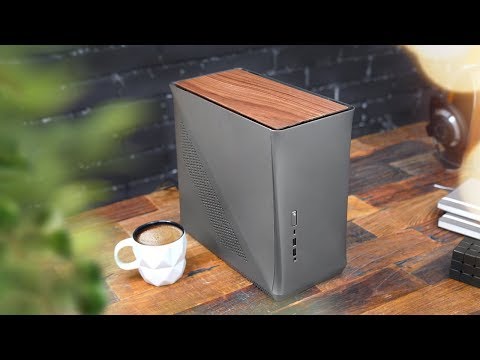 Fractal Design has packed some really good features in with the Node 304, such as support for longer graphics cards, support for six SSDs or HDDs, cable management options, and much more as we will discover soon.
I will note here that there are two color configurations available for this chassis. The version we will be reviewing today is the white version. And without further delay, let us begin the review!
I would like to thank Fractal Design for providing the review sample. This is a snippet from what Fractal Design has to say about themselves on their website:
|
Visions and Goals Without a doubt, computers are more than just technology – they have become an integral part of our lives. Computers do more than make living easier, they often define the functionality and design of our homes, our offices and ourselves. The products we choose represent how we want to describe the world around us and how we want others to perceive us. The Path to Reaching Our Goals To attain our goal of providing functional, efficient and sleek Scandinavian designed products for our customers, we apply extreme focus, research and passion each step of the way. Taking pride and extra care from the brainstorming phase through to the planning, design and production phase, we are dedicated to bringing you reliable and quality designs. The Concept – Design The concept of Fractal Design is to provide products with an extraordinary level of design, without compromising the important factors of quality, functionality and pricing. Designed and Engineered in Sweden All Fractal Design products have been carefully designed and tested in our Swedish headquarters. The well-known elements of Scandinavian design can be found throughout all of our product lines; a minimalistic, elegant and simple design, embracing the motto of ‘less is more’. We are True Listeners Year over year, the Fractal Design brand continues to grow and we pride ourselves on honestly listening to our partners and customers. All feedback is carefully considered and new revisions of products as well as new product line launches are a direct response to the demand and feedback received from the market. |
 Many of us are drawn to designs from Scandinavia, which are organized, clean and functional while remaining stylish, sleek and elegant. We like these designs because they harmonize with our surroundings and become nearly transparent. Brands like Georg Jensen, Bang Olufsen, Skagen Watches and Ikea are just a few that represent this Scandinavian style and efficiency. In the world of computer components, there is only one name you should know, Fractal Design.
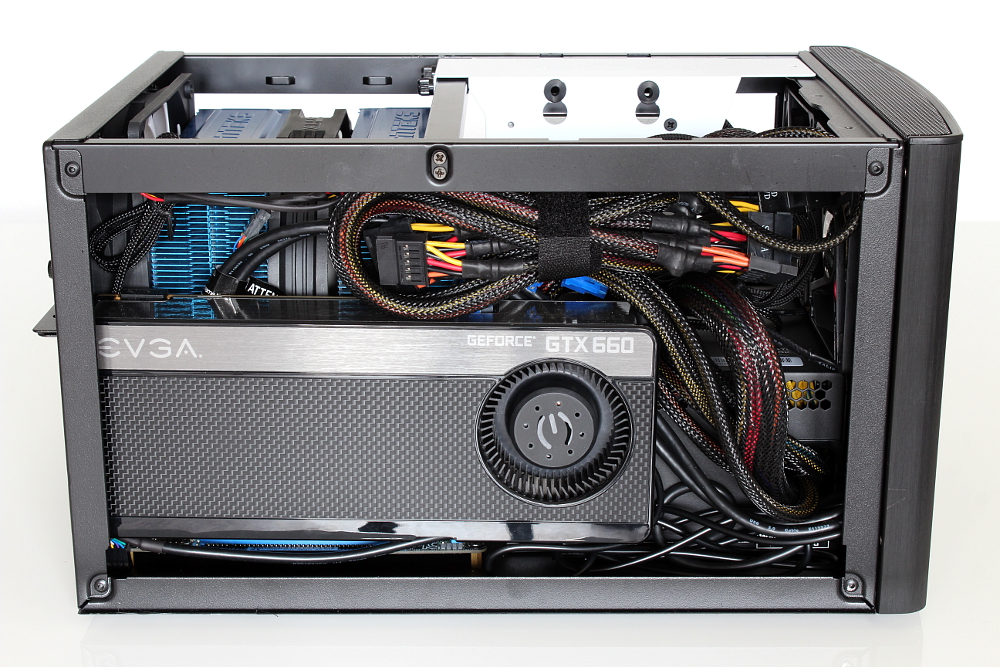 Today’s computer has evolved into playing a central role in most homes, creating a demand for appealing design of the computer itself and its accessories. Our main product areas are computer enclosures, power supplies and related accessories.
Latest Headlines
Weekend Hardware Round Up 1st October 2022
News
October 1, 2022
0
Here is the Weekend Hardware Round Up 1st October 2022. Audio: Elgato Wave DX Dynamic XLR Microphone Review @ Kitguru Edifier W240TN Wireless Earbuds Review …
Phanteks Unveils GeForce RTX 4000 Series Water Blocks
News
September 30, 2022
0
With the new generation of GeForce RTX 4000 cards announcement, Phanteks today unveils the upcoming Glacier G40 GPU water blocks for ASUS, MSI and Gigabyte …
Tinkering with computers and other electronics since the days of the Apple IIe and the Intellivision as the Prodigal 80s child, Jeremy seeks to constantly expand his knowledge of the ever-changing and ever-enticing world of Consumer Electronics. He enjoys tinkering, overclocking, modding, and most of all gaming.
Contact:
Website
YouTube
Liquid selection unit
Main
» Brazhnye columns and designer Alcovar
» Constructor of Beer Columns Alcovar
» Liquid selection unit
Description
Reviews (2)
Delivery across Russia responsibly.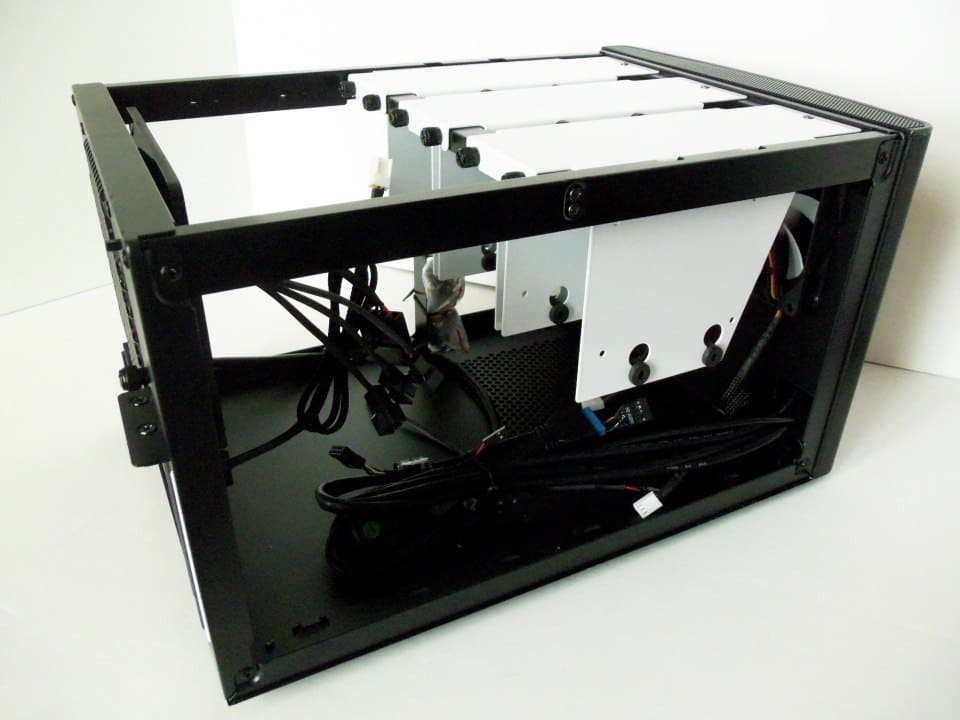
Selection unit specifications:
|
Height |
44 mm |
|
Clamp Mounts |
1.5″ or 2″ |
|
Sampling tube diameter |
8 mm |
|
sampling tube |
Inclined to knot |
|
Material |
Stainless steel 304 |
Specifications of the automatic selection unit:
|
Height |
44 mm |
|
Clamp fixings |
1. |
|
Sampling tubes connection |
Threaded ¼» |
|
sampling tube |
Inclined to knot |
|
Material |
Stainless steel 304 |
 5″ or 2″
 Extraction assembly specifications:
|
Height |
46 cm |
|
Clamp fixings |
1.5″ or 2″ |
|
Stainless steel needle valve |
Threaded ¼» |
|
Aftercooler |
8mm |
|
Material |
Stainless steel 304 |
The liquid selection unit is designed for the convenience of separating the distillate body from third-party fractions.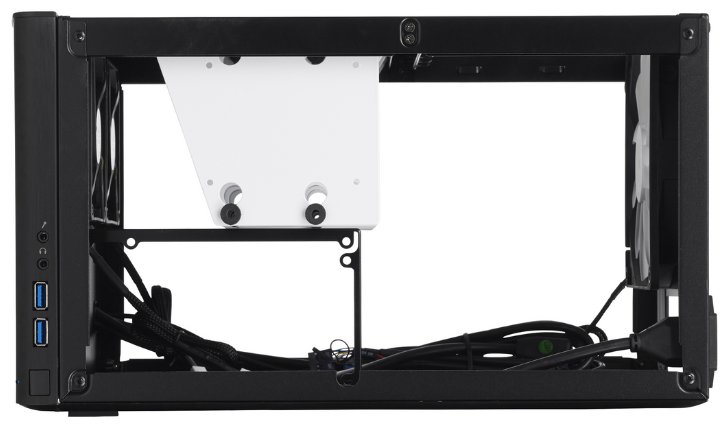 With it, you can qualitatively separate the heads and tails and turn the distillation process into a convenient activity. The steam rises, condenses, then flows down in the form of a liquid into the selection unit, where we select the amount we need, at the speed we need. Installed with a clamp in front of the dephlegmator.
Benefits of the steam extraction unit.
- 1) Not dependent on domestic water pressure.
- 2) Not dependent on water temperature
- 3) Voltage fluctuations in the network do not affect the operation of the selection unit
- 4) Cooling is much easier to connect.
- 5) Extraction is controlled by needle cock only.
The principle of operation of the liquid sampling unit.
- 1) We install the selection unit between the drawer and the reflux condenser.
- 2) Alcohol vapor passes through the drawer with a nozzle and the sampling unit and enters the refrigerator.
 There they condense and flow down in the form of phlegm. They fall into the glass of the selection unit.
 - 3) The process is continuously repeated, heat and mass transfer begins.
- 4) The column begins to work for itself, and the fractions line up according to the boiling point.
- 5) After the column reaches the regime, it is time to carry out the selection of the product. For these purposes, a side outlet with a crane or a Hoffmann clamp is provided in the selection unit.
- 6) Open the needle valve and the phlegm enters the aftercooler where it is converted into the final product alcohol.
- 7) When selecting heads, the needle valve is slightly ajar, the sampling rate is 1-2 drops per second. Then we open more and select the body.
- 8) We monitor that the selection speed is small. Why is it necessary to monitor the rate of distillate output, because the required volume of phlegm may stop returning back to the drawer, heat transfer will be disturbed, and separation into fractions will cease to occur.
- 9) This process is controlled by a digital thermometer. If we take a lot, heavier fractions rise to the top and the temperature begins to rise.
- 10) The goal is to control the temperature in the column, no matter what it rises, while the body is being selected. If the temperature has become, rise, reduce the selection.
Difference between: liquid sampling in a standard beer column, from liquid sampling.
|
|
Standard beer column |
Liquid sampling |
|
Selection management |
By means of cooling supplied to the dephlegmator |
Extraction adjustable with needle valve only |
|
Process control |
Power input to the cube and water pressure |
Digital thermometer |
Write a Review
Your Name:
Your Review:
Note: HTML markup is not supported! Use plain text.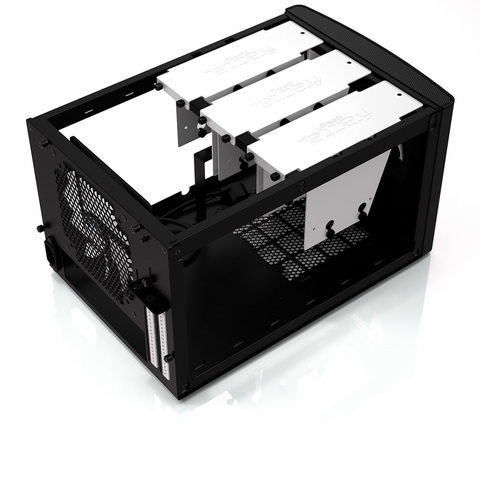
Rating: Poor
Good
Enter the code shown in the picture:
Continue
Description
Delivery within Russia responsibly.
Selection unit specifications:
|
Height |
44 mm |
|
Clamp fixings |
1.5″ or 2″ |
|
Sampling tube diameter |
8 mm |
|
sampling tube |
Inclined to knot |
|
Material |
Stainless steel 304 |
Specifications of the automatic selection unit:
|
Height |
44 mm |
|
Clamp fixings |
1. |
|
Sampling tubes connection |
Threaded ¼» |
|
sampling tube |
Inclined to knot |
|
Material |
Stainless steel 304 |
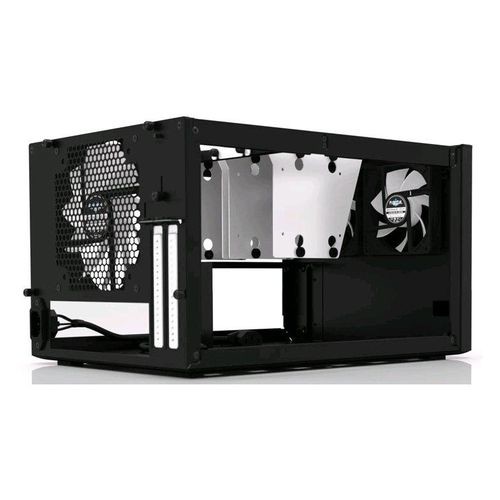 5″ or 2″
 Specifications for complete selection:
|
Height |
46 cm |
|
Clamp fixings |
1.5″ or 2″ |
|
Stainless steel needle valve |
Threaded ¼» |
|
Aftercooler |
8mm |
|
Material |
Stainless steel 304 |
The liquid selection unit is designed for the convenience of separating the distillate body from third-party fractions. With it, you can qualitatively separate the heads and tails and turn the distillation process into a convenient activity. The steam rises, condenses, then flows down in the form of a liquid into the selection unit, where we select the amount we need, at the speed we need. Installed with a clamp in front of the dephlegmator.
Benefits of the steam extraction unit.
- 1) Not dependent on domestic water pressure.
- 2) Not dependent on water temperature
- 3) Voltage fluctuations in the network do not affect the operation of the selection unit
- 4) Cooling is much easier to connect.
- 5) Extraction is controlled by needle cock only.
The principle of operation of the liquid sampling unit.
- 1) We install the selection unit between the drawer and the reflux condenser.
- 2) Alcohol vapor passes through the drawer with a nozzle and the sampling unit and enters the refrigerator.
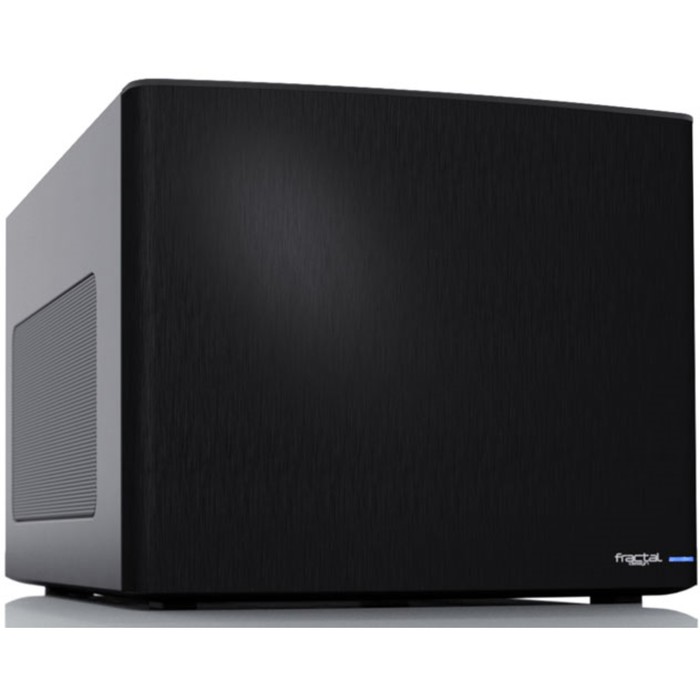 There they condense and flow down in the form of phlegm. They fall into the glass of the selection unit.
 - 3) The process is continuously repeated, heat and mass transfer begins.
- 4) The column begins to work for itself, and the fractions line up according to the boiling point.
- 5) After the column reaches the regime, it is time to carry out the selection of the product. For these purposes, a side outlet with a crane or a Hoffmann clamp is provided in the selection unit.
- 6) Open the needle valve and the phlegm enters the aftercooler where it is converted into the final product alcohol.
- 7) When selecting heads, the needle valve is slightly ajar, the sampling rate is 1-2 drops per second. Then we open more and select the body.
- 8) We monitor that the selection speed is small. Why is it necessary to monitor the rate of distillate output, because the required volume of phlegm may stop returning back to the drawer, heat transfer will be disturbed, and separation into fractions will cease to occur.

- 9) This process is controlled by a digital thermometer. If we take a lot, heavier fractions rise to the top and the temperature begins to rise.
- 10) The goal is to control the temperature in the column, no matter what it rises, while the body is being selected. If the temperature has become, rise, reduce the selection.
Difference between: liquid sampling in a standard beer column, from liquid sampling.
|
|
Standard beer column |
Liquid sampling |
|
Selection management |
By means of cooling supplied to the dephlegmator |
Extraction adjustable with needle valve only |
|
Process control |
Power input to the cube and water pressure |
Digital thermometer |
Write a Review
Your Name:
Your Review:
Note: HTML markup is not supported! Use plain text.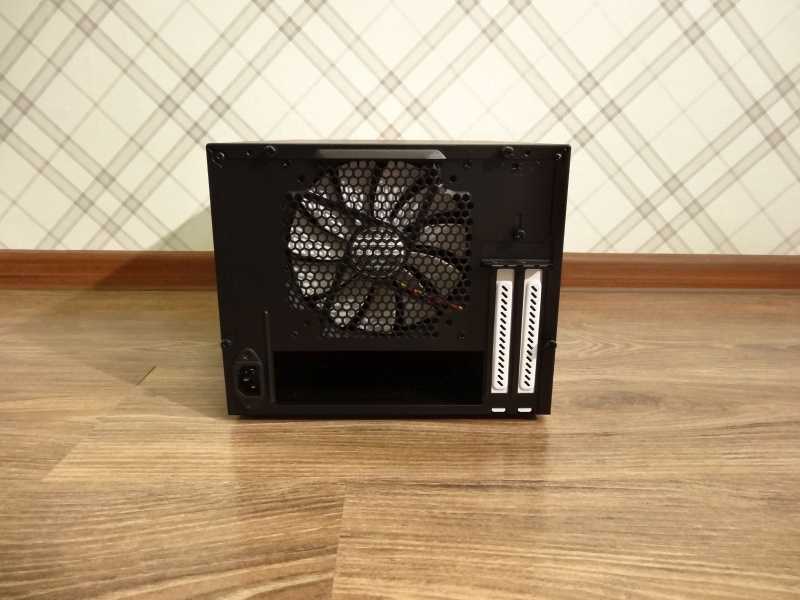
Rating: Poor
Good
Enter the code shown in the picture:
Continue
Characteristics and dimensions of the moonshine still LUXSTAHL 8M
| Material | AISI 304 (food grade) |
| Column diameter | 76 mm (clamp 3”) |
| Column height | 50 cm + 50 cm + 15 cm (UO) |
| Filler (SPN) | SPN 3.5×3.5, 4.8 kg |
| Cover/bottom thickness | 2 mm/5 mm |
| Weight | 21.99 kg |
| Package dimensions (cm) | 52.5x43x55 cm |
| Warranty | 10 years |
| Product per distillation | 12 bottles 0. 5 l 5 l |
Dephlegmator characteristics
| Steel | AISI 304 (food grade, stainless steel) |
| Mount | Clamp 3” |
| Total height | 25 cm |
| Number of tubes | 15 pcs |
| Tube diameter | 14×1 |
| Number of partitions | 7 pcs |
| Water consumption | <0.1 m3/h |
| Consumption billing | <2.28 rub / hour |
Extraction unit specifications
| Steel | AISI 304 (food grade, stainless steel) |
| Glass | Borosilicate |
| Total height | 15 cm |
| Number of irrigation pipes | 19 pcs x 12 mm |
| Number of irrigation points | 5 pcs/tube, 95 pcs |
| Glass height | 6 cm |
| Glass thickness | 4 mm |
| Outlet/mount | Clamp 1/2″ |
Aftercooler features and dimensions
| Steel | AISI 304 (food grade, stainless steel) |
| Mount | Clamp 1/2” (2 pcs) |
| Overall length | 410 mm |
| Coolant length | 352 mm |
| Outer diameter (jackets) | 25 mm |
| Inner tube diameter | 8 mm |
Characteristics and dimensions of the drawer side 3” (2 pieces included!)
| Steel | AISI 304 (food grade, stainless steel) |
| Diameter | 76 mm (3 in. ) ) |
| Length | 500 mm |
| Nipple material | Food grade silicone |
| Edge to nipple | 10 cm |
| Price (without delivery) | 3590 rub |
180° pipe turn characteristics (connector)
| Material | AISI 304 (food grade, stainless steel) |
| Mount | Clamp 3” |
| Length | 337 mm |
| Connection diameter pipes | 38 mm |
Spiral prismatic nozzle (SPN)
| Material | AISI 304 (food grade, stainless steel) |
| Size | 3.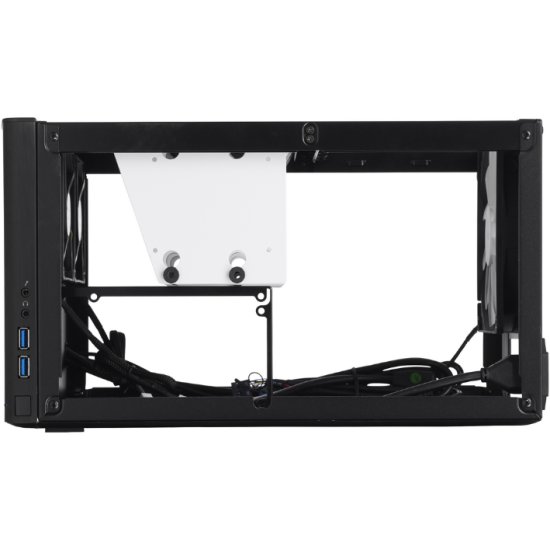 5×3.5×0.25 mm 5×3.5×0.25 mm |
| Quantity | 4.8 kg |
Heating element 3.5 kW and 3 kW with power regulator and voltmeter
| Material | stainless steel AISI 430 |
| Dimensions (L*W*H) | 90*100*120 mm |
| Heating element power | 3 kW and 3.5 kW (optional) |
| Supply voltage | 220-230 V / 50 Hz |
| Clamp connection diameter | 2 in. (51 mm) |
| Degree of protection (IP) | 23 |
| Electric shock rating | I |
Mounting unit UK-R-01 (galvanized)
Product catalog
- Cables Twisted pair
Indoor 2 pairs
for rooms 4 pairs
for street laying 2 pairs
for street laying 4 pairs
for rooms with shell LSZH
suspended with a cable
multi -pound for premises
multi -pavement for the street and sewage system
Copper 9000 9000 UTP 9000 UTP
- Optical cables
Suspended subscriber DROP COVLINE
Suspended subscriber DROP
For premises
For sewerage into pipes
Suspended with a cable
Shipping Self -supporting
Armored in the sewer
Armored in the soil
for sewage with copper veins
Suspended with copper cores
Armor 9000
Armored flexible IN/OUT
OPTICAL patch cords
- Copper cables
Speaker cables 9
Crowsts for fastening the couplings
Fasteners (screws, nuts, rails)
Input sets for couplings.
 Remkompleki. Hermot. Accessories
 Culpans optical dead end
9000
Telecom floor cabinets
Optical wall boxes
FTTH wall boxes
Rack and cabinet organizers
Patch panels RJ-45 19 «
Patch corities copper UTP
Patchcores Optical
Pigteles
Plints, Frames
Shelves for racks and cabinets for racks and cabinets 9022 Optical outlets
Splice cassettes
Optical splitters
Shelving units
Open racks
Heat shrink tubes (HUT)
Heat shrink caps
Roset RJ-45
brackets with nails
Stretch-tape
Copp, D-GEL
Bags and tools
Cable Testers
Chemicals and lubricants
Nylon clamps (ties)
Stainless steel clamps (ties)
Mounting cable stockings
Tool boxes
- Professional KNIPEX tools (Germany)
Sharnary-hobby tool
Tools for cleaning and removing insulation
Tools for crimping
Tool suitcases and bags
Clans 9000 Equipment for GPON, GEPON, FTTH
SFP xPON modules
GEPON optical terminals
Optical splitters
ATTENTION! Cable rewinding ends half an hour before the warehouse closes.
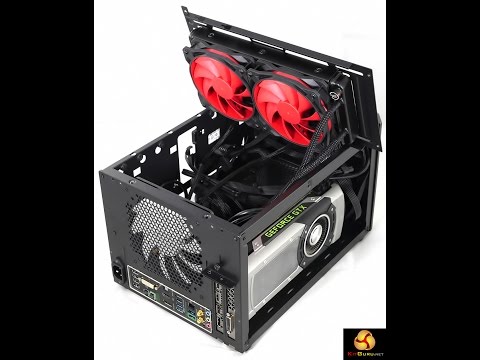
Warehouse address:
Moscow, Volokolamskoye Shosse, 142
Coordinates for the navigator:
55.830012, 37.371102 on the maphours of work:
Monday 9000 9000 to 17
Warehouse address:
St. Petersburg, st. Mineralnaya, 31
Navigator coordinates:
59.966493, 30.360149On the mapOpening hours:
Monday — Friday
from 8:30 to 17:30UCP bearing unit
The bearing unit UCP consists of a housing bearing — UC and a stationary housing on the feet — P.
The bearing is fixed to the shaft with locking screws.
The bearing has a spherical outer race and the housing, respectively, a spherical seat for the bearing,
in this way, the bearing can move in the housing, which allows it to withstand misalignment of the shaft due to misalignment during installation or operation.
The housing is completed with an oil can for oil supply and the bearing with an oil groove and holes for lubrication and protective seals.The body can be made of gray cast iron, stainless steel AISI304 AISI316 or composite material, plastic or thermoplastic.
The bearing can be made of bearing or stainless steel.
It is also possible to manufacture in high-temperature version.Buy bearing unit UCP in St. Petersburg at the best price
with delivery in Russia you can in our company: ContactsDimensions and features
Marking d mm h mm a mm e mm b mm S1 mm S2 mm g mm W mm B1 mm n mm Screw Load dyn. Load stat. Weight kg UCP 201 12 30.  2
2 127 95 38 13 19 14 62 31.0 12.7 M10 12160 6318 0.69 UCP 202 15 30.2 127 95 38 13 19 14 62 31.0 12.7 M10 12160 6318 0.69 UCP 203 17 30.2 127 95 38 13 19 14 62 31.0 12.7 M10 12160 6318 0.68 UCP 204 20 33.3 127 95 38 13 19 14 65 31.0 12. 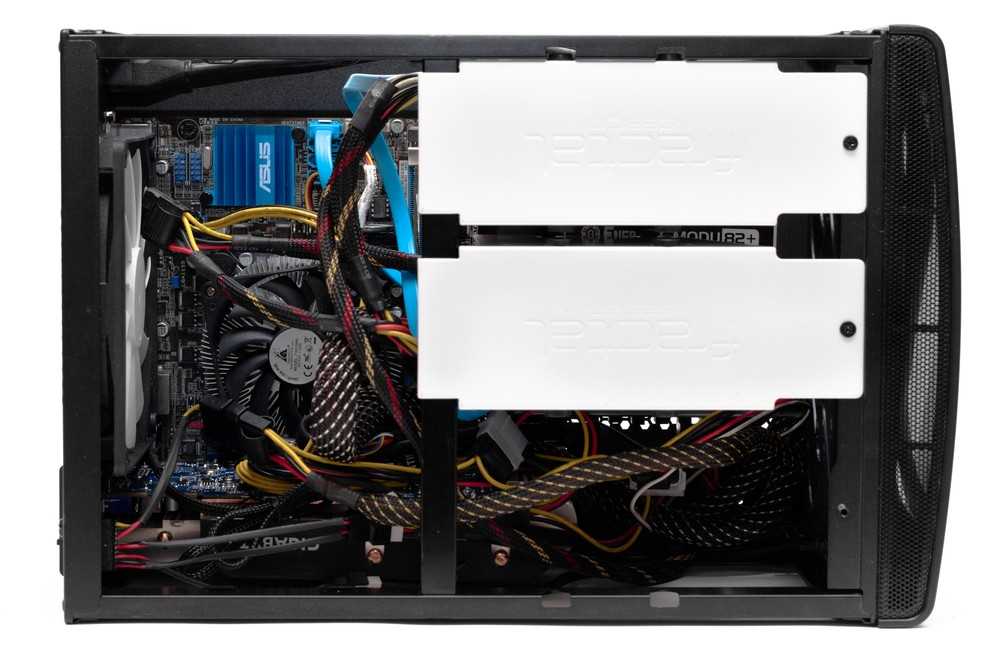 7
7 M10 12160 6318 0.66 UCP 205 25 36.5 140 105 38 13 19 15 71 34.1 14.3 M10 13300 7457 0.81 UCP 206 30 42.9 165 121 48 17 20 17 84 38.1 15.9 M14 18525 10735 1.24 UCP 207 35 47.6 167 127 48 17 20 18 93 42.9 17.5 M14 24415 14630 1.58 UCP 208 40 49.  2
2 184 137 54 17 20 18 100 49.2 19.0 M14 27645 16910 1.89 UCP 209 45 54.0 190 146 54 17 20 20 106 49.2 19.0 M14 32395 20235 2.14 UCP 210 50 57.2 206 159 60 20 23 21 113 51.6 19.0 M16 33345 22135 2.66 UCP 211 55 63.5 219 171 60 20 23 23 125 55.  6
6 22.2 M16 41230 27930 3.31 UCP 212 60 69.8 241 184 70 20 23 25 138 65.1 25.4 M16 49780 34390 4.90 UCP 213 65 76.2 265 203 70 25 28 27 150 65.1 25.4 M20 54340 38095 5.15 UCP 214 70 79.4 266 210 72 25 28 27 156 74.6 30.2 M20 59090 41895 6.20 UCP 215 75 82.  6
6 275 217 74 25 28 28 162 77.8 33.3 M20 64030 45885 7.16 UCP 216 80 88.9 292 232 78 25 28 30 174 82.6 33.3 M20 69065 50350 8.10 UCP 217 85 95.2 310 247 83 25 28 32 185 85.7 34.1 M20 79800 58805 9.81 UCP 218 90 101.6 327 262 88 27 30 33 198 96.  0
0 39.7 M22 67925 11.96 UCPX05 25 44.4 159 119 51 17 20 18 85 38.1 15.9 M14 18525 10735 1.5 UCPX06 30 47.6 175 127 57 17 20 20 93 42.9 17.5 M14 24415 14630 2 UCPX07 35 54 203 144 57 17 20 21 105 49.2 19 M14 27645 16910 2.6 UCPX08 40 58. 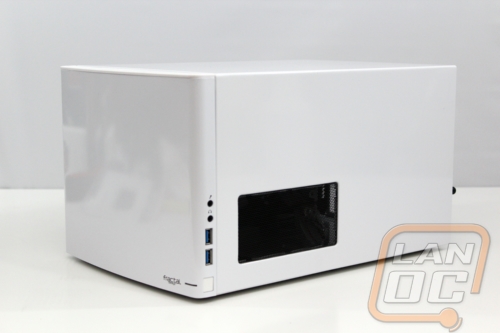 7
7 222 156 67 20 23 26 111 49.2 19 M16 32395 20235 3.3 UCPX09 45 58.7 222 156 67 20 23 26 116 51.6 19 M16 33345 22135 3.3 UCPX10 50 63.5 241 171 73 20 23 27 126 55.6 22.2 M16 41230 27930 4.3 UCPX11 55 69.8 260 184 79 25 28 30 137 65.1 25. 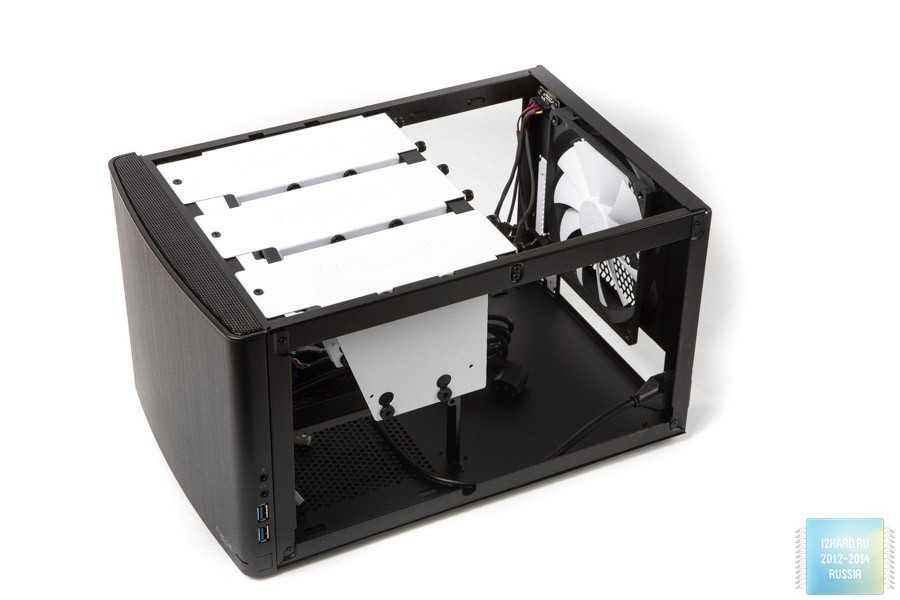 4
4 M20 49780 34390 5.7 UCPX12 60 76.2 286 203 83 25 28 33 151 65.1 25.4 M20 54340 38095 7.3 UCPX13 65 76.2 286 203 83 25 28 33 154 74.6 30.2 M20 59090 41895 7.6 UCPX14 70 88.9 330 229 89 27 30 35 170 77.8 33.3 M22 64030 45885 9.9 UCPX15 75 88. 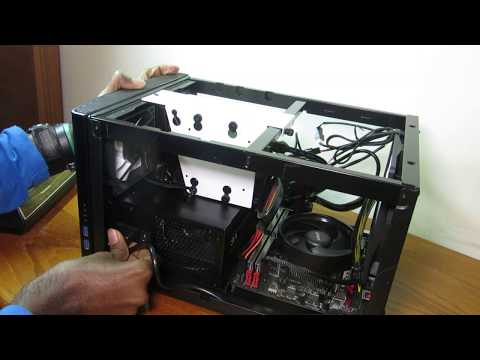 9
9 330 229 89 27 30 35 175 82.6 33.3 M22 69065 50350 11 UCPX16 80 101.6 381 283 102 27 30 40 194 85.7 34.1 M22 79800 58805 15 UCPX17 85 101.6 381 283 102 27 30 40 200 96 39.7 M22 67925 16 UCPX18 90 101.6 381 283 111 27 30 40 206 104 42.  9
9 M22 103550 77805 17 UCPX20 100 127 432 337 121 33 36 45 244 117.5 49.2 M27 126350 99750 30 UCP 305 25 45 175 132 45 17 20 15 85 38 15 M14 20140 10355 1.4 UCP 306 30 50 180 140 50 17 20 18 95 43 17 M14 25365 14250 1.8 UCP 307 35 56 210 160 56 17 25 20 106 48 19 M14 31730 18335 2.  8
8 UCP 308 40 60 220 170 60 17 27 22 116 52 19 M14 38665 22800 3 UCP 309 45 67 245 190 67 20 30 24 129 57 22 M16 46455 28025 4.1 UCP 310 50 75 275 212 75 20 35 27 143 61 22 M16 58900 36385 5.8 UCP 311 55 80 310 236 80 20 38 30 154 66 25 M16 68020 42750 7. 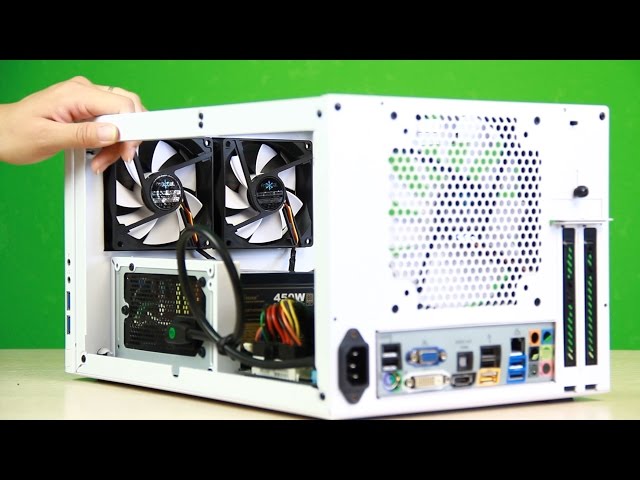 4
4 UCP 312 60 85 330 250 85 25 38 32 165 71 26 M20 77805 49590 9.4 UCP 313 65 90 340 260 90 25 38 33 176 75 30 M20 88065 56905 10 UCP 314 70 95 360 280 90 27 40 35 187 78 33 M22 98800 64790 12 UCP 315 75 100 380 290 100 27 40 35 198 82 32 M22 107350 73340 14 UCP 316 80 106 400 300 110 27 40 40 210 86 34 M22 111850 82365 18 UCP 317 85 112 420 320 110 33 45 40 220 96 40 M27 126350 20 UCP 318 90 118 430 330 110 33 45 45 235 96 40 M27 135850 101650 24 UCP 319 95 125 470 360 120 36 50 45 250 103 41 M30 145350 113050 29 UCP 320 100 140 490 380 120 36 50 50 275 108 42 M30 164350 133950 35 UCP 321 105 140 490 380 120 36 50 56 283 112 44 M33 174800 145350 35 UCP 322 110 150 520 400 140 40 55 61 303 117 46 M33 194750 171000 45 UCP 324 120 160 570 450 140 40 55 71 323 126 51 M33 196650 175750 55 UCP 326 130 180 600 480 140 40 55 81 363 135 54 M33 217550 203300 72 UCP 328 140 200 620 500 140 40 55 81 403 145 59 M33 240350 233700 89 Analogs
SKF 1 SKF 2 SKF 3 FAG INA ASAHI NSK NTN-SNR RHP ISB SY TF SY TR SYJ TF RASEY N RASEY N UCP UCP SF NP UCP Manufacturers
FAG
INA
NSK
NTN
SNR
SKF
ASAHI
TIMKEN
ISB
RHP
Overview of the error jam in the risograph — Printmatic
home
Information section
Articles about risographs
Overview of the error jam in the risograph
November 17, 2014
In the last review, we introduced you to the possible types of errors that occur on the risograph and their identification.
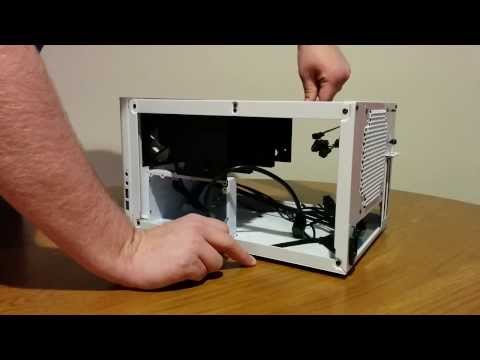 Now we will look at error type indicators in more detail.
The first in our list will be the paper jam indicator in one or another place of the risograph. In English, this type of error sounds like «JAM», i.e. jam.
To identify a paper jam error, you need to look at the error display, where you will see a number in a circle that describes the location of the error, and on the circulation display, the error code itself. Next, you need to find the displayed error number in the table with a description, find out the reason that caused the error and follow the instructions for eliminating it.
-
Error Code A-01/34 (Location 4, Master Making Unit)
Cause.
This problem is caused by incorrect installation of the master in the manufacturing unit.Remedy.
To resolve this error, simply unlock the Master Making Unit, remove it, and reinsert the Master Roll, making sure that the Master is not slack. Return the node back.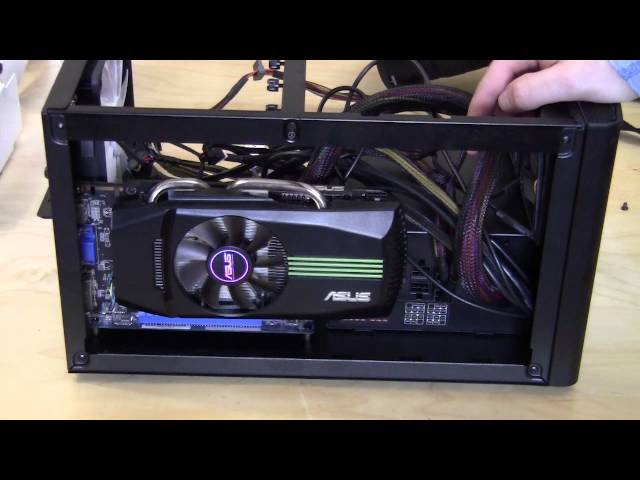
-
Error code A-02 (position 3, ink cylinder)
Cause.
Incorrectly wound master film frame on the ink cylinder.Remedy.
First you need to remove the ink cylinder from the risograph. Next, you need to unlock the drum using the lever on the left and turn the drum until the master metal clamp is on top.Next, by pressing the lever of this presser, you need to pry off the edge and remove the entire frame of the master film from the cylinder.
After you have removed the master, you need to rotate the drum until the marks line up and put it back into the risograph. Then, unlock the Master Making Unit and remove it, reinstall the Master Making Unit, and slide the Master Making Unit back. Then repeat the procedure for making a new master on the risograph.
-
Error code A-04 (position 3, ink cylinder)
Cause.
The removed frame of the master film was not loaded into the Master Waste Container.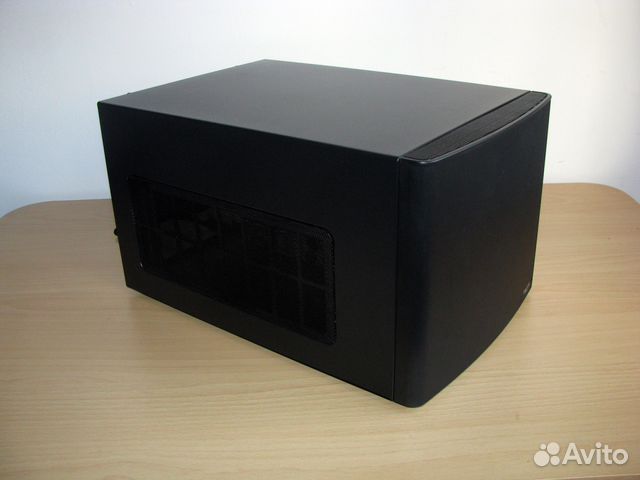
Remedy.
First you need to remove the ink cylinder and remove the master frame from it. Next, return the drum back to the machine and press the «start» button. -
Error Code A-05 (Location 5, Waste Master Container)
Cause.
This error indicates a paper jam in the master waste unit.Elimination.
First you need to remove the waste masters container by pressing the special lever to the right of the container.Next, remove the stuck master and install the container in reverse order.
-
Error code A-06 (position 1, feed table)
Cause.
There are foreign objects under the tray or on the paper.Remedy.
To correct this problem, you need to check the input tray, under it and on the paper for foreign objects and remove them if there are any. -
Error code J-08 (location 6, paper feed unit)
Cause.
Indicates that there is a paper jam in this node.
Remedy.
To correct the error, it is necessary to remove the jammed paper and refill the tray with paper, then to reset the error, press the «reset» button. -
Error code A-16 (position 3, ink cylinder)
Cause.
Problem with removing the master from the drum.Elimination.
You need to repeat all the described steps for removing the master film frame from the drum, which are described above for error A-02 and repeat the procedure for making a new master frame. -
Error Code A-17 (Location 4, Master Making Unit)
Cause.
Master film frame cut incorrectly.Remedy.
Remove the Master Making Unit and reinstall the Master Roll. -
Error code J-01 (location 8, automatic paper feed unit)
Cause.
If an ADF is installed on your risograph and this error is on, then a paper jam has occurred in the ADF.Remedy.
To remove problem paper from the ADF unit, pull the original release lever to the right and pull out the paper. If the paper is stuck further than this node, then you need to lift the risograph cover up and turn the ADF release roller to remove the paper.
-
Error Code J-02 (Location 6, Output Tray Assembly)
Cause.
Indicates that there is a paper jam in this node.Remedy.
Remove the paper from the jamming area and reset the error by pressing the «reset» button. -
Error code J-04 (position 3, ink cylinder)
Cause.
Problem with paper jam in the ink cylinder.Elimination.
Remove the cylinder from the risograph, check it for jammed paper and remove it if necessary.
Thus, we introduced you to the errors of the risograph, which are directly related to the jamming of the master or paper in different aggregate units of the apparatus. In the next overview, we will look at the errors associated with the active function indicator.

© Printmatic
Recommended reading:
- Risograph error
- Parameter check error summary
- Overview of errors related to indicator “i”
Key news and useful information from Nizhny Novgorod Steel
Use of rolled metal products in agriculture
Stainless steel wire 12x18n10t
Stainless steel circle 08x18h10
AISI 304 stainless wheel
Demanded rolled metal in Russia circle 12x18n10t
Stainless steel sheet 121810t
Properties and types of stainless steel sheets
Stainless circle
Stainless steel strip: varieties, basic properties, scope of rolled metal
Rolled metal assortment, types of steel pipes
Main types and classifications of fittings
Select all
A circle
Circle (kov.)
Circle (forging)
Sheet
Band
Wire
Pipe
Search
Search
Select all
0419113
06199
08PS
09G2S
12x18n10t
12x18n9
30HGSA
30HGSA (calibr.
 )
)
40x
40X (calibr.)
40X13
40HN
4X5MFS
5
65g
9xc
AISI 304
Aisi321
St20
St20 x / c
St3
St45
Steel 20
Steel 20 (caliber)
Steel 3
Steel 45
Steel 45 (caliber)
U8A
H12MF
CVH
Search
Search
Select all
0.
 4
4
0.5
0.6
0.8
one
1.2
1.5
1.6
ten
100
102
105
108
110
114
115
12
120
121
127
130
133
fourteen
140
146
fifteen
150
152
159
16
160
168
170
eighteen
180
190
2
2.
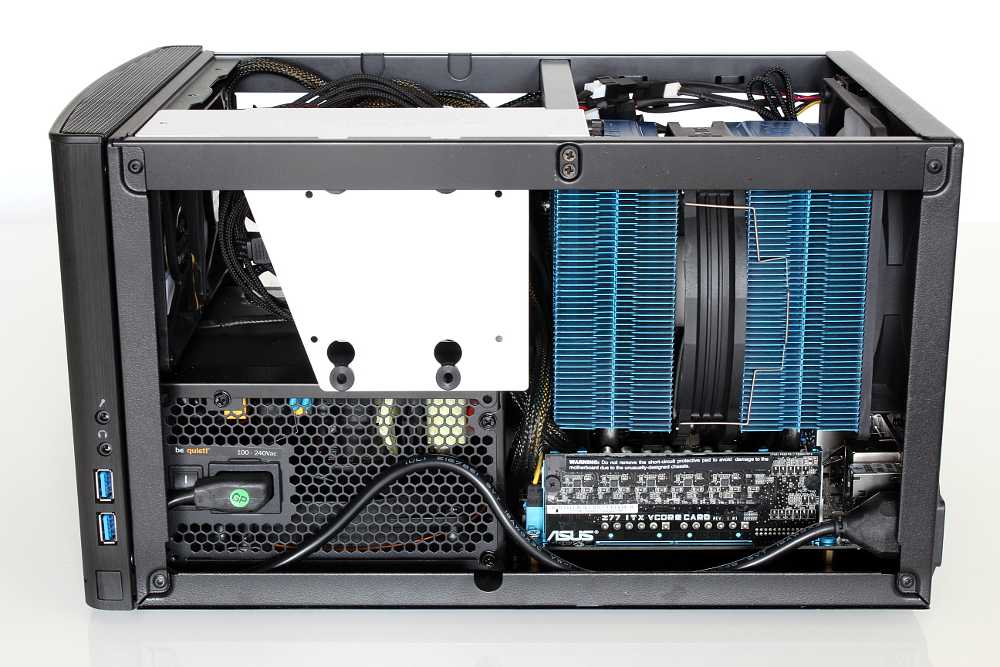
-