NVIDIA — ArchWiki
This article covers the proprietary NVIDIA graphics card driver. For the open-source driver, see Nouveau. If you have a laptop with hybrid Intel/NVIDIA graphics, see NVIDIA Optimus instead.
Contents
- 1 Installation
- 1.1 Unsupported drivers
- 1.2 Custom kernel
- 1.3 DRM kernel mode setting
- 1.3.1 Early loading
- 1.3.1.1 mkinitcpio
- 1.3.1.2 Booster
- 1.3.1.3 pacman hook
- 1.3.1 Early loading
- 1.4 Hardware accelerated video decoding
- 1.5 Hardware accelerated video encoding with NVENC
- 2 Xorg configuration
- 2.1 Automatic configuration
- 2.2 nvidia-settings
- 2.3 Manual configuration
- 2.3.1 Minimal configuration
- 2.3.2 Disabling the logo on startup
- 2.3.3 Overriding monitor detection
- 2.3.4 Enabling brightness control
- 2.3.5 Enabling SLI
- 2.4 Multiple monitors
- 2.4.1 Using nvidia-settings
- 2.
4.2 ConnectedMonitor
- 2.4.3 TwinView
- 2.4.3.1 Vertical sync using TwinView
- 2.4.3.2 Gaming using TwinView
- 2.4.4 Mosaic mode
- 2.4.4.1 Base Mosaic
- 2.4.4.2 SLI Mosaic
- 3 Wayland
- 4 Tips and tricks
- 5 Troubleshooting
- 6 See also
Installation
Warning: Avoid installing the NVIDIA driver through the package provided from the NVIDIA website. Installation through pacman allows upgrading the driver together with the rest of the system.
These instructions are for those using the stock linux or linux-lts packages. For custom kernel setup, skip to the next subsection.
1. If you do not know what graphics card you have, find out by issuing:
-
$ lspci -k | grep -A 2 -E "(VGA|3D)"
2. Determine the necessary driver version for your card by:
-
- Visiting NVIDIA’s driver download site and using the dropdown lists.
- Finding the code name (e.g. NV50, NVC0, etc.) on nouveau wiki’s code names page or nouveau’s GitLab, then looking up the name in NVIDIA’s legacy card list: if your card is not there you can use the latest driver.
- Visiting NVIDIA’s driver download site and using the dropdown lists.
3. Install the appropriate driver for your card:
Note:
- When installing dkms, read Dynamic Kernel Module Support#Installation
- nvidia may not boot on Linux 5.18 (or later) on systems with Intel CPUs due to FS#74886/FS#74891. Until this is fixed, a workaround is disabling the Indirect Branch Tracking CPU security feature by setting the
ibt=offkernel parameter from the bootloader. This security feature is responsible for mitigating a class of exploit techniques, but is deemed safe as a temporary stopgap solution. You can alternatively try nvidia-open and continue using IBT. - nvidia-open does not work on systems that have AMD integrated GPUs due to nvidia-open issue #282.
-
- For the Maxwell (NV110/GMXXX) series and newer, install the nvidia package (for use with the linux kernel) or nvidia-lts (for use with the linux-lts kernel) package.
- If these packages do not work, nvidia-betaAUR may have a newer driver version that offers support.
- Alternatively for the Turing (NV160/TUXXX) series or newer the nvidia-open package may be installed for open source kernel modules on the linux kernel (On other kernels nvidia-open-dkms must be used).
- This is currently alpha quality on desktop cards, so there will be issues.
- For the Kepler (NVE0/GKXXX) series, install the nvidia-470xx-dkmsAUR package.
- For the Fermi (NVC0/GF1XX) series, install the nvidia-390xx-dkmsAUR package.
- For even older cards, have a look at #Unsupported drivers.
- For the Maxwell (NV110/GMXXX) series and newer, install the nvidia package (for use with the linux kernel) or nvidia-lts (for use with the linux-lts kernel) package.
4. For 32-bit application support, also install the corresponding lib32 package from the multilib repository (e. g. lib32-nvidia-utils).
5. Reboot. The nvidia package contains a file which blacklists the nouveau module, so rebooting is necessary.
Once the driver has been installed, continue to #Xorg configuration or #Wayland.
Unsupported drivers
If you have an older card, NVIDIA no longer actively supports drivers for your card. This means that these drivers do not officially support the current Xorg version. It thus might be easier to use the nouveau driver, which supports the old cards with the current Xorg.
However, NVIDIA’s legacy drivers are still available and might provide better 3D performance/stability.
- For the Tesla (NV50/G80-90-GT2XX) series, install the nvidia-340xx-dkmsAUR package.
- For the Curie (NV40/G70) series and older, drivers are no longer packaged for Arch Linux.
Custom kernel
If using a custom kernel, compilation of the NVIDIA kernel modules can be automated with DKMS.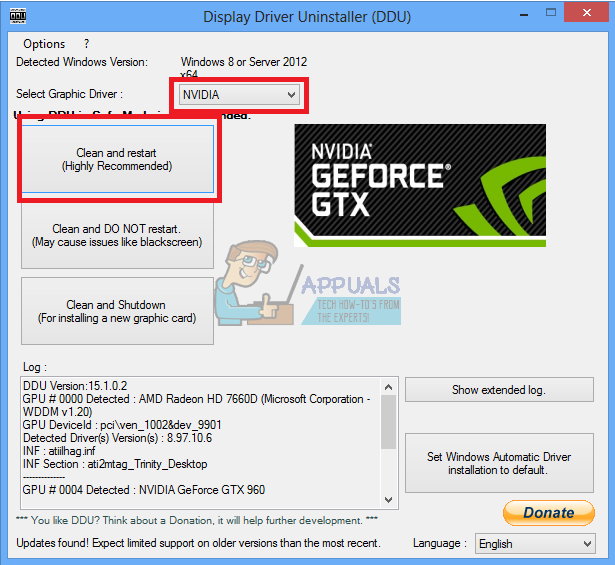 Install the nvidia-dkms package (or a specific branch), and the corresponding headers for your kernel.
Ensure your kernel has CONFIG_DRM_SIMPLEDRM=y, and if using CONFIG_DEBUG_INFO_BTF then this is needed in the PKGBUILD (since kernel 5.16):
install -Dt "$builddir/tools/bpf/resolve_btfids" tools/bpf/resolve_btfids/resolve_btfids
The NVIDIA module will be rebuilt after every NVIDIA or kernel update thanks to the DKMS pacman hook.
DRM kernel mode setting
To enable DRM (Direct Rendering Manager) kernel mode setting, add the nvidia_drm.modeset=1 kernel parameter.
Note:
- The NVIDIA driver does not provide an
fbdevdriver for the high-resolution console for the kernel compiled-invesafbmodule. However, the kernel compiled-inefifbmodule supports a high-resolution console on EFI systems. This method requires GRUB or rEFInd and is described in NVIDIA/Tips and tricks#Fixing terminal resolution.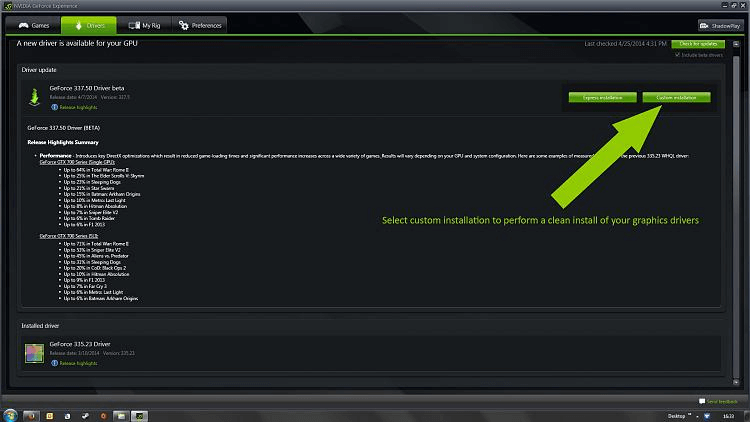 [1][2][3].
 - NVIDIA drivers prior to version 470 (e.g. nvidia-390xx-dkmsAUR) do not support hardware accelerated XWayland, causing non-Wayland-native applications to suffer from poor performance in Wayland sessions.
Early loading
For basic functionality, just adding the kernel parameter should suffice. If you want to ensure it is loaded at the earliest possible occasion, or are noticing startup issues (such as the nvidia kernel module being loaded after the display manager) you can add nvidia, nvidia_modeset, nvidia_uvm and nvidia_drm to the initramfs.
mkinitcpio
If you use mkinitcpio initramfs, follow mkinitcpio#MODULES to add modules.
If added to the initramfs, do not forget to run mkinitcpio every time there is a nvidia driver update. See #pacman hook to automate these steps.
Booster
If you use Booster, follow Booster#Early module loading.
pacman hook
To avoid the possibility of forgetting to update initramfs after an NVIDIA driver upgrade, you may want to use a pacman hook:
/etc/pacman.d/hooks/nvidia.hook
[Trigger]
Operation=Install
Operation=Upgrade
Operation=Remove
Type=Package
Target=nvidia
Target=linux
# Change the linux part above and in the Exec line if a different kernel is used
[Action]
Description=Update NVIDIA module in initcpio
Depends=mkinitcpio
When=PostTransaction
NeedsTargets
Exec=/bin/sh -c 'while read -r trg; do case $trg in linux) exit 0; esac; done; /usr/bin/mkinitcpio -P'
Make sure the Target package set in this hook is the one you have installed in steps above (e.g. nvidia, nvidia-dkms, nvidia-lts or nvidia-ck-something).
Note: The complication in the Exec line above is in order to avoid running mkinitcpio multiple times if both nvidia and linux get updated. In case this does not bother you, the
 Target=linux and NeedsTargets lines may be dropped, and the Exec line may be reduced to simply Exec=/usr/bin/mkinitcpio -P.
Hardware accelerated video decoding
Accelerated video decoding with VDPAU is supported on GeForce 8 series cards and newer. Accelerated video decoding with NVDEC is supported on Fermi (~400 series) cards and newer. See Hardware video acceleration for details.
Hardware accelerated video encoding with NVENC
NVENC requires the nvidia_uvm module and the creation of related device nodes under /dev.
The latest driver package provides a udev rule which creates device nodes automatically, so no further action is required.
If you are using an old driver (e.g. nvidia-340xx-dkmsAUR), you need to create device nodes. Invoking the nvidia-modprobe utility automatically creates them. You can create /etc/udev/rules. to run it automatically:
 d/70-nvidia.rules
/etc/udev/rules.d/70-nvidia.rules
ACTION=="add", DEVPATH=="/bus/pci/drivers/nvidia", RUN+="/usr/bin/nvidia-modprobe -c0 -u"
Xorg configuration
The proprietary NVIDIA graphics card driver does not need any Xorg server configuration file. You can start X to see if the Xorg server will function correctly without a configuration file. However, it may be required to create a configuration file (prefer /etc/X11/xorg.conf.d/20-nvidia.conf over /etc/X11/xorg.conf) in order to adjust various settings. This configuration can be generated by the NVIDIA Xorg configuration tool, or it can be created manually. If created manually, it can be a minimal configuration (in the sense that it will only pass the basic options to the Xorg server), or it can include a number of settings that can bypass Xorg’s auto-discovered or pre-configured options.
Tip: For more configuration options, see NVIDIA/Troubleshooting.
Automatic configuration
The NVIDIA package includes an automatic configuration tool to create an Xorg server configuration file (xorg.conf) and can be run by:
# nvidia-xconfig
This command will auto-detect and create (or edit, if already present) the /etc/X11/xorg.conf configuration according to present hardware.
If there are instances of DRI, ensure they are commented out:
# Load "dri"
Double check your /etc/X11/xorg.conf to make sure your default depth, horizontal sync, vertical refresh, and resolutions are acceptable.
nvidia-settings
The nvidia-settings tool lets you configure many options using either CLI or GUI. Running nvidia-settings without any options launches the GUI, for CLI options see nvidia-settings(1).
You can run the CLI/GUI as a non-root user and save the settings to ~/.nvidia-settings-rc by using the option Save Current Configuration under nvidia-settings Configuration tab.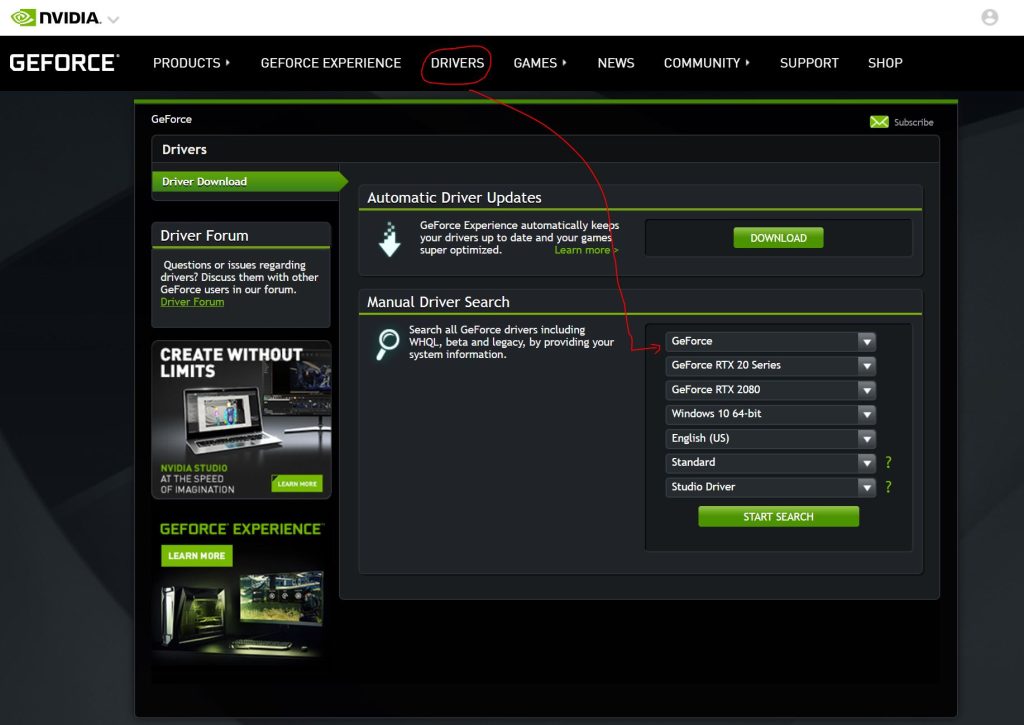
To load the ~/.nvidia-settings-rc for the current user:
$ nvidia-settings --load-config-only
See Autostarting to start this command on every boot.
Note:
- Xorg may not start or crash on startup after saving
nvidia-settingschanges. Adjusting or deleting the generated~/.nvidia-settings-rcand/or Xorg file(s) should recover normal startup. - Cinnamon desktop can override changes made through
nvidia-settings. You can adjust the Cinnamon startup behavior to prevent that.
Manual configuration
Several tweaks (which cannot be enabled automatically or with nvidia-settings) can be performed by editing your configuration file. The Xorg server will need to be restarted before any changes are applied.
See NVIDIA Accelerated Linux Graphics Driver README and Installation Guide for additional details and options.
Minimal configuration
A basic configuration block in 20-nvidia. (or deprecated in  conf
confxorg.conf) would look like this:
/etc/X11/xorg.conf.d/20-nvidia.conf
Section "Device"
        Identifier "NVIDIA Card"
        Driver "nvidia"
        VendorName "NVIDIA Corporation"
        BoardName "GeForce GTX 1050 Ti"
EndSection
Disabling the logo on startup
Add the "NoLogo" option under section Device:
Option "NoLogo" "1"
Overriding monitor detection
The "ConnectedMonitor" option under section Device allows to override monitor detection when X server starts, which may save a significant amount of time at start up. The available options are: "CRT" for analog connections, "DFP" for digital monitors and "TV" for televisions.
The following statement forces the NVIDIA driver to bypass startup checks and recognize the monitor as DFP:
Option "ConnectedMonitor" "DFP"
Note: Use «CRT» for all analog 15 pin VGA connections, even if the display is a flat panel. «DFP» is intended for DVI, HDMI, or DisplayPort digital connections only.
Enabling brightness control
This article or section is out of date.
Reason: Potentially obsolete[4], upstream package also seems to be ancient. (Discuss in Talk:NVIDIA)
Add to kernel paremeters:
nvidia.NVreg_RegistryDwords=EnableBrightnessControl=1
Alternatively, add the following under section Device:
Option "RegistryDwords" "EnableBrightnessControl=1"
If brightness control still does not work with this option, try installing nvidia-bl-dkmsAUR.
Note: Installing nvidia-bl-dkmsAUR will provide a /sys/class/backlight/nvidia_backlight/ interface to backlight brightness control, but your system may continue to issue backlight control changes on /sys/class/backlight/acpi_video0/. One solution in this case is to watch for changes on, e.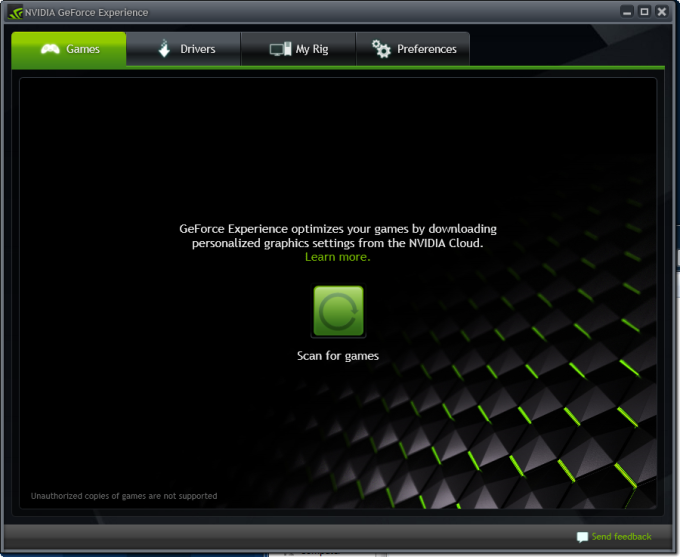 g.
g. acpi_video0/brightness with inotifywait and to translate and write to nvidia_backlight/brightness accordingly. See Backlight#sysfs modified but no brightness change.
Enabling SLI
Warning: Since the GTX 10xx Series (1080, 1070, 1060, etc) only 2-way SLI is supported. 3-way and 4-way SLI may work for CUDA/OpenCL applications, but will most likely break all OpenGL applications.
Taken from the NVIDIA driver’s README Appendix B: This option controls the configuration of SLI rendering in supported configurations. A «supported configuration» is a computer equipped with an SLI-Certified Motherboard and 2 or 3 SLI-Certified GeForce GPUs.
Find the first GPU’s PCI Bus ID using lspci:
# lspci | grep "VGA|3D controller"
00:02.0 VGA compatible controller: Intel Corporation Xeon E3-1200 v2/3rd Gen Core processor Graphics Controller (rev 09) 03:00.0 VGA compatible controller: NVIDIA Corporation GK107 [GeForce GTX 650] (rev a1) 04:00.0 VGA compatible controller: NVIDIA Corporation GK107 [GeForce GTX 650] (rev a1) 08:00.0 3D controller: NVIDIA Corporation GM108GLM [Quadro K620M / Quadro M500M] (rev a2)
Add the BusID (3 in the previous example) under section Device:
BusID "PCI:3:0:0"
Note: The format is important. The BusID value must be specified as "PCI:<BusID>:0:0"
Add the desired SLI rendering mode value under section Screen:
Option "SLI" "AA"
The following table presents the available rendering modes.
| Value | Behavior |
|---|---|
| 0, no, off, false, Single | Use only a single GPU when rendering. |
| 1, yes, on, true, Auto | Enable SLI and allow the driver to automatically select the appropriate rendering mode. |
| AFR | Enable SLI and use the alternate frame rendering mode. |
| SFR | Enable SLI and use the split frame rendering mode.
|
| AA | Enable SLI and use SLI antialiasing. Use this in conjunction with full scene antialiasing to improve visual quality. |
Alternatively, you can use the nvidia-xconfig utility to insert these changes into xorg.conf with a single command:
# nvidia-xconfig --busid=PCI:3:0:0 --sli=AA
To verify that SLI mode is enabled from a shell:
$ nvidia-settings -q all | grep SLIMode
  Attribute 'SLIMode' (arch:0.0): AA
    'SLIMode' is a string attribute.
    'SLIMode' is a read-only attribute.
    'SLIMode' can use the following target types: X Screen.
Warning: After enabling SLI, your system may become frozen/non-responsive upon starting xorg. It is advisable that you disable your display manager before restarting.
If this configuration does not work, you may need to use the PCI Bus ID provided by nvidia-settings,
$ nvidia-settings -q all | grep -i pcibus
Attribute 'PCIBus' (host:0[gpu:0]): 101.'PCIBus' is an integer attribute. 'PCIBus' is a read-only attribute. 'PCIBus' can use the following target types: GPU, SDI Input Device. Attribute 'PCIBus' (host:0[gpu:1]): 23. 'PCIBus' is an integer attribute. 'PCIBus' is a read-only attribute. 'PCIBus' can use the following target types: GPU, SDI Input Device.
and comment out the PrimaryGPU option in your xorg.d configuration,
/usr/share/X11/xorg.conf.d/10-nvidia-drm-outputclass.conf
...
Section "OutputClass"
...
    # Option "PrimaryGPU" "yes"
...
Using this configuration may also solve any graphical boot issues.
Multiple monitors
See Multihead for more general information.
Using nvidia-settings
The nvidia-settings tool can configure multiple monitors.
For CLI configuration, first get the CurrentMetaMode by running:
$ nvidia-settings -q CurrentMetaMode
Attribute 'CurrentMetaMode' (hostnmae:0.0): id=50, switchable=no, source=nv-control :: DPY-1: 2880x1620 @2880x1620 +0+0 {ViewPortIn=2880x1620, ViewPortOut=2880x1620+0+0}
Save everything after the :: to the end of the attribute (in this case: DPY-1: 2880x1620 @2880x1620 +0+0 {ViewPortIn=2880x1620, ViewPortOut=2880x1620+0+0}) and use to reconfigure your displays with nvidia-settings --assign "CurrentMetaMode=your_meta_mode".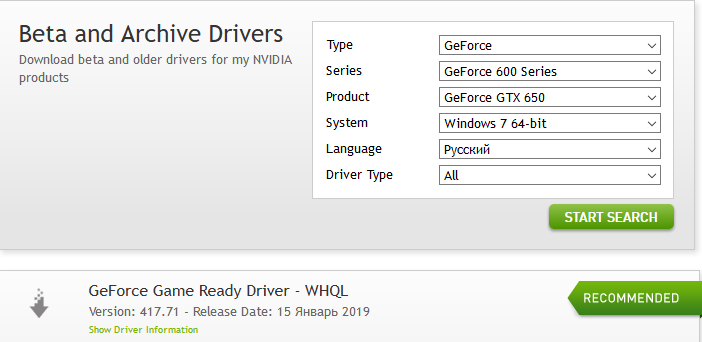
Tip: You can create shell aliases for the different monitor and resolution configurations you use.
ConnectedMonitor
If the driver does not properly detect a second monitor, you can force it to do so with ConnectedMonitor.
/etc/X11/xorg.conf
Section "Monitor"
    Identifier     "Monitor1"
    VendorName     "Panasonic"
    ModelName      "Panasonic MICRON 2100Ex"
    HorizSync       30.0 - 121.0 # this monitor has incorrect EDID, hence Option "UseEDIDFreqs" "false"
    VertRefresh     50.0 - 160.0
    Option         "DPMS"
EndSection
Section "Monitor"
    Identifier     "Monitor2"
    VendorName     "Gateway"
    ModelName      "GatewayVX1120"
    HorizSync       30.0 - 121.0
    VertRefresh     50.0 - 160.0
    Option         "DPMS"
EndSection
Section "Device"
    Identifier     "Device1"
    Driver         "nvidia"
    Option         "NoLogo"
    Option         "UseEDIDFreqs" "false"
    Option         "ConnectedMonitor" "CRT,CRT"
    VendorName     "NVIDIA Corporation"
    BoardName      "GeForce 6200 LE"
    BusID          "PCI:3:0:0"
    Screen          0
EndSection
Section "Device"
    Identifier     "Device2"
    Driver         "nvidia"
    Option         "NoLogo"
    Option         "UseEDIDFreqs" "false"
    Option         "ConnectedMonitor" "CRT,CRT"
    VendorName     "NVIDIA Corporation"
    BoardName      "GeForce 6200 LE"
    BusID          "PCI:3:0:0"
    Screen          1
EndSection
The duplicated device with Screen is how you get X to use two monitors on one card without TwinView. Note that
 nvidia-settings will strip out any ConnectedMonitor options you have added.
TwinView
You want only one big screen instead of two. Set the TwinView argument to 1. This option should be used if you desire compositing. TwinView only works on a per card basis, when all participating monitors are connected to the same card.
Option "TwinView" "1"
Example configuration:
/etc/X11/xorg.conf.d/10-monitor.conf
Section "ServerLayout"
    Identifier     "TwinLayout"
    Screen         0 "metaScreen" 0 0
EndSection
Section "Monitor"
    Identifier     "Monitor0"
    Option         "Enable" "true"
EndSection
Section "Monitor"
    Identifier     "Monitor1"
    Option         "Enable" "true"
EndSection
Section "Device"
    Identifier     "Card0"
    Driver         "nvidia"
    VendorName     "NVIDIA Corporation"
    #refer to the link below for more information on each of the following options.
    Option         "HorizSync"          "DFP-0: 28-33; DFP-1: 28-33"
    Option         "VertRefresh"        "DFP-0: 43-73; DFP-1: 43-73"
    Option         "MetaModes"          "1920x1080, 1920x1080"
    Option         "ConnectedMonitor"   "DFP-0, DFP-1"
    Option         "MetaModeOrientation" "DFP-1 LeftOf DFP-0"
EndSection
Section "Screen"
    Identifier     "metaScreen"
    Device         "Card0"
    Monitor        "Monitor0"
    DefaultDepth    24
    Option         "TwinView" "True"
    SubSection "Display"
        Modes          "1920x1080"
    EndSubSection
EndSection
Option "HorizSync" "DFP-0: 28-33; DFP-1: 28-33"
Option "VertRefresh" "DFP-0: 43-73; DFP-1: 43-73"
Option "MetaModes" "1920x1080, 1920x1080"
Option "ConnectedMonitor" "DFP-0, DFP-1"
Option "MetaModeOrientation" "DFP-1 LeftOf DFP-0"
EndSection
Section "Screen"
Identifier "metaScreen"
Device "Card0"
Monitor "Monitor0"
DefaultDepth 24
Option "TwinView" "True"
SubSection "Display"
Modes "1920x1080"
EndSubSection
EndSection
Device option information.
If you have multiple cards that are SLI capable, it is possible to run more than one monitor attached to separate cards (for example: two cards in SLI with one monitor attached to each). The «MetaModes» option in conjunction with SLI Mosaic mode enables this. Below is a configuration which works for the aforementioned example and runs GNOME flawlessly.
/etc/X11/xorg.conf.d/10-monitor.conf
Section "Device"
        Identifier      "Card A"
        Driver          "nvidia"
        BusID           "PCI:1:00:0"
EndSection
Section "Device"
        Identifier      "Card B"
        Driver          "nvidia"
        BusID           "PCI:2:00:0"
EndSection
Section "Monitor"
        Identifier      "Right Monitor"
EndSection
Section "Monitor"
        Identifier      "Left Monitor"
EndSection
Section "Screen"
        Identifier      "Right Screen"
        Device          "Card A"
        Monitor         "Right Monitor"
        DefaultDepth    24
        Option          "SLI" "Mosaic"
        Option          "Stereo" "0"
        Option          "BaseMosaic" "True"
        Option          "MetaModes" "GPU-0.DFP-0: 1920x1200+4480+0, GPU-1.DFP-0:1920x1200+0+0"
        SubSection      "Display"
                        Depth           24
        EndSubSection
EndSection
Section "Screen"
        Identifier      "Left Screen"
        Device          "Card B"
        Monitor         "Left Monitor"
        DefaultDepth    24
        Option          "SLI" "Mosaic"
        Option          "Stereo" "0"
        Option          "BaseMosaic" "True"
        Option          "MetaModes" "GPU-0. DFP-0: 1920x1200+4480+0, GPU-1.DFP-0:1920x1200+0+0"
        SubSection      "Display"
                        Depth           24
        EndSubSection
EndSection
Section "ServerLayout"
        Identifier      "Default"
        Screen 0        "Right Screen" 0 0
        Option          "Xinerama" "0"
EndSection
DFP-0: 1920x1200+4480+0, GPU-1.DFP-0:1920x1200+0+0"
SubSection "Display"
Depth 24
EndSubSection
EndSection
Section "ServerLayout"
Identifier "Default"
Screen 0 "Right Screen" 0 0
Option "Xinerama" "0"
EndSection
Vertical sync using TwinView
If you are using TwinView and vertical sync (the «Sync to VBlank» option in nvidia-settings), you will notice that only one screen is being properly synced, unless you have two identical monitors. Although nvidia-settings does offer an option to change which screen is being synced (the «Sync to this display device» option), this does not always work. A solution is to add the following environment variables at startup, for example append in /etc/profile:
export __GL_SYNC_TO_VBLANK=1
export __GL_SYNC_DISPLAY_DEVICE=DFP-0
export VDPAU_NVIDIA_SYNC_DISPLAY_DEVICE=DFP-0
You can change DFP-0 with your preferred screen (DFP-0 is the DVI port and CRT-0 is the VGA port). You can find the identifier for your display from nvidia-settings in the «X Server XVideoSettings» section.
Gaming using TwinView
In case you want to play fullscreen games when using TwinView, you will notice that games recognize the two screens as being one big screen. While this is technically correct (the virtual X screen really is the size of your screens combined), you probably do not want to play on both screens at the same time.
To correct this behavior for SDL, try:
export SDL_VIDEO_FULLSCREEN_HEAD=1
For OpenGL, add the appropriate Metamodes to your xorg.conf in section Device and restart X:
Option "Metamodes" "1680x1050,1680x1050; 1280x1024,1280x1024; 1680x1050,NULL; 1280x1024,NULL;"
Another method that may either work alone or in conjunction with those mentioned above is starting games in a separate X server.
Mosaic mode
Mosaic mode is the only way to use more than 2 monitors across multiple graphics cards with compositing. Your window manager may or may not recognize the distinction between each monitor. Mosaic mode requires a valid SLI configuration. Even if using Base mode without SLI, the GPUs must still be SLI capable/compatible.
Base Mosaic
Base Mosaic mode works on any set of Geforce 8000 series or higher GPUs. It cannot be enabled from within the nvidia-setting GUI. You must either use the nvidia-xconfig command line program or edit xorg.conf by hand. Metamodes must be specified. The following is an example for four DFPs in a 2×2 configuration, each running at 1920×1024, with two DFPs connected to two cards:
$ nvidia-xconfig --base-mosaic --metamodes="GPU-0.DFP-0: 1920x1024+0+0, GPU-0.DFP-1: 1920x1024+1920+0, GPU-1.DFP-0: 1920x1024+0+1024, GPU-1.DFP-1: 1920x1024+1920+1024"
Note: While the documentation lists a 2×2 configuration of monitors, GeForce cards are artificially limited to 3 monitors in Base Mosaic mode. Quadro cards support more than 3 monitors. As of September 2014, the Windows driver has dropped this artificial restriction, but it remains in the Linux driver.
SLI Mosaic
If you have an SLI configuration and each GPU is a Quadro FX 5800, Quadro Fermi or newer then you can use SLI Mosaic mode. It can be enabled from within the nvidia-settings GUI or from the command line with:
$ nvidia-xconfig --sli=Mosaic --metamodes="GPU-0.DFP-0: 1920x1024+0+0, GPU-0.DFP-1: 1920x1024+1920+0, GPU-1.DFP-0: 1920x1024+0+1024, GPU-1.DFP-1: 1920x1024+1920+1024"
Wayland
See Wayland#Requirements for more information.
For further configuration options, take a look at the wiki pages or documentation of the respective compositor.
Regarding XWayland take a look at Wayland#XWayland.
Follow GDM#Wayland and the proprietary NVIDIA driver when using GDM.
Tips and tricks
See NVIDIA/Tips and tricks.
Troubleshooting
See NVIDIA/Troubleshooting.
See also
- Current graphics driver releases in official NVIDIA Forum
- NVIDIA Developers Forum — Linux Subforum
Can’t Download Nvidia Drivers on Windows 10? Fix it Fast
Outdated drivers are the chief causes of this issue
by Milan Stanojevic
Milan Stanojevic
Windows & Software Expert
Milan has been enthusiastic about PCs ever since his childhood days, and this led him to take interest in all PC-related technologies. Before joining WindowsReport, he worked as… read more
Published on
Reviewed by
Vlad Turiceanu
Vlad Turiceanu
Editor-in-Chief
Passionate about technology, Windows, and everything that has a power button, he spent most of his time developing new skills and learning more about the tech world. Coming… read more
Affiliate Disclosure
- Display drivers ensure that anything you see on the screen has the right size, quality, colors, etc.
- Keeping them updated means you will benefit from performance upgrades over time, including launching new games.
- Fix this by canceling any other processes, ensuring that the version is correct for your NVIDIA card and that the antivirus or firewall does not block the download.
You’re not alone if you can’t download Nvidia drivers on Windows 10 and install them. Many users reported Nvidia driver download greyed out, and we will explain how to fix it in this guide.
Why can I not download NVIDIA drivers?
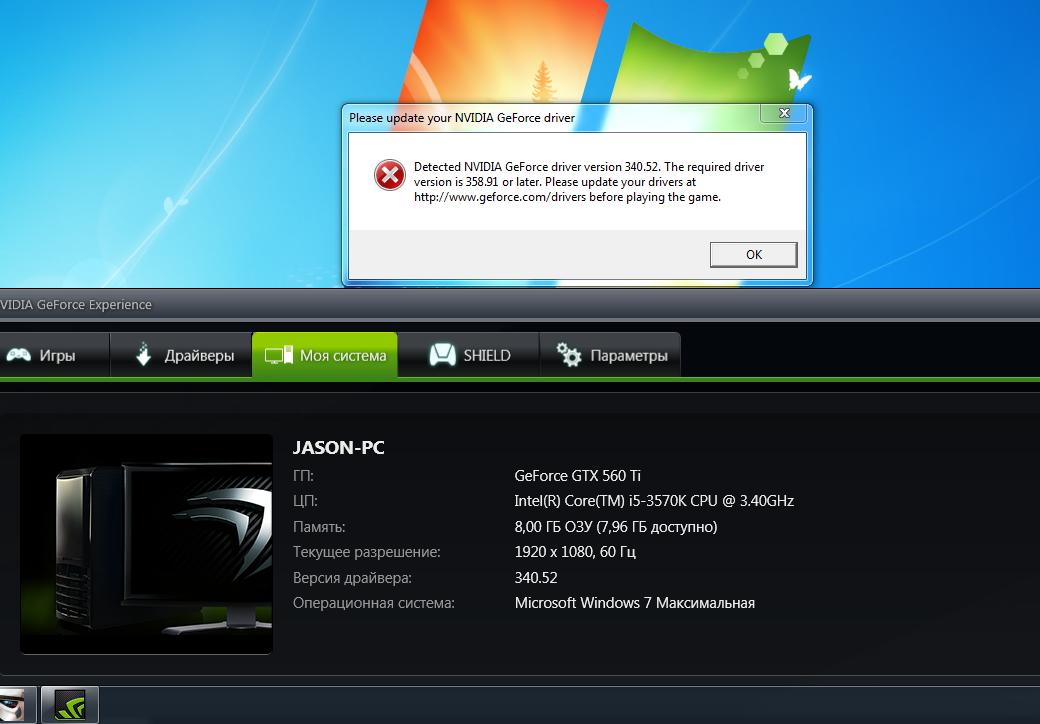
Nvidia driver update failed message can cause many problems to your PC, including a BSOD error; therefore, fixing it as soon as possible is essential.
There are multiple reasons why the update process is unsuccessful, and one of them might be if the Nvidia graphics card is not detected correctly.
If you tried installing Nvidia drivers on your Windows 10, the GeForce driver wouldn’t download in some cases. You might have encountered an error message or similar issues like:
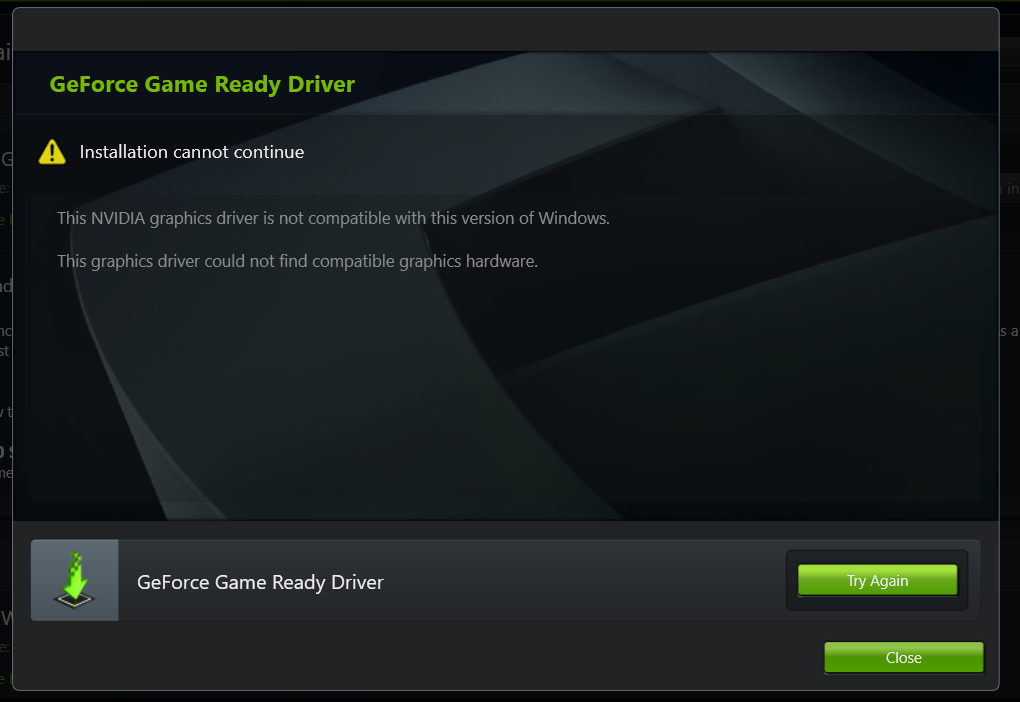
- Nvidia Installer can’t continue – This issue doesn’t really give you any other information other than informing you that the installer has failed, but thankfully, we have some great solutions to tackle it
- Your Nvidia Installer failed – The installer can fail due to a wide range of reasons, but it is most likely something to do with your internet connection or the manufacturer’s servers.

- Nvidia Installer stuck – If your installer gets stuck, then it might be an issue with your RAM, or you could be running too many apps at the same time.
It’s also possible that your Nvidia driver isn’t compatible with your Windows version, so you’ll have to roll back your Nvidia drivers to fix that.
Expert tip:
SPONSORED
Some PC issues are hard to tackle, especially when it comes to corrupted repositories or missing Windows files. If you are having troubles fixing an error, your system may be partially broken.
We recommend installing Restoro, a tool that will scan your machine and identify what the fault is.
Click here to download and start repairing.
Below are some of the other variations of the can’t download Nvidia drivers issue as reported by users:
- GeForce Game Ready driver installation can’t continue
- Nvidia drivers won’t install on Windows 10
What can I do if the GeForce driver won’t download?
Before trying any of these fixes, ensure there is no ongoing background Windows Update. If this is the case, wait for the update to end and check if the installation works before moving to any of these solutions.
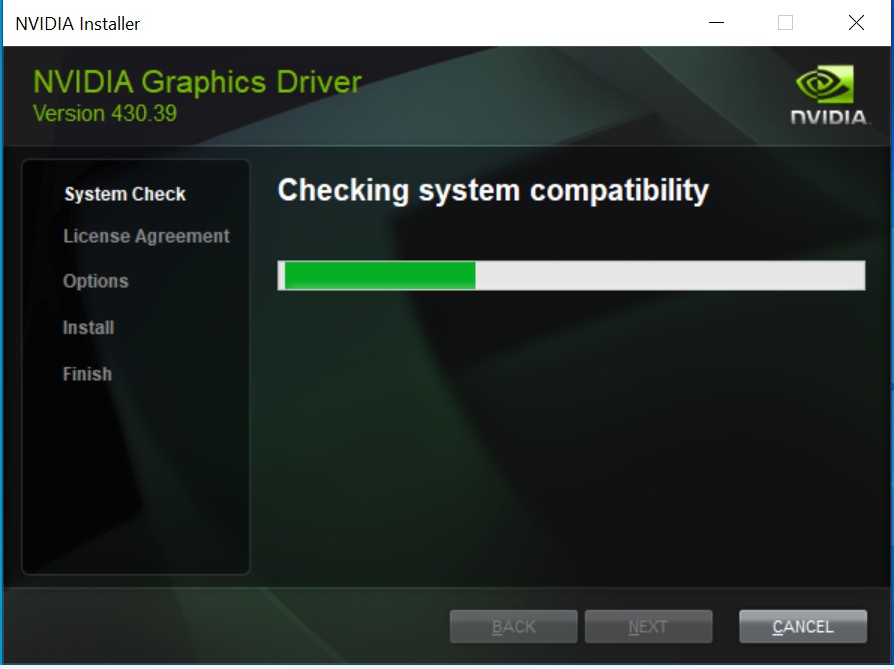
1. Confirm that you are installing the fitting version of the driver
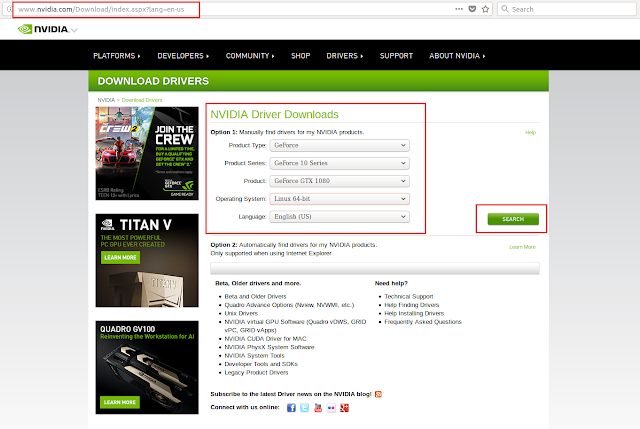
- Navigate to the official Nvidia support website.
- Make sure to choose the appropriate product and system, while sticking to the latest version.
- Once you have confirmed the details, click Search.
- Then click Download.
- Alternatively, you can try and download an older version, as that fixed the problem for some users.
- Download the driver, right-click on the installer, and run it as administrator.
If that didn’t help, we recommend trying a 3rd party driver updater software that can install the correct driver version for you in seconds. In this way, you will avoid the risk of getting the wrong driver installed.
To make sure that everything goes smoothly and avoid any kind of GPU driver errors, be sure to use a complete driver update assistant that will solve your problems with just a couple of clicks, and we strongly recommend DriverFix. Follow these easy steps to safely update your drivers:
- Download and install DriverFix.
- Launch the software.
- Wait for DriverFix to detect all your faulty drivers.
- The application will now show you all the drivers that have issues, and you just need to select the ones you’d liked fixed.
- Wait for the app to download and install the newest drivers.
- Restart your PC for the changes to take effect.
DriverFix
Keep you GPU on the peaks of their performance without worrying about its drivers.
Free trial
Visit website
Disclaimer: this program needs to be upgraded from the free version in order to perform some specific actions.
2. Temporarily close your antivirus software and update GeForce Experience
- Click on the hidden access arrow in the Taskbar.
- Click on your antivirus icon, hover over Avast shields Control and select Disable for 10 minutes (This step varies for different antivirus software).

- Redownload the installer, and try the next solution if the GeForce driver won’t download.
4. Update Windows, remove old drivers with DDU and try again
- Navigate to Start and Settings.
- Click on Update & Security, then select Check for updates to update Windows 10.
- Download DDU (Display Driver Uninstaller) and install it.
- Open Settings > Update & Security > Recovery > Advanced startup.
- Choose Troubleshoot > Advanced options > Startup Settings > Restart.
- Boot into Safe mode and run the DDU utility.
- Lastly, try the GeForce download and installation again.
If the GeForce driver doesn’t download, the issue might also come from the fact that the NVIDIA driver is incompatible with your Windows version, so you should explore that possibility.
Finally, if you have any questions or suggestions, don’t forget to mention them in the comments section below, and we will get back to you.
Still having issues? Fix them with this tool:
SPONSORED
If the advices above haven’t solved your issue, your PC may experience deeper Windows problems. We recommend downloading this PC Repair tool (rated Great on TrustPilot.com) to easily address them. After installation, simply click the Start Scan button and then press on Repair All.
Was this page helpful?
Start a conversation
Share
Copy link
Newsletter
Software deals
Friday round-up
I agree with the Privacy Policy regarding my personal data
Official GeForce Drivers | NVIDIA
Automatic Driver Updates
GeForce Experience automatically notifies you of new NVIDIA driver releases.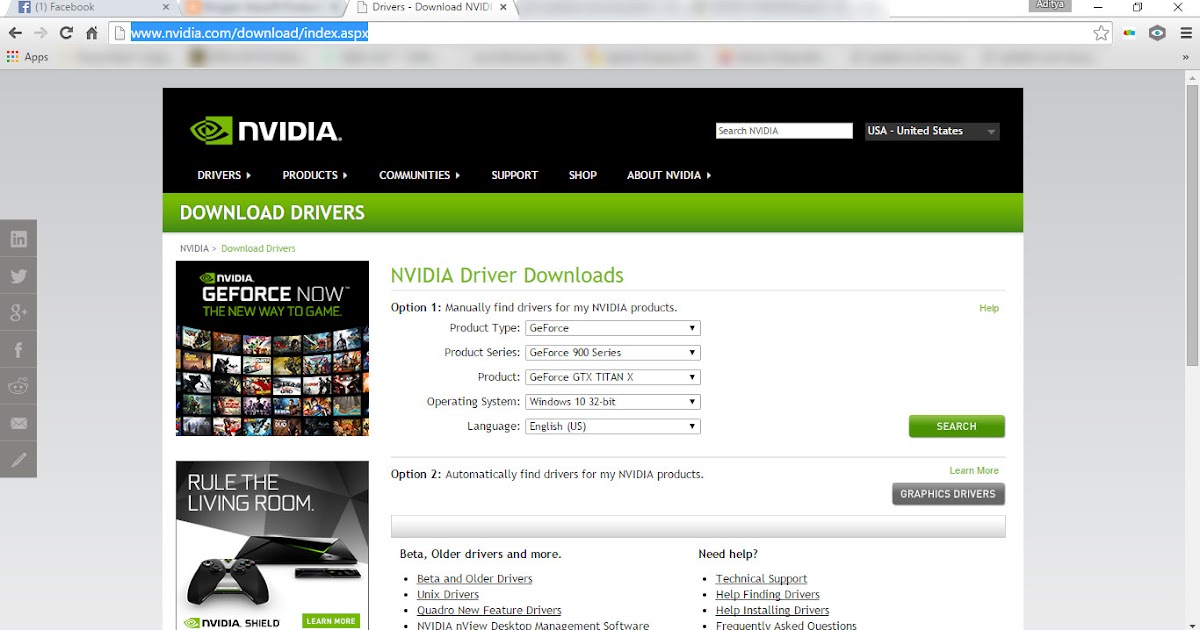 With the application, you can update the driver in one click.
Manual Driver Search
Find all GeForce drivers by providing information about your system.
Product Type:
dflt TITAN
Product Series:
dflt GeForce MX100 Series (Notebook)
Product:
GeForce MX150
Operating System:
dflt Windows 10 32-bit
Language:
dflt English (US)
Windows Driver Type:
DCHStandard
Download Type:
AllGame Ready DriverStudio Driver
Driver Forum
Questions about drivers? Discuss them with other GeForce users on our forum.
Go to the forum (in English) >
Game Ready Drivers & Studio Drivers
NVIDIA drivers are specifically designed to provide the best experience for both modern gaming and graphics applications. Gamers looking to support new games, patches, and additional content from day one should opt for Game Ready drivers.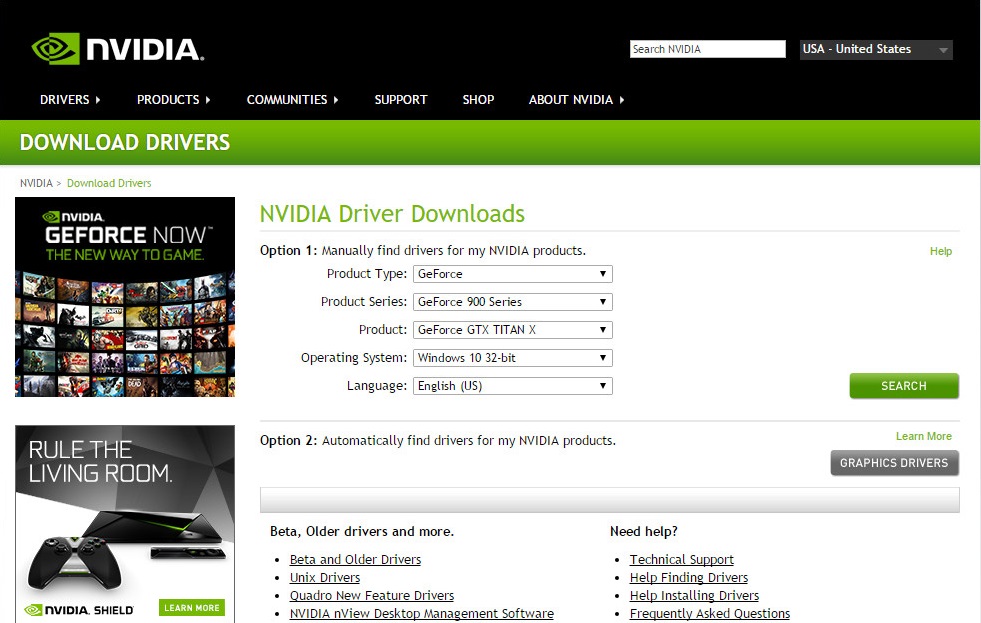 If reliability is your number one concern for your graphics work, including video editing, animation, photography, graphic design, and live production, Studio drivers are your best bet. Working and playing? Don’t worry, any driver will keep your graphics running and great gaming experience.
How to determine the series and model of the video card
If the NVIDIA driver is not installed:
Open Device Manager in the Windows Control Panel
Select Display adapters
Below will be the series and model of your video card
If the driver is installed right: 9005 9005 click on the desktop and select NVIDIA Control Panel
Click on «System Information» in the lower left corner of the window
On the «Display» tab, the type of video card is listed in the «Components» column
Windows Driver Type
«Standard» packages are those that do not require the DCH driver components.
«DCH» ( D eclarative, C omponentized, H ardware Support Apps) refers to new packages preinstalled by OEMS implementing the Microsoft Universal Driver paradigm.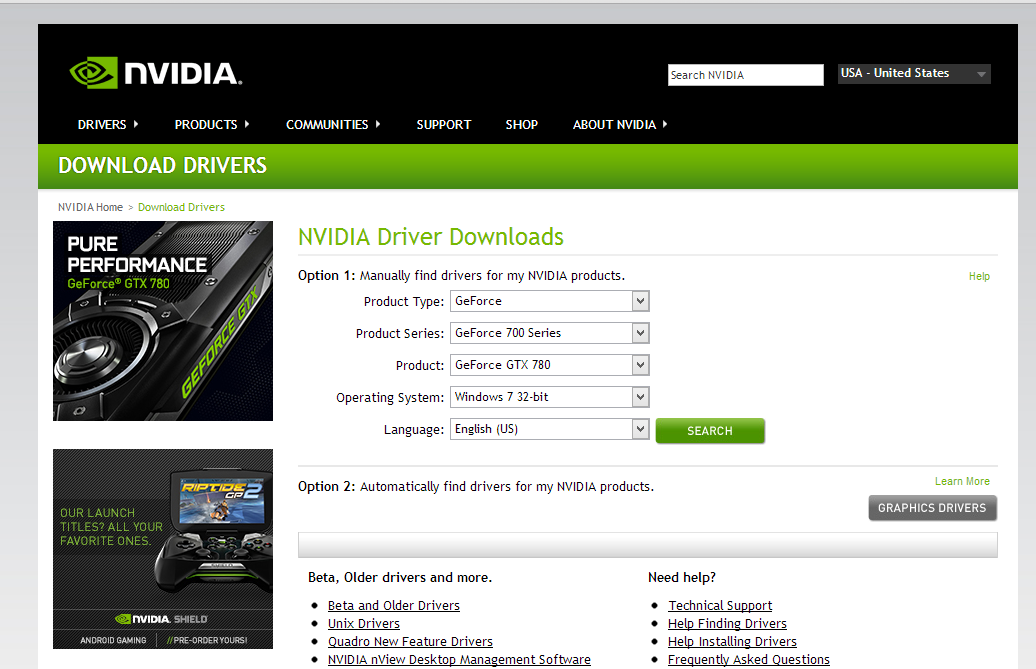
DCH drivers cannot be installed over a standard system, and Standard drivers cannot be installed over a DCH system.
To confirm the type of system you have, locate Driver Type under the System Information menu in the NVIDIA Control Panel.
For more information, visit What’s new in driver development
All, GRD, SD
All Shows all available drivers for the selected product.
«GRD» Game Ready drivers provide the best gaming experience for all popular games. Both Early Access games and all add-on content are thoroughly tested by the NVIDIA driver developers to optimize performance, stability, and functionality. These drivers are certified by Microsoft Windows Hardware Quality Labs (WHQL).
«SD» Studio drivers provide the best graphics experience for popular creative applications. NVIDIA conducts rigorous testing across all major applications to ensure the highest levels of performance, stability and functionality. These drivers are certified by Microsoft Windows Hardware Quality Labs (WHQL).
Archive drivers | All about NVIDIA GeForce
graphics cards
Another software package for NVIDIA GeForce video cards was released by the manufacturer on March 5, 2019. The driver with index 419.35 has received WHQL certification and supports graphics cards of desktop computers and laptops. This release offers improved gameplay in Tom Clancy’s The Division 2, Apex Legends, and Devil May Cry 5 projects. Along with this, the new release received […]
NVIDIA released the latest update to GeForce gaming drivers on December 12, 2018. The stable version received serial number 417.35 and a WHQL certificate of conformity. A key feature of this release was the support for DLSS anti-aliasing technology in Final Fantasy XV: Windows Edition. The new DLSS (Deep Learning Super-Sampling) anti-aliasing algorithm was received by the latest GeForce RTX series video cards. This smoothing method is a boolean […]
As you know, the release of the new game project Battlefield V is scheduled for November 20, 2018. In connection with the upcoming event, NVIDIA has updated the driver package for its GeForce series gaming graphics cards. Version 416.81 WHQL was published on November 8 and is specially optimized for the new game project. In addition to special optimizations, bugs found in previous versions have also been fixed […]
On October 11, 2018, NVIDIA published the next release of Game Ready drivers with the WHQL certificate and serial number 416.34. This release powers the GeForce GTX and RTX family of graphics cards and offers NVIDIA graphics card users the «best gaming experience.» The driver package has support for Windows 10 October 2018 Update. Improved Call of Duty: Black Ops 4, GRIP and SOULCALIBUR VI games. Fixed shortcomings of past […]
On September 10, NVIDIA announced the release of the next release of Game Ready WHQL drivers with serial number 399.24. The new release is designed for the GeForce family of graphics cards and offers their users «the best gaming experience.