How to Overclock Skylake 6600K
By Kevin ArrowsAugust 2, 2022
6 minutes read
Kevin is a certified Network Engineer
If you are thinking of buying one of the Intel Skylake CPUs, you are probably going to wonder, sooner or later, about its overclocking potential. That is nothing unusual since we are talking about powerful CPUs which go between $200 and $300, and for that price I am sure all of you are expecting ridiculously great performance. With this being said, it is without doubt that Intel’s 6th generation of processors has an amazing lineup, but today, we are going to be focusing solely on one of the mid-priced models – the i5 6600K. It is available for cca $250 on Amazon and provides great value for money when it comes to business tasks such as video and image editing, as well as demanding games that are CPU bound. In addition to this, it also features great overclocking potential if paired with on par equipment, which is something all of you PC enthusiasts will greatly appreciate. So, with this in mind, let’s see how can you overclock it in order to reach its full potential and get the last bit of juice out of this beast!
Basic info on today’s mission
If you don’t know already, that K at the end of its respective name represents the fact that its core clock multiplier is unlocked. In other words, this means that you can freely increase the core clock multiplier of the CPU in order to increase its overall performance, which is exactly what we are going to be showing you today. Keep in mind that we are not going to go easy on it – we will teach you how to pair your i5 with some of the best price / performance parts to see how far can it really go. Our desired core clock is going to be around 4.7Ghz which is shocking compared to its stock 3.5GHz ( base clock ) and 3.9 ( with Intel’s Turbo Boost technology ). Hopefully, with our instructions you will be able to reach those heights and get that extra bit of free power from your CPU. So, without further adue, let’s jump straight to work.
Preferred components for overclocking i5 6600K
First thing’s first – for the base of your build you need to look for a proper motherboard that supports overclocking. The new Skylake Z170 chipset is a must since it is the only chipset that currently supports core clock multiplier overclocking with Skylake CPUs. With this being said, you will find a huge amount of decent Z170 motherboards on Amazon, but for the sake of doing this the best way, we sincerely recommend the Asus ROG Maximus VIII Hero motherboard which can be considered a wet dream for OC enthusiasts, not only because of its amazing overclocking capabilities but because of its relatively cheap price which goes around $200.
Pair it up with 16 gigs of decent DDR4 RAM cards and you will be all set up. Once again for the sake of doing this the best way we recommend you opt for the Adata XPG DDR4 memory which runs at 2400Mhz.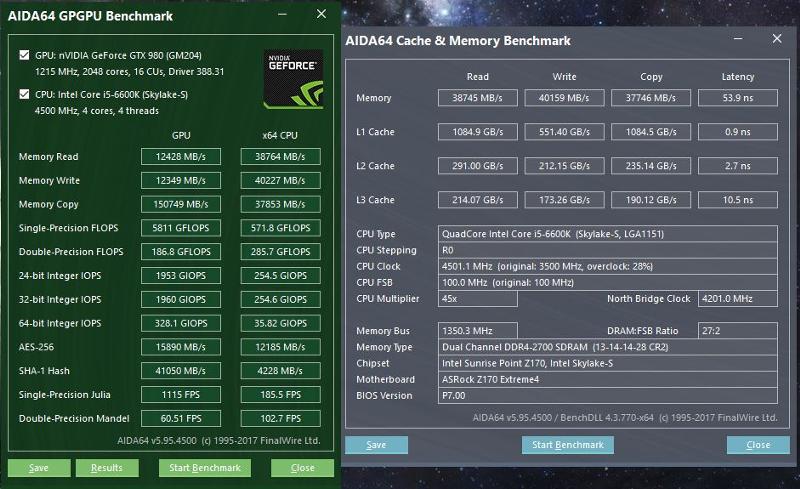 This will ensure that you have a proper base for your new gaming rig.
Now, if you are up for some serious overclocking you will need to invest in a proper cooling system for your CPU and you cannot go wrong with Corsair’s Hydro h200i liquid CPU cooler. It shows great temperature drops in a variety of benchmarks which makes it the best price / performance CPU cooler under $100.
For your GPU, you cannot go wrong with the nVidia GTX 970 which provides amazing performance for a reasonable price. If you are one of those people who are into new stuff, you can also wait a couple more months to get your hands on the brand new 1080 or 1070. They both promise twice the performance of 980s and even the beast itself – Titan X.
And finally, you will need a juicy PSU that will be able to handle all of the above mentioned components without worrying about damaging any of them. For this occasion we recommend the CoolerMaster’s V650 semi modular PSU which is rated as 80 plus gold efficiency and marketed as “6th Gen Skylake Ready”.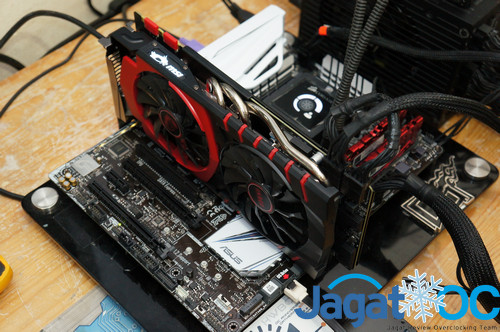
Now that we have went through all of the desired components, now comes the easy part – the actual overclocking. Truth be told, overcloking can get tricky from time to time, especially if you don’t know what you are doing and / or you do not have a proper overclocking setup; but if your rig is similar to the one we listed above you will have no problems with overclocking it.
Let’s get ready tooooo overclock!!!
Now that you have everything set up nicely, start off by turning your rig on and, depending on your motherboard’s manufacturer, spam press F8, F9 or Delete until you get into the BIOS.
If you have the Asus ROG Maximus VIII Hero this is how your bios will look like once you enter it:
Now, after you have entered the BIOS you will want to navigate to the Advanced Settings Tab, Overclocking Settings Tab or something like that, depending on your motherboard. In this case, if you are using the Maximus VIII Hero you will want to navigate to the Extreme Tweaker Tab where you will be able to find all the required settings.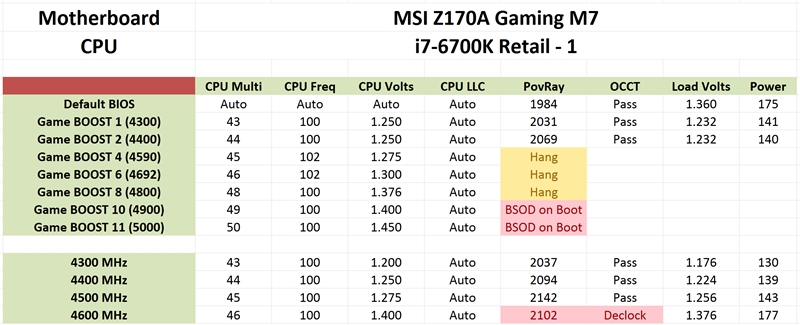
Now keep in mind that there are 2 ways of overclocking your CPU:
- Increasing the base clock of your CPU ( also known as BCLK) – this method can be quite dangerous if you do not know what you are doing, but it is available on virtually all setups.
- Increasing the multiplier of your CPU( also known as Ratio ) – this method is not nearly as dangerous as BCLK OCing because all it does is increase the CPUs multiplier; it does not temper with the base clocks of your CPU.
Today, we will be focusing on the multiplier OCing because it is the easiest, safest and most effective way of overclocking. With this being said, your job is pretty straightforward from here – simply increase the multiplier / ratio to your desired number. Your i5 6600K’s default multiplier is 35 and you can go ahead and increase it to 42. After you do this, you will need to scroll down to the voltage settings and give it a slight increase there as well. In order for a 6600K to run @4.2GHz you can set the voltage at around 1. 250 – 1.260. This will give your CPU a boost of 7% meaning it will run on 4.2GHz … but this is not nearly enough to satisfy anyone’s needs because virtually all i5 6600K CPUs can run on 4.2GHz without having to tweak the voltage settings much or worry about their safety.
With this being said, if you have the setup listed above you can go ahead and raise the multiplier to 46 which will squeeze a bit more juice out of it. Keep in mind that, after raising the multiplier, you should also raise the voltage to around 1.350 so it can run properly without crashing.
If this is not enough for you and you want to go all crazy with it, with the build above you can even go 47+ which will give you more than 10% performance increase.
Keep in mind that you should stress test your CPU after each succesfull OC boot. Make sure you do this with benchmarking tools such as GeekBench, PCMark, CineBench etc. This will put your PC under great load which can result in occasional crashes if your CPU cannot deal with your OC settings. If this happens, simply reboot your PC, enter the BIOS again and decrease the multiplier and voltage settings and do the stress test again. In other words – keep doing the stress test until your CPU is able to withstand it without crashing.
Now that you have did your best with the overclocking, you can do some gaming benchmarks as well, just to make sure everything is working properly.
With the build mentioned above and with the CPU increased to cca 4.7Ghz, you will have no problem with running games such as The Witcher 3, Metal Gear Solid V, Battlefield 4 with Ultra settings on 1080p ( even 1440p if you are lucky enough ) with constant 60FPS.
Well, ladies and gentlemen, boys and girls, we have come to the end of our overclocking guide. We hope that we were easy to follow and interesting at the same time. We also hope that you found lots of useful information in this guide and that you managed to get the last drops of juice from your CPU by overcloking it to its limits and also that it increased the performance of your rig whether for gaming or video / image editing. Until next time, stay safe and keep those multipliers as high as you can!
ABOUT THE AUTHOR
Overclocking my i5 6600k
2016-10-06, 10:03 AM
#1
Overclocking my i5 6600k
Hey!
Recently I got a new computer with the following components:
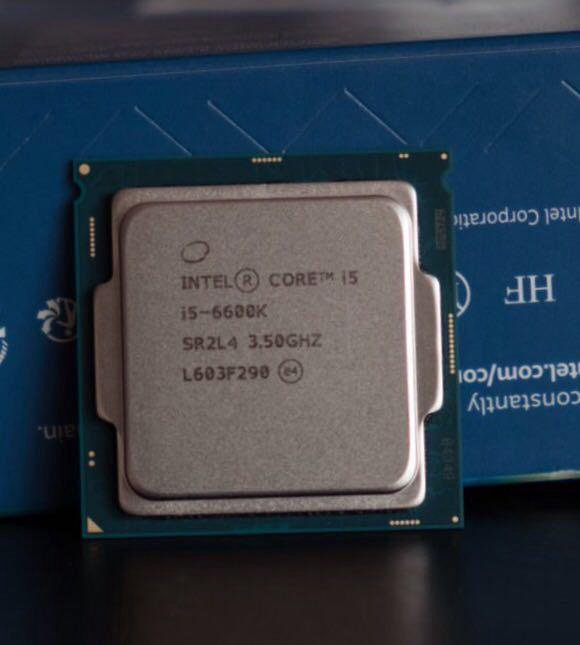
i5 6600K
Asus Z170-A
Corsair 16GB (2x8GB) DDR4 2666Mhz Vengeance
Phanteks Enthoo Pro M
be quiet! Pure Rock
Corsair RM550x 550Wso I want to OC my cpu, but I don’t want to risk going overboard or not getting the correct settings so I’m asking you for help. I don’t really need a max OC, just a light-medium OC.
I suppose I’d need some CPU monitoring program and a way to stress test the CPU, if you know of any reliable softwares then that’d help as well!
Thanks in advance!
Reply With Quote
2016-10-06, 10:05 AM
#2
Asus should have an auto clocking tool in the BIOS afaik.
Usually it asks what sort of cooling device you have and then it adjusts the core clock + voltage
Reply With Quote
2016-10-06, 10:10 AM
#3
I’m on the same boat, not much experience with OCing.
I used my mobo’s auto overclock and went with the 4.2GHz option just to test and be safe.
It all went fine until my WoW and sometimes even my desktop would freeze for 1-2 seconds from time to time. Annoying.I’ve been warned before that those auto OC options are usually crap and they don’t do a stable overclock but didn’t want to believe.
Educate yourself or ask an expert/good friend to do it for best/most stable results.
Intel i7-10700k | ASUS ROG STRIX Z490-F GAMING
ASUS ROG STRIX RTX 2080 Ti | 2x 8GB Corsair Vengeance LPX DDR4 2400MhzA-Data SSD SP920 256GB | Seagate 1TB 7200rpm | NZXT Kraken x62
Fractal Design Define R6 TG | be quiet! Dark Power Pro 11 650W | Asus ROG Swift PG279Q
Razer: Blackwidow Elite | Basilisk Ultimate | Nari Ultimate| Firefly | NZXT Hue+
Reply With Quote
2016-10-06, 10:13 AM
#4
Originally Posted by Theprejudice
Asus should have an auto clocking tool in the BIOS afaik.
Usually it asks what sort of cooling device you have and then it adjusts the core clock + voltage
Yea I noticed that one. But it put a different clock on each CPU core and I wasn’t sure if that was OK. Anyways, I enabled that option and then changed the core multiplier to 43 to get 4300Mhz on my CPU (i think), and with Real Temp my CPU temperatures is sitting around 35-45 degrees with World of Warcraft on. I’m not sure how reliable Real Temp is and if the temperatures is ok. I’m just sitting in dalaran so it’s not during raiding or anything like that so during a stress test when load is 100% it might increase further.
Reply With Quote
2016-10-06, 10:20 AM
#5
Originally Posted by Sheeya
Yea I noticed that one. But it put a different clock on each CPU core and I wasn’t sure if that was OK. Anyways, I enabled that option and then changed the core multiplier to 43 to get 4300Mhz on my CPU (i think), and with Real Temp my CPU temperatures is sitting around 35-45 degrees with World of Warcraft on.
I’m not sure how reliable Real Temp is and if the temperatures is ok. I’m just sitting in dalaran so it’s not during raiding or anything like that so during a stress test when load is 100% it might increase further.
Run something like Prime95 to stress test it, although the temps seems fine. To check clocks use a tool like CPU Z
Reply With Quote
2016-10-06, 10:36 AM
#6
Originally Posted by Theprejudice
Run something like Prime95 to stress test it, although the temps seems fine. To check clocks use a tool like CPU Z
During stress test temperatures were at ~75 degrees celsius max. Because of the automatic OC option enabled it overwrote my 43 multiplier so it’s currently at 4.2Ghz according to CPU-Z.
How much temperatures does an OCed CPU usually reach during a stress test when it’s considered acceptable?
And since Azurenys said the automatic OC option is pretty shit I should probably disable it and do it manually.
What speed do you think is safe, and what should I do with the voltage options?
There also seems to be several different voltage options, could you tell me specifically which one is for the CPU, what it’s called, so I don’t accidentally change the voltage for something else?
Thanks in advance.
Reply With Quote
2016-10-06, 10:42 AM
#7
Hi there,
(I do not recommend automatic overclocks or software overclocks for the CPU)
Since you have the K version of the CPU it means you can change the multiplier on the bios.
I dont know what CPU cooler you have, but if you are on AIR cooling then you must be careful when playing with voltages because more voltage equals to more heat.
Overclocking a CPU is a silicon lottery thing. it means you can OC your CPU by lets say 800mhz and dont need to touch the VCORE (voltage) and if you’re out of luck you can only OC it only 200mhz without touching the VCORE (voltage).
Use the software AIDA64 to stress test the processor and see if it is stable at that speed. keep in mind that this is a stress test and never in real world applications your processor will be stressed like this specially when you’re just playing games. Use also the software Hardware monitor to keep track of your CPU temperatures. (i will link the webpage for both software in the bottom)
With that said, i would recommend you to go to your bios and only play with the multiplier for now. I think your processor has a base clock of 3.5ghz since it is the i5, so this means your default multiplier is 35x. Start by changing it to lets say 38x. this will result in your processor to get to 3.8ghz.
Once you do the stress test for lets say 30 minutes and if the computer doesn’t Blue screen while doing it, it means your OC is «stable» (30 minutes is not enough to be complete sure about this). Dont be afraid of BSOD (blue screen) they just mean your OC is not stable at this point and because ur not changing the VCORE there’s no risk to fry your CPU.
After the 1st test, you may want to go a bit further and if the previous multiplier test was stable change the multiplier to 39x and then 40x (3.9ghz and 4Ghz) or even higher if the stress tests are successful for every new speed you’re trying.
When the computer BSOD at any of this multiplier values, it means it reached his limit to run those speeds at the default VCORE value. To get this stable, you need to increase your VCORE with increments of 0.025v but i will only recommend this if you run your CPU with a water cooling loop or a good after market air cooler.
In terms of temperatures, never go behond 80C. Actually if you go behond 75 its already time to start to either reduce the vcore value because the voltage is generating too much heat or change the cooling system to better one (something like the corsair h80 or h200i).Software websites:
Aida64: aida64 . com / downloads
Hardware Monitor: cpuid . com /softwares / hwmonitor.htmlYou don’t need the PRO version in any of this software so don’t bother installing the trials.
Please come back here and let me know if you still have doubts about this.
Good luck!
Last edited by mmoc67c31f3128; 2016-10-06 at 10:50 AM.
Reply With Quote
2016-10-06, 10:46 AM
#8
Originally Posted by gameshowtime
Hi there,
Since you have the K version of the CPU it means you can change the multiplier on the bios.
I dont know what CPU cooler you have, but if you are on AIR cooling then you must be careful when playing with voltages because more voltage equals to more heat.
Overclocking a CPU is a silicon lottery thing. it means you can OC your CPU by lets say 800mhz and dont need to touch the VCORE (voltage) and if you’re out of luck you can only OC it only 200mhz without touching the VCORE (voltage).Use the software AIDA64 to stress test the processor and see if it is stable at that speed.
keep in mind that this is a stress test and never in real world applications your processor will be stressed like this specially when you’re just playing games. Use also the software Hardware monitor to keep track of your CPU temperatures. (i will link the webpage for both software in the bottom)
With that said, i would recommend you to go to your bios and only play with the multiplier for now. I think your processor has a base clock of 3.5ghz since it is the i5, so this means your default multiplier is 35x. Start by changing it to lets say 38x. this will result in your processor to get to 3.8ghz.
Once you do the stress test for lets say 30 minutes and if the computer doesn’t Blue screen while doing it, it means your OC is «stable» (30 minutes is not enough to be complete sure about this). Dont be afraid of BSOD (blue screen) they just mean your OC is not stable at this point and because ur not changing the VCORE there’s no risk to fry your CPU.
After the 1st test, you may wanto to go a bit further if it was stable so change multiplier to 39x and then 40x (3.9ghz and 4Ghz) or even higher if the stress tests are successful for every new speed you’re trying.
When the computer BSOD at any of this multiplier values, it means it reached his limit to run those speeds at the default VCORE value. To get this stable, you need to increase your VCORE with increments of 0.025v but i will only recommend this if you run your CPU with a water cooling loop or a good after market air cooler.
In terms of temperatures, never go behond 80C. Actually if you go behond 75 its already time to start to either reduce the vcore value because the voltage is generating too much heat or change the cooling system to better one (something like the corsair h80 or h200i).Software websites:
Aida64: aida64 . com / downloads
Hardware Monitor: cpuid . com /softwares / hwmonitor.htmlYou don’t need the PRO version in any of this software so don’t bother installing the trials.
Please come back here and let me know if you still have doubts about this.
Good luck!
Never go beyond 80C during stress test or just while playing?
edit: my cooler is «be quiet! Pure Rock»
Reply With Quote
2016-10-06, 11:40 AM
#9
Originally Posted by Sheeya
Never go beyond 80C during stress test or just while playing?
edit: my cooler is «be quiet! Pure Rock»
dont go behond 80C at any given time! but there’s a chance u get to 80C faster using something like AIDA 64 which is the stress testing software than you will while playing a game. AIDA64 really stresses the processor to be used at 100% (all instructions and what not). Even if while playing a game you dont reach 80C but on AIDA u do, i always recommend to follow AIDA64 values and make sure it is stable with it under the correct temps values. If you’re OK with the values in AIDA64 you will never have a problem while gaming or doing whatever in your PC.
your PC will always be ready to whatever you throw at it.
To be honest with you, OC your CPU for gaming you wont get any BIG advantage in terms of FPS, but what i do recommend is since we bought the CPU and if you can extend the speed for it without touching the VCORE, why not? specially if you’re lucky with the silicone lottery and you can lets say push it to 4.2ghz without touching the voltage
edit: sorry for all the bad English, when i start reading what i wrote i really feel bad, hahaha. i hope you understand it though.
— — — Updated — — —
Let us know your results. Im curious about it
I had mine running at 4.7GHZ with 1.3v and some alterations for the CPU ring as well. It’s an old i7 4770K. I have a custom water loop so i was able to push the voltage. with aida running was getting 68C as max temp. Now i have it running at 4GHz without touch the vcore because i have no need to a 4.7ghz OC… and since i play WoW for so many hours, i want to keep my electrical bill as down as possible.
but then again, i have my 2 780 graphic cards running at 1.2ghz with temps of 55C (both on the custom waterloop as well) while playing
Last edited by mmoc67c31f3128; 2016-10-06 at 11:28 AM.
Reply With Quote
2016-10-06, 11:52 AM
#10
Originally Posted by gameshowtime
dont go behond 80C at any given time! but there’s a chance u get to 80C faster using something like AIDA 64 which is the stress testing software than you will while playing a game. AIDA64 really stresses the processor to be used at 100% (all instructions and what not). Even if while playing a game you dont reach 80C but on AIDA u do, i always recommend to follow AIDA64 values and make sure it is stable with it under the correct temps values. If you’re OK with the values in AIDA64 you will never have a problem while gaming or doing whatever in your PC.
your PC will always be ready to whatever you throw at it.
To be honest with you, OC your CPU for gaming you wont get any BIG advantage in terms of FPS, but what i do recommend is since we bought the CPU and if you can extend the speed for it without touching the VCORE, why not? specially if you’re lucky with the silicone lottery and you can lets say push it to 4.2ghz without touching the voltage
edit: sorry for all the bad English, when i start reading what i wrote i really feel bad, hahaha. i hope you understand it though.
— — — Updated — — —
Let us know your results. Im curious about it
I had mine running at 4.7GHZ with 1.3v and some alterations for the CPU ring as well. It’s an old i7 4770K. I have a custom water loop so i was able to push the voltage. with aida running was getting 68C as max temp. Now i have it running at 4GHz without touch the vcore because i have no need to a 4.7ghz OC… and since i play WoW for so many hours, i want to keep my electrical bill as down as possible.
but then again, i have my 2 780 graphic cards running at 1.2ghz with temps of 55C (both on the custom waterloop as well) while playing
Keeping it at 4.0Ghz for now, will see if I turn it up more later.
Reply With Quote
2016-10-06, 11:59 AM
#11
I also have the 6600k, absolute belter of a chip.
Soon as I got it, I knocked the multiplier up to 45 and didnt look back. I did however run a custom loop at the time, Currently on a h200i GTX and temps rarely hit above 40°c
Reply With Quote
2016-10-06, 12:17 PM
#12
Originally Posted by Sigma
I also have the 6600k, absolute belter of a chip.
Soon as I got it, I knocked the multiplier up to 45 and didnt look back. I did however run a custom loop at the time, Currently on a h200i GTX and temps rarely hit above 40°cIf you had ur CPU overclocked with an increased OC of 1000mhz (since the base clock for that CPU is 3.
5ghz) without touching the VCORE, i can tell you that you are 1 in a million (if not more) lucky bastard. I do even find this hard to believe to be honest with you!
You get 40C in iddle? must be
Reply With Quote
2016-10-06, 12:19 PM
#13
Originally Posted by gameshowtime
If you had ur CPU overclocked with an increased OC of 1000mhz (since the base clock for that CPU is 3.5ghz) without touching the VCORE, i can tell you that you are 1 in a million (if not more) lucky bastard. I do even find this hard to believe to be honest with you!
You get 40C in iddle? must beMotherboards adjust the voltage up with clock speed, so he isnt on «stock volts».
Reply With Quote
2016-10-06, 12:49 PM
#14
Originally Posted by gameshowtime
If you had ur CPU overclocked with an increased OC of 1000mhz (since the base clock for that CPU is 3.
5ghz) without touching the VCORE, i can tell you that you are 1 in a million (if not more) lucky bastard. I do even find this hard to believe to be honest with you!
You get 40C in iddle? must beMax temp after 12 hours, 51°c. Cpu Voltage 1.284. Didnt notice that the mobo adjusted the voltage :S
edit — just checked the CPU-Z result.Current Rank 4 on MMOC OC leaderboards. Here
Last edited by mmocd8f86ed6f0; 2016-10-06 at 12:59 PM.
Reply With Quote
2016-10-06, 01:12 PM
#15
your VCORE on the motherboard voltage in case you havent noticed is 1.7v… this is extremely high mate. you should consider have a look at this. Its only my advise here!
Last edited by mmoc67c31f3128; 2016-10-06 at 01:17 PM.
Reply With Quote
2016-10-06, 01:43 PM
#16
Why can’t people just use google and look for some guides on how to overclock a CPU.
.. You will get a lot more info than someone just saying stuff here. That said, overclocking is quite simple.
Here is a guide, http://www.overclock.net/t/1570313/s…ith-statistics
Reply With Quote
2016-10-06, 01:56 PM
#17
I was just trying to help
Reply With Quote
2016-10-12, 11:08 PM
#18
Interesting thread for me. I got a i5 4690k and havent overclocked yet. Perhaps i will do it because i can
I already got an scyte muguen4 aftermarket cooler, i think he will get it.
One question… does overclocking shorten the lifetime of my cpu?
Reply With Quote
2016-10-12, 11:10 PM
#19
Originally Posted by axiom
One question… does overclocking shorten the lifetime of my cpu?
People have been running heavily OCed 2500ks for over 5 years and older CPUs for longer than that.
I mean, yeah, it may shorten the life some, but were talking about shortening the life from 30 years to 20 years. By the time it would die, you’ll likely have replaced it anyway.
Reply With Quote
2016-10-13, 04:46 PM
#20
Originally Posted by Butthurt Beluga
I’m not sure there’s anything definitive out there.. there are people who have a stable OC on CPUs for a decade or more, running 24/7.
It’s hard to determine the longevity of silicon and then also the detrimental affects of OC’ing, but I think it is safe to say that pumping more voltage than is recommended will probably reduce the lifespan of your CPU — by how much is unknown.There’s also undervolting, which is similar to OC’ing in a way, where one lowers the voltage on their CPU/GPU to reduce energy/heat but retain performance.
I’d imagine there’s probably less chances for things to go wrong in that scenario.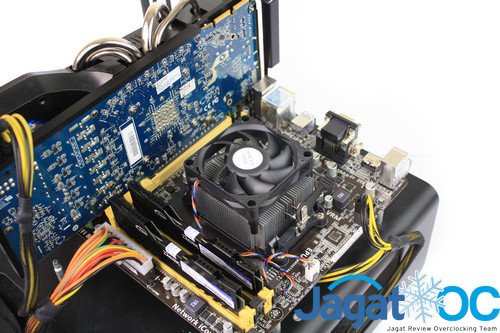
I’ve OC’d all my parts and I’ve honestly never had a CPU or GPU fail and at this point I have owned many of each.
Thx for the info. I am very interested in overclocking )
— — — Updated — — —
Originally Posted by Lathais
People have been running heavily OCed 2500ks for over 5 years and older CPUs for longer than that. I mean, yeah, it may shorten the life some, but were talking about shortening the life from 30 years to 20 years. By the time it would die, you’ll likely have replaced it anyway.
Thx for the information
Reply With Quote
MSI Russia
{{blogList.tagContent}}
{{blogList.blogTitle}}
By {{blogList.blogAuthor}}
|
{{bloglist.date}}
Want to overclock your brand new Skylake processor?We compared overclocking results with different cooling systems — air, liquid and liquid nitrogen to find the best settings for 24/7 overclocking.
|
Overclocking Skylake: The Basics
After Intel decided to move the FIVR (Fully Integrated Voltage Regulator) integrated into the processor to the motherboard, thus giving the manufacturer of the latter the opportunity to fully develop the VRM module, overclocking the new i7 processors -6700K and i5-6600K on the Z170 platform has become a fairy tale. Indeed? Motherboard overclocking is now more important than ever, so we chose wisely. Let’s find out why 😉
The Z170 has amazing base clock flexibility, but when it comes to overclocking for 24/7 OC, we focused on the simplest. We raised the core voltage to a reasonable value, staying at the operating temperature limit that the cooling system determined (we recommend not to go above 87°C / 1.48V at full load), gradually changing the multiplier, until a blue screen or other characteristic sign of instability appeared. Sounds pretty familiar from overclocking Sandy Bridge processors doesn’t it? Let’s see if the results are the same or better. .
.
For our 24/7 overclocking experiment, we used the following hardware:
|
— Motherboard: MSI Z170A GAMING M7 Cooling system: Stability test: |
|
Overclocking results Z170 24/7 : Air cooled
Let’s start with air cooling. For this purpose, Cooler Master Hyper TX3 EVO was chosen instead of the boxed Intel cooler.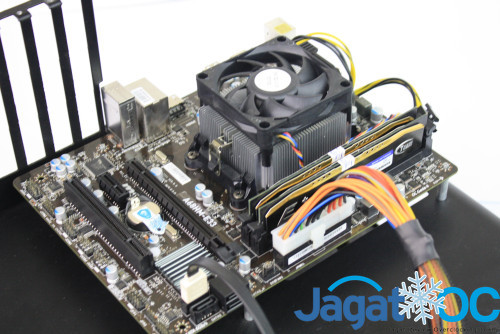 In order to stay in the safe area, the maximum voltage has been set to 1.35V. The temperature measurement showed that we made the right choice of voltage, the temperature quickly reached 83°C.
Thus, the value of vCore voltage equal to 1.35V turned out to be optimal for air cooling systems. Let’s try to find out how things are with the search for the most stable multiplier. As most overclockers would expect, hitting 4500MHz for the 6700K looks like a no-brainer.
Since unstable behavior starts around 4800 MHz, we stopped at 4700 MHz.
Our tested processor scored 1355 points in Intel XTU and 11.22 points in Cinbench (no OS optimization/benchmark). Not a bad start, especially considering the fact that we used conventional air cooling.
Z170 24/7 Overclocking Results: Liquid Cooling
Initial results are very promising. The closed, liquid cooling system of the Corsair Hydro Series h200i is one of the most popular liquid water coolers. Let’s try to squeeze some more performance out of our 6700K processor. This time we raised the vCore voltage to 1.44V to allow the processor to increase the frequency even more. However, it should be understood that there is a certain frequency / voltage ratio at which the processor stops overclocking.
At a voltage of 1.44V, the processor temperature was 81°C.
Since we were confident that we could reach 4800MHz with ease, we immediately jumped to 4900MHz. Working at this frequency did not reveal any problems, so we decided to raise the frequency even higher, to 5.0 GHz, but then a surprise awaited us. The third attempt to pass XTU and Cinebench did not complete successfully. At 4.91GHz, we were able to get 1383 points in Intel XTU and 11.80 points in Cinbench (without OS optimization/benchmark).
We can say that we have reached the frequency of 5.0 GHz on the Skylake processor. It remains to obtain the final result at temperatures below zero.
Z170 24/7 Overclocking Results: Liquid Nitrogen Cooling
|
The sky is the limit with the LittleDevil LD PC-V2 cooling system. |
 After carefully isolating the motherboard around the CPU socket to prevent possible damage to the motherboard caused by condensation, we can start overclocking.
 Since we are interested in settings for stable operation in 24/7 mode and since the 6700K processor is made using 14nm technology, a maximum voltage of 1.5V was used. When the voltage was raised from 1.35V to 1.44V, no significant increase was observed. Increasing the voltage by 6mV did not lead to the desired results for the 6700K, but it looks like we were wrong. At -45.5°C it’s time to see what else the 6700K can do.
We immediately go to the frequency of 5.1GHz and observe stability. Not bad! We go further and observe a complete failure at a frequency of 5.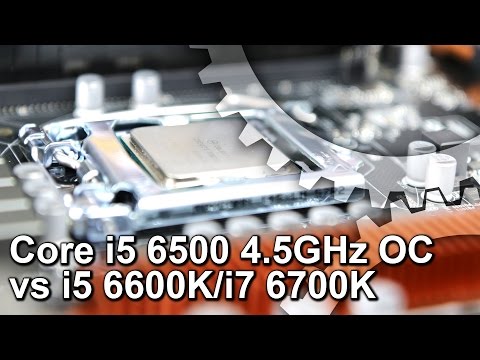 4 GHz. Strangely, at 5.3GHz, the processor demonstrated amazing stability and managed to score 1411 points in Intel XTU and 12.85 points in Cinbench (without OS optimization / benchmark). Something in the XTU prevented it from rising above 1411, since we observed the same result at a frequency of 5.1GHz. Cinebench however showed a performance increase up to 5.3GHz.
Here’s what we get when overclocking 24/7 on the new Z170 platform using air, liquid and sub-zero cooling systems.
Looking at the results, we can say that the overclocking capabilities are significantly better compared to Haswell and it is reasonable to expect quite a lot of stable results 24/7 for 5.0GHz with a liquid cooling system. Because extreme cooling systems are significantly more expensive and exotic, a decent liquid cooling system is recommended for everyday Skylake overclocking.
|
Processor frequency (OC) |
Cooling type |
CPU core voltage under load |
Maximum temperature |
|
4. |
Air cooled |
1.35v |
87°C |
|
4.7GHz — 4.9GHz (17% OC) |
Liquid cooling |
1.44v |
83°C |
|
4.9GHz — 5.3GHz (26% OC) |
Liquid nitrogen cooling |
1.5v |
15°C |
 5GHz — 4.7GHz (12% OC)
 It’s time to show us your results!
how to overclock? — Tips from TehnObzor
Author Alexander Shaman Read 8 min Published Updated
Abstract
- How to overclock an Intel processor?
- How to overclock an Intel processor from the system level (Intel XTU)
- Overclocking an Intel Core i5 processor from a UEFI motherboard
- How to check the stability of an overclocked processor?
- What will we get after overclocking the processor?
- Cinebench R20 Rendering
- Intel Core Processor Overclocking Video — Video
The processor is one of the elements that have the greatest impact on computer performance — overclocking it will lead to increased performance not only in programs, but also in games. Overclocking an Intel processor is based on simple truths — the higher the clock speed, the higher the performance.
In this article, I will not delve into overclocking other elements (for example, uncore). In the case of Intel processors, overclocking is officially only possible for models with an unlocked multiplier (note K line, Core i5-6600K or Core i9-10900KF). In addition, you must use a motherboard with a Z-series chipset (such as Z370, Z390, or Z490).
See also: What is computer overclocking? We figure out how to overclock a computer yourself
How to overclock an Intel processor?
I’ll use the latest generation Core i5-10600K as an example, which is equipped with 6 cores with 12 threads running at 4.1 GHz (in Turbo Boost mode, they can be accelerated to 4.8 GHz). However, the principle will be very similar for other chipset models.
How to overclock an Intel processor from a system level (Intel XTU)
Before starting overclocking, I recommend checking the standard system performance in a test (for example, Cinebench R20) or in a game.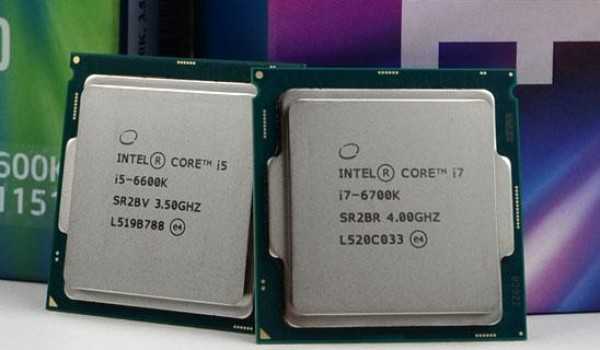 After that, it will be easier to see the performance gain.
What software is needed to overclock an intel processor? The easiest way to do this is from the Intel Extreme Tuning Utility (Intel XTU) application, a useful tool where you can find all the most important information about the processor. The software is designed intuitively, so it should be understandable even to less experienced users.
All the most important settings can be found on the Advanced settings tab.
Let’s start by changing the Ratio Multipler — you can set the same value for all cores, or for each core independently. First we increase the multiplier by 1 or 2 times (by 100 or 200 MHz). If the value is stable, we go back and increase it by another 1x (thus getting the largest stable value).
More advanced users may try to increase the processor multiplier, but decrease it by the specified value for applications that use the AVX Ratio offset. This technology allows you to speed up some operations (for example, simulation, analysis, simulation of artificial intelligence / machine learning problems), but entails a large load on the processor, so the combination with lowering the multiplier often leads to better timing and higher performance.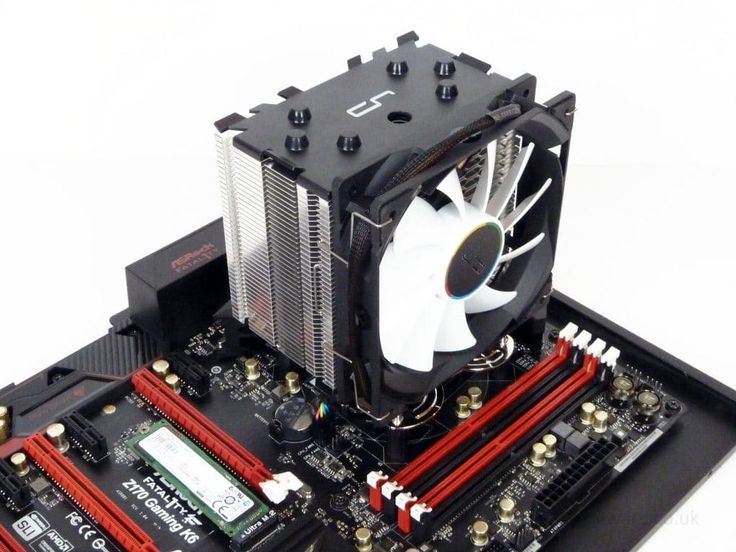
Example: A processor with a multiplier of 49x will run at 4900 MHz (49x 100 MHz). When the AVX offset is set to 1x, it will be 4900 MHz in most applications, but for applications using the AVX instruction, it will drop to 4800 MHz (by 1x 100 MHz).
Just increasing the clock speed is not enough, because the processor may have problems with stable operation. In this situation, it is necessary to increase the supply voltage (Core Voltage). However, it is worth remembering that higher voltage leads to increased power consumption and higher processor temperatures, so do not overdo it.
What voltage should I set? It’s best to start at 1.25V and increase by 0.05V as needed. For the Core 6000, 7000, 8000, 9000, and 10000 models, the maximum safe value is 1.4V, but I don’t recommend going over 1.35V , especially if you don’t have efficient cooling, such as a good cooler with 120mm or 140mm fans.
An overclocked processor will be limited by the power limits imposed by the motherboard.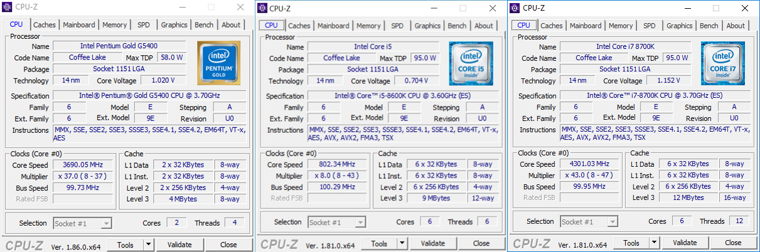 In such a situation, it is necessary to remove the restrictions (Turbo Boost Short Power Max and Turbo Boost Power Max) — move both sliders as far as possible to the right to the value «Unlimited».
After increasing the clock frequency, increasing the supply voltage and removing the restrictions, save the settings with the «Apply» button.
Overclocking an Intel Core i5 Processor from a UEFI Motherboard
Experienced users usually prefer to overclock their processor from a UEFI motherboard where there are more options. How to do it? The Gigabyte Z490 G will be an example of this — a mid-range model that supports the latest tenth-core generation systems. The process will look similar in other models of this manufacturer (in models of other companies, the location of the menu and the names of individual options may differ, but the procedure is similar).
Go to the Tweakers tab, where we find all the most important features.
Let’s start by changing the processor multiplier (CPU Clock Ratio) — as in Intel XTU, first by 1x or 2x. You can then go back and raise the multiplier by another 1x.
In case of stability problems, you can also try to reduce the application multiplier using the AVX (AVX Offset) instructions.
This can’t be done without increasing the supply voltage (CPU Vcore) — it’s safer to start at 1.25V and maybe increase it by 0.05V. However, we don’t recommend going over 1.4V (preferably 1.35 IN).
An overclocked processor will be limited by power limits, so you need to «loosen» them. UEFI Gigabyte gives you the ability to increase the limits (Package Power Limit1 — TDP (W) and Packege Power Limit2 (W)) up to 4090 W — these values \u200b\u200bshould not be a limit even for a heavily overclocked processor.
In case of stability problems, it is worth using the load line calibration function (found in the Advanced voltage settings menu > CPU / VRAM settings), which helps to reduce voltage drop, but leads to an increase in power consumption. For overclocking at home, I do not recommend exceeding the average level. Higher values may result in overvoltage and increased temperature/power consumption.
Save the settings (Save and Exit tab) and proceed to the stability test of the overclocked processor.
Intel processors with an unlocked multiplier are sold without cooling, so you need to buy a cooler for them. If you are going to overclock, then you should take care of a powerful cooler or cooling system.
How can I check the stability of an overclocked processor?
Before we can enjoy our overclocked processor, we need to check if the values we have set are stable. The easiest way is to use the Prime9 app5, which is used for intensive CPU usage.
Run Prime95, select the Small FFT test. At the same time, it is worth running the Intel XTU application, which will automatically detect overheating of the processor (thermal throttling control) or motherboard power supply (motherboard thermal throttling control).
The processor has reached 100 degrees Celsius, so the Intel XTU application has automatically notified that the processor is throttling (amber thermal throttling indicator)
The test is switched on for at least an hour (preferably several hours). In case of problems with the stability of the computer (for example, blue screen, restart, suspend), it will be necessary to reduce the multiplier or increase the supply voltage. But it is also worth monitoring the temperature of the processor (CPU) and the motherboard power supply (VRM MOS) — exceeding 100 degrees Celsius will lead to a decrease in clock pulses (the so-called throttling), so in this situation it is necessary to reduce the multiplier and supply voltage.
If there are no stability issues and the processor and board are at optimal operating temperatures, you can test for performance gains and then try increasing the clock/voltage even more.
What will we get after overclocking the processor?
Each processor has a different overclocking potential. I managed to overclock the Core i5-10600K to 5000 MHz (50×100 MHz) at a supply voltage of 1.35 V. How did this affect performance? I ran the following tests:
Cinebench R20 Rendering
In typical CPU applications, I got about 8% using all cores and about 5% using only one core. Those are pretty decent results.
The additional megahertz also resulted in a slight increase in the smoothness of the displayed image, in The Witcher 3 it was more noticeable, although slightly less in Hitman 2 (tests were carried out with a Gigabyte Radeon RX 5700 XT Gaming OC 8G video card).
However, it is worth noting that overclocking also affected the increase in power consumption — with a heavy load on the processor, the difference was 86 W, and in games — 50 W. Temperatures also increased from 70 to 90 degrees Celsius, although with good water cooling you can be calm.
Video instruction on overclocking the Intel Core processor — video