PS3 Hard Drive Recommendation and How to Replace PS3 Hard Drive
Do you know what hard drive is compatible with your PS3? How to replace or upgrade your PS3? If you don’t know those, you should read this post, in which MiniTool recommends you 4 suitable hard drives and shows you how to replace the PS3 hard drive.
PlayStation 3 is a home console developed by Sony Interactive Entertainment. It was released in 2006 and discontinued in 2017. So far, most players may have already bought more advanced gaming devices like PS4, but there are still some players continue to use PS3 due to nostalgia or other reasons.
Now, PS5 is coming on the way. Get more information from this post: Sony PlayStation PS5 New Features, Games and Specs.
Most hard drives shipped with the PS3 consoles have a small capacity and the largest capacity is 500GB, which means that the storage space will soon run out and you have to delete some games. To avoid that situation, you can upgrade your PS3 hard drive to a lager one or add a PS3 external hard drive. If so, this post is worth reading.
Best PS3 Internal Hard Drive
If you want to upgrade PS3 internal hard drive, you may wonder what hard drives are compatible with PS3. In practical terms, you just need to make sure that the new PS3 hard drive is a 2.5-inch 9.5mm SATA drive.
However, there are still some principles you need to adhere to when purchasing a PS3 hard drive:
Capacity: It seems that the max capacity supported by PS3 is 1TB. Although there are some people saying they have installed 2TB hard drive into PS3 successfully, there are also some people saying their PS3 can’t work after installing 2TB hard drive.
Interface: The interface equipped on the PS3 console is SATA I (150 MB/s). If you want to save money, you can buy a hard drive with SATA II (300 MB/s). However, if you want to use this drive on other devices after eliminating the PS3 completely, you should buy a hard drive with SATA III (600 MB/s).
Here I recommend two PS3 internal hard drives to you.
1. HGST Travelstar 7K1000 2.5-Inch Hard Drive 0J22423
Capacity: 1 TB
Cache: 32 MB
Rotational speed: 7,200 rpm
Interface: SATA III
Price: $68
HGST hard drives have always been known for their reliability. The HGST Travelstar drive 0J22423 has no exception. In addition, the high rotational speed brings you a smooth gaming experience on PS3.
2. Western Digital 500GB 2.5-Inch PS3/PS4 Hard Drive WD500LPCX
Capacity: 500 GB
Cache: 8 MB
Rotational speed: 5,400 rpm
Interface: SATA III
Warranty: 2 years
Price: $31.39
This drive is very cheap and can work with any PS3/PS4 Model. If 500 GB is enough for you, you can buy this drive. Its rotational speed is not low and can also bring you a smooth gaming experience.
Best PS3 External Hard Drive
Another way to enlarge PS3 storage space is adding a PS3 external hard drive, which is also the easiest way. You just need to buy a PS3 external hard drive, format it to FAT32 (it is the only file system supported by PS3), and then connect it to your PS3 console.
Although PS3 consoles come with a USB 2.0 interface (60 MB/s), I suggest you should buy an external hard drive with USB 3.0 interface (625 MB/s), which is backwards compatible with USB 2.0 and performs ten times faster than USB 2.0 HDDs.
In addition, if you choose USB 3.0, you can use this drive in other occasions (PC, PS4, etc.) without worry about speed.
Here I recommend two PS3 external hard drives to you.
1. Seagate FreeAgent GoFlex Desk External Hard Drive
Capacity: 1 TB, 2 TB, 3 TB
Interface: USB 3.0
Warranty: 2 years
File system: NTFS
Price: Starts at $92
The GoFlex Desk external drive delivers high-capacity storage, backup and encryption for all your files with its plug-and-play USB 3. 0 connectivity. You can use it in many situations and it performs well.
2. WD Gaming Drive
Capacity: 2 TB, 3 TB, 4TB
Interface: USB 3.0
Warranty: 3 years
Price: Starts at $78.99
This drive is originally designed for PS4 console, but its USB 3.0 interface makes it also compatible with PS3. Setup is easy. Just connect this drive to a PS3 console and make a quick formatting. You’re game-on in next-to-no time.
Tip: Some users may like to store and run games on external drives, which will definitely affect the game running speed. If you don’t want to affect the gaming experience, you should perform PS3 hard drive upgrade.
How to Upgrade PS3 Hard Drive
How to Upgrade PS3 Hard Drive
- Back up game data via the backup utility on the PS3.
- Replace the PS3 hard drive.
- Reinstall the system software.
- Restore the game data.

Then, read the following content to get a detailed guide.
First Move: Back up PS3 Game Data
Step 1: Prepare a USB drive or an external hard drive and connect it to your computer. Please note that this drive should be large enough to store all the content of the original PS3 hard drive.
Step 2: Convert the partition on the drive to FAT32 file system. If you do this in Disk Management, you should delete the partition and then create many small FAT32 partitions, which is not convenient. Therefore, I suggest you use MiniTool Partition Wizard.
Tip: If you create a FAT32 partition in Disk Management, the partition is not allowed to be larger than 32 GB. However, in MiniTool Partition Wizard, you are allowed to create a FAT32 partition up to 2TB.
Free Download
- Download MiniTool Partition Wizard and launch it.
- Right-click the partition to choose Format if the partition is not larger than 2 TB and there is no data in the partition; Choose Convert NTFS to FAT (not free) if there is important data in the partition and the partition is not larger than 2 TB; Choose Delete if the partition is larger than 2 TB or it is not an NTFS partition.

- If you choose Delete, you should then right-click the gray unallocated space and choose Create to create a new FAT32 partition.
- Click the Apply button to execute all the pending operations.
Step 3: Connect the FAT32 drive to your PS3 console and then back up all your favorite or important data.
- From the PS3 Home screen, go to System Settings > Backup Utility.
- Select Back Up and then Yes.
- Choose the destination (the drive you inserted just now). Then, the backup process starts and you just need to wait for it to finish.
Then, you can perform PS3 hard drive replacement as the following contents.
Second Move: Replace PS3 Hard Drive
Step 1: Turn off the PS3 and the system. Then, remove the plug for the power cord from the electrical outlet, and then detach the other cables from the system.
Step 2: Remove the HDD bay on the system.
- In some PS3 models, the HDD bay is located on the left side of the system. You should use a small screwdriver to remove the HDD bay cover, remove the blue screw, then raise the metal handle to pull the hard disk out from the system, or raise the metal handle, slide the hard disk to the right, and then pull out the hard disk.
- In some PS3 models, the HDD bay is located at the bottom of the system. You should place the system upside down and then open the screw cover. Then, remove the blue screw that fastens the hard disk in place, slide the HDD bay cover to the left to remove it, and then pull the handle upwards to pull out the hard disk from the system.
Step 3: Use a crosshead screwdriver to remove the screws (4 places) and then lift one end and slide the hard disk out to remove it from the metal frame.
Step 4: Mount the PS3 replacement hard disk into the metal frame and install it back in the system.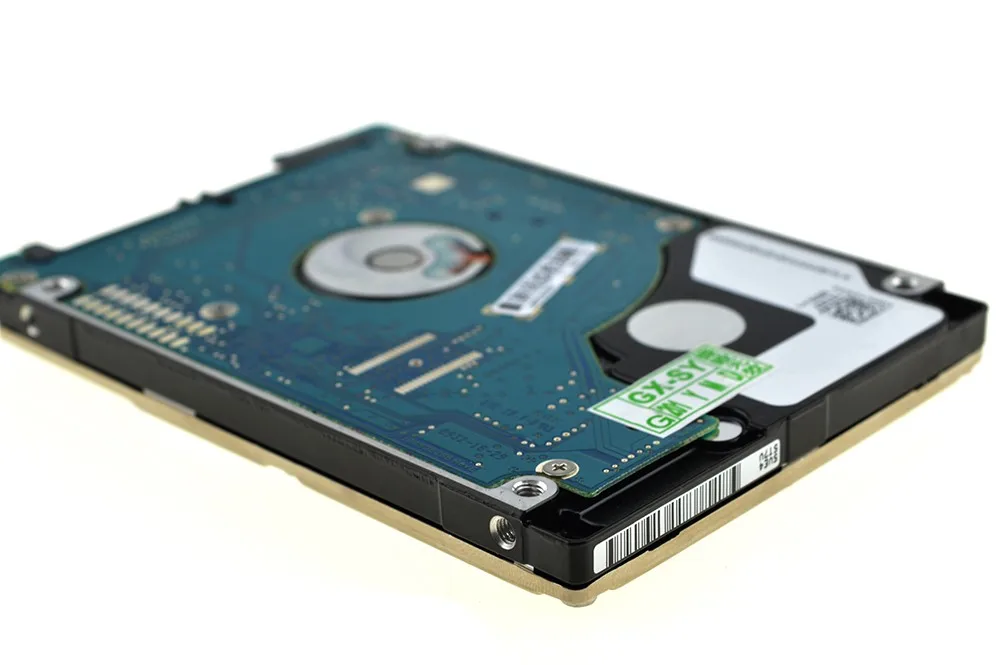 Then, reattach the blue screw and the HDD bay cover.
Third Move: Reinstall the System Software
After the PS3 hard drive replacement, you should reinstall the PS3 system as follows:
Step 1: Turn on the PS3 system. Follow the on-screen instructions to perform initial setup.
Step 2: Reinstall the PS3 system software.
- Click here to download PS3 system software to your computer.
- Name the software «PUP» and then save it on a USB storage device. The store path should be «USB drive > PS3 > UPDATE> PS3UPDAT.PUP«, which means that you should create a folder «PS3» in the USB drive and then create a folder «UPDATE» in the PS3 folder.
- Connect the USB storage device that contains the update file to your PS3 system, and then follow the on-screen instructions to reinstall the PS3 system.
Fourth Move: Restore PS3 Game Data
After the PS3 system is reinstalled, you can restore your PS3 data.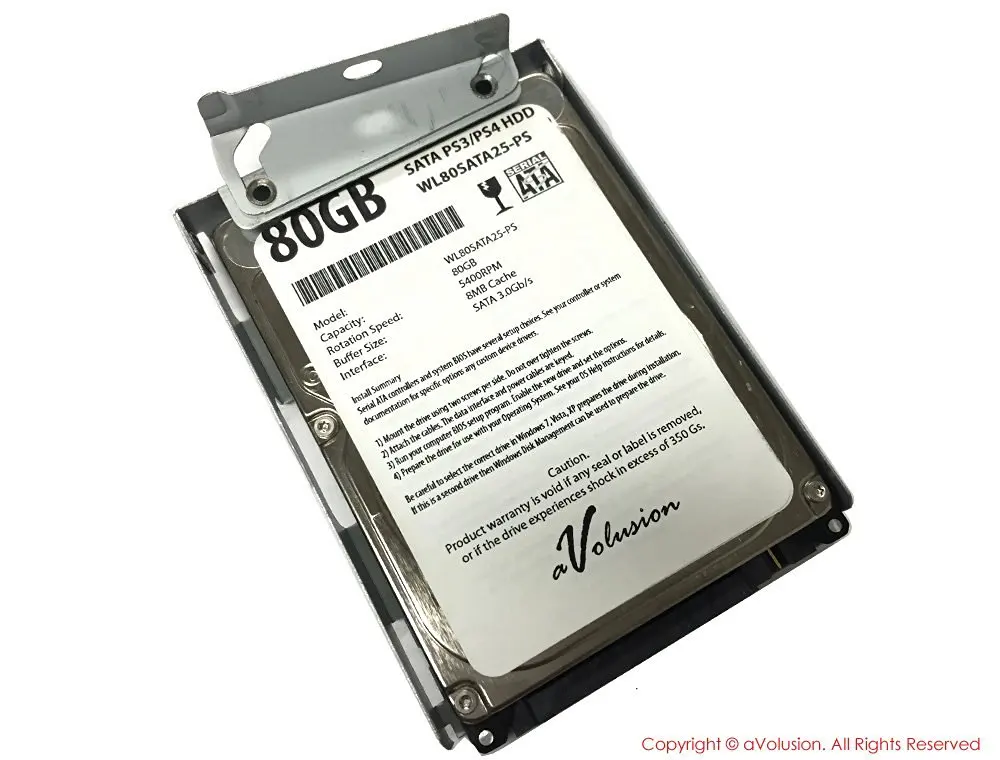 Please refer to the following steps:
Step 1: Connect the drive containing the backup data to the PS3 console.
Step 2: From the PS3 Home screen, go to System Settings > Backup Utility and select Restore. Then, click Yes button.
Step 3: Choose the storage media that contains the backup data and then select the backup data to restore. Then, click Yes to restore the data.
Tip: After performing the PS3 hard drive upgrade, the original PS3 hard drive will be useless. But if you don’t want to waste it, you can use it on PC and store some «cold» data. To do that, you should reformat it. Please refer to this post: Two Ways to Reformat PS4 Drive for Windows PC.
PS3 Hard Drive FAQ
How big of a HDD can I put in a PS3?
You should make sure it’s a 2.5-inch drive of 9. 5mm height or less. As for capacity, it seems that the max capacity supported by PS3 is 1TB.
What hard drives are compatible with PS3?
As long as the hard drive has a SATA interface and its thickness is not more than 9.5mm, insert this drive into PS3 and it will be formatted to be compatible with your PS3 console.
Can you put a SSD in a PS3?
Of course you can install an SSD in your PS3, as long as its interface is SATA and its thickness is not more than 9.5 mm. However, I don’t recommend you do that, because the interface of PS3 is SATA I, which cannot fully take advantage of SSD. And this is why I mainly recommend PS3 HDDs in this post.
Can PS3 read exFAT external hard drive?
PS3 only support FAT32, so it can’t read exFAT.
Here is a post recommending PS3 hard drives and offering you a detailed guide on how to upgrade PS3 hard drive. I think it can answer almost all your doubts.Click to Tweet
After reading this post, do you have any doubt about PS3 hard drive compatibility and replacement? Do you have any doubt about converting PS3 external hard drive to FAT32 file system?
If you have any question, please leave a comment below or contact us via [email protected]. We will reply to you as soon as possible.
PS3 Hard Drive Upgrade Guide
The price is right. With 500GB external drives now hovering around the £40 mark, there’s never been a better time to upgrade the storage capabilities of your PlayStation 3.
For owners of older consoles in particular, upgrading is swiftly becoming an essential requirement. The release of games like Gran Turismo 5 and Mass Effect 2 illustrate that lengthy, massive mandatory installs aren’t going to disappear any time soon. In addition to that, downloadable content including full game and HD movie downloads also places demands on the storage you have available for your console.
The PlayStation 3 is designed to run with 9.5mm high, 2.5-inch SATA hard drives — the exact same models found in most modern laptop computers. As SATA is effectively an open standard, you can pair your PS3 with any device that uses the interface. If you want to be particularly insane, you can even hook up desktop drives externally and get a full 2TB of storage. The Xbox 360 uses the same standard of drive, but upgrade options are limited as Microsoft has locked down compatibility to very specific HDDs it licenses.
For PS3 owners choosing a new drive, there are performance considerations to factor in too. Recently we have seen how GT5 ninjas have upgraded their PS3s with ultra-fast Solid State Storage (SSD) drives in order to halve loading times, to give just one example.
In the course of this feature, we’ll be covering off a number of different angles to your hard drive upgrade. We’ll be targeting a cheap 500GB HDD and putting it through its paces, and we’ll also be looking at various drive technologies and directly testing them to see whether the price premium translates into any performance advantage while installing or indeed gaming.
Finally, we’ll be looking at the causes of long installs and loading times. Ever wondered why Devil May Cry 4 takes 25 minutes to install, when BioShock copies the same amount of data in just 10? In this feature you’ll find out why.
How hard drives work: the basics
First up, a quick primer on hard drive tech. Typically HDDs are defined by two factors according to the base spec: the speed of the drive — typically 5400rpm or 7200rpm — and the size of the onboard cache, which can be anything from 8MB all the way up to 64MB on the latest desktop drives. However, there are several other factors that are of equal, if not higher, importance.
A 5400rpm drive at 500GB spins at the same speed as the basic launch PS3’s 60GB drive. However, as the data is more densely packed onto the disk platter, it physically reads more data per revolution. Larger hard drives also use more than one platter — anything up to four in a 1TB drive. So, in an ideal world you’d want a drive that has as few platters as possible with as high a capacity as you can get in order to get the fastest drive.
The other physical reality of hard drives is that as the head of the drive moves towards the inner part of the platter, the amount of area on the disk is smaller, therefore it reads less data per revolution. In very basic terms, the more data you cram onto your HDD, the slower it gets. Any performance testing has to factor this in, because simply benchmarking on a clean empty drive in no way gives an indication of how good the drive is overall.
The final factor is seek time. This is the time it takes for the drive’s reading or writing heads to move from one file on one part of the disk to another elsewhere on the drive. When you have Gran Turismo 5 installing over 40,000 individual files onto your hard drive, this is of crucial importance.
What’s in your PS3 now?
There have been a large range of different PlayStation 3 SKUs over the years and typically Sony locks in a particular hard drive supplier per model. The chances are that the choice of drive is dictated entirely by the deals the platform holder can arrange with any given supplier, as opposed to any real consideration about how good the drive itself actually is.
One particular developer, which uses the HDD extensively to cache game data in its top-rated openworld game, spoke to us off the record about how the 40GB drive’s performance level was significantly worse than the launch model’s 60GB disk, requiring a code rewrite to cope with the lower throughput.
A quick look at the drives used by Sony reveals a large degree of variance in the drive spec. The poor performance of the 40GB drive comes into focus here just from a perusal of the basic stats — not only is data less densely packed onto the platter, but also the onboard cache of the drive is a paltry 2MB, whereas the launch model’s 60GB drive had four times as much. Seek time — a crucial element in hard drive performance — is also poor.
Based on what we know of the raw specs of the drives, the simple act of moving to a higher density drive should, in theory, give you a performance boost regardless.
The question is just how much performance is there to be gained by paying a premium for a more expensive drive? In the four years since the PS3 launched, has hard drive tech moved on to such a degree that even a cheapo drive will outstrip the performance of your original HDD?
The PS3’s stock drive is remove from the unit and we hooked up a SATA extension cable to make swapping between each HDD much easier and faster.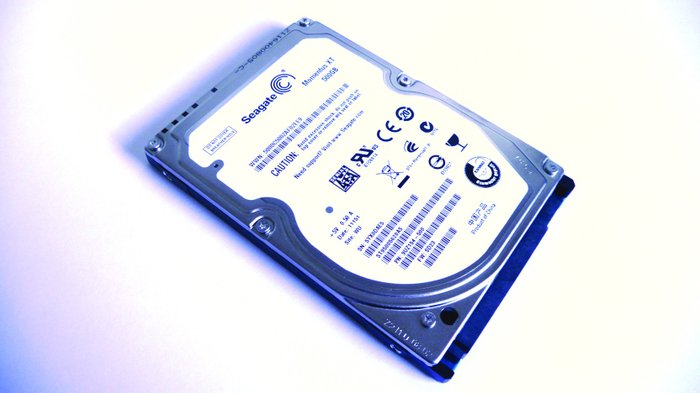
Drives and testing methods
While the SATA interface within the PS3 remains a constant, hard drive tech has improved radically over the years with drive vendors offering a range of models with significantly different performance levels. In our testing we are including an original 60GB PS3 stock drive, along with these carefully chosen alternatives:
- 500GB Western Digital WD5000BEVT: A well-reviewed 5400rpm 8MB cache drive, also known as the Scorpio Blue. Samsung’s HM500JI was also considered, but the seek times on this model were faster, it reviewed better amongst the quality PC tech press, and it was just a couple of pounds more expensive.
- 500GB Western Digital WD5000BEKT: 10 pounds more gets you a 7200rpm Scorpio Black drive with double the cache and faster access times. But does the extra cash translate into real-world speed gains?
- 128GB Samsung PM800 SSD: Not the fastest or the newest SSD by any stretch, but this was a solid servant in a Dell laptop for a long time before a 256GB upgrade.
 The drive was secure-erased in order to restore its original performance level (more on that a bit later).
 - 500GB Seagate ST95005620AS Momentus XT: Very expensive at £93, but 32MB of cache, 7200rpm speeds plus 4GB of onboard SSD-style NAND storage makes this hybrid drive irresistible for the benchmarking part of this features. This drive smart-caches the areas of the disk that are the most read, boosting performance considerably on laptops when booting Windows or loading frequently used apps. But can the PS3 benefit from this tech?
In addition to the stock PS3 60GB drive, four newer models with vastly superior base specs are put to the test in our analysis. But does increased performance translate into a better PS3 experience?
So, an interesting range of drives to put to the sword encompassing a range of spec levels and technologies, while the inclusion of the stock PS3 drives gives us a strong indication of what kind of performance increase we can expect, if any.
In testing these drives we cover off the process of installing game data from the Blu-ray drive, plus we use Gran Turismo 5 and BioShock — two games with some mammoth loading times — to judge improvements to in-game performance.
【How to upgrade PS4, PS4 Slim and PS4 Pro hard drive】 — Greatech
What’s in the article:
- 1 Best PS4 Hard Drive Upgrades
- 2 Best All-round PS4 Hard Drive Upgrades
- 2.1 Seagate 1TB 9006 9011
- 3 Best PS4 SSD Upgrade
- 3.1 Crucial MX300
- 4 Best Budget PS4 Hard Drive
- 4.1 HGST 1TB Travelstar 7K1000
- 4.200005 4.3 Step one: find the correct replacement
- 4.4 Step two: back up your PS4
- 4.5 Step three: detect hard disk
- 4.6 Step four: unplug
- 4.7 Step five: free hard disk
980005 sixth: step replacement 4.
- 4.9 Step Seven: Download PS4 Software
- 4.10 Support External Hard Drive
- 5 The best external hard drive for your PS4
- 5.
 1 Western Digital My Passport 4TB
 - 5.2 Seagate 5TB
- 5.
- 6 Conclusion
If you want to upgrade your PS4’s hard drive, the good news is that it’s a fairly simple process, and we’ll go through this guide step by step.
It doesn’t matter if you have PS4 , PS4 Slim or PS4 Pro , the method is very similar and it won’t take too long. This means you can expand your hard drive up to 2TB with relative ease. nine0003
Alternatively, without spending a fortune, you can purchase an external hard drive. The cost of such devices is usually lower than that of high-capacity 2.5-inch hard drives.
If that option sounds appealing to you, you can check out our selection of the best external hard drives. Just remember to make sure it’s USB 3.0!
If you prefer SSD drives, we will walk you through the process step by step to replace your PS4 hard drive at home. Set aside 40 minutes and you can easily double or quadruple your console storage! nine0003
Along with this step-by-step guide, we’ve also released a video that will show you everything you need to know about upgrading your PS4’s hard drive.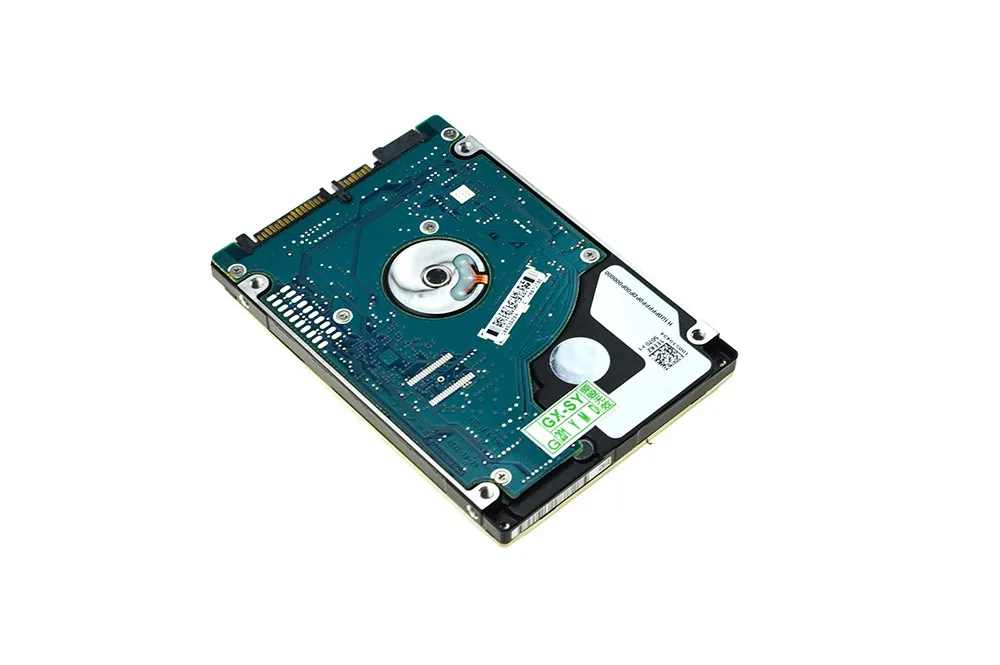
Make sure you have already browsed our list of the best internal desktop and portable hard drives to find a good hard drive for your PlayStation 4 . You will need a 2.5″ laptop hard drive, so make sure you choose one of these!
Want to upgrade your PS3 hard drive? We did the same with an older Sony console, the PS3. And if you own both, you can even use your old PS4 hard drive. nine0003
If you upgraded your original PS4 hard drive, but now want to transfer it to your new PS4 Pro, you can do it exactly the same way. Just be aware that the system will format the drive, so make sure you back up any saved data to PS Plus Cloud or an external hard drive.
Best PS4 Hard Drive Upgrades
Before taking apart your PS4, check out our selection of the best hard drives for your PS4. Whatever your needs, we have a hard drive to give your PS4 the extra storage you need for today’s games, and all of these hard drives are compatible with your Sony console. nine0003
Best All-round PS4 Hard Drive Upgrade
Seagate 1TB SSHD
If you want a hard drive that offers performance and speed without spending money, you need a hybrid SSHD.
It combines one of the best SSD technology (solid state drives) and a standard hard drive, and by installing a Seagate 1TB SSHD, your PS4 will get a speed boost — so that games will load much faster, and you will also get a lot of space thanks to the excellent disk capacity of 1 TB! nine0003
Best PS4 SSD Upgrade
Crucial MX300
Solid State Drives or SSD for short is quickly becoming one of the most cost-effective upgrades you can make on a PC, and to a certain extent, this applies to PS4 as well.
SSDs are much faster than conventional mechanical hard drives, and as such, they can greatly reduce game loading times, meaning you can get into the action as quickly as possible. nine0003
However, they have a couple of drawbacks.
First, the fact that the SSD is significantly more expensive than their mechanical equivalents. After all, fast loading isn’t cheap.
Secondly, SSDs have a much smaller impact on PS4 game loading speeds than on PCs. They do speed things up a bit, of course, but that’s a case of cutting load times by ten seconds or so, not instantly loading games.
Digital Foundry 9 analysis0068 downloading games via PS4 and PS4 Pro found that SSDs give about 0.9s loading speed for Project Cars and Fallout 4. Sure, it’s an improvement, but frankly, it’s not very noticeable.
The SSD upgrade is slightly more beneficial on the PS4 Pro, which has a higher bandwidth SATA 3 interface, but even then the difference in download speeds for Just Cause was minimal.
Personally, we think that these results mean that an SSD upgrade is not essential, but it does mean, however, that you don’t have to choose the fastest SSD if you want to upgrade. If you want to buy a good SSD without having to break the bank, Crucial’s MX300 is your choice if you go for the 1TB version. But the 2TB version is also available, but at a higher price. nine0003
Best Budget PS4 Hard Drive
HGST 1TB Travelstar 7K1000
Just because you want to stick to a budget when upgrading your PS4 hard drive doesn’t mean you need to skimp on capacity.
HGST 1TB Travelstar 7K1000 has a large capacity of 1TB and it spins at 7,200rpm, which is higher than the PS4 hard drive which only spins at 5,400rpm. This means that you will also see a slight increase in performance on this hard drive. nine0003
What you need:
- 1x PS4;
- 1x Phillips screwdriver;
- 1x 2.5″ SATA HDD;
- 1x USB stick (8 GB recommended) or 1x FAT32 USB HDD;
- 1x laptop or PC with internet;
- Controller 1x PS4;
- 1x microUSB cable;
- Step one: buy a hard drive.
Step One: Find the Right Replacement
The first thing to do is buy a replacement hard drive. The PS4 uses a 2.5-inch SATA hard drive, which is commonly found in laptops or super-thin external devices, not desktops. nine0003
It also needs to be 9.5mm high to fit into the caddy’s protective mount to securely fit into the PS4 case. This limits the list of suitable hard drives a little, since at the time of this writing, at least many of the 2 TB hard drives are of other sizes.
As an optimal solution, we used Western Digital 1TB drives, which doubled the console’s 500GB hard drive capacity. It is also the choice of many buyers in this budget segment of the market, as you will find suitable 1TB hard drives for around £45-50 (about £69).-US$77, AU$88-98). As for the 2TB drives, oddly enough, they cost almost twice that price.
When you buy hard drives, you will also see the «rpm» number. This stands for RPM and is a rough guide to drive speed. Most models are 5400 RPM, just like a standard PS4 hard drive.
If you want to see a real improvement in download speed, you need to look for a 7200 RPM drive.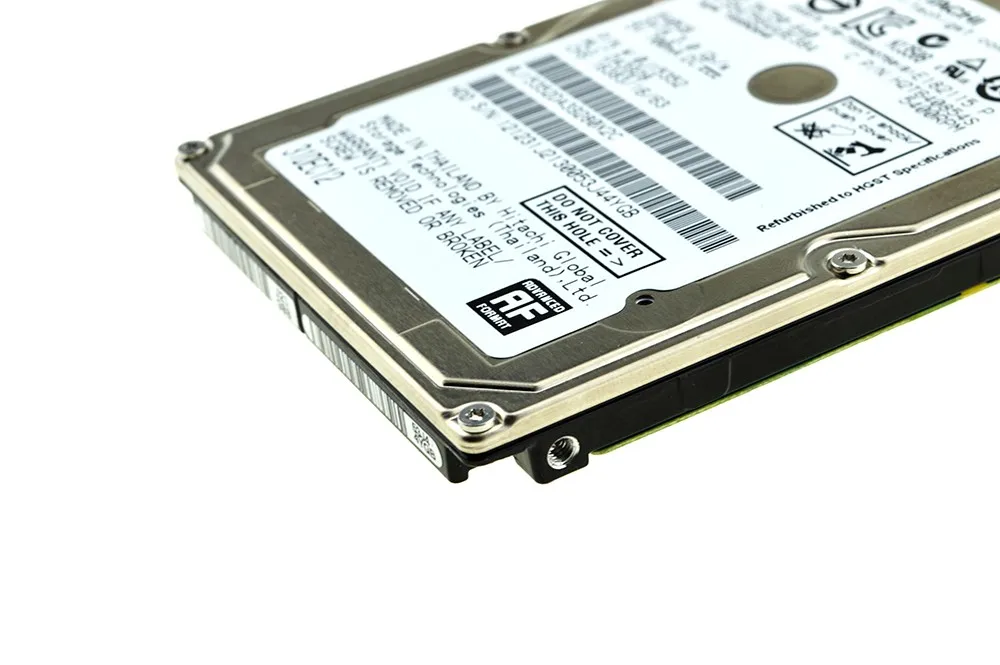 They usually cost a little more. nine0003
Want to find out? For better performance, you can install an SSD. However, this is an extremely expensive upgrade: you’ll pay around £175 (about US$269, AU$175) for a 500GB SSD.
Step two: back up your PS4
Got a hard drive? The next step is to back up everything you definitely don’t want to lose on your PS4. The bad news is that you can’t back up games. nine0003
PS Plus subscribers don’t have to worry too much about game saves, as they will be automatically saved to the cloud. However, if you want to be sure that your progress in games will be saved, you can backup them to a USB drive or external hard drive.
Simply insert a disc, then in the PS4 menu go to settings > saved data management > saved data in system storage. Here you will see the option to copy saved data to a USB stick. nine0003
Step Three: Detecting the Hard Drive
After you’ve saved everything you need, completely! turn off PS4. If your PS4 goes into standby mode in standard mode, press and hold the PS button until the power menu pops up, then turn off your PS4.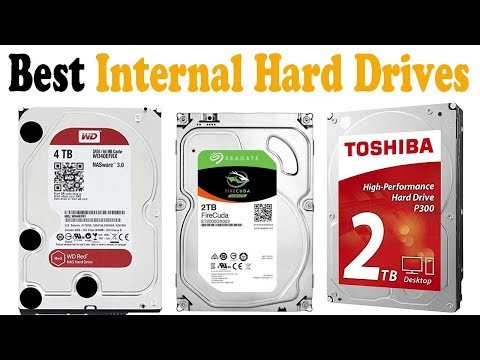 Then disconnect all PS4 cables (most likely the HDMI cable and power cable).
Place your PS4 on a stable surface, place your hand on the shiny top plate and move it slightly to the side. It’s actually a simple plastic hard drive cover that isn’t held in place with screws. And it is fixed with clips. nine0003
Once the lid clips are released, you can remove the lid from the shown part of the PS4 metal skeleton, and if you do everything carefully and slowly, nothing bad will happen to the console.
To remove the hard drive from the PS4 Slim console, remove the plastic cover by hand, it can be found on the left corner of the PS4 Slim on the back of the console.
With the plastic clip removed, you will see the PS4 Slim hard drive secured with a single screw. nine0003
To open the PS4 Pro hard drive, simply place the system upside down on a flat surface and locate the small plastic panel on the back. Use the small tab next to the Ethernet port to detach the panel.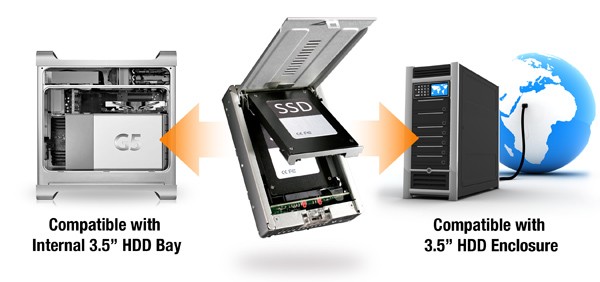
With the cover removed, you will see the hard drive and one screw holding it in place.
Step Four: Disconnecting
On a regular PS4, you will notice that the hard drive can’t just be opened after opening the cover. One screw needs to be unscrewed to detach it from the metal frame that holds the hard drive. Use a regular Phillips screwdriver. nine0003
This screw is encrusted with classic PlayStation button icons. So it’s hard for you to go wrong.
Once the screw is removed, you can simply slide the drive horizontally out of the PS4 case.
To replace the hard drive in PS4 Slim and PS4 Pro, you just need to remove one screw that holds it in place.
You can then remove the hard drive.
Step five: free hard drive
There are four more screws that hold the hard drive in the metal bay where it is installed. They sit on the sides and can be removed using the same Phillips screwdriver you used to pry open the hard drive bay.
However, these are just the screws that we need to remove. You’ll also notice some rubber bits that press down on the screws to absorb any shock to the HDD: leave them there.
Do the same to replace the PS4 Slim and PS4 Pro hard drive. nine0003
Step Six: Replacing the Hard Drive
Once you free up the hard drive, insert the new drive into the bay, and then reverse the process you just completed. Simply put the 4 screws back in place, and slide the drive bay into the back of the PS4, secure it in place with the large screw, and install the plastic hard drive cover onto the PS4.
If you have a PS4 Slim or PS4 Pro, the process is the same. Place the hard drive in the bay, secure it, then slide it back into the Slim or Pro console, screw it in and replace the plastic cover. nine0003
If the hard drive doesn’t fit, are you sure you bought a 9.5mm or less than 2.5″ SATA drive?
If the process goes as smoothly as it did with us, you should do it within 15 minutes.
Step Seven: Download the PS4 Software
You now have a PS4 with completely empty memory. The console’s OS is stored on the hard drive you just removed, and the one inside the console is completely empty. nine0003
You need to download the software offline using another computer. You’ll find it on the PlayStation website, and it’s currently around a gigabyte.
External Hard Drive Support
With the PS4 4.5 firmware update, you’ll have another way to expand your console’s storage by using an external hard drive.
To use this method, make sure you have a USB 3.0 USB 3.0 or less external hard drive. nine0003
Then simply connect the drive to your console and you can download, save and install games, apps and add-ons directly to it. You can also transfer any files you previously saved to the console’s internal hard drive or to another external drive.
When you plug in an external drive, it will be accessible from the PS4 home screen just like your internal drive, so finding everything is a fairly straightforward process.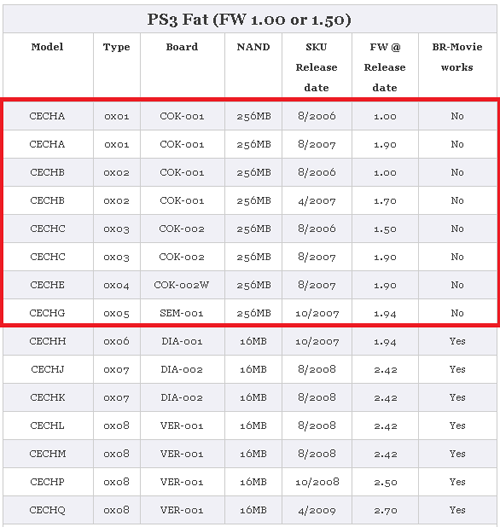
The best external hard drive for your PS4
Western Digital My Passport 4TB
Here are the latest Western Digital My Passport external hard drives available in sizes from 1TB to 4TB. It features cloud storage and 256-AES encryption, as well as WD’s own backup software.
Even better, it performs great when it comes to data transfer speed, outperforming many of its competitors. It’s not quite the same as what SSDs are capable of, but for an external drive based on a traditional hard drive, this is your best bet. nine0003
Seagate 5TB
This drive is more expensive than our previous offering, but it also boasts more storage at a reasonable price if you really want to take advantage of that generous 8TB limit. In fact, you can expect 1TB to cost you around $24.
The Seagate 5TB drive has 64MB of cache and requires an external power supply to run it.
This drive is ideal for gamers as it perfectly complements the internal hard drive of gaming consoles such as the PS4. nine0003
Conclusion
Is it possible to change the hard drive on PS4? Of course yes! It’s easy, takes less than half an hour, and isn’t really that expensive: the price of one new game. It won’t even void your warranty.
The only issue with the arrival of firmware 4.50 is whether to choose to upgrade the internal hard drive or just use an external one.
Larger external hard drives are definitely cheaper, but you’ll need to find a place for them and remember to take them with you whenever you move your console. nine0003
However, whichever solution you choose, you’ll be happy with the extra memory for your favorite games.
Don’t forget that installing an SSD will help you speed up the loading of your games.
How to upgrade your PS4, PS4 Slim and PS4 Pro hard drive from your PS4 library? Then it might be time to upgrade your hard drive. nine0003
Some games — we’re looking at you, Red Dead Redemption 2 — require more than 100 GB of hard drive space. And with only 500GB of storage on the standard PS4, PS4 Slim, and 1TB on the PS4 Pro, it won’t take long before you run out of space quickly.
There is another reason you might want to upgrade besides adding more storage space. You might want to go faster with a faster hard drive, or use a core with an SSD. nine0003
There are two ways to increase the hard drive capacity of your PS4: replace the internal drive or connect an external hard drive. External hard drives are generally cheaper than the high-capacity 2.5-inch drives needed to upgrade internal storage, but be aware that they will require one of the PS4’s three USB ports.
Either way, we’ll show you how to upgrade your PS4 hard drive in this simple guide that covers all PS4 systems and available storage options. And don’t worry, replacing the internal drive won’t void your warranty. nine0003
Along with this detailed guide, we’ve also released a video that will show you everything you need to know about upgrading your PS4 hard drive.
Check out our best external hard drives available (just make sure you choose USB 3.0) and our A list of the best internal hard drives for desktops and laptops to find a good hard drive for your PlayStation 4 console.
Looking to upgrade your PS3 hard drive? We did the same with an older Sony console, the PS3. And if you have both, you can even use an old PS4 hard drive in his dad. nine0003
If you have upgraded your original PS4 hard drive but now want to transfer it to your new PS4 Pro, you can do so. Just be aware that the system will format the drive, so make sure you back up all your saved data to PS Plus Cloud or an external hard drive before doing anything else to keep it safe. hard drives for PS4
Before taking apart your PS4, check out our selection of the best hard drives for your PS4, which we have listed below. No matter what you need, we have a hard drive that will give your PS4 support, and they are all compatible with the Sony console..
Best Comprehensive HDD Upgrade for PS4
Seagate 1TB SSHD
If you want a hard drive that provides capacity and speed without breaking the bank, you need a hybrid SSHD.
This combines some of the best technology from Solid State Drives (SSDs) and standard hard drives, and by installing a Seagate 1TB SSD, your PS4 will get a speed boost — so games will load faster — and at the same time time will get a lot of space thanks to the 1TB capacity..
Today’s Best Seagate 1TB Solid State Hybrid Solutions579 Amazon Customer Reviews ☆☆☆☆☆ Seagate 1TB ST1000LM014 64MB … eBay $59.99View 130M+ Products Every Day at Best Prices
Best PS4 SSD Upgrade
Crucial MX300
SSDs, or SSDs for short, have quickly become one of the most cost-effective upgrades you can make to a PC, and to a certain extent, that’s true of PS4 as well..
Solid state drives are much faster than regular mechanical hard drives, and as such they can significantly reduce game loading times, meaning you can get started as quickly as possible.
They do, however, have a couple of drawbacks.
First, is the fact that SSDs are significantly more expensive than their mechanical equivalents. Fast loading doesn’t come cheap.
Secondly, SSDs have a much more limited impact on PS4 boot times than on PC. They do speed things up a bit, of course, but that’s a case of cutting load times by about ten seconds, not instantly loading games..
Digital Foundry’s analysis of PS4 and PS4 Pro load times found that SSDs provide a load time advantage ranging from 0.9 seconds for Project Cars to 26.4 seconds for Fallout 4 on a standard PS4. An improvement, certainly, but not the biggest in the world.
The SSD upgrade is a bit better for the PS4 Pro, which boasts a higher bandwidth SATA 3 interface, but even then the difference to Just Cause 3 was minimal. nine0003
Personally, we think these results mean that an SSD upgrade is optional, but if you really want to switch, you don’t have to choose the fastest SSD. Our choice if you want a decent hard drive without breaking the bank is the Crucial MX300. Choose the 1TB version if you want to keep the same PS4 storage, or the 2TB version if you don’t mind paying a hefty premium.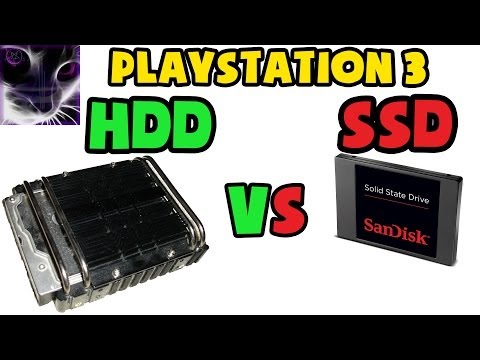
Best mx300 Major Deals Today 1TB662 Amazon Customer Reviews ☆☆☆☆☆ Crucial MX300 1TB Internal Tiger Direct $313.99ViewCrucial MX300 2TB 3D NAND … Amazon * Free * Trial Pricing Information Check eBay We check over 130 million products every day for the best prices
Best Budget PS4 Hard Drive Upgrade
HGST 1TB Travelstar 7K1000 If you If you want to stick to a budget when upgrading your PS4 hard drive, that doesn’t mean you have to skimp on capacity.
HGST 1TB The Travelstar 7K1000 has a large capacity of 1TB and spins at 7200RPM — faster than a standard PS4 hard drive that spins at 5400RPM. This means that you will also see a slight increase in performance on this hard drive.0003
Today’s Best HGST 1TB Travelstar 7K1000 Deals28 Amazon Customer Reviews ☆☆☆☆☆ view similareBayNo pricing informationCheck eBayWe check over 130 million products daily for the best prices
What you need:
- 1x PS4
- 1x Phillips screwdriver
- 1x 2.
 5″ SATA HDD
 - 1x USB stick (preferably 8 GB) or 1x FAT32 USB HDD
- 1x laptop or PC with internet
- 1 PS4 controller
- 1x microUSB cable
- Step One: Purchase HDD
Step One: Find the Right Replacement
The first thing to do is buy your replacement hard drive. The PS4 uses a 2.5″ SATA hard drive, which is typically found in laptops or ultra-slim external drives, not desktops. , which protects the drive and holds it in place. This turns out to be a bit of a limitation, as many 2TB hard drives are way too short. nine0003
For security purposes, we have used a 1TB Western Digital drive that doubles the storage capacity of a standard 500GB hard drive without tearing the seams. It’s also the budget shopper’s choice, as you’ll find suitable 1TB hard drives for around £45-50 (around $69-77, AU$88-98), while 2TB oddly costs almost double the price..
You will also see RPM when buying hard drives. This stands for revolutions per minute and is a rough indication of the speed of movement. Most models have 5400 rpm, just like a standard PS4 hard drive. nine0003
If you want to see a real improvement in download speed, you need to find a 7200 RPM drive. They usually cost a little more.
Want to do your best? For even better performance, you can install an SSD. However, this is an extremely expensive upgrade: you’ll pay around £175 (around $269, AU$175) to match the standard 500GB storage. oh.
Step two: Back up your PS4
Do you have a hard drive? The next step is to back up everything you definitely don’t want to lose on your PS4. The bad news is that you can’t back up games. Your home internet will just have to put up with it to reinstall the site.
You must sync your trophies first as they will not be included in the backup data. Simply press the «OPTIONS» button on your controller and select «Sync Trophies with PSN». Your trophies will now be safe and sound. nine0003
PlayStation Plus subscribers also don’t have to worry about saving their games as they are automatically saved to the cloud. However, if you want to be more secure, you can back up to a USB stick or external hard drive. system storage. Here you will see an option to copy your saves to a USB stick. You need to select files for each game, so you can leave out titles you will never play again..
Step Three: Revealing the Hard Drive
If you’re happy that you’re not going to erase your game history, make sure there’s no disc in the drive and turn off the PS4 completely (not in standby mode). If your PS4 goes into standby mode as standard, hold down the PS button until the power menu appears, and then select turn off PS4. Then disconnect all PS4 cables (this is most likely the HDMI cable and power cable).
Place your PS4 on a stable surface, place your hand on the shiny top plate and move it slightly to the side. In fact, this is a simple plastic hard drive cover that is not fastened with screws, but with a regular clip..
Once it’s free from the moorings, you can remove the cover, revealing part of the PS4’s metal frame.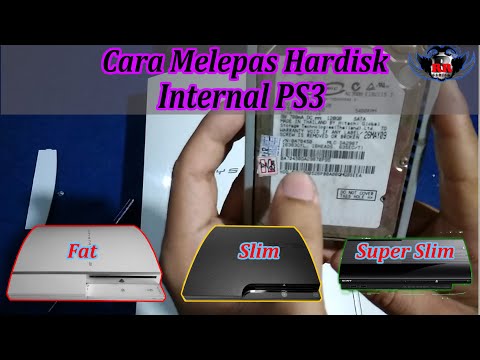 You can’t hurt much here, as it’s really just a hard drive in the show.
To open the PS4 Slim hard drive, remove the plastic cover by hand. This clip can be found on the left corner of the PS4 Slim at the back of the console.
Remove the plastic clip to reveal the PS4 Slim hard drive secured with one screw.
To open your PS4 Pro’s hard drive, simply place the system upside down on a flat surface and locate the small plastic panel on the back. Use the small tab next to the Ethernet port to disable the panel.
Remove this cover to reveal the hard drive case and the single screw holding it in place.
Step Four: Releasing the Caddy
On a regular PS4, you will notice that the hard drive is not yet full. There is one screw that we need to unscrew in order to release the frame that holds the hard drive using a Phillips screwdriver. nine0003
It’s the largest one you see on a metal surface and is encrusted with classic PlayStation button icons.
Once the screw is removed, you can simply slide the drive horizontally out of the PS4 case.
To replace the hard drive in PS4 Slim and PS4 Pro, you just need to remove one screw holding the case in place.
You can then remove the hard drive.
Step five: free hard drive
There are four more screws that secure the hard drive to the metal frame it is in. They are on the sides and can be released using the same Phillips screwdriver you used to free the hard drive frame.
These are the only screws we need to remove though. You’ll also notice some rubber inserts that the screws rest against to absorb any shock to the hard drive: leave them there.
This is almost the same as PS4 Slim and PS4 Pro hard drive replacement..
Step Six: Swap Hard Drives and Replace
Once you have freed up the hard drive, simply put in a new one and then reverse the process you just followed.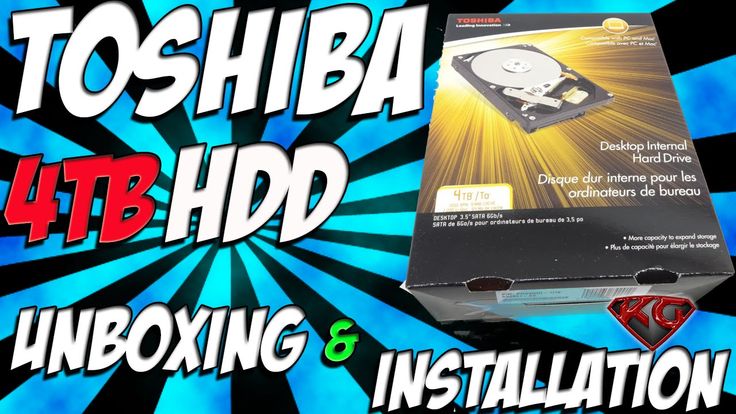 So put those four screws on the sides, put the case back in the PS4, secure it with the big screw, and put the shiny plastic hard drive cover on the PS4..
If you have a PS4 Slim or PS4 Pro, the process is the same. Place the hard drive in the case, secure it, then slide it back into the Slim or Pro console, screw it in and replace the plastic cover..
If the hard drive does not fit, are you sure you checked that it is a 2.5″ SATA drive 9.5mm high or smaller before purchasing?
If the process goes as smoothly as ours, you should be done within 15 minutes.
Step Seven: Download the PS4 Software
You now have a PS4 with completely empty memory. The operating system of the console is stored on the hard drive you just removed, and the one inside the console is completely empty..
You need to download the software offline using another computer. You’ll find it on the PlayStation website, and it’s currently about a gigabyte.
Today’s Best Biggest Deals with mx300 1TB662 Amazon Customer Reviews ☆☆☆☆☆ Crucial MX300 1TB Internal… Tiger Direct $313. 99 130 million products every day at 9 best prices0003
External hard drive support
With the PS4 4.5 firmware update, you’ll have another way to expand your console’s storage by using an external hard drive.
To use this method, make sure you have a USB 3.0 USB 3.0 or less external hard drive.
Then simply plug the drive into your console and you can download, save and install games, apps and add-ons directly to it. You can also move any files you previously saved to the console’s internal hard drive to an external drive to stay organized. nine0003
When you plug in your external drive, it will be accessible from the PS4 home screen just like your internal drive, so finding everything will be a simple process.
The best external hard drive for your PS4
Western Digital My Passport 4TB
Here is the latest range of Western Digital My Passport external hard drives in sizes ranging from 1TB to 4TB. Features cloud storage and 256-AES encryption, as well as WD’s own backup software..
What’s more, it performs very well when it comes to data transfer speed, beating many of its competitors. It’s not quite at the same speed levels that SSDs are capable of, but for an external drive based on a traditional HDD, this is your best bet.
Today’s Best Western Digital My Passport 4TB offer $99View on eBay $129.99View on BHPhoto $149.99View on AmazonSee all prices (34 found) 927 Amazon customer reviews ☆☆☆☆☆
Seagate 5TB Expansion
This is older than our previous offering, but it also boasts more storage for the price you pay — perfect if you really want to take advantage of that generous 8TB limit. In fact, you can expect to shell out just under £20 for TB if you’re in the UK, or just under $24 in the US.
The Seagate 5TB Expansion has 64MB of cache and requires an external power supply to run it. nine0003
This drive is ideal for gamers as it perfectly complements the internal storage of gaming consoles such as PS4.