Best SD cards for Raspberry Pi 4 in 2023
Before you can even get started with the Raspberry Pi, you’ll need to find the best Raspberry Pi 4 SD cards, as that’s how you’re going to be able to install the operating system. That means it’s essential to find the right card. One that’s fast and robust enough, has ample storage, and won’t break the bank. If you picked up one of the best Raspberry Pi kits, then you likely already received one in the kit, but if not, or if you need to expand the storage a bit further, here are your best options.
These cards are the best for almost everyone
Why you can trust Android Central
Our expert reviewers spend hours testing and comparing products and services so you can choose the best for you. Find out more about how we test.
Samsung EVO+ 32GB
Best all around
Samsung’s 32GB EVO+ card ticks all the right boxes when it comes to using it in your Raspberry Pi 4. It’s fast enough, hits the maximum native format size, and it’s nice and inexpensive. If you’re not sure which card to get, pick this one.
Silicon Power Superior Pro 64GB
More storage for the pro
If you need more space, the 64GB version of SanDisk’s Extreme Plus card is a great option as long as you correctly format it using the FAT32 file system. If you need the extra space, it’s worth it.
Lexar 633x 32GB
Nice and cheap
This 32GB card from Lexar isn’t going to win and speed tests when used in the Raspberry Pi 4. But it’s super cheap and perfect for someone who wants to save a little cash or likes to swap things up by using different software on different cards.
Kingston High Endurance 32GB
Better for travelers
Kingston’s High Endurance card may not be the fastest out of the bunch, but you’ll make up for durability and reliability. Read speeds come in at 95MB/s and write speeds hover around 45MB/s. Kingston also promises the card can withstand water, shocks, and just about anything else that could interrupt performance.
SanDisk Extreme 32GB
Life in the fast lane
This 32GB card from SanDisk costs a couple of dollars more than some others, but it’s the fastest and best-performing card in the Raspberry Pi 4 according to some tests. If you need slightly quicker read times, it’s money well spent.
GeeekPi Noobs MicroSD Card
Get started with ease
GeeekPi is well known for some great Raspberry Pi accessories, and the company has now released its own microSD card with Noobs pre-loaded. This kit also includes a microSD to SD card adapter, along with a microSD card to USB adapter, making it easy to plug in your microSD card to transfer any files.
SanDisk Ultra 32GB preloaded with NOOBS OS
For the NOOBS
A1 class cards don’t make a difference when used in the Raspberry Pi 4, but they also don’t make read and write speeds any worse.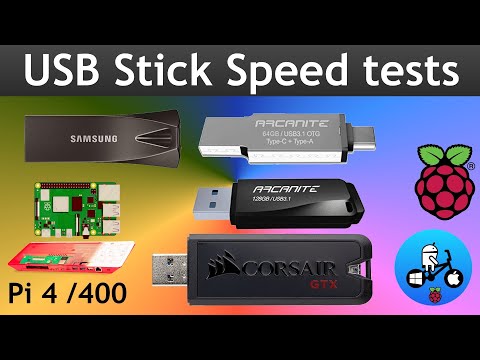 Buy this one because NOOBS OS — the Raspberry Pi Foundation’s operating system(s) of choice — is preloaded.
SanDisk Extreme Pro 32GB
Rugged and quick
The SanDisk Extreme Pro was made with stability and ruggedness in mind, as it’s shockproof, waterproof, and even temperature-proof. The card provides read speeds up to 100MB/s while also including an SD card adapter if you need to transfer files between your computer and the Raspberry Pi 4.
PNY Elite
Faster reactions
With its Class-10 rating, the PNY Elite is capable of reading speeds up to 100MB/s, along with being able to transfer files and content quickly and easily on your Raspberry Pi. PNY also offers its Elite microSD card in a wide variety of sizes, ranging from 16GB all the way up to 512GB, but your Pi can’t handle that much storage just yet.
- Back to the top ^
Finding the best Raspberry Pi SD cards is of paramount importance
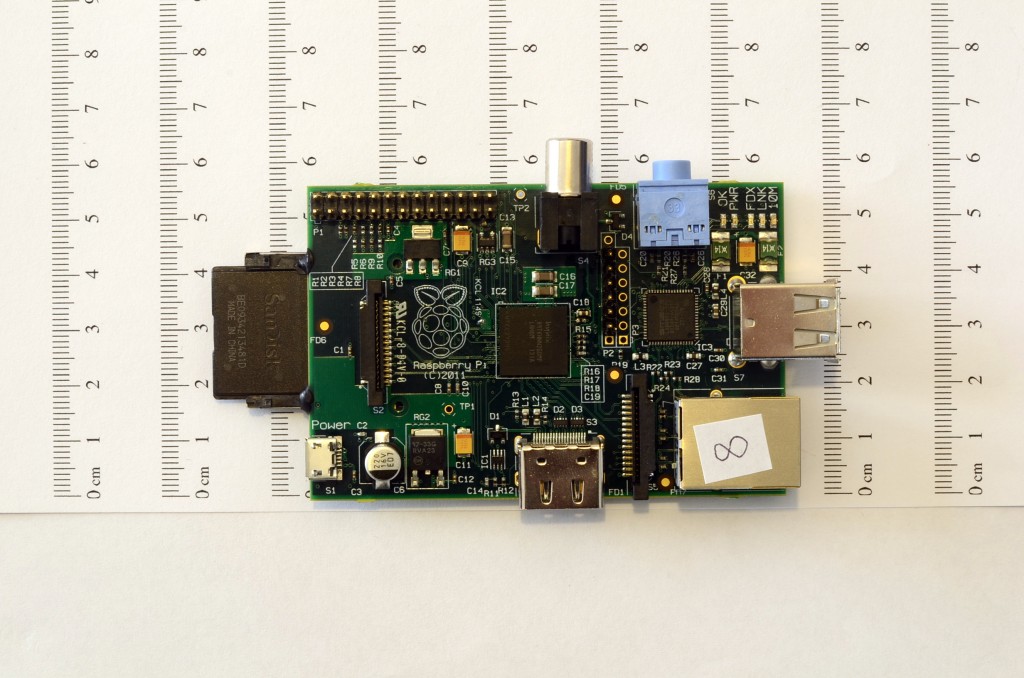
(Image credit: Jerry Hildenbrand)
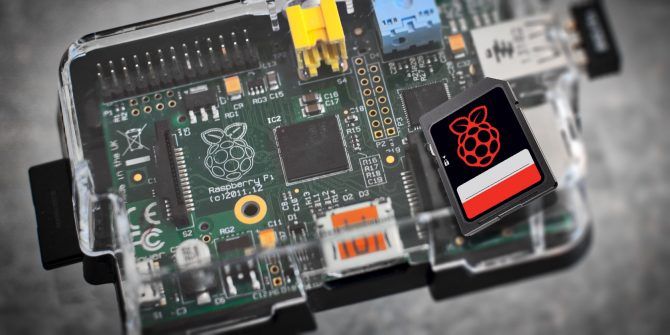
You’ve probably used a micro SD card before even if you’ve never used a Raspberry Pi, but the little board that can do it all also does SD cards a little differently than you might be used to. After getting it all set up, you can even connect one of the best Raspberry Pi screens, and some of these even have a display built into the case.
- How to save $100 off your Galaxy S23 preorder
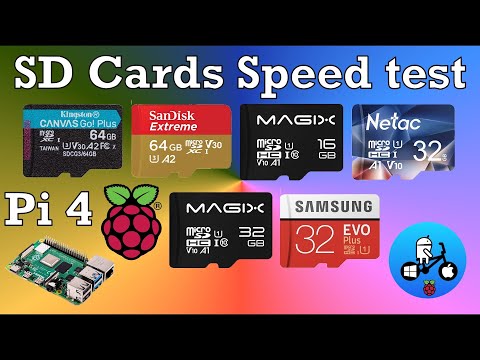
The first thing to know about is the read and write speed. Micro SD cards are marketed using their maximum throughput speeds, and for most applications this is fine. But when you use the card as the boot partition, the OS partition, and the storage partition random input and output speeds matter a lot more than optimized throughput speeds. In plain English — any SD card will never reach its advertised speed when used in your Raspberry Pi. Jeff Geerling has taken the time to test all the major brands in the Raspberry Pi 4 and found that the Samsung EVO+ delivers the most consistent speeds, which is why this comes so highly recommended.
Another thing to know is that the Raspberry Pi only supports cards of 32GB or smaller unless you reformat them. This is because cards larger than 32GB are formatted using the exFAT file system and the Raspberry Pi bootloader only works with cards formatted as FAT16 or FAT32.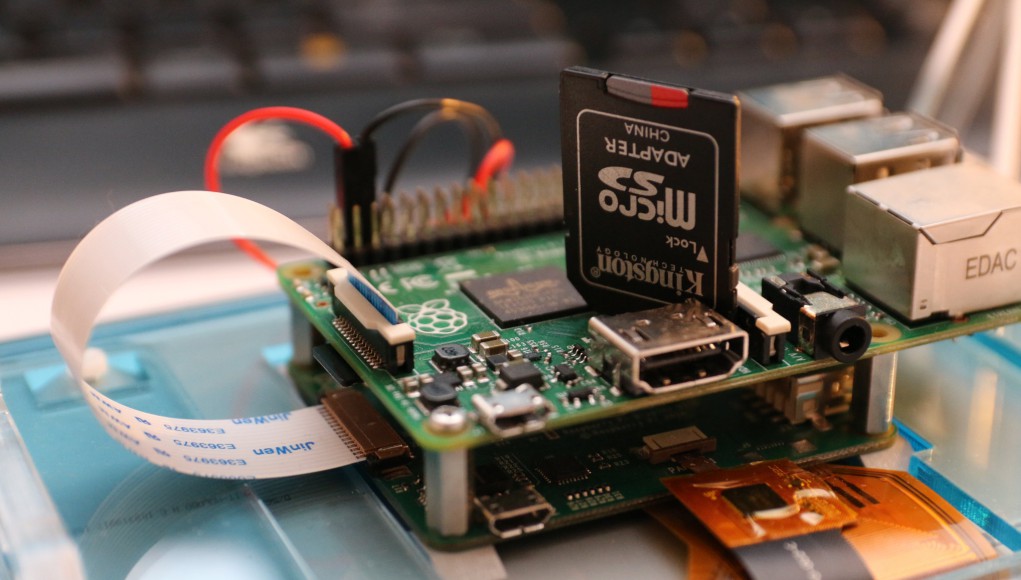 You’ll need to know how to do this using another computer before you can expand a file system onto one, or use a tool that formats and partitions the card as an image. If you’re not sure how to go about this or don’t have time to fuss with it, stick to 32GB or lower cards. The OS is so small you’ll probably never even notice.
As for myself, I switched to the Samsung EVO+ brand of cards a few months ago and have a 32GB model inside every Pi I have in use. I can heartily recommend them as the best value out there for use in your Raspberry Pi.
Get instant access to breaking news, the hottest reviews, great deals and helpful tips
Contact me with news and offers from other Future brandsReceive email from us on behalf of our trusted partners or sponsors
Jerry is an amateur woodworker and struggling shade tree mechanic. There’s nothing he can’t take apart, but many things he can’t reassemble. You’ll find him writing and speaking his loud opinion on Android Central and occasionally on Twitter.
How to Format an SD Card for Raspberry Pi
You just got off the computer store with an 8gigabyte Raspberry Pi. You pay no mind to the size because you have a spare 64gigabyte SD card at home. You install the card on the hardware and it has refused to boot. You were not prepared for this, were you? How do you get this SD card to work? What are the special requirements for Raspberry Pi SD cards?
This article will guide you as to why you need to format your SD card, The Raspberry Pi SD card format, Raspberry Pi SD card size and most interestingly, how to format or reformat an SD card for a Raspberry Pi. Let’s dive in, shall we?
- Part 1. Do You Need to Format SD Card for Raspberry Pi?
- Part 2. 4 Methods to Format SD Card for Raspberry in Windows
- Part 3. Format SD Card for Raspberry Pi on Mac
- Part 4. Format SD Card on Raspberry Pi
- Part 5. Tips on Making an SD Card for Raspberry Pi
Part 1.
 Do You Need to Format SD Card for Raspberry Pi?
The Raspberry Pi is a group of small boarded computers that were made majorly for teaching basic computer science in learning institutions. They have been in existence since 2012 and have since then gained relevance in other fields such as research, robotics & Artificial Intelligence, and Climatology. The Raspberry Pi became very popular for its portability and because it is inexpensive.
Due to its peculiar nature, it also possesses some special features to make it work. The SD card used in the Raspberry Pi is one of them. These SD cards should be of special formats and sizes to prevent any irregularities in the performance of the machine. We’ll look through these special features as we go on below.
Raspberry Pi SD Card Format
Today, there are 3 major formats of SD cards. They are the FAT16, FAT32, and exFAT formats. Each format represents classes of SD cards based on specifications provided by the SD association. The FAT16 format is found in SD cards and their capacities are from 128Mb to 2Gb of data. The FAT32 on the other hand is found in SD High Capacity (SDHC) cards and can take information between 4Gb to 32Gb. The last format, exFAT, is found in SD Extended Capacity (SDXC) cards. These cards can take data ranging from 64Gb to 1Tb.
The Raspberry Pi’s bootloader can only read from FAT16 and FAT32 SD cards. Thus, if you have any SD card with capacities higher than 32Gb, you have to format or reformat such SD card to FAT32 before installing on your Raspberry Pi. Now that you know the format, Let’s talk about size.
Raspberry Pi SD Card size
SD cards have evolved from time. As we have come of age, we have seen a lot of doubling in sizes and capacities of these cards. Currently, we have SD cards of 128Mb, 256Mb, 512Mb, 1Gb, 2Gb, 4Gb, 8Gb, 16Gb, 32Gb, 64Gb, 128Gb, 256Gb, 512Gb, 1Tb and most recently 2Tb. The earlier sizes (2Gb and below) have lost relevance as requirements for them have reduced over time. The 2Tb SD card is still the most recent one and thus, very scarce.
The Raspberry Pi comes with an 8Gb SD card installed. It’s great if you are not a constant user of the computer. If you are, then you’ll be getting the «Low Disk Space» warning soon. This is why most Raspberry Pi users use SD cards with a higher capacity. Cards with capacities greater than 32Gb have been found to work fine, if properly formatted (As you’ll learn in this article).
Before you go to the next step, it is important to keep a backup of important files and documents on the SD Card before formatting or reformatting the card. RecoverIt is a great tool for recovering lost files on a drive or SD Card.
Part 2. 4 Methods to Format SD Card to FAT32 in Windows for Raspberry Pi
If you use a Windows OS, formatting your SD card to FAT32 is very simple. The methods to format your SD card may vary depending on the size of the SD card.
If your SD card is 32Gb and below, we can use the Windows Explorer method, The Disk Management Method, and the DISKPART method.
Method 1. Windows Explorer to Format SD Card
Follow the steps below to format your SD card using windows explorer.
Step 1. Open Windows Explorer and right-click on the SD Card. Select «Format» as shown below.
Step 2. Under «File System» choose FAT32 as seen below and click on «START»
Step 3. A warning message will pop up to seek confirmation for the formatting process. Click on «OK» if you’re set and click «Cancel» if you have not backed up your key files and documents.
Once this process is done, your FAT32 SD card is ready for use on your Raspberry Pi.
Method 2. Disk Management
Disk management is a tool on the windows system that helps you to do advanced tasks on storage and disks present on the computer.
To convert your SD Card to FAT32 using this method, follow the following steps.
Step 1. Open Run from the Start menu and type «diskmgmt.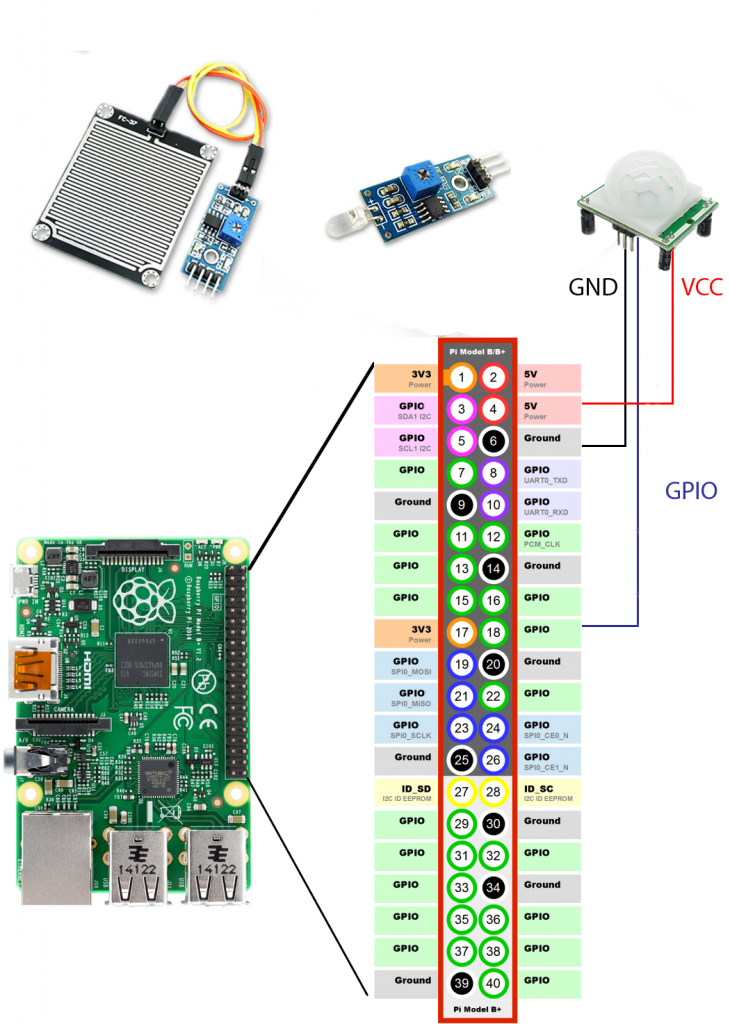 msc» into the command box. Right-click on the SD card you want to format and click «format».
Step 2. Under the file system select «FAT32» and click OK as seen below.
Step 3. A warning message comes up. Ensure to backup any important files before clicking «OK». Select «Cancel» if you are yet to back up important files.
Your FAT32 SD Card is now ready to be used on your Raspberry Pi.
Method 3. Diskpart to Format Your SD Card
DISKPART (short for Disk Partition Tool) is a tool found in windows Operating systems for managing computer drives and partitions.
To use the diskpart method to format your SD card for your Raspberry Pi, follow the steps below.
Step 1. Run Diskpart as administrator. This can be done by opening «Run» from the start menu, typing «diskpart» and clicking «OK».
Step 2. Enter «ListDisk» to list disks available on the system
Step 3.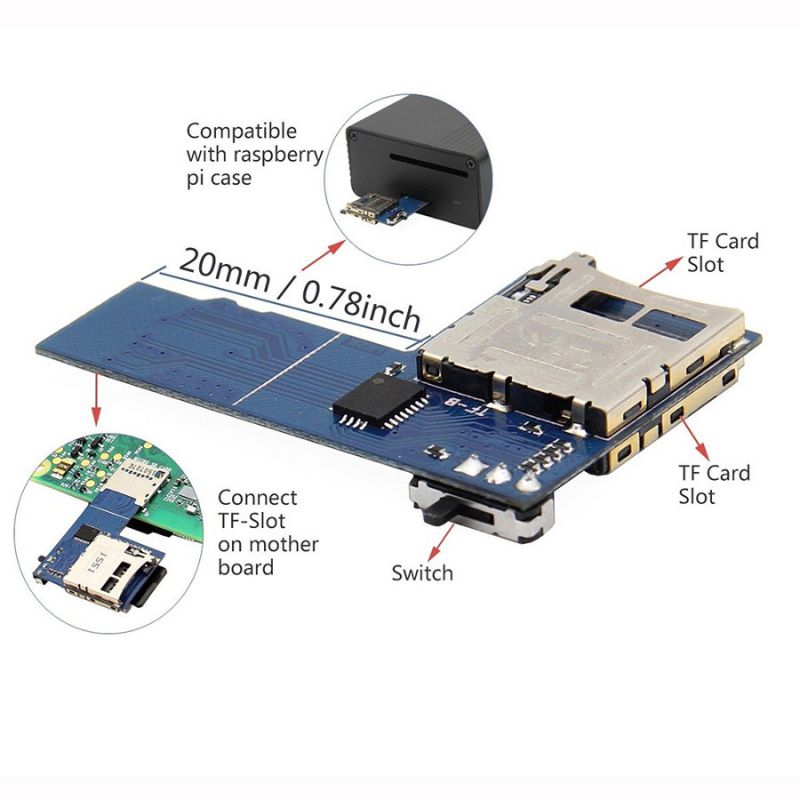 Enter «Select disk x» where x is the number corresponding to your disk
Step 4. Enter «List Partition» to create a list partition on the SD Card
Step 5. Enter «select partition x» where x is the same number of the SD card as in step 3
Step 6. Finally, enter «format fs=fat32 quick» and wait for the program to run to 100% completion as seen below.
When the process is complete, the SD Card is ready to be used on a Raspberry Pi.
If your SD Card is higher than 32Gb, you can use the Powershell to format it into the FAT32 type.
Method 4. Powershell Method For 64gb And 128gb SD Cards
This method takes quite some time to complete due to the volume of the cards involved.
To do this, follow the steps below;
Step 1. Enter the Windows button and «X» simultaneously and click on «Powershell (Admin)» from the menu to run Powershell as an administrator.
Step 2.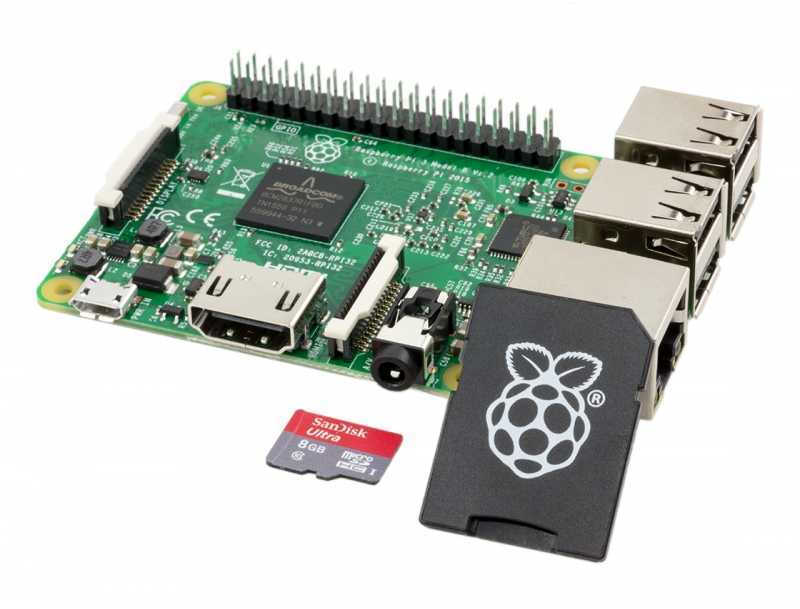 Type «format /FS:FAT32 X:» into the command box and press enter. The card begins to be formatted and once completed in an hour or so, the SD Card is ready for use on the Raspberry Pi.
Tutorial Guide about How to Format an SD Card
Recent Videos from Recoverit
View More >
Free Download | Win Free Download | Mac
Part 3. Format SD Card for Raspberry Pi on Mac
If you own a Mac OS system, you are not left out on getting yourself a reformatted SD Card. It is easily done using Mac’s inbuilt tool known as «diskutil». Diskutil is similar to the diskpart tool on windows OS. To format your SD card for your Raspberry Pi, follow the steps below.
Step 1. Launch the terminal application on your computer and insert the SD Card also.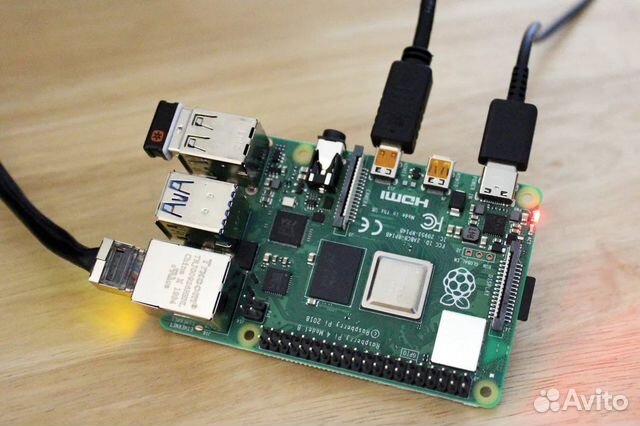
Step 2. In the terminal window, enter «diskutil list» to list all connected disks and drives as below
Step 3. To format your disk, enter «sudo diskutil eraseDisk FAT32 YOURNAME MBRFormat /dev/diskX» into the command box. Where x is the number that corresponds to your disk in step 2. The system runs the program as shown below
When the process is complete, the SD Card can be installed safely on the Raspberry Pi.
Part 4. Format SD Card on Raspberry Pi
If you do not have access to a Windows or Mac PC, you can also format the SD Card on the Raspberry Pi itself! All you need is a special tool made by the creators of Raspberry Pi. This tool is called the «Raspberry Pi Imager». To use this tool to format your card, follow the steps below.
Step 1. Install the Raspberry Pi imager to your device. It can be installed directly by entering «sudo apt install rpi-imager» in a terminal window or by downloading the files from their website and subsequently moving to the SD Card
Step 2.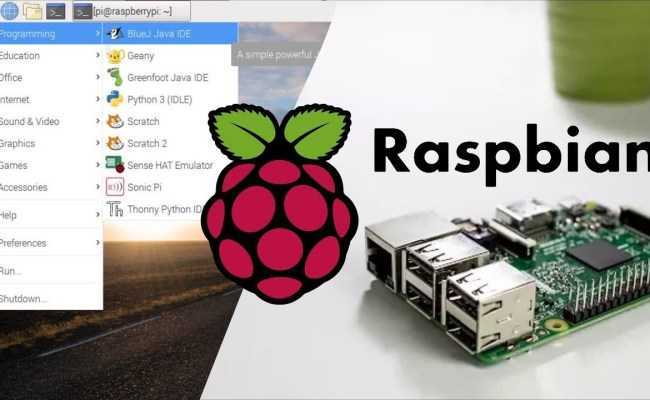 Once installed, open it and on the «Select OS Option», choose «Erase (Format as FAT32)».
Step 3. Click on «Choose SD Card» and select the SD card you wish to format.
Step 4. Click on Write and wait for the process to complete.
Once this is done, your SD Card is set to be used on your Raspberry Pi.
Part 5. Tips on Making an SD Card for Raspberry Pi
There are some important tips to take note of when making an SD Card for your Raspberry Pi. This is key to prevent loss of data and to ensure that the formatting process is as efficient as possible.
1. Be patient and careful
See all the instructions above, you don’t want to make a mistake on any one of them and end up formatting a wrong disk drive. This is why you must not rush when performing any of the processes above. You must also ensure that your computer is well charged or connected to a power source when any formatting process is ongoing. This is to prevent the corruption of the SD Card as a result of the system going off.
2. Always back up your files
If the SD card you’re looking to format is a new one, you have little to worry about when it comes to backing up. If it has been in use before now, then you have to pay attention to the files on it. Formatting an SD card will lead to erasing all of the files on it. This is why you should back up by making copies on the cloud, on a separate drive/disk, or on your computer.
3. How to recover lost files
Accidents happen. It could have been an error, or even deliberately but we can end up losing key files. You need not worry. They’re not gone forever! Recoverit is a fast, effective, and easy to use Recovery tool that gets your files back in less than 5 minutes!
Free Download | Win Free Download | Mac
Your files can be regained in these easy steps;
Step 1. Download Recoverit for your Mac or Windows here. Install and open the application.
Step 2. Insert your SD Card and select it as the location to start recovering files. Click on Start after selecting.
Step 3. Recoverit scans the computer for the files as shown below.
Step 4. Once the scan is complete, you can preview the files and click the ones you want to recover. Once you finish choosing, click on the «Recover» button on the bottom right corner of the screen and like magic, your files are back to their original location.
Closing words
Getting the best out of your Raspberry Pi shouldn’t be so daunting. Your computer should work for you without stressing you out. With larger space on your Raspberry Pi, you can enjoy your work and play and no longer get the «low memory» prompt (well at least anytime soon). Enjoy!
Free Download | Win Free Download | Mac
Raspberry Pi Users Also Ask
-
1. What is the best size SD card for Raspberry Pi?
The best size SD Card for Raspberry Pi is 32Gb.
 Some users have used larger card sizes like 64Gb and 128Gb very well. What’s important is that you format it to FAT32 before use.
 -
2. Does Raspberry Pi have memory?
Yes, it does. The latest models of Raspberry Pi have variants of 2Gb, 4Gb, and 8Gb of RAM. You can make a decision depending on your computing needs and usage.
-
3. Can Raspberry Pi run Windows?
The Raspberry Pi can run a special version of Windows IoT (Internet of Things) Core. It is not as seamless as the regular windows OS but it serves as a great substitute for core Windows users who aren’t looking to change their User Interface.
-
4. How do you format a Raspberry Pi?
The Raspberry Pi Imager is a tool that can be used to format a Raspberry Pi.
 It is available for download on the Raspberry official website.
Raspberry v4 (2 GB) Starter Kit
Raspberry Pi 4 Starter Kit v4 (2 GB) is a kit to get you started with your Raspberry Pi 4 with 2 GB of RAM and contains everything you need to complete 19 tutorial projects with examples of use!
Have you ever dreamed of turning your computer into a mini-server that would perform tasks around the clock or at the click of a finger? What to make it from? The laptop will lose mobility, the desktop computer will be noisy, and any background task will interfere with normal operation. nine0003
Now imagine having a separate inexpensive computer that doesn’t make noise, consumes a minimum of electricity, and fits in your pocket.
This is exactly what the Raspberry set is. It is based on the Raspberry Pi 4 Model B single board computer and contains everything you need to get a complete and ready-to-run Linux system in just a couple of minutes.
Linux Education Computer
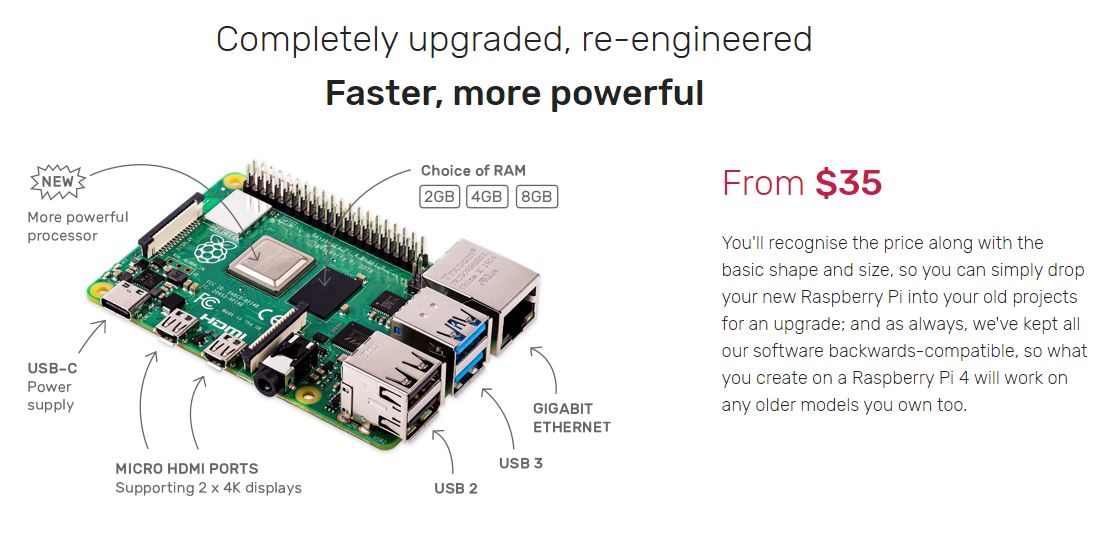
The heart of the kit is a Raspberry Pi 4 Model B (2 GB) microcomputer the size of a bank card.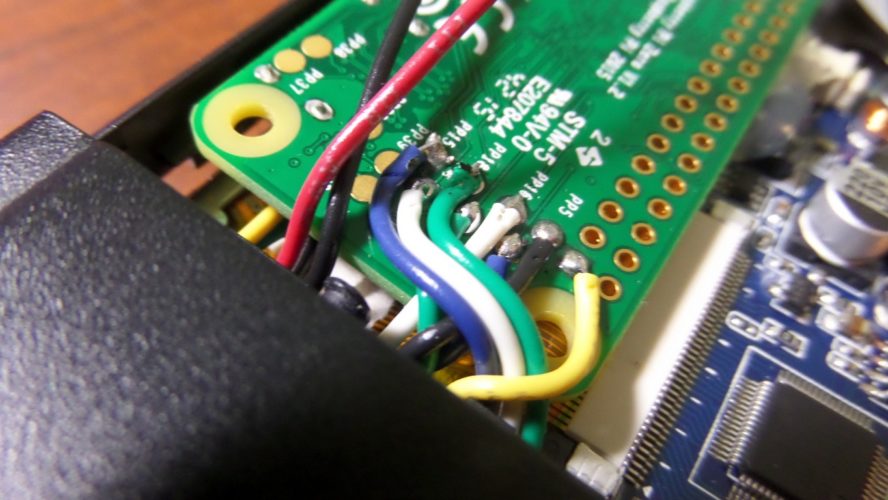 On board you will find the usual components: a processor, RAM, two Micro-HDMI ports, four USB, Ethernet, Wi-Fi and Bluetooth modules. nine0003
Only 40 general purpose input/output (GPIO) pins look unusual. Peripherals are connected to them to interact with the outside world: actuators, any sensors and everything that runs on electricity.
The operating system is stored on a microSD card. The Raspberry Pi 4 runs a custom build of Linux called Raspbian. If you don’t know Linux, don’t be intimidated. This set is a great opportunity to sort things out. Connect the single board to a monitor or TV and apply power. After a few seconds, the board will boot into graphics mode, very similar to familiar Windows. nine0003
It’s okay to lose data or screw up the settings badly: the image on the SD card can be restored in a matter of minutes. After that, feel free to continue experimenting!
What’s in the box
In addition to the original Raspberry Pi 4 board, we put everything you need for a quick start in the box with the kit: an SD card with an installed operating system, a powerful power supply, a set of wires for connecting to a monitor or TV.
In order not to mess around with breadboards and a scattering of radio components, we came up with an electronic cloud. It has four buttons and a dozen yellow and blue LEDs. The cloud sits on regular GPIO pins, and its elements can be controlled directly from the program code. nine0003
The set comes in a nice package. It is perfect as a gift for a novice programmer from the age of 14 and a web developer of any age.
What you’ll learn
A colorful booklet will help you understand the contents — a minimum of theory, a maximum of practice.
The beginning of the book is devoted to the basics of working with Linux. You will learn how to start the computer, set up Wi-Fi and change the screen resolution, get acquainted with the console and the file system.
Then comes the turn of nineteen experiments that will teach you the basics of the Python language, help you master web programming and build a home theater media center. nine0003
Experiments are accompanied by color illustrations and screenshots, program codes with detailed comments and tasks for the development of the project.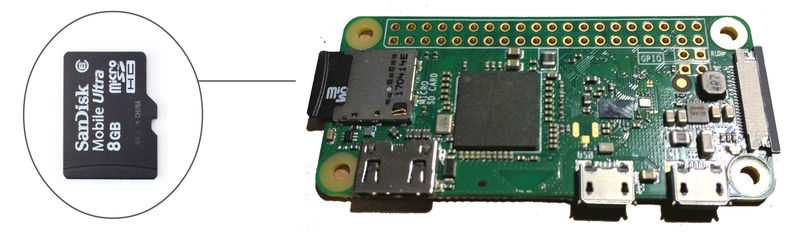
Experiments are waiting for you:
- A little about Python
- Lamp
- Beacon
- Switch
- Switch
- Brightness control
- Light control panel
- Massive optimization
- Web server
- Internet light
- Feedback
- Weather Fidget
- Bot VKontakte
- Autostart and schedules
- FTP — File Server
- Karamba!
- Cinema
- Install the torrent in advance
nine0041 Landing page
What’s next
Many controllers can work with the Raspberry Pi: Arduino, micro:bit, Espruino and Iskra JS.
Raspberry assembles stand-alone smart home systems, game consoles, home theater systems, CNC machines and 3D printers using these platforms. nine0003
Package
- Raspberry Pi 4 Model B (2 GB)
- microSD card with Raspbian Linux operating system
- GPIO Cloud
- The book “Raspberry.
 Educational computer on Linux»
 - Housing
- 3A power supply with USB output
- USB cable (A to Type-C) with 3A current support
- micro-HDMI cable
- Twisted Pair Patch Cord
- Putting together a retro console
- Electronic booklet
- Learn more about the set «Raspberry v4»
- SD card from which you will boot the operating system; the manufacturer recommends using a card from 8 to 32 Gb, it actually works on smaller cards; nine0042
- monitor or TV with HDMI, DVI or RCA connectors (only for models A and B), and respectively an HDMI-HDMI, HDMI-DVI or RCA-RCA cable, an HDMI-VGA converter can also be used;
- USB keyboard;
- USB mouse
- power cable or micro-USB battery
nine0107
Projects
Documentation
Raspberry Pi Beginner | Fun Robotics
Not sure where to start learning about the Raspberry Pi? The Entertaining Robotics project presents the Raspberry Pi: Getting Started training course.
Lessons include text instructions, photos and instructional videos. In each lesson you will find a list of required components and a program listing. The course is aimed at beginners, to start it, you do not need any additional knowledge from electrical engineering or robotics. nine0003
Raspberry Pi Introduction
What is a Raspberry Pi?
Raspberry Pi is a single board computer, that is, various parts of the computer that are usually located on separate boards are shown here on one. In addition, this board has a relatively small size — approximately 8.5 * 5.5 cm.
The product name combines Raspberry — raspberry and Pi — the number of Pi. The image of a raspberry became the logo of the project.
The Raspberry Pi is an inexpensive platform — its MSRP is only $35, and for the latest A+ it’s $20. nine0003
Sale of «raspberry» began relatively recently — in early 2012, today it is the most popular platform in its field, more than 3.5 million copies of Raspberry Pi have already been sold.
Learn more about the Raspberry Pi in our publication «Raspberry Pi — what kind of fruit?»
How are Raspberry Pi and robots connected?
Raspberry Pi is often used as robot brain, home server or just computer.
Raspberry Pi in education
Initially created as an educational project, Raspberry Pi is great for learning the basics of electronics. Many computer classes have been created based on the Raspberry Pi. However, today his appointment has gone beyond educational.
What do you need to get started with your Raspberry Pi?
To get started with the Raspberry Pi, in addition to the board itself, you will need:
Raspberry Pi comes without an OS, you need to download it from the manufacturer’s website and upload it to an SD card.
Raspberry Pi Mods
The Raspberry Pi comes in three flavors: A, A+, B and B+. Model B is the most popular, B+ is gaining popularity as it was released recently.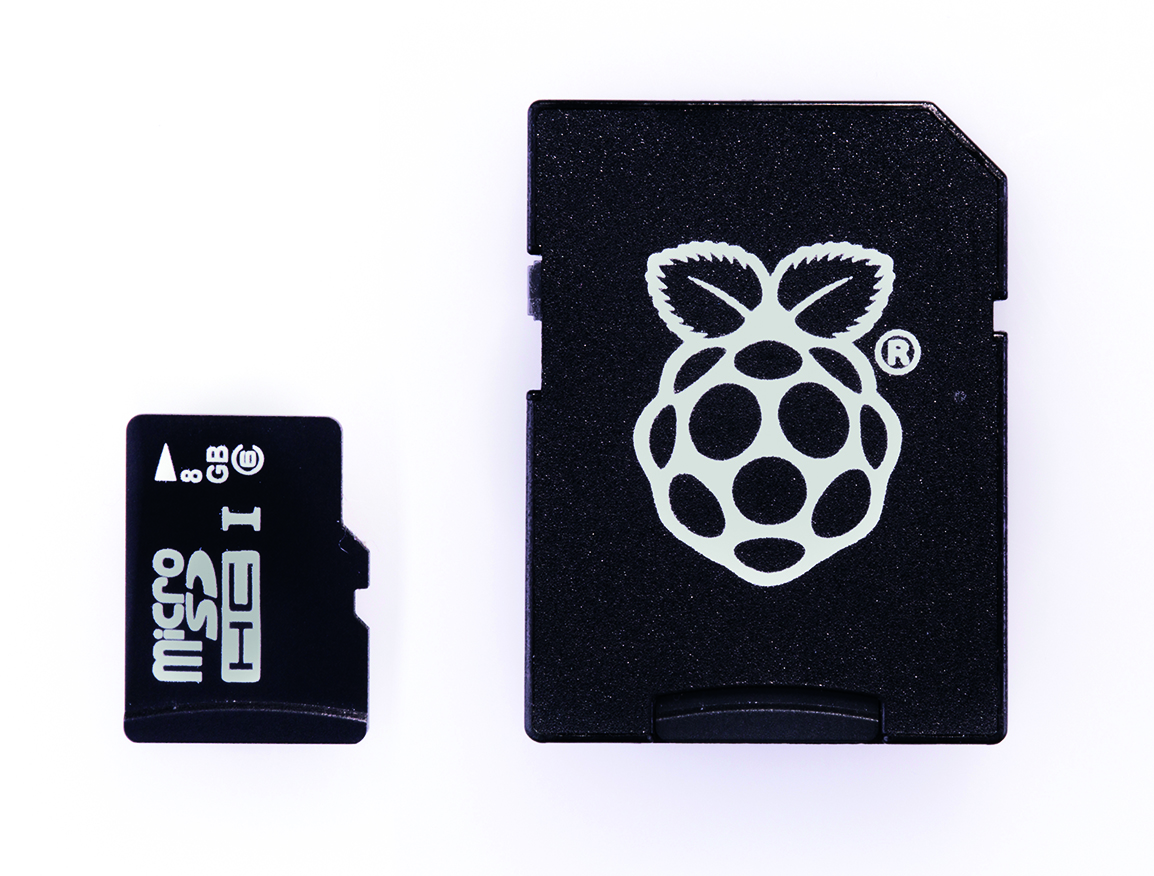 The newest and cheapest version of the A+ is likely to be a hit due to its price. nine0003
Upd. New modifications of the Raspberry Pi board have been released. Some of them are: Raspberry Pi 4, Raspberry Pi 3, Raspberry Pi Zero.
Online course
«Raspberry Pi: Getting Started»
Lesson 1. Device and OS installation
Raspbian
The first lesson discusses the Raspberry Pi device, installing the operating system Raspbian , turning on and turning off the Raspberry Pi.
Text and video of lesson « Device and OS installation on Raspberry Pi « .
Lesson 2. Connecting to the Internet, programs from the Pi Store and LibreOffice
In this lesson, you will set up your Raspberry Pi to connect to the Internet via a LAN cable or WiFi adapter, learn how to download programs from the Pi Store catalog, in particular, install a free office suite libreoffice.
Text and video of the lesson «Internet, programs from the Pi Store and LibreOffice on Raspberry Pi».
Lesson 3. Console, apt-get utility, screenshots, remote control
In this tutorial, you will learn how to use the Linux console, download programs using the apt-get utility, take screenshots using the scrot utility, and control your Raspberry Pi remotely using VNC.
Text and video of the lesson “Console, apt-get utility, screenshots, remote control of Raspberry Pi” .
Lesson 4: Working with GPIOs, Blinking an LED, Python
In this lesson, you will connect an LED and a button using the GPIO ports found on the Raspberry Pi. nine0003
Text and video of the lesson «Raspberry Pi: Working with GPIO, blinking LED, Python».
Where to buy Raspberry Pi
Raspberry Pi and kits with it can be purchased from authorized dealers and their partners and in numerous online stores.
The most attractive prices, constant special offers and free shipping on the websites of the Chinese stores Aliexpress and DealExtreme.