Hosting a Webserver Using a Raspberry Pi | Engineering Education (EngEd) Program
The Raspberry Pi can be used as a web server on your main local network or the internet at large. It is a great selection in cases where you want an intranet for the office or a web development server.
You can create a local Pi webserver to deliver various contents while you are surfing over the internet. To make the webserver operational, the Raspberry Pi should be connected to the local network. And, ensured that it has the latest version of the operating system of Raspbian. These are the defined instructions you need for any model to work even on the pocket-sized Raspberry Pi Zero W and the very powerful Raspberry Pi 4.
Table of contents
- Prerequisites
- Introduction
- Setting up Apache on Raspberry Pi
- Changing the Host Name of the Server
- Conclusion
- Further reading
Prerequisites
For the readers to follow through, they are assumed to have an installed operating system with the Pixel window manager. In summary, you need to have:
- A Raspberry Pi Zero W.
- Apache webserver.
- Internet.
- Modules such as SSH enabled.
Introduction
Various web servers can be related to the Raspberry Pi, and each has utilization advantages. This tutorial uses the Apache webserver application.
Apache is an open-source web server that provides content via the internet. It can be installed on a Raspberry Pi and used to deliver web pages. Apache can handle HTML files through HTTP, and with extra modules, it can help with dynamic web pages written in languages like PHP.
Apache offers the advantage of being able to handle high traffic with less configuration. You can configure it to conduct an operation you wish and the approach to use. To increase its efficiency on the Raspberry Pi, you can eliminate modules that are not required.
Setting up Apache on Raspberry Pi
Step 1: Accessing the terminal
This step will describe how to access the raspberry pi’s terminal. This can be achieved in two main ways as shown below:
- You can access the command terminal by clicking
CLRL+ALT+Tfrom the Raspbian desktop.
- You can also opt to connect remotely through SSH in case it is enabled on the Raspberry Pi. This is possible through a tool such as Putty and then use raspberry’s username and password to log in.
Note: The default login credentials for a raspberry Pi using SSH are: Username: pi, Password: raspberry.
Step 2: Updating packages
In this step, we will make sure that the available packages in our Raspberry pi are updated by typing the command below into the terminal. This ensures you have the current versions of any file you download afterward.
Sudo apt update
Step 3: Installing Apache
In the third stage, we will install apache. To Install apache2, we run the following command:
Sudo apt install apache2 –y
Step 4: Installing PHP
This is the point where we install PHP. PHP helps in making sure that the web pages function as expected and also communicate with the database.
Add PHP using the command:
sudo apt-get -y install php5-common php5-cgi php5
Step 5: Downloading MySQL
After PHP has been successfully installed, we can now download our desired database. In this tutorial we are using the MySQL database.
To download MySQL, run the following command in the terminal:
sudo apt-get install MySQL-server
Note: When prompted to change the root password, please choose a strong password for MySQL. Make sure to write it down somewhere you can refer to later on.
Step 6: Installing MySQL
This stage describes the installation process of the already downloaded database.
When the download is finished, formal installation is required and can be done using the command:
sudo mysql_secure_installation
Step 7: Restarting the server
At this point, we will restart the webserver, apache2, to confirm that the changes take effect and are running.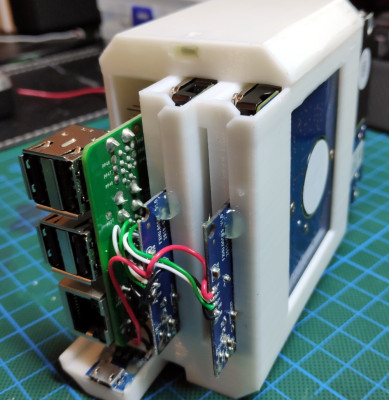 Use the command:
sudo service apache2 restart
Step 8: Testing the webserver
We will now put the apache webserver to test. Since Apache has an HTML file in the Apache web subdirectory, you can serve it on the raspberry when you browse HTTP://[Host_IP_Address]/.
When you browse to the default page of the webserver on the Pi or using another computer, the following page will be displayed if the Apache webserver is working.
You can build your website by locating the PHP files or the HTML in the /var/www/HTML directory. To make the folder easily accessible to the default user, that is, the pi, run the command:
Sudo chown –R pi/var/www/html
Changing The host name of the server
The hostname of the Raspberry Pi will be raspberry by default. Since you might have other raspberry pi names on your network, you can make changes using the following steps:
- Type
Sudo raspi-configin the terminal and then select the hostname option.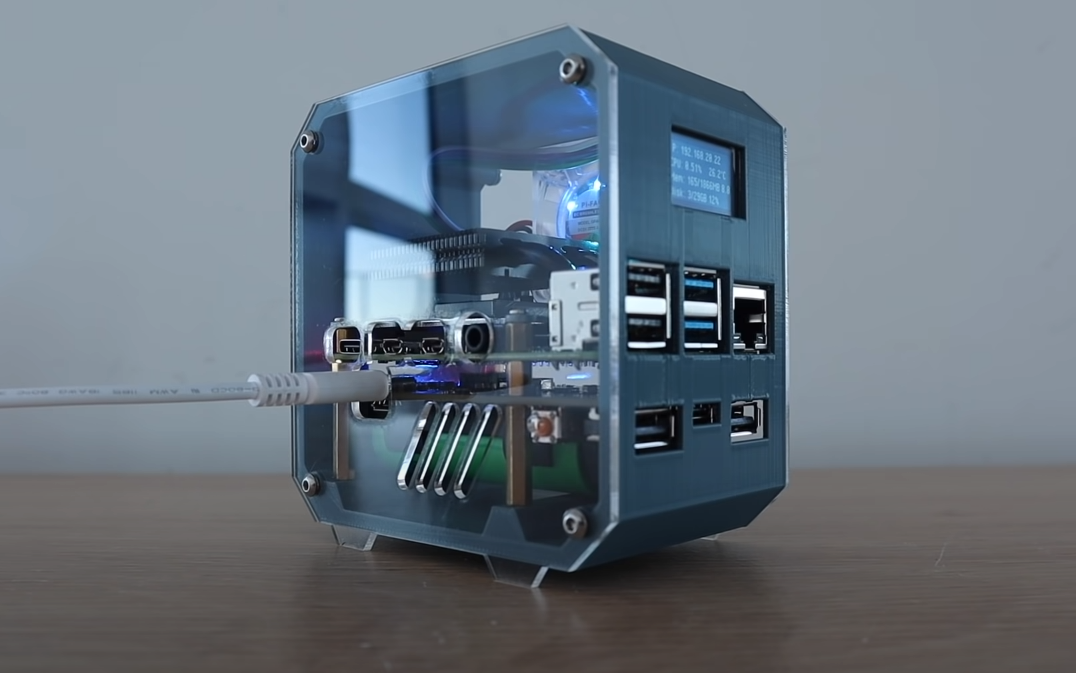
Alternatively, use the start menu to navigate to Preferences->Raspberry configuration to launch the windowed version.
- Choose the Hostname you wish to have, for instance, “myraspserver”, then click ok.
Note: This will assist you in getting over the warning about not using characters other than numbers, hyphens, or letters. The hyphen is only allowed in situations where it is in between a name.
- Choose “yes” when prompted to restart.
Once you have allowed your computer to reboot, the Raspberry Pi will now be shown with its changed name.
Conclusion
Web hosting offered by providers of such services is given at a price and in some cases, it can be very expensive. Hence, it is important to find ways of cutting such costs, especially if the hosted service is only for a small group of people.
By following the steps presented above, it is possible to install and host a web server using a Raspberry Pi. The hosted web server can be used to serve a small office through an intranet and is more cost-efficient.
Further reading
- Broadcasting a private FM radio station using a Raspberry Pi
Peer Review Contributions by: Dawe Daniel
How to Set Up a Raspberry Pi Web Server — Tom’s Hardware
One of the most popular uses of the Raspberry Pi is as a web server that lives on your local network. Whether you need an Intranet for your office or a small server for doing web development, the Pi is a great choice. In fact, at Tom’s Hardware, we have a local Pi web server that we use to deliver the content for our laptop battery test, which involves continuous surfing over Wi-Fi.
To get your web server working, you’ll need a Raspberry Pi that’s connected to your local network and running a fairly-recent version of the Raspbian operating system. These instructions will work on just about any model, including the powerful Raspberry Pi 4 and diminutive Raspberry Pi Zero W. If you need to install Raspbian, see our tutorial on how to set up a Raspberry Pi or, better yet, how to do a headless install (no keyboard or screen required).
1. Navigate to the command prompt / terminal. You can get there by hitting CTRL+ALT+T from the Raspbian desktop or connecting remotely via SSH if you have that configured. Some users also configure the Raspberry Pi to boot directly to the command prompt.
2. Update your packages by typing
sudo apt-get update
This will make sure that you get the latest versions of every file you download after this.
3. Install apache2 with the command:
sudo apt-get install apache2 -y
4. Install php for your sever by typing:
sudo apt-get install php libapache2-mod-php -y
5. Install mariadb so you can use a mysql database with your website. You start by typing:
sudo apt-get install mariadb-server
Then, after the download is finished. You must do the formal install by typing:
sudo mysql_secure_installation
You will be asked for a root password. You can leave it blank.
6. Install the php-mysql connector so php pages can access the DB.
sudo apt install php-mysql
7. Restart apache2 so all of the changes are running.
sudo service apache2 restart
8. Test your server. On the Raspberry Pi itself, you should be able to go to http://localhost and see a test page. From another computer on the same network, you should be able to get there by visiting http://raspberrypi.local or http://raspberrypi, provided that your Raspberry Pi’s hostname is raspberrypi.
9. Build your website by putting html or PHP files in the /var/www/html directory.
Changing Your Server’s Host Name
By default, your Raspberry Pi’s host name is «raspberrypi.» But that’s not only a boring address for a website, but it’s problematic if you have more than one Pi on your network.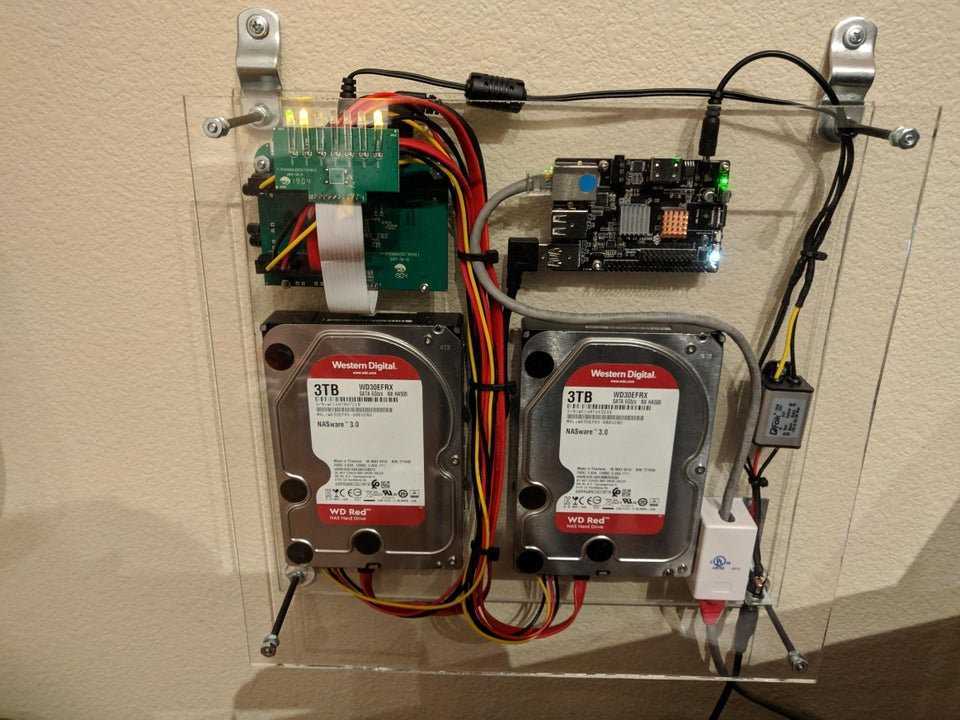 Fortunately, it’s each to change the host name to something else.
1. Enter the Raspberry Pi Configuration tool by typing this in the terminal.
sudo raspi-config
Alternatively, you can launch the windowed version by navigating to Preferences->Raspberry Pi Configuration from the start menu, but why like doing it via the command line utility instead.
2. Select Network Options
3. Select Hostname
4. Tap Ok
to get past a warning about not using characters other than letters, numbers or a hyphen (but only if the hyphen is in the middle of the name).
5. Enter your hostname and hit Ok.
6. Select Finish.
7. Select Yes when prompted to reboot.
After you reboot, your Raspberry Pi will have its new name.
How to Set Up FTP on Your Pi Web Server
You won’t have much of a web server if you don’t put some web pages and media files in the /var/www/html folder.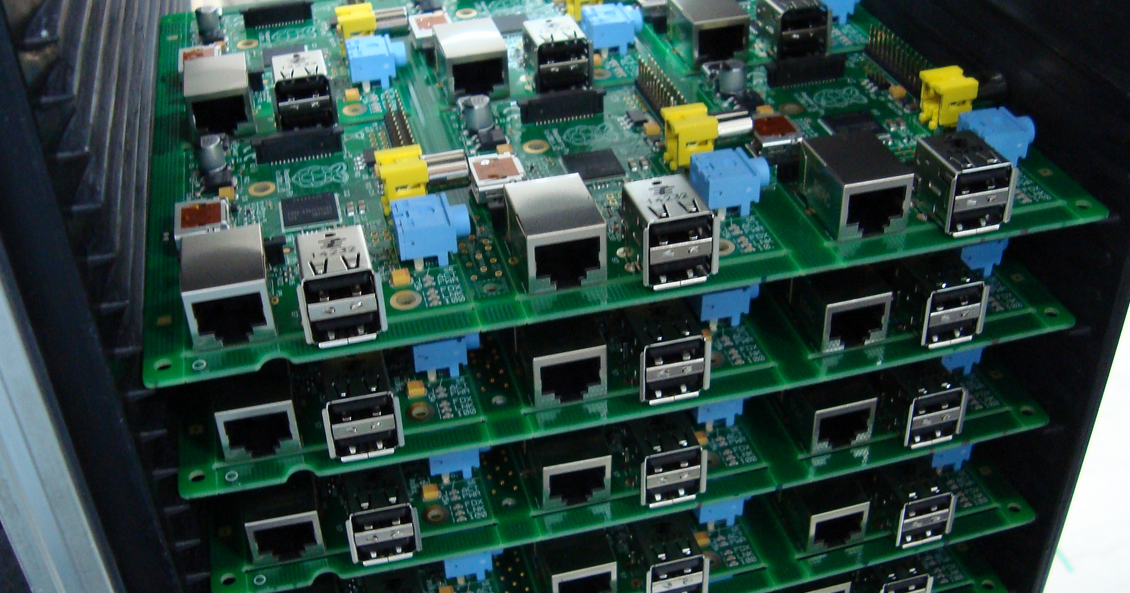 And while you could do all of your web development on the Pi, most people will probably want to write the code on their primary PCs and then copy it over. And one of the best ways to do that is via FTP. Here’s how.
1. Enable SSH on your Raspberry Pi if you haven’t already. You can do that by navigating to the Interfacing Options->SSH menu from rasp-config. Or, if you’re on the desktop, you can go to Preferences->Raspberry Pi Configuration and click on the interfaces tab.
2. Change the permissions for the /var/www/ folder (and all folders under it) so you can write files to it. To do this, you must enter the following commands.
sudo chown pi /var/www/html
3. Use an FTP client on your PC and make sure to set it to use SFTP protocol, not just plain FTP. If you’re using Windows, we recommend Filezilla, which is the leading free FTP app.
The default username and password are «pi» and «raspberry» as they are for SSH.
Get instant access to breaking news, in-depth reviews and helpful tips.
Contact me with news and offers from other Future brandsReceive email from us on behalf of our trusted partners or sponsors
Avram Piltch is Tom’s Hardware’s editor-in-chief. When he’s not playing with the latest gadgets at work or putting on VR helmets at trade shows, you’ll find him rooting his phone, taking apart his PC or coding plugins. With his technical knowledge and passion for testing, Avram developed many real-world benchmarks, including our laptop battery test.
Topics
Raspberry Pi
Raspberry Pi as a Website Hosting Server / Sudo Null IT News It is well suited to the role of a platform on the basis of which devices are created that must be constantly turned on. Among the many ways to use the Raspberry Pi is to use this computer as a web server. And, in fact, hosting websites on the Raspberry Pi is very simple. If you calculate the cost of the services of a regular hosting provider, it turns out that they are not so cheap.
 An alternative to such services can be your own hosting on Raspberry Pi, the maintenance of which costs almost nothing. In addition, the Raspberry Pi platform is constantly evolving, so those who decide to use it do not have to worry about having to work with outdated hardware and software in the future. nine0003
Strengths of Raspberry Pi Hosting
Hosting websites on Raspberry Pi has many advantages over using traditional servers for this purpose. Here are some of them:
- Regular hosting is expensive.
- Raspberry Pi is very energy efficient.
- Raspberry Pi is easy to transport.
- Running a regular server 24/7 means a lot of power consumption. nine0014
The
The
Among other things, you can organize hosting on Raspberry Pi in a matter of minutes. Any version of Raspberry Pi will work. As a result, it turns out that someone who has a Raspberry Pi and a good Internet connection can easily host their own website and not worry about anything.
Raspberry Pi website hosting
In this article, I will provide a step-by-step guide to organizing website hosting on the Raspberry Pi. If you need such hosting, it is recommended to read this material without missing anything, and immediately do what is being said. And before you start, review the article — this will allow you to get a general idea of \u200b\u200bwhat you will need to do and what you will need to do this. nine0003
Hardware
To host a Raspberry Pi, you will need the following:
- Raspberry Pi. I guess it goes without saying that you will need a Raspberry Pi before starting this project. But still, I’ll say it. At the same time, try to get the most modern version of the Raspberry Pi — it will provide better performance.
- Router or modem. They are needed to connect the Raspberry Pi to the Internet. Sometimes ISPs give users a device that allows a limited number of user devices to connect to the Internet.
 In such a situation, in order to simplify the connection to the Internet of many devices, a router will come in handy. nine0014
- Ethernet cable. The best way to connect your Raspberry Pi to the internet is with a cable. In this way, a higher quality connection can be achieved. But you can also use a Wi-Fi adapter — built-in or external.
Step 1: Set up the operating system on the Raspberry Pi
Connect the microSD card to your computer and format it. Download NOOBS (New Out Of Box Software). This is an operating system installer designed for beginners. Once the archive has finished downloading, unpack it and copy the files to a freshly formatted microSD card. nine0003
Insert the card into the Raspberry Pi, connect the power supply, keyboard, monitor and mouse to the board. The Raspberry Pi will start to boot, you will see a screen to select the operating system you want to install. If something went wrong at this stage, most likely the power supply or HDMI cable is not connected securely enough. Therefore, check the cable connections to the Raspberry Pi.
If you have no experience with the Raspberry Pi, then on the operating system selection screen, I recommend choosing Raspbian. Another good option is Adafruit. The installation of the operating system will take some time. Make sure that during this time the Raspberry Pi does not turn off. nine0003
Operating system selection screen
After you see the message Image applied successfully , you can click the Return button and the Raspberry Pi will reboot. After the reboot is complete, you will see the GUI of the installed OS.
Step 2: Communicating with the Raspberry Pi Server via SSH
In this step, we will set up an SSH connection to the Raspberry Pi server. The SSH protocol allows you to establish a secure connection between the computer and the Raspberry Pi, used for data transfer. With this connection, you can also use command line tools to control your Raspberry Pi. nine0003
Now that you have the Raspbian OS installed using the latest version of NOOBS, you probably have everything you need to work with SSH installed. In order to establish a connection between the computer and the Raspberry Pi, you will need to find out the IP address of the board. To do this, use the following command:
sudo ifconfig
What you need can be found at the top of the screen. If you connected your Raspberry Pi to the internet using an ethernet cable, the block containing the address you need will start with eth0 . If you are using Wi-Fi, then there will be wlan0 . In both cases, what we need comes after inet addr: . It is this address that can be used to connect to the Raspberry Pi from a computer.
Finding the IP address of the Raspberry Pi
If your computer is running Windows, you will need an SSH client. For example — PuTTY.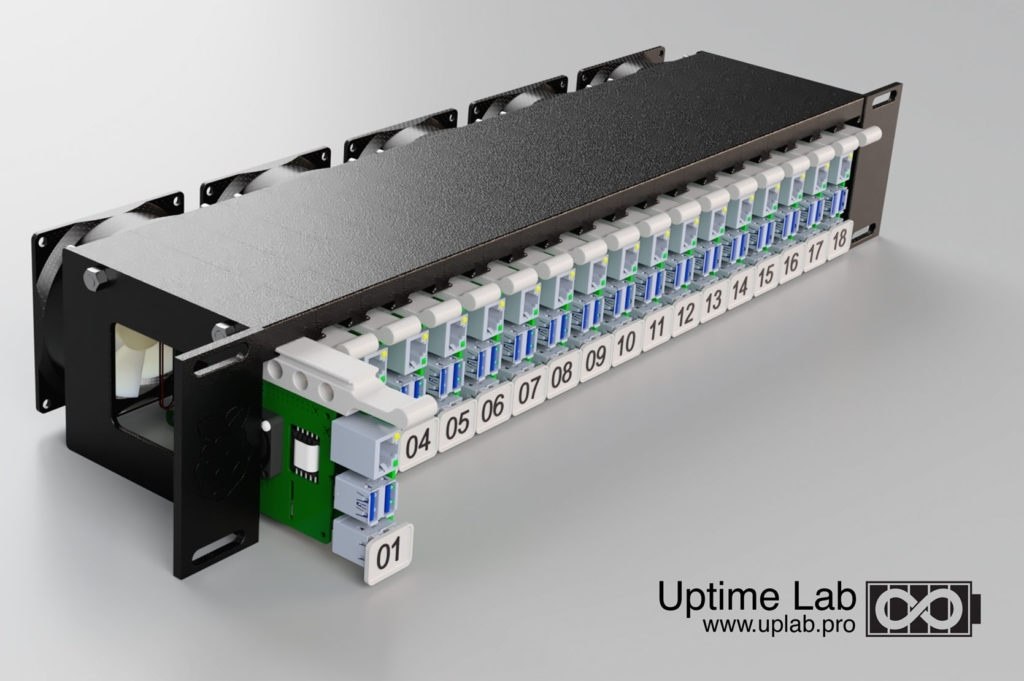 To configure the connection, you will need to specify the IP address in the
 Host Name field, leaving 9 in the field0054 Port 22. If you press Enter , PuTTY will open a terminal window that will ask you for a username (default is pi ) and a password (default is raspberry ) to connect to your Raspberry Pi. Enter them and you are ready to work remotely with your new server.
SSH connection setup window
If you use a Mac or some Linux distribution, then you probably already have everything you need to organize an SSH connection. You, to connect to the Raspberry Pi, just run the following command in the terminal:
ssh pi@IP ADDRESS
If the board’s IP address looks like 192.167.2.2 , you will need to modify this command to:
ssh [email protected]
Then you will be asked for a password.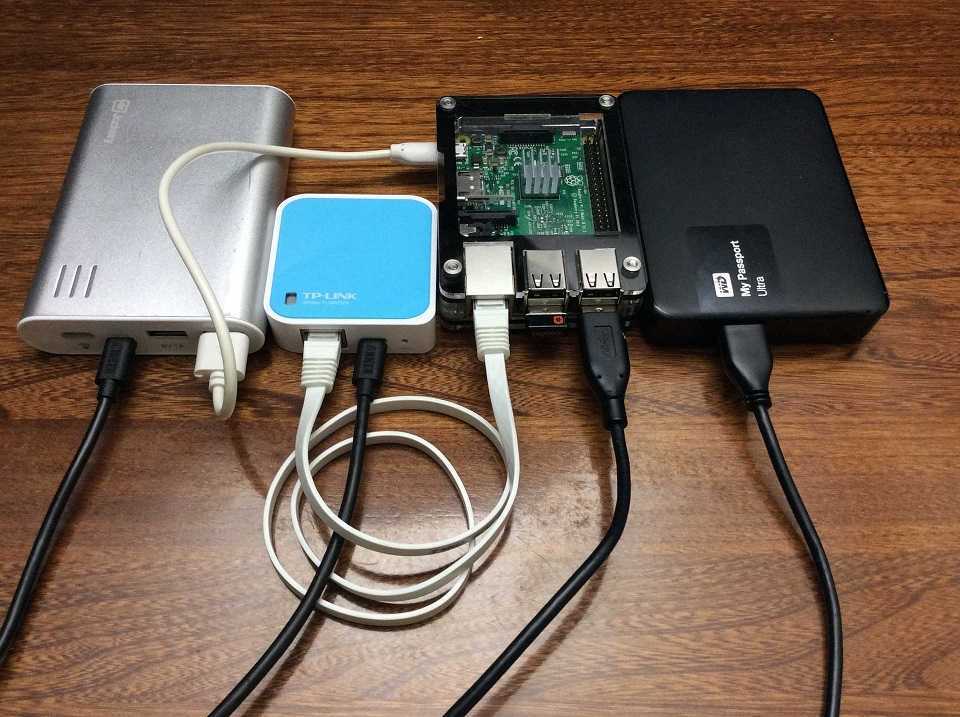 The default password (
 raspberry ) can be changed to something more secure.
Step 3: Update Raspberry Pi Software
Once you have connected to your Raspberry Pi from a computer via SSH, you need to bring the system up to date before installing Apache. To do this, you can use the following commands:
 sudo apt-get update
sudo apt-get upgrade
The system will update and you will be ready to install Apache.
Step 4: Install Apache
If you’re trying to turn your Raspberry Pi into something that can host websites, then you’ll need custom software. For example, Apache. This is an open source and completely free HTTP server, which will allow you to make a web server out of Raspberry Pi.
After downloading the Apache installation files, just one command is enough to install it:
sudo apt-get install apache2 php5 libapache2-mod-php5
This command, however, installs not only Apache. She is responsible for installing some other packages, like PHP and the PHP library for Apache. We may need PHP capabilities, for example, to organize a site connection to a database.
Successful installation of Apache
After the installation is completed, you need to restart the program using the following command to activate the program:
sudo service apache2 restart
Then, to make sure Apache is working properly, you can use this command:
sudo service apache2 status
Verifying that Apache is running correctly
If the output of the above command has the green text active (running) , it means that everything is working as it should. If the server is turned off for some reason, you can start it again like this:
sudo service apache2 start
After that, you will be able to access your Raspberry Pi from your computer. For example, you can open a browser and navigate to this address (which contains the board’s previously found IP address that was used to connect to it via SSH):
http:// 192.167.2.2
A page will be displayed in the browser indicating the successful installation of Apache.
Step 5: Create a simple website
After Apache is installed on the Raspberry Pi, the server will issue a simple standard HTML page when accessed, indicating that the server is running. nine0003
Simple page
If you want to change this page to something of your own, go to the /var/www/ folder and add your code to index.html . You can do this in the terminal like this:
 cd /var/www/
sudo nano index.html
You can check what happened, as before, by accessing the server from the browser.
Step 6: FTP setup
You most likely already have a website that you want to host on your Raspberry Pi. It only needs to be transferred to the server. For this, it is convenient to use FTP. Install
 vsftpd (Very Secure FTP Daemon):
 sudo chown -R pi /var/www
sudo apt install vsftpd
After installing vsftpd , some configuration needs to be done.
Open configuration file vsftpd :
sudo nano /etc/vsftpd.conf
First you need to change the value of setting anonymous_enable from YES to NO . Then uncomment the following lines:
#local_enable=YES #write_enable=YES nine0066Add the following to the end of the file:
force_dot_files=YESThis will allow you to see files whose names start with a dot, like
.htaccess.Configuring vsftpd
After editing the file
vsftpd., pressconf
CTRL+Xto save the file and exit the terminal. You can confirm the operation by enteringYand pressingEnter. As a result, you need to restartvsftpd:sudo service vsftpd restartNow it will be possible to connect to the Raspberry Pi and upload site materials to the server, to the directory
/var/www/html.Step 7: Get a domain name
Now you can upload your site materials to the server and access the site from the local network. But your site is not available to anyone else yet. In order for Internet users to access the site, one more thing needs to be done. Next, we will talk about one of the most important steps in setting up a Raspberry Pi server. nine0003
In order for Internet users to access your site, the server must have an external IP address. But suggesting that everyone access the site by IP address is not entirely professional.
People prefer to go to sites using their addresses, written not in numbers, but in letters, understandable words. There are many services that allow you to set up a correspondence between an IP address and a domain name for free. They are usually very easy to work with.
If you don't have a static IP address and your ISP keeps changing your IP address, you can use the No-IP service, which will automatically update the association between your domain name and your current IP address. In order to use this service, you need to create a free account on it and register a domain name, like
rspi.no-ip.org. After that, you need to install some programs on the Raspberry Pi:cd /usr/local/src/ sudo wget http://www.no-ip.com/client/linux/noip-duc-linux.tar.gz tar xf noip-duc-linux.tar.gz sudo rm noip-duc-linux.tar.gz cd noip-2.1.9-1/ sudo make installAfter that, you will be asked for a username and password, then the installation will begin.
Next, you need to make sure that the No-IP client starts automatically when you turn on the Raspberry Pi. To do this, edit file
rc.local:cd /etc/ sudo nano rc.localYou need to add the following line to it:
sudo noip2Save and close the file. Then reboot your Raspberry Pi with
sudo reboot.Step 8: visit the website
After the connection between the IP address and the domain name of the site is configured, you can enter it by entering its domain name in the address bar of the browser. When using the No-IP service, the operation of the system can be checked with the following command:
sudo noip2 -S
Check noip2
If you manage to get a valid PID, it means that everything is working fine.
Step 9: Improve performance and security
Raspberry Pi hosting is pretty easy, but Raspberry Pi is not the best server in terms of performance.
If you lack the performance of your server, you can try to improve it.
One way to improve the performance of the Raspberry Pi server is to use a USB drive instead of an SD card to host site content. With this approach, the time required to access the data will be reduced. nine0003
In general, it can be noted that it is best to host simple static sites on a Raspberry Pi server.
If we talk about security, it is recommended to change the default password to something more secure. To change the password, you can use the command
passwd. This will increase the security of the system.Organization of LAMP hosting
If you think that a static HTML site is too easy for you and that you need something more advanced, then a LAMP server might be for you. Such a server supports PHP and MySQL, which allows you to provide interactive websites. If you want to use this system, install the Apache server first and then MySQL.
To install MySQL and related PHP components, run the following command:
sudo apt install mysql-server php-mysql -yAfter that restart Apache:
sudo service apache2 restartNext, you need to install PHP:
sudo apt install php -y
LAMP server
Once the installation is complete, restart Apache again using the above command. Now the LAMP server is ready to go and you have PHP and MySQL at your disposal, allowing you to create advanced web projects. nine0003
Totals
We have reviewed several options for hosting sites on the Raspberry Pi. As you can see, such hosting is not so difficult to set up. But here you need to take into account the fact that the capabilities of the Raspberry Pi, in comparison with regular hosting, are limited. However, if you need to host a simple static site, then this hosting is quite suitable for you.
You will also need to take performance and security issues into account.
I sincerely hope that you will be successful in setting up and using your Raspberry Pi as an HTTP server. nine0003
How would you host a Raspberry Pi?
Raspberry Pi file server as home NAS / Habr
Single-board mini-computers are suitable for completely different useful applications: blocking ads in all traffic (Pi-hole), controlling a smart home, or printing on an old printer in a pantry via Wi-Fi. But an almost ideal use case is as a file server with an external SSD or HDD connected. It can be home hosting, and even colocation in a real data center. nine0003
We have already talked about creating your own web server on Andoid, as well as hosting files in DNA.
Now let's see what developments are available for Linux:
Ready-made devices
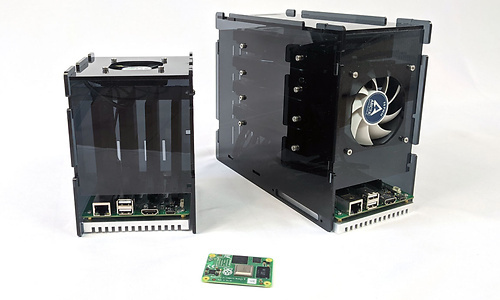
Any server with Raspberry Pi looks nicer in a case that protects electronic components from dust and moisture.
In addition, a small display with status indicators can be attached to the case. It is these devices called PiBox developed by KubeSail. nine0005
The PiBox is a compact container for the Raspberry Pi CM4 module and two 2.5" SSDs (Box 2 mini model), with a small 1.3" status screen that shows temperature, CPU load, and free disk space.In the future, the company promises to release containers for a pair of 3.5-inch drives (Box 2), as well as for five HDD / SSD 2.5" or 3.5" form factor: Box 5 and Box 5 mini models , respectively.
PiBox is positioned as an inexpensive NAS for backup and distribution of files over the local network. And also as a media center, since the latest versions of the "raspberry" support hardware decoding of 4K video. nine0003
You can put on it any standard Linux distribution that you are used to working with, including Ubuntu or Raspberry Pi OS.
Developers have published a catalog of applications that you can put on your hosting as an alternative to proprietary cloud services, which Richard Stallman calls SaaSS.
All these applications will also run on Raspberry: SimpleTorrent torrent client, Plex home media center, PhotoPrism photo archive, Code-Server code editor, Factorio server and many others. nine0003
KubeSail has already collected the necessary budget on Kickstarter, and is now preparing to manufacture and ship the first batch of servers. The standard kit with PiBox boards, fan, external WiFi antennas, LCD, power supply, and a customized Raspberry Pi CM4 (8GB RAM, 8GB eMMC) costs a hefty $250. You can order boards only for the adapter itself, without a case and raspberries, for $100.
It is cheaper to assemble the device yourself by printing the case on a 3D printer according to ready-made layouts. nine0003
Other than the Raspberry Pi, there are file servers on other single boards. For example, ODROID-HC4 on the Amlogic S905X3 processor (four Cortex-A55 cores, 1.8 GHz) is designed in a case that is initially designed to connect and install two more 2.5" or 3.
5" SSD or HDD drives.
ODROID-HC4
This is a cheaper device with a weaker processor, but it still works fine with Ubuntu, Debian or Arch with any server software like Samba, FTP, NFS, SSH, Nginx, Apache, SQL, Docker , WordPress, etc. And it costs only $73, which is almost five times cheaper than PiBox. nine0003
There are more glamorous and more expensive options like The Bitcoin Machine with the Umbrel server on board.
Umbrel OS is a Raspberry Pi OS (Raspbian) based operating system optimized to run a personal cloud, file hosting, Bitcoin and Lightning nodes.
Umbrel OS Application Catalog
DIY
No one forces you to buy a ready-made device. It is much cheaper and more pleasant to assemble it yourself. Based on the cost of components, then an analogue of the same PiBox will cost no more than $60, if you take the cheapest CM4 module. The Raspberry Pi CM4 board comes in 32 variants to suit your taste.
nine0003
32 options
| Part Number | Wireless | RAM | eMMC | Price* |
| CM4001000 | No. | 1GB | 0GB (Lite) | $25 |
| CM4001008 | 8GB | $30 | ||
| CM4001016 | 16GB | $35 | ||
| CM4001032 | 32GB | $40 | ||
| CM4002000 | 2GB | 0GB (Lite) | $30 | |
| CM4002008 | 8GB | $35 | ||
| CM4002016 | 16GB | $40 | ||
| CM4002032 | 32GB | $45 | ||
| CM4004000 | 4GB | 0GB (Lite) | $45 | |
| CM4004008 | 8GB | $50 | ||
| CM4004016 | 16GB | $55 | ||
| CM4004032 | 32GB | $60 | ||
| CM4008000 | 8GB | 0GB (Lite) | ||
| CM4008008 | 8GB | $75 | ||
| CM4008016 | 16GB | $80 | ||
| CM4008032 | 32GB | $85 | ||
| CM4101000 | Yes | 1GB | 0GB (Lite) | $30 |
| CM4101008 | 8GB | |||
| CM4101016 | 16GB | $40 | ||
| CM4101032 | 32GB | $45 | ||
| CM4102000 | 2GB | 0GB (Lite) | $35 | |
| CM4102008 | 8GB | $40 | ||
| CM4102016 | 16GB | $45 | ||
| CM4102032 | 32GB | $50 | ||
| CM4104000 | 4GB | 0GB (Lite) | $50 | |
| CM4104008 | 8GB | $55 | ||
| CM4104016 | 16GB | $60 | ||
| CM4104032 | 32GB | $65 | ||
| CM4108000 | 8GB | 0GB (Lite) | $75 | |
| CM4108008 | 8GB | $80 | ||
| CM4108016 | 16GB | $85 | ||
| CM4108032 | 32GB | $90 |
*The price does not include sales tax and import duties, if any
The main features of the CM4 are not too different from the popular Raspberry Pi 4 Model B, only in a more compact 55x40mm format:
- Broadcom BCM2711 64-bit quad-core processor (Cortex-A72, ARM v8), 1.
 5 GHz;
 - Dual display support up to 4K resolution;
- H.265 hardware video decoding up to 4Kp60;
- RAM 1, 2, 4 or 8 GB;
- eMMC flash memory 8, 16 or 32 GB
- Gigabit Ethernet;
- one USB 2.0;
- two camera interfaces; nine0005
- one PCIe Gen 2;
- 28 GPIOs;
- optional: WiFi 2.4/5.0 GHz and Bluetooth 5.0.
Radio modules were not specifically included in the basic package so that the board could easily pass certification in any country and be used in real products. To guarantee support, it was initially announced that the Raspberry Pi CM4 will not be removed from industrial production until at least January 2028. That is, support is guaranteed for at least another seven years. nine0003
As an option, we take the usual Raspberry Pi 4 Model B, which immediately has all the necessary connectors.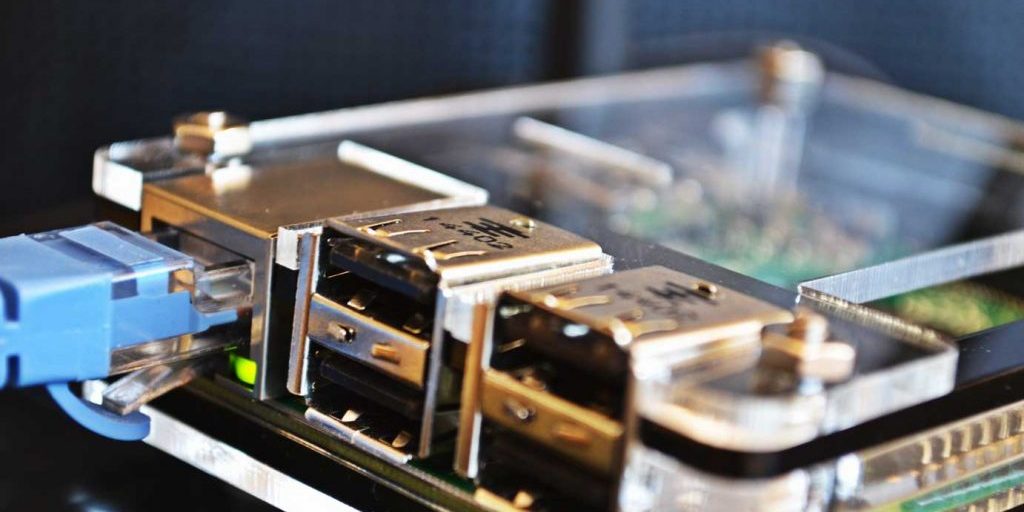 It remains only to install the fan, mount the disk and share it over the network.
Since microSD is supported, you can boot from a flash card, install the desired distribution, and then install the software that will act as a file server. For example, Nextcloud is recommended as an open source alternative to Dropbox on its hosting, PhotoPrism is recommended instead of Google Photos, and so on. If anyone is bothered by Plex becoming a media company, there is a lightweight alternative: Jellyfin. nine0003
Jellyfin interface resembles Plex
Mini server is great for backup, media archive, streaming. It can also act as a firewall and VPN tunnel, providing remote access to your home network via SSH. Such a mini version of Synology or Netgear NAS.
Energy efficiency
Reducing energy consumption provides a direct financial benefit, that is, energy-efficient equipment literally brings money. For example, a 200-watt "dinosaur" with round-the-clock operation devours electricity for about $ 10 per month, depending on the region. The power consumption of the RPi in an inactive state is about 2 watts. If you replace a standard NAS with an x86 processor with a 15-watt Raspberry Pi mini-server, then the “raspberry” pays off in just a few months. nine0003
There are quite energy efficient NAS based on ARM processors on the market. For example, such a Qnap TS-932PX-4G model on an Alpine AL324 processor (four Cortex-A57 cores, 1.7 GHz) costs a little more than the above-mentioned “machine” with an Umbrel server on a Raspberry Pi.
Qnap TS-932PX-4G
You can also find a motherboard for the x86 processor that consumes several watts in an inactive state, as well as an energy efficient processor. But it still doesn't compare to the RPi. nine0003
Raspberry Pi commercial hosting
The popularity of raspberries is so great that several providers started offering dedicated servers on the Raspberry Pi a few years ago!
The data centers themselves are also very unusual. It is assumed that this will be a decentralized network of data centers. Cabinets with "raspberries" are installed inside wind turbines (inside the supports).
A specially designed rack of Raspberry Pi servers installed inside one of the wind turbines
The 3U unit holds 12 air-cooled Raspberry Pi servers. Here's what it looks like:
Rackmount boards are mail-order, no cases, with power supply and cable. Only 2.5" USB drives. It is better to install a flash card that is reliable, designed for long-term use, Transcend High Endurance (Gold) or SanDisk Max Endurance is recommended. Because the provider will charge a separate fee for replacing failed equipment.
Perhaps in some cases commercial hosting on Raspberry Pi is better than home hosting, although it is unlikely that such hosting will have many customers. Maybe it’s more convenient for someone to keep a Bitcoin node, a web server on an external IP, distribute torrents, some services that need reliable uptime 24/7.