How to use multiple desktops in Windows 10
How to use multiple desktops on Windows 10
Windows 10, now enjoying the October 2020 Update, continues to make it extremely easy to set up and use multiple virtual desktops in Windows 10. Multiple desktops are great for keeping unrelated, ongoing projects organized, or for quickly hiding from the boss that browser game you can’t stop playing. And if you’ve not yet upgraded to Windows 10, be sure to have a look at our collection of the best Windows laptop options with the latest OS.
Ready to tackle the day with multiple desktops? Let’s go!
How to create a new virtual desktop in Windows 10
Creating a new virtual desktop can be done with a couple of clicks or with a keyboard shortcut.
- Click the Task View button in your taskbar.
- You can also use the Windows key + Tab shortcut on your keyboard, or you can swipe with one finger from the left of your touchscreen.
- You can also use the Windows key + Tab shortcut on your keyboard, or you can swipe with one finger from the left of your touchscreen.
- Click New Desktop. (It’s located in the top left corner of your screen.)
Source: Windows Central (Image credit: Source: Windows Central)
That’s it. Easy, right? There’s also a Ctrl + Windows key + D keyboard shortcut that will immediately create a new virtual desktop.
How to switch between virtual desktops in Windows 10
Now that you’ve created a new virtual desktop, you can quickly switch a few different ways.
- Click the Task View button in your taskbar.
- You can also use the Windows key + Tab shortcut on your keyboard, or you can swipe with one finger from the left of your touchscreen.
- Click Desktop 2 or any other virtual desktop you’ve created.
Source: Windows Central (Image credit: Source: Windows Central)
You can switch back to your original desktop at any time by following the above steps but choosing Desktop 1.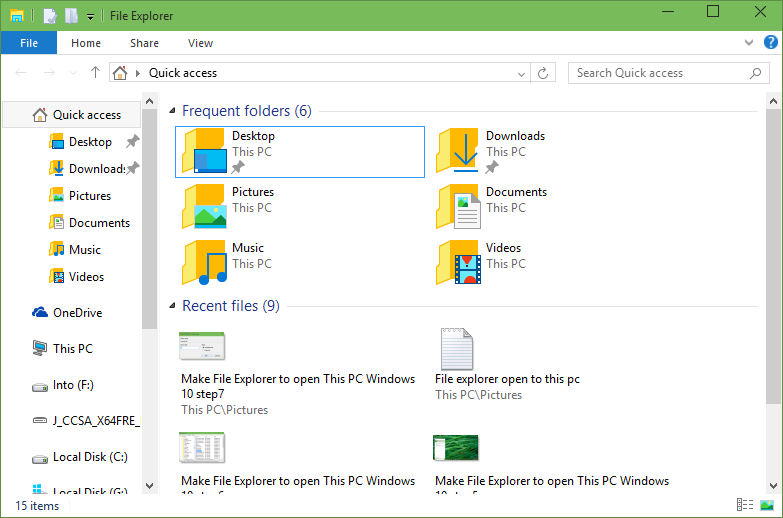 There’s also a Ctrl + Windows key + Left and right arrow keyboard shortcut that you can use to switch between virtual desktops. Using a device with a touchpad? You can perform a four-finger swipe left or right to switch between virtual desktops.
How to move windows between virtual desktops in Windows 10
There are two ways you can move windows between virtual desktops. First, you can click and drag windows; second, you can right-click the window and use the menu.
Click-and-drag method
- Click the Task View button in your taskbar.
- You can also use the Windows key + Tab shortcut on your keyboard, or you can swipe with one finger from the left of your touchscreen.
- Click and hold the window you want to move.
- Drag and release the window on an alternate desktop.
Source: Windows Central (Image credit: Source: Windows Central)
- Click the Task View button in your taskbar.
- You can also use the Windows key + Tab shortcut on your keyboard, or you can swipe with one finger from the left of your touchscreen.
- Right-click on the window you’d like to move to another desktop.
Source: Windows Central (Image credit: Source: Windows Central)
- Hover your cursor over Move to.
- Click the desktop to which you’d like to move the window.
Source: Windows Central (Image credit: Source: Windows Central)
You can move windows back and forth between desktops to your heart’s content.
How to duplicate windows across virtual desktops
Certain windows or collections of windows from one app can be duplicated across all virtual desktops.
- Click the Task View button in your taskbar.
- You can also use the Windows key + Tab shortcut on your keyboard, or you can swipe with one finger from the left of your touchscreen.
- You can also use the Windows key + Tab shortcut on your keyboard, or you can swipe with one finger from the left of your touchscreen.
- Right-click an active window.
Source: Windows Central (Image credit: Source: Windows Central)
- Click Show this window on all desktops to duplicate a single window.
- Click Show windows from this app on all desktops to duplicate all windows from one app.
Source: Windows Central (Image credit: Source: Windows Central)
How to remove a virtual desktop in Windows 10
Want to get back to just one desktop? No problem.
- Click the Task View button in your taskbar.
- You can also use the Windows key + Tab shortcut on your keyboard, or you can swipe with one finger from the left of your touchscreen.
- Hover your cursor over the desktop you’d like to remove.
- Click the X in the top-right corner of the desktop icon.
Source: Windows Central (Image credit: Source: Windows Central)
Open and running windows in a desktop you close will be moved back to your original desktop. You can also use the Ctrl + Windows key + F4 keyboard shortcut to immediately close the virtual desktop you’re currently viewing.
Cale Hunt is a Senior Editor at Windows Central. He focuses mainly on laptop reviews, news, and accessory coverage. He’s been reviewing laptops and accessories full time since 2016, with hundreds of reviews published for Windows Central. He is an avid PC gamer and multi-platform user, and spends most of his time either tinkering with or writing about tech.
10 Ways to Quickly Access the Windows Desktop
Do you know the various ways to access the Windows desktop? You might be familiar with accessing the desktop by minimizing all your active apps and programs. However, that can be a tedious task—especially if you have tonnes of windows open.
So, let’s take a look at how you can easily access the Windows desktop. You’d be glad to know that one of these methods involves a single mouse click!
Have you ever noticed that tiny vertical stripe at the bottom-right of your taskbar? You can access the desktop by simply left-clicking on it.
To restore your active windows, simply click the vertical stripe again. This is an easy way to switch between your active windows and the desktop.
If you’re unable to left-click on that vertical stripe, here’s what you can do:
- Scroll to the bottom-right corner of the taskbar and right-click on the vertical stripe.
- Select Show desktop from the options.
To restore your active windows, right-click on the vertical stripe and select Show desktop again.
2. Use a Keyboard Shortcut
There are tonnes of keyboard shortcuts that you can use on your Windows device. Did you know that there’s also a shortcut that helps you quickly access the desktop?
To get started, all you need to do is press Win + D. This will immediately minimize all windows and take you straight to the Desktop. To restore your windows, simply use the same shortcut.
3. Right-Click on the Taskbar
There’s another way to access the Desktop through the Taskbar. All you have to do is right-click on a blank space on the taskbar and then click Show the desktop.
To restore your windows, right-click on the taskbar again and select Show open windows.
For this method to work, ensure that you’re clicking on a blank space on the Taskbar. If you’re right-clicking on a taskbar app, this won’t give you the correct menu items.
You can use the Quick Access menu to access various system tools like the Event Viewer, Device Manager, and Task Manager. But did you know that this feature can also help you quickly access the Desktop?
Here’s how you can open the Windows desktop via the Quick Access Menu:
- Press Win + X or right-click the Windows icon on the taskbar to open the Quick Access Menu.
- Select Desktop from the options
5.
 Use the Run Command Dialog Box
The Run command dialog box can also help you access the Windows desktop. Here’s how:
- Press Win + R to open the Run command dialog box.
- Type the following command and press Enter to access the desktop:
%windir%\explorer.exe shell:::{3080F90D-D7AD-11D9-BD98-0000947B0257}
6. Use File Explorer
File Explorer is a critical tool that makes it easy to handle PC files. However, this tool can also help you access the files on your desktop.
Related: Key Tips for Managing and Organizing Your Computer Files
If you want to open a window that displays your Desktop icons, here’s how File Explorer can help:
- Press Win + E or click the File Explorer icon on the taskbar.
- Select the Desktop option on the left-hand side pane.
7. Use File Explorer’s Address Bar
Ever tried accessing Windows system tools using File Explorer’s address bar? This feature can help you open the system settings, Device Manager, Task Manager, and more.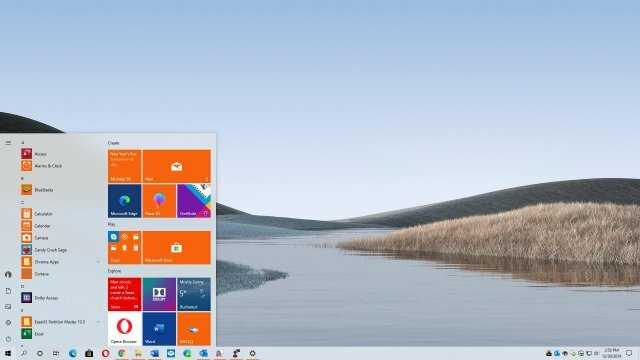
Here’s how you can use File Explorer’s address bar to access the desktop:
- Press Win + E to open File Explorer.
- Type the following command in the address bar and press Enter to access the desktop:
%windir%\explorer.exe shell:::{3080F90D-D7AD-11D9-BD98-0000947B0257}
8. Use the Task Manager
The Task Manager is one of those reliable Windows tools that you can always depend on. This tool is helpful when it comes to analyzing system performance or terminating problematic apps. But that’s not all—this tool also allows you to easily access several Windows software programs.
Related: 7 Tools to Increase Hard Drive Performance on Windows
Here’s how you can access the desktop via the Task Manager:
- Press Ctrl + Shift + Esc to open the Task Manager.
- Click the File tab on the top-left corner and select Run new task.
- Type the following command in the search box and press OK to access the desktop:
%windir%\explorer.exe shell:::{3080F90D-D7AD-11D9-BD98-0000947B0257}
9. Use the Command Prompt or Powershell
The Command Prompt and PowerShell are reliable for troubleshooting several system issues. But you can also use these tools to open various software programs.
Here’s how you can use the Command Prompt to access the desktop:
- Press Win + R to open the Run command dialog box.
- Type CMD and press Ctrl + Shift + Enter to open an elevated Command Prompt.
- Type the following command and press Enter to access the desktop:
%windir%\explorer.exe shell:::{3080F90D-D7AD-11D9-BD98-0000947B0257}
Meanwhile, here’s how you can use PowerShell to access the desktop:
- Press Win + R to open the Run command dialog box.

- Type Powershell and press Ctrl + Shift + Enter to open an elevated PowerShell window.
- Type the following command and press Enter to access the desktop:
%windir%\explorer.exe shell:::{3080F90D-D7AD-11D9-BD98-0000947B0257}
10. Create a Shortcut
Do you prefer creating and using your own shortcuts? If so, let’s show you how you can create a shortcut that helps you quickly access the desktop:
- Navigate to the desktop using any of the methods we’ve covered.
- Right-click on a blank space on the desktop and select New > Shortcut.
- In the next window, type the following command and then click Next:
%windir%\explorer.exe shell:::{3080F90D-D7AD-11D9-BD98-0000947B0257}
Name the shortcut as Show Desktop or something similar. Click Finish to complete the process.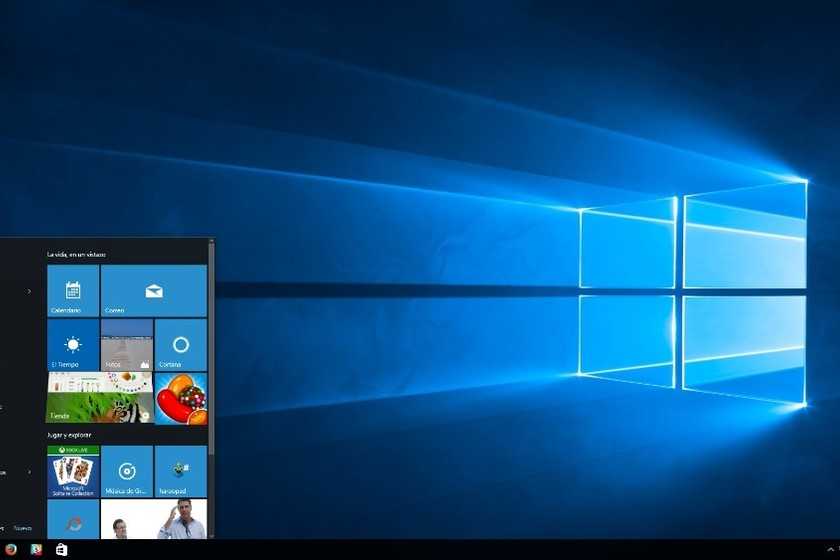
You’ll notice that the default icon for the Show Desktop shortcut is similar to File Explorer’s icon. To customize your Show Desktop shortcut, here’s what you can do:
- Right-click on the Show Desktop shortcut and select Properties.
- Navigate to the Shortcut tab and click the Change icon button. Select your favorite icon and press OK.
- Click Apply and then click OK to apply these changes.
Finally, all you need to do is to pin the Show Desktop shortcut to the taskbar. Here’s how:
- Right-click on the Show Desktop shortcut and select Pin to taskbar.
- Now, you can switch between your active windows and the Desktop by left-clicking on this Taskbar icon.
How Often Do You Access the Desktop?
It’s quite an easy task to switch between your active programs and the Windows desktop. But if you really want to access the desktop like a pro, simply apply any of the methods we’ve covered.
How to Restore Desktop Icons on Windows 10 and 11
You can create a desktop icon for virtually anything on your Windows PC. If you don’t see any, you’ll need to restore them. Here’s how.
When you set up a new Windows PC, you’ll see a familiar sight on your desktop.
This is where icons like the Recycle Bin and Microsoft Edge often appear for you to launch as soon as you’re ready. Over time, you might add other system icons pop-up for easy access, too.
If you clean install your PC, you’ll want to restore the desktop icons on Windows 10 and 11 that you’ve lost. It’s a straightforward process on both versions of Windows, however. Here’s what you’ll need to do.
How to Restore Desktop Icons on Windows 11
To restore system icons on the Windows 11 desktop:
- Click Start or hit the Windows key to launch the Start menu.
- Select Settings from the menu.
- Click on Personalization and then select Themes on the right.
- Scroll down the Themes section and click the Desktop icon settings option.
- On the Desktop Icons Settings screen, select the system icons you want to show on the desktop and click OK.
How to Restore Desktop Icons on Windows 10
You can also restore desktop icons on Windows 10, although the steps are different from Windows 11.
To restore icons on Windows 10, do the following:
- Click Start or hit the Windows key to launch the Start menu.
- Click Settings from the menu.
- Select Personalization from the Settings menu.
- Select Themes and click the Desktop icon settings link on the right on the left side.
- Check each of the system icons you want to appear on the desktop and click OK.
On Windows 10 and 11, you can select This PC, User Files, Network, Recycle Bin, and Control Panel from the menu. You don’t need to check them all—just the ones you want to appear on the desktop.
This option will show legacy desktop icons (although they have a new design). If you rely on system icons, it’s helpful to have them on your desktop for easy access.
How to Restore All Desktop Icons on Windows
Restoring system icons to the desktop is easy enough, but what if all your icons are gone? For example, you might sit down at your computer one day and realize they’re all missing.
Restore All Desktop Icons on Windows 11
To restore all desktop icons on Windows 11:
- Right-click an empty area on the desktop and select View > Show desktop icons from the menu.
- All of your icons should now show up on your desktop.
Restore All Desktop Icons on Windows 10
If you’re not seeing any of your desktop icons on Windows 10, making them appear is as straightforward as Windows 11.
To restore all desktop icons on Windows 10:
- Right-click an empty area on the desktop and select View > Show desktop icons from the menu.
- All of your desktop icons should now be on your desktop.
How to Restore Desktop Icons from the Recycle Bin
If you still aren’t seeing all of your desktop icons, they might have been deleted from the desktop. If you delete a file, it shows in the Recycle Bin, and so do desktop shortcuts. In that case, you can restore a desktop icon from the Recycle Bin.
To restore an icon from the Recycle Bin:
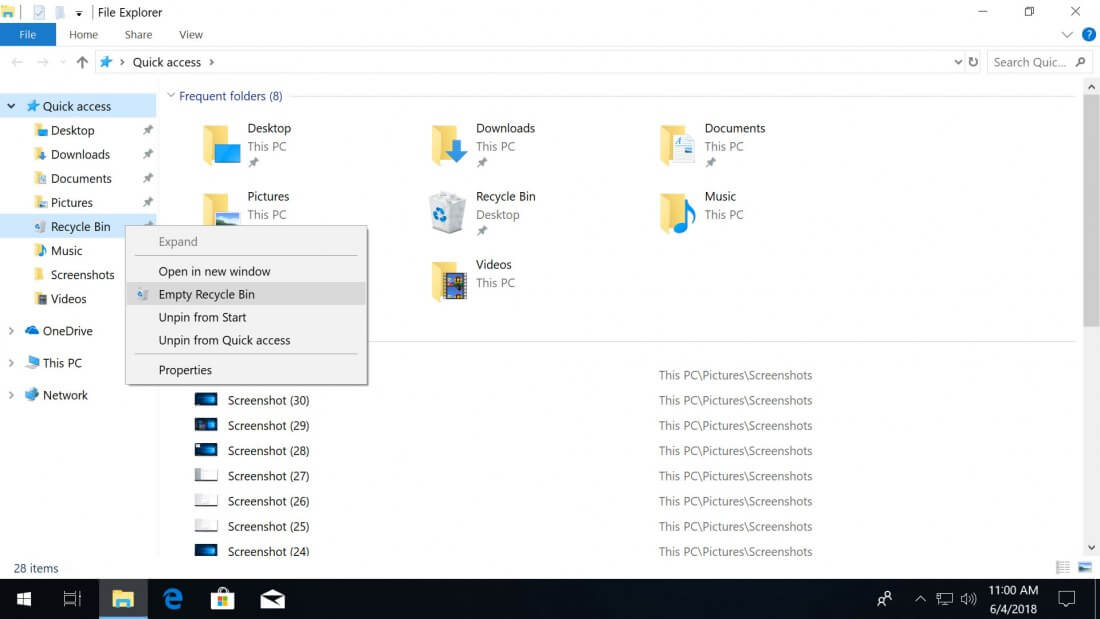
- Double-click the Recycle Bin to view its contents.
- Right-click the desktop shortcut icon you need and select Restore.
- Your desktop icon will revert to its original position on the desktop.

How to Manually Restore Desktop Shortcuts on Windows
If you already emptied the Recycle Bin, you’ll need to add shortcuts to the desktop manually.
To add an app shortcut, use the following steps:
- Select Start or hit the Windows key to launch the Start menu.
- Find the app you need from the All apps list.
- Drag and drop it from the list to the desktop, and it will create a shortcut to the app.
- To create a shortcut to a document or spreadsheet, open File Explorer. Hold the Alt key and drag it to the desktop.
- Create a desktop shortcut to a website by opening the page and dragging the lock icon to the desktop.
Using Desktop Icons on Windows
Desktop icons are an essential piece of navigating your workflow on Windows. It’s possible to create a shortcut icon for virtually anything. If your shortcuts and other desktop icons are missing, use the steps above to get them back.
If you’re looking to create more shortcuts to Windows tools, check out how to create a shortcut to Device Manager. Or, you might be interested in creating a shortcut to the Windows Tools folder. If you have poor eyesight or are looking for a change, you can make desktop icons larger.
Related Items:Hero, Microsoft, Windows 10, Windows 11
How to Quickly View Your Desktop on Windows 11
If you want to get to the desktop on your Windows 11 PC but have loads of open applications in the way, you can use the Show Desktop button on the taskbar or one of several nifty keyboard shortcuts to get the job done.
Minimizing each window one by one just to get a look at your desktop is a waste of time. Instead, Windows 11 offers the Show Desktop button, which gives you a quick look at your desktop. There are also several keyboard shortcuts that you can use to view your desktop or even minimize all those windows quickly.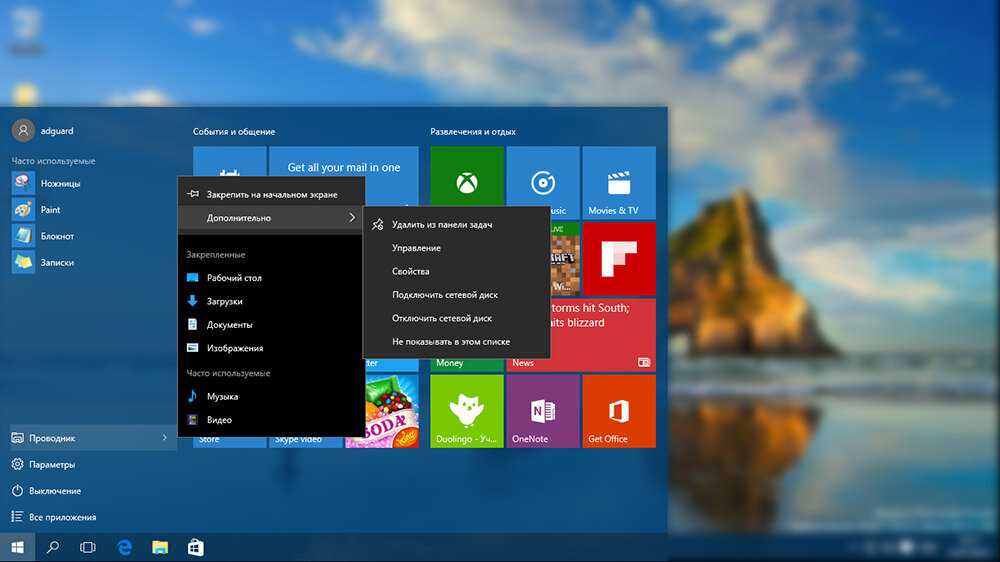
Table of Contents
Click the Show Desktop Icon on the Windows 11 Taskbar
If you’re coming in from a previous version of Windows (such as Windows 10), you probably already know about the Show Desktop button. Microsoft may have implemented radical design changes to the Windows 11 user interface, but the handy taskbar button is still there. It’s just not as apparent.
To use the Show Desktop button, move your pointer to the bottom right corner of the screen, where you’ll see a thin vertical line. Click or tap that button once to hide all open windows.
If you change your mind and want to restore each window, just click or tap the Show Desktop button again. Note that you won’t be able to show all your windows again automatically if you perform additional activities after getting to the desktop area (e.g., opening the Start menu, opening a folder, using Windows Search, or launching another application).
Unlike in previous Windows versions, Windows 11 does not allow you to peek at the desktop by hovering the cursor over the Show Desktop button. But you do have a system keyboard shortcut that accomplishes the same thing (we’ll cover how to do that in just a bit).
Activate the Show Desktop Button in Windows 11
The Show Desktop button is active by default. But if nothing happens when you click or tap the right side of the Windows 11 taskbar (or you don’t see the thin vertical line when you place the pointer over the area), you must enable it via the Settings app. Alternatively, you can use the Registry Editor to activate it.
1. Open the Start menu and launch the Windows Settings app. If you don’t see it among your pinned apps, select All Apps, scroll down the list of programs, and choose Settings. Alternatively, you can press Windows + I to open the Settings window directly.
2. Click Personalization on the sidebar.
3. Scroll down and select Taskbar to reveal Windows 11’s taskbar settings.
4. Select Taskbar behaviors.
5. Check the box next to Select the far corner of the taskbar to show the desktop.
Use Show Desktop Keyboard Shortcut in Windows 11
Want an even easier way to show your desktop? Just press Windows + D to hide all open windows instantly. Use the same keyboard shortcut again if you want to restore them. Note that just like with the Show Desktop button, if you make any changes after hiding your windows, you won’t be able to display them again automatically.
Note: You don’t have to have the Show Desktop button enabled on the taskbar to use the Windows + D shortcut.
Use Minimize Windows Keyboard Shortcut in Windows 11
Another way to get to the Windows 11 desktop quickly is to use the Minimize Windows shortcut. Just press Windows + M to minimize all open application windows.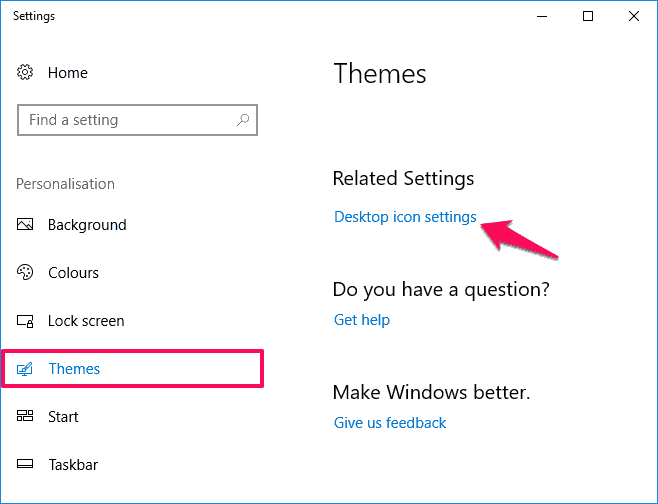 You can also use the Windows + Shift + M shortcut to maximize all minimized windows.
Although the Show Desktop and Minimize Windows shortcuts appear to do the same thing, there’s a subtle difference. The Show Desktop shortcut hides all open windows (including dialog boxes and properties panes), while the Minimize Windows shortcut only hides windows that support minimizing.
Use Desktop Peek Shortcut in Windows 11
In Windows 10 and earlier, you can hover the pointer over the Show Desktop button and peek at the desktop. That’s incredibly handy if you want to, say, look at your desktop wallpaper quickly. That functionality is missing in Windows 11, but there is a keyboard shortcut you can use.
Just press and hold Windows + Comma (,) and you’ll immediately view your desktop. Releasing the keys restores all open windows.
Tip: Learn how to get the best Windows 11 wallpapers for your desktop.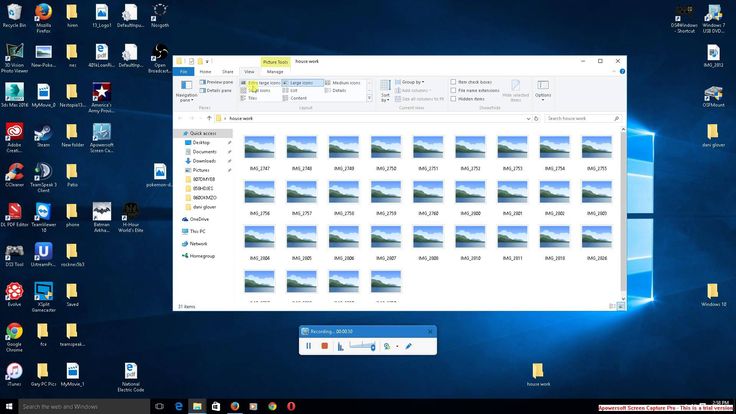
Get to the Windows 11 Desktop Fast
To recap, using the taskbar’s Show Desktop button (or the Windows + D shortcut) is a quick way to get to your PC’s desktop area in Windows 11. You can also use the Windows + M key combo to minimize all open windows that support minimizing (and Windows + Shift + M to maximize all minimized windows). Finally, you can press Windows + Comma if you only want a quick peek at your desktop.
Dilum Senevirathne is a freelance tech writer and blogger with three years of experience writing for online technology publications. He specializes in topics related to iOS, iPadOS, macOS, and Google web apps. When he isn’t hammering away at his Magic Keyboard, you can catch him binge-watching productivity hacks on YouTube. Read Dilum’s Full Bio
Subscribe on YouTube!
Did you enjoy this tip? If so, check out our YouTube channel from our sister site Online Tech Tips.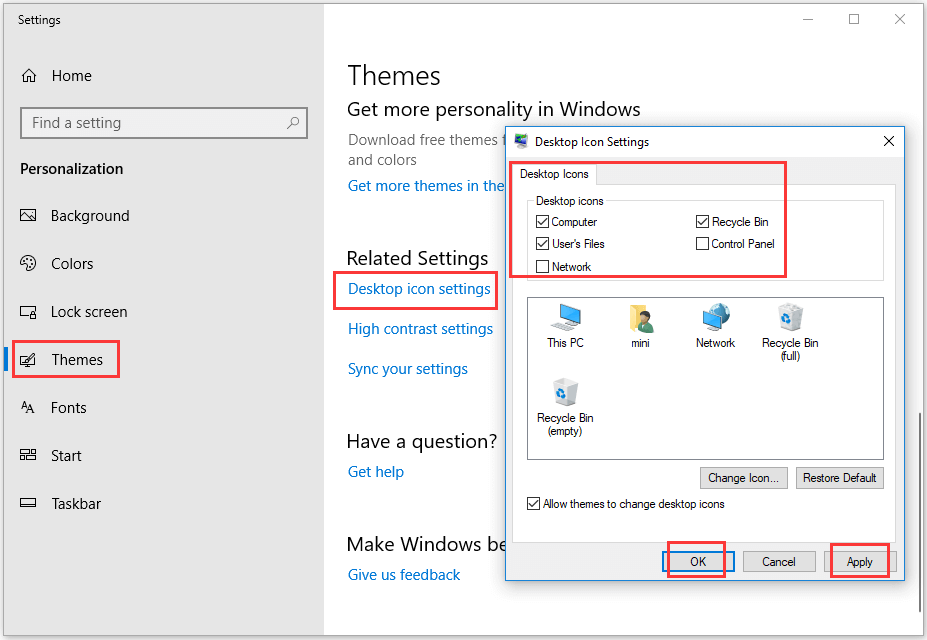 We cover Windows, Mac, software and apps, and have a bunch of troubleshooting tips and how-to videos. Click the button below to subscribe!
Subscribe
How to Add Icons to Your Desktop on a Windows 10 PC
- You can add icons to your desktop in Windows 10 and more easily access system folders or apps.
- When you add icons to your desktop, you create shortcuts to folders or programs such as your Recycle Bin or Control Panel.
- Here’s how to add icons to your desktop in Windows 10.
- Visit Business Insider’s homepage for more stories.
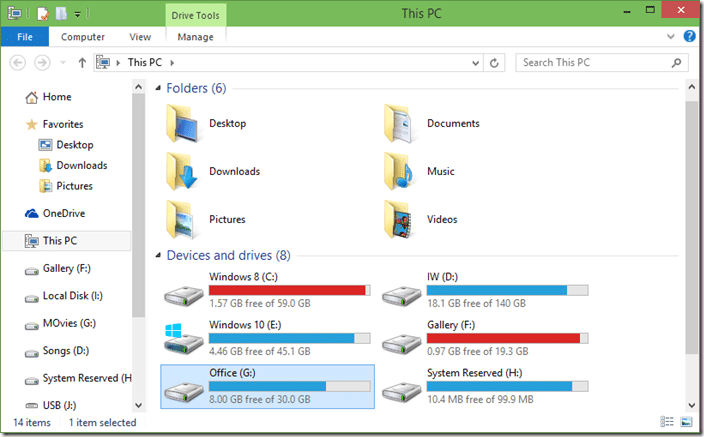
Your Windows computer has a certain set of integral files built-in to it, such as the Computer, User Files, Network, Recycle Bin, and Control Panel folders.
Now, you can get to any of these folders at any time by looking them up in the Windows Start Menu, or by typing their name into the search bar. However, if you find yourself using one or more of them frequently, you may find it easier to simply add it to your desktop instead.
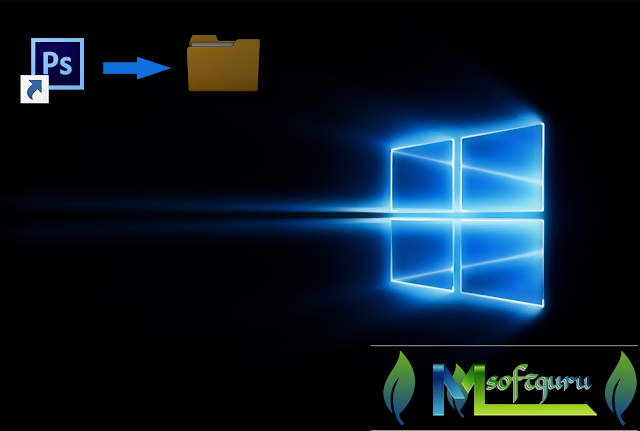
Adding these shortcuts to your desktop will allow you to click on them to open them in one step, as well as click and drag other files to them to easily keep your desktop organized.
Here’s how to add icons to your desktop on your Windows 10 computer.
Check out the products mentioned in this article:
Windows 10 (From $139.99 at Best Buy)
Lenovo IdeaPad 130 (From $299.99 at Best Buy)
How to add icons to your desktop on your Windows 10 computer
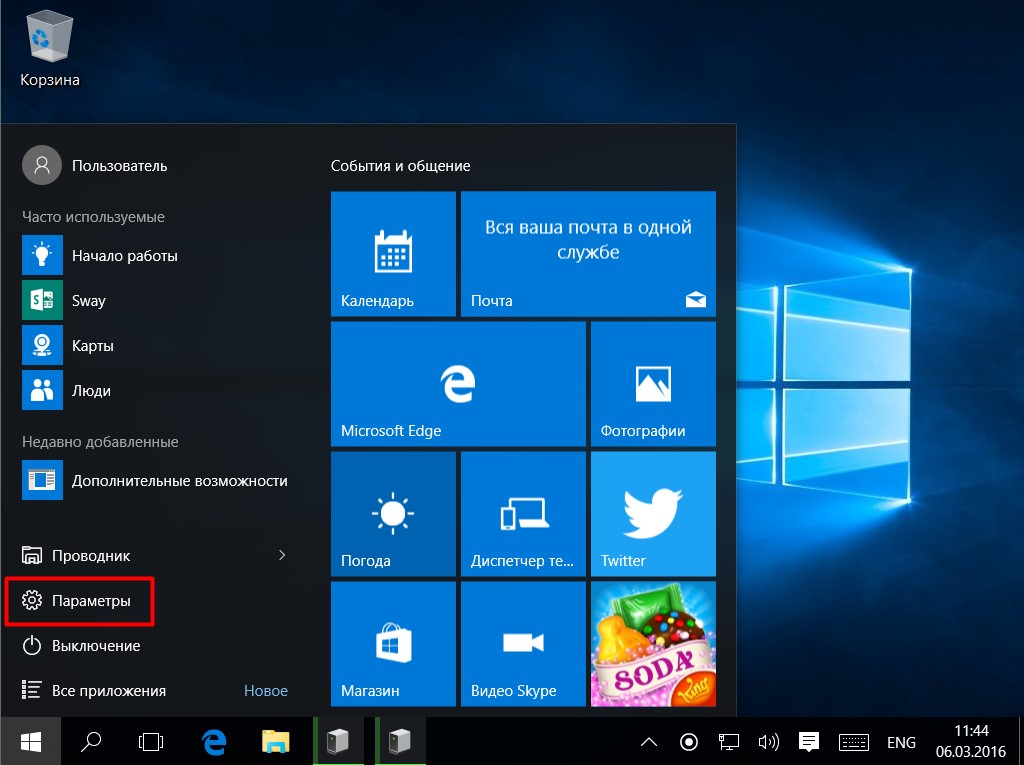
1. Open the Start menu by clicking the Windows icon at the bottom-left of your screen.
2. Select the Settings button, the gear icon above the power button.
Open the Start menu and click «Settings. »
»
Melanie Weir/Business Insider
3. In the Settings menu, click «Personalization,» the icon at the top-left depicting an image of a desktop computer and a paintbrush.
Click «Personalization.»
Melanie Weir/Business Insider
4. From the menu on the left hand side, select «Themes.»
5. Under «Related Settings» on the right hand side, click «Desktop icon settings.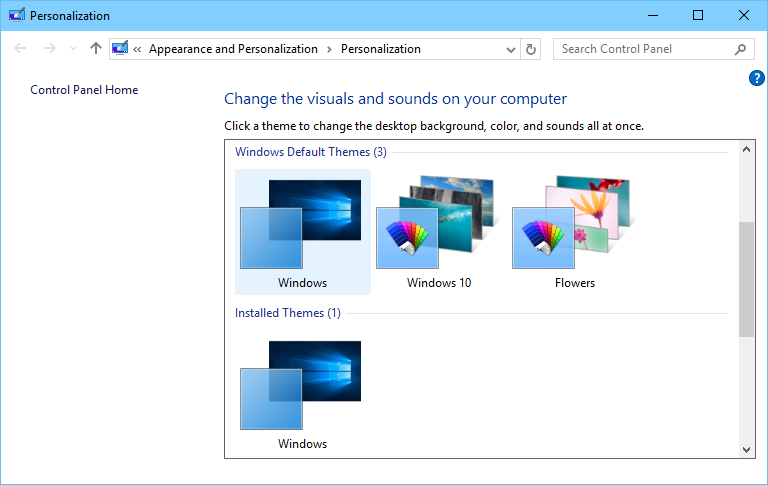 «
«
Go to «Themes» and select «Desktop icon settings.»
Melanie Weir/Business Insider
6. In the pop-up menu, choose the icons that you want to appear on your desktop from the checklist, then click «Apply.»
7. After the process is complete, click «OK.»
Choose the icons that you want on your desktop, then click «Apply» and «OK.»
Melanie Weir/Business Insider
-
How to empty the recycle bin on your Windows 10 computer in 3 ways
-
How to change the size of your desktop icons on a Windows 10 computer
-
How to add websites to your favorites bar on a Windows 10 PC’s Microsoft Edge browser
-
How to change the admin user on a Windows 10 computer, and add or remove admin accounts
-
How to open a Pages file on your Windows 10 computer using a third-party app
Melanie Weir
Freelance author
Melanie Weir is a freelance author for Insider, mainly focusing on the Tech Reference section, but occasionally contributing to Lifestyle and Entertainment topics as well.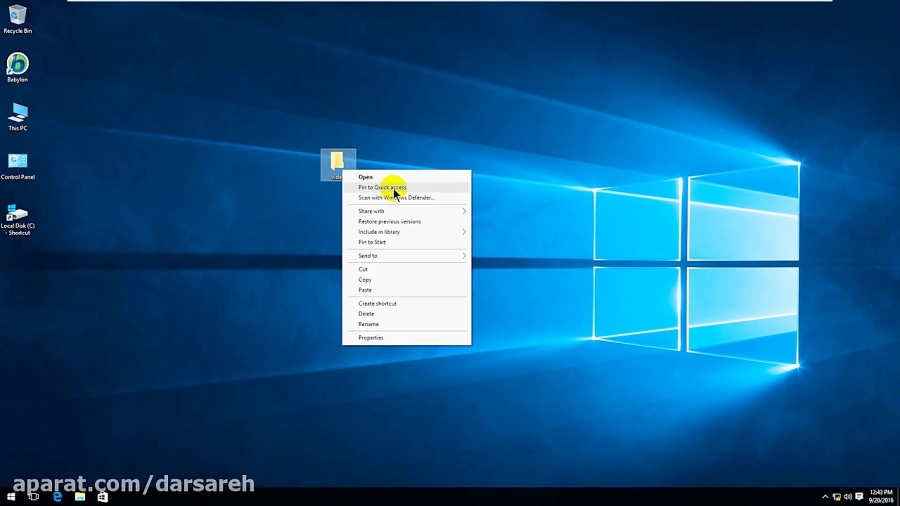 She is also a freelance writer for ScreenRant, and is the Lead Weekend News Editor at TheThings.com. In her spare time she writes plays for both stage and screen. She can be reached at [email protected], or through LinkedIn.
Read moreRead less
Insider Inc. receives a commission when you buy through our links.
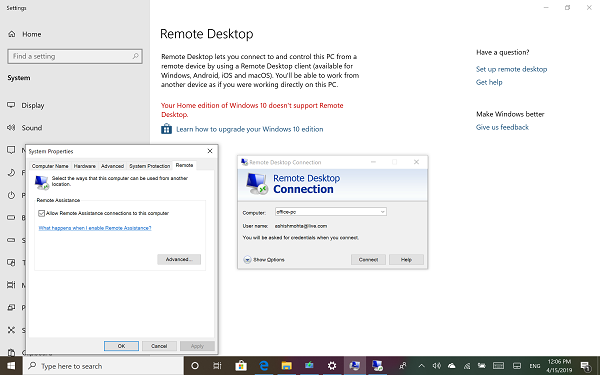
How to Fix the Desktop Icons Disappeared on Windows 10
The desktop is often the fastest way of reaching important files, system folders, and provides quick access to applications as well. However, many Windows 10 users have reported that their desktop icons disappeared or are missing.
This problem can cause a lot of distress, especially if you rely on the desktop to get quick access to your stored data. In our article, you can find the best solutions for quickly restoring your desktop and gaining access to your icons, shortcuts, and files back.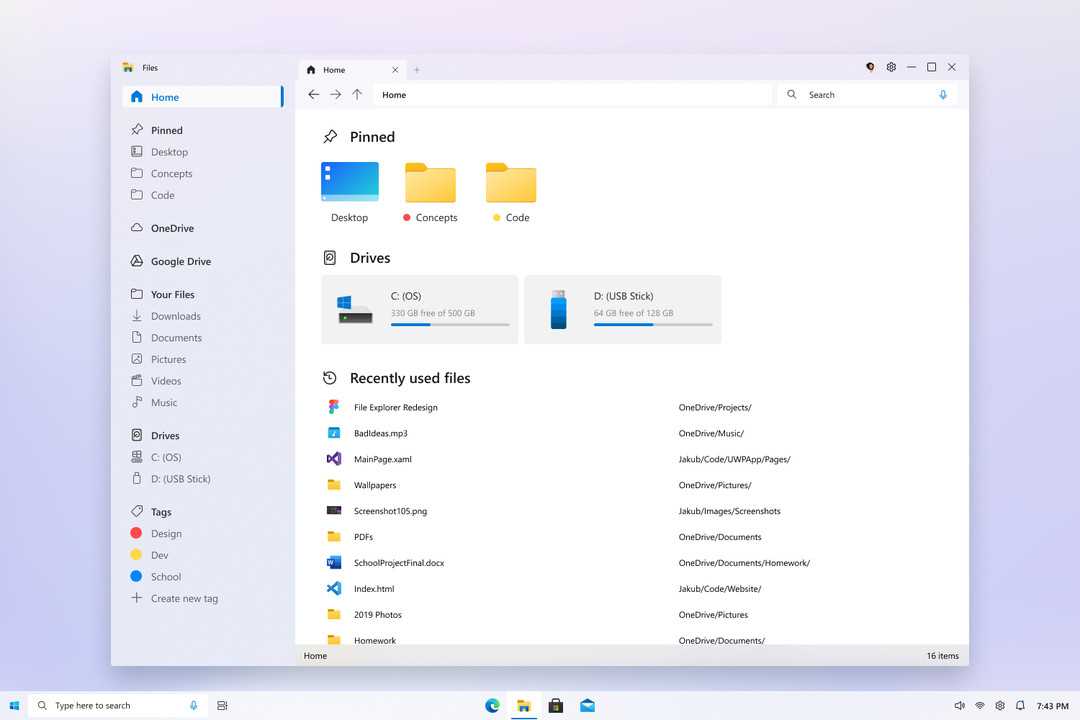
There can be multiple sources of your desktop icons disappearing, however, that also means multiple fixes can be applied to get them back. Our article focuses on bringing you the most reliable and tested methods, allowing you to troubleshoot this issue efficiently.
Let’s not waste any time and get right into it!
Solution 1: Turn on the visibility of desktop icons
It’s possible that your desktop icon visibility settings were toggled off, which caused them to disappear. This can be human error or caused by an application you recently used or installed. You can easily turn it back on by following the steps below.
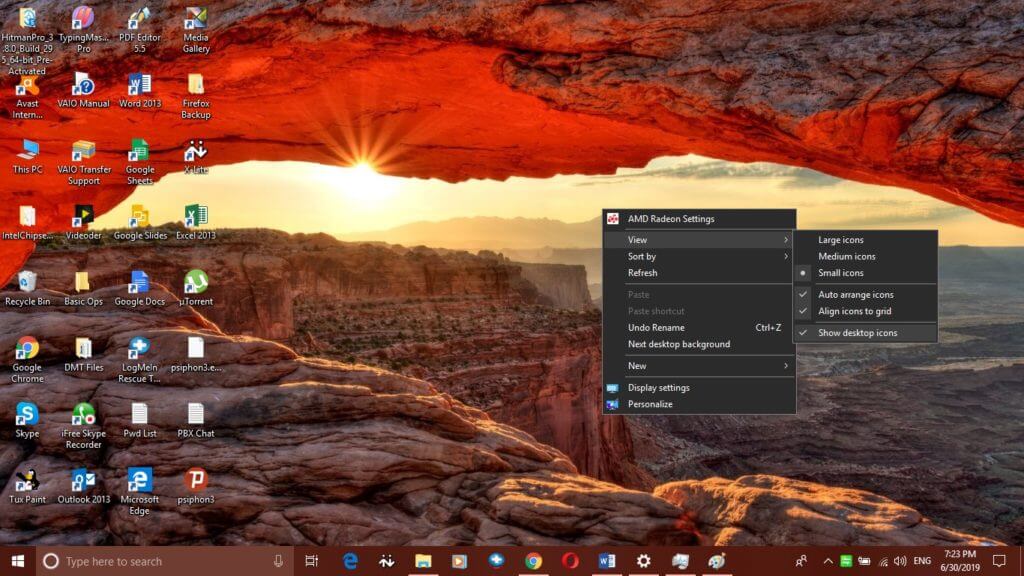
- Right-click on an empty space on your desktop.
- Click on the “View” option from the context menu to expand the options.
- Make sure that “Show desktop icons” is ticked. If it isn’t, simply click on it once to ensure it wasn’t causing issues with displaying your desktop icons.
- You should immediately see your icons reappear. If you don’t, proceed with our next methods.
Solution 2: Disable the Tablet mode
Users have reported that having Tablet mode enabled can cause errors with the display of desktop icons. This mode aims to help touch-enabled devices function, however, it can cause unwanted changes for many people.
Below are the steps on how you can easily disable Tablet mode in Windows 10.
- Open the Start menu by clicking on the Windows icon in the bottom left corner of your screen. You can also press this key on your keyboard to bring the menu up.
- Click on Settings from the left side of the pop-up menu. It’s indicated with a gear icon. For faster access, simply use the Windows + S keyboard shortcut.
- You’ll see a new window displaying many system options. Click on the System tile.
- Use the left-side panel to switch to the “Tablet mode” tab.
- Depending on what you see displayed, follow the next instructions:
- If you see the “Make Windows more touch-friendly using your device as a tablet” option, make sure that the toggle is set to off.
- Otherwise, change your tablet mode settings to “When I sign in use desktop mode” and “Always ask me before switching.”
Solution 3: Use the Command Prompt to rebuild your icon cache
The Command Prompt allows you to reach a deeper level of system configuration, making it simple to restore settings. All you have to do is follow the steps below — make sure not to make any other changes, as poorly inputting commands can cause more issues on your device!
Simply rebuilding your icon cache may be the right thing to do if your desktop icons disappeared.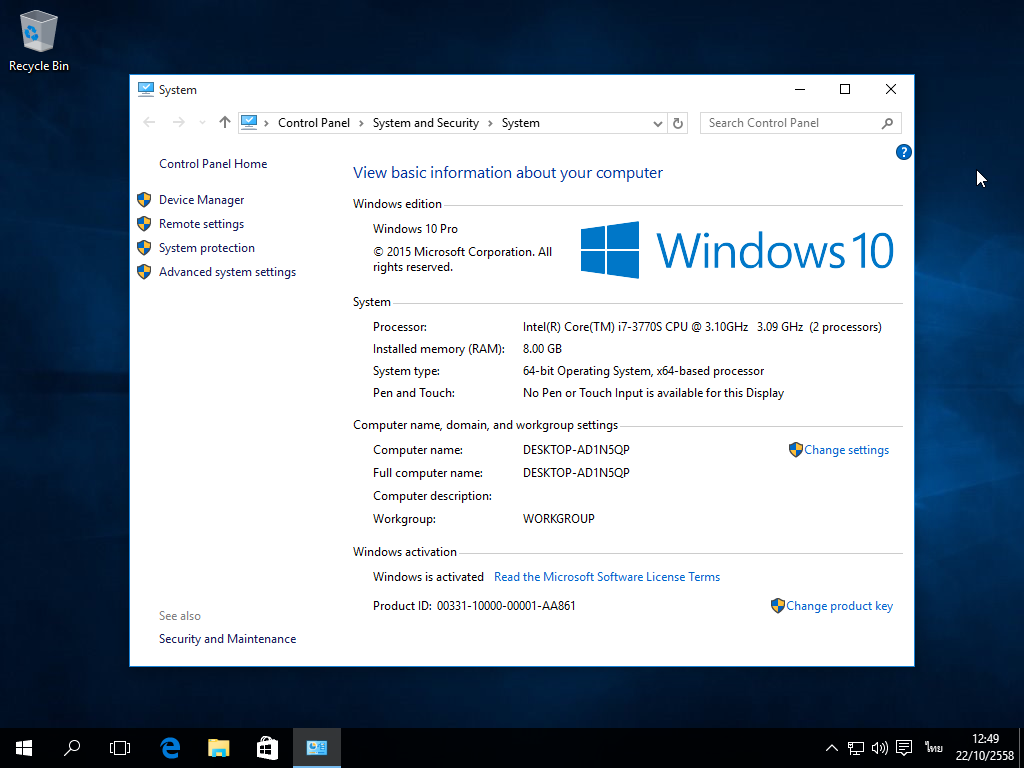 This will ensure that Windows 10 has a clean canvas to render your icons, restoring any previous issues with the cache files.
- Press the Windows + R keys the on-screen keyboard. This is going to bring up the Run utility.
- Type in “cmd” and press the Ctrl + Shift + Enter keys on your keyboard. Doing so, you’re launching the Command Prompt with administrative permissions.
- If prompted, click Yes to allow the Command Prompt to make changes on your device.
- Input the following commands, pressing the Enter key in-between each new line. This is going to restore your icon cache one step at a time:
- Restart your device. You should be able to check immediately whether or not your desktop icons reappeared.
Solution 4: Run the System File Checker
The System File Checker is a tool available in Windows 10 by default. It’s also called an “SFC scan,” and it’s your quickest way to automatically fix corrupted system files and other issues.
Running this scan has proven to get rid of issues with the Windows 10 icons missing. Here’s what you need to do to run it.
- Press the Windows + R keys on your keyboard. This is going to bring up the Run utility.
- Type in “cmd” and press the Ctrl + Shift + Enter keys on your keyboard. Doing so, you’re launching the Command Prompt with administrative permissions.
- If prompted, click Yes to allow the Command Prompt to make changes on your device.
- Once in the Command Prompt, type in the following command and press Enter to execute it: sfc /scannow
- Wait for the SFC scan to finish scanning your computer and repairing corrupt files. This may take a long time; ensure that you don’t close the Command Prompt or shut your computer down.
- Restart your device after the scan is complete.
Solution 5: Update Windows 10 to the latest release
Upgrading to the newest Windows 10 release may be able to restore some system issues on your device. Many users report that an update was able to resolve known bugs, and it also brings you new and exciting features, patches up security holes, and much more.
Here are the steps to guide you when updating Windows 10.
- Click on the Start menu and choose “Settings.” You can alternatively use the Windows + I keyboard shortcut as well.
- Click on the “Update & security” tile.
- Make sure to stay on the default “Windows Update” tab.
- Click on the “Check for updates” button.
- When an update is found, click on the “Install” button and wait for Windows 10 to download and apply the update.

Solution 6: Reset your Windows 10
While this is the least desirable option, it can certainly help when dealing with serious system issues. Many users turn to reset Windows 10 in an attempt to get a clean start and fix messy problems that otherwise would require hours and hours of troubleshooting.
Here are the steps to reset Windows 10. You have the option of keeping all of your personal data, but you may also choose to entirely wipe all data and start with a fresh system.
- Click on the Start menu and choose “Settings.” You can alternatively use the Windows + I keyboard shortcut as well.
- Click on the “Update & security” tile.
- Switch to the “Recovery” tab.
- You should see a header that says “Reset this PC.” Simply click on the “Get started” button under it.
- Choose whether or not you want to keep personal files.
 Both options mean that your applications will be removed, but you can easily keep personal documents safe.
 - Proceed with the on-screen prompts and reset your PC.
We hope that this guide was helpful when restoring your missing or disappeared desktop icons on Windows 10. You should have quick and easy access to your most important shortcuts and folders again.
If you notice in the future that your system is experiencing similar issues, feel free to return to our article and apply some other fixes. If nothing works, we recommend turning to either Microsoft’s customer support team or looking for an IT specialist in regards to your PC’s health.
Windows 10 Virtual Desktops
Windows 10 was the first to introduce virtual desktops, previously available in alternative operating systems, and in Windows 7 and 8 available only through third-party programs (see Windows 7 and 8 Virtual Desktops).
In some cases, virtual desktops can actually make your computer experience more convenient. This guide details how to use Windows 10 virtual desktops for a more convenient workflow.
What are virtual desktops
Virtual desktops allow you to organize open programs and windows into separate «areas» and conveniently switch between them.
For example, one of the virtual desktops can have the usual organized work programs open, while the other can have personal and entertainment applications open, and you can switch between these desktops with a simple keyboard shortcut or a couple of mouse clicks.
Create a Windows 10 virtual desktop
To create a new virtual desktop, follow these simple steps:
- Click the Task View button on the taskbar or press the keys with the Windows logo) on the keyboard.
- In the lower right corner, click on «Create desktop».
- In Windows 10 1803, the button for creating a new virtual desktop has moved to the top of the screen and the Task View button has changed in appearance, but the essence is the same.
Done, the new desktop has been created. To create it completely from the keyboard, without even going into Task View, press the keys Ctrl+Win+D .
I don’t know if there is a limit to Windows 10 virtual desktops, but even if it is, I’m pretty sure you won’t run into it (While I was trying to check the information about the limit, I found a message that one of the users had «Task View» stuck on the 712th virtual desktop).
Using virtual desktops
After creating a virtual desktop (or several), you can switch between them, place applications on any of them (i.e. the program window will be present on only one desktop), and delete unnecessary desktops.
Switching
To switch between virtual desktops, you can click on the Task View button and then on the desired desktop.
The second switching option is using the hotkeys Ctrl+Win+Left_arrow or Ctrl+Win+Right_arrow .
If you are using a laptop and it supports multi-finger gestures, additional switching options can be performed with gestures, for example, swipe up with three fingers to see the task view, all gestures can be found in Settings — Devices — Touchpad.
Hosting apps on Windows 10 Virtual Desktops
When you run a program, it is automatically placed on the virtual desktop that is currently active. You can move already running programs to another desktop, for this you can use one of two methods: ” (you can also create a new desktop for this program in this menu).
Please note that there are two more interesting and sometimes useful items in the context menu:
- Show this window on all desktops (I think it needs no explanation, if you check the item, you will see this window on all virtual desktops tables).
- Show windows of this application on all desktops — this means that if the program can have several windows (for example, Word or Google Chrome), then all windows of this program will be displayed on all desktops.
Some programs (those that allow you to run multiple instances) can be opened on multiple desktops at once: for example, if you launch the browser first on one desktop and then on the other, these will be two different browser windows.
Programs that can only be run in one instance behave differently: for example, if you run such a program on the first virtual desktop, and then try to run it on the second, you will automatically be «transferred» to the window of this program on the first desktop.
Deleting a virtual desktop
To delete a virtual desktop, you can go to Task View and click the cross in the corner of the desktop image. At the same time, the programs opened on it will not be closed, but will be moved to the desktop, located to the left of the one being closed.
The second way, without using the mouse, is to use the hotkeys Ctrl+Win+F4 to close the current virtual desktop.
Additional information
Created Windows 10 virtual desktops are saved when the computer is restarted. However, even if you have programs in autorun, after a reboot, they will all open in the first virtual desktop.
However, there is a way to «beat» this using a third-party VDesk command line utility (available at github. com/eksime/VDesk ) — it allows, among other virtual desktop management features, to run programs on the selected desktop, something like this way: vdesk.exe on:2 run:notepad.exe (notepad will be launched on the second virtual desktop).
remontka.pro in Telegram | Other ways to subscribe
Support the author and the site
Desktop setup in Windows 10
Hello everyone! We are starting a new course on mastering the Windows 10 operating system and will devote the first lesson to studying the desktop and everything connected with it. Here we will give the desktop the desired look and set it up so that working at the computer becomes more convenient.
The desktop is a graphical environment that displays folders, shortcuts, system controls, and more. At the bottom, by default, is the Taskbar with the START button. For the convenience of the user, the ability to change the appearance of the desktop was provided.
Taskbar is a default interface element located at the bottom of the desktop designed to quickly launch programs, as well as to manage running applications.![]()
Taskbar
Let’s start with the Taskbar and look at its main elements.
- START button is the main button that provides access to the main menu of the system, its settings, programs and much more.
- Quick Launch . The name speaks for itself. This panel provides access to quick launch programs. You can add the most popular applications to it and launch them with one click.
- Running Applications Bar — allows you to monitor running programs, manage and switch between them
- Notification area . Some system icons, icons of running applications, time and date, language, notifications and more are displayed here.
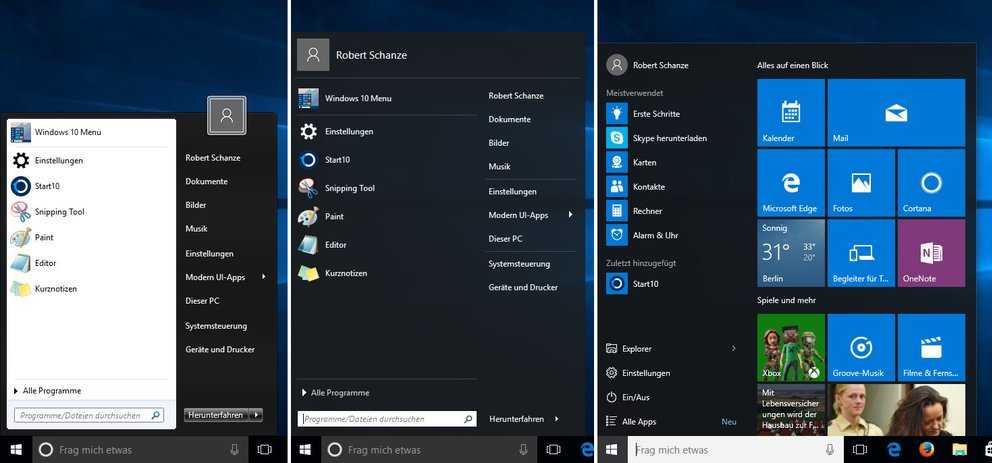
START menu
Let’s take a closer look at the START menu.
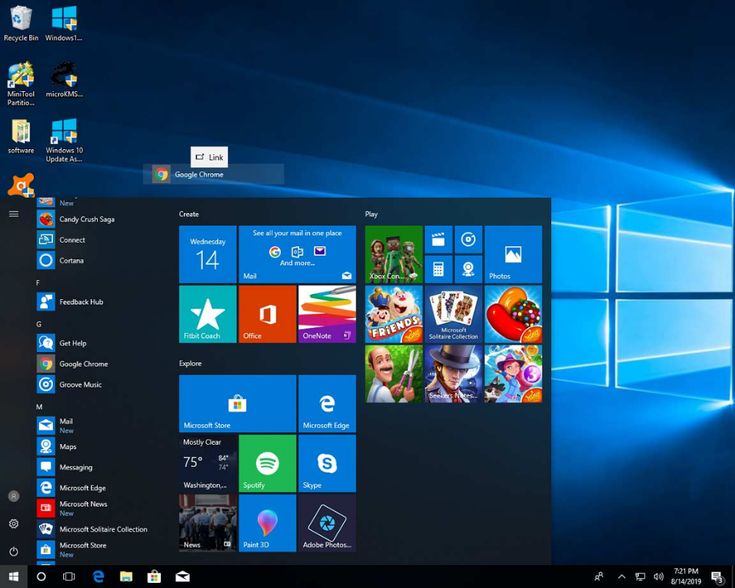
Left-clicking on this menu will open an area that displays installed programs, frequently used programs, tiles, and more. From here you can access the system settings. This is where the computer shutdown button is located.
Right-clicking on the START menu will open the following menu:
Here are the most important elements of the system that can be quickly accessed. In the process of studying the course, we will touch on many items of this menu.
Basic settings of the Taskbar
Well, since we have taken up the taskbar, let’s look at the most important of its settings. Right-click on an empty space in this panel and select Parameters . As a result, the following window will open.
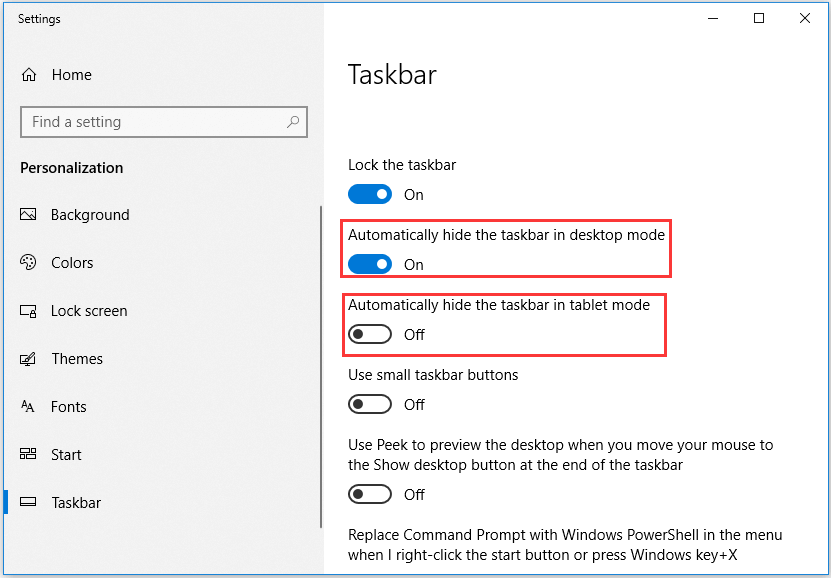
- Lock the taskbar . If this option is disabled, then it becomes possible to change the position of this panel by dragging it up, down or to the side with the mouse, as well as resize it
- Automatically hide the taskbar in desktop mode . Enabling this option hides the taskbar, and you must hover your mouse pointer down the screen to display it.
- Use small taskbar buttons . Visually reduces taskbar items.
- Position of the taskbar on the screen . Allows you to select one of four panel positions. Try all the positions and keep the most comfortable.
- Group buttons on the taskbar . Combines the icons of one program into a common group.
- Select the icons displayed in the taskbar . Here you can customize the icons that will be displayed in the notification area.
- Turn system icons on and off . Actually enables or disables the output of a particular icon.
Play with these settings and bring the taskbar to the desired look.
Desktop
So let’s move on to the desktop settings. By right-clicking on an empty space on the desktop, a context menu will be displayed (image below). Let’s go through some of its points.
- View .
 When you hover over this menu item, a submenu is displayed where you can customize the appearance of desktop icons, that is, their size: small, normal, large. Select each option with the left mouse button and choose the one that suits you best.
 - Arrange icons automatically . By activating this option, the shortcuts will be located one after another and you will lose the ability to move them around the desktop. Practice on your own. Tick this option and try moving the icon to a different corner of the screen. In order to drag an icon around the screen, you need to click on it with the left mouse button and, without releasing the button, move.
- Align icons to grid . This option draws an invisible grid on the screen that arranges labels in cells exactly one behind the other both horizontally and vertically. By activating this option, the ability to accurately position the icon on the screen is lost. It will align with the grid.
- Display desktop icons . This option either hides desktop shortcuts or displays them in their proper places.
- Sort . Sorts desktop icons based on the selected option: by name, by size, by item type, by date modified.
- Update . Refreshes the desktop and its elements. Sometimes desktop changes do not take effect on their own and you need to enable this setting.
- Screen settings . Displays the screen settings window.
- Personalization. Starts screen parameter settings.
Let’s dwell on the last two points in more detail.
Screen settings.
By clicking on this menu item, the following window will open:
In this section, we will consider only item Screen , since the rest do not relate to our today’s topic.
If you are not satisfied with the font size and other elements, you can change it by dragging the slider to the right.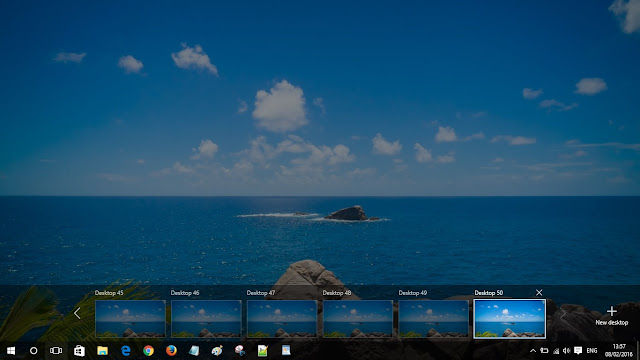 As a result, all elements will become larger.
Parameter Orientation changes the display of the screen by rotating it 90 or 180 degrees.
Adjusting the brightness level of increases or decreases the brightness of the screen backlight accordingly.
Additional display options. By clicking on this link, some more screen settings become available. We are interested in the Extension setting here.
Approval . Changes the size of the displayed image. It is better not to change this parameter and leave the one that the system recommends, otherwise the image on the computer may be distorted and become out of proportion. But there are cases when, by changing this parameter, working at a computer becomes more comfortable. Therefore, if you are not satisfied with the aspect ratio, then you can experiment.
And we move on to the analysis of the last menu item.
Personalization.
Right-click on an empty space on your desktop and select Personalize. You will see a window with the following content:
Background.
Allows you to change the desktop image, put a photo or a group of images that will change each other after a certain period of time. There is a choice of one of three background options:
- Photo
- Solid color
- Slideshow
Photo it becomes possible to select an image from those provided or by clicking on the button Browse to find what you need on your computer. If the selected image does not match the screen parameters, that is, there are empty spaces at the top, bottom or sides, then you can correct it by setting it to Position .
Solid color allows you to choose from the suggested background and set the screen to a solid color.
Slideshow allows you to select a folder with images on your computer using the Browse button, which will change after a certain period of time, which in turn can also be configured.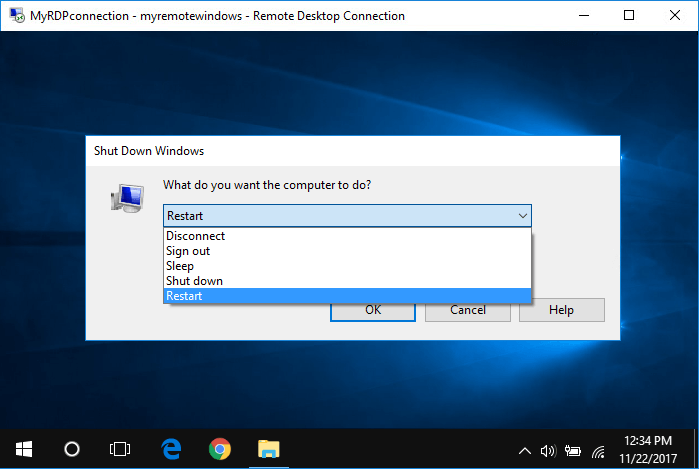
Colours.
Here you can set a specific color for the Start menu and some other elements. You can also add transparency to the Start menu and taskbars by enabling the appropriate option.
Lock screen.
This screen appears when the computer is turned on, when the computer is idle for a certain time, or when the computer is forced to lock. Here you can also customize the view and some display options. Let’s take a look at the basic lock screen settings.
There are three background options: Windows Interesting, Photo, and Slideshow.
Windows interesting loads pictures from the Internet and puts them on the lock screen on its own.
Photo allows you to select a specific image for the lock screen.
Slideshow , as we already know, broadcasts a slide show that changes each other after a certain period of time.
Having decided on the choice of background, you can add applications to the lock screen that will display some information.
Parameter Show lock screen background on the login screen transfers the background to the Login screen accordingly. The login screen follows the lock screen where you need to enter a password to your account or confirm it.
Themes
Go to section Themes. The following options will be displayed on the right:
- Theme Options
- Additional sound parameters
- Desktop Icon Options
- Mouse pointer settings
Follow the link Theme Options . The “Personalization” window will open
All topics are concentrated here and you can select them. Also, by clicking on the link Other topics on the Internet you can choose and download the one you like. Let’s close this window and follow the link Additional sound settings . Here you can manually select the sound for each program event. Nobody usually does this, leaving everything as it is. Close the Sound window. Follow the link to Desktop icon settings. Here, by ticking, you can select the icons you need to display on the desktop, or vice versa, uncheck the box to remove a specific icon. Also in the field below you can set the icon to another icon. To do this, select the icon with the left mouse button and click on the button Change icon. Next, select the required one from the list provided, and then click OK .
Let’s move on. Consider Mouse Pointer Options. A window will open where we need a tab Pointers . Here you can change the mouse pointer by selecting a specific scheme and marking the pointer you like from the list below with the left mouse button. To save the parameters, do not forget to press OK .
Start
Set the following items to be displayed on the Start menu:
- Show more tiles. accordingly displays more tiles on the right side of the Start menu.
 Put it at your discretion.
 - Sometimes show recommendations in the start menu . Disable this option if it is enabled.
- Show the most used applications . Accordingly, it displays a list of applications that are used most often on the computer. You can turn on the option to have quick access to such applications.
- Show recently added applications . Will display recently installed applications. Here at will.
- Open the start screen in full screen mode . By activating this option, the menu will open in full screen. Try it, maybe you will like this kind of Start.
- Show last opened items… Let it show.
That’s all with personalization settings for today. Now you can customize your workplace and bring it to the desired view for more comfortable work.
how to create and delete using hotkeys
One of the new features of the Windows 10 operating system is the ability to create additional desktops. This means that you can run different programs in different areas, thereby limiting the space used. In this article, you will learn how to create and use the mentioned elements.
How to manage virtual desktops in Windows 10
In order to be able to manage virtual desktops in Windows 10, you need to click on the corresponding button on the taskbar.
You can also access virtual desktops using the Win-Tab key combination.
After using this key combination, or pressing the button on the taskbar, you will see an interface for managing virtual desktops.
This interface allows you to create new desktops, move windows from one desktop to another, and switch between desktops.
Disadvantages
While this technology does not fully meet the expectations of most users. And here’s why:
- Windows 10 virtual tables are rigidly fixed, which excludes their movement, change of position;
- Cannot rename elements;
- When you restart your PC, the previously created «surfaces» will disappear;
- Multiple monitor support not implemented;
- It is not possible to set different wallpapers, to set a different location of shortcuts in some cases.

How do you feel about these innovations in Windows 10? Do you like the functionality or do you think it needs to be improved? Share your opinion in the comments.
How to create a virtual desktop in Windows 10
Creating virtual desktops in Windows 10 is quite easy. This can be done using the new interface created for managing desktops. To do this, open the interface using the button on the taskbar or the Win-Tab key combination and click on the «Create Desktop» button.
You can also create desktops using the Win-Ctrl-D keyboard shortcut.
When you use this key combination, the system will create a new virtual desktop and switch to it.
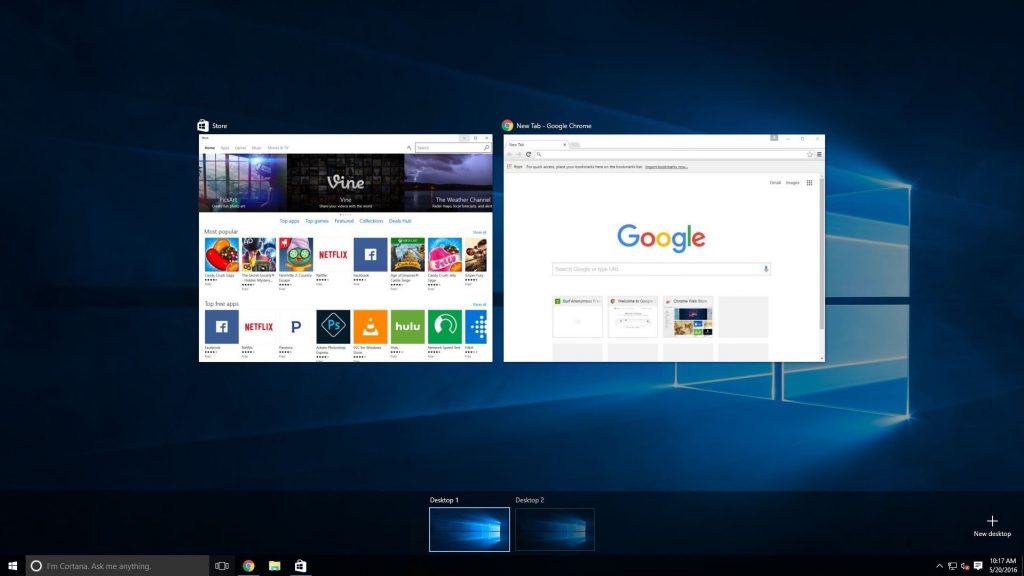
New «Snap» window organization feature for Windows applications
The « Snap » function is required to more conveniently change Windows application windows. This feature will be of greatest interest to laptop owners. Using « Snap «will allow you to minimize the manipulations with the computer mouse as much as possible thanks to the key combination on the keyboard and thereby reduce the time for scaling between certain windows.
Let’s deal with the « Snap » function in more detail. To do this, we will launch two windows, namely the new Microsoft Edge browser and the updated calculator.
Now make the browser window active and press the Win key combination + ↑. The browser will then expand to full screen.
You can minimize the browser window with the following combination: Win + ↓. To attach the browser to the right or left side of the screen, use the Win + ← and Win + → combinations. As you can see from the figure below, two windows are located on the left and right side of the screen.
If you have several programs open and you want to split them into four active areas, then try activating one program and typing the following combination on the keyboard — Win + →, and then Win + ↓. After that, your application will be placed in the lower right part of the screen. This trick can be done several times with the remaining three programs.
As you can see from the example, the « Snap » function is quite simple and at the same time very useful. So by using « Snap » you will save time as much as possible by dragging and scaling different windows.
How to switch between virtual desktops in Windows 10
You can switch between desktops through the desktop management interface. To do this, open the interface using the button on the taskbar or the Win-Tab key combination and click on the desired desktop.
You can also switch using the Win-Ctrl-arrow key combination.
Using this key combination, you can quickly switch to the next or previous virtual desktop.
Exiting tablet mode to the regular desktop
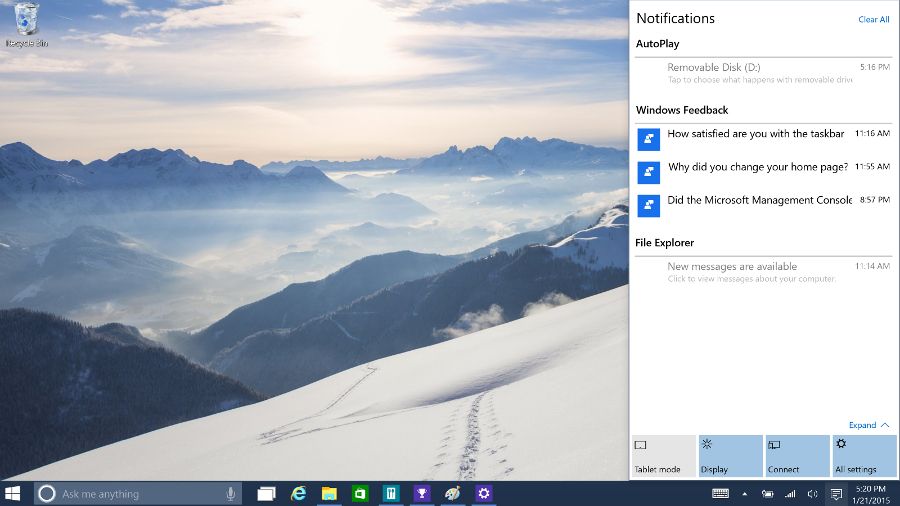
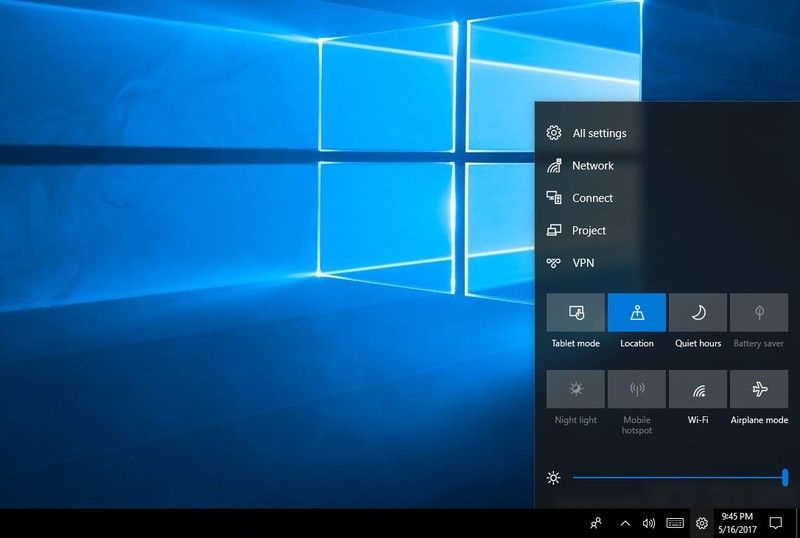
Many tablet users with a dozen often face the question of how to use a tablet PC as a desktop. This is pretty easy to do. To do this, go to « Notification Center » by launching it by clicking on the corresponding tray icon.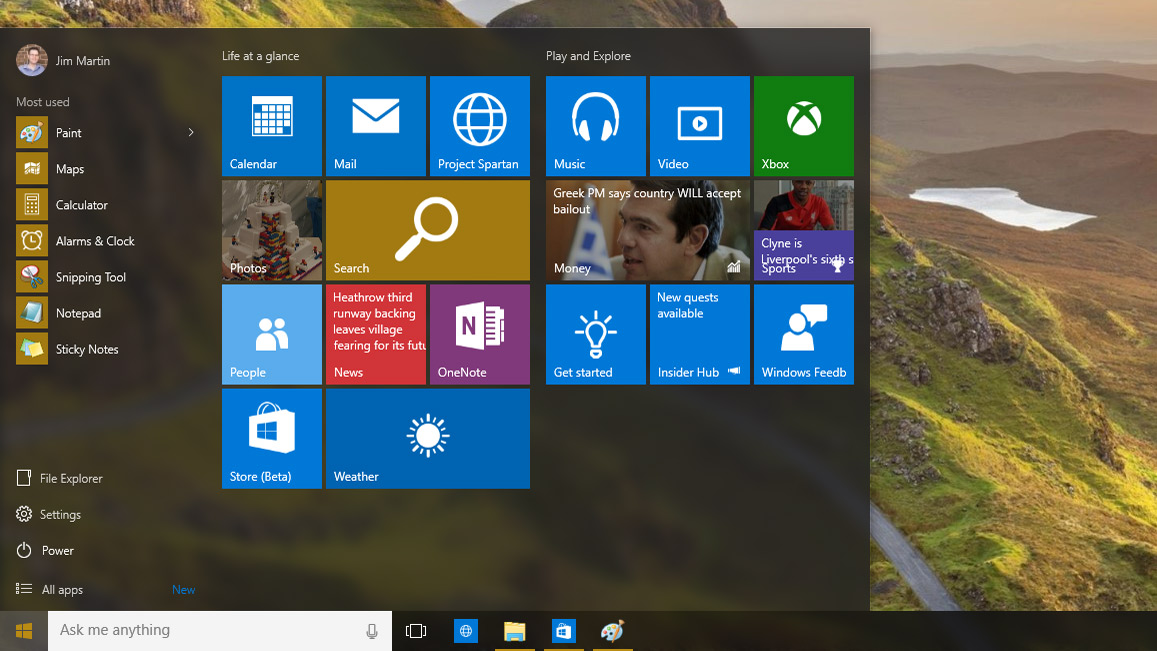
Next, you need to click on the item “ Tablet Mode ”, after which the tablet will turn into classic desktop , which can be controlled with a mouse, not a touch screen. This mode of operation remains until you change it to tablet mode in the same way.
How to delete a virtual desktop in Windows 10
You can also delete virtual desktops in two ways. This can be done through the desktop management interface. To do this, you need to open the interface and click on the cross next to the desktop that you want to delete.
You can also delete the desktop using the Win-Ctrl-F4 key combination.
When deleting a desktop, all windows and programs smelling on it are not closed, but moved to the adjacent desktop.
Brief essence of the virtual desktop
The standard working area of the user «dozens» (and other OS versions) is limited to the desktop — a screen that hosts shortcuts, files, folders. Now it is possible to create several virtual zones. Roughly speaking, the developers offered to increase the number of screens without buying new monitors.
Several desktops are distributed according to tasks: on one place text programs, documents, on the other — video or photo editors, on the third — browsers, instant messengers, etc. There are many options for working with two or more virtual zones.
Moving windows among desktops
If you need to merge open windows or move partitions among running screens, then it is advisable to do the following:
- On the selected desktop, open the Task View shortcut;
- Move the mouse to the table whose windows need to be moved;
- Right click on the table to display a drop-down menu;
- In the context menu, select the «Move» tab;
- Show the desired direction for the selected partitions.
The tips are simple, suitable for beginners.
Working with VRS
In Windows 10, the VRS function is built into the system, that is, no additional programs need to be downloaded.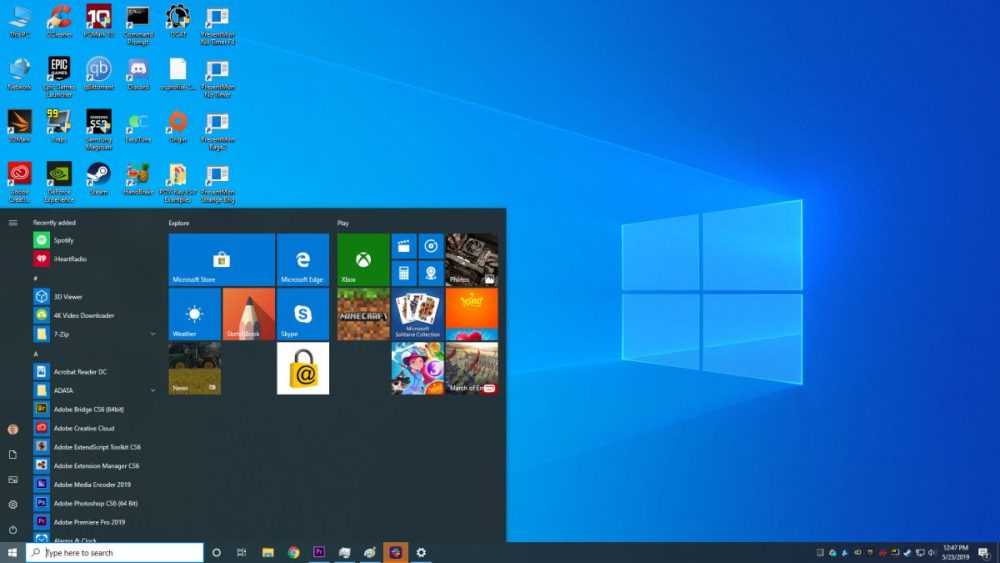 In different versions of the operating system, the appearance of the VPC control window may differ slightly, but all the functions described below were present both in the latest and in the first version.
Transition to VPC
VPC is called Task View in the operating system. You can go to the list of open VRS using a special icon located in the lower left corner of the quick access panel. By default, it is the third, if counted from left to right. The icon often changed its appearance. Build 17134 (the latest at the time of writing) has three rectangles and a rewind line, indicating that you can switch between these rectangles (desktops).
Click on the third icon from the left
Create a VPC and switch to it
Once in the control window, at the top of the screen you will see a list of available desktops. By default, it will have two blocks: one is yours, in which you are currently working, and the second is a spare one created by the VRS system.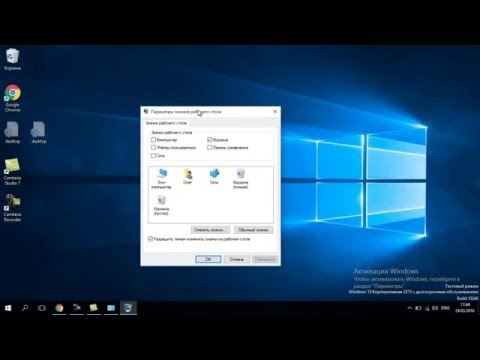 To generate another VRS, click on the «Add» button.
Click the Add button
Using this list, you can switch between VRS. You can create as many VRS as you like, but remember that the programs open in each of the desktops take up part of the total computer power. If you do not control this process, you can significantly reduce performance.
Delete BPC
Go back to the BPC list again. Hovering over one of the tables, you will see that a cross has appeared on top. Click on it to close the desktop. Please note that all programs that are not previously closed in the deleted VRS will automatically go to the nearest desktop in the list.
Click on the cross next to VRS
Let’s say you have an additional table in which the video editor is open. By closing this desktop, you will not close the program, but transfer it to another, open VRS.
It will not be possible to close all tables, since the last remaining table becomes the main one by default and the function that allows you to close the VRS automatically disappears.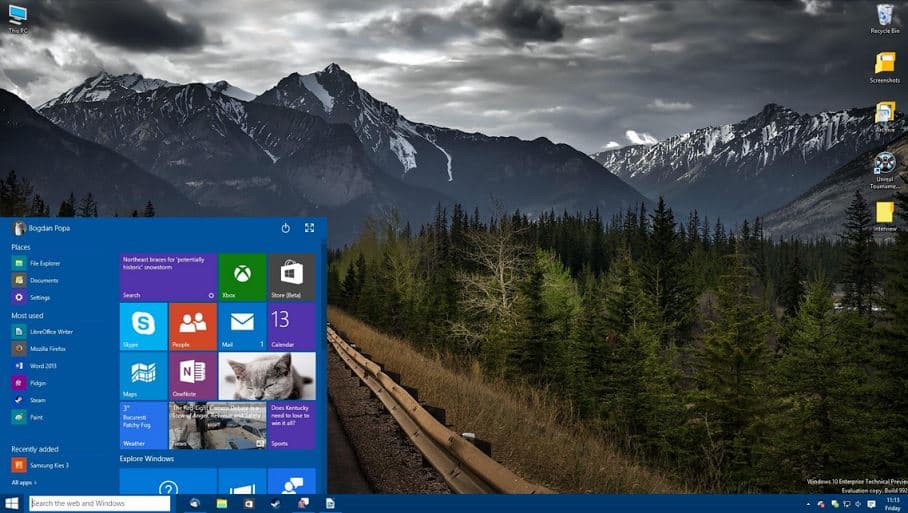
Moving programs between VRSs
There may come a time when you realize that a program opened in one VRS is needed in another VRS. Do not close it and run it in another table. It is enough to go to the desktop management window, find the one you need in the list of running applications, “take” it with the left mouse button and drag it to the block of the appropriate VPC. Done, as soon as you release the button, the window will be transferred to another VPC.
Drag a window to another table
Restoring closed windows via VPC
By default, in the control window you can see the list of previously closed windows. At the very top of it are the programs currently running, and below — information about previously closed applications, broken down by date. Using this data, you can find out when you last worked on a file in a program.
In the list you can see which windows were opened and when
If you sign in with your Microsoft account, you can increase the list of stored information up to 30 days.
Hot Keys for VPC Management
If you start using VPC frequently, you will lose a lot of time to expand the control window and other actions to switch between tables. To speed up the process, use the following combinations:
- Win + Ctrl + D — automatically create a new desktop and switch to it;
- Win + Ctrl + F4 — automatically close the current VRS and, accordingly, transfer all open windows to the neighboring VRS;
- Win + Ctrl + arrow left and right — move through the list of VPCs in one direction or another.
All of the above combinations work not only in the Task View window, but also at any time when working with the desktop.
Video: Working with virtual desktops in Windows 10
Snap Assist
Snap Assist either replaces or complements the ability to create multiple desktops. With it, you can arrange open windows in the best possible way across the entire screen. Prior to this feature, users who worked with several programs at once had to manually adjust the size of both windows so that they fit on the screen. Snap Assist takes on this task and does it much better.
- To start using Snap Assist, just drag the window from the right side of the monitor. When a semi-transparent rectangle is stretched to half the screen, the window must be released. At this moment, it will stretch exactly to half of the monitor, and a list of open windows will appear in the free part.
Dragging windows off the screen
- If you select any program from the list, it will occupy the second half of the screen. By moving the frame of the window, you can change the ratio of space distributed between active applications, one to one to another.
Specify which application to place in the second half
- If you take one of the windows and pull it out of the monitor, and then release it, then one of the halves of the screen will again be divided into two parts, in each of which it will be possible to place a program. Using this method, you can arrange up to four windows at the same time.
Up to four windows can be positioned in Snap Assist
The advantage of the function is that it allows you to determine a clear position and size of the window, preventing it from straying or moving. For example, this is very convenient if you are typing text in one part of the screen, and looking for information using a browser in another. You can come up with a lot of combinations, using which you will speed up the process of completing the task, since you will always have several windows in front of your eyes at once.
Hotkeys for Snap Assist
To manage windows in Snap Assist mode or switch to this mode, you can use the following key combinations: ;
Hotkeys allow you to minimize the use of the mouse, which significantly speeds up the process of managing windows.
How to navigate between desktops using the cursor?
It is possible to move from one table to another using a certain number of techniques — this is directly dependent on the user and his ability to work with a computer. In order to see the working elements, you need to move the mouse over the «Task View» icon. This icon is located on the left side of the quick launch bar.
Important : there is no such icon on the PC part. If this is the case, it means that the displayed functionality, which helps in managing virtual screens, is turned off.
The user can easily enable this shortcut to help navigate between virtual computer monitors:
- Click on an unoccupied part of the RMB quick launch panel to display an additional list of options with settings;
- Select the «Show task view button» tab.
The tool will appear immediately, no need to restart the computer.
how to beautifully customize the interface and arrange icons
The desktop on the Windows 10 operating system is the main interface. This is the main screen of the computer where the user can store files, folders and application shortcuts. To optimize the workflow, it is important to properly configure the interface, because it depends on how comfortable it will be to interact with the PC. The main screen offers a lot of features that the computer owner can adjust at their discretion.
CONTENT OF THE ARTICLE:
Customizing the Start Menu
As a rule, Windows 10 users are those who switched to the latest version of the operating system from Windows 7. And for the first time, owners of a computer based on the current OS experience problems when interacting with the Start menu. If in the “seven” it is a small area, then in the “ten” the interface occupies the entire screen when a person clicks on the corresponding icon in the taskbar.
However, after going to the menu, the user has the opportunity to change its size. To do this, just fix the mouse cursor on one of the edges, and then drag the window to the center. Then it will decrease and become habitual.
Full screen mode
Return to full screen mode, when the Start menu takes up the entire monitor space, is done as follows:
- Open the settings by clicking on the gear logo in the «Start».
- Go to Personalization and then Start.
- Opposite the item «Open the Start menu in full screen mode», move the slider to the active position.
The same section contains other functions that allow you to customize Start. In particular, you can customize the applications that will appear in the menu, or, for example, activate additional elements such as tiles and recently added applications. This will allow you to use the interface, making it functional and convenient.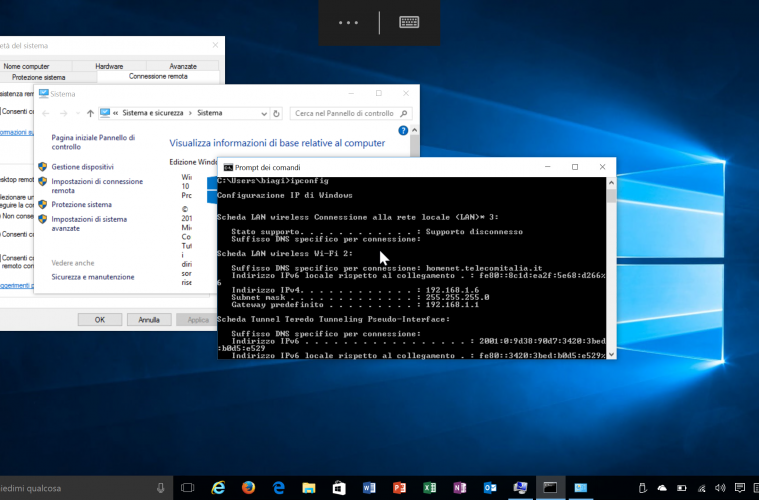
Tablet mode
It’s not uncommon for people to buy two-in-one devices. They combine the functions of a computer and a tablet, that is, their screen is touch. This allows you to get more options for interacting with your PC, but at the same time you need to activate a special mode:
- Open «Settings».
- Go to the System section.
- Select the Tablet Mode tab.
- Activate the slider.
Switching to tablet mode breaks down the boundaries between the desktop and the Start menu. Instead of the usual elements like small files and folders, the user sees only impressive tiles. On the one hand, it is inconvenient when a person interacts with a PC using a mouse and keyboard. On the other hand, on the contrary, such an implementation of the interface seems well thought out, since tapping on large tiles is more convenient than doing the same with small icons in normal mode.
Note. In the «Parameters» you can fine-tune the operation of the tablet mode. In particular, it is allowed to disable the icons in the taskbar.
Customizing the theme of the desktop and lock screen
The main part of customizing the main screen is to change its appearance. To go to the settings for the appearance of the Desktop, open «Settings», and then — the section «Personalization». Here you will see several items, each of which is responsible for a certain type of settings:
- Fon. This is the image that will be placed on the Desktop. You can choose from pre-installed templates, your own photos or pictures from the Internet. When choosing a background, pay attention to the resolution of the image, as for the correct display it must match the screen parameters.
- Colours. At this point, it is proposed to choose the general gamut of the Desktop. The choice is made both with the help of templates, and through the creation of your own shade.
 In addition, «Settings» allows you to activate the auto-color matching function, which will be correlated with the background and design features of the applications involved.
- Lock screen. This element is indirectly related to the Desktop, but is extremely common among users. A person has the ability to customize the design of the lock screen by setting the appropriate image and individual elements here. To gain access to the main screen, you will need to enter a password. However, this method of protection can be abandoned.
- Themes. These are full-fledged table design templates. Unlike point customization, themes offer a basic set of interface options that already include a header image, color scheme, and even mouse click sounds. The choice is made from standard themes, as well as options uploaded to the Microsoft store. Each ready-made theme is modified at the discretion of the user.
- Fonts. Another important part of the design.
 The choice of font determines the appearance of text in standard applications. By analogy with themes, design options are available both in a preinstalled form and in the Microsoft Store.
- Start. This section has already been discussed earlier in the material, so it makes no sense to focus on it for a long time. Just remember that this is where you adjust the contents of the Start menu.
- Taskbar. The final section of «Personalization», which is responsible for the design of the lower area of the PC, namely the strip, which is called the «Taskbar». Here you can place shortcuts to applications and individual computer settings.
A combination of personalized settings allows you to beautifully design your desktop, making it unique. If the changes made do not suit the owner, he retains the right to cancel the correction by returning to the standard parameters.
Desktop and start menu like in Windows 7
Using Windows 10, the owner of the computer now and then remembers how convenient the «seven» was.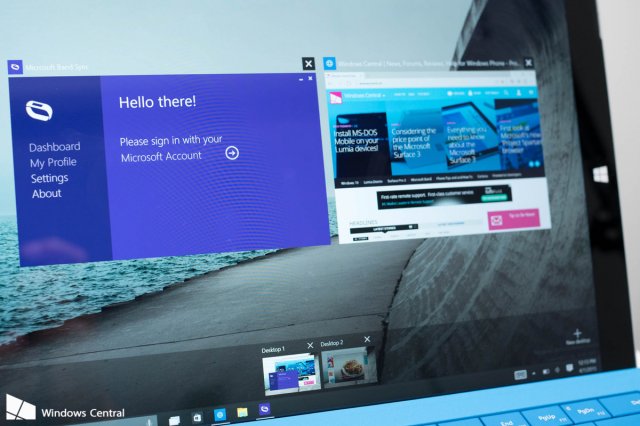 If the design capabilities of the current operating system do not suit the user, then he is invited to make the desktop and the Start menu look classic. To do this, you need to download and install the Classic Shell application. The parameters will be configured as follows:
- After installing the program, click LMB on the Start icon.
- Next, the application menu should open, where in the «Start Menu Style» tab you need to select the design of Windows
- Adjust the remaining parameters as you wish.
To bring the appearance of the «tens» to the «seven» it is not necessary to use third-party software. Windows 10 settings allow you to organize the icons on the home screen and bring back shortcuts instead of tiles. In addition, with the help of «Settings», the size of the Start window is reduced to a size comparable to this menu from Windows 7. Therefore, it is important to carefully study all the OS settings.
Live Tiles and Groups
Changing the Live Tiles and Groups in Start will bring it closer to Windows 7. To do this, open the menu and then right-click on any of the tiles. You will see that among the options offered there are pinning and unpinning. Thus, you can get rid of the tiles or, for example, add new ones.
Functional expansion
For those who are not satisfied with the standard customization options, it is recommended to download and install the PowerToys package. It will add new features like color picker, keyboard and window manager. Outwardly, PowerToys are difficult to distinguish from the standard «Parameters», and therefore the setting should not be difficult.
Tiffany Garrett
Help And How To
Source: Windows Central
Windows 10, now enjoying the October 2020 Update, continues to make it easier to set up and use multiple virtual desktops in Windows 10.![]() Multiple desktops are great for organizing unrelated ongoing projects or for quick hiding from the boss of that browser game you can’t stop playing. And if you haven’t upgraded to Windows 10 yet, be sure to check out our collection of the best Windows laptops with the latest OS.
Multiple desktops are great for organizing unrelated ongoing projects or for quick hiding from the boss of that browser game you can’t stop playing. And if you haven’t upgraded to Windows 10 yet, be sure to check out our collection of the best Windows laptops with the latest OS.
Ready to take on a multi-desk day? Went!
- How to create a new virtual desktop on Windows 10
- How to switch between virtual desktops on Windows 10
- How to move windows between virtual desktops on Windows 10
- How to duplicate windows on virtual desktops 9017 How to remove virtual desktop in Windows 10
How to create a new virtual desktop in Windows 10
You can create a new virtual desktop in a couple of clicks or with a keyboard shortcut.
-
Click the Task View icon on the taskbar.
- You can also use the Windows key + Tab keyboard shortcut, or you can swipe with one finger to the left of the touch screen.
-
Click New Desktop . (It’s located in the upper left corner of the screen.)
Source: Windows Central
That’s it. Easy, right? There is also a Ctrl + Windows key + D keyboard shortcut that will immediately create a new virtual desktop.
How to switch between virtual desktops in Windows 10
Now that you’ve created a new virtual desktop, you can quickly switch in several ways.
-
Click the Task View icon on the taskbar.
- You can also use the Windows Key + Tab keyboard shortcut, or you can swipe to the left of the touch screen with one finger.
-
Click Desktop 2 or whatever virtual desktop you have created.

Source: Windows Central
You can return to the original desktop at any time by following the steps above, but selecting Desktop 1. There is also Ctrl + Windows key + left/right arrow Keyboard shortcut that can be used to switch between virtual desktops. Are you using a device with a touchpad? You can swipe left or right with four fingers to switch between virtual desktops.
How to move windows between virtual desktops in Windows 10
You can move windows between virtual desktops in two ways. First, you can click and drag windows; second, you can right-click the window and use the menu.
Click and drag method
-
Click the Task View icon on the taskbar.
- You can also use the Windows Key + Tab keyboard shortcut, or you can swipe to the left of the touch screen with one finger.
- Press and hold window you want to move.

-
Drag and drop the window onto the alternate desktop .
Source: Windows Central
Context Menu Method
-
Click the Task View icon on the taskbar.
- You can also use the Windows Key + Tab keyboard shortcut, or you can swipe to the left of the touch screen with one finger.
-
Right-click window you want to switch to another desktop.
Source: Windows Central
- Move your cursor over Go to .
-
Click the desktop icon to which you want to move the window.
Source: Windows Central
You can move windows between desktops to your heart’s content.
How to duplicate windows on virtual desktops
Certain windows or collections of windows from one application can be duplicated on all virtual desktops.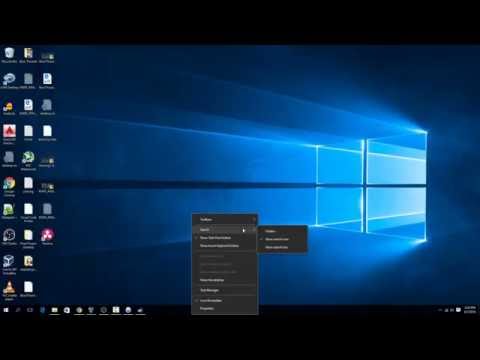
-
Click the Task View icon on the taskbar.
- You can also use the Windows Key + Tab keyboard shortcut, or you can swipe to the left of the touch screen with one finger.
-
Right click active window .
Source: Windows Central
- Click Show this window on all desktops to duplicate a single window.
-
Click Show windows from this application on all desktops duplicate all windows from the same application.
Source: Windows Central
How to delete a virtual desktop in Windows 10
Want to go back to just one desktop? No problem.
-
Click the Task View icon on the taskbar.
- You can also use Windows Key + Tab keyboard shortcut, or you can swipe with one finger to the left of the touchscreen.
- You can also use Windows Key + Tab keyboard shortcut, or you can swipe with one finger to the left of the touchscreen.
- Move your cursor over the desktop you want to delete.
-
Click the icon X in the upper right corner of the desktop icon.
best video card for minecraft
Source: Windows Central
Open and running windows on the closed desktop will be returned to the original desktop. You can also use Ctrl + Windows key + F4 keyboard shortcut to immediately close the virtual desktop you are currently viewing.
More Windows 10 Resources
For more helpful articles, articles, and answers to common questions about Windows 10, visit the following resources:
- Everything you need to know about Windows 10 in Windows Central Windows 10
- Windows 10 forums in Windows Central
How to open a new desktop on windows 10 using keyboard shortcuts
Contents
- Windows 10 in Detail
- Saturday, May 9, 2020
- 4.
 Virtual Desktops in Windows 10 9002 Lesson 9017 Virtual Desktops in Windows 10 9002 desktops in Windows 10
 - Create and work with virtual desktops using a GUI.
- How do I create a Windows 10 virtual desktop?
- How do I switch between virtual desktops in Windows 10?
- How do I remove the virtual desktop?
- Windows 10 virtual desktop shortcuts
- Windows 10 virtual desktop shortcuts
- Virtual desktop shortcuts
- Windows+Tab: Open Task View create a new virtual desktop
- Windows+Ctrl+Left or Right Arrow: Switch desktops
- Windows+Ctrl+F4: Close current virtual desktop
- Esc: Close Task View
- Move a window between virtual desktops
- How to open or create a new virtual desktop in Windows 10
- Opening
- How to create a second one
- More keyboard shortcuts
- More keyboard shortcuts
- Video
Windows 10 in Detail
Saturday, May 9, 2020
4.
Virtual Desktops in Windows 10
Lesson 4: Virtual Desktops in Windows 10
In this lesson, we will understand what virtual desktops are in Windows 10 and learn how to use them.
In this tutorial, we will look at both of these methods.
Create and work with virtual desktops using a graphical interface.
How do I create a Windows 10 virtual desktop?
When using the GUI, the first thing to do is to turn on the «task view» mode.
If you don’t know how to do this and what it is, then be sure to study the previous lesson: https://www.win10details.ru/2020/05/sposoby-pereklyucheniya-mezhdu-otkrytymi-oknami.html
Now in short I will say that you can enable this mode by clicking this button on the taskbar:
| Task View Button |
Or by using the keyboard shortcut Win + Tab .
After the task view mode is enabled, a button will appear in the upper left corner of the screen:
Creating a virtual desktop in Windows 10. ! Virtual Desktop Created:
In the same way, I can create both 3 and 4 desktops. And so on until the resources of the computer run out. How do I switch between virtual desktops in Windows 10?As you have already noticed, when creating a virtual desktop, a new menu appears at the top of the «task view» mode, in which all currently created virtual desktops are represented in thumbnails.
This menu is navigated using the mouse cursor. If you move the mouse cursor over the virtual desktop thumbnail and do not click anything, we will see which applications are open on this desktop. If you move the mouse cursor over the desktop thumbnail and click on it with the left mouse button, then we will exit the mode of presenting tasks to this desktop. I also want to draw your attention to the fact that all created virtual desktops are completely empty by default, and are in the same state as your computer would be if you just turned it on. It’s pretty handy for work. But let’s get back to task view. While in task view mode, we can move already open applications from one desktop to another. To do this, we just need to move the mouse cursor over the corresponding thumbnail of the desktop on which applications are already open, then move the mouse cursor over the application that we want to move. After that, holding down the left mouse button, we move this application to the desktop we need.
So all the applications we migrated disappeared from the first virtual desktop and ended up on other virtual desktops. How do I remove the virtual desktop? If the virtual desktop is no longer needed, you can easily close it.
This will move all applications that were open on this virtual desktop to the neighboring one. They won’t be closed! If we close all virtual desktops, then all applications from them will be transferred to the only remaining one. When we have only one desktop left, the menu from the top of the task view disappears:
|