Zalman HD160 Home Theater PC Enclosure
The HD160 is Zalman’s first more-or-less conventional PC case, designed for a quiet, high performance HTPC. All-aluminum construction, front panel VFD display with MCE remote control, a prominent front panel volume control knob, and a fat price tag to match it all identifies the HD160’s high end aspirations. How high does it reach?
May 17, 2005 by Mike Chin
|
Product |
HD160 Home Theater PC Enclosure |
|
Manufacturer |
Zalman Tech Co. Ltd. |
|
MSRP |
US$250~300 |
Zalman’s first entry into the growing HTPC case market is an unabashedly high end affair. The HD160 identifies its lofty sights with all-aluminum construction, front panel VFD display with MCE remote control, a prominent front panel volume control knob, and a fat price tag to match it all. That Zalman would aim high is no surprise; the company’s other cases are the no-holds-barred fanless TNN 500 and TNN 300 models, which we’ve reviewed. Unlike the “exoskeleton heatsink” TNN cases made by this silent computing pioneer, the Zalman HD160 is much more conventional, though it is still designed with low noise operation as a primary goal.
The HD160 comes in a retail merchandizing box. The case itself is packed with two closed-cell foam end caps for shock protection.
Packaged for retail merchandising.
The Zalman HD160 looks like a high end A/V component.
The all-aluminum case is available in natural brushed aluminum, as our sample was, or in anodized black. The unit is quite light, just 4.8 kg. No power supply is included, but there are several accessories.
Remote Control, Install CD, Optical Disk Cover, Batteries, ATX Power Cable Adapter, Other cables and screws, User’s Manual
The case is built close to the “4U” standard, standing 7″ tall, and 6. 25″ without its feet. “U” refers to server rack mount sizing, 1U = 1.75″. It doesn’t suffer much from the “too chunky” look. Some of the really ambitious cases such as the Lian Li PC-V880, or Thermaltake Tenor/Bach are over 4U height, which gives them the sumo wrestler look.
Published Zalman HD160 Specifications |
|
| Enclosure Dimensions | 435mm X 420mm X 160mm (L*W*H) |
| Net Weight | 4.8kg |
| CPU TDP | Up to 130W for Quiet Cooling |
| Construction Material | All Aluminum |
| Motherboard Compatibility | ATX & microATX |
| PSU Support | ATX PSU |
| PCI/AGP Card Support | Full Size |
| Drive Bays | 4 X 3. 5″ Internal Drive Bays 5″ Internal Drive Bays1 X 3.5″ External Drive Bay 1 X 5.25″ External Drive Bay |
| Cooling Components | 2 X 80mm Rear Exhaust Fans ZM-MC1 Multi Connector |
| Expansion Slots | 7 Slots |
| Front I/O Ports | 2 X USB Ports 1 X Firewire (1394) Ports 1 X MIC 1 X Headphone |
| Available Colors | Silver & Black |
| Card Reader | 17(sic) in 1 |
Among the key features listed for the Zalman HD160:
Key Features of the Zalman HD160 |
|
| Zalman’s Statements | Our Comments |
All Aluminum Based Chassis – The entire chassis consists of aluminum unlike other enclosures that solely use aluminum for the front panel.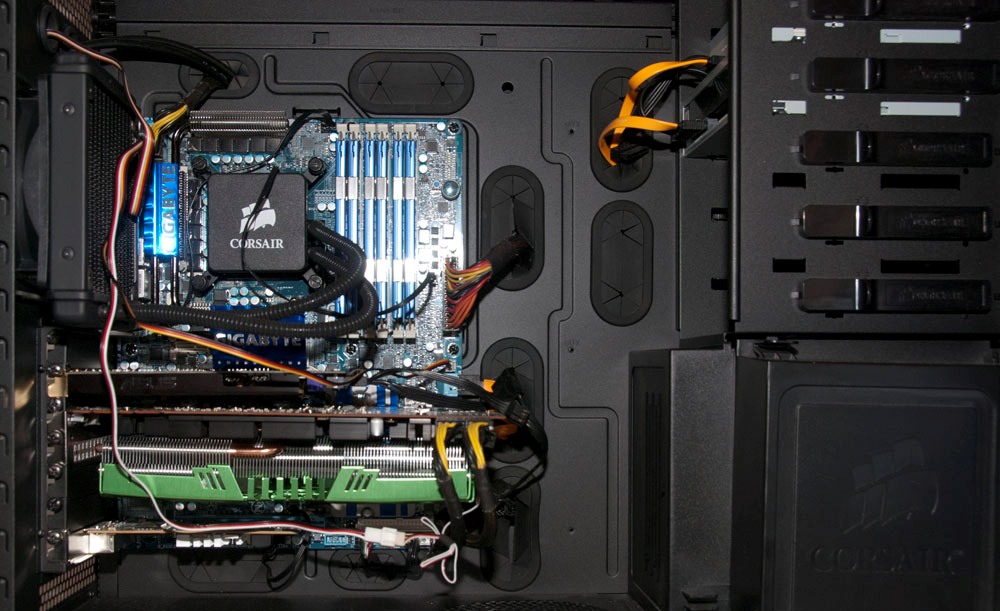 |
But is all-aluminum better? We don’t think so: Aluminum Myth. |
| Optimized Ventilation and Cooling | Good. |
| Excellent Expandability – The 5.25″ and 3.5″ exposed bays along with the four 3.5” internal bays provide plenty of expansion room. The push-open door style front I/O panel houses two USB ports, 1394 port, MIC and headphone jacks. | Good. |
| VFD & Remote Control – The VFD displays the PC’s operation status while the remote control provides convenient access to various media. | Good. |
| Energy Conservation – The HD160 can be operated at minimum fan speed with Zalman’s silent cooling solutions, consuming less power than regular systems. | Surely it’s only a watt or two! |
User Friendly Components – USB 2. 0 ports, 1394 , MIC, headphone and built-in flash memory reader supporting seventeen types of cards. 0 ports, 1394 , MIC, headphone and built-in flash memory reader supporting seventeen types of cards.– Remote control for enabling multimedia software operation and control. – Convenient volume knob. |
OK. |
| PCI/AGP Card Support | Full Size |
| Drive Bays | 4 X 3.5″ Internal Drive Bays 1 X 3.5″ External Drive Bay 1 X 5.25″ External Drive Bay |
| Cooling Components | 2 X 80mm Rear Exhaust Fans ZM-MC1 Multi Connector |
| Expansion Slots | 7 Slots |
| Front I/O Ports | 2 X USB Ports 1 X Firewire (1394) Ports 1 X MIC 1 X Headphone |
| Available Colors | Silver & Black |
| Card Reader | 17 in 1 |
Zalman offers some performance data on their website to indicate the cooling capability of the HD160.
Their test system was a fairly minimalist config: Intel Pentium D 830 processor, an ATI X700Pro vidcard, and the standard complement of PSU, HDD, and optical. drive. A Zalman 9500CU cooled the CPU, and a
Zalman VF700
cooled the video card, both at 5V. The voltage of the exhaust fans is not shown, however, nor are any noise measurements given. The temperature results shown are
thus not that useful (and reporting the temperatures to a hundredth of a degree seems absurd given the inherent vagaries of temperature measurements.)
Zalman’s Own Test Results |
||||
CPU |
VGA |
System |
PSU |
Room |
57.  42°C 42°C |
52.59°C |
35.31°C |
32.51°C |
30°C |
THE EXTERIOR
You’ve seen the front and left side of the case. Here’s a shot from the other angle.
The extensive i/o panel is hidden behind a drop down door.
Note the vents on right side, near the back. This is the intake vent for the PSU. There is a top vent as well, and it can be seen better in the photos below.
The two back panel 80mm exhaust fans are mounted with the usual screws and large rubber grommets; the latter look substantial enough (and not too compressed) to have some effect in reducing fan vibration transfer into the case.
Only the two 80 fans are exhausts —
all other vents in the case are meant to be intakes.
The top vent is directly over the CPU area. It can be closed or open, or set to any position in between as shown in the animated GIF below. A small coin or slot screwdriver can be used to make this adjustment. This vent is in line with Intel’s recommendations for a fresh air vent for their TAC (Thermally Advantaged Case) specification, but the HD160 lacks the additional vent for VGA cooling that TAC also specifies. Probably because it’s adjustable, the vent does rattle a bit when the top panel is tapped.
Top intake vent is adjustable.
Almost ubiquitous stylized feet, with a rubber insert in the center.
The bottom panel has two intake vents, one at the front directly beneath the hard drive cage, and the other just in front of the PSU area.
The top of the photo is the front of the case.
THE INTERIOR
The top panel is secured with five machined screws, two on each side and one on the back.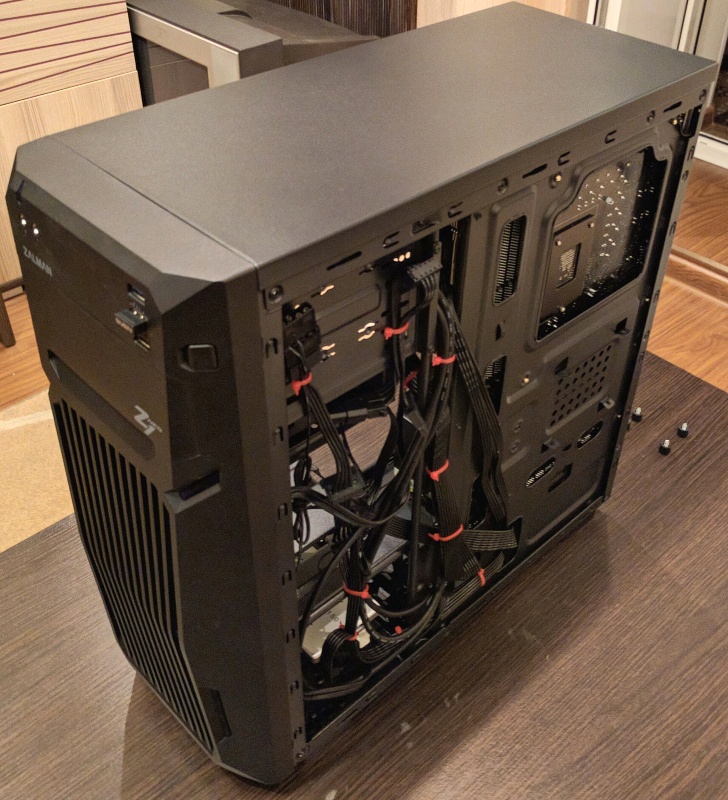 A gasket runs across the perimeter, presumably to help reduce vibration conduction. The underside of the top panel vent has two screws which can be tightened to keep the its action from being too sloppy. As mentioned earlier, the vent rattles a bit when the top panel is tapped.
The top is a flat panel secured by five machined screws. Note damping gasket along its perimeter.
The white box
holds accessories, screws, etc.
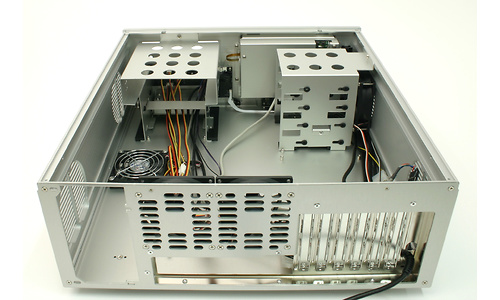
The photo below shows the optical drive bay, which is atop the front panel I/O block. Directly behind that is a series of slots which are close to the PSU area. To the right is the back of the VFD and hard drive cage, with intake vents below the cage.
Left slot leads to PSU chamber, below the CD drive tray; right slot goes to motherboard chamber.
PSU mounting area.
A standard ATX12V power supply is meant to be mounted sideways in the back right corner of the case.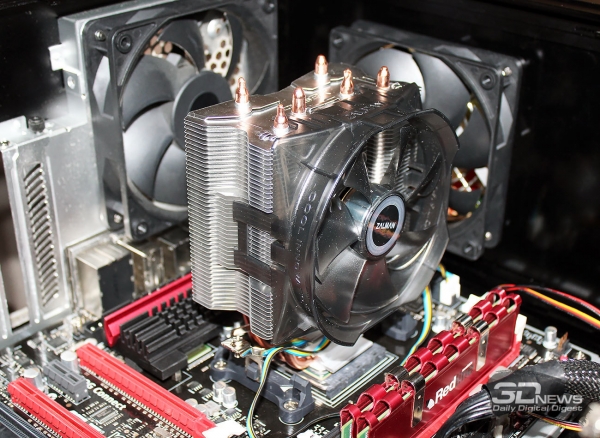 The rubber-cushioned tab in the center of the photo above is used to jam it up against the right side panel. The PSU is mounted on a separate plate first, which allows it to be mounted to the case. That is the procedure; the PSU cannot be mounted without removing the plate from the case and attaching it first on the PSU.
There are several PSU installation options:
1. A 120mm fan intake PSU, with the fan facing either direction.
A. With the intake fan facing the side vent, you’d have a completely self-contained cooling system for the power supply, like in the Antec NSK2400 or Antec P180 cases.
B. With the intake fan facing the interior of the case, the increased airflow from the PSU fan maye help to cool components, especially the CPU. The expense would be higher temperatures within the PSU itself and a risk of the PSU fan ramping up in speed at a lower load than with option A. The side vent then becomes blocked and useless.
The vents on the bottom just ahead of the PSU become the closest fresh air intake for the PSU.
2. An 80mm fan PSU can also be used. In this case, the bottom vents visible in the photo above become the fresh air intake for the PSU, but some of the heat in the case may also exhaust through the PSU. Again, there is a risk of the PSU fan ramping up in speed at a lower power load than with option 1.A.
Here’s a drawing from Zalman that illustrates the target airflow design for the case.
The arrow from the front refer to vents on the bottom of the case under the HDD cage.
The arrow that seems to originate from the optical drive area refers to the bottom vent in front of the PSU.
The role of the top panel opening is not illustrated here.
HDD CAGE DETAILS
The hard drive cage looks simple enough, but it’s actually a bit of a pain to work with.
The HDD cage is a bit awkward to work with.
It’s in two parts: A U-shaped part that screws over a base. Fours screws on opposite sides attach the two parts together. The other two sides of the base have holes through which screws attach the cage to the bottom of the case. You might be able to see in the photos that the base has two pads and a pin through each pad to simply hold the bottom edge of the drive in place. Two screws through the top secure the drive. Three drives can be accommodated, with very tight spacing between them.
The metal tabs and the pins both make contact with the HDD.
The cage mounting hole on the far side becomes covered when the HDD is installed.
The bottom pads and the top rubber grommets are meant to mechanically decouple the drive from the cage, but there are problems with this arrangement.
- The little tabs for each drive make contact with the drive, hence “short-circuiting” the soft bushings.
- There’s still metal-to metal contact between the pins at the bottom and the HDD.
The manual suggests removing the entire cage, mounting the drives, then screwing the cage back in place. What it doesn’t tell you is that if a drive is mounted in either of the two edge positions, a screw to attach the cage becomes blocked. You can’t secure the cage at all. It also doesn’t tell you that you need a fairly long shaft (~6″), magnetic Philips head screw driver to access the cage mounting screws.
Base part of HDD cage.
The only ways to make this work is to use just one hard drive and mount it in the center position, or to leave the base in place, removing only the top U-shaped part to mount the drives. It’s fiddly, but it is doable.
VFD POWER
Another potential problem with the HDD cage is that it blocks access to the terminals on the VFD to power it up. The photo below shows the location of this pair of pins; the HDD cage needs to be removed completely to fit the VFD power connector.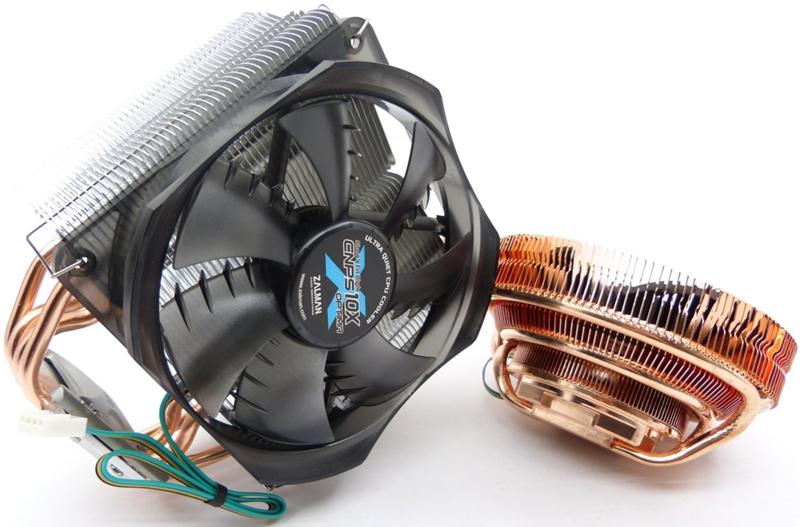
Access to VFD power connection requires removal of HDD cage.
Another related issue is where the VFD feed voltage comes from. Remember the ATX Power Cable Adapter pictured on the first page? Well, it’s simply an ATX cable extender with a single pair of breakout leads. The output voltage is 5V, and it comes from the 5VSB (5V stand-by) line, as shown in the photo below. We’re not thrilled with this arrangement, as the extra contacts may cause some voltage drop by the time the juice gets to the motherboard. Users of many modern PSUs that have just 2A capacity on the 5VSB line might be wise exercise a bit of caution about overdrawing from that line (with lots of USB devices, for example).
ATX breakout lead to power the VFD.
OPTICAL DRIVE BAY
The trouble with mounting continues with the optical drive. You might be able to spot the problem just by examining the photo below: The optical drive cannot be adjusted for correct positioning at the front panel while it is actually in place.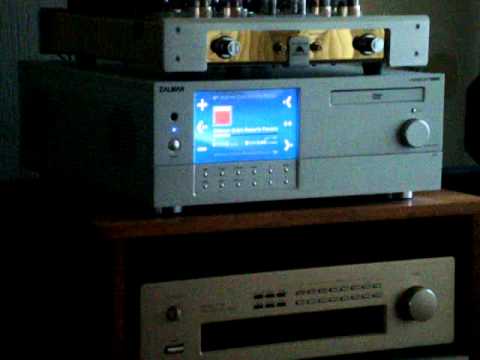 There is no way to access the screws that lock the optical drive down. The best way to deal with this is to install all four screws for the optical drive loosely. Put the cage in place, and position the drive. Tighten the two screws you have access to. Then you can take the cage out, tighten the other two screws, and reinstall. You need to remove the cage once, but once is all that is necessary.
There’s also an additional HDD mounting bay at the top of the optical drive cage. It is equipped with the same rubber grommets as the ones at the top of the main HDD cage. However, given the absence of any airflow vents nearby, a hard drive in this location is likely to get very hot, and we would not recommend using this drive bay.
Optical drive bay and front panel I/O assembly.
The front of the optical drive bay needs to be worked on in order to match the brushed aluminum bezel. Zalman provides a machined brushed aluminum cover piece to replace the plastic one on the optical drive.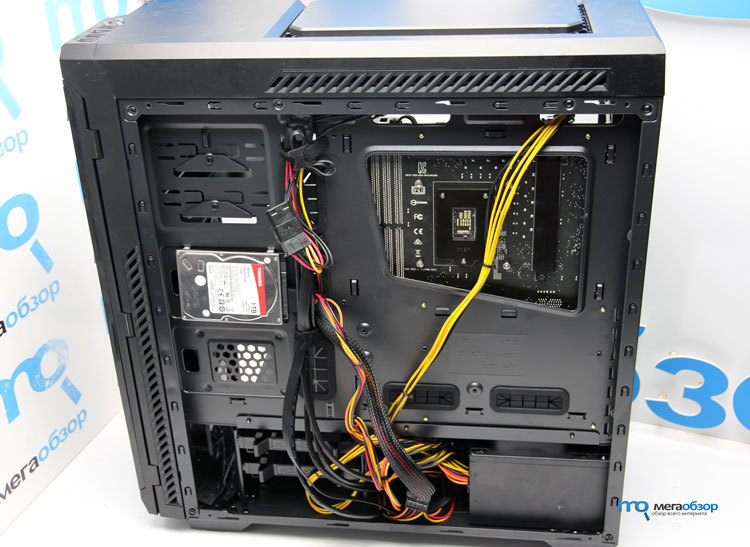
Looks nice when done, but the doing is not fun.
The front plastic lip of the disk tray on most optical drives can be removed without damage if you work carefully, but as they all differ a bit, you have to examine the drive and figure it out for yourself. Usually there’s a couple of clips or tabs that hold the lip in place. Once the piece is removed, then the aluminum cover piece can be placed. It’s backed with a strip of double sided tape. We ended up using another layer of double sided tape atop the existing one to make things work. The fact that all this has to be done while the front/back position of the optical drive is adjusted to align its front to that of the case makes things quite tedious. Again, it’s not impossible to do, but it is certainly very fiddly and annoying, even for those who have lots of experience assembling systems.
THERMAL & ACOUSTIC TESTING
Thermals and noise comprise the core of most SPCR equipment reviews.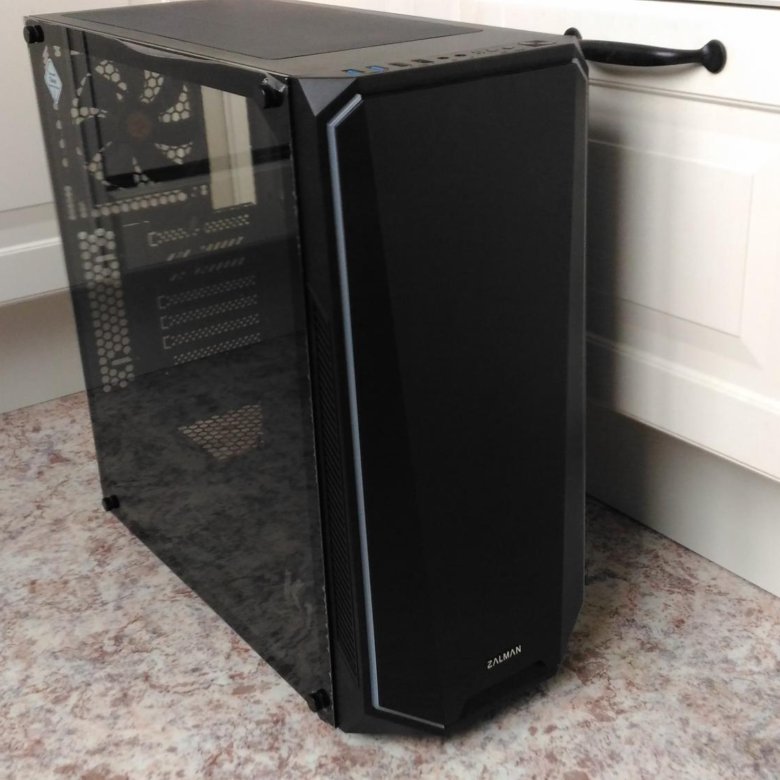 Several system variants were installed and tested in the Zalman HD160. The base components were:
DFI RS482 Infinity MicroATX motherboard
This new ATI Radeon Express 200 chipset model from DFI has the most flexible and user-adjustable BIOS we’ve seen on any microATX board, comparable to the best of the full-ATX boards. It allows the CPU core voltage to be manually set without disengaging Cool’n’Quiet, which simply applies the manual voltage adjustment to the various CPU power states. It allowed the X2 4800+ to be undervolted by 0.1V throughout the testing, for very modest power consumption in every load. It has no fans.AMD Athlon 64 X2 4800+ processor
AMD’s current second fastest desktop processor, one small step down from the flagship FX-60, this particular dual-core sample has a rated TDP of 85W. Previous testing showed it easily undervolts by 0.1V or more, with resulting power draw at full load of just ~60W at the 2x12V motherboard socket.It is overkill for a HTPC, but we’re trying to push the envelope for thermal and noise testing in this new case.
OCZ Technology Gold PC4000 2 x 512MB DDR matched dual channel memory.
Samsung SP2504C 250GB SATA 3.5″ hard drive
Our preferred quiet 3.5″ desktop reference measures 21~22 dBA@1m.Seasonic S12-330 PSU, new sleeved version
A very quiet 120mm fan power supply.
Other components included:
AOpen Aeolus PCX6800GT-DVD256 video card with Zalman VF900 VGA cooler at 5V. The SPL of this HSF at 5V measures 20 dBA@1m. It sounds a bit like a whispery rubbing of paper.
Zalman CNPS7700CU CPU heatsink modded with Nexus 120 fan
At a measured 21 dBA@1m (at 12V, which is where it was set throughout testing here), this modded HSF very quiet and offers decent performance.Zalman CNPS9500 CPU HSF
The model used in Zalman own testing of this case, pretty quiet at 5V, and more effective cooling than the 7700.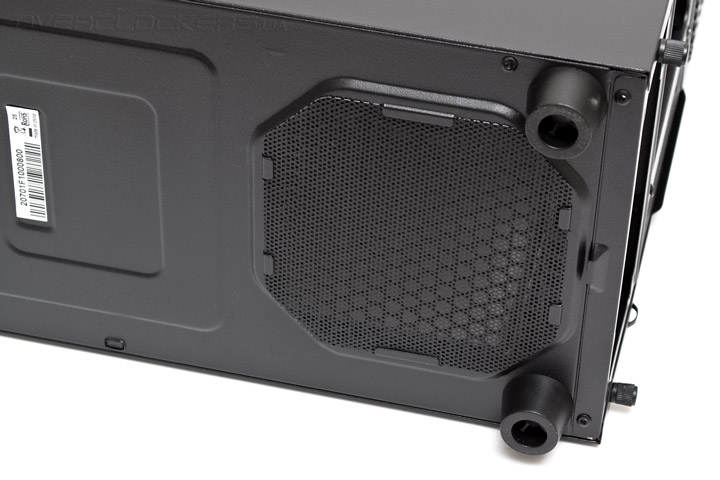
The system assembly took some three hours, including fiddling time (to examine parts carefully) and the time needed to stop, plan out photos, take and check them, and so on. Even if photos were not being taken, it would have taken a couple hours to complete assembly. The installation of the drives and the PSU are all quite fiddly. Cable routing options are not great, even though a couple of adhesive-backed plastic cable hooks are provided. Most of the extra cabling was stuffed beneath the optical bay drive.
System with Zalman 9500 HSF in the HD160 case.
Bit of a cable mess around the HDD area.
Windows XP Pro SP2 was installed and fully updated, and our usual gamut of software tools installed:
- SpeedFan
4.27 for CPU and other hardware monitoring. - CPUBurn for processor stress testing.
- Rthdribl provides a steady high load to the GPU in a reduced window, allowing the nVidia GPU temperature gauge to be seen (on the monitor screen).
Other tools:
- Extech Power Analyzer / Data Logger 380803
power meter, for precise, unmanned, long term AC power monitoring. - SPCR digital audio recording system to record and save noises in high quality MP3 files.
- B&K 2203 Sound Level Meter to measure sound pressure levels.
ACOUSTICS AROUND A MEDIA PC
Just a quick, relevant digression about the acoustic environment and desired functionality of the media PC. The way a media PC is used is substantially different than the average desktop PC. The most important differences are noted below.
Criteria |
Media PC |
Normal PC |
Location |
On equipment rack, near TV / stereo |
On desktop next to monitor on on floor under / beside desk |
Application |
Play & record music and video, play games; usual PC functions secondary. 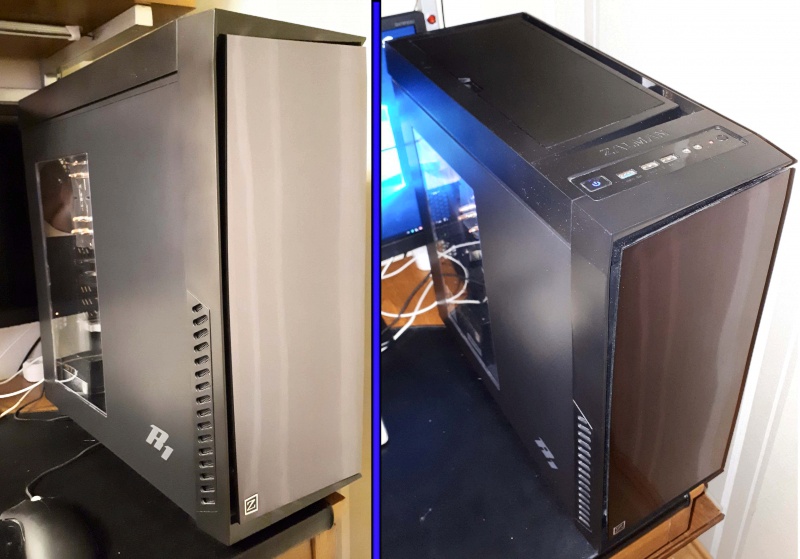 |
Office, creative, engineering, scientific and communication work; gaming and other entertainment functions usually secondary |
User Position |
Typically at least 2 meters away. |
Typically not more than 1 meter |
Overall Acoustics |
Background, the PC noise, noise from other A/V equipment, conversation, and the music/soundtrack playing from TV/stereo speakers |
Background + typing noise + noise generated by PC, perhaps background music |
In a nutshell, the media PC is usually situated near the TV, which is usually at least six feet away from the seated viewers. The noise in the room includes whatever is being played through the speakers of the A/V system, plus any noise made by other audio/video gear. From first hand experience, we know that…
Many digital TV boxes and PVRs contain a noisy hard drive and fan(s). The HDD is usually on all the time, as long as the unit is plugged in. This means the noise is there all the time, whether you’re using the gear or not. There is no real care in ensuring low acoustics; we’ve measured nothing lower than 25 dBA@1m; it’s more typically closer to 30 dBA@1m or higher because the HDD is hard mounted to the chassis, and the chassis then makes whatever it’s sitting on resonate.
Many high end A/V receivers (and not so high end) contain a fan that runs almost all the time. This is usually not as intrusive as the HDD noise in the digital TV boxes and PVRs, but still measure at least 20 dBA@1m.
Almost all rear projection TVs require at least one cooling fan to be on constantly.
The speed of this fan does usually vary with internal temperature, which naturally goes up the longer the TV is left on. The typical noise of these TVs (with the speakers muted) is around 30 dBA@1m.
30 dBA@1m is about the absolute minimum level needed for intelligibility of speech, given typical dynamics when the TV, movie or game sound is turned on. Typical levels are much higher, with peaks reaching ~60 dBA@1m, and averaging at least 40~45 dBA@1m. This depends a great deal on viewer / listener habits, hearing sensitivity, housing setup, etc. In general, sound levels for movies are much higher, likely 10~20 dBA higher for both average and peaks. This is also true of music listening: Most people prefer higher levels for better realism. Typical peaks from an A/V system playing music probably reach 80 dBA@1m, with the average being perhaps 10~15 dBA lower (depending on the type of music, of course.)
These are broad generalizations on the acoustic environment for a media PC.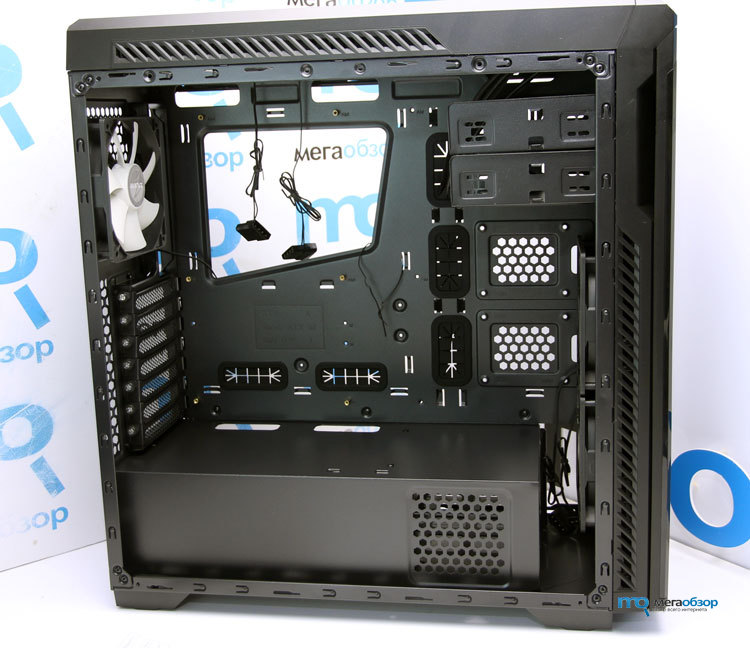 Suffice it to say that we believe the acoustic environment for a media PC will almost always be much louder than for other types of home PCs. Its noise will be masked by the sound from the speakers — at least until you hit the mute button, at which point the PC and other A/V equipment noise may become very audible.
If the HTPC is in a multfunction room, but you still want quick and instant access to its media functions, then it will have to stay on. Then the idle HTPC noise will be there for you to hear whenever you are in the room, whether you’re using the equipment or not. This is true for most systems even when the computer in standby mode.
TEST RESULTS
Ambient conditions in the 20′ x 10′ room were 20 dBA and 22°C throughout testing. Idle measurements were taken 5~15 minutes after boot or reboot, whenever none of the temperatures had changed for >5 minutes. Load measurements were taken after >20 minutes of full load.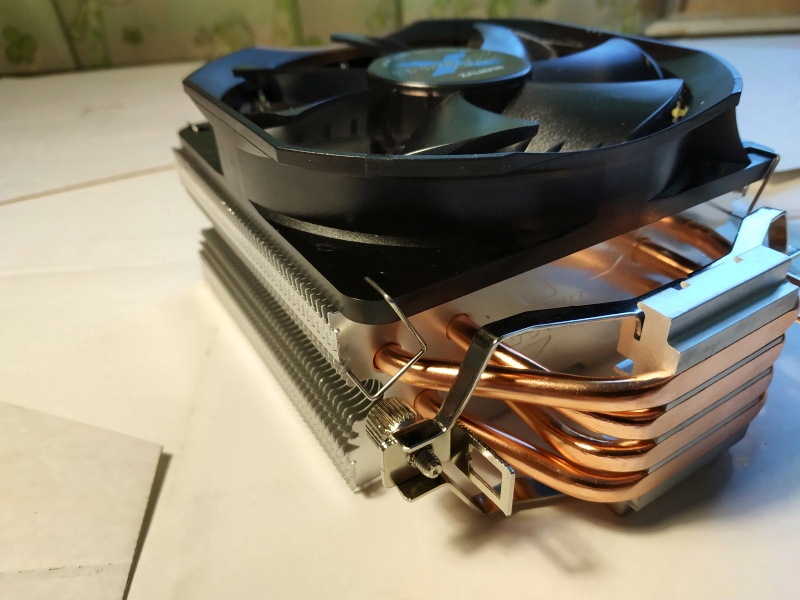
Configuration #1 represents a fairly high performance system with an AMD X2 4800+ at its heart, one of the fastest dual-core desktop processors money can buy. The Asus 1600XT is one of the highest performance fanless video cards available.
DFI RS482 Infinity MicroATX motherboard
AMD Athlon 64 X2 4800+ processor
OCZ Technology Gold PC4000 2 x 512MB DDR matched dual channel memory
Asus Radeon EAX1600XT Silent/TVD/256M PCIe video card
Samsung SP2504C 250GB SATA 3.5″ hard drive
Seasonic S12-330 PSUZalman 7700Cu heatsink modified w/ Nexus 120 fan, @12V
System Config #1 |
|||||
Load |
AC |
CPU |
Board |
Hard Drive |
SPL |
idle |
75W |
32°C |
34°C |
31°C |
24 dBA@1m |
CPUBurn x2 + Rthdribl |
187W |
58°C |
40°C |
31°C |
|
The overall noise of the system was quite modest, though far from inaudible.
The stock 80mm exhaust fans on the back panel were surprisingly quiet, especially given our experience with previous Zalman fans, which were almost all judged too noisy with intrusive acoustic signatures.
The noise from the Samsung HDD was quite audible, especially in seek. The damping grommets and pads for the HDD did very little to lower the noise, which was both sharp and loud, somewhat amplified by the aluminum panels. In this aspect, the Zalman HD160 case was considerably more audible than the recently reviewed Antec NSK2400 case with virtually identical components (and a swap of the Antec stock fans for a quieter Scythe fan). The difference could be clearly attributed to the HDD noise, which was more subdued in the NSK2400.
The cooling was fine on all counts. The hard drive was very well cooled;
it ran >10°C lower than on the desktop in free air. The temperature
on the Seasonic S12-330 PSU was not monitored, but its exhaust never felt
more than moderately warm, and its fan never ramped up from default.
Configuration #2 was a still higher performance
system. Two components were swapped: The video card and the heatsink fan.
The AOpen Aeolus PCX6800GT-DVD256,
one of the workhorses around the SPCR lab, was outfitted with a Zalman
VF900 VGA cooler run at 5V. The SPL of this HSF at 5V measures 20
dBA@1m. Zalman’s own CNPS9500 heatsink/fan,
with the fan run at 5V, took the place of the older 7700. It’s slightly noisier
than the modded 7700.
System Config #2 |
|||||
Load |
AC |
CPU |
Board |
Hard Drive |
SPL |
idle |
89W |
33°C |
35°C |
31°C |
25 dBA@1m |
CPUBurn x2 + Rthdribl |
208W |
54°C |
37°C |
31°C |
|
The measured noise hardly changed, but because the noise signatures of both the ZF900 GPU cooler fan and the 9500 CPU cooler fan are more obtrusive than that of the Nexus fan modified 7700 heatsink, our subjective reaction was that it seemed louder than the measurements indicated.
The change of video cards increased the overall power draw (and heat in the case) by about 20W at full load, but the CPU and board temperatures actually improved, due to the high cooling performance of the 9500 heatsink and its higher airflow.
Configuration #3 was a more serious attempt at minimizing noise, heat and power. We swapped out the CPU for an Athlon 64 3000+ and dispensed with the video card, opting to use the onboard ATI200 graphics, instead. We went back to the quieter modded Zalman 7700 heatsink/fan. We also swapped the Seasonic S12-330 for the recently reviewed picoPSU + 120W power brick.
- AMD A64 3000+, Venice Rev. JH8-E3. TDP is 44.1W, and TCaseMax is 57°C
- DFI RS482 motherboard
- ATI 200 Onboard Video
- OCZ PC4000 2 x 512MB DDR matched dual channel memory
- Zalman 7700CU heatsink modded with a Nexus 120mm fan @ 12V
- 2 x 80mm Zalman case fans @ 5V
- Samsung Spinpoint P120 250GB hard drive
- Samsung CD-RW drive
System Config #3
Load
AC
CPU
Board
Hard Drive
SPL
idle
39.5W
30°C
32°C
31°C
23 dBA@1m
CPUBurn x2
72.6W
45°C
36°C
31°CDespite the dramatic reduction in power consumption, the only reduction in noise came from the elimination of the S12-330’s 120mm fan, which is pretty quiet anyway, so the actual noise reduction was modest. The acoustic “bottlenecks” here was the hard drive, followed by the two 80mm exhaust fans.
The Adjustable Top Panel Vent gave mixed results. All the results above were with the vent fully closed. Opening it up did not really change temperatures much. The changes were just 1~2°C. With the exhaust fans at 5V, there was not much intake impedance even with the top vent closed.
Opening the top vent simply meant that less air was pulled in through other, more distant vents. This might increase HDD and VGA temperature a bit, but the CPU cooling didn’t really improve. Our assessment is that the top vent is worth playing around with, but unless you have a much hotter CPU than the one used in the test system, your results probably will not differ much from ours. Noise did not increase audibly with the vent open.
ANALYSIS
The cooling qualities of the HD160 case are good, roughly on par with that of the recently reviewed Antec NSK2400. The latter probably has a slight edge, especially at lower noise levels, given the much greater air-moving capacity of its dual 120mm fans compared to the Zalman’s 80mm fans. Regardless, the cooling capacity of the HD160 is better than the remainder of the other HTPC cases we’ve tested thus far, which admittedly is not an extensive list:
- Silverstone LC-11
- Silverstone LaScala LC-04
- SilverStone SST-LC01
- Antec Aria SFF Case
- D.
 Vine 5 HTPC Case by Ahanix
The thermal solution for the power supply is simple and effective, even though it’s really workable only with a 120mm fan PSU. As long as a decently efficient PSU with a quiet fan is used, there’s little risk of the power supply fan ramping up to become a major noise source. You must ensure a certain amount breathing room for the intake fan of the PSU on the right side, however; probably at inch is the minimum, and two inches are much better. As with all HTPC cases, fully enclosed A/V equipment cabinets are not recommended because some access to outside air is necessary for adequate cooling.
The cooling for the single drive in the main HDD cage was quite good. However, putting three drives in that position is probably unwise. The spacing between the drives is so tight that only the bottom edges of the drives would get any airflow, and the temperatures would go much higher than with one or two drives. If using two drives, you should leave the middle space empty.
Acoustically, the HD160 is a bit of a mixed bag. The stock 80mm fans are quite good at 5V, around 20 dBA@1m; we didn’t bother much with higher voltage settings, as there seemed to be plenty of airflow even at 5V. The fan measured 36 dBA@1m at 12V.
Like other aluminum chassis we’ve reviewed, there’s a tendency to higher levels of audible humming from the hard drive, due to the much lower density of aluminum compared to steel. A 7200 RPM hard drive’s primary harmonic is at 120Hz, and this is a frequency where many cases have internal cavity and panel resonances. The HD160 is no exception. The hard drive’s seek noise comes through loud and clear as a thrumming with considerable low frequency content. It is considerably sharper and more noticeable than with the Antec NSK2400, which has the benefit of better HDD damping and a denser, heavier steel chassis.
If the HDD could be better damped, much of the aluminum’s acoustic weakness could be overcome, but the HD160’s hard drive cage doesn’t allow much in the way of suspension options. It’s simply too small and too tight for better damping materials or mechanical decoupling techniques to be applied easily.
The third recording below, of the system booting up, gives you a pretty good idea of what the HDD noise sounds like.
|
MP3 Sound Recordings of Zalmn HD160 Test System Configurations Zalman HD160 Test System Config 1 (24 dBA@1m) Zalman HD160 Test System Config 2 (25 dBA@1m) Zalman HD160 Test System Config 1 during startup (24~29 dBA@1m) (689kb file) |
|
Sound Recordings of Other Comparative Cases Unfortunately, we have few recordings of cases, and even fewer of HTPC cases. Comparative: Antec Shuttle SD11G5 Pentium M SFF system at full load w/ notebook drive, single fan: 23 dBA@1m Zalman TNN-300 w/Samsung P80 3.5″ HDD: 23 dBA@1m Antec P180 “Hot Potato” Config 4: 25 dBA/1m |
|
HOW TO LISTEN & COMPARE These recordings were made with a high To set the volume to a realistic level (similar to the original), try playing the Nexus 92 fan reference recording and setting the volume so that it is barely audible. Then don’t reset the volume and play the other sound files. Of course, tone controls or other effects should all be turned off or set to neutral. For full details on how to calibrate your sound system to get the most |
 Here’s a mix of cases in various configurations from past reviews.
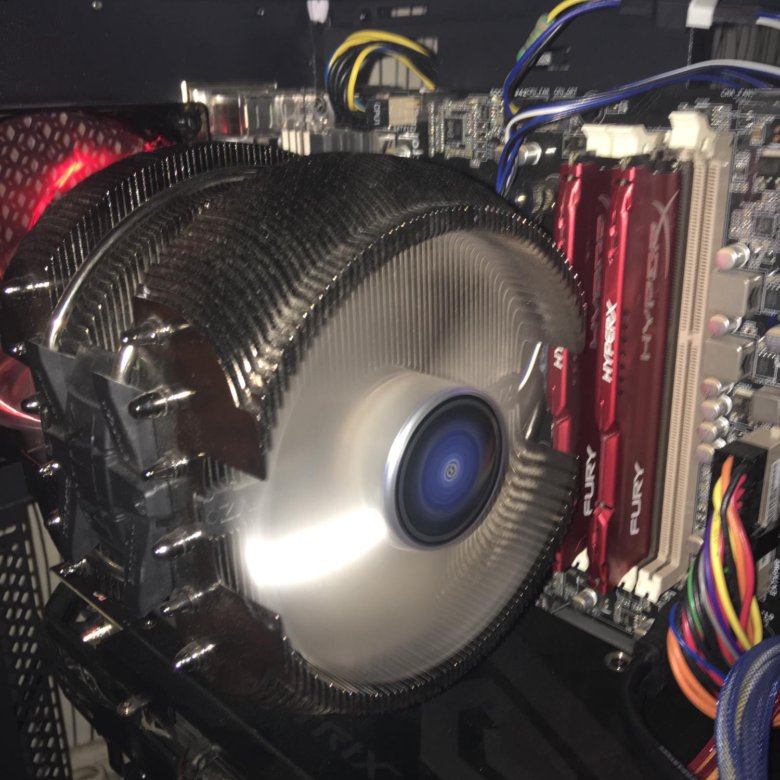
FINAL THOUGHTS
The Zalman HP160 is a reasonably successful first try at a quiet, high performance HTPC case. The styling is quite nice, as is the basic build quality. The provided remote system works fine with Windows XP Pro, and it is MCE (Windows Media Center Edition) compatible. The volume control on the front panel was not tested; it works in MCE.
MCE remote works OK in Windows XP.
The cooling performance is quite good, roughly on par with the recently reviewed Antec NSK2400. It does have the advantage of accepting full ATX size motherboards, unlike the mATX limitation of the NSK2400. The 80mm fans that come as standard equipment are pretty quiet and probably blow enough air for most system at 5V. The supplied nifty adapter (4-pin Molex to dual 5V and 12V fan headers) makes it easy to get 5V for the fans from any power supply as well.
Ergnomic issues during assembly were annoying, but not impossible to overcome. The most niggly problems were encountered while mounting the optical drive, its faceplate, the hard drive and the VFD power cable. We expect better in an enthusiast case that’s priced as high as this one.
The lack of proper HDD damping is more significant. It basically means that unless you use a 2.5″ laptop drive and suspend it with elastic in the HDD cage, the limit to how quiet you can make a system in the HD160 will always be the vibrations conducted so efficiently into the case by the hard drive(s).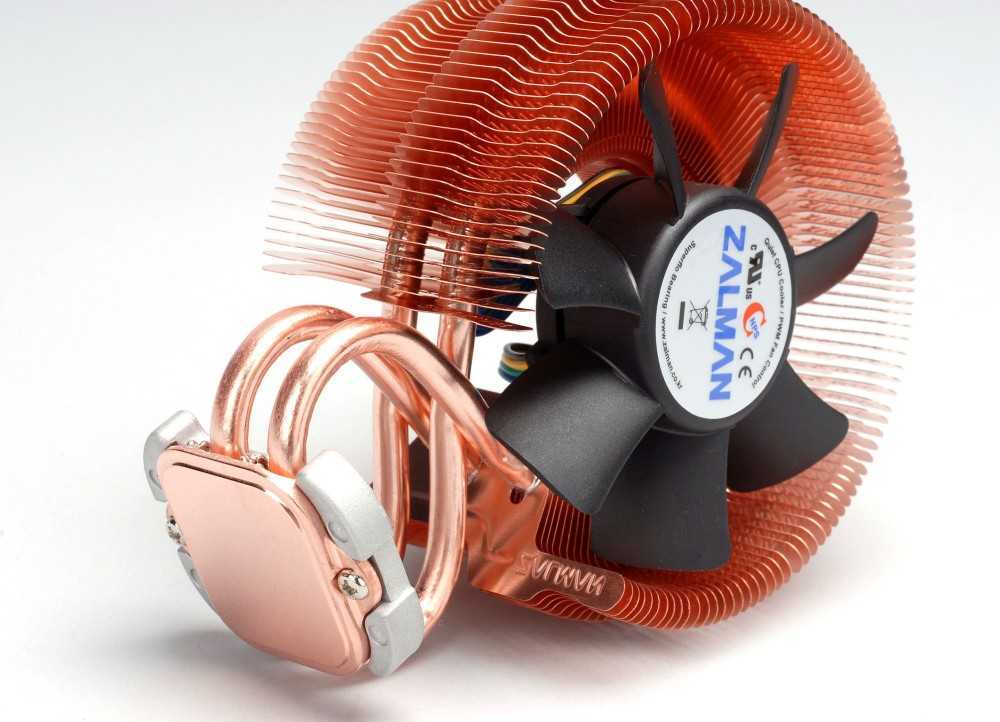 With the large top panel and the low density of aluminum, such vibration will result in increased audible noise.
We did experiment a bit with damping. Applying a firm hand (palm down) on the top of the case does help damp the noise a bit, but a lot of HDD-induced thrumming is still audible, which suggests that many other panels in the case are also vibrating in sympathy with the hard drive, not just the top panel. Still, 24~25 dBA@1m may be perfectly good enough for most users for a HTPC system, for reasons discussed earlier in the section Acoustics Around a Media PC on page 5.
For those who seek a full-featured HTPC case with an integrated MCE remote, support for full ATX motherboard, excellent cooling performance, decent acoustics, and the visual appeal of a brushed aluminum facia and panels, the Zalman HD160 certainly fits the bill. If your acoustic requirements are as stringent as ours, you could try some modifications — including external location of the OS drive by using eSATA, damping materials and so on — or keep waiting for that perfect HTPC case to materialize.
| PROS
* Good airflow / thermal design |
CONS* Price * Niggly assembly problems * Poor HDD damping results in vibration noise |
Much thanks to Zalman USA for the HD160 sample.
* * *
Articles of Related Interest
Antec NSK2400 HTPC case
SilverStone LC-11 media PC case
D.Vine 5 HTPC Case by Ahanix
Zalman TNN-300 Fanless PC Enclosure System
Shuttle SD11G5: Pentium-M SFF PC
Hush ATX fanless PC
Cases: Basics & Recommendations
* * *
Discuss this article in the SPCR Forums.
Zalman Reviews | TechPowerUp Review Database
-
Review Database
- Cases
- Zalman
Sort items by:
DateReview TitleSite NamePopularity
| 2021 | |||
|---|---|---|---|
| Nov 9, 2021 | Zalman Z9 Iceberg | Basic Tutorials (de) | |
| Oct 7, 2021 | Zalman Z9 Iceberg | Cowcotland (fr) | |
| Sep 24, 2021 | Zalman Iceberg | Cowcotland (fr) | |
| May 18, 2021 | Zalman X3 | TechPowerUp | |
| May 3, 2021 | Zalman Z3 Iceberg | TechPowerUp | |
| 2020 | |||
| Jan 20, 2020 | Zalman Z7 Neo | OverClocked Inside (de) | |
| 2019 | |||
| Dec 30, 2019 | Zalman Z7 Neo | OverClocked Inside (de) | |
| 2018 | |||
| Apr 16, 2018 | Zalman X7 | Hardwareluxx (de) | |
| 2017 | |||
| Dec 22, 2017 | Zalman Z9 Neo Plus White | i2Hard (ru) | |
| Dec 13, 2017 | Zalman ZM850-ARX Z | i2Hard (ru) | |
| Dec 11, 2017 | Zalman Z-Machine X7 | Benchmark Reviews | |
| 2016 | |||
| Sep 28, 2016 | Zalman Z9 Neo | Overclockers Club | |
| Aug 29, 2016 | Zalman Z9 Neo | Tom’s Hardware | |
| Jul 19, 2016 | Zalman Z9 NEO | i2Hard (ru) | |
| May 27, 2016 | Zalman Z9 NEO | TechPowerUp | |
| May 6, 2016 | Zalman Z9 Neo White | Think Computers | |
| Apr 20, 2016 | Zalman Z9 Neo White | Guru3D | |
| Apr 12, 2016 | Zalman Z9 Neo White | Benchmark Reviews | |
| Mar 30, 2016 | Zalman Z9 Neo | i2Hard (ru) | |
| Mar 22, 2016 | Zalman Z9 Neo | Technologix | |
| Feb 29, 2016 | Zalman Z11 Neo | Vortez | |
| 2015 | |||
| Oct 7, 2015 | Zalman R1 White | i2Hard (ru) | |
| Sep 3, 2015 | Zalman Z11 Neo | i2Hard (ru) | |
| Aug 24, 2015 | Zalman Z11 Neo | Tweaktown | |
| Aug 10, 2015 | Zalman Z11 Neo | ||
| Jul 22, 2015 | Zalman Z11 NEO | TechPowerUp | |
| Jun 29, 2015 | Zalman Z11 Neo | Silent PC Review | |
| May 29, 2015 | Zalman ZM-T3 | Hardware Secrets | |
| May 21, 2015 | Zalman Z11 Neo | Tom’s Hardware | |
| May 19, 2015 | Zalman Z11 Neo | Legit Reviews | |
| May 8, 2015 | Zalman Z11 Neo | Benchmark Reviews | |
| May 5, 2015 | Zalman Z11 Neo | Think Computers | |
| Jan 23, 2015 | Zalman M1 | i2Hard (ru) | |
| 2014 | |||
| Oct 6, 2014 | Zalman h2 | ||
| Sep 15, 2014 | Zalman Z3 Plus White | Tweaktown | |
| Apr 9, 2014 | Zalman Z3 Plus White | Hi Tech Legion | |
| 2013 | |||
| Oct 21, 2013 | Zalman MS800 Plus | TechPowerUp | |
| Jun 18, 2013 | Zalman MS800 | Tweak.dk (dk) | |
| Jun 11, 2013 | Zalman ZM-T2 Mini | ||
| Apr 8, 2013 | Zalman Z9 | PCFoster (pl) | |
| Mar 29, 2013 | Zalman MS800 | Think Computers | |
| Mar 14, 2013 | Zalman Z11 Plus | Hardware.info | |
| Feb 12, 2013 | Zalman MS800 | Hardware Secrets | |
| 2012 | |||
| Jun 19, 2012 | Zalman Z11 Plus Black | Legit Reviews | |
| May 4, 2012 | Zalman Z11 | HardwareLook | |
| Apr 27, 2012 | Zalman Z11 Plus | Think Computers | |
| Mar 9, 2012 | Zalman Z11 Plus | Hardware Secrets | |
| 2011 | |||
| Jul 13, 2011 | Zalman Z9 Plus | Think Computers | |
| May 24, 2011 | Zalman Z9 Plus | PureOverclock | |
| May 13, 2011 | Zalman Z9 Plus | Cowcotland (fr) | |
| Apr 28, 2011 | Zalman Z9 Plus | Bjorn3D | |
| Apr 28, 2011 | Zalman Z-Machine GT1000 | eTeknix | |
| Apr 21, 2011 | Zalman Z9 Plus | TechGage | |
| Mar 17, 2011 | Zalman Z9 Plus | Big Bruin | |
| Mar 15, 2011 | Zalman Z9 | Techware Labs | |
| Feb 3, 2011 | Zalman Z9 Plus | HardwareSecrets | |
| Jan 25, 2011 | Zalman Z9 Plus | BCCHardware | |
| Jan 24, 2011 | Zalman Z9 Plus | Benchmark Reviews | |
| Jan 23, 2011 | Zalman Z9 Plus | Benchmark Reviews | |
| Jan 12, 2011 | Zalman Z9 Plus | TweakNews | |
| Jan 6, 2011 | Zalman Z9 | ProClockers | |
| 2010 | |||
| Aug 27, 2010 | Zalman Z7 Plus | TechReaction | |
| Jun 18, 2010 | Zalman Z7 Plus | Guru3D | |
| May 26, 2010 | Zalman MS1000-HS2 | Overclockers Online | |
| Apr 30, 2010 | Zalman Z7 Plus | Think Computers | |
| Mar 2, 2010 | Zalman Z7 Plus | TweakNews | |
| Feb 12, 2010 | Zalman Z7 Plus | HardwareSecrets | |
| Feb 4, 2010 | Zalman MS1000-HS2 Pro | Guru3D | |
| Feb 4, 2010 | Zalman MS1000-HS2 Pro | Guru3D | |
| 2009 | |||
| Dec 30, 2009 | Zalman MS1000-HS2 Professional Tower | ProClockers | |
| Sep 30, 2009 | Zalman GS1000 Plus | BCCHardware | |
| Jul 19, 2009 | Zalman Z-MACHINE GT10008 | Computing on Demand | |
| May 14, 2009 | Zalman GS1000 SE | HardwareSecrets | |
| Feb 11, 2009 | Zalman GS1000 | TheTechLounge | |
| 2008 | |||
| Sep 26, 2008 | Zalman GS1000 | TechGage | |
| Sep 20, 2008 | Zalman ZMachine LQ1000 | Bit-Tech | |
| Sep 5, 2008 | Zalman GS1000 | ProClockers | |
| Sep 3, 2008 | ZALMAN HD160XT HTPC | TweakNews | |
| Aug 26, 2008 | Zalman GS1000 Tower Case | BCCHardware | |
| Aug 6, 2008 | Zalman GS1000 | HardwareSecrets | |
| Jul 12, 2008 | Zalman GS1000 | Bit-Tech | |
| Jul 1, 2008 | Zalman GS1000 | XSReviews | |
| Jun 28, 2008 | Zalman LQ1000 Z-Machine | XSReviews | |
| Jun 26, 2008 | Zalman LQ1000 Z-Machine Hybrid Liquid | XSReviews | |
| Feb 23, 2008 | Zalman HD160XT Plus HTPC | Guru3D | |
| Feb 9, 2008 | Zalman Z-Machine LQ1000 | HardwareSecrets | |
| Feb 3, 2008 | Zalman HD160XT Plus | Bit-Tech | |
| 2007 | |||
| Nov 12, 2007 | Zalman Z-Machine GT1000 High End Gaming Enclosure | TweakNews | |
| Oct 18, 2007 | Zalman Z-Machine GT1000 | HotHardware | |
| Oct 10, 2007 | Zalman Z-Machine GT1000 Case | Hardwarelogic | |
| Sep 10, 2007 | Zalman Z-Machine GT1000 | Benchmark Reviews | |
| Sep 10, 2007 | Zalman Z-Machine GT1000 | TechGage | |
| Aug 31, 2007 | Zalman Z-Machines GT 1000 | Overclocker Cafe | |
| Aug 28, 2007 | Zalman Z-Machine GT1000 Titanium | BCCHardware | |
| Aug 28, 2007 | Zalman Z-Machine GT1000 | BCCHardware | |
| Jul 31, 2007 | Zalman Z-Machine GT1000 | Bit-Tech | |
| Jul 26, 2007 | Zalman Z-Machine GT1000 | ProClockers | |
| May 5, 2007 | Zalman HD160XT | BCCHardware | |
| May 4, 2007 | Zalman Fatal1ty Cham1onship Series FC-ZE1 | Hi-tech Reviews | |
| Mar 27, 2007 | Zalman HD160XT | TweakNews | |
| Feb 28, 2007 | Zalman HD160XT | Virtual Hideout | |
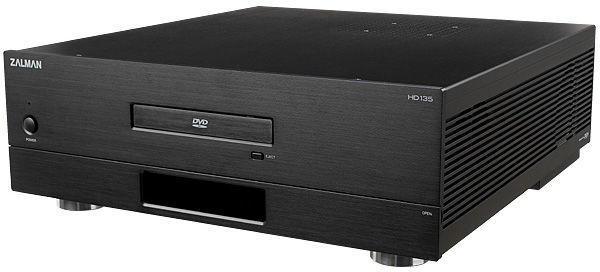
| Feb 28, 2007 | Zalman HD135 | BCCHardware | |
| Feb 16, 2007 | Zalman Fatal1ty FC-ZE1 | Bios Magazine | |
| Feb 15, 2007 | Zalman Fatal1ty FC-ZE1 | XYZ Computing | |
| Jan 19, 2007 | Zalman HD135 | Bit-Tech | |
| Jan 18, 2007 | Zalman HD135 | ModTheBox | |
| 2006 | |||
| Dec 27, 2006 | Zalman FC-ZE1 | Hardwarelogic | |
| Nov 29, 2006 | Zalman Fatal1ty FC-ZE1 | Overclock Intelligence Agency | |
| Nov 29, 2006 | Zalman Fatal1ty FC-ZE1 | ProClockers | |
| Nov 28, 2006 | Zalman HD135 | Big Bruin | |
| Nov 22, 2006 | Zalman Fatal1ty FC-ZE1 | Virtual Hideout | |
| Oct 18, 2006 | Zalman Fatal1ty FC-ZE1 | TweakNews | |
| Sep 27, 2006 | Zalman HD135 HTPC Case | TechPowerUp | |
| Sep 22, 2006 | Zalman Fatal1ty | HardwareSecrets | |
| Sep 7, 2006 | Zalman HD135 | Madshrimps | |
| Sep 7, 2006 | Zalman HD135 | Metku Mods | |
| Aug 16, 2006 | Zalman HD160 | Metku Mods | |
| Jun 23, 2006 | Zalman HD160 | PC Apex | |
| Jun 14, 2006 | Zalman HD160 | TweakNews | |
| Apr 20, 2006 | Zalman HD160 HTPC | Bit-Tech | |
| Mar 29, 2006 | Zalman HD160 | HTPCNews | |
| Mar 28, 2006 | Zalman HD160 HTPC System | X-bit labs | |
| Mar 21, 2006 | Zalman HD160 | Virtual Hideout | |
| Mar 18, 2006 | Zalman HD160 HTPC Enclosure | Madshrimps | |
| Feb 23, 2006 | Zalman HD160 | Red and Blackness Mods | |
| Feb 22, 2006 | Zalman HD160 | DarkVision Hardware | |
| 2005 | |||
| Dec 1, 2005 | Zalman’s TNN300 Totally No Noise Chassis | GamePC | |
| Aug 9, 2005 | Quiet PC/Zalman TNN 300 System | Hexus | |
| May 1, 2005 | Zalman Totally No Noise 500AF Computer Case | Systemcooling | |
Zalman HD160 HTPC Case review
I recently had a chance to review Zalman’s Home Theatre PC Enclosure HD160. It motivated me to go ahead and turn my own personal PC into a «Media Cener» PC. The entire chassis is 100% brushed aluminum and it sits horizontally which allows it to blend right into the rest of your home theatre equipment, and gives the system a very luxurious look. It comes complete with a volume control knob and a card reader panel right on the front of the case. Here are some of the case dimensions and the specifications:
- Enclosure Dimensions (L*W*H): 435mm * 420mm * 160mm
- net Weight: 4.8kg (10.6lb)
- TDP (Thermal Design Power): Up to 130W for Quiet Cooling
- Construction Material: All Aluminum Chassis
- Motherboard Compatibility: ATX, Micro ATX
- PSU Support: ATX PSU
- PCI/AGP Card Support
- Full Size Drive Bays
- 4 * 3.5” Internal Drive Bays
- 1 * 3.5” External Drive Bay
- 1 * 5.25” External Drive Bay
Cooling System- 2 * 80mm Rear Exhaust Fans
- ZM-MC1 Multi Connector
- Expansion Slots: 7 Slots
- Front I/O Ports
- 2 * USB Ports
- 1 * Firewire (1394) Port
- 1 * MIC
- 1 * Headphone
- Available Colors: Black and Silver
- Card Reader: 17 in one
Now, let’s open the case up and see what it has to offer. This is where I found my first little «problem», however. Upon attempting to open the case, I found that I actually had to go and find a screwdriver! I would need to use it several times during the course this build. This isn’t really so much of a «problem» as it is an «inconvenience». Now most cases today come with thumb screws, snap on drive rails, and push button removable drive cages. It turns, however, that a majority of HTPC cases are set up using normal screws. Having normal screws as opposed to thumb screws and drive rails helps to lower the ambient noise coming from the case, a feature which is very important for HTPCs. I think that most computer enthusiasts today, myself included, have gotten pretty spoiled with all of the «easy open» cases and the «tool-less case builds. So, needless to say, the build process to a little longer, and required a little more wrist action, than I had expected.
Once I had opened the case I found everything on the inside to be fairly straight forward. Each of the drive bays were held in by 4 screws, the case already had the fans and motherboard supports mounted, and the card reader was already in place. All I would have to do is screw all the hardware into place.
I found that the PSU and the mobo fit right into place, so I then proceeded to the drive bays. The hard drive bay had room for 3 separate drives, and included rubber shock absorbers to eliminate vibration noise. The other drive cage has room for your optical drive, an additional hard drive, and if you choose to do so, you can remove the card reader and install a floppy drive.
The case comes 100% Windows Media Center compatible right out of the box. The front of the case has a display which shows the time and date, or information on any media that is currently playing, and it serves as a receiver for the Windows Media Center remote, which is also included. Well, of course, I HAD to try this feature out, so I obtained a copy of Windows Media Center and a video capture card just for this purpose. After installing Media Center, all I had to do was install the included «IR Trans» software for the receiver, then I had a fully functional «Home Theatre» PC.
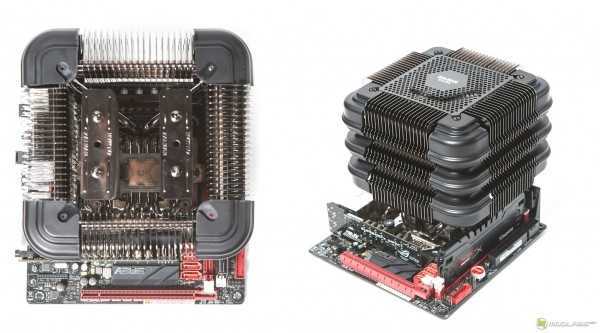
The other feature that really impressed me with this case is its «Ultra Quiet» operation. When you combine this case with other «Ultra Quiet» components, it is whisper quiet. Luckily, ZALMAN was generous enough to supply me with their ZM460-APS power supply unit, and their CNP9500 LED CPU cooler. I was rather impressed with these two items. The PSU is a solid black, 460W, «noiseless» power supply with pre-wrapped cables, and an included cable tie. The CPU cooler was a very innovative passive bent heatpipe design that was cooled by a massive fanned copper heatsink, which was actively cooled by an ultra quiet 92mm opaque fan, which included blue LEDs for a little extra bling. Well, after I installed all of these «ultra quiet» components, I booted up the machine, and sure enough, it was VERY quiet. In fact, if it weren’t for the fans spinning, and the blue LED from the CPU cooler, I wouldn’t have known it was on at all! In fact, the loudest components in my computer right now are the fan on my video card, and my Raptor hard drives. ZALMAN apparently knows what they are doing when it comes to keeping it quiet.
I then decided to see how these low RPM «ultra quiet» fans would handle a load. So I installed Motherboard Monitor 5, turned on the Media Center, and let that baby run and record for a couple hours. The average temps with the CPU fan set to its lowest speed were 76°C (CPU), and 45°C (case). When I turned up the CPU fan to the max the temps dropped to an average of 67°C (CPU) and 44°C (case)
Overall, this is a pretty impressive HTPC case. It succeeds in meeting the top requirements for most HTPC enthusiasts. The case is exceptionally quiet, and it will blend in very nicely with the rest of your home theatre equipment. Here is a breakdown with the pros and cons:
PROS
— Media Center ready
— Ultra Quiet cooling
— Sturdy anodized design
— Luxurious look that blends well with other home theatre equipment
CONS
— Lack of a cable management system (built in case ties, cable rails)
— Drive cover is held on with tape
— More screws than most HTPCs
— A few problems installing the IR-Trans software (had to manually install the drivers off the CD)
As far as Home Theatre PCs go, this is a very nice choice, and I rate it 8 out of 10.
Added: February 21st 2006
Product reviewed: Zalman HD160 HTPC Case
Reviewer: Robert McElroy
Score: 8/10
Please enable JavaScript to view the comments powered by Disqus.
Comment #1 posted by Anonymous on 2010-02-12 15:21:11
You can rotate the cooler with the same motherboard, so did I with my gemin II.
Comment #2 posted by Anonymous on 2006-08-21 20:07:00
The CPU fan orientation is not related to the case construction or CPU fan itself but by the motherboard design. You can change this by changing your motherboard.
Comment #3 posted by Anonymous on 2006-03-02 23:39:09
I’ve got to agree with the first poster, the temps are too high because of the facing of the CPU cooler. That’s just blowing hot air into the case. Zalman’s own presentation of the case shows the CPU cooler facing so that the air gets blown out the back, as it should be. An alternative would be to use the Zalman 7700 cooler, also very quiet. That cooler faces up, so the air would blow out the vent right above. Either way I think would result in cooler temps.
Comment #4 posted by rmcelroy on 2006-02-28 16:20:52
from other reviews that I have read, it seems that the ZALMAN cooling solutions provide some of the best for this particular case. i think the primary reason for my higher temps was the location of the PC. I have the PC set inside a large compartment of my desk. it is an open compartment with plenty of room on the front, top, and back, however, the sides of the case did not have much breathing room. I believe if the case were out in the open, the temps would be lower. Also, they would obviously be lower if slightly lower end hardware was used. Most HTPCs arent set up to also do gaming.
Comment #5 posted by Anonymous on 2006-02-27 16:52:20
Much better review, thank you. Do you think the cooling would be improved by switching out some of the cooling solutions? Or is it just from the design?
Comment #6 posted by Anonymous on 2006-02-25 01:38:15
Much better review, thanks for re-reviewing this case.
Comment #7 posted by rmcelroy on 2006-02-24 22:38:55
The case has been 2 separate sets of components, on the second set, I moved the fan to the proper position. The setup consists of a P4 3.8GHz LGA775, 1GB (2 * 512MB) 533 DDR2, 2 * 74GB 10k RPM Raptor HD, one 80GB 7200RPM HD, a Radeon X800 PCIE, and the Nvidia XFX capture card. I would imagine that would be the primary reason for the higher temps. Also, the camera is a Sony Cybershot, the main reason for the poor image quality, is poor lighting, and having to drastically resize the picture from a 5.1 megapixel camera. I will work on that though…
Comment #8 posted by Anonymous on 2006-02-24 19:32:38
OK, this updated review is an improvement. A couple of comments though. I still think you would be better off rotating the CPU heat sink 90 degrees so it blows toward the back of the case, which should help lower CPU & case temps quite a bit. Those temps all seem really high. What was your test platform? One other thing, loose the cell phone camera & get a real one for the photos
Zalman HD160XT HTPC Enclosure with Integrated Touch Screen
Author:
Vasily Melnik
Date:
10/11/2007
All photos of the article
Introduction
The market for cases for HTPC systems can already be called mature. Although there is still no single standard and sensible classification of existing models, at least two options for the most common sizes can already be distinguished. The first includes the smallest cases, which, as a rule, are not sold separately, since they are designed to install components specially designed for them and you can simply ignore them — they play their role mainly in the market of ready-made solutions, and for an enthusiast who wants to assemble a system to solve their own problems is often not suitable. The second, most common type is HTPC cases of a more standard form factor, designed to install common components, including motherboards. They are the most common and in fact it is a regular computer case, only ennobled externally. Often, manufacturers limit themselves to just replacing the front panel, not even caring about the complete set of the device with a remote control, a vivid example of which is the NMEDIAPC HTPC 288 SA, a review of which we published a couple of months ago.
 The main advantage of such cases is their cheapness, but strange as it may sound, it is also their main disadvantage: the fact that the manufacturer often sacrifices equipment, packaging and chassis quality will not appeal to everyone who wants to buy a case of this type. Moreover, as we have already mentioned, the cost of an assembled HTPC system is often lost against the prices of other components of a good home theater, so wealthy enthusiasts can easily afford to overpay for such details as the «correct» case material or advanced functionality. It is on them that the new Zalman case is oriented, which, in addition to a pleasant appearance, is distinguished by rich equipment and high quality workmanship. However, let’s talk about everything in more detail.
Appearance, design, assembly nuances
The case comes in a neat box with high-quality printing and a convenient carrying handle:
There are two color options available today — silver and black:
This is quite enough, since The bulk of Hi-Fi equipment is produced in these colors, and therefore the problem of HD160XT color compatibility with the rest of the equipment will arise only for those who prefer exotic colors such as golden. Inside, both cases are no different, so in the future we will consider the silver version, because, unlike its counterpart with an anodized black finish, it is practically not afraid of minor scratches that may occur during assembly.
The case itself looks very decent — ribbed sides, all-aluminum chassis and external panels (the only plastic element is the volume knob), a neat front part, not overloaded with controls. However, the 7-inch screen attracts the most attention, of course:
The solution is very interesting — as it turned out later, this is not just a symbolic LCD screen for service information, but a full-fledged monitor that connects via a standard analog interface to the video card. As befits a real monitor, it has its own menu, and the corresponding control keys are located directly below the screen:
The solution is not entirely successful — you are unlikely to set up this monitor every day, so it would be worth leaving only the screen off button in sight (it will certainly come in handy if you watch movies in a darkened room), and put the rest under the cover at the bottom body parts. To the left of the screen there is a power button, a power indicator LED and an IR receiver window:
0005
The latter is combined with a quick mute button — if you press the knob, the «mute» mode is activated. Unfortunately, such a complication of the design had a negative impact on ergonomics: the volume knob has a noticeable play along its axis, which does not affect its performance, but is somewhat unpleasant. Front interface connectors and built-in universal card reader are hidden behind a hinged cover at the bottom of the front panel:
Standard connector set:
Two USB-ports and one FireWire are quite enough for quick connection of «small-caliber» peripherals like external drives, video cameras and the like. The built-in memory card reader supports almost all major formats:
To assemble the system, you only need to remove the top cover, which is held by 10 classical type screws: , so the use of recently popular screws designed for screwdriverless assembly in this case is simply harmful from an aesthetic point of view, because they protrude noticeably beyond the dimensions of the case. Pay attention to how the ventilation holes are implemented — there are two of them in each sidewall:
Unfortunately, there are no dust filters, so the user himself will have to take care of their installation.
From the back side, it is a typical desktop landscape case:
The only thing that confuses is the configuration of the exhaust fan grilles:
noise level. It is not clear what prevented either to make the usual frequent round holes, or to install a neat wire mesh in general, but it was hardly a desire to save money: the case costs quite a tangible amount of money, and it’s not Zalman’s style to save on trifles.
A D-Sub cable for connecting the built-in monitor is also brought out to the rear panel:
Moreover, the grille is not simple — it is double and the lower part can be moved relative to the upper one, thus closing the ventilation hole:
There are quite a lot of wires inside the case:
Moreover, even putting them into bundles does not greatly smooth out the impression made: screen, a four-channel fan controller with software control, a temperature controller with two remote thermal sensors, a built-in card reader, an interface cable for a control system with a remote control, four fans with power cable extensions . .. A rather large list — only USB connectors designed for connecting to blocks motherboard, three pieces, which automatically means that only modern motherboards with at least three groups of internal contacts for connecting USB devices are installed in this case.
As already mentioned, there are four built-in fans in the case. Two are on the rear panel:
Another one is on the bottom, between the power supply and the optical drive cage:
The last, fourth one is behind the hard drive cage: can be removed without problems in a matter of seconds
All installed fans are exhaust fans, so that fresh air can only enter the case through two openings in the side panels and the top air intake in the area of the processor cooling system. This somewhat facilitates the installation of air filters — if the upper air intake is closed, then only two side ones remain, on which you can put filters of a standard size:
True, for this you will have to use a tool and make a filter frame mounting system, but this is only a matter of time and desire. By the way, pay attention to the massive stiffening ribs, which are clearly visible in the photo of the inside of the side vent — their thickness is almost 10 mm, so it is not at all surprising that even with the top cover removed, the case practically does not lose anything in terms of chassis rigidity .
Another point of interest is the built-in screen electronics, which is located behind the hard drive cage and is covered by a metal plate:
The main thing you should pay attention to is the presence of two buttons in its upper part:
The left one is for automatic image adjustment, and the right one is for resetting the settings. If everything is clear with the latter — it is unlikely that she will have to use it often, then why the first one is located inside the case is not entirely clear. The built-in screen supports at least two different resolutions, and when switching between them, free access to the automatic image adjustment key would not be superfluous at all.
The optical drive cage attaches in the same way as the HDD cage, and if you remove it you can access the fan speed control panel:
through the speed controller and also the fans of the cooling systems of the processor and video card, then you will need an additional controller, and an internal one, since there are simply no external compartments to accommodate it. However, the vast majority of modern motherboards are able to independently control at least three fans, so this problem should not arise. Two thermal sensors are also connected to the same panel, only slightly to the right, the readings of which can then be displayed on the screen. Conventional sensors, tape type:
The classic version and the only thing you can complain about is their number: temperature measurements in just two points are hardly enough to get an objective picture of the condition of the components. However, if you mark the sensors in the most thermally loaded zones, then in some cases this may well be enough.
HDD and 5″ drive cages equipped with damping inserts and transverse stiffeners: hull:
In addition to the standard set of fasteners, the package includes instructions for assembling the system and installing the software, the software disk itself, a decorative overlay for the optical drive instead of the standard one, a USB extension cable (in case your motherboard has only two internal pads for connecting USB devices) and a convenient remote control:
The implementation of the remote control is very pleased — it is quite convenient, the necessary keys are easy to touch, and simply — it looks nice:
The only disadvantage of the remote control is the inability to control the cursor in PC mode, like, say, Soundgraph systems.
The implementation of the decorative panel for the optical drive is a bit unsuccessful — it is attached with double-sided tape:
Holds the tape very tightly, but, alas, does not provide for the possibility of reuse — it will not be so easy to replace the drive with another one.
If the basic assembly instructions can be completely neglected if you have experience in assembling a PC, then we advise you to keep this leaflet nearby:
It shows the connection diagram of all connectors — both interface and power, the total number of which, admittedly, is quite considerable.
Actually with the complete set everything, you can proceed to the assembly. You didn’t have any problems installing the motherboard:
There is more than enough free space in the case with the HDD and optics cages dismantled.
To ensure the possibility of turning on a PC with a remote control, the power supply of the motherboard is connected through an adapter. And, apparently, for Zalman and Soundgraph these adapters are made by the same company — they are equally cumbersome for both systems. It is worth noting that Zalman itself turns out to be much more accurate — the connectors for powering the screen and the fan speed controller are made quite compactly.
Special screws are used to fasten drives:
They are screwed through rubber dampers:
After that, the baskets with installed hard drives and optical drive are fixed in the case:
There is enough space even with the basket installed for ordinary video adapters:
But the latest monsters made by NVIDIA and ATI won’t fit — you won’t be able to install the card because of the HDD basket located close to the board. This cannot be called a critical shortcoming, since such powerful graphics accelerators are usually not used in HTPC systems.
In addition, on some boards there will be problems with connecting a PATA cable — although it seems unlikely that anyone will use an old PATA hard drive or optical drive in a new HTPC.
The exhaust fan in the lower part of the case is also a little unfortunate: it is partially blocked by the wires coming out of the power supply.
After all the wires are laid, we connect the built-in screen:
Now we just have to close the top cover — and the case will be completely ready for installation in a rack with Hi-Fi equipment.
Despite some minor flaws, the overall impression of the assembly of the system is positive — if you are not lazy and spend a little more time than usual on laying cables, the result will be quite good. The only thing that can be attributed to the shortcomings of the HD160XT is the lack of «native» dust filters in the kit. As for the rest, it’s time to move on to checking the operation of the assembled HTPC…0182
Dimensions: 435 (width) x 460 (length) x 160 (height), mm.
Weight: 7 kg.
Material: aluminium.
Cooling system: 92mm side fan and two 80mm exhaust fans on the rear panel, one 80mm fan on the bottom panel.
Motherboard form factor: ATX or microATX.
External bays: One 5. 25″ optical drive bay.
Internal bays: Five 3.5″ optical drives.
Front interface connectors: two USB 2.0, IEEE 1394 firewire, sound.
Maximum number of expansion slots: 7 pcs.
Supported memory card formats: Compact Flash, Micro Drive, Secure Digital, Multi Media, Memory Stick, Memory Stick Pro.
Software and features
The case comes with three software packages — DigiTouch software for LCD touch screen, M.Play-ZiNi for remote control and MediaBay — Zalman multimedia shell.
DigiTouch software is a banal set of drivers and the minimum software required for the operation of the touch screen — only calibration is available from the settings, so there is no point in dwelling on it in detail — there is simply nothing to write about. Fortunately, once you install the drivers and calibrate the screen, you won’t need to return to this in the future.
M.Play-ZiNi is a bit more difficult. In the basic settings, you can select software download options, interface language, equalizer settings (the main thing is not to forget to set the «Wave» or «Stereo mix» input as the sound source, depending on the manufacturer of the sound card, otherwise the equalizer simply will not work) and sensitivity parameters controls:
In the fan controller tab, you can select their operation parameters:
Two control schemes are available — direct mode (which, by the way, did not work in our case — the fans continued to spin at maximum speed regardless of the position of the settings slider) and adjustment according to the readings of the built-in temperature sensors. The latter is quite curious and really works, only the lower speed limit — 40% of the maximum speed — does not allow to lower the noise level of the assembled system to an acceptable level:
One possible solution would be to replace the fans with slower and quieter ones — such as Scythe or Minebea — but this, of course, will require additional financial investments.
The third tab is responsible for reassigning the remote control keys in various programs:
Now let’s move on to the most interesting thing — the screen functionality. Unfortunately, it turned out to be extremely poor — it can only display service information. The basic mode is the current time and the ability to select one of the additional modes:
When automatic mode is activated, the system decides what to display, for example, an equalizer is displayed during music playback. However, you can choose what exactly you want to see, even though the list of options is small. The first is an indication of the temperature sensors readings and the fan speed in percent:
It should be noted that in all modes the current volume level is displayed on the right, and the active window on the main screen is on top. Next come the equalizer:
Large clock:
Network load indication:
And finally, the degree of RAM usage and CPU load:
That’s it. The built-in screen with the supplied software can’t do anything else — it’s just not clear why they tried so hard to end up with a banal indicator of service information that is generally useless. Particularly surprising is the fact that even when the MediaBay proprietary multimedia shell is launched, the screen is also not used in any way, and it would be logical to put a number of additional functions on it that make it easier to manage or, say, navigate.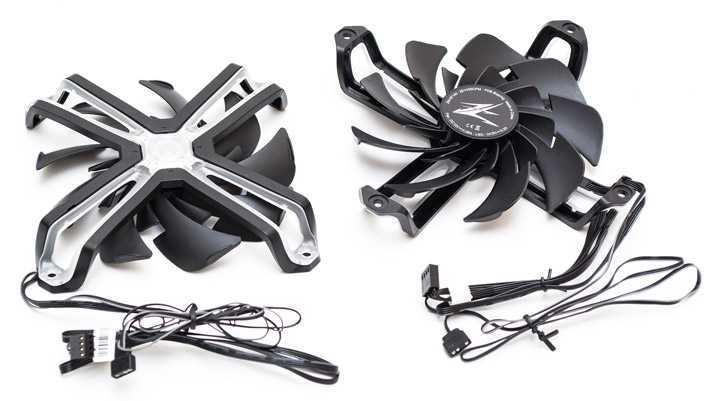 In general, one gets the impression that an additional screen was installed, but it simply did not work out to come up with really useful functionality. It is not surprising — when, for example, a plasma with a diagonal of about forty inches hangs over the case itself, who needs this tiny screen at all?
Another interesting point is that the screen is declared to support 1024×768 resolution, but it is clearly not native, since the matrix is widescreen, and interpolation artifacts are clearly visible. And the strangest thing is that the native resolution, which is approximately 800×480 or so, is not so easy to install — there are no drivers for the monitor in the kit, and without them, the video card does not offer such resolutions in the list of possible modes. As a result, in both available resolutions — 800×600 and 1024×768 — the screen works with interpolation, the picture quality on it is very low, and, frankly, it is very difficult to use it as a second monitor.
The MediaBay multimedia shell was not pleased either, which practically did not leave Windows MCE in terms of functionality — playback of audio and video files, Flash player and Internet broadcasting (both radio and TV) are available. The shell looks very attractive:
But, alas, in terms of capabilities and ease of navigation, it is noticeably inferior to Soundgraph products. We will return to the expediency of such an approach in the conclusions, but for now let’s go directly to testing.
Test Method
Testing was done with the case closed and fully assembled and at constant ambient temperature. The fan speed was not regulated, and no changes were made to the configuration of the air flows. During testing, the upper air intake was open.
The following set of components was chosen as a test stand:
Motherboard Asus P5WD2;
Intel Pentium Extreme Edition 955 (3.46 GHz; Presler Core, Hyper Threading disabled)
Thermaltake Big Typhoon Cooler (1200 rpm)
512 MB DDR2 RAM;
Video card ATI Radeon X1800XT 256 MB;
Hard drive: Seagate Barracuda 7200.8 200 GB;
Power supply: Seasonic SS-401HT.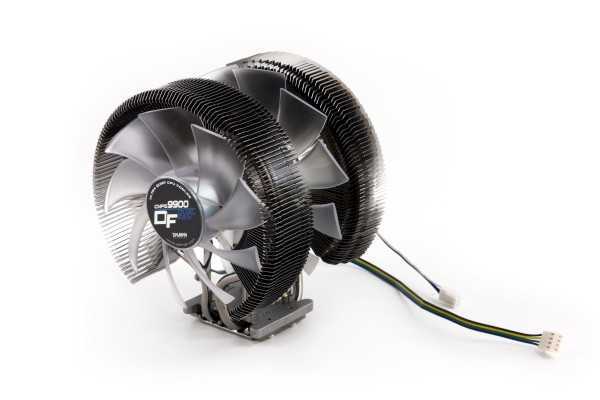
We chose this set of components not by chance — this is a top-end case, and it is quite reasonable to assemble a system in it that, in addition to being able to cope with music and video playback, can also compete with modern gaming PCs. I was also pleased with the fact that a fairly large Thermaltake Big Typhoon processor cooler can be installed into the case.
We tested in four modes:
Idle : idle mode;
CPU Burn : Two copies of CPU Burn are running;
VGA Burn : UT2004 game started with the highest possible quality settings;
HDD Burn : Simultaneous cross-copy of two sets of files — a catalog of a large number of small files of 7 GB and a catalog of 40 GB movies from partition to partition within the same drive.
The Asus PC Probe software that comes with the motherboard was used to take CPU temperatures, and the Scythe KamaMeter device was used to obtain the temperatures of the GPU, VRM transistors, northbridge and southbridge.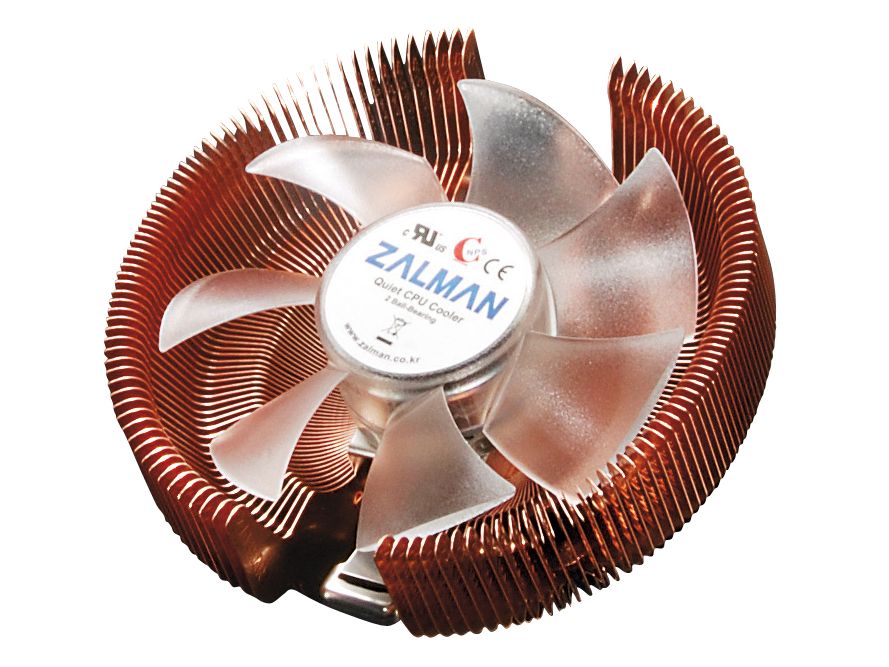 The hard disk temperature was measured using the «HDD Thermometer» program.
The temperature in the room during the test was 28°C and did not change during the test. All temperature readings were taken only after their values had completely stabilized.
Partial noise assessment was carried out — only for pre-installed fans. Noise from the power supply and cooling systems of the CPU and video card was not taken into account — they were turned off when assessing the noise level of case fans.
Test results and conclusions
Despite its rather small size (compared to full-fledged cases for top systems), the Zalman HD160XT is well suited to accommodate a very serious set of components:
It can easily assemble a fairly powerful system, Fortunately, there is only one limitation here — the impossibility of installing the most powerful graphics accelerators (with an increased length of the printed circuit board) without dismantling the hard drive cage. The only significant drawback of the case is that at a fan speed of 40% of the maximum it is still quite noisy — and it should be noted that in this mode it provides normal cooling and there is a margin for reducing the fan speed. Moreover, if you assemble a system with a less voracious Core 2 Duo or Athlon 64 X2 processor and a medium-powered video card, then half of the fans can be turned off altogether, and the rest can be set to the lowest possible speed, ensuring more than quiet operation of the system as a whole. The potential of the Zalman HD160XT case is excellent — due to the fact that it is designed for the use of conventional components, there will be no problems either during the assembly process or if it is necessary to upgrade, and the excellent workmanship, competent selection of materials and design in the Hi-Fi style of technology will allow without problems to fit it into the ensemble of even a very expensive home theater.
As for the software, or rather, that part of it that is important for the functioning of the system as a media center, then Zalman did not work out.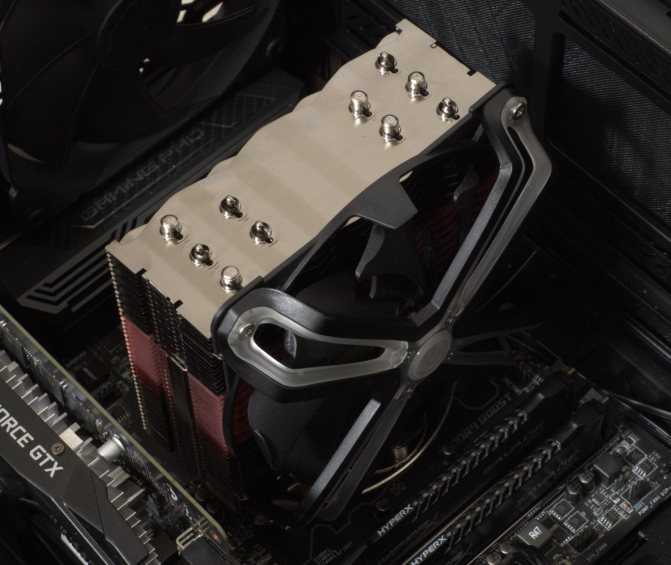 However, this is not surprising — until a standard common to all manufacturers of such systems is developed, private implementations will always be insufficiently complete and wide. In the meantime, this has not happened, there is only one way out — to offer a product that allows you to control a computer with a remote control, and not separate specialized applications. In general, there is nothing to blame Zalman for — the company’s engineers did everything they could, and with the fact that the display that significantly increased the cost of the case turned out to be nothing more than a toy, they could not do anything for quite objective reasons. However, what is the difference between us? No matter what they say about growing up, we still love toys — it’s just that their value increases over the years. And Zalman HD160XT, in addition to being an excellent case for HTPC concept fans, is also a great toy for techno-maniacs — they will surely be able to find the only right use for the built-in display that Zalman engineers could not find.
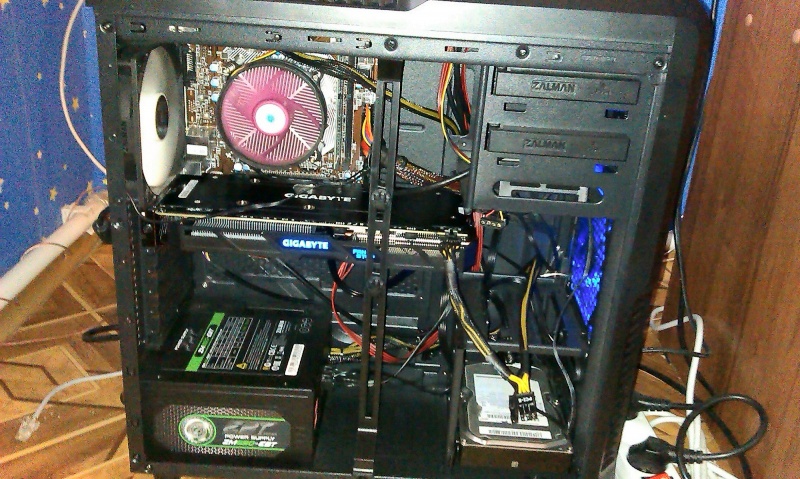 And this process will certainly be no less exciting than watching a fresh blockbuster in your home theater.
NMEDIAPC HTPC 288 SA — Affordable case for HTPC system
Cooler Master Media 260 — One step closer to the ideal
Zalman HD190 — Great case for HTPC system, but no more 9003 9003
Cases Zalman: catalog, specifications
220x450x480 mm, 12.5 kg, color: black
Case Zalman GS1000 SE Black
ATX, mATX, EATX, Full-Tower, without power supply, 2xUSB on the front panel, FireWire on the front panel,
260x570x640 mm, 17.4 kg, color: black
Case Zalman Z-MACHINE GT900 Black
ATX, mATX, Midi-Tower, aluminium, without power supply, 2xUSB on the front panel, FireWire on the front panel,
220x430x480 mm, 12.4 kg, color: black
Case Zalman Z-Machine LQ1000
ATX, mATX, Midi-Tower, aluminium, without power supply, liquid cooling system, 2xUSB on the front panel, FireWire on the front panel,
220x450x480 mm, 15 kg, color: black
Case Zalman HD135 Silver
ATX, mATX, Slim-Desktop, for HTPC, without power supply, 2xUSB on the front panel, FireWire on the front panel,
425x135x435 mm, 5.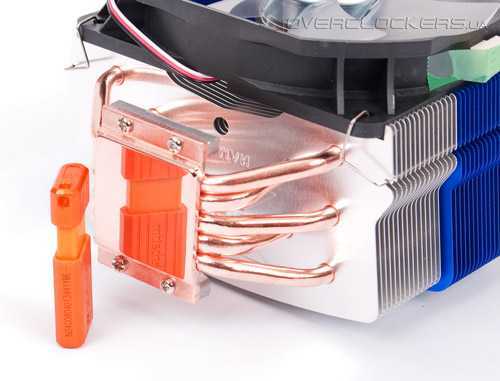 2 kg, color: silver
Case Zalman GS1000 Black
ATX, mATX, EATX, Full-Tower, without power supply, 2xUSB on the front panel, FireWire on the front panel,
220x560x580 mm, 12 kg, color: black
Case Zalman Z-MACHINE GT1000 Titanium
ATX, mATX, Midi-Tower, aluminium, without power supply, 2xUSB on the front panel, FireWire on the front panel,
220x450x480 mm, 12.5 kg, color: gray
Case Zalman HD160XT Plus Silver
ATX, mATX, Full-Desktop, for HTPC, aluminium, no power supply, 2xUSB on the front panel, FireWire on the front panel,
435x160x460 mm, 6.8 kg, color: silver
Case Zalman HD135 Black
ATX, mATX, Slim-Desktop, for HTPC, without power supply, 2xUSB on the front panel, FireWire on the front panel,
425x135x435 mm, 5.2 kg, color: black
Case Zalman HD160XT Silver
ATX, mATX, Full-Desktop, for HTPC, without power supply, 2xUSB on the front panel, FireWire on the front panel,
435x160x460 mm, 6. 9kg, color: silver
Case Zalman HD160 Plus Silver
ATX, mATX, Full-Desktop, for HTPC, aluminum, without power supply, 2xUSB on the front panel, FireWire on the front panel,
435x160x460 mm, 6.8 kg, color: silver
Case Zalman HD160 Plus Black
ATX, mATX, Full-Desktop, for HTPC, aluminium, without power supply, 2xUSB on the front panel, FireWire on the front panel,
435x160x460 mm, 6.8 kg, color: black
Enclosure Zalman HD160XT Plus Black
ATX, mATX, Full-Desktop, for HTPC, aluminum, no power supply, 2xUSB on front panel, FireWire on front panel,
435x160x460 mm, 6.8 kg, color: black
Enclosure Zalman TNN 300 350W Black
mATX, Micro-Tower, aluminium, power supply 350 W, 1xUSB on front panel, 230x330x470 mm, 14.74 kg, enclosure: black
Zalman HD160XT Black
ATX, mATX, Full-Desktop, no power supply, 2xUSB on front, FireWire on front,
435x160x460 mm, 6. 9kg, color: black
Case Zalman Z-MACHINE GT1000 Silver
ATX, mATX, Midi-Tower, aluminium, without power supply, 2xUSB on the front panel, FireWire on the front panel,
220x450x480 mm, 12.5 kg, color: silver
Case Zalman Z7 Plus Black
ATX, mATX, Midi-Tower, steel, without power supply, 2xUSB on the front panel, 224x472x496 mm, 7.7 kg, color: black
Case Zalman Z9 Plus Black
ATX, mATX, Midi-Tower, steel, without power supply, 4xUSB on the front panel, 207x464x504 mm, 7.2 kg, color: black
Case Zalman GS1000 Plus Black
ATX, mATX, EATX, Full-Tower, steel, without power supply, 2xUSB on the front panel, 260x570x640 mm, 13.5 kg, color: black
Case Zalman Z9 Black
ATX, mATX , Midi-Tower, steel, without power supply, 4xUSB on the front panel, 207x464x504 mm, 7 kg, color: black
Case Zalman HD501 Black
ATX, mATX, Full-Desktop, for HTPC, steel, without power supply, 2xUSB on the front panel, 450x170x455 mm, 8 kg, color: black
Case Zalman HD503 Black
ATX, mATX, Full-Desktop, for HTPC, steel, no power supply, 2xUSB on the front panel, 450x170x455 mm, 8 kg, color: black
Zalman MS1000-HS2 Black case
ATX , mATX, Midi-Tower, steel, without power supply, 2xUSB on the front panel, 200x500x560 mm, 12 kg, color: black
Enclosure Zalman MS1000-HS1 Black
ATX, mATX, Midi-Tower, steel, without power supply , 2xUSB on the front panel, 200x500x560 mm, 11. 7 kg, color: black
Case Zalman Z7 Black
ATX, mATX, Midi-Tower, steel, without power supply, 2xUSB on the front panel, 207x472x496 mm, 7.2 kg, color: black
Case Zalman GS1200 Black
ATX, mATX, EATX, Full-Tower, without power supply, 4xUSB on the front panel, 260x570x640 mm, 12.4 kg, color: black
Enclosure Zalman MS1000-HS1 White/black
ATX, mATX, Midi-Tower, steel, without power supply, 2xUSB on front panel, 200x500x560 mm, 11.7 kg, color: white
Case Zalman HD160 Silver
ATX, mATX, Slim-Desktop, for HTPC, without power supply, 2xUSB on the front panel, FireWire on the front panel,
420x160x435 mm, 4.8 kg, color: silver
Case Zalman Fatal1ty FC-ZE1 Black
ATX, mATX, Midi-Tower, without power supply, 2xUSB on the front panel, FireWire on the front panel,
220x430x480 mm, 12. 5 kg, color: black
Case Zalman HD160 Black
ATX, mATX, Slim-Desktop, for HTPC, without power supply, 2xUSB on the front panel, FireWire on the front panel,
435x160x420 mm, 4.8 kg, color: black
Case Zalman Z9 450W Black
ATX, mATX, Midi-Tower, steel, power supply 450 W, 4xUSB on the front panel, 207x464x504 mm, 7 kg, color: black
Case Zalman Z11 Plus Black
ATX, mATX , Midi-Tower, steel, without power supply, 4xUSB on the front panel, 260x498x525 mm, 7.4 kg, color: black
Enclosure Zalman Z11 Black
ATX, mATX, Midi-Tower, steel, without power supply, 4xUSB on the front panels, 260x498x525 mm, 7.4 kg, color: black
Htpc ready solutions
The card is valid both when buying online and in retail stores. Full terms and conditions of the program. Shop addresses Price list Discounts, promotions, bonuses Payment and delivery. Login Registration For partners. Addresses of shops Moscow. Internet shop — 24 hours
Search for data on your request:
Htpc ready solutions
Schematics, manuals, datasheets:
Price lists, prices:
Discussions, articles, manuals:
Wait until the end of the search in all databases.
Upon completion, a link will appear to access the found materials.
Content:
- DIY HTPC. Part 1 — silent HTPC (page 2)
- Ready Servers
- Fractal Design Node 605 — case review for assembling a powerful HTPC
- HTPC Enclosure — Cooler Master Elite 120 Advanced
- HTPC,
based media centers
- Industrial design of computer, NAS, HTPC cases
- Controlling your PC from a distance
- HTPC FOR MUSIC .

- Zalman HD160XT — HTPC Enclosure with Integrated Touch Screen
- Fractal Design Node 605 — case review for assembling a powerful HTPC
WATCH RELATED VIDEO: In pursuit of the perfect HTPC (all-audio.pro series?)
We make HTPC with our own hands. Part 1 — silent HTPC (page 2)
Introduction At the very beginning I would like to say one absolutely obvious evidence. Everything that you have read, are reading, and will read is the opinion of the author of these lines themselves. Even the rules of the road represent the understanding of a group of people about how a driver should behave on the road.
Truth, acquiring the force of law.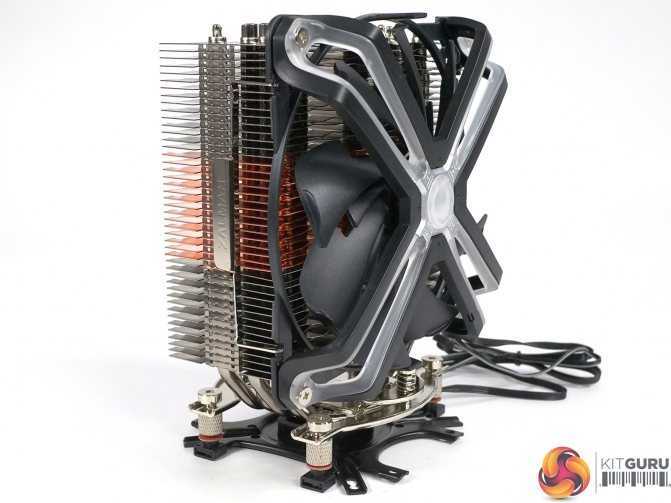 Therefore, everything that can be seen below is my and only my point of view, which may not coincide with yours.
If you liked something in this coverage of the issue, or, on the contrary, outraged you, welcome to the conference for discussion.
Home Theater Personal Computer — a personal computer equipped with software and in some cases hardware that allows it to be used as a home theater computer. Cinema, too narrow.
I would replace the term with another — multimedia center. I will not delve into the intricacies of using HTPC, it will not be about that at all. And case modifications are something that is convenient and interesting from my point of view. Yes, now they produce and continue to produce a sufficient number of quiet fans. However, there is a large category of people who do not compromise and want a fanless solution. The latter options will be discussed in this article. The topic itself is not new to me, I have been interested in such systems for a long time.
I even made several variations. These were processor cooling systems. Then heat pipes could only be obtained from a hard drive cooler or made by yourself. Silencing boxes for the hard drive did not pass me by either. And what about fanless power supplies, of which I personally made several options. Block in which power transistors and diode assemblies are placed on an external radiator, or another project when a serial power supply is immersed in a radiator case filled with vegetable oil.
It was a long time ago, when it was impossible to buy such things made industrially. This is where people did their own thing. Now everything is ready to assemble a fanless computer. Much of what previously enthusiasts had to do themselves is on sale. But, as before, I receive a lot of letters with requests to tell me more about the manufacture of this or that fanless device.
I always answer that there was nothing like it on sale before. In any case, in Russia. If something like that suddenly appeared, then it was unrealistic to find it in the public domain. And I had to do everything myself. Why mess around and do it yourself, isn’t it easier and cheaper to buy in a store?
Usually after such an answer they still ask for a link. A person does not want to find what he needs using a search engine. Saves his time and wishes that someone else did it. Such a desire is close to me, I can understand it. Who doesn’t like having a job done for them? But if you think about it… Why are there so many computer related sites?
For example, our Overclockers. Including so that a person, after reading articles about computer components, can choose what he needs. The idea is quite sound. It is only required to compile a list of fanless components, with links. And the reader is able to decide for himself what suits him for his purpose. Ready components In this section, I will list the fanless components and attach links to them. Let me remind such people that they did not always know everything.
And were once beginners. So please be understanding.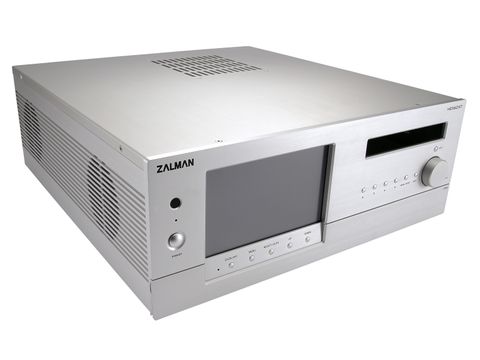 I’ll start with the CPU cooler. The list is incomplete. Perhaps there are other options. The noisiest thing that remains is the hard drive. But there are muffler boxes for him too. Chipset cooling. Very often, manufacturers complete motherboards with a small heatsink, assuming it is blown by a processor cooler or at least by internal airflows.
This does not happen in the fanless version, so there may be times when the heatsink needs to be replaced. Video cards will not be considered. Or video cards with passive cooling, with the same HD hardware support. If you want a more powerful accelerator or you already have a video card, but with a propeller, then there are fanless COs for video cards. And many others.
The above cards are just an example, the choice is yours. Why, when it comes to HTPCs, do people want to see a case designed for a video/audio rack? But are the standards for the size of such equipment really that good? Its dimensions were dictated many years ago by the size of a vinyl player, which usually stood on top of such a rack.
The televisions were with a kinescope and had decent depth. The equipment was quietly placed under the TV and did not stick out. Then it was convenient and normal. But now plasma or LCD panels are mounted on the wall, providing a depth of no more than 20 cm with fasteners.
Why then this bulging post? Everything goes to the fact that physical media audio-video discs will soon sink into oblivion. The consumer will receive the content over the network. It turns out that soon only the HTPC itself and a set of active speakers will be enough. From the above list of passive processor COs, all except Orochi work much more efficiently on a vertically standing board.
And the mentioned Scythe model also works well on a horizontally placed board. If you put such a case under the TV, sideways to the wall, then the view will appear faceless side wall of the case. Moved the front panel to the side of the case. The idea was flying in the air, I was not the only one doing similar alterations, several other people were doing this, and independently of each other. So to find out the authorship of the idea is meaningless.
But the idea is interesting. One more moment. Why not disguise it so that it does not stand out from the interior? Or, on the contrary, not to make it a bright, conspicuous detail of the same situation?
Usually only modders do this. In this article I will try to do something similar. In its first part there will be a slightly altered factory case, and in the second — a case that does not look like either a computer or a Hi-Fi component. Chassis So, the idea is an HTPC made from industrially produced components and in a slightly modified factory case. I take what is left after writing an article about the remake of the Gigabyte 3D Aurora.
Let me remind you that the front panel of the case has already been moved to the side surface. A hole has already been cut in the bottom, and to improve the flow of air, the case is placed on high .5 cm rubber feet. Now nothing prevents the flow of fresh cool air from below.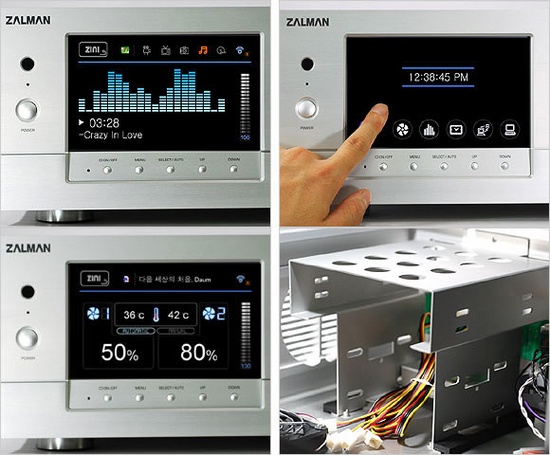 As you may have noticed, there is a 14 cm hole cut in the housing cover above the power supply.
It is closed with a six-inch acoustic grill, the fixing method is glue. The paint on these grills is very similar to the body paint, so there is no need to repaint anything. Naturally, all the default fans have been dismantled. The case almost corresponds to the intended concept.
Also, the disadvantage of this arrangement of components is that the power supply is located above the CO of the processor, south and north bridges. The situation is saved by the fact that the heat dissipation of the components is small, and the power supply itself is designed for a similar mode of operation, and even more severe.
Few factory cases have ventilation in the top cover above the PSU. Kindly, it is necessary not to adapt the existing one, but to develop a new building of the same dimensions and with a more thoughtful arrangement. Maybe someday I will do it, if someone else does not do it before me.
But at the moment — for now, what we have.
Ready servers
Moderators: igorbv , EL. Hardware questions. By the way, how much did it cost you or will it cost? Connected 2 wireless joysticks. Come out inexpensive Bluray drives put.
As it turns out, many people who choose HTPCs also like to assemble them themselves, rather than buying ready-made solutions, so here it is.
Fractal Design Node 605 — case review for building a powerful HTPC
Submit a comment. In this post, I want to talk about my experience building a fanless HTPC, in fact, a media player computer; in the absence of an absolutely silent HDD based on an HD-Plex case: about selection, delivery, assembly and results. I hope my opus will be useful to someone and, perhaps, encourage them to assemble a similar device. Case selection. For an HTPC, perhaps the most important parameter is the case, its form factor and cooling system. Many options were explored, but I finally realized that I wanted a device that is unlike the usual PC and with a complete absence of fans. Firstly, because of the appearance, secondly, because of the complete set of the case, PSU, Pico PSU, IR receiver and remote control, and thirdly, because of the very good support: the guys respond almost immediately on supported configurations , delivery, payment, etc. Options are available with and without a drive. I liked the H5 chassis the most.
Case for HTPC — Cooler Master Elite 120 Advanced
Having been bored with compromises between sound and convenience with a digital source, having tested the pioneer n 50, the logic box and even Oliva amused me the most After studying the insides of Oliva, it somehow even became uncomfortable for me to buy it I decided to consider the option of a computer for music as a source of numbers. I listened to different cards — I chose Julia. What would you like. Perhaps the whole world will be able to assemble a device of decent sound. Big request — let’s not sracha.
A typical HTPC-class system should look like this: usually, to build such systems, enthusiasts get cases that resemble Hi-Fi equipment in their appearance: such a case is not ashamed to be placed in the living room in the same rack with a Blu-ray player, receiver and other audio equipment. and video equipment.
HTPC Computer Based Media Centers
Hard Disk 3. Hard Disk 3. Note: 1. This table is for reference only and does not restrict installation on servers with different settings. For specific cases, especially for large geographically distributed objects with a large number of controllers, users and workstations, it is recommended to contact the technical support service to clarify the requirements for the server. RusGuard provides support to its customers throughout the life of the equipment.
Industrial design of computer, NAS, HTPC cases
In short, a lot, but small, not requiring a heavy load. I got a broken-down laptop with iM Nehalem and some kind of Nvidia from the Kepler family for free. So far, everything is dragging. I hope by virtual machines you mean containers, not hardware virtualization? Ah, you wrote that KVM. My solution to the issue. I don’t watch movies directly from it now, I use it as a storage and virtualization host. I will gladly take your recommendations.
For this, a full-fledged HTPC must have a remote control with such ready-made solutions in our market are still rare, and they are worth it.
Manage your PC from a distance
Htpc ready solutions
Cooler Master is famous for its stylish and thoughtful solutions. This new model belongs to an emerging class of hulls. Shuttle has done a lot to promote them to world markets, but, alas, they have not received wide distribution.
HTPC FOR MUSIC .
RELATED VIDEO: An HTPC for the Family — PC of the Month: August
Submit a comment. My HTPC or how to watch movies correctly. Type of movie in the library:. What I got in the end: Convenient and beautiful home media library YouTube NetFlix Online series and movies Photo media library Weather Online radio Music Movies with full description So now there is a digital TV of the future, for free and now. I hardly download movies, I have enough online.
Help, support, discussion, plugins.
Zalman HD160XT — case for HTPC-system with built-in touch screen
Profile Write a message. Due to the fact that HD content has now become quite affordable and the prices for large panels have become quite adequate, there is a need to somehow reproduce this content. This option has both its pros and cons. The second option is to use t for this. We actually talked about ready-made solutions
Fractal Design Node 605 — case review for assembling a powerful HTPC
A few years ago, a device called a «home personal computer» performed a fairly narrow range of tasks — working with office suites, games and communications. Application applications corresponded to the then level of performance, but among the whole variety of software, the segment of multimedia programs was rather poorly represented. And no wonder, because such an application involves handling large amounts of streaming data, which consumer-level systems have not yet been ready for.